Signatures
Signatures in emails are generally important in business scenarios. They render professionalism to the emails and also let the recipients know about your organization, your position, and so on. Nowadays, email signatures also have links to the social media pages of your organization and help you stay in touch with your clients and customers even outside email. You can add your job title, organization details, and contact details. You can even insert your corporate logo as an image in your signature.
Zoho Mail supports having multiple signatures and customizes them according to the email address/ email alias used. You can create and use Rich Text Signatures in Zoho Mail. Further, you can insert formatted HTML in the Signature using the Insert HTML option in the editor. You can also create one using the email signature generator tool and use it in your emails.
Note: Ensure that the signature complies with your organization's email policy to reduce the risk of policy violations.
Creating and Adding Signatures
- Login to Zoho Mail
- Click the Settings icon.
- Go to Signatures
- Click the + icon to create a new signature.
- The Add Signature popup appears.
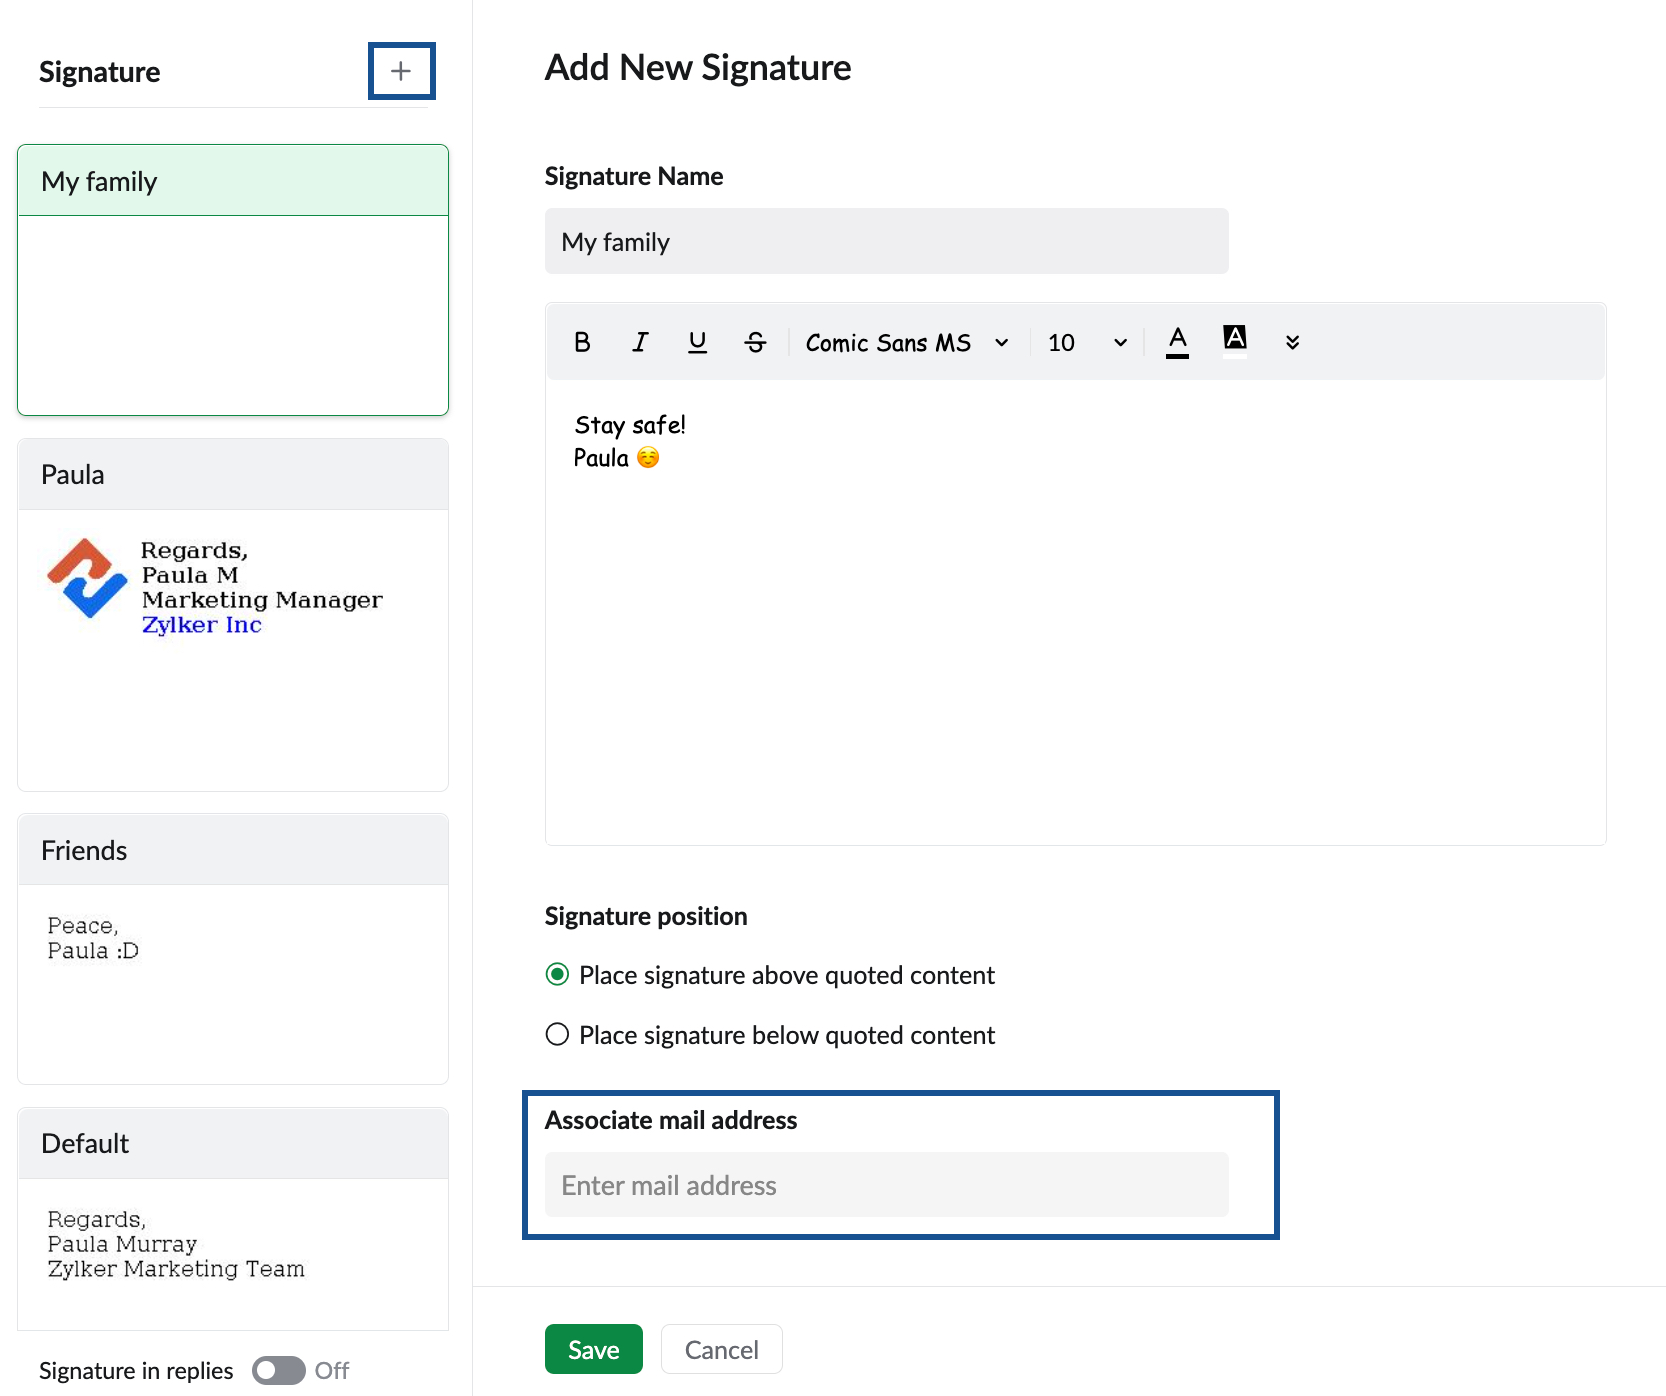
- Provide a Name for the signature
- Enter the details of the signature and format it to suit your preference.
- You can insert images (like logos) to your signature, paste copied images, and also hyperlink them if required. Refer here for instructions.
- Click Save.

Note:
- Custom emojis cannot be added to a signature. However, you can utilize the built-in emojis available in Zoho Mail.
- Additionally, if you attempt to use a signature name that already exists, a warning message will prompt you to enter a different name.
You need to link the Signature with the From address for the signature to appear automatically when you compose an email. You can use the 'Associate Mail Address' option to link with the From address while creating the signature or click the + icon in the existing signature to associate it with the required From address. Repeat the steps with different titles to add multiple signatures.
To learn more about Signatures, refer to the video below:
Note:
If the administrator of your organization has configured a signature for your account, you will not be able to edit the signature. You also will not be able to associate a new signature to the email address associated with the Admin assigned signature. The admin-assigned signature is denoted with a lock icon. Visit this help page to know more.
With the Signature Generator feature available in Zoho Toolkit, powered by Zoho Mail, you can easily create professional email signatures using a variety of customizable templates.
Setting up default signatures for new emails
When you create a new signature you can choose to have it as the default signature for an email address. So, whenever you create a new email with the associated email address in the From field, the signature set as default for the email address will be auto-populated in the composer.
When you create a new signature, navigate to the Associated From address(es) for new emails section. This field lists the From email addresses associated with your account. You can select the email address with which you want to associate this signature.

When you have external email addresses added to your account, are part of a group, or have an email address delegated to you, those email addresses will be grouped respectively and displayed in the Associated email address(es) drop-down. You can choose the appropriate email addresses to associate with the signature you create and have them automatically appear when you compose an email.

You can also choose to manually change the signature while composing an email using either the Signature icon or the Insert Signature option. The selected signature will replace the default signature for that particular email alone.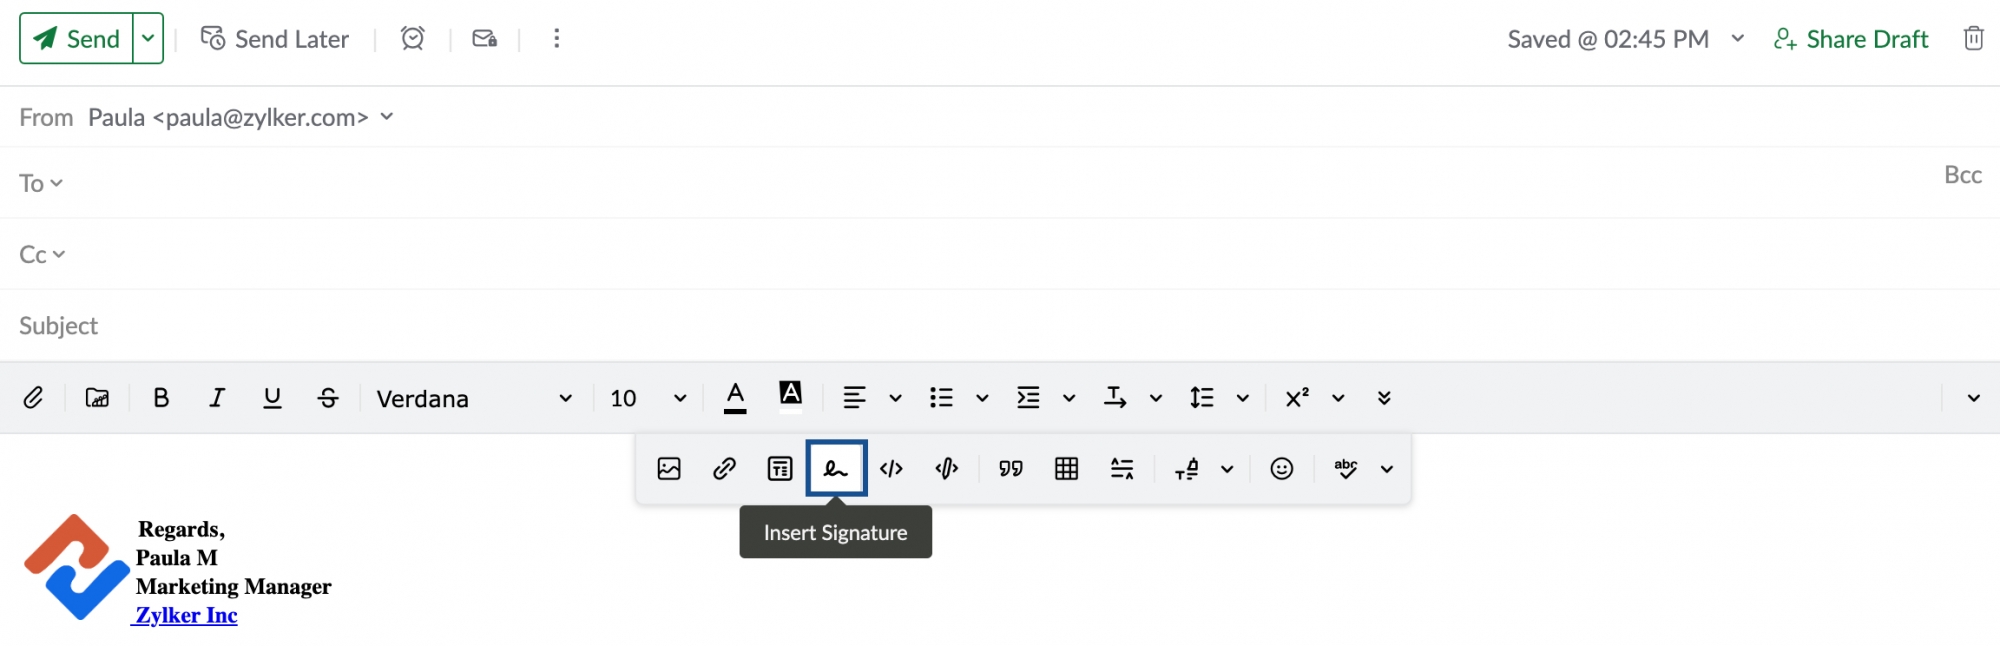
Signature for replies
You can choose to include/ not include signatures while replying to emails. To configure this option, click the Settings icon in the top pane and select the Add signature to all my email replies checkbox under Signature for replies. If you do not select this option, a signature will not be included in your email replies.

While replying to an email, you can choose where to insert the signature in the email. It can be placed either at the bottom of the mail composer (below the quoted text) or below the reply you just drafted (above the quoted text).

Setting up default reply signatures
You can also create signatures that you can use particularly while replying to emails.
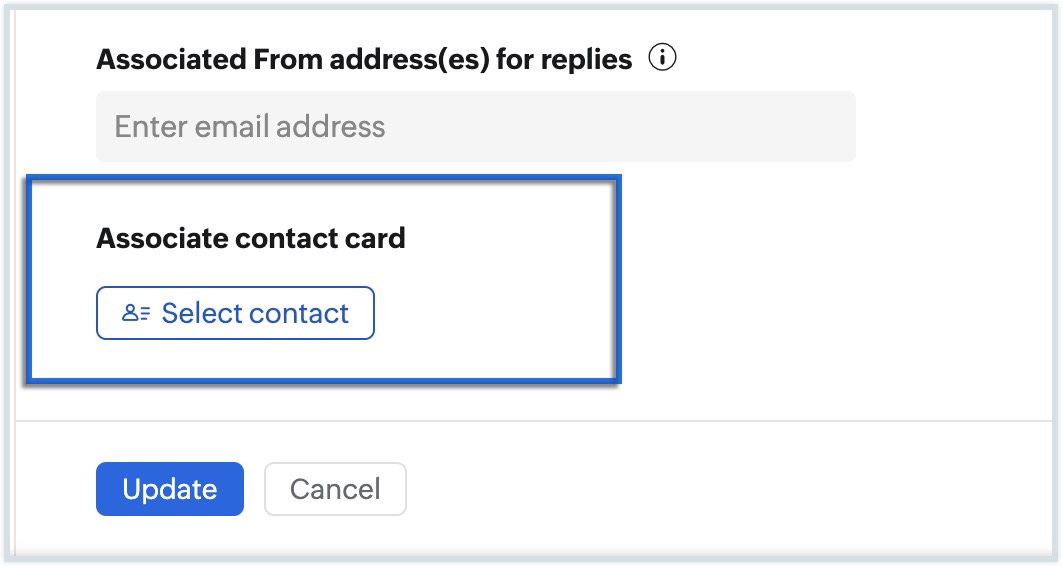
To associate a signature for your reply emails, navigate to the Associated From address(es) for the replies section. This field lists all the email addresses or groups associated with your account. You can select the email address with which you want to associate this signature for your replies.

Note:
You must enable the Signature for replies option to auto-include signatures for email replies.
Associate Contact card
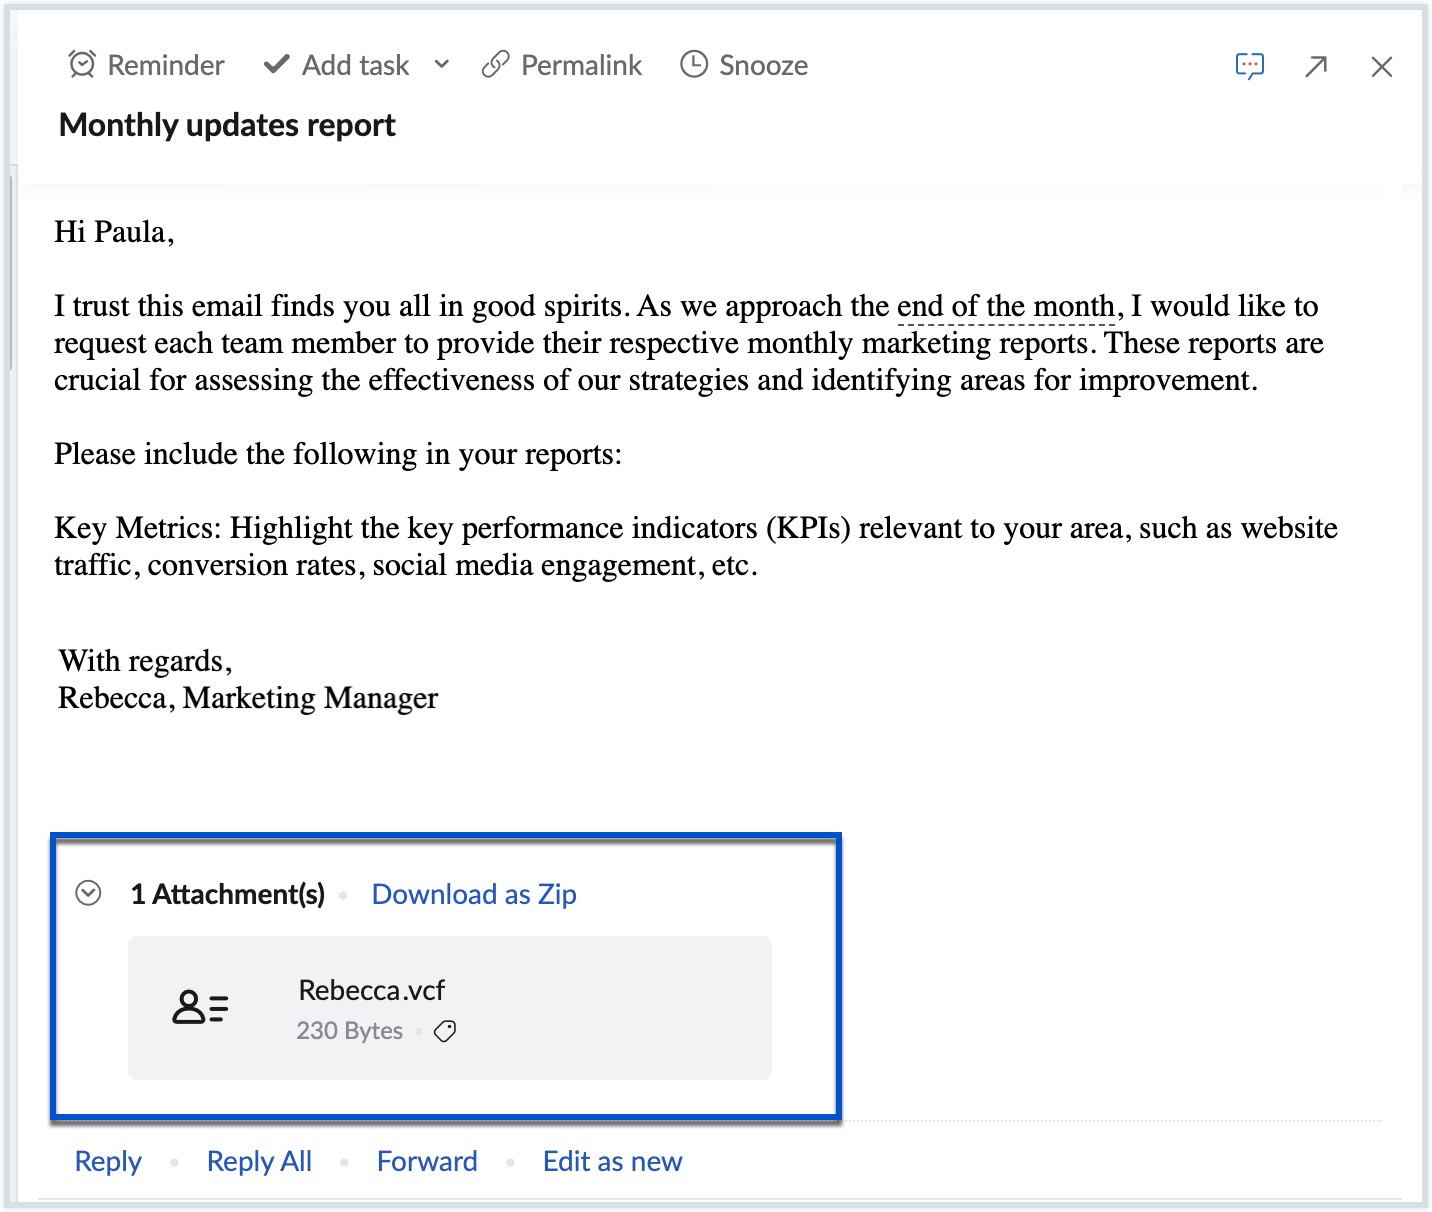
A vCard (virtual card) or contact card is a digital representation of a traditional business card. This contact card contains the contact information of a specific user, which can be associated with a signature. When linked to a signature, this contact card is automatically included as an attachment when you send or respond to an email using that signature. This enables the recipient to effortlessly save or import the contact card into their address book or contacts without manually entering the contact information.
To associate a contact card with a signature, navigate to the signature with which you want to associate a contact card, click Select contact under Associate contact card section, select the user from the dropdown, and click Update.
Insert Images
You can also insert images into your signatures. Click on the Insert Image option to browse and insert the required image. Using the Insert image options, you can also choose how you want to display the image in the signature. Refer to this page for detailed instructions about inserting images.
Supported image formats for inserting images in signatures: GIF, JPG, JPEG, BMP, PNG. No image formats other than those mentioned will be supported.
Note:
When you create a signature by inserting HTML, the images inserted should have a functional public URL to be fetched and displayed. If you don't have a public URL for the images saved to your computer, you can insert them as Inline images and resize them based on your requirement.
Hyperlink image in a signature
You can also choose to hyperlink the images inserted into your signature. To hyperlink the image:
- Click on the image inserted into the signature.
- Click More from the Image options provided.

- Choose Link.

- Provide the URL in the Insert link pop-up.
- Click Insert

- Click Save or Update


Your signature will be saved and the image inserted into the signature will be hyperlinked.
Note:
Any formatting applied to the signature including images and hyperlinks will not be displayed when you compose your email in Plain text format.
Related Pages
Images in Signature | Email Disclaimer | Rich Text Signatures | Out of office message | Multiple From Addresses