Users
Invite your employees as users to your Zoho Expense organization. Customize the user roles and access permissions given to users based on your business needs.
Invite Users
You can invite your employees as users and assign them roles based on the nature of their designation.
Pro-tip: If you would like to assign custom roles to your users, besides the predefined ones in Zoho Expense, it’s best to create the custom roles and then invite users, so that you can associate the role while inviting them.
To invite users:
- Click Admin View on the left sidebar.
- Go to Settings on the left sidebar.
(OR)
Click Settings in the top right corner of the page. - Go to Users under Users and Control.
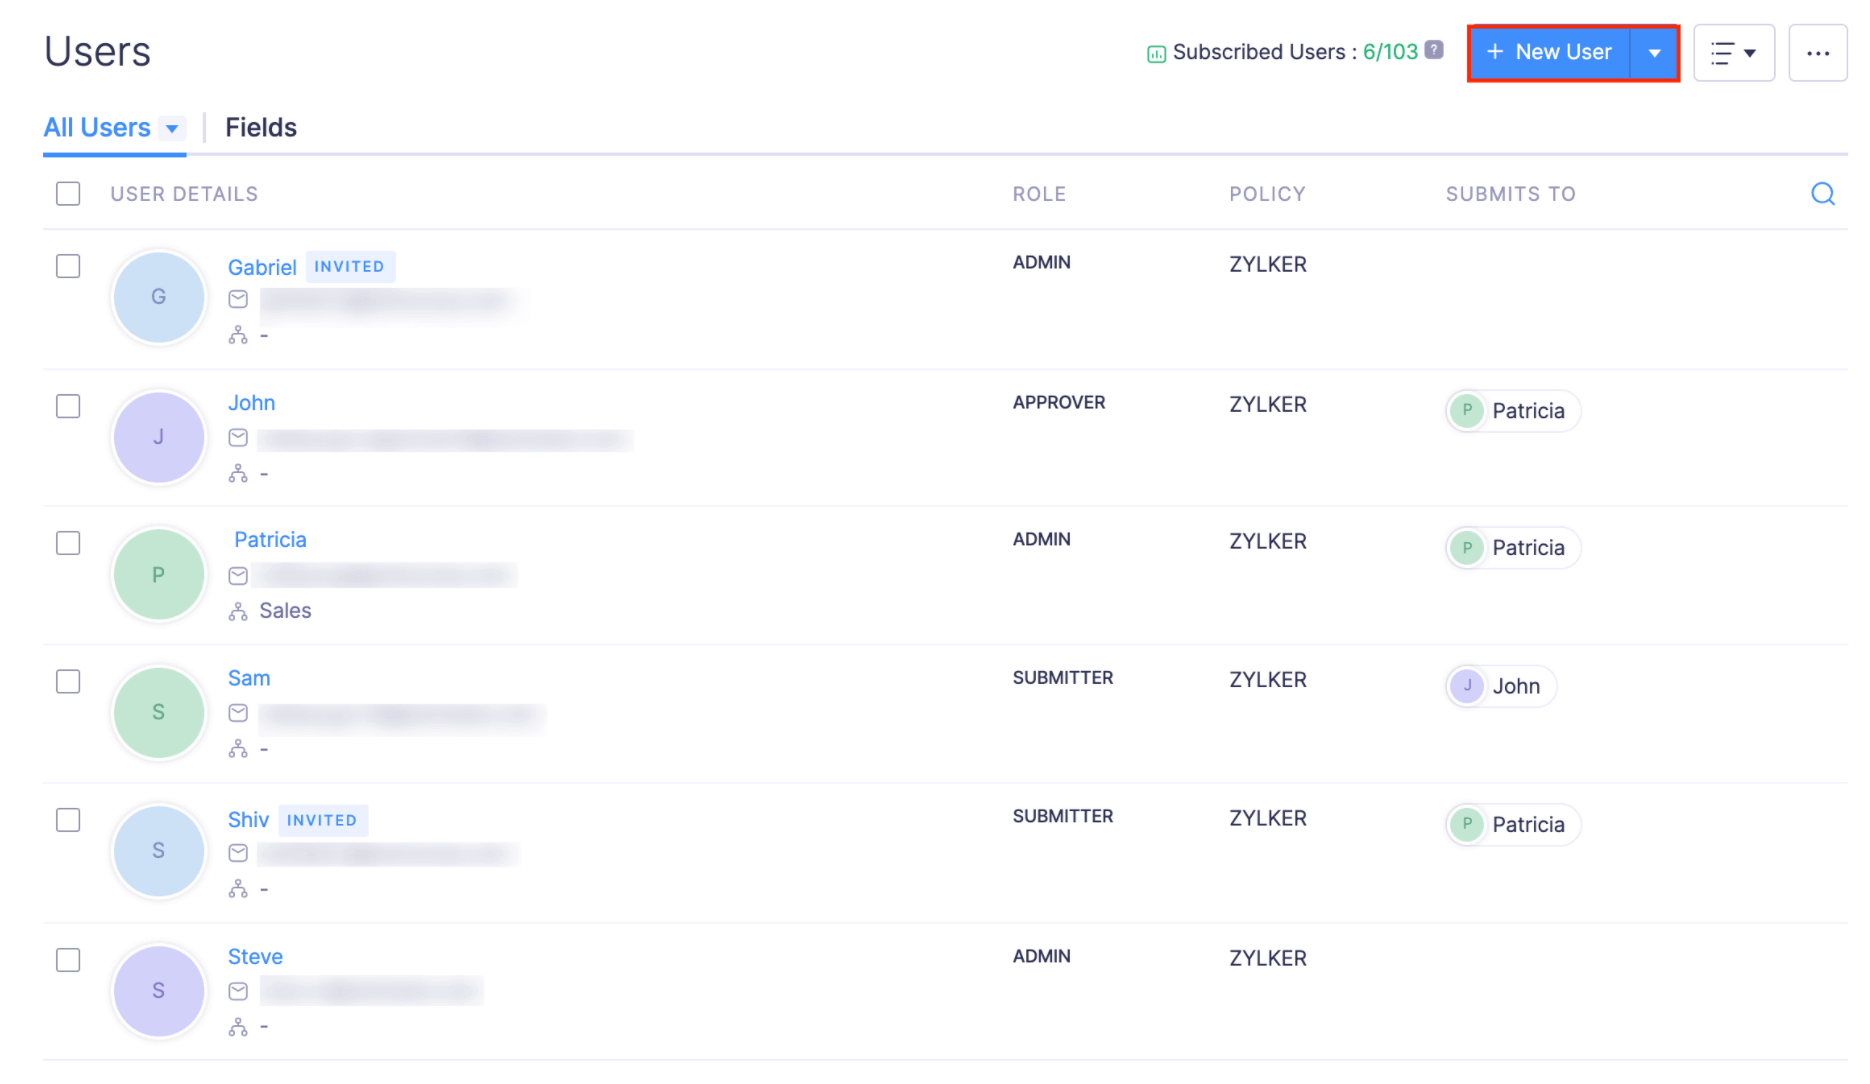
- Click + New User at the top right corner.
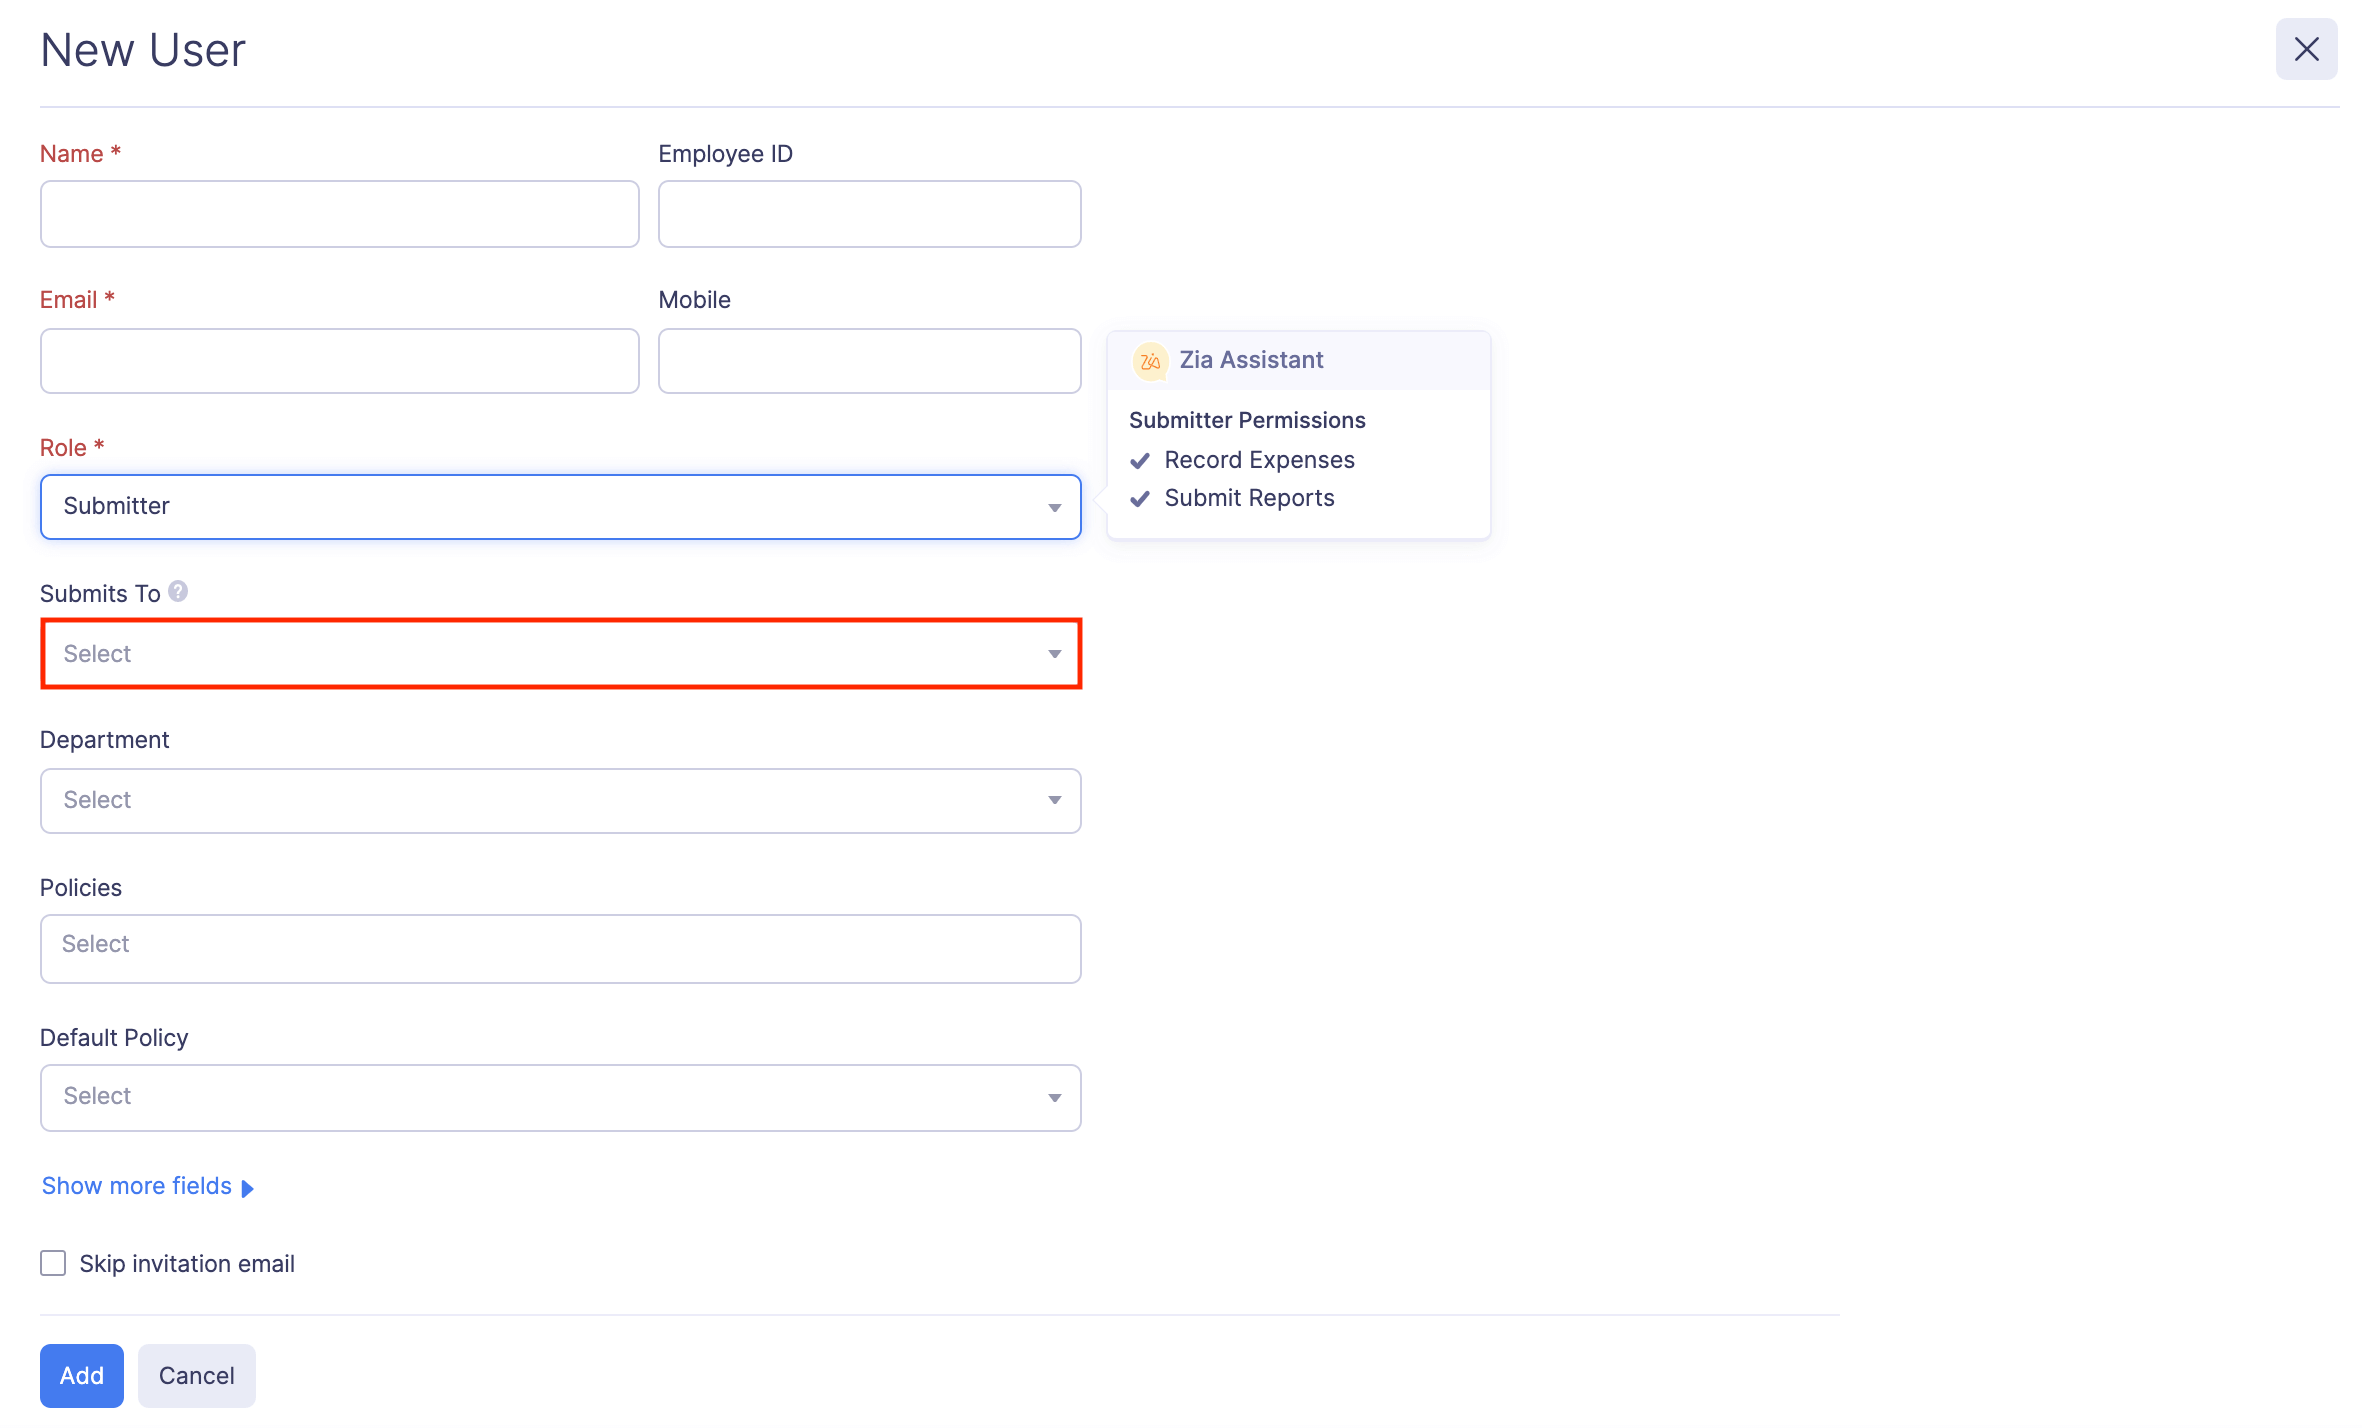
- Enter the Name, Employee ID, and Email Address of the user.
- Select a role for the user from the Role dropdown.
- Choose an approver for the user from the Submits To dropdown. Set a criterion, if required.
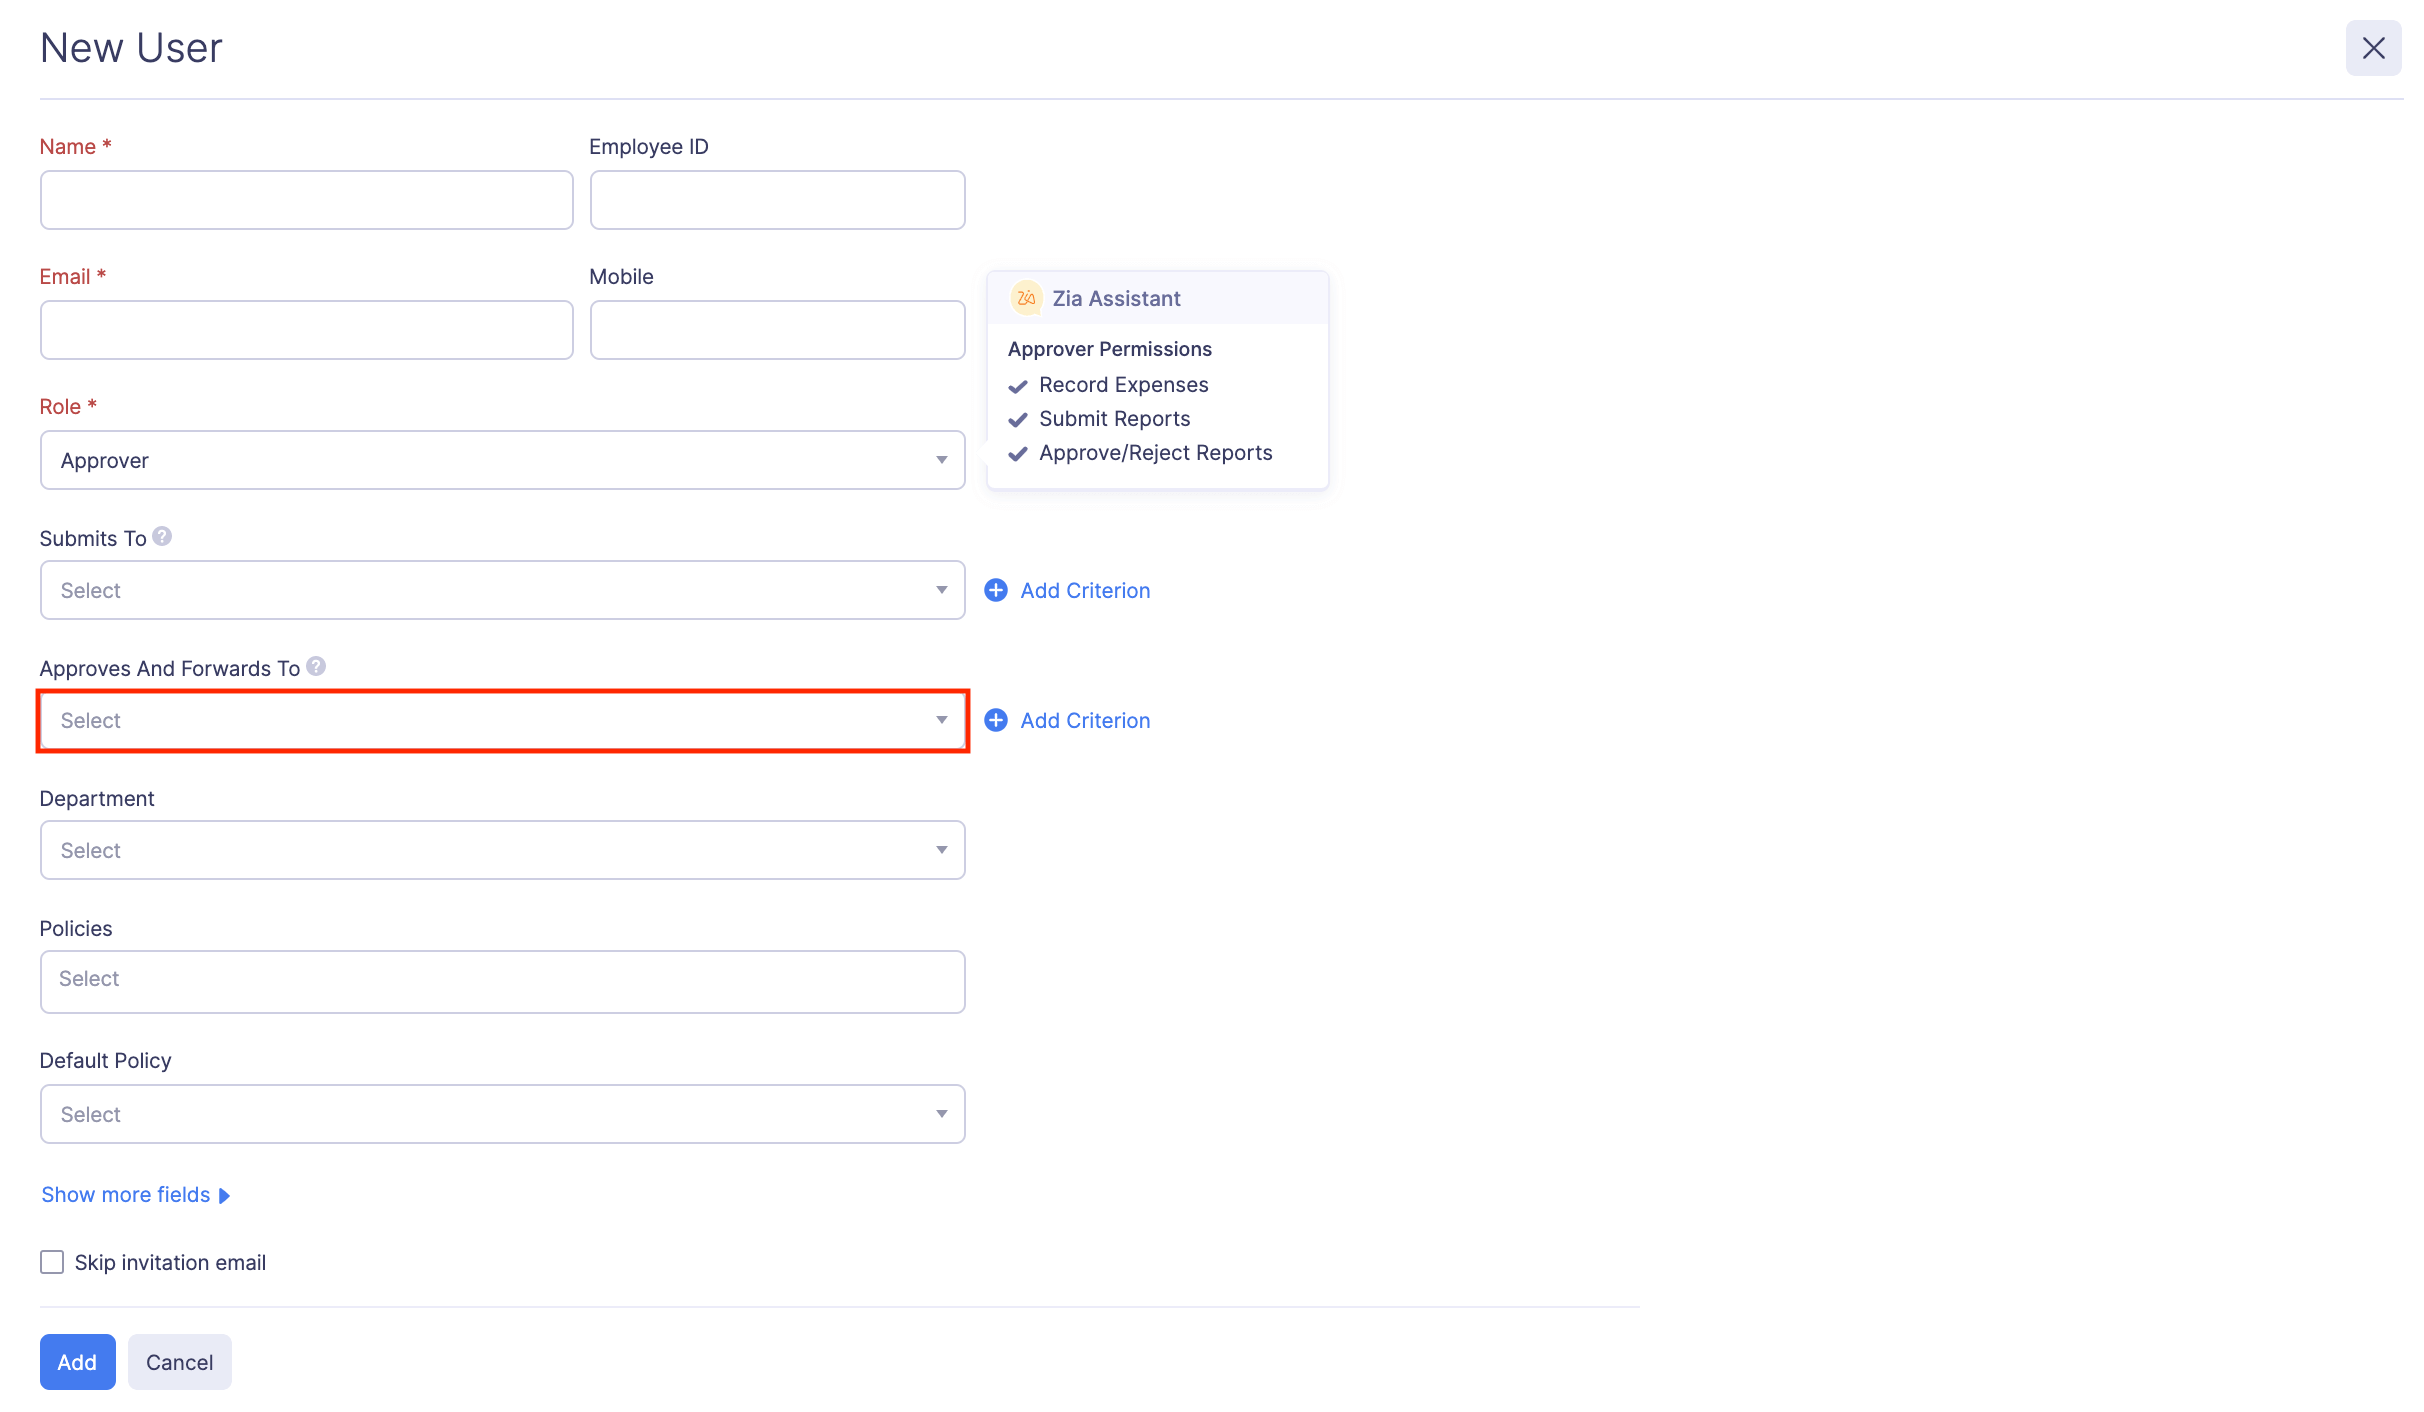
- If the role you’ve selected for this user has approval permissions, you can choose an approver from the Approves and Forwards To dropdown. All the items that are approved by this user will be submitted to the user selected from the Approves and Forwards To dropdown, for further approval.
- If you want to add more information about this user, click Show more fields and fill in the necessary details. Besides this information, if you want to add more, you can create custom fields.
- Click Add and an invitation will be sent to the user’s email address.
- If you want to add the details of the user but send the invitation later, mark the Skip Invitation Email checkbox.

Invite Users in Bulk
Sending individual user invites can be difficult when you have to invite more than 3 users at a time. That’s when you can bulk invite the users. To do this:
- Click Admin View on the left sidebar.
- Go to Settings on the left sidebar.
(OR)
Click Settings in the top right corner of the page. - Go to Users under Users and Control.
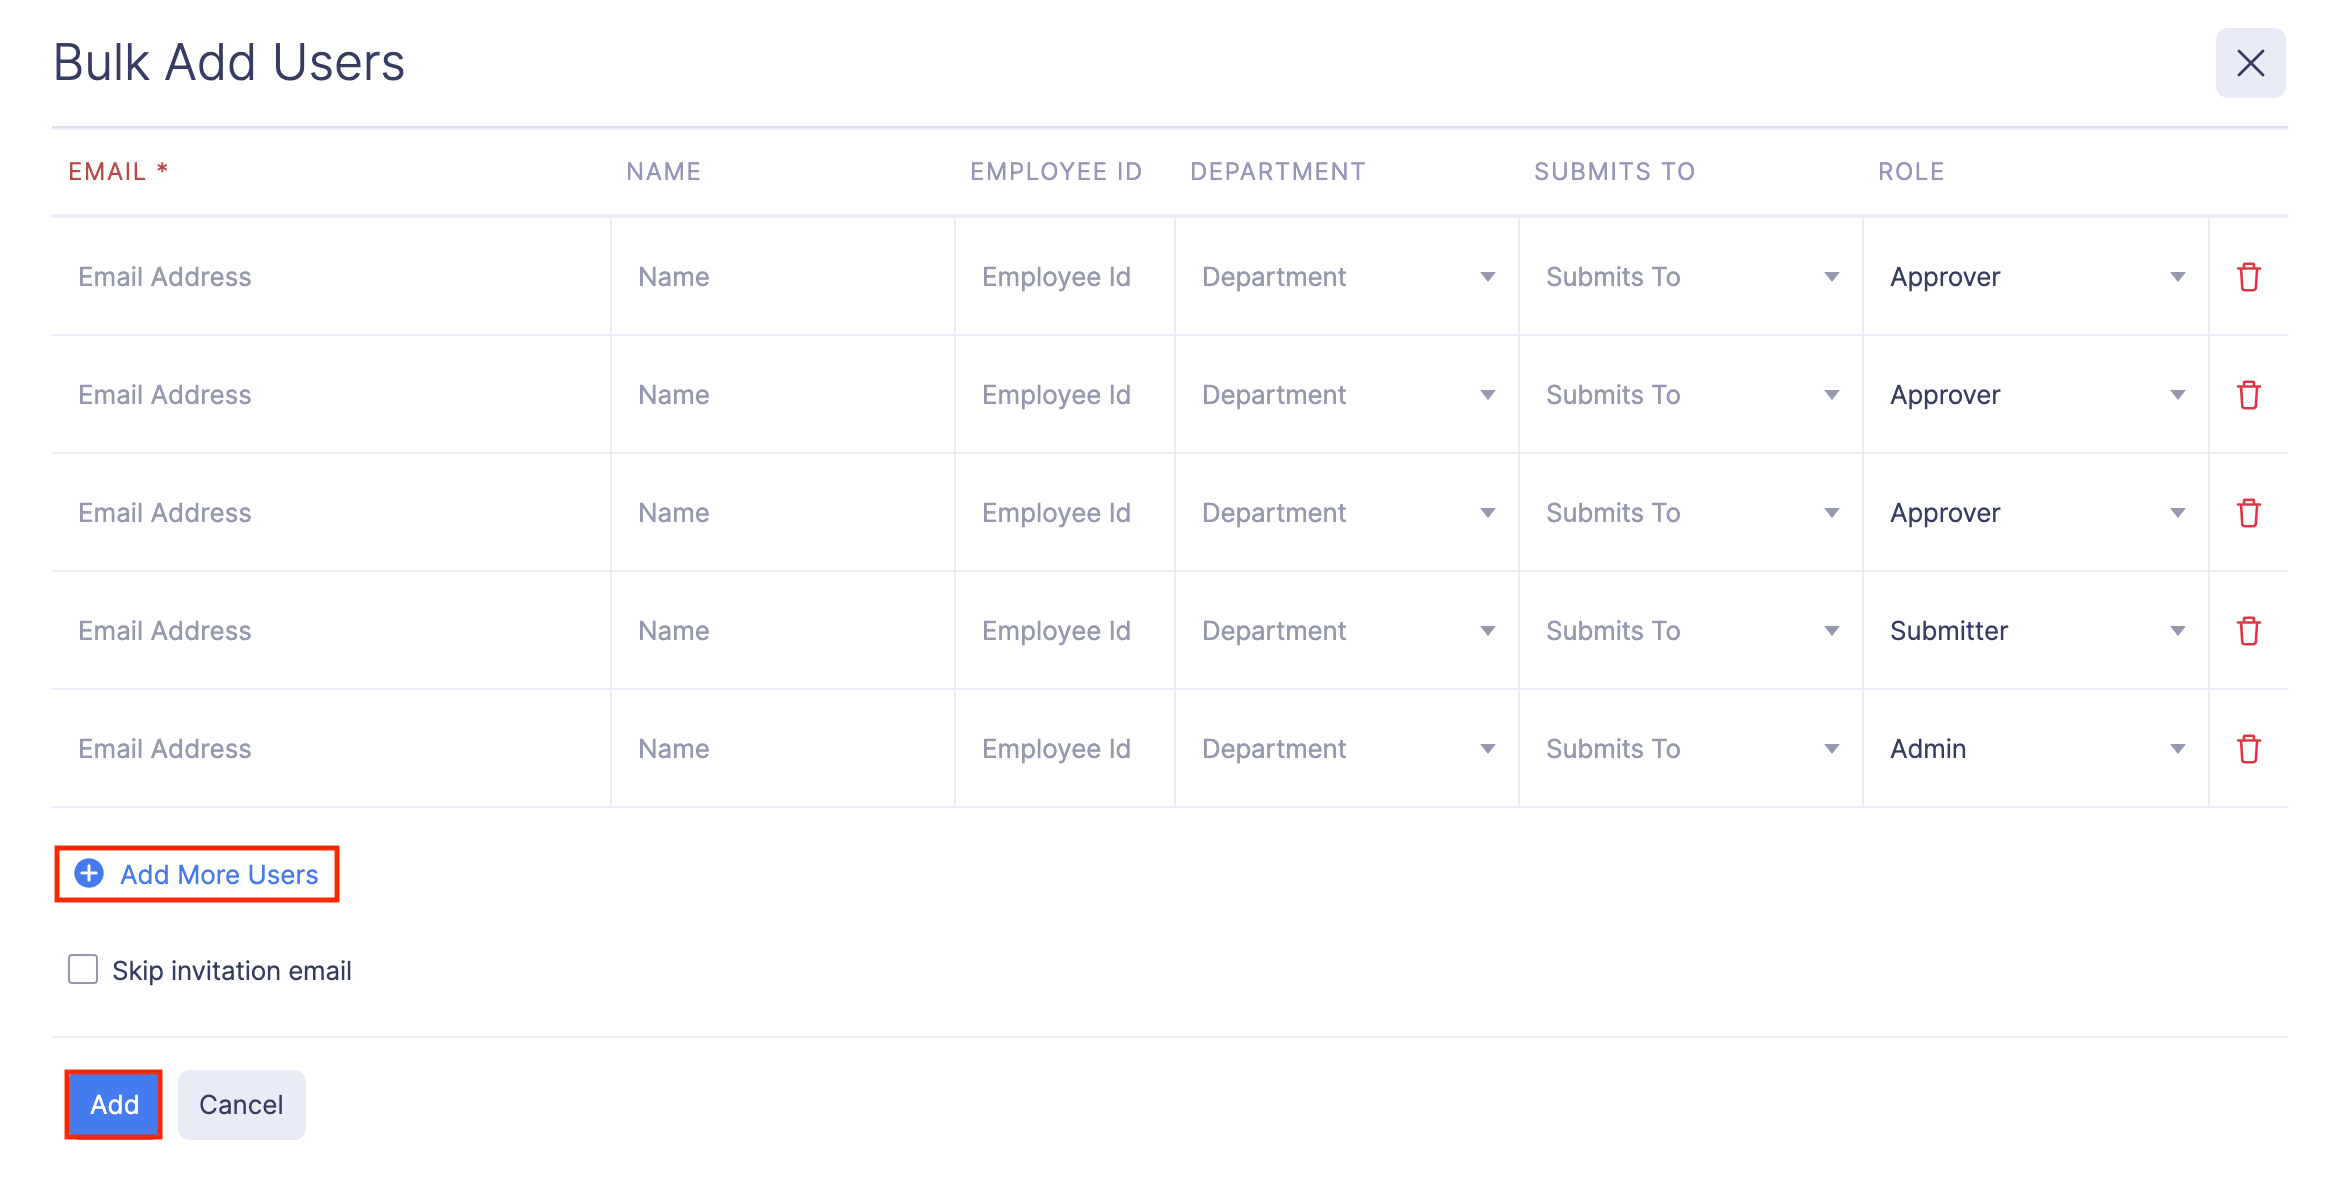
- Click the + New User dropdown at the top right corner and select Multiple Users.

- Enter the necessary details like the email addresses, names of the users, etc.
- Assign roles to the users.
- Click + Add More Users, if necessary.
- Click Save.
An invitation will be sent to each of the user’s email address that you entered.
Import Users
Users can be imported in the following formats:
| CSV - Comma Separated Values | TSV - Tab Separated Values |
To import users:
- Click Admin View on the left sidebar.
- Go to Settings on the left sidebar.
(OR)
Click Settings in the top right corner of the page. - Go to Users under Users and Control.
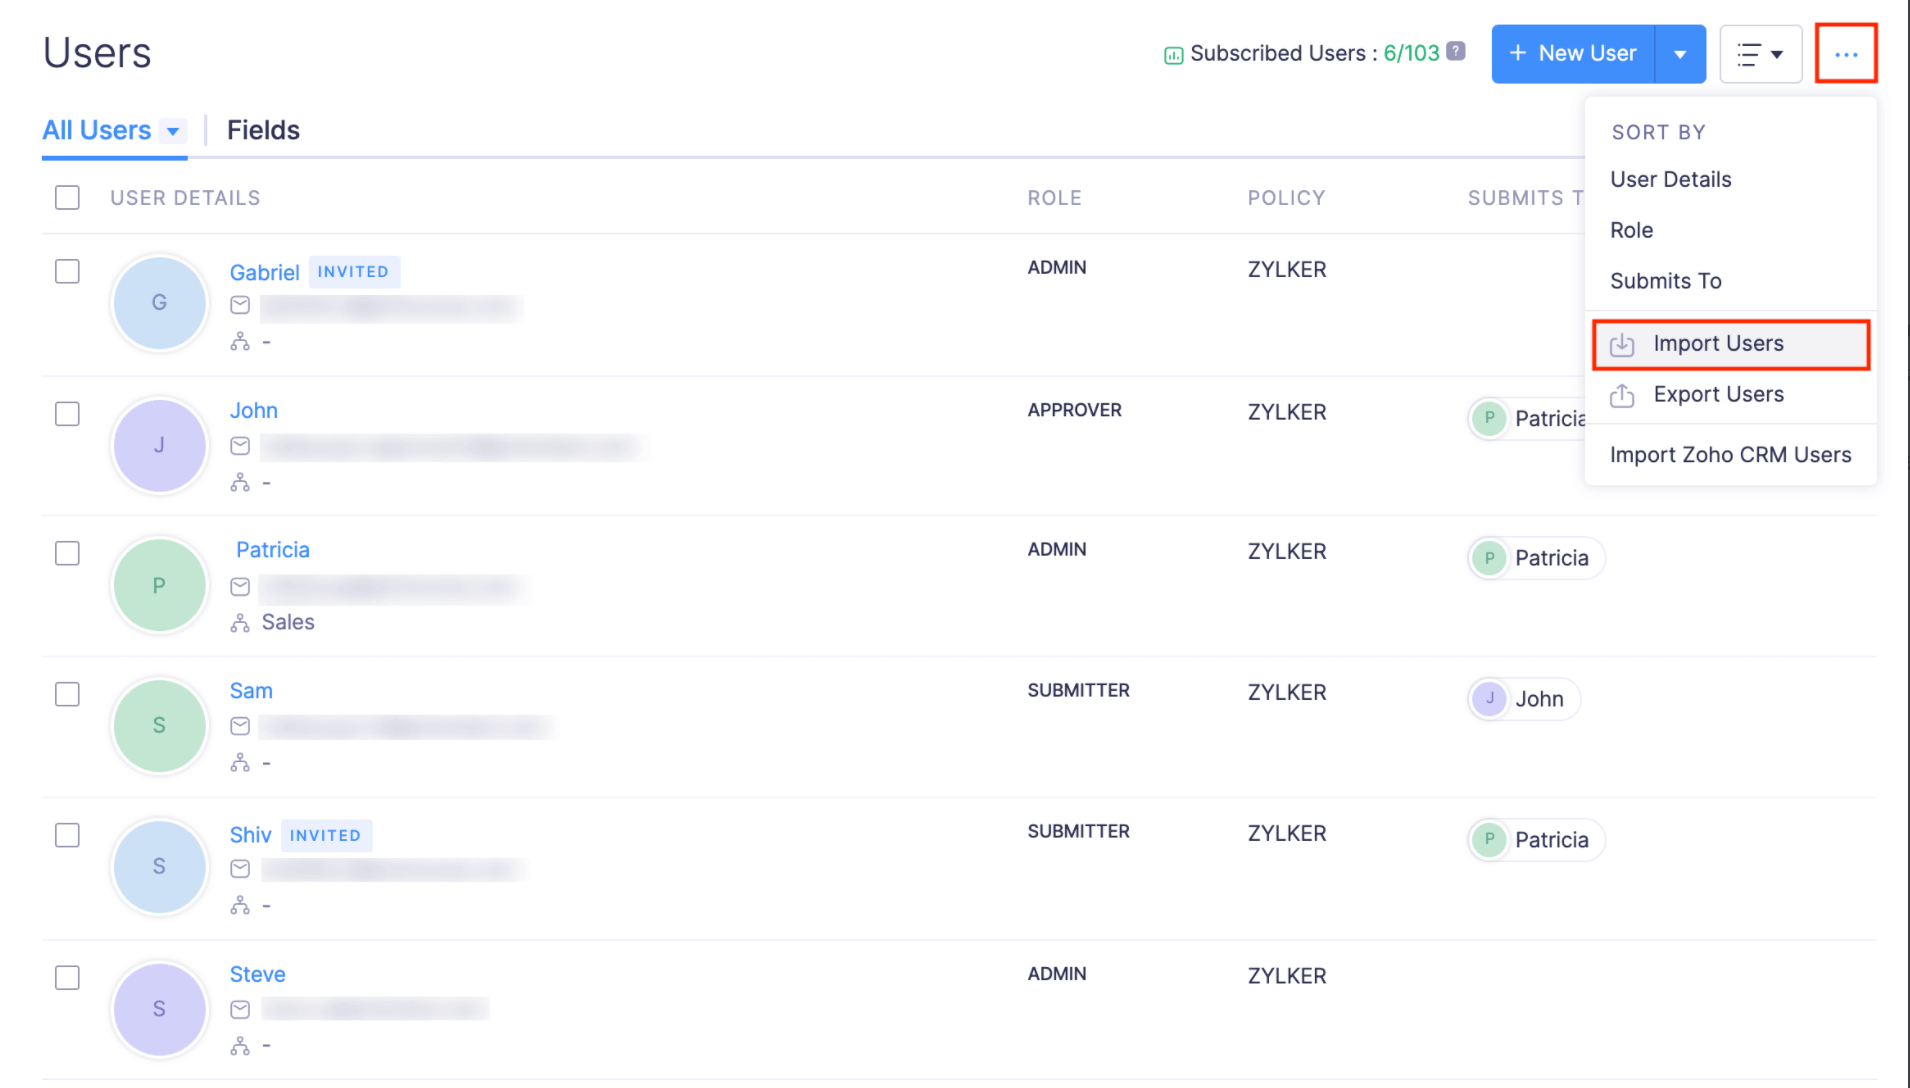
- Click the More icon at the top right corner of the page.
- Select Import Users.
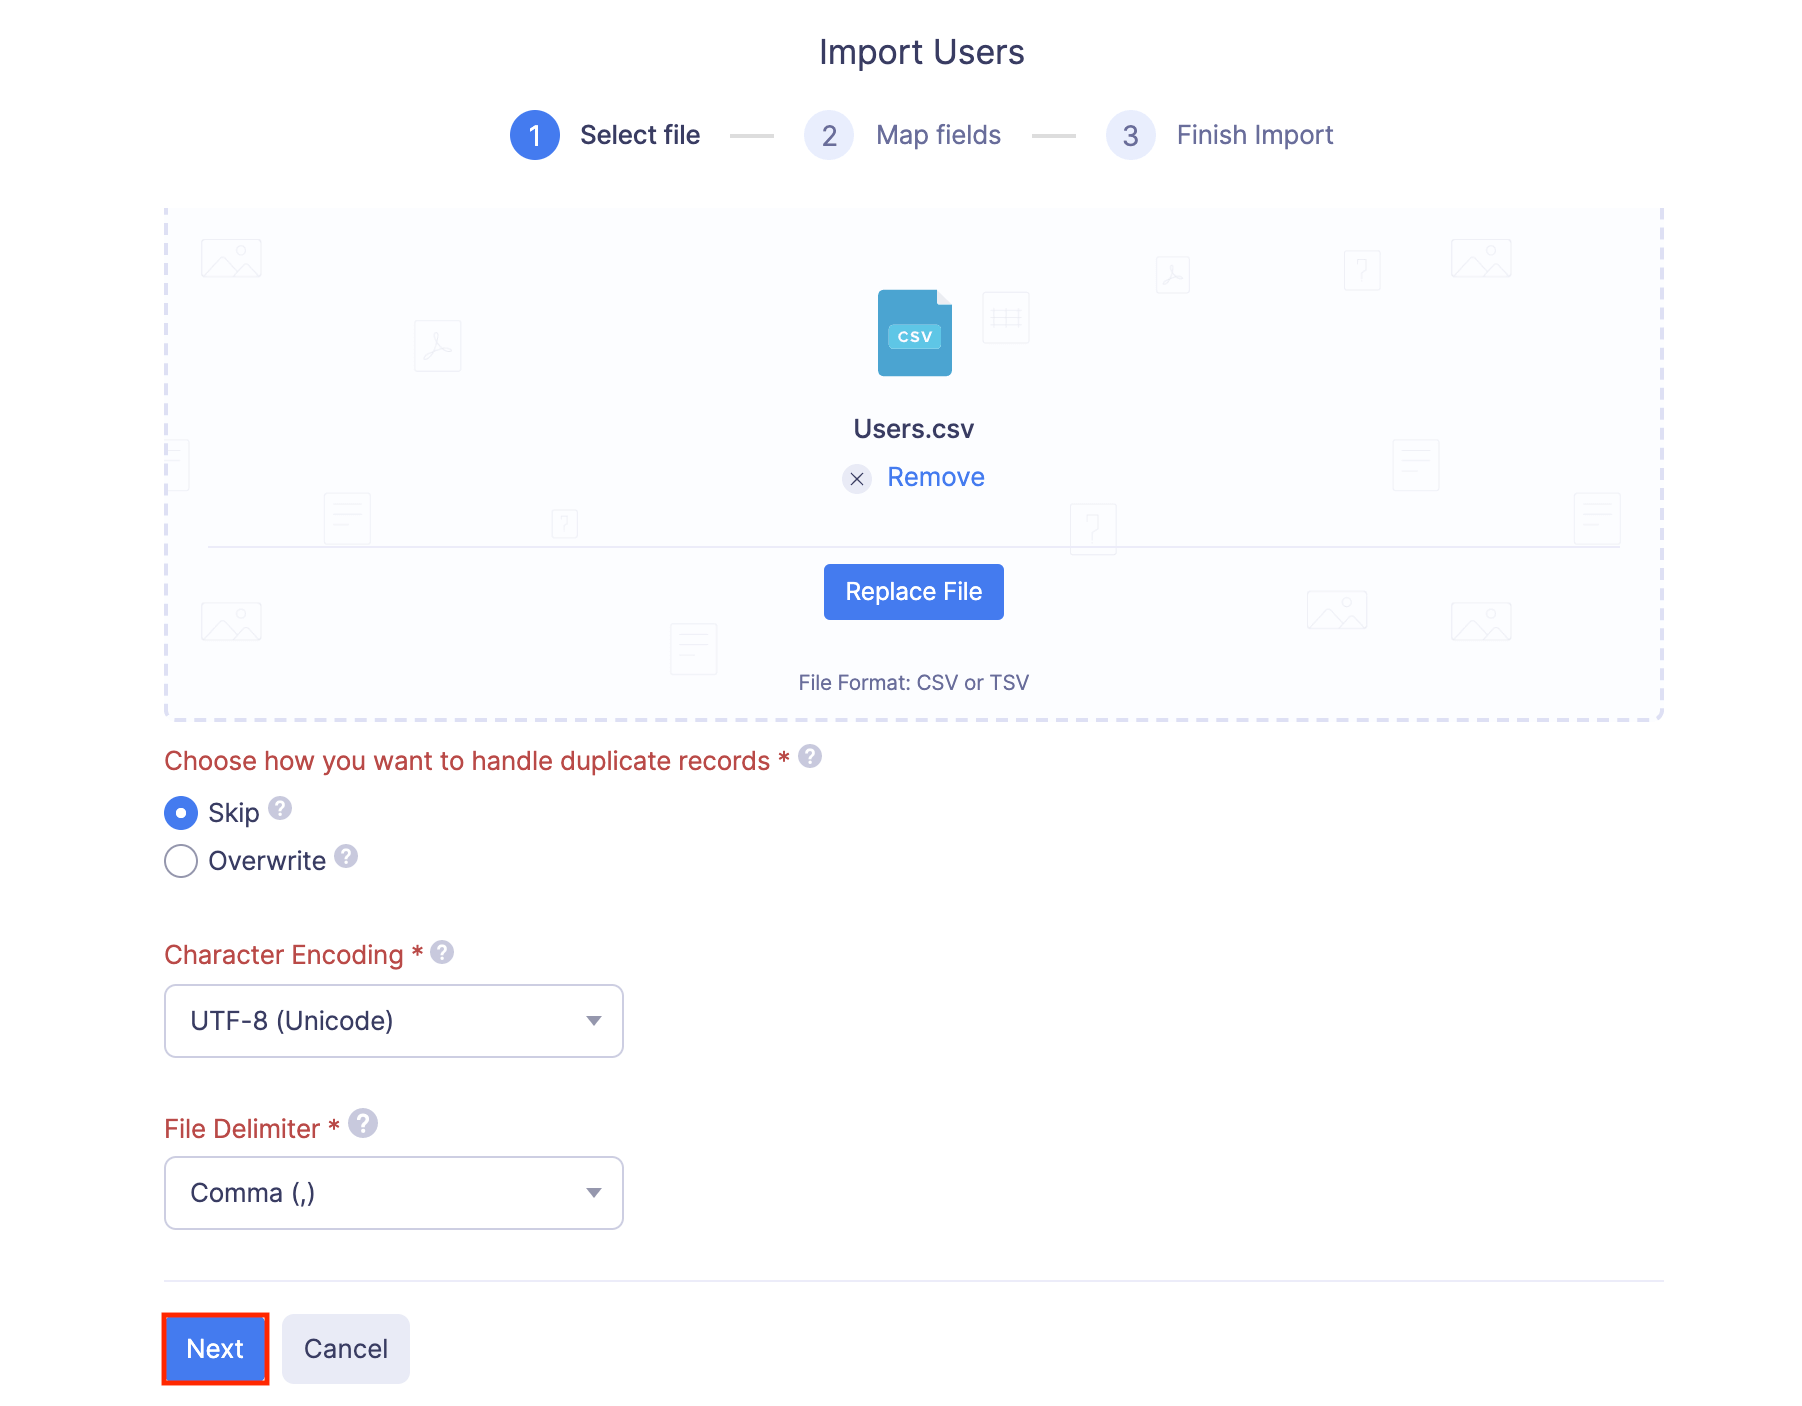
- In the first step, drag and drop a file or choose a file from your desktop or a cloud account.
- If you want to upload another file instead of the selected file, click Replace File and choose another file.
- Configure how you want to handle duplicate records. In case the import file has a user who has already been added as a user in Zoho Expense, you can select Skip to skip the import of that user or select Overwrite if you want to replace the existing user in Zoho Expense with the new user from the import file.
- Click Next.
- In the next step, the best match to each field in Zoho Expense will be auto-mapped with the fields in the imported file. If there are unmapped fields, you can map them manually.
- If you want to save the mapping for future use, mark the Save these selections for use during future imports option. Click Next.
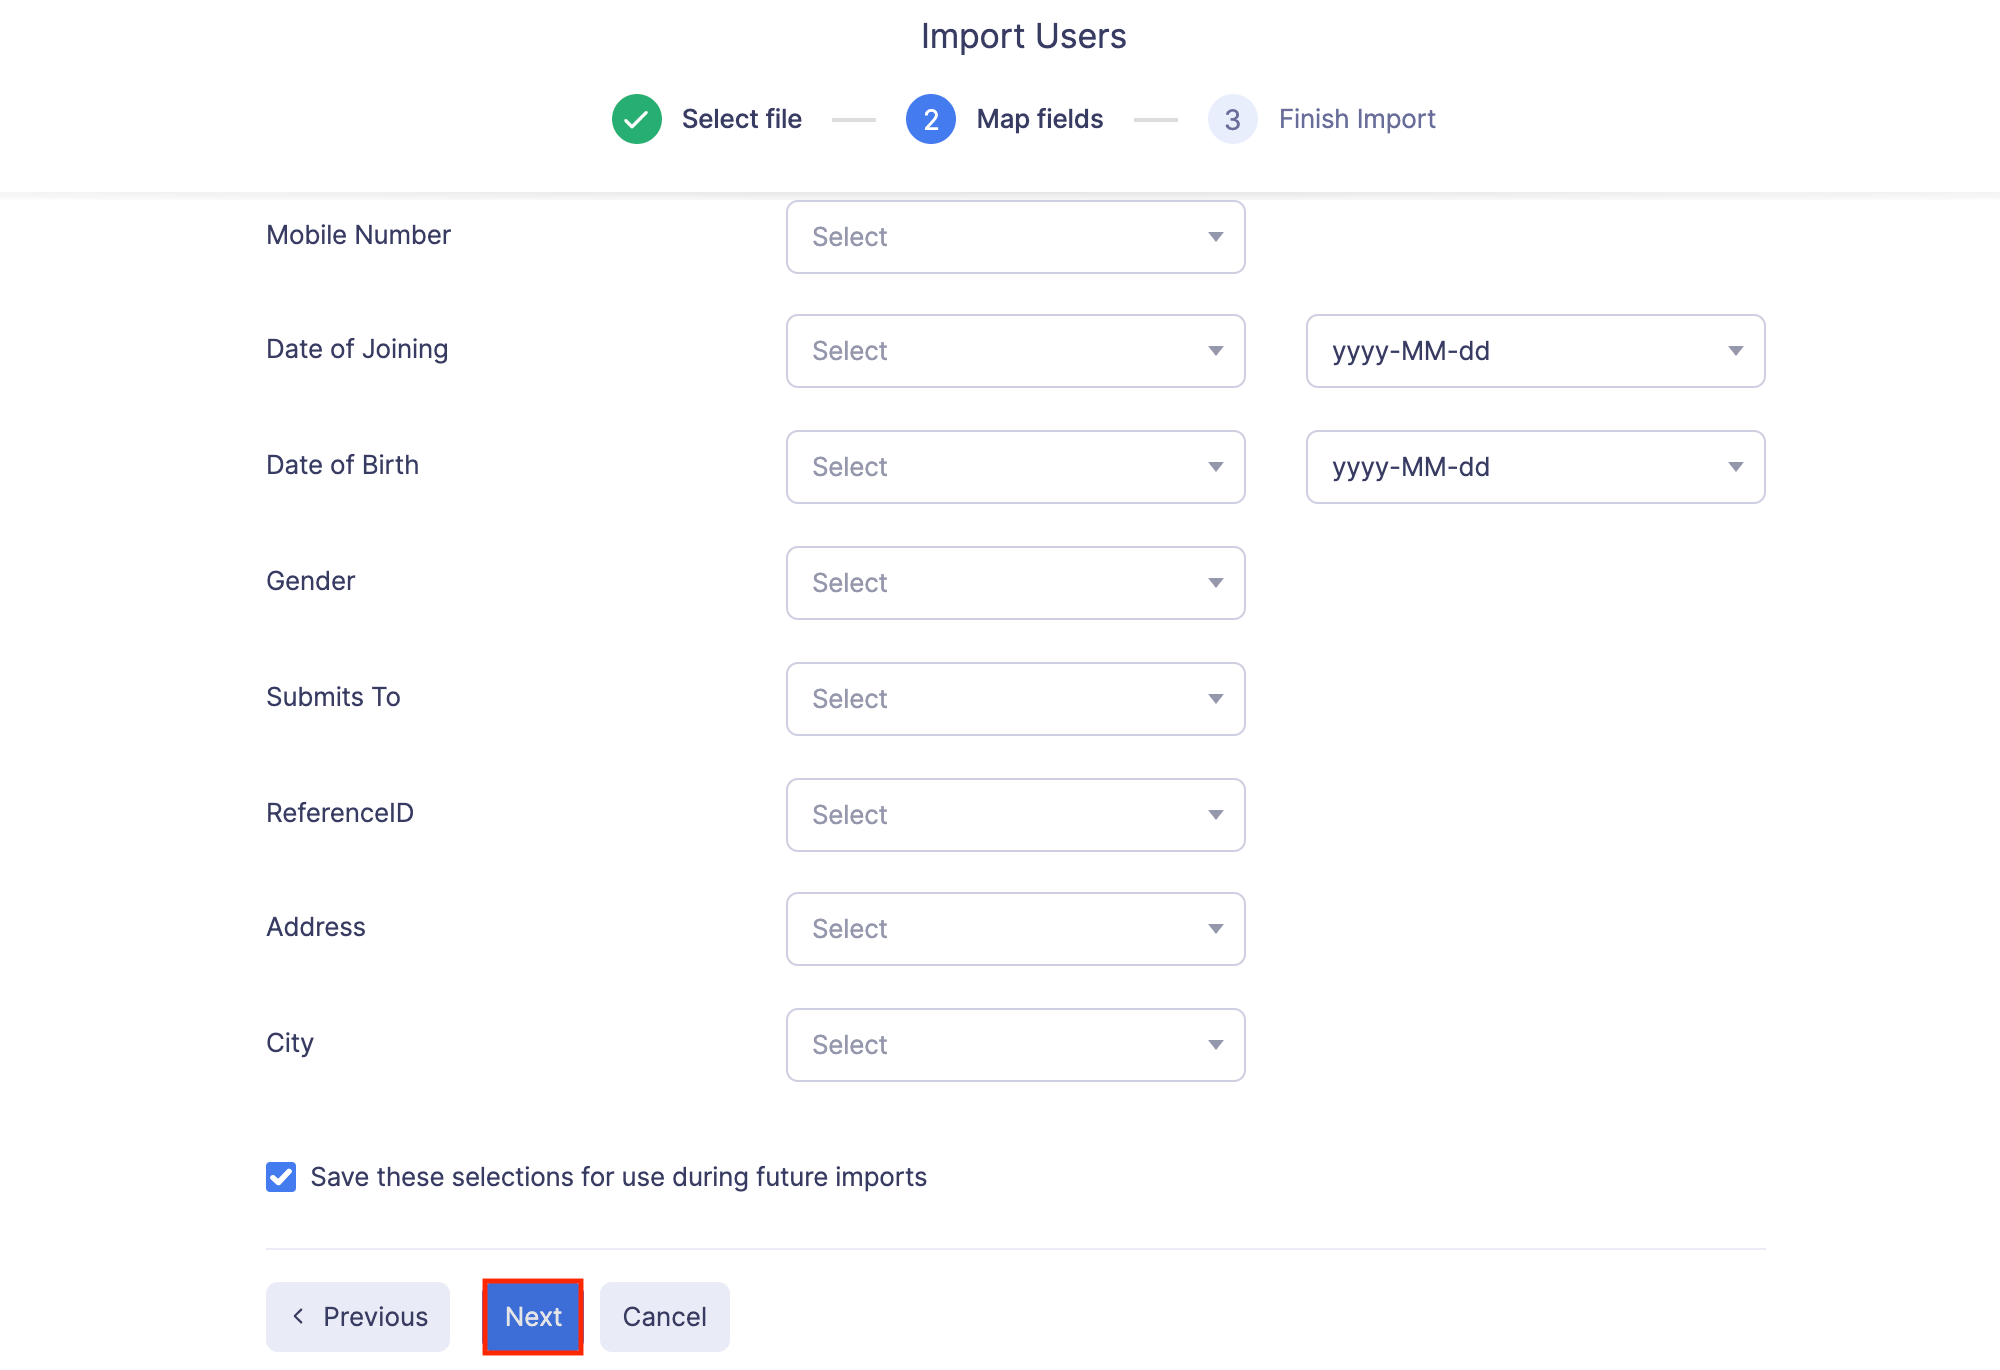
- The data in the unmapped fields will not be imported into Zoho Expense. If you want to map those fields, click Previous and map the unmapped fields.
- Once you have mapped all the relevant fields, click Import to import users into Zoho Expense.
Add Custom Fields in the User Invite page
If you want to add additional details such as important document links and attachments about your employees, you can add custom fields in the User Invite page. To add custom fields:
- Click Admin View on the left sidebar.
- Go to Settings on the left sidebar.
(OR)
Click Settings in the top right corner of the page. - Click Users under Users and Control.
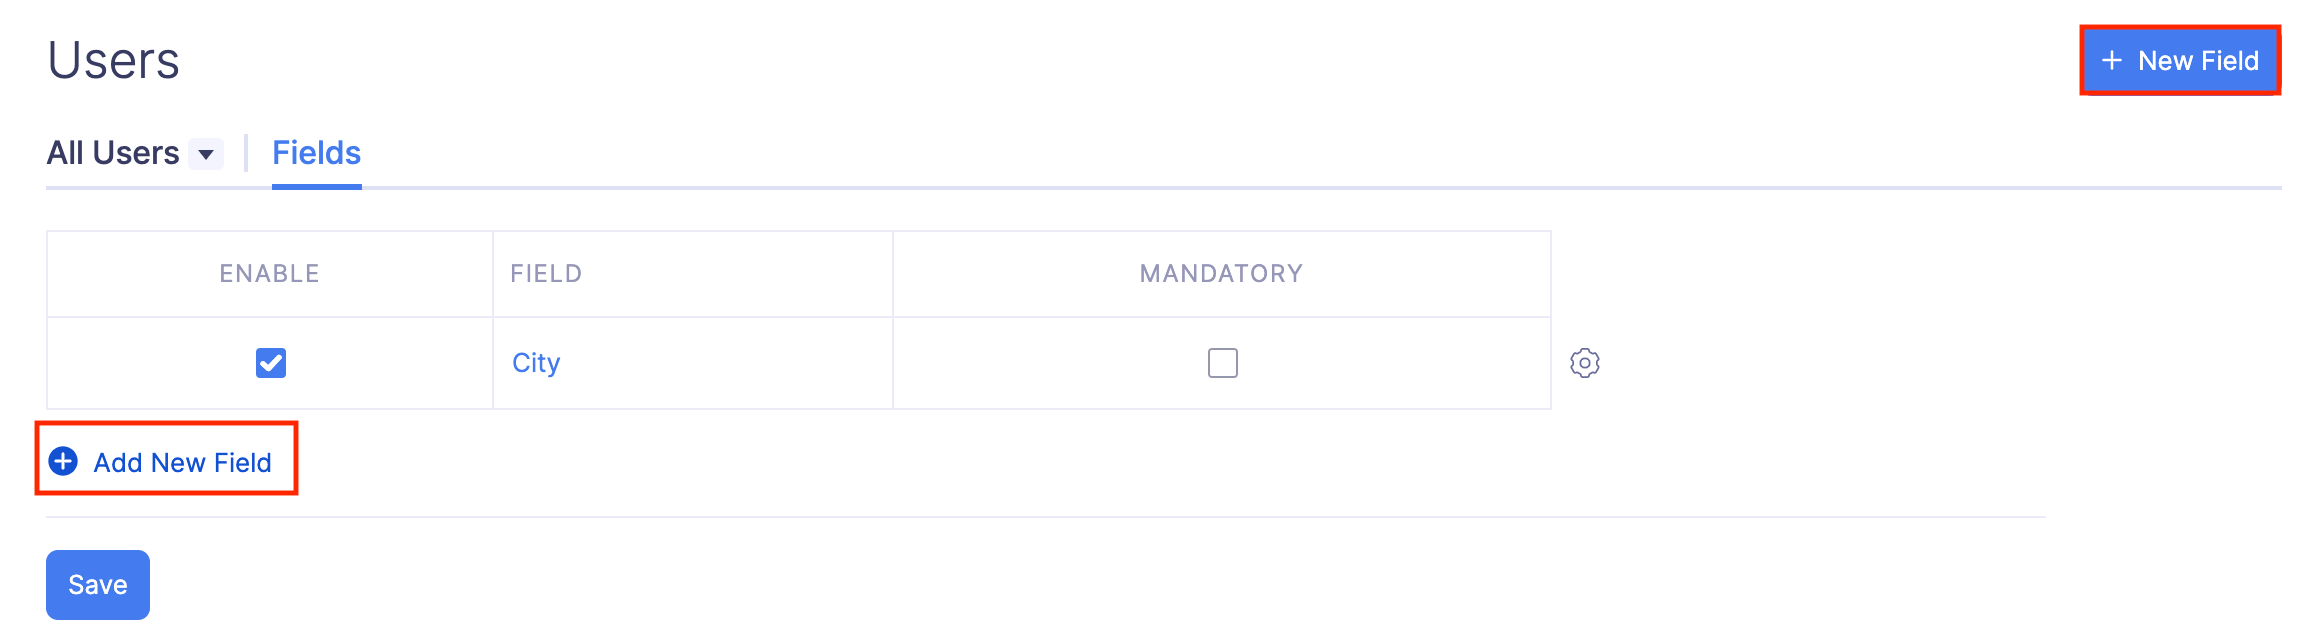
- Click the Fields tab.
- Click + Add New Field
(OR)
Click + New Field in the top right corner of the page.
Read our help document on Custom Fields to learn more.
- Click Save after filling the required details.

Pro Tip:
You can also decide which user role can view and fill the custom fields you’ve added. To define access permissions:
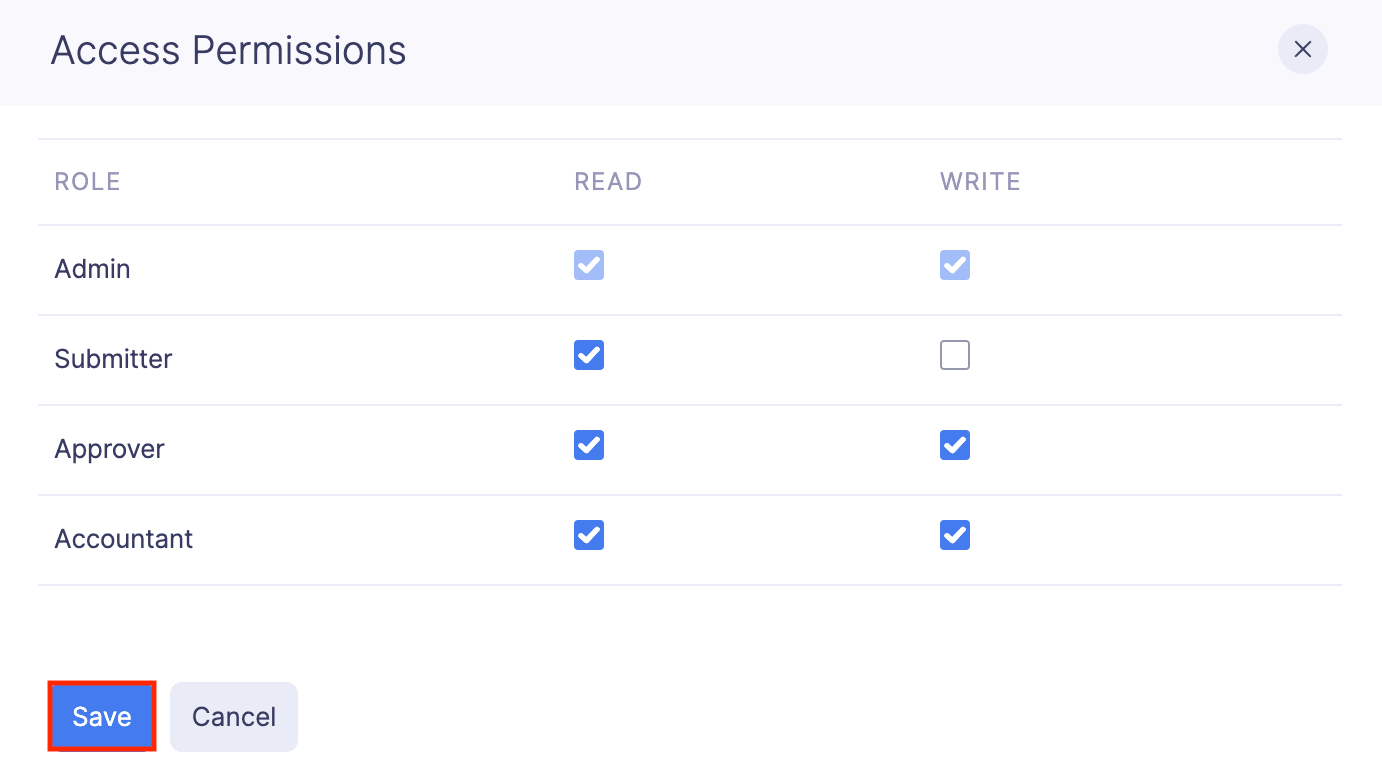
- Click the Gear icon at the right corner of the custom field you’ve added.
- Select Access Permissions.
- Enable only Read if you want the corresponding user role to only view the custom field.
- Enable Write if you want to allow the user roles to view and fill the custom field.
- Click Save.
Set Up the Approval Flow for Users
As an admin, you can set up the approval flow for your users. You can choose the approvers to whom the users must submit their transactions for approval. There are two types of Approval, Hierarchical and Custom Approval. The approval flow you set up while inviting the users in the user details page is Hierarchical Approval.
Let’s take a look at how the hierarchical approval flow works based on user roles:
Approval flow for submitters
When a submitter submits a report, it will be sent to the user assigned to him in the Submits To field.
Submits To: You can assign a default approver for the submitter. All the reports from the submitter will be sent by default to the assigned approver.
Approval flow for approvers and admins
The approvers and admins have the authority to approve their own reports. However, you can set a criteria where reports exceeding a certain amount can be submitted or forwarded to another approver.
Admins also have the permission to approve the reports submitted by any user across the organization, even if they’re not the assigned approver.
Submits To: Select an approver from the Submits To dropdown and all the reports will be submitted to that approver for approval.
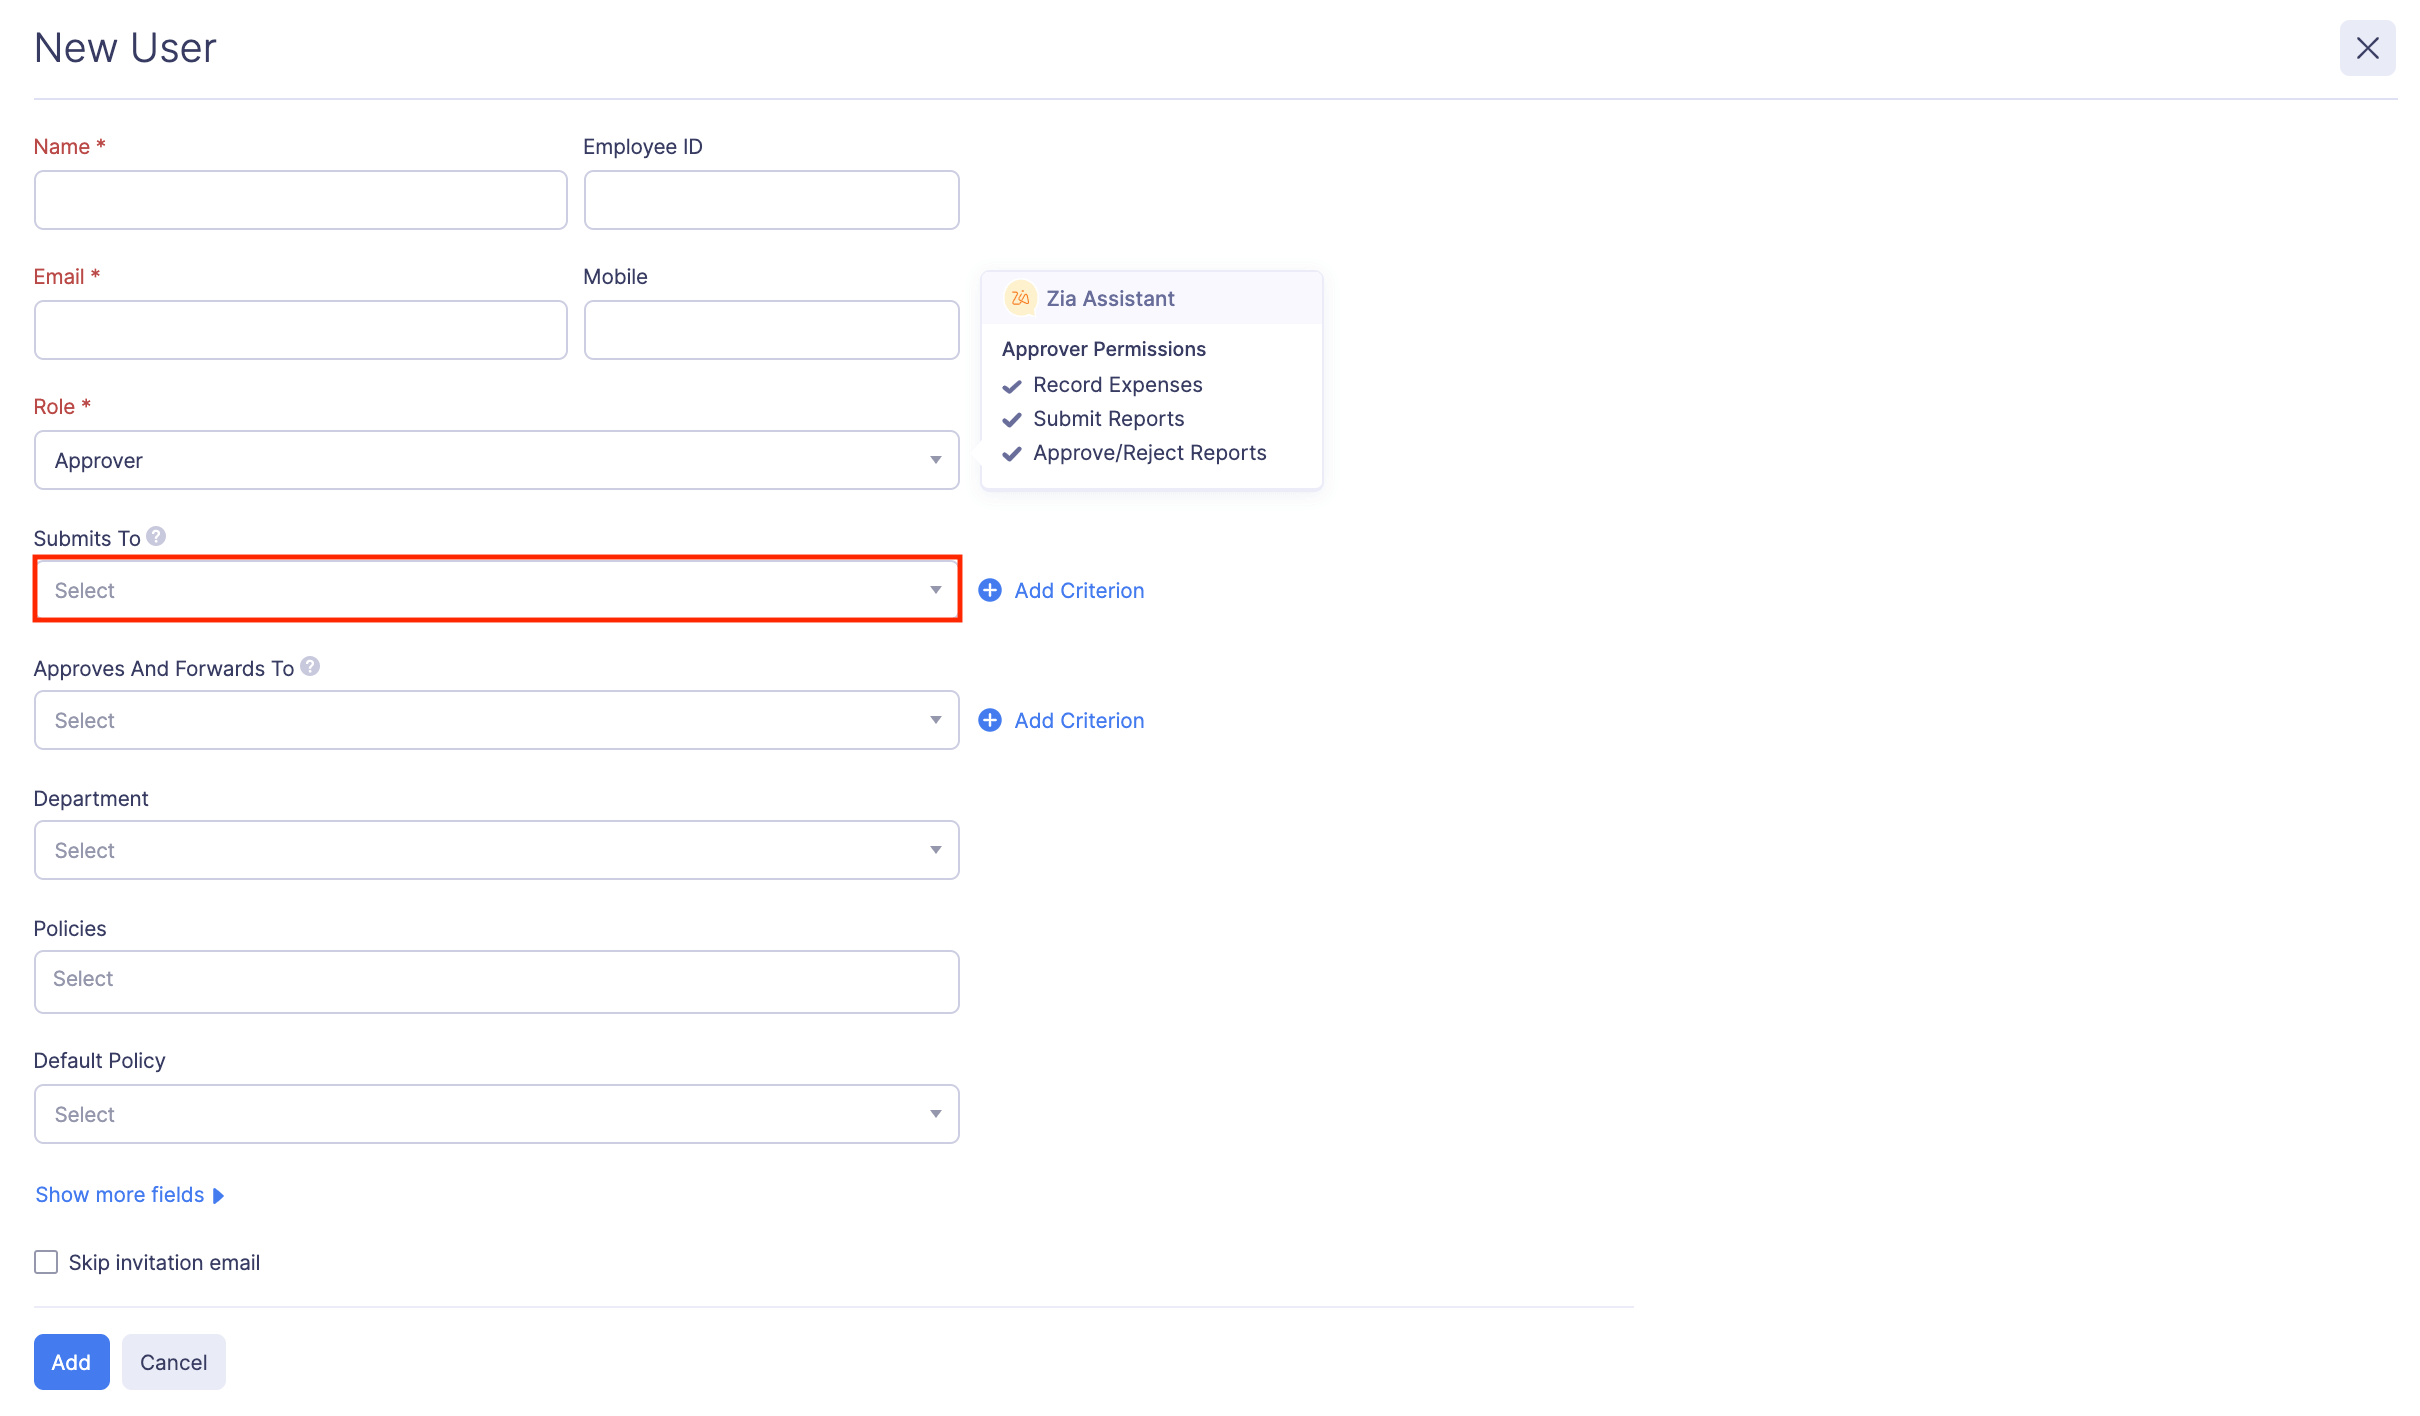
Approves and Forwards To: On selecting a user from Approves and Forwards To dropdown, all the reports that are approved by the approvers or admins, will be forwarded to this user, for further approval.
Set up approvers based on criteria
You can set up a criteria based on which the reports will be submitted to the approver. If the report satisfies the criteria, it will be submitted to the selected approver. To set up criteria, click the + Add Criterion button next to the Submits To and Approves and Forwards To dropdown.
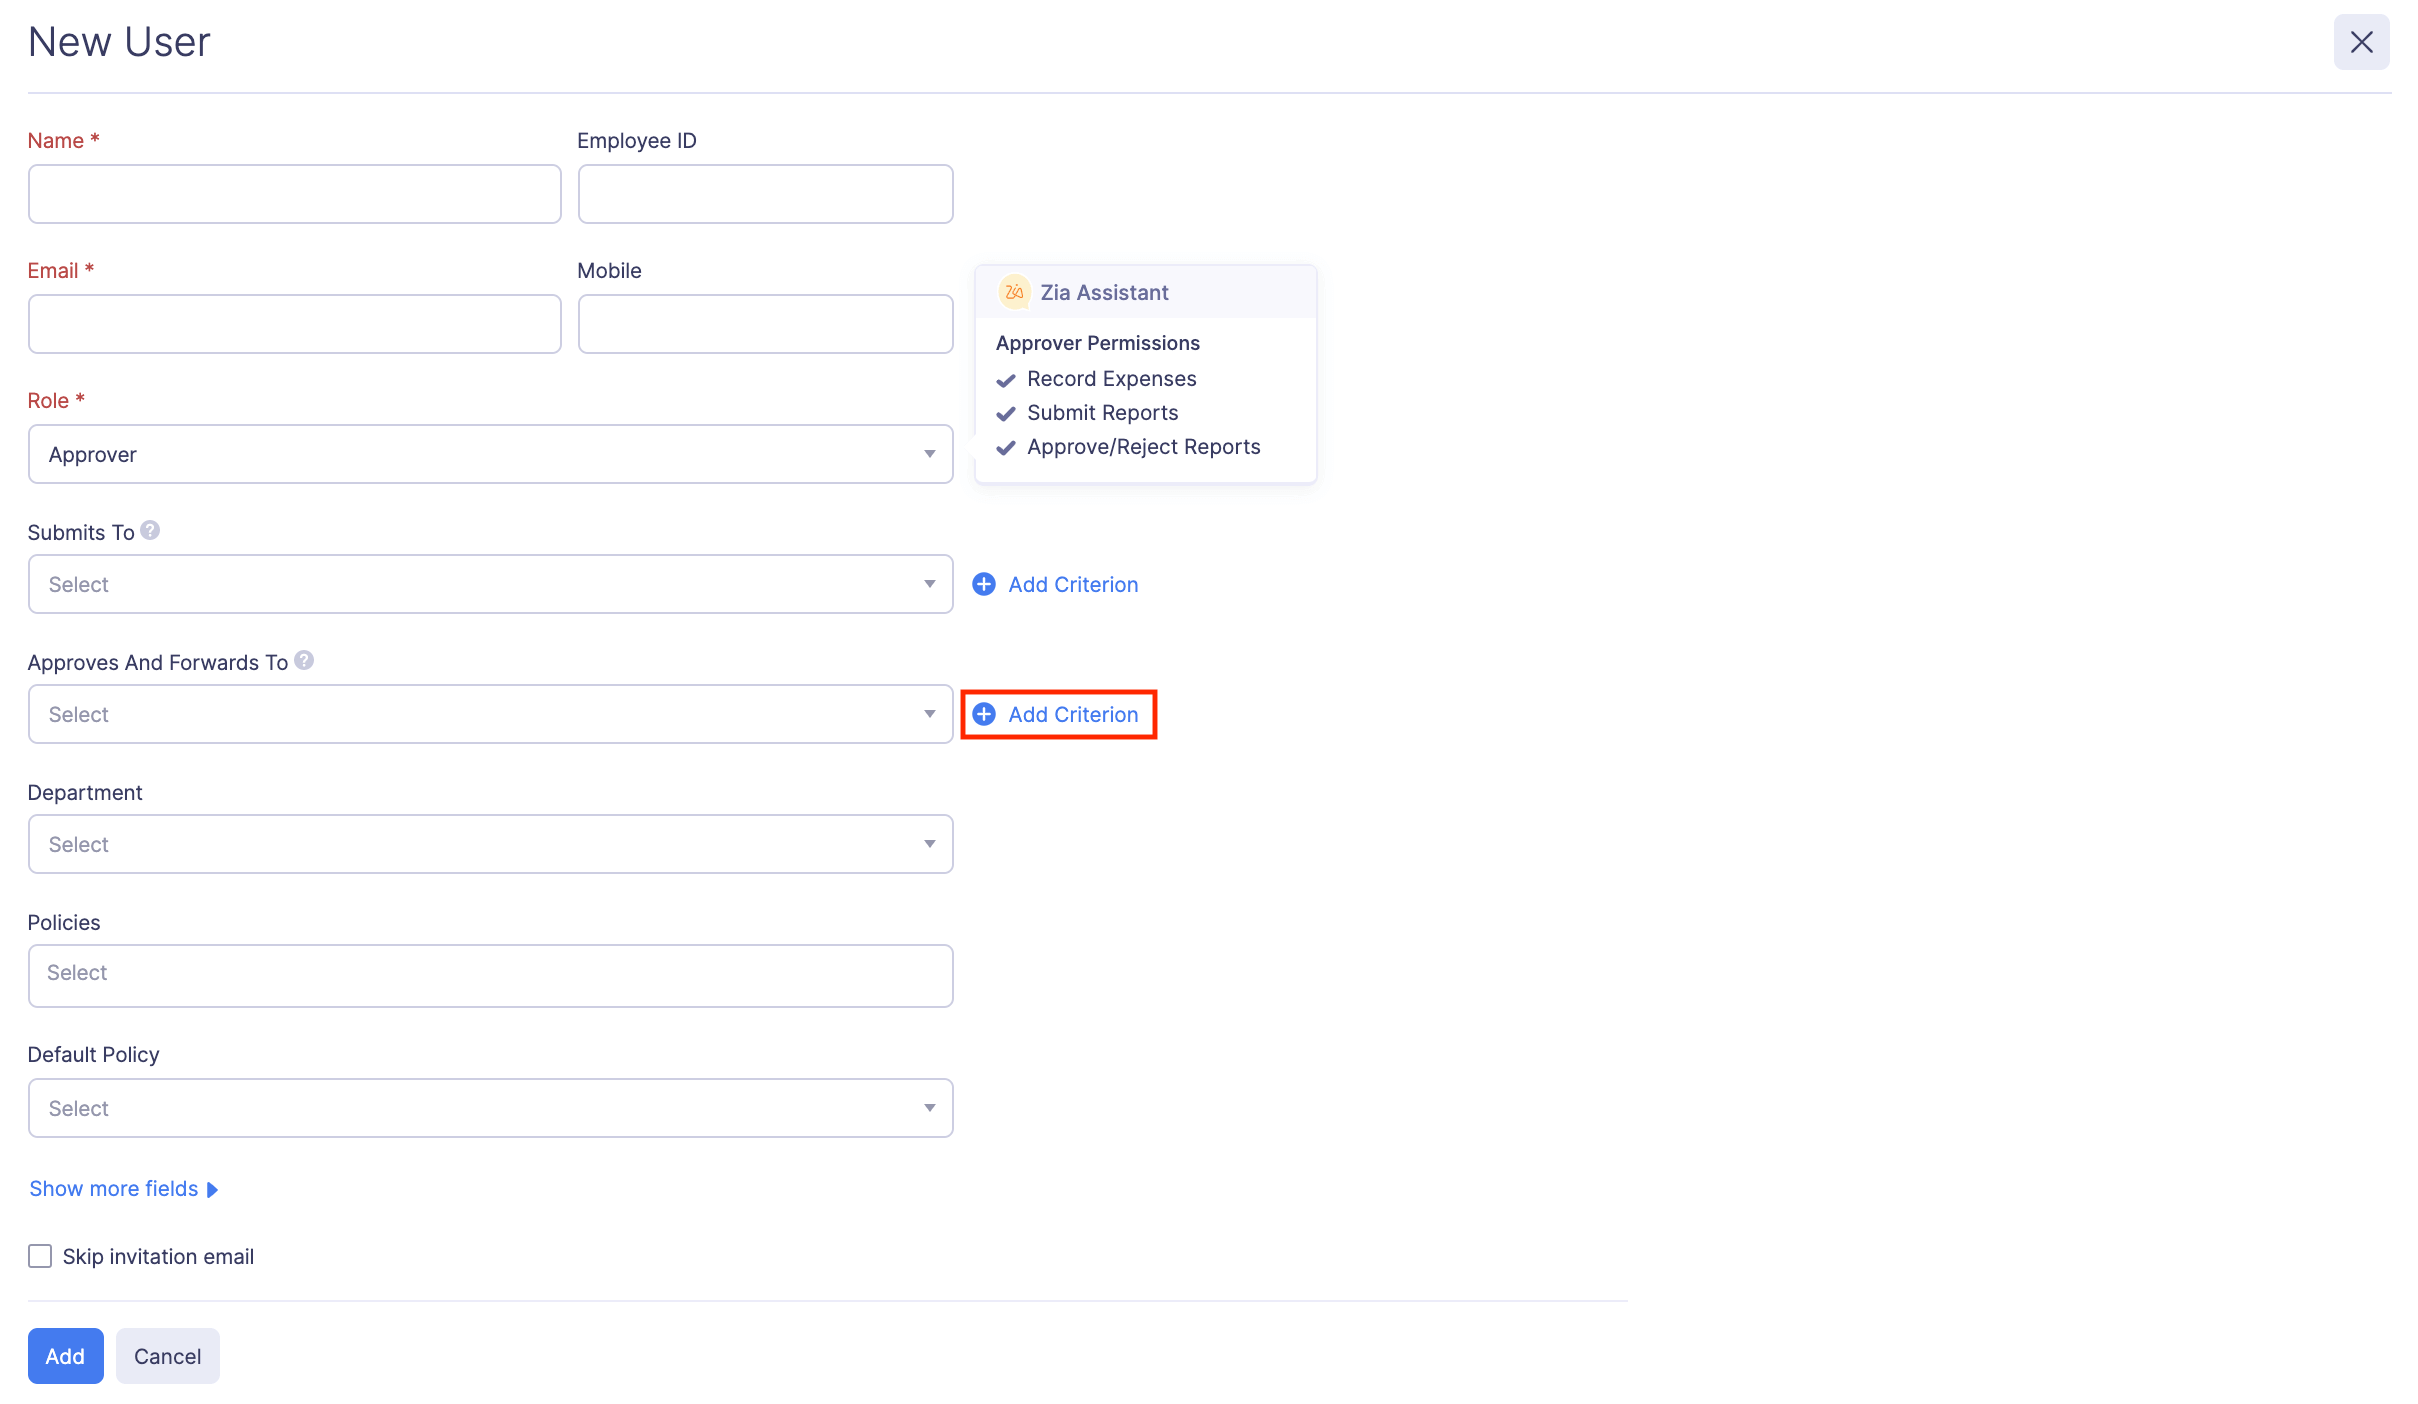
Let’s take an example where the criterion is set to if the amount exceeds $1000.
So, if the submitted report does not exceed $1000, it will be approved by the approver selected under the Submits To dropdown. However, if the submitted report exceeds $1000, it will be forwarded to the next approver (the one who was chosen from the Approves and Forwards To dropdown) for further approval.
Note: Approval workflow for existing approvers and admins can be set up by editing the users.
Learn how to set up hierarchical approval.
For a better understanding of the Hierarchical Approval Flow, let’s have a look at an example:
Harry is the CEO of Zylker Global, a small product marketing startup. Let’s consider Harry to be the admin. He manages a sales team that is led by Stuart, the regional sales head. Stuart recruits two members for his team: Sarah, the sales manager; John, the sales executive. We’ll use this example to see how many different types of approval workflow Harry can create for his organization.
| Designations | Names |
|---|---|
| Sales Executive | John |
| Sales Manager | Sarah |
| Regional Sales Head | Stuart |
| CEO | Harry |
Scenario 1 Harry invites John to his Zoho Expense organization and sets up an approval flow for him. So, in the Invite User form, Harry selects Sarah from the Submits To dropdown, thereby making him the default approver for John. So, when John tries to submit an expense report for approval, it will automatically be submitted to Sarah.
Scenario 2 In scenario 1, Harry has set up an approval flow for John. Now, Harry decides to extend this approval flow where reports exceeding $2500 should be submitted to Stuart, the regional sales head. In this case, he can edit the user, Sarah. In the Edit User form, he chooses Stuart from the Approves and Forwards To dropdown, and adds a criterion as “Only if amount exceeds $2500”. So, whenever a report whose value is more than $2500 is submitted, Sarah, the default approver will approve the report and it’ll be forwarded to Stuart, for further approval.
Scenario 3 As an admin, Harry has given rights to Stuart, an approver, to approve his own reports. However, Harry wants the expense reports of a value higher than $4000 to be brought to his notice. So, he decides to set up an approval flow for Stuart. To do this, Harry heads to the Users section and edits the user, Stuart. In the Edit User form, he chooses his own name from the Submits To dropdown and adds a criterion as “Only if the amount exceeds $4000”. So, whenever Stuart tries to approve his own reports that exceed $4000, he won’t be able to do it. Instead, he would have to submit it to Harry for approval.
To set up an approver while inviting a user:
- Click Admin View on the left sidebar.
- Go to Settings on the left sidebar.
(OR)
Click Settings in the top right corner of the page. - Go to Users under Users and Control.
- Click + New User at the top right corner.
- Enter the Name, Employee ID and Email Address of the user.
- Select a role for the user from the Role dropdown.
- Choose an approver for the user from the Submits To dropdown. Set a criterion, if required.
- If the role you’ve selected for this user has approval permissions, you can choose an approver from the Approves and Forwards To dropdown. All the items that are approved by this user will be submitted to the user selected from the Approves and Forwards To dropdown, for further approval.
- Click Add and the approval will be set.
Update Approval Flow in Bulk
You can update the approval flow in bulk. To do this:
- Click Admin View on the left sidebar.
- Go to Settings on the left sidebar.
(OR)
Click Settings in the top right corner of the page. - Go to Users under Users and Control.
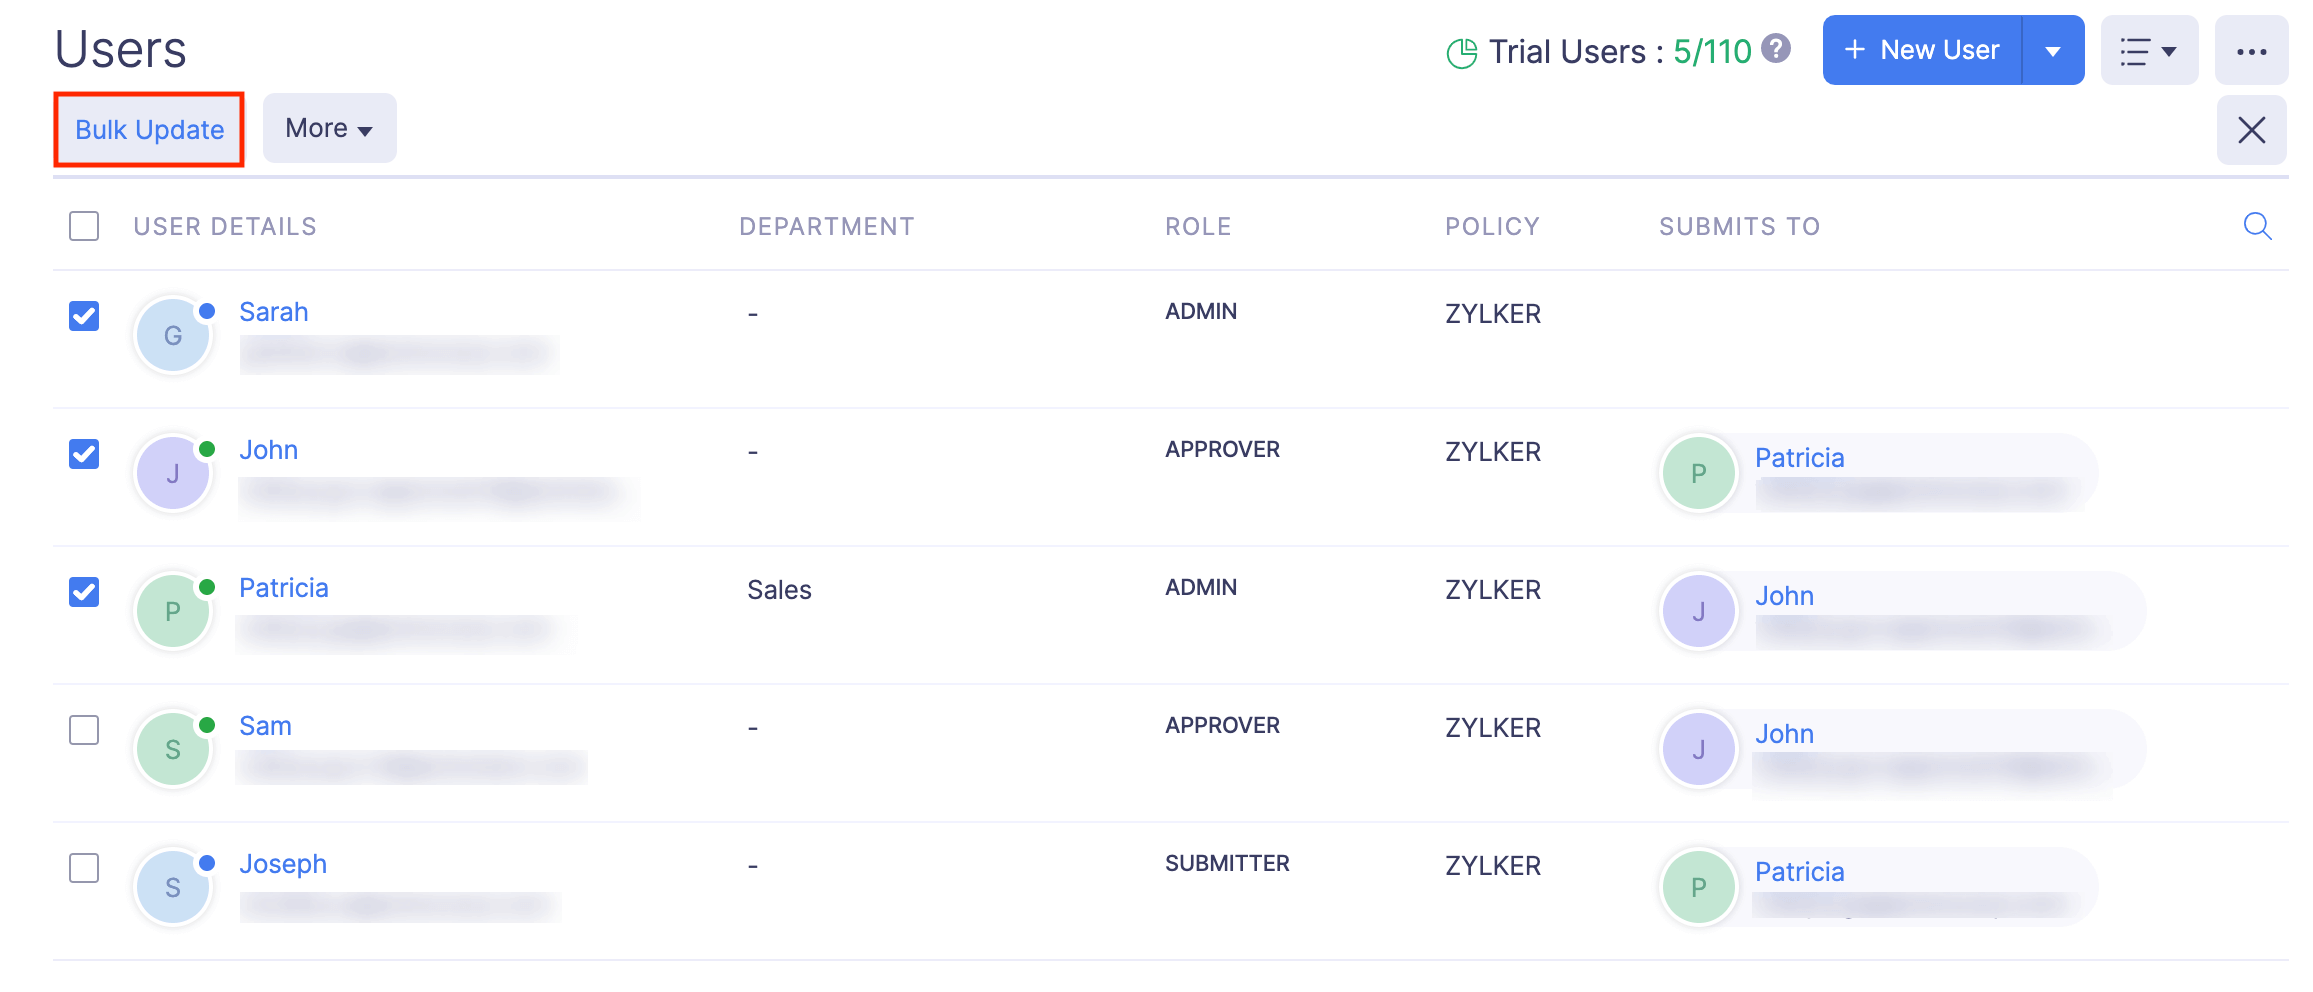
- Select the users for whom you want to update the approval flow.
- Click Bulk Update in the top pane.
- Select an approver from the Submits To dropdown.
- Click Save.

Bulk Update Users
You can update users in bulk. Here’s how:
- Click Admin View on the left sidebar.
- Go to Settings on the left sidebar.
(OR)
Click Settings in the top right corner of the page. - Go to Users under Users and Control.
- Select the users for whom you want to bulk update.
- Click Bulk Update in the top pane.
- You can update Role, Submits To, Department, Policies, and Default Policy of the user.
- Click Save.
Re-invite Users
If the user you’ve invited misses their invitation in the email inbox or if their invite email expires, you can choose to send an invite again. To re-invite users:
- Click Admin View on the left sidebar.
- Go to Settings on the left sidebar.
(OR)
Click Settings in the top right corner of the page. - Go to Users under Users and Control.
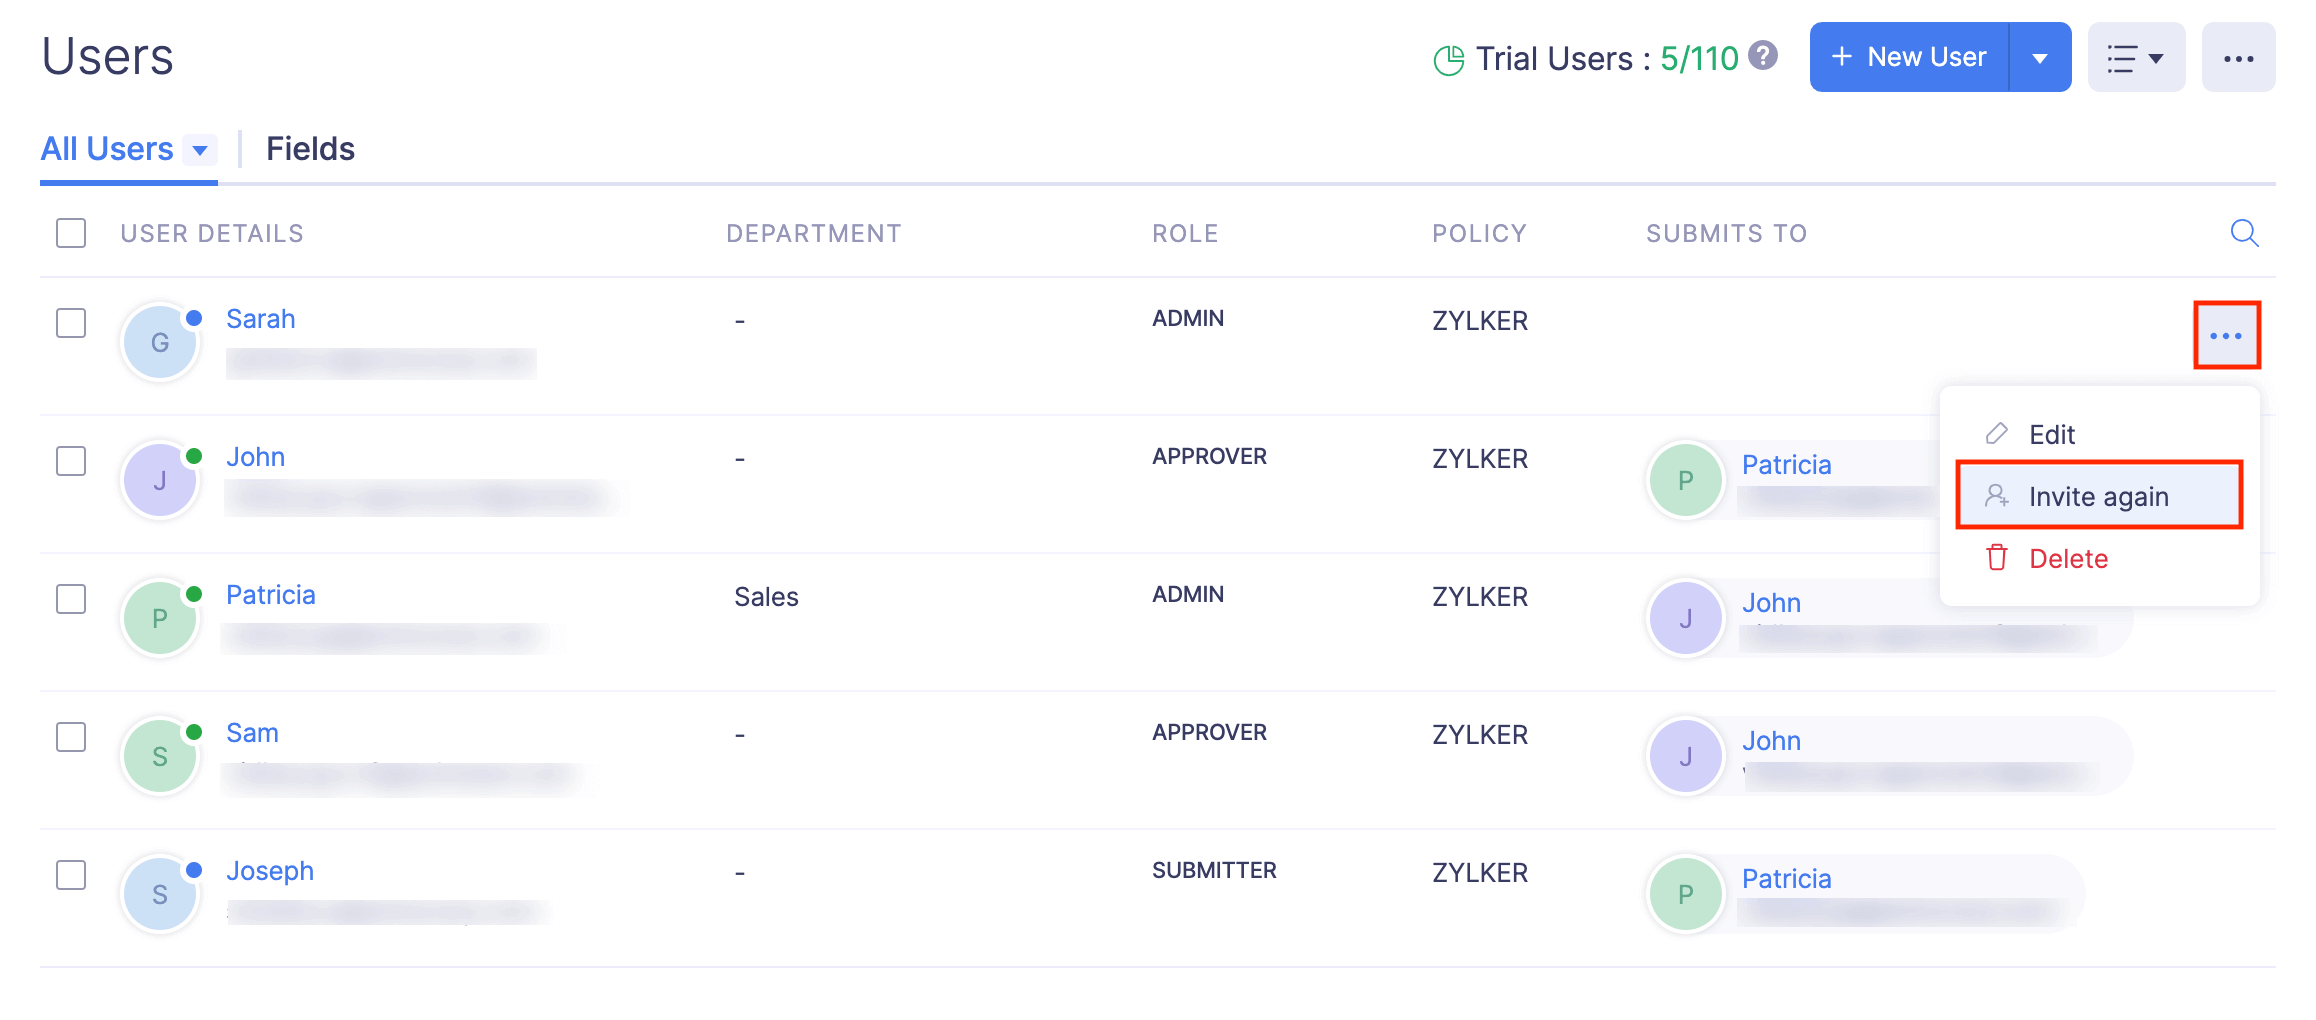
- Hover over the user you want to re-invite and click the More icon at the right corner of the user.
- Select Invite Again. An invite will be sent to the user again.
Note: If your employees are unable to find the invite in their inbox, you can ask them to search for the invite email in the Spam folder.
Edit User
If you want to make changes to the user details, you can edit the user. Here’s how:
- Click Admin View on the left sidebar.
- Go to Settings on the left sidebar.
(OR)
Click Settings in the top right corner of the page. - Go to Users under Users and Control.
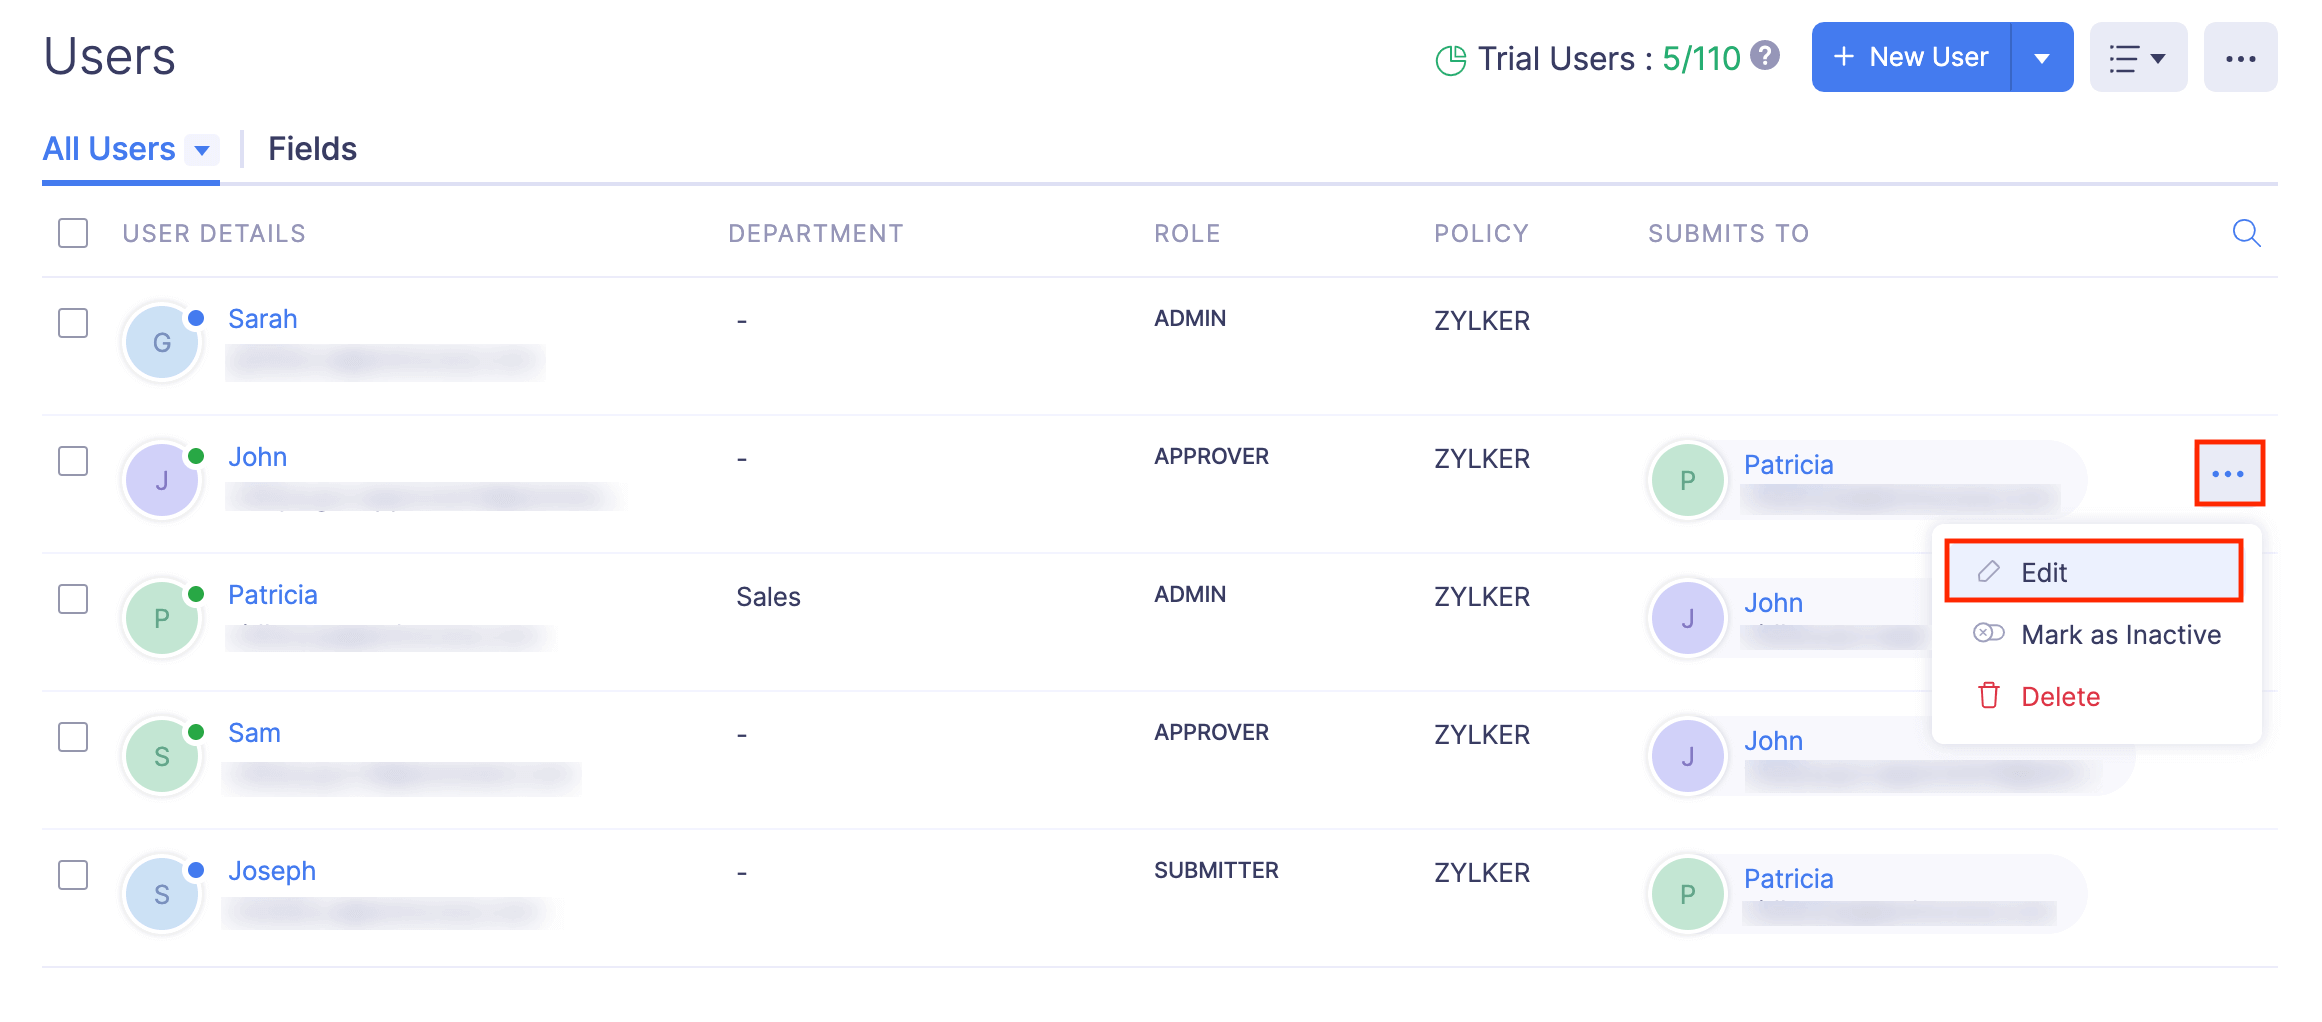
- Click the More icon at the right corner of the user you want to edit.
- Select Edit.
- Make the necessary changes and click Save. The user’s details will be updated.
Mark a User as Inactive
You can temporarily disable a user from accessing your Zoho Expense organization by marking them as inactive. The user won’t be able to access the organization unless the admin marks the user as active again.
To mark a user as inactive:
- Click Admin View on the left sidebar.
- Go to Settings on the left sidebar.
(OR)
Click Settings in the top right corner of the page. - Go to Users under Users and Control.
- Click the More icon at the right corner of the user you want to mark as inactive.
- Select Mark as Inactive. The user will no longer be able to access the organization.

Mark a User as Active
The user you’ve marked as inactive, can be marked as active again. Once the user is marked as active again, they will be able to access the organization.
To mark an inactive user as active:
- Click Admin View on the left sidebar.
- Go to Settings on the left sidebar.
(OR)
Click Settings in the top right corner of the page. - Go to Users under Users and Control.
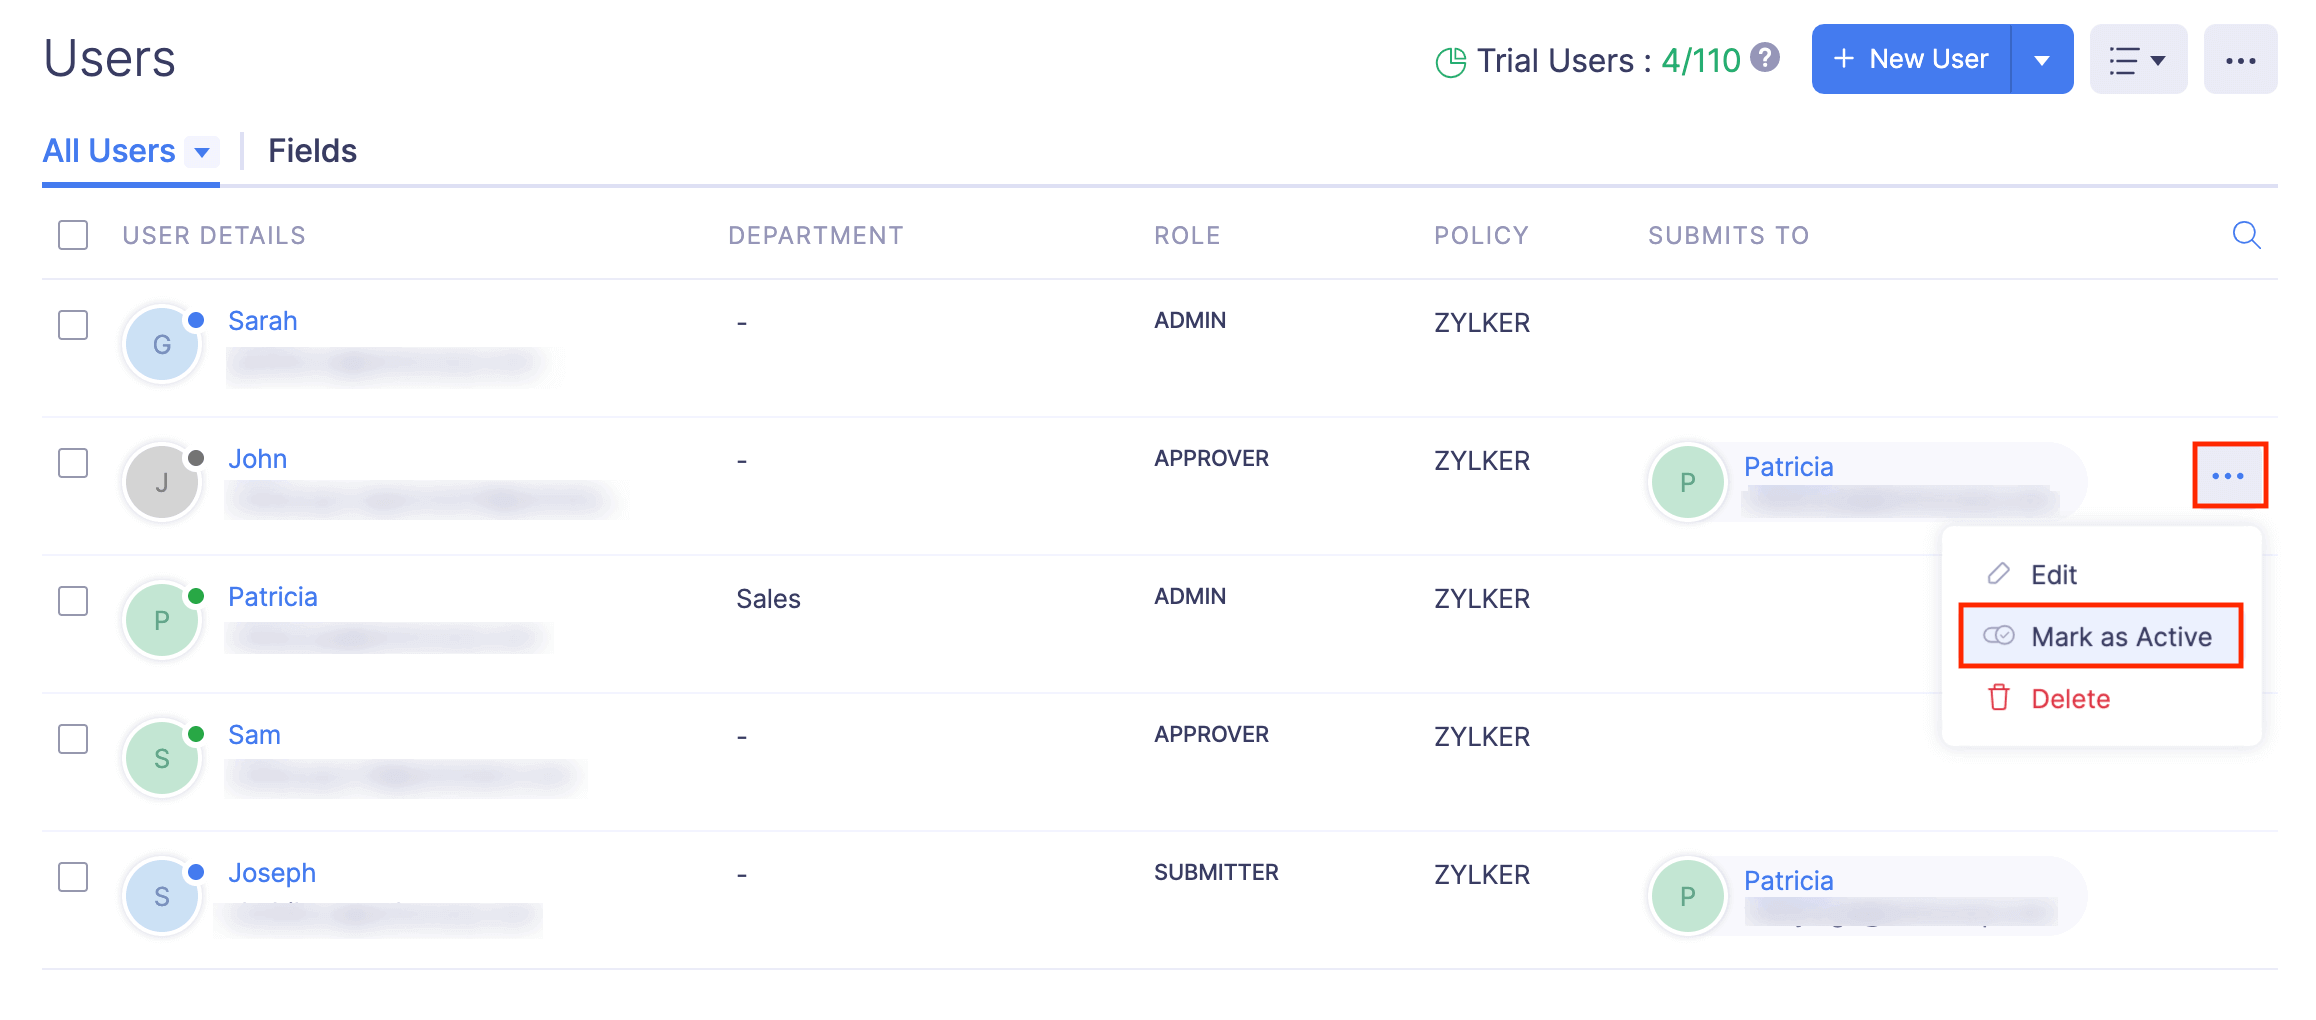
- Click the More icon at the right corner of the user you want to mark as active.
- Select Mark as Active. The user will be able to access the organization again.
Delete User
If an employee quits or leaves your organization due to any other reason, you can delete that user from your Zoho Expense organization.
Pro Tip:
If you want to disable a user temporarily from accessing your Zoho Expense organization, you can mark them as inactive.
Notes:
- The records that belong to the deleted user will remain in Zoho Expense.
- If you invite a deleted user to your organization again, that user will be added as a new user in Zoho Expense.
- A user deleted from Zoho Expense will still be able to access other Zoho services using the same email address.
- Deleting a user does not cancel the user’s license. To cancel a license, you must manage your subscriptions.
To delete a user:
- Click Admin View on the left sidebar.
- Go to Settings on the left sidebar.
(OR)
Click Settings in the top right corner of the page. - Go to Users under Users and Control.
- Click the More icon at the right corner of the user you want to delete.
- Select Delete.

- Confirm your action by clicking Delete again in the pop-up to delete the user.
You can also delete users in bulk.
- Click Admin View on the left sidebar.
- Go to Settings on the left sidebar.
(OR)
Click Settings in the top right corner of the page. - Go to Users under Users and Control.
- Select the users you want to delete.
- Click the More dropdown at the top of the users list and select Delete.
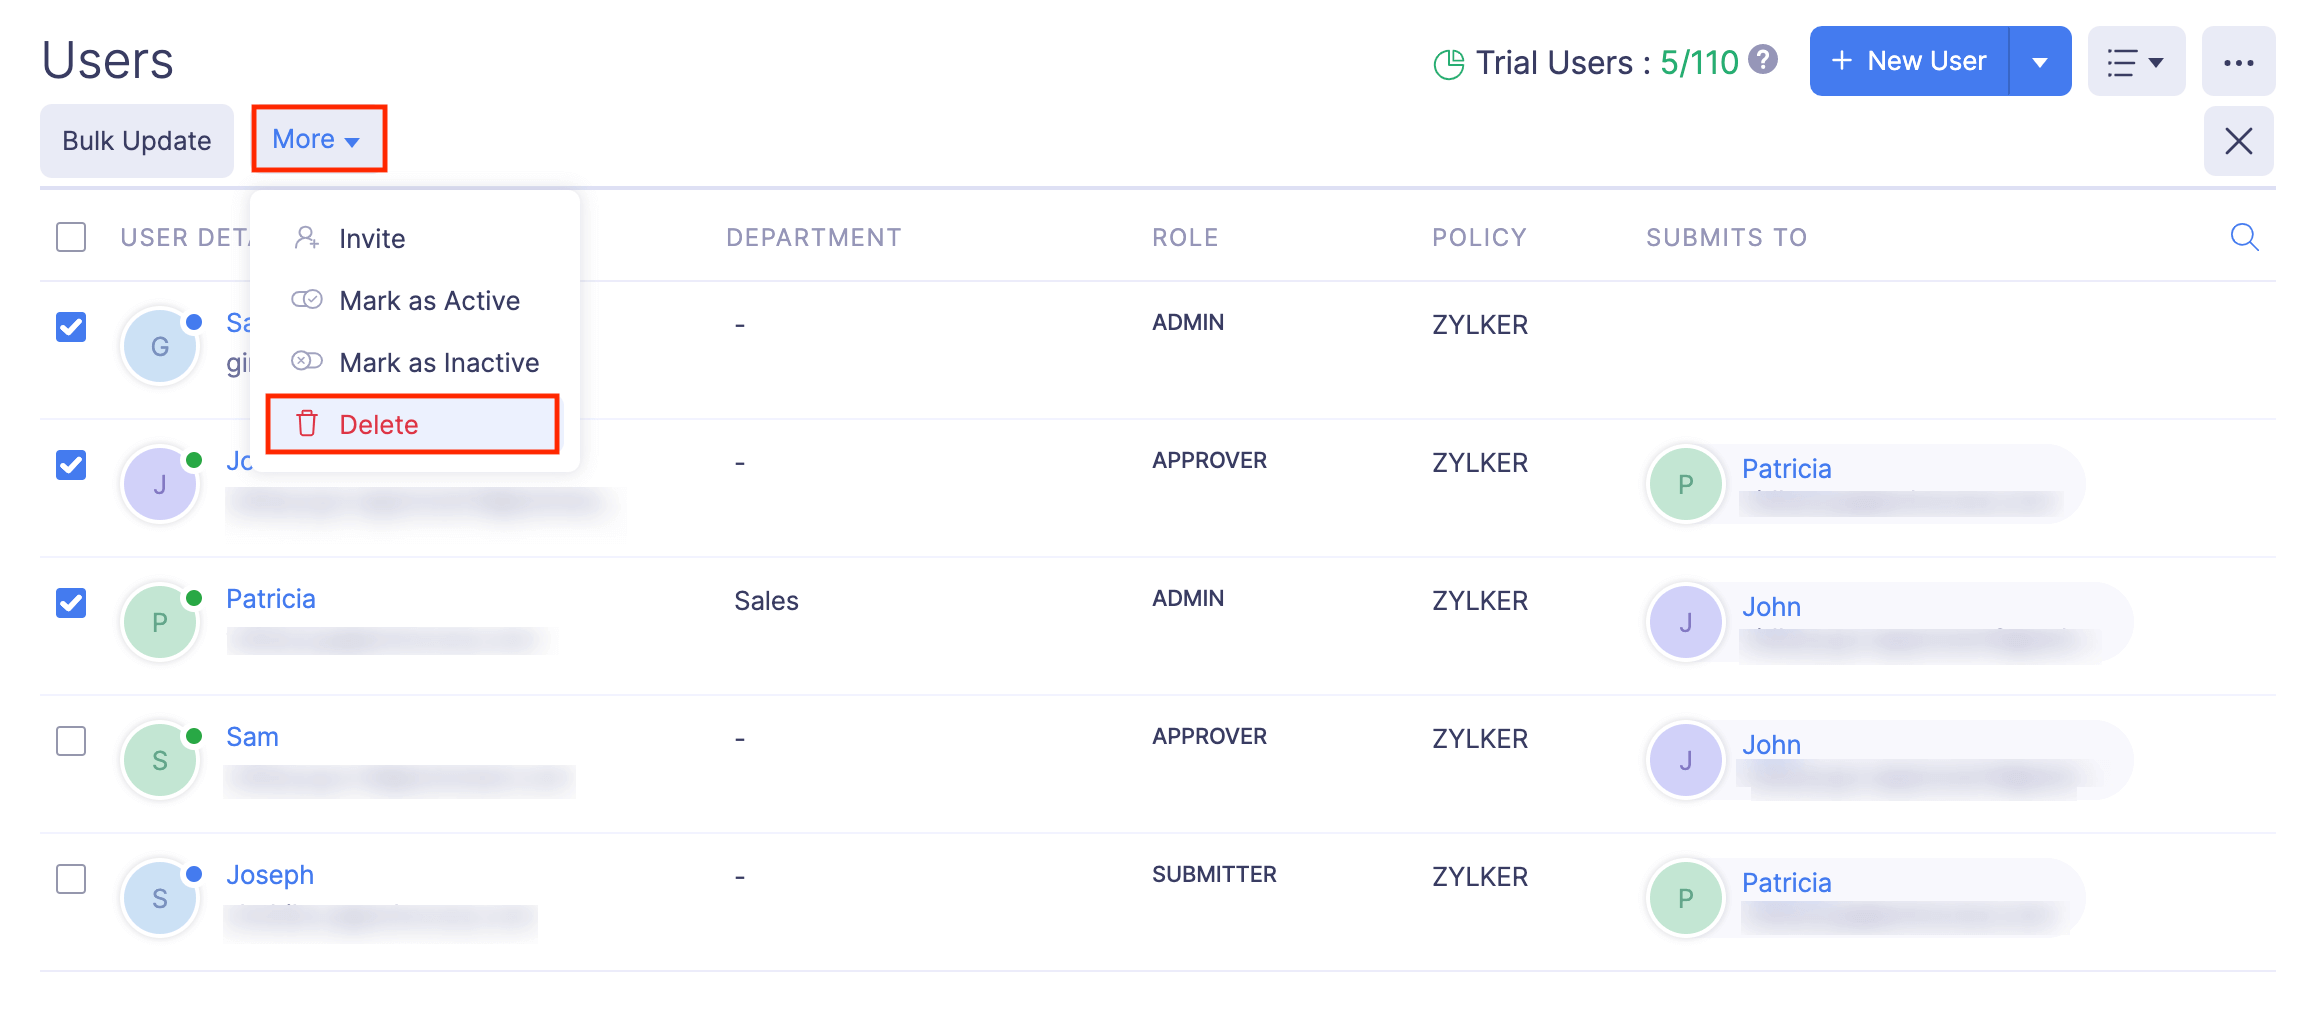
- Confirm your action by clicking Delete again in the pop-up to delete the users from your organization.
Export Users
You can export users in two formats:
| CSV - Comma Separated Values | XLS (XLSX) - Microsoft Excel |
To export users:
- Click Admin View on the left sidebar.
- Go to Settings on the left sidebar.
(OR)
Click Settings in the top right corner of the page. - Go to Users under Users and Control.
- Click the More icon at the top right corner and select Export Users.

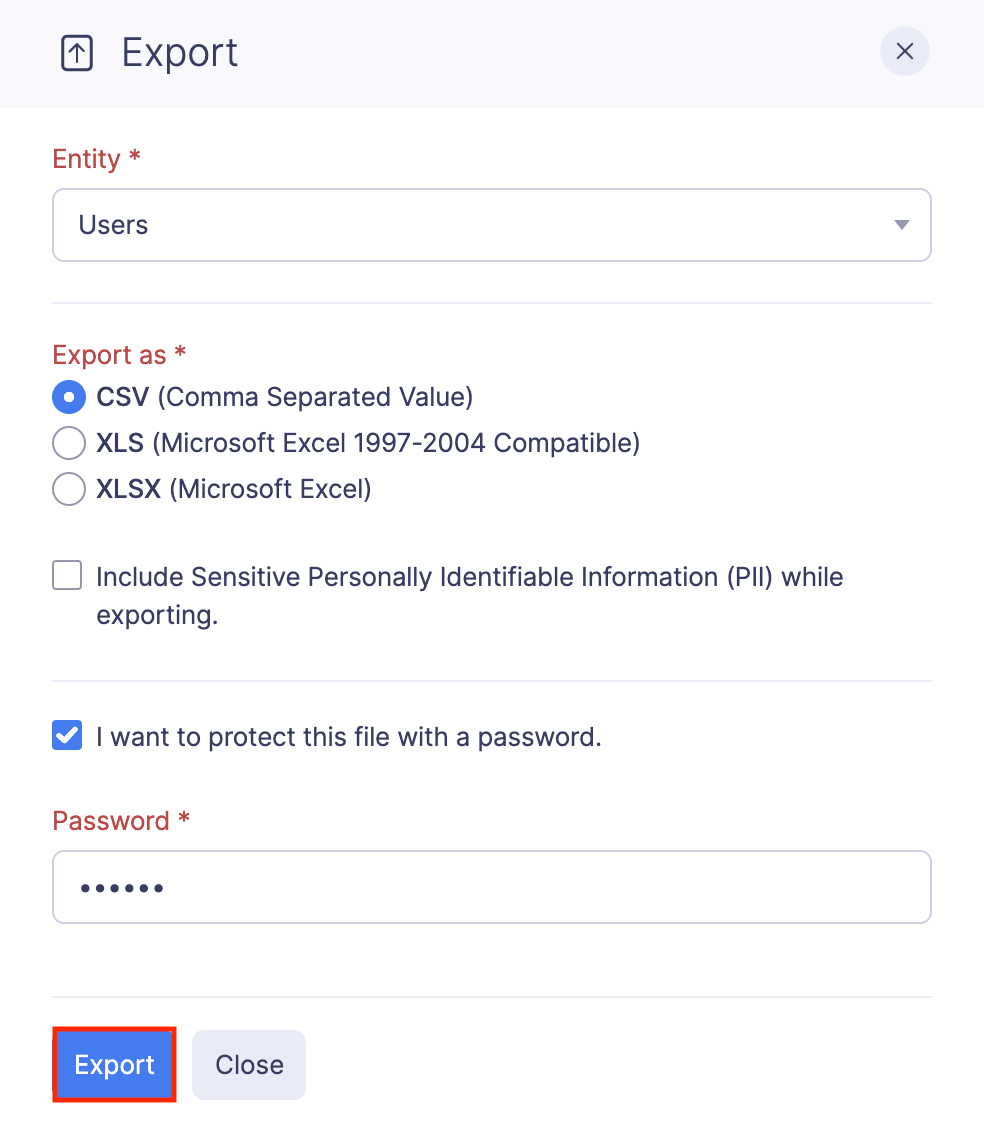
- Select the format in which you want to export your users [CSV or XLS (XLSX)].
- You can decide if you want to include personally identifiable information like email address, contact number, etc., by marking the Include Sensitive Personally Identifiable Information (PII) while exporting option.
- If you want to secure the report with a password, mark the I want to protect this file with a password option and provide a password in the Password field.
- Click Export to download the data to your computer.