- HOME
- Email sending
- How to send confirmation emails: A step-by-step guide
How to send confirmation emails: A step-by-step guide
- Published : April 29, 2026
- Last Updated : April 29, 2026
- 212 Views
- 6 Min Read
In our previous article, we saw how to write an effective confirmation email. In this article, we’re going to see how to send these transactional emails using ZeptoMail.
What are confirmation emails?
Confirmation emails are one of the essential types of transactional emails. They’re sent immediately after a user completes an action, like placing an order, booking a service, or signing up. Simply put, a confirmation email acknowledges an action and provides the recipient with key details related to it.
When should you send confirmation emails?
Confirmation emails should be triggered right after a user completes a specific action. Common scenarios include:
After a purchase or order placement.
After a booking or reservation.
After account registration.
After a payment or subscription.
The goal of a confirmation email is to instantly reassure users that their action was successful and provide them with all necessary information in one place.
Can confirmation emails be automated?
Yes, confirmation emails are typically automated. They’re triggered by user actions and sent in real time through your email system or application. Automation ensures:
Immediate delivery.
Consistency in messaging.
Reduced manual effort.
Scalability as your user base grows.
Without automation, sending confirmation emails manually would be inefficient and prone to delays or errors.
How to send confirmation emails using Zoho ZeptoMail
Setting up confirmation emails in Zoho ZeptoMail is straightforward and designed for transactional use cases. Here’s a step-by-step guide.
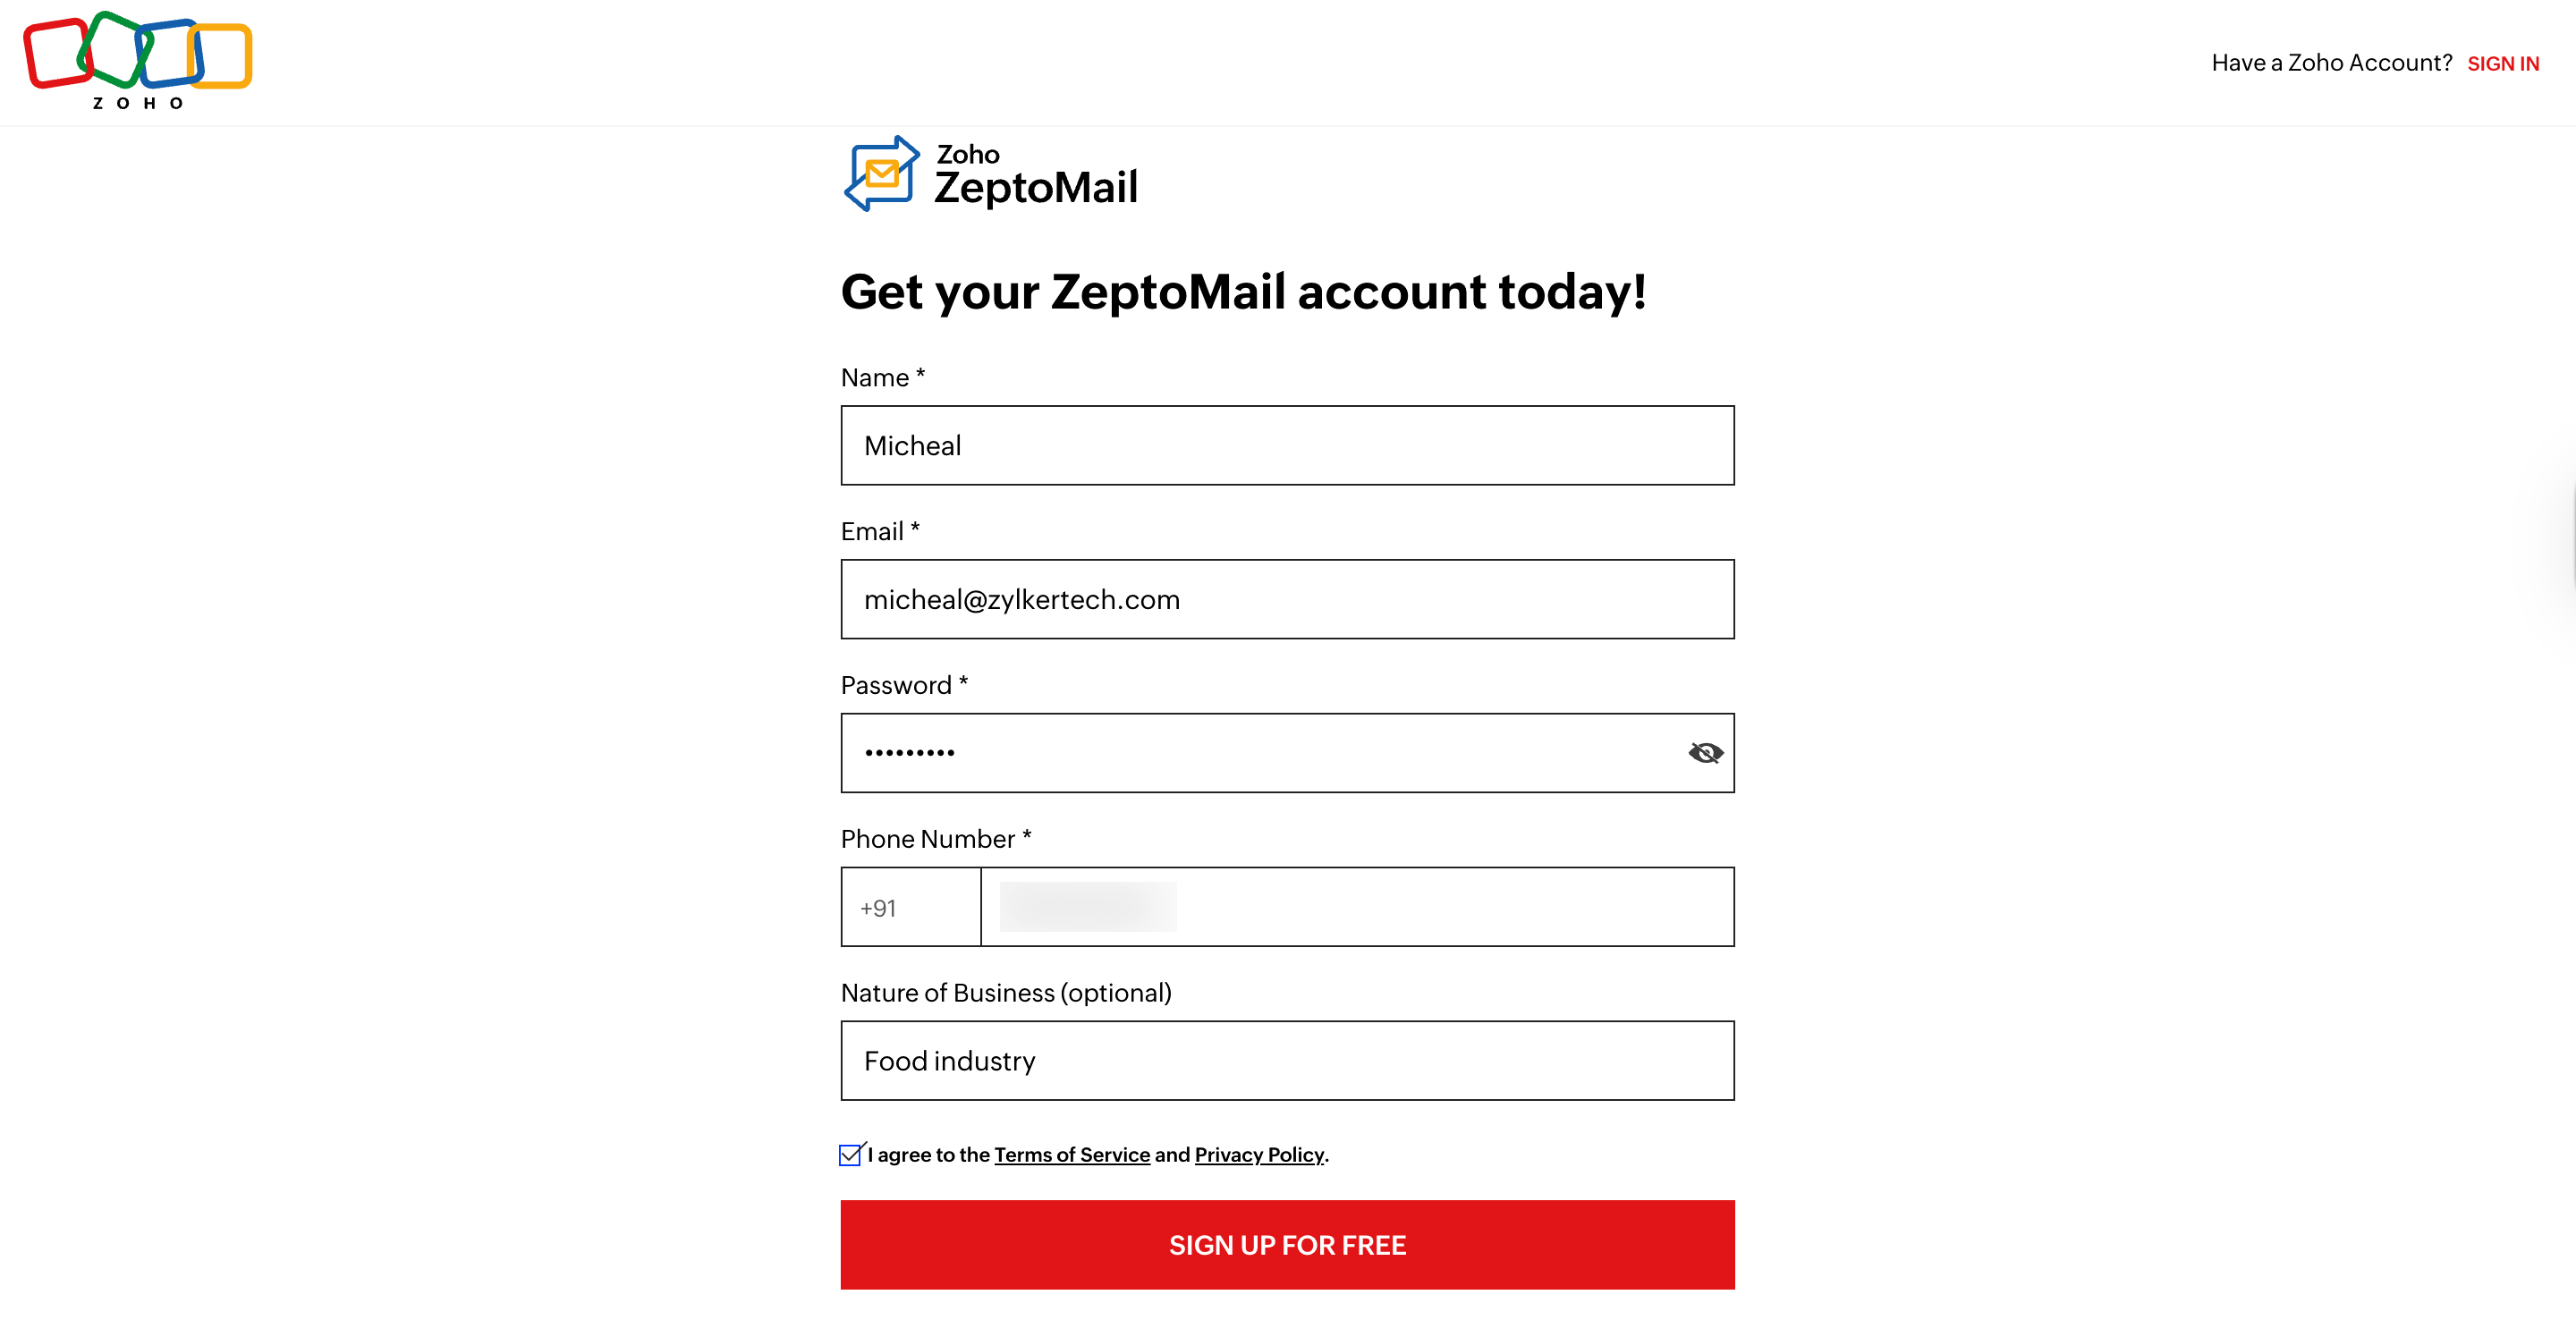
1. Sign up to ZeptoMail
Sign up to create your ZeptoMail account and complete your customer validation form.
2. Add and verify your domain
Configure your DNS by adding DKIM and CNAME records.

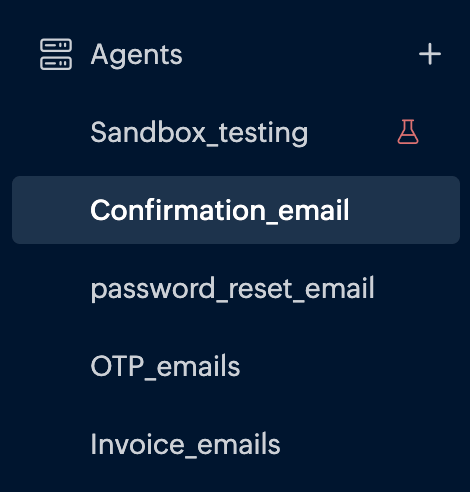
3. Create an Agent for confirmation emails
Agents help you organize and manage different types of transactional emails.
4. Select the Agent and go to the Templates tab
This is where you’ll create and manage your email templates.
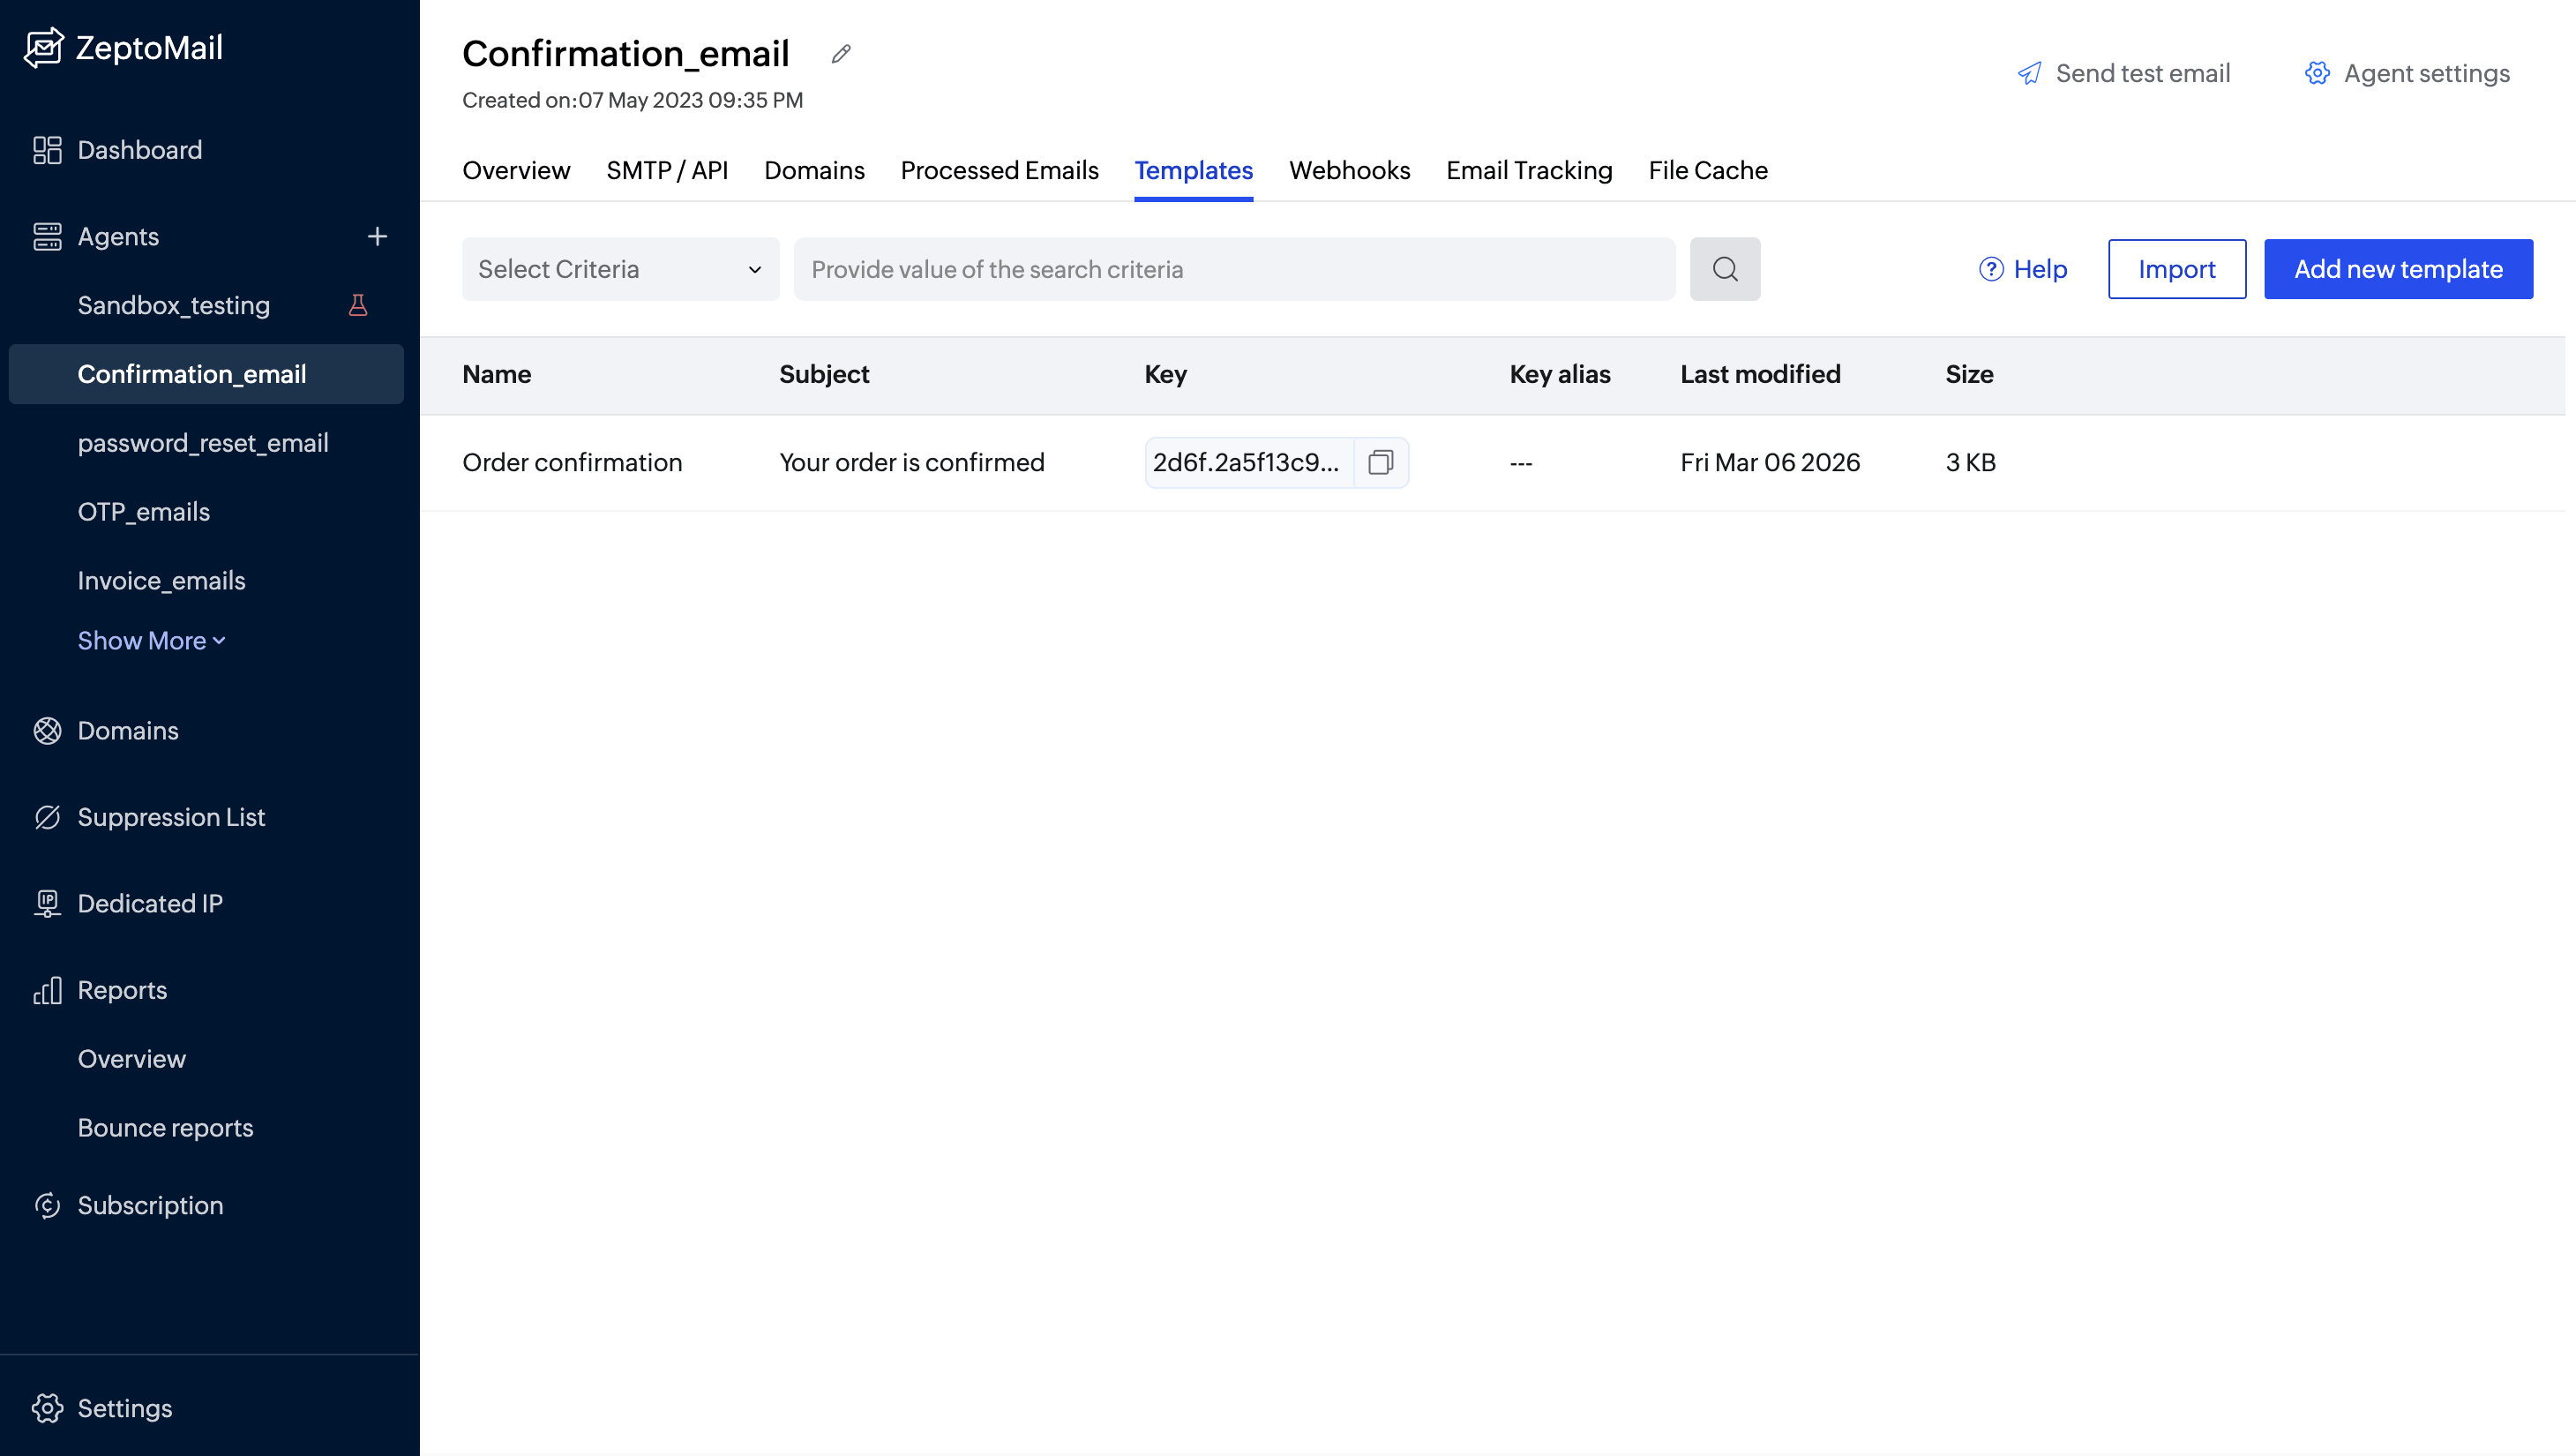
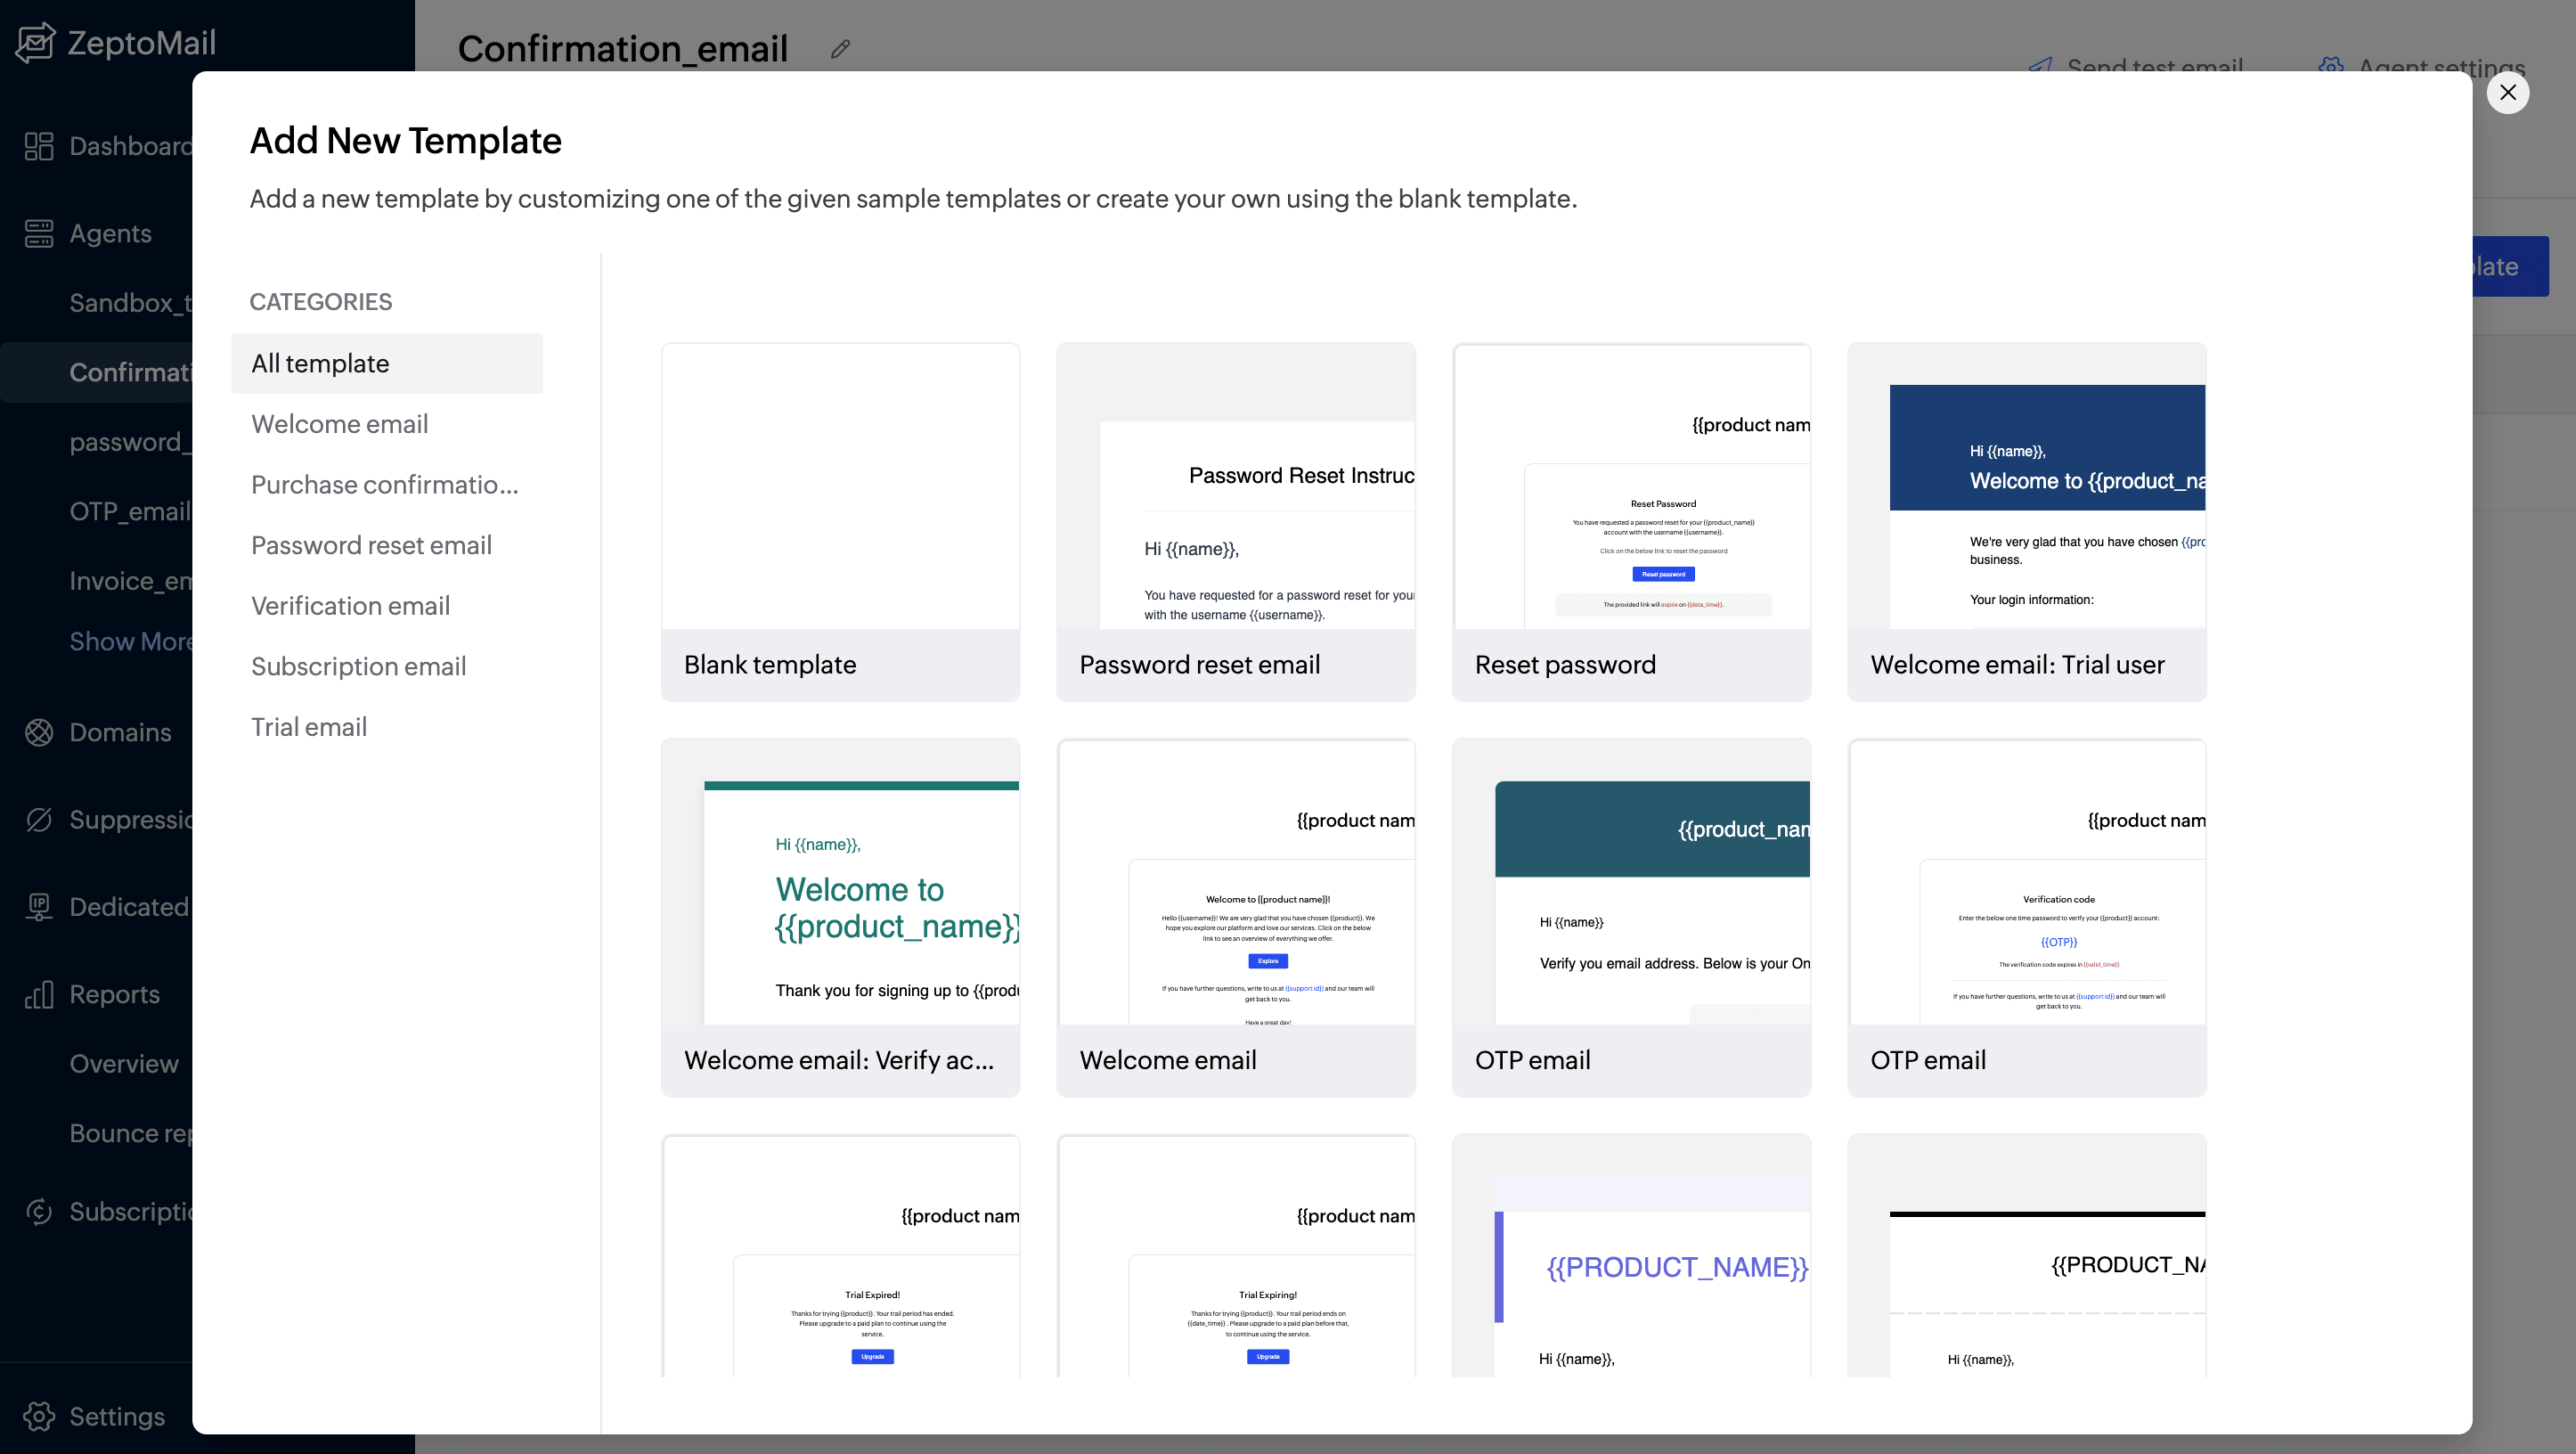
5. Choose a template or start from scratch
Click Add new template. You can:
Pick a ready-made template from the library and start editing.
Select a blank template to build your own.
6. Name your template
After choosing a template,
Provide a name for your template.
Add a subject line to your email.
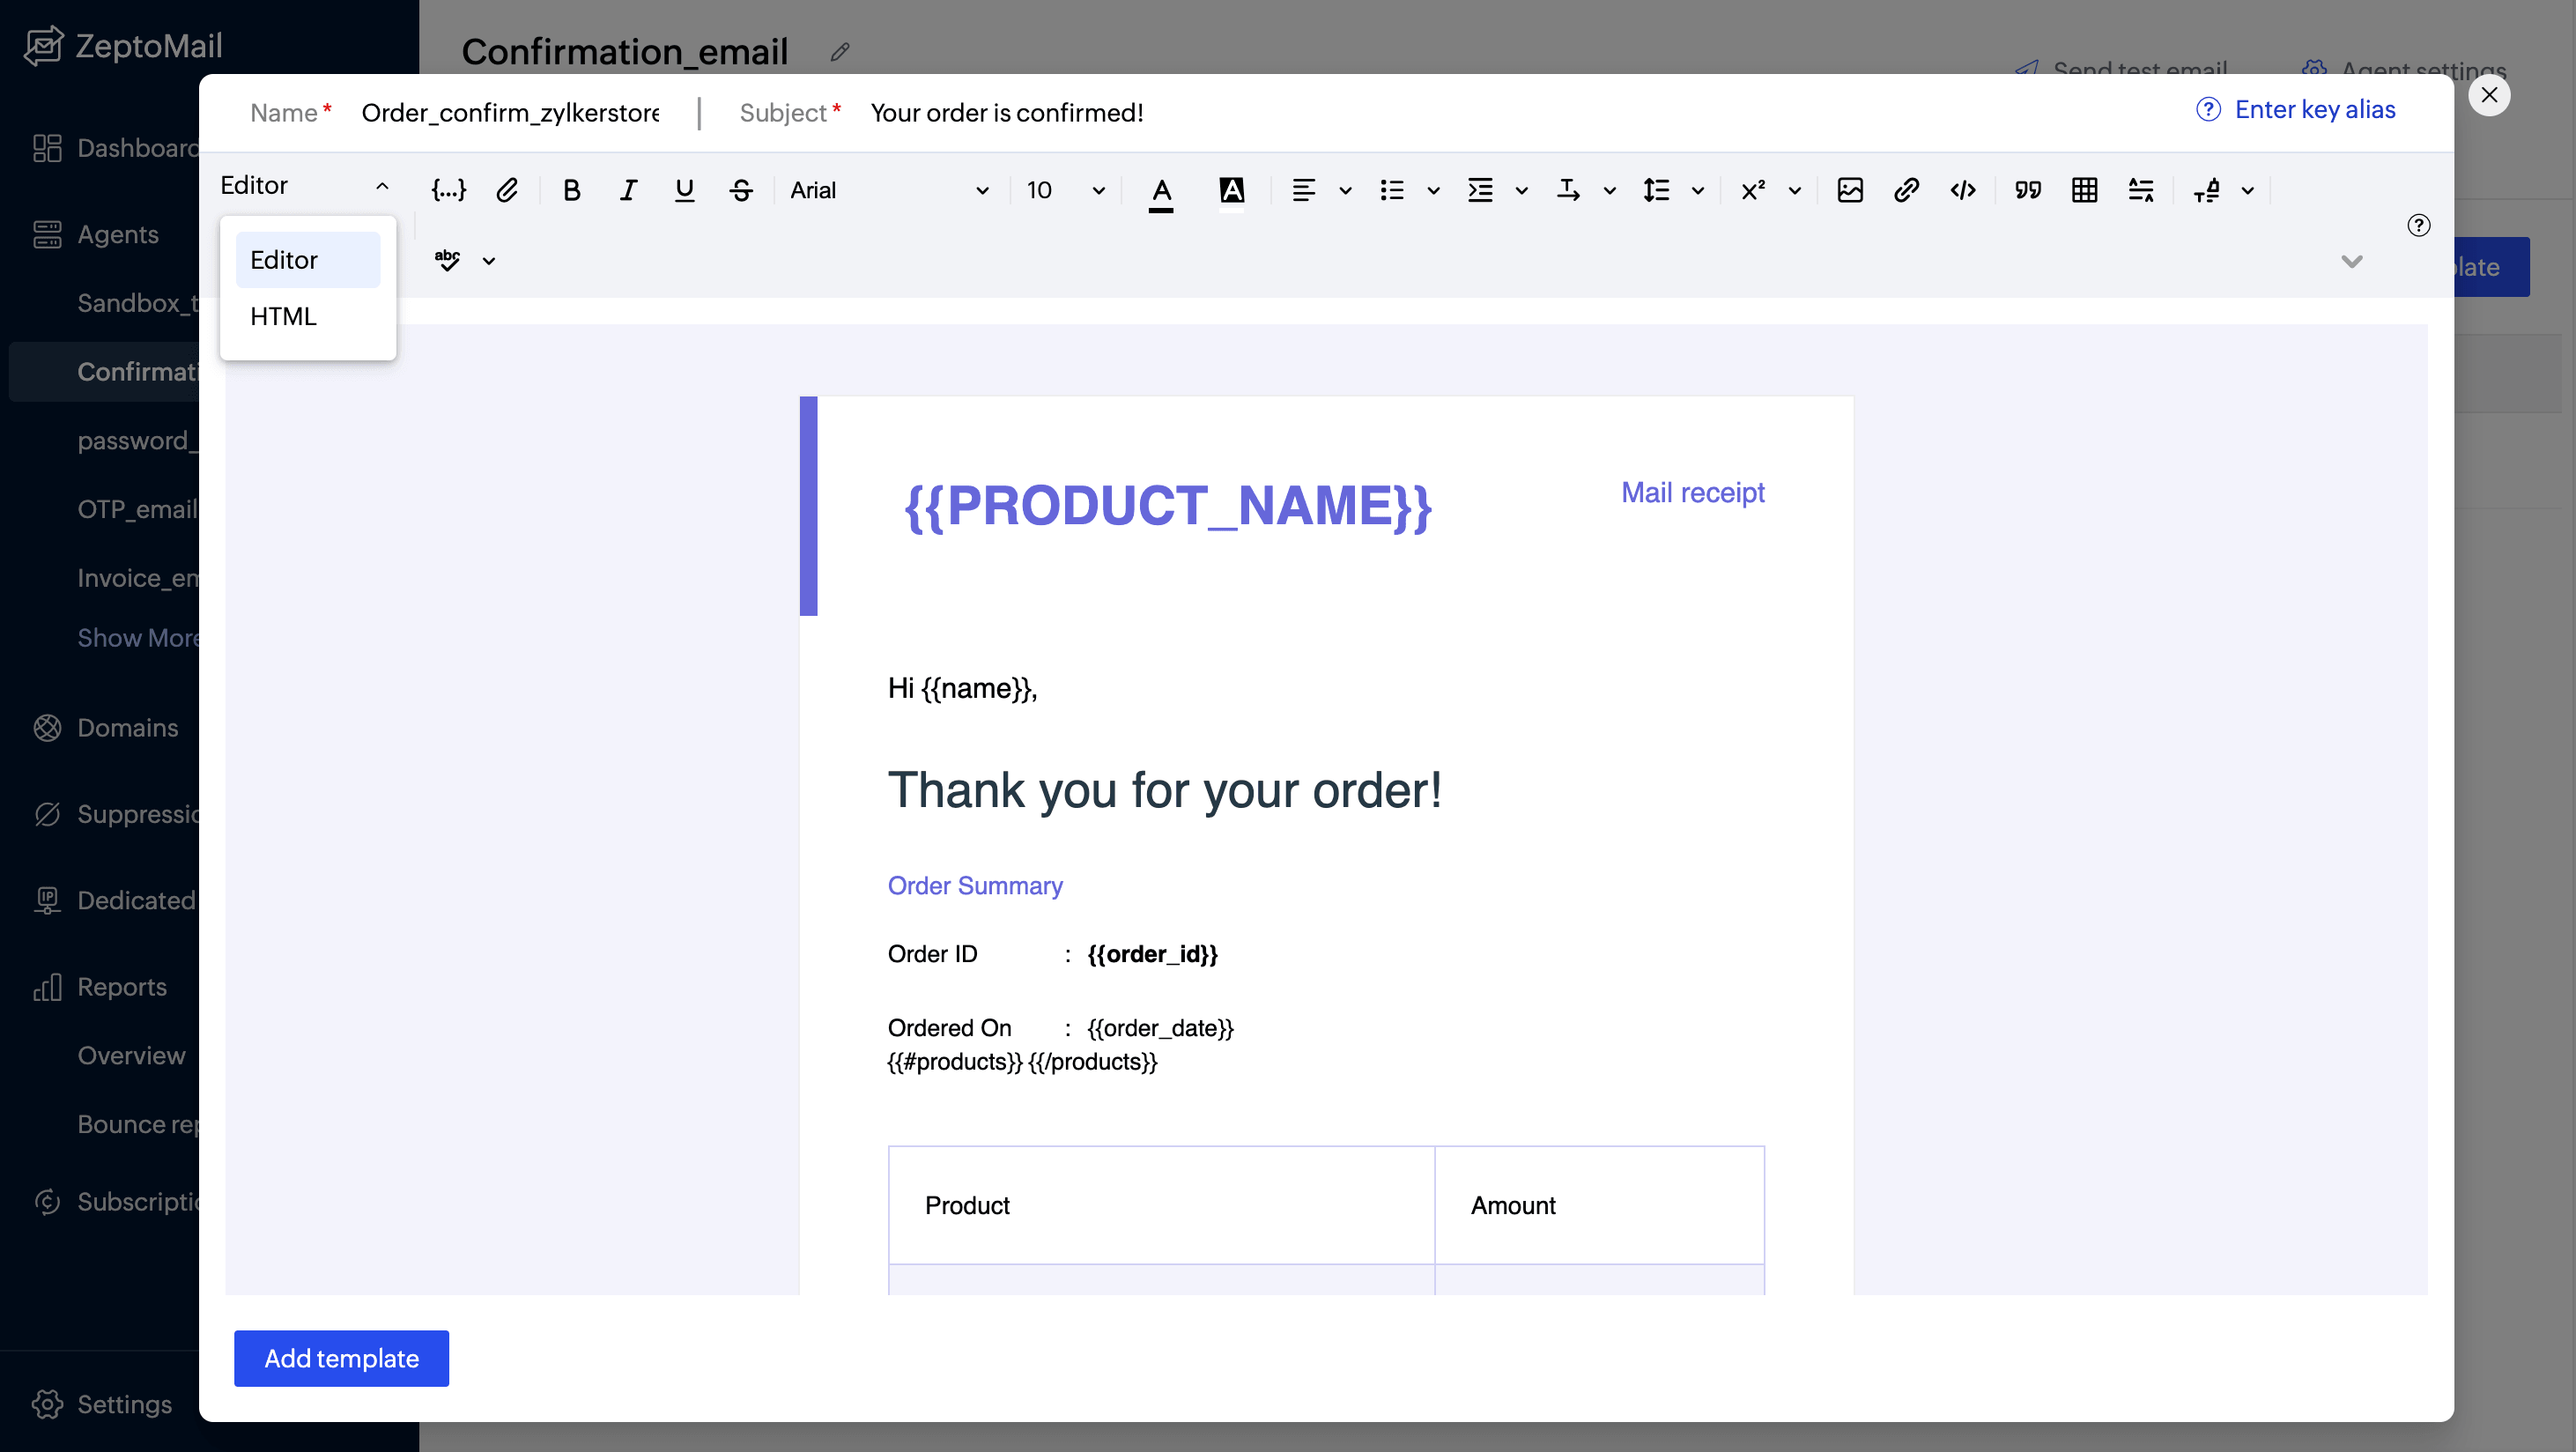
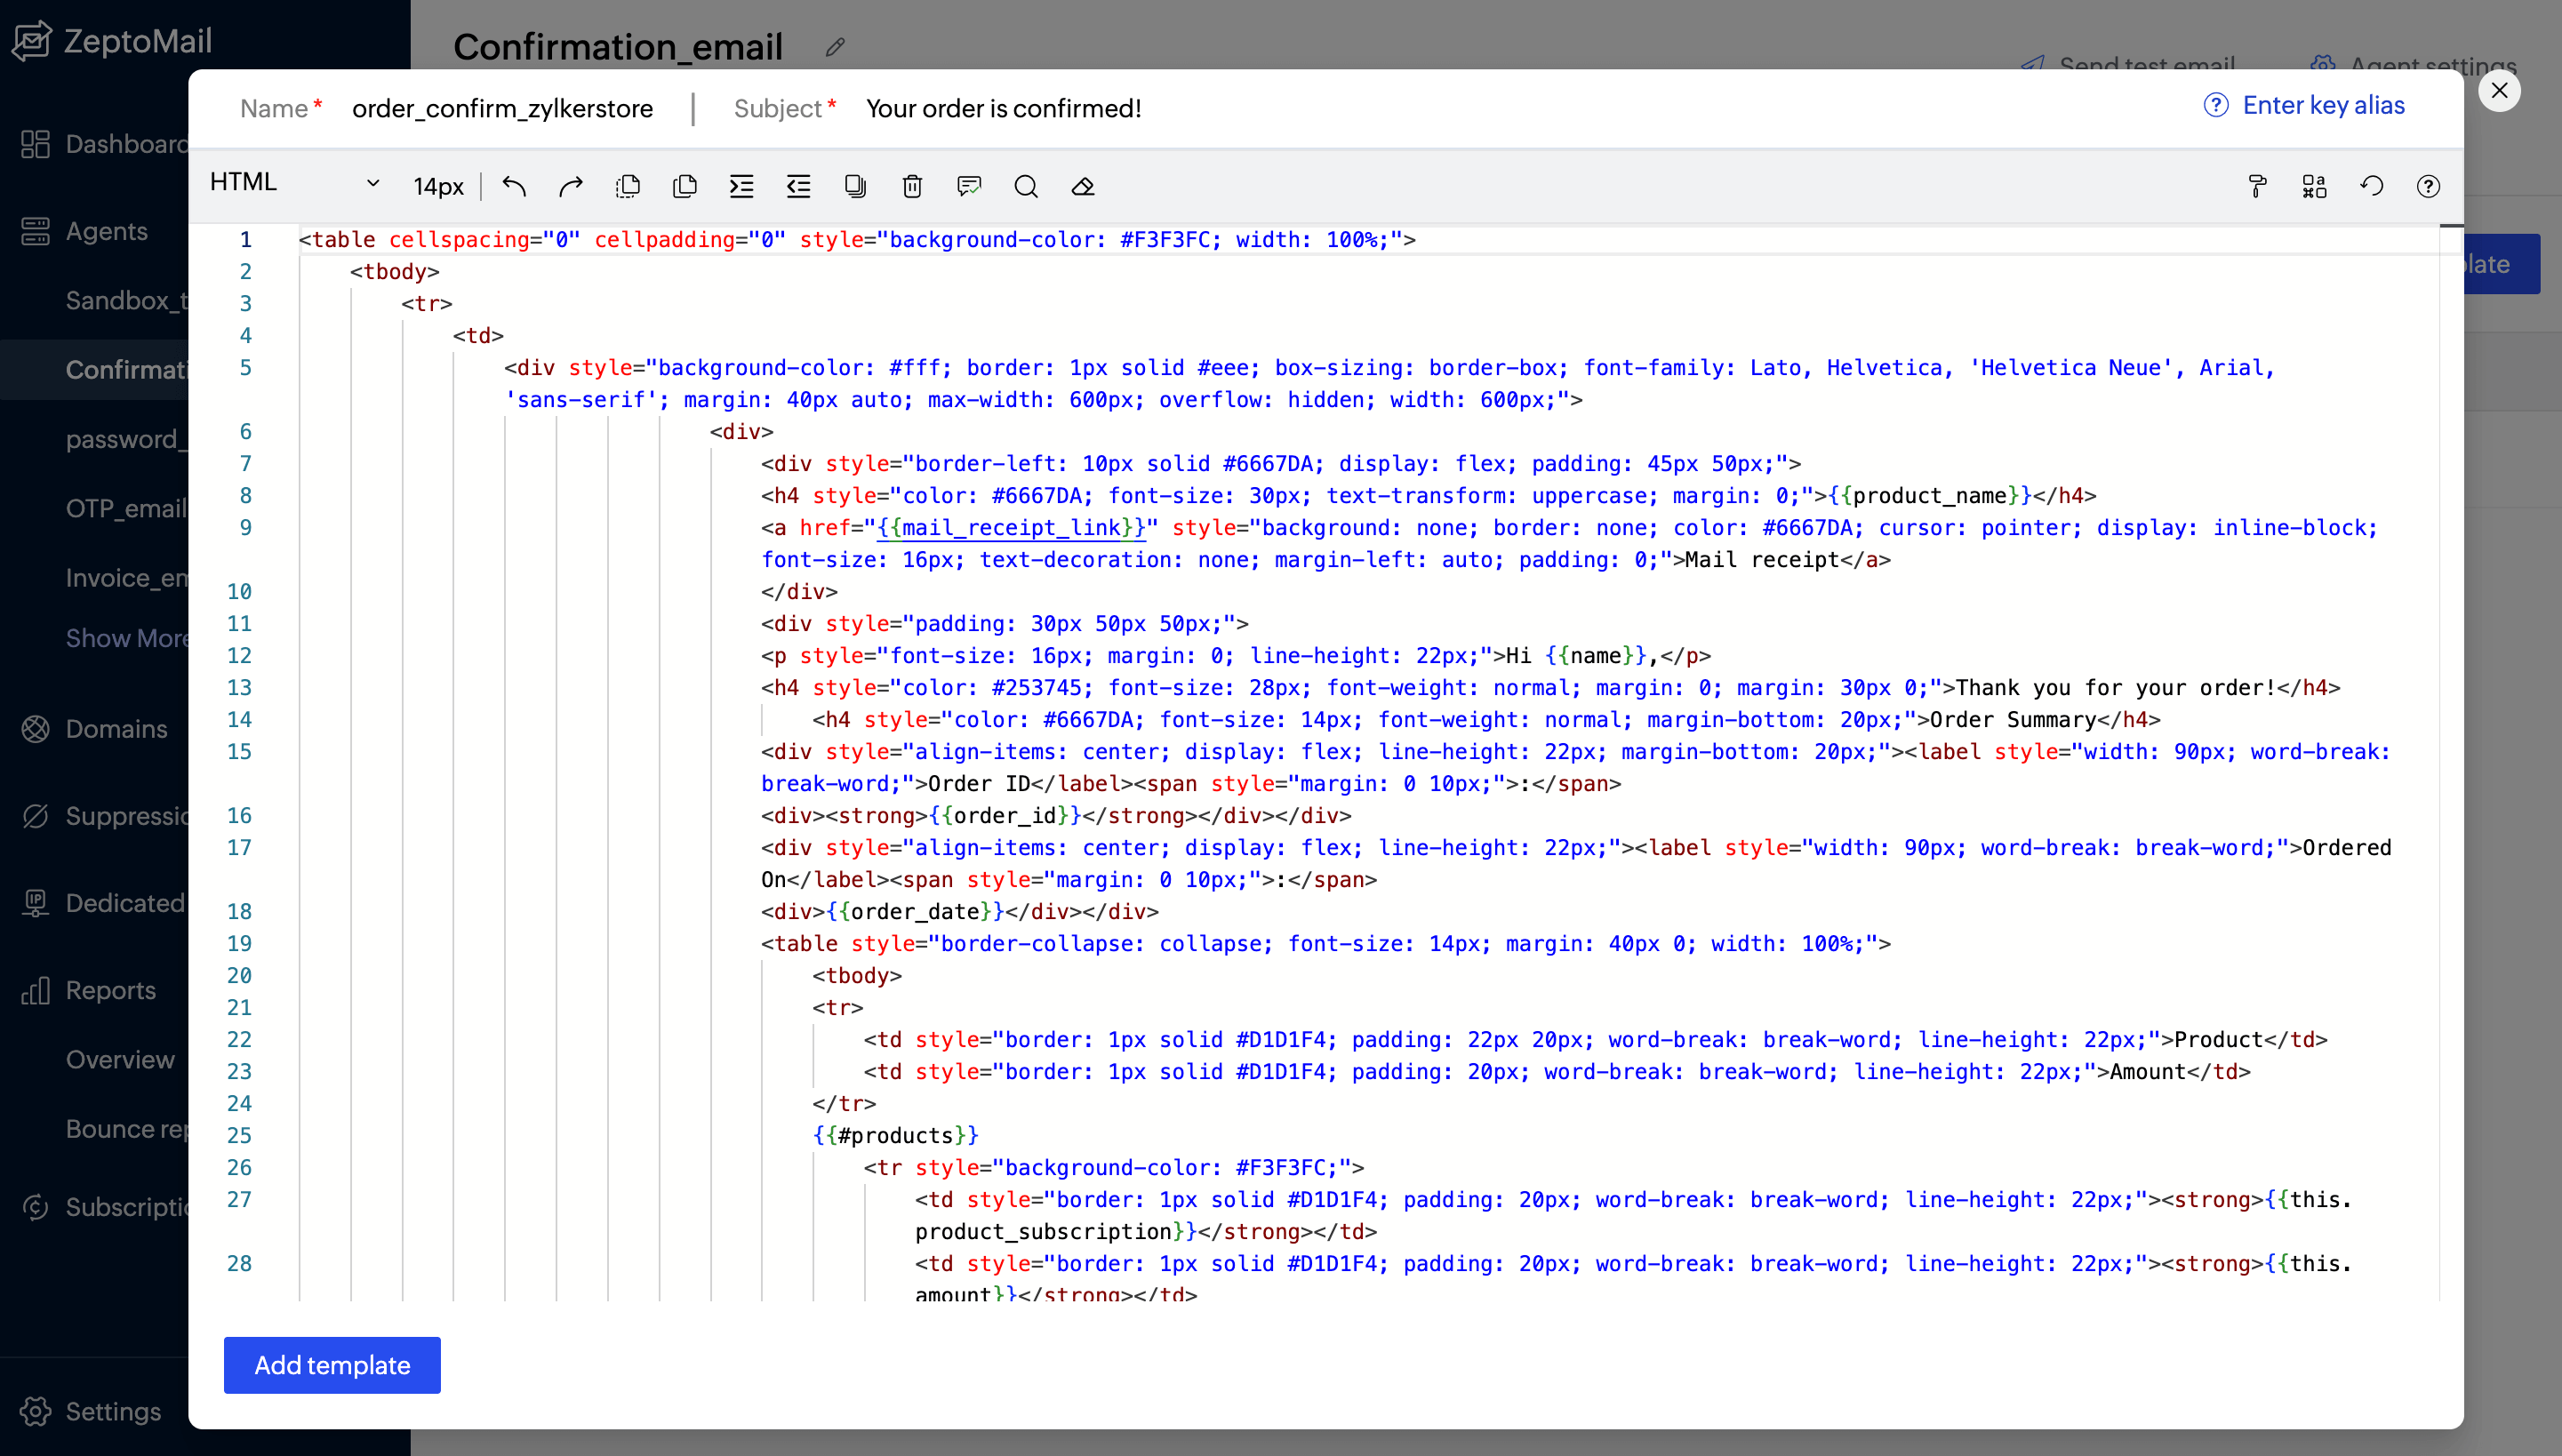
7. Choose the editor
Choosing the right format depends on your use case, audience, and design needs. With ZeptoMail, confirmation emails can be designed in two main formats:
HTML emails for visually rich layouts with branding, colors, and structured content.
Plain-text emails for simplicity, faster loading, and better deliverability in some cases.
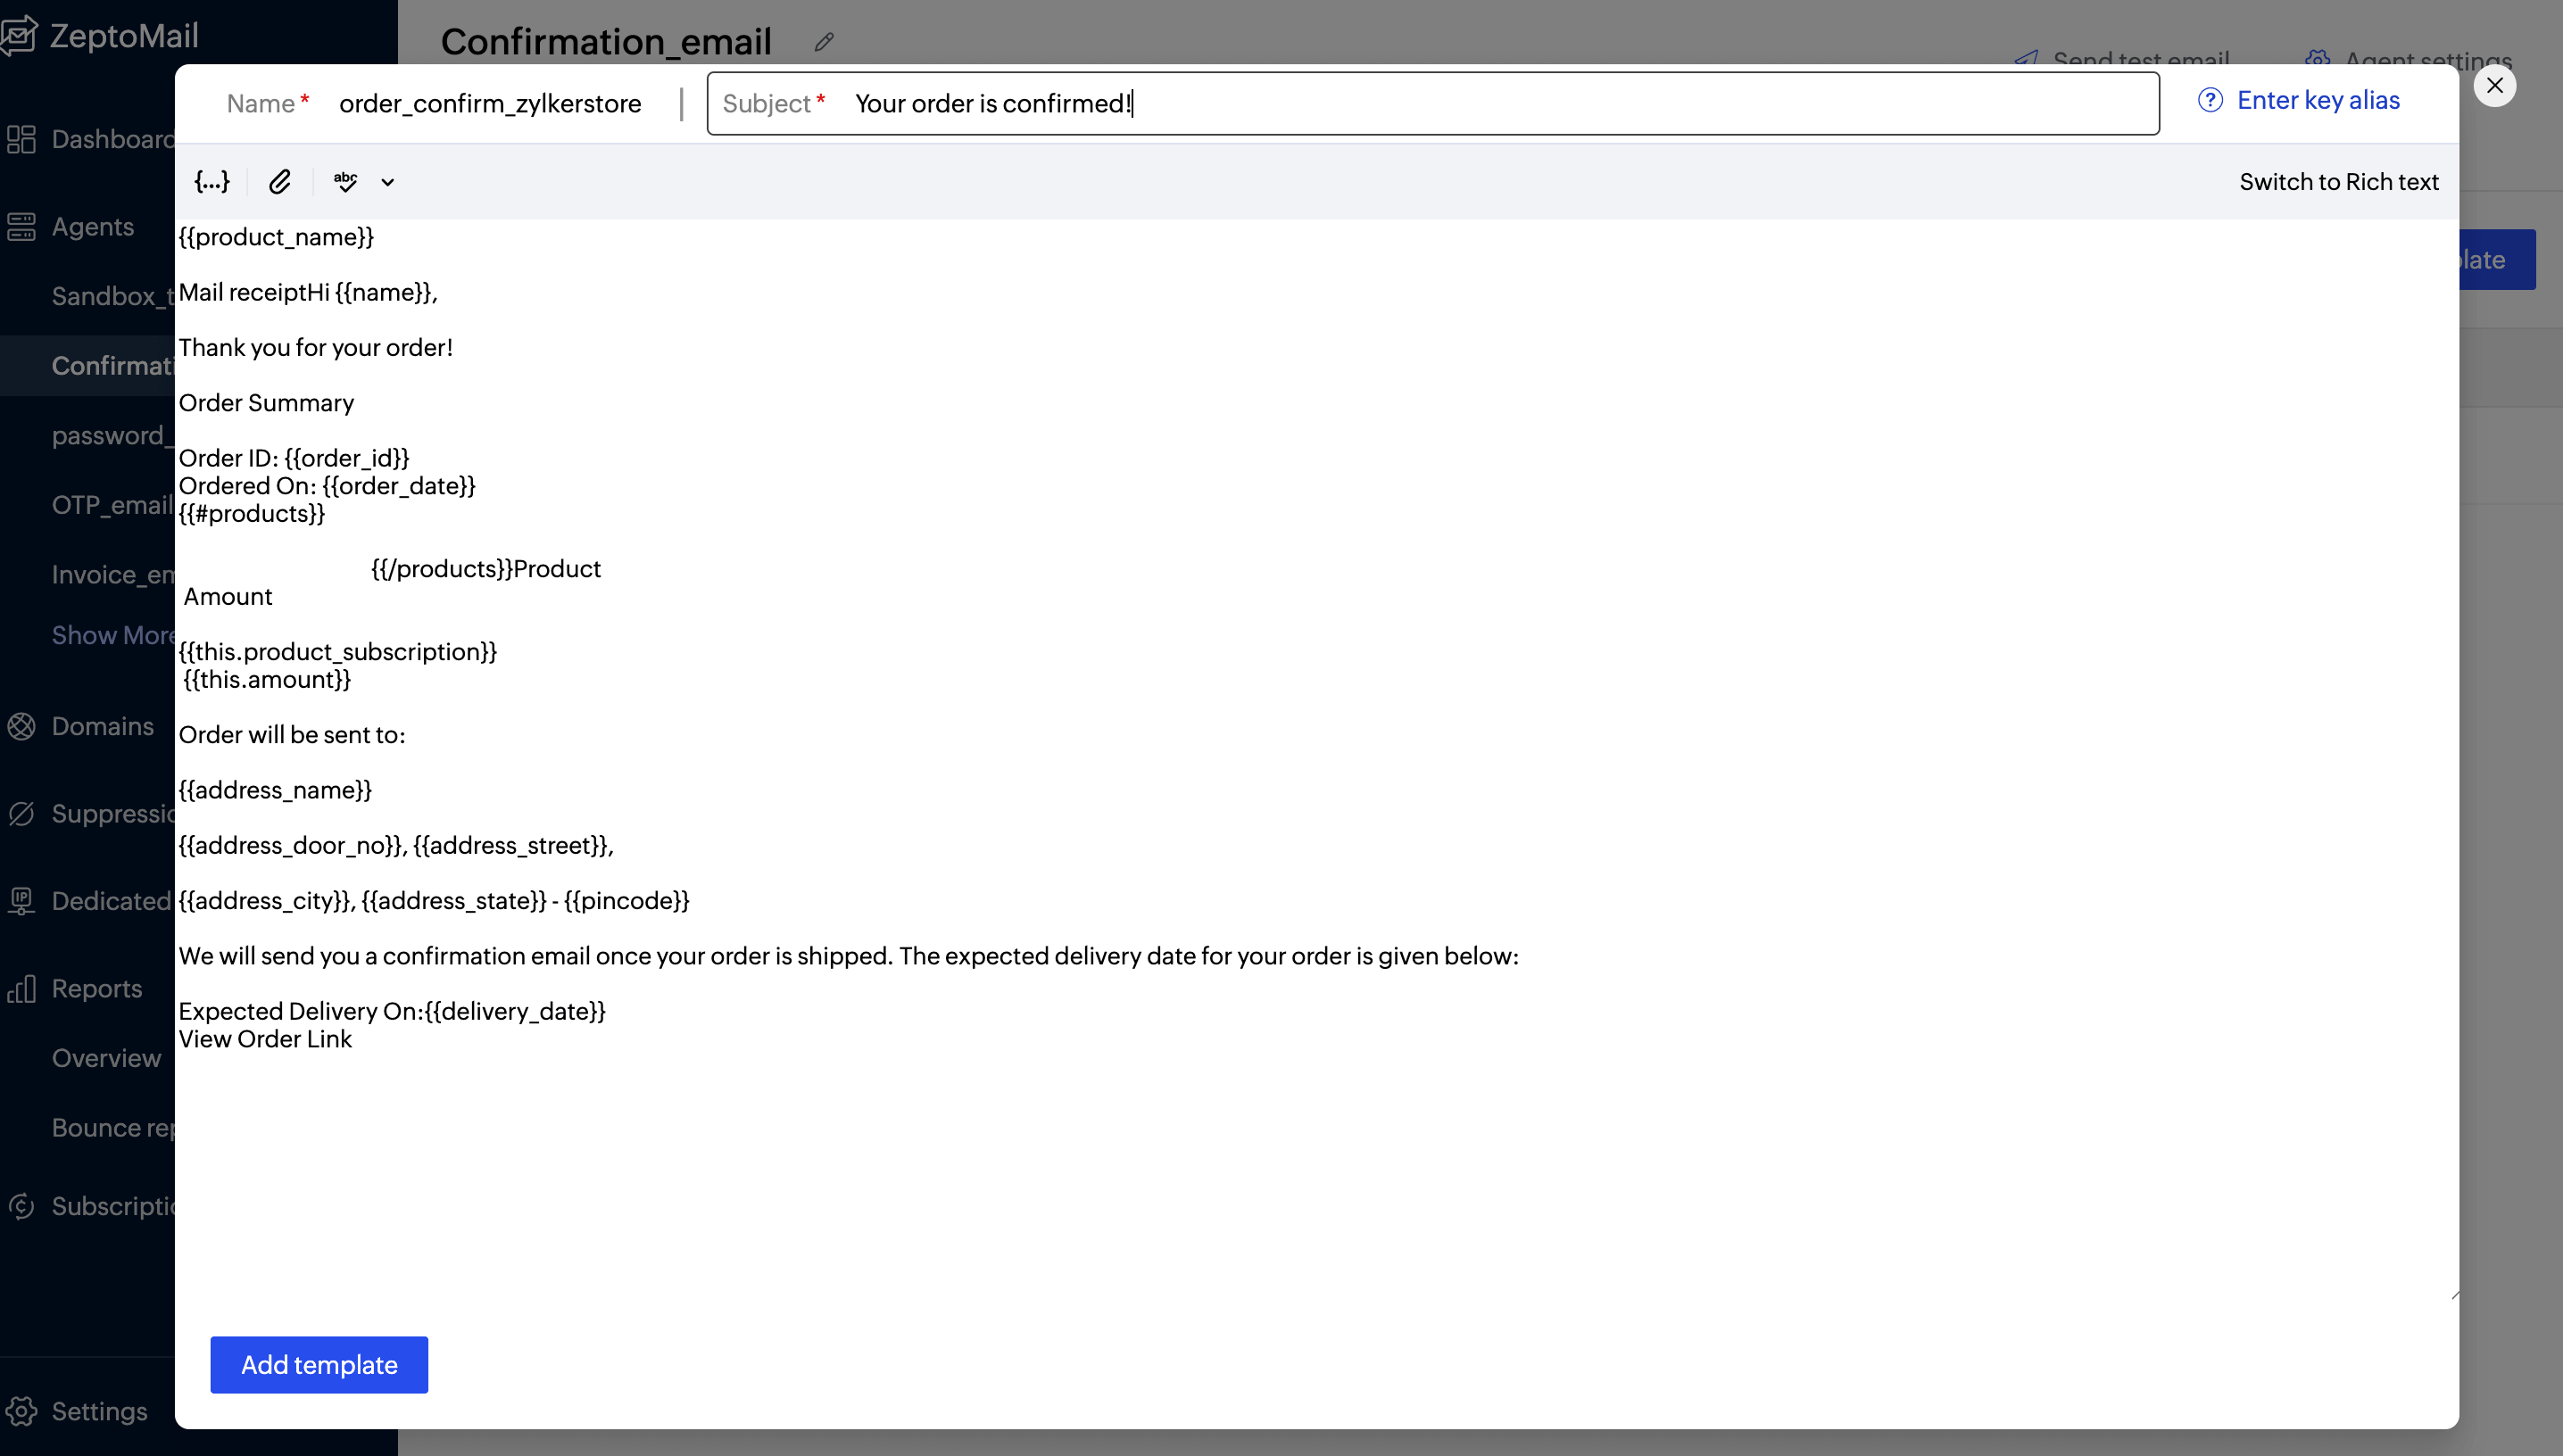
8. Use editor toolbar icons

The editor toolbar provides a range of formatting and content tools to help you structure and style your content effectively. Here’s what each icon represents:
Text formatting tools
Bold (B): Makes selected text bold for emphasis.
Italic (I): Italicizes text, often used for highlights or quotes.
Underline (U): Adds an underline to the selected text.
Strikethrough (
S): Draws a line through text, useful for edits or indicating removed content.
Font and style controls
Font family (e.g., Lato): Lets you change the font style of your text.
Font size (e.g., 22): Adjusts the size of the text.
Text color (A with underline): Changes the color of your text.
Background highlight (A with box): Adds a background color highlight to text.
Alignment and structure
Text alignment: Align text left, center, or right.
Bulleted list: Creates a list with bullet points.
Numbered list: Creates an ordered (numbered) list.
Indent controls: Increase or decrease indentation for better structure.
Advanced formatting
Superscript (x²): Formats text slightly above the line (e.g., exponents).
Subscript (Tₓ): Formats text slightly below the line (e.g., chemical formulas).
Media and linking
Insert image: Adds images to your content.
Insert link 🔗 (chain icon): Adds hyperlinks to text or elements.
Code and quotes
Code view (</>): Allows you to view or edit HTML/code.
Block quote (“ ”): Formats text as a quotation block.
Table and layout
Table icon: Inserts tables for structured data presentation.
Additional tools
Clear formatting (Tx with eraser): Removes all formatting from selected text.
More options (three dots/dropdown): Expands additional formatting or editor options.
Help icon (?): Provides guidance or documentation for using the editor.
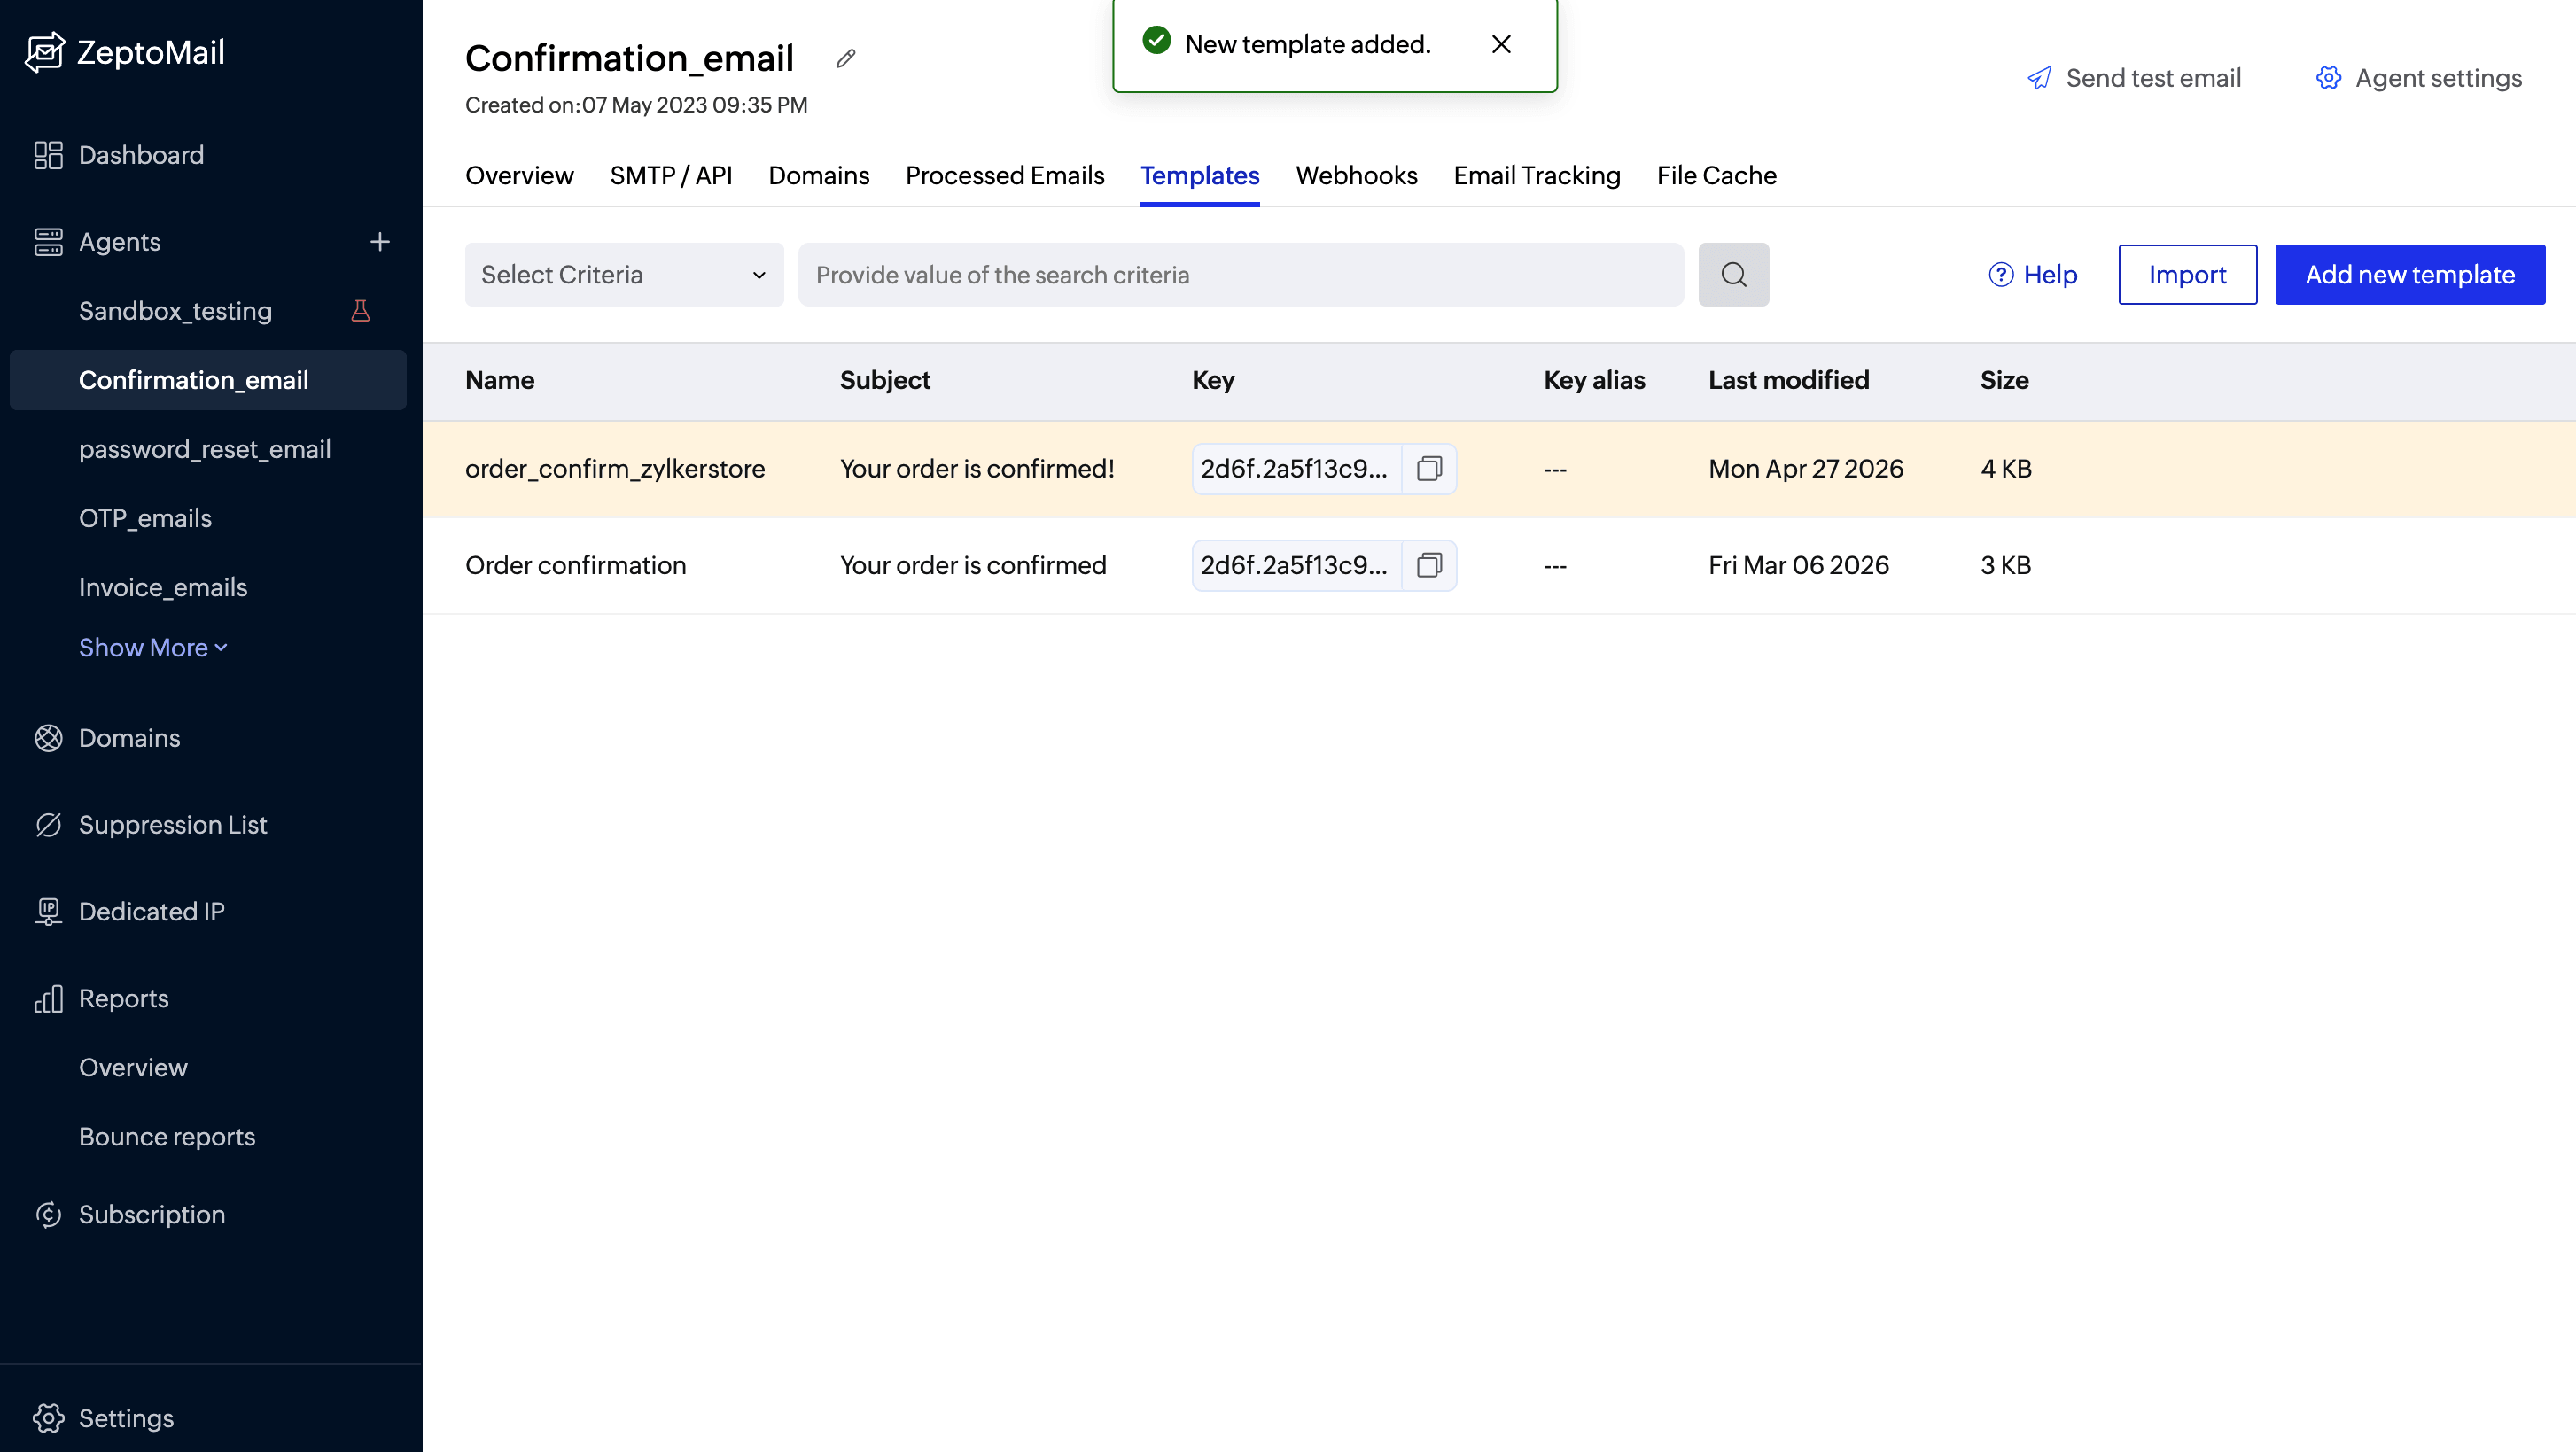
9. Save your template
Make sure all of the details, like dynamic fields and formatting, are correct before saving.
Click Save and your template will be saved under the Templates tab.
All of the templates you create will be listed under the Templates tab along with the Subject, Template key, Last modified date, and size of the template.
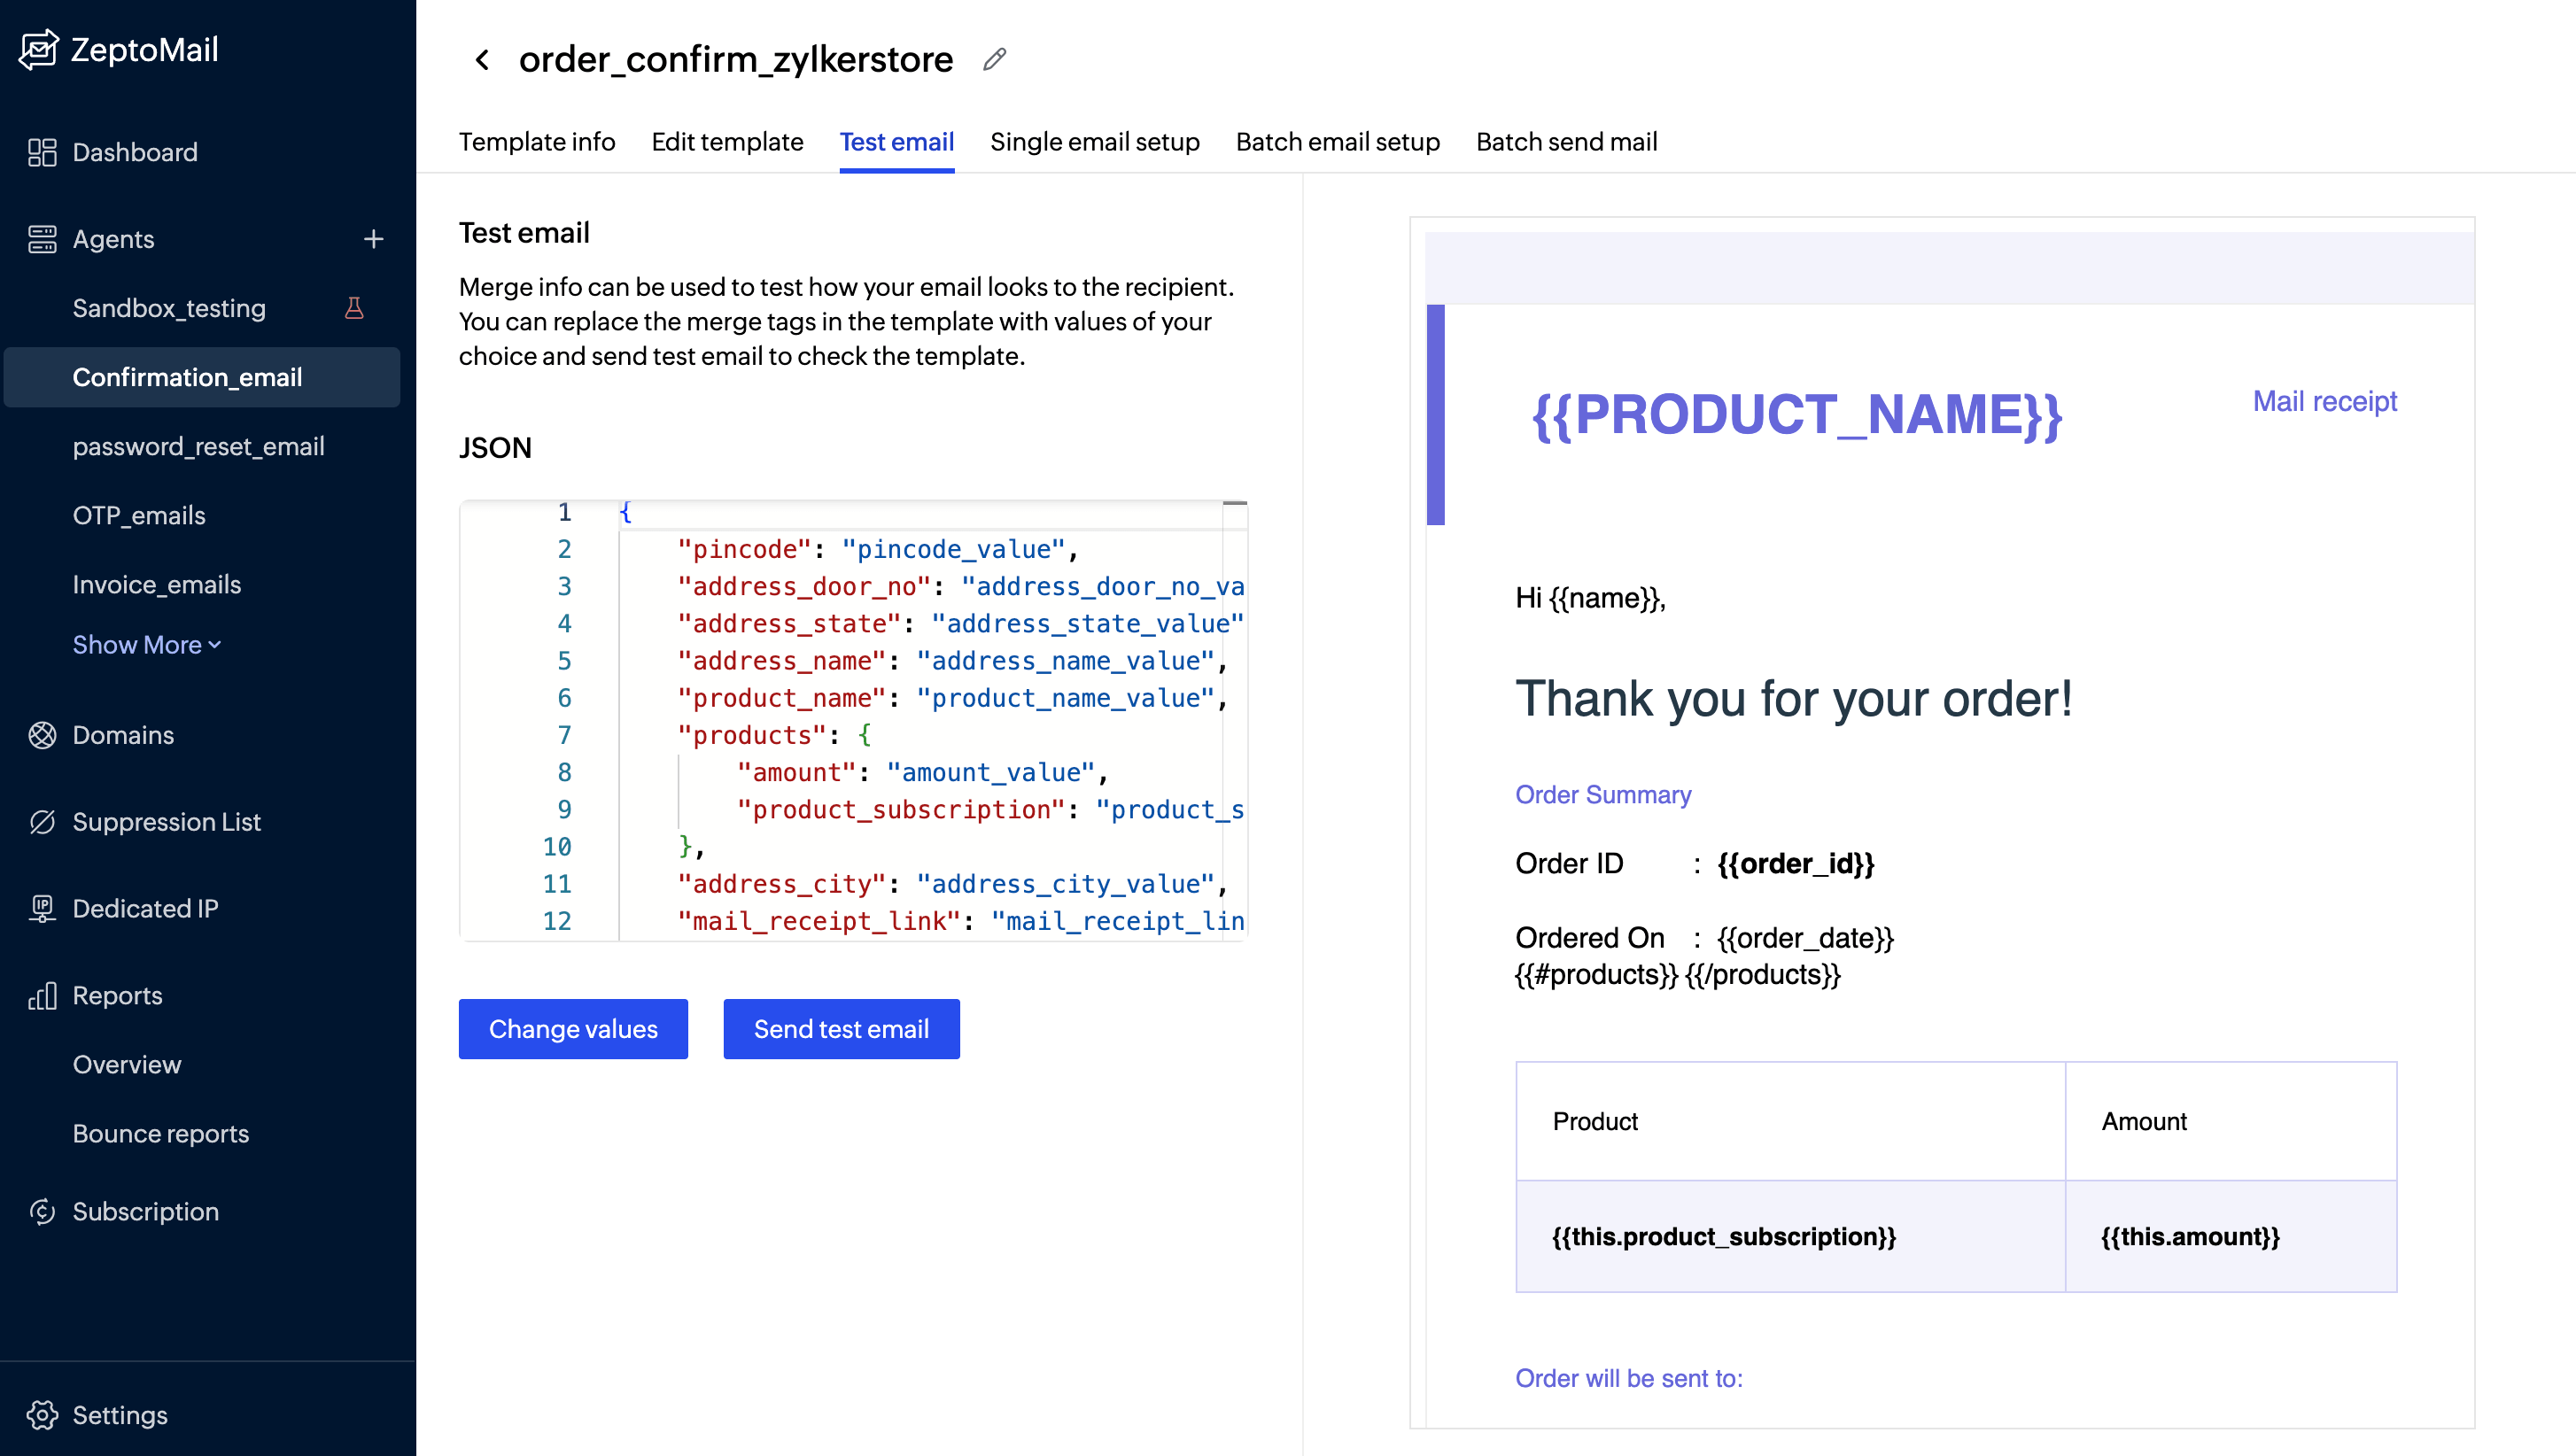
10. Test your email
You can send test emails directly from ZeptoMail to ensure that everything looks and works as expected before going live.
Ways to send confirmation emails to customers
Now you’re ready to send emails using either API or SMTP.
Option A: Email sending via API (recommended for automation)
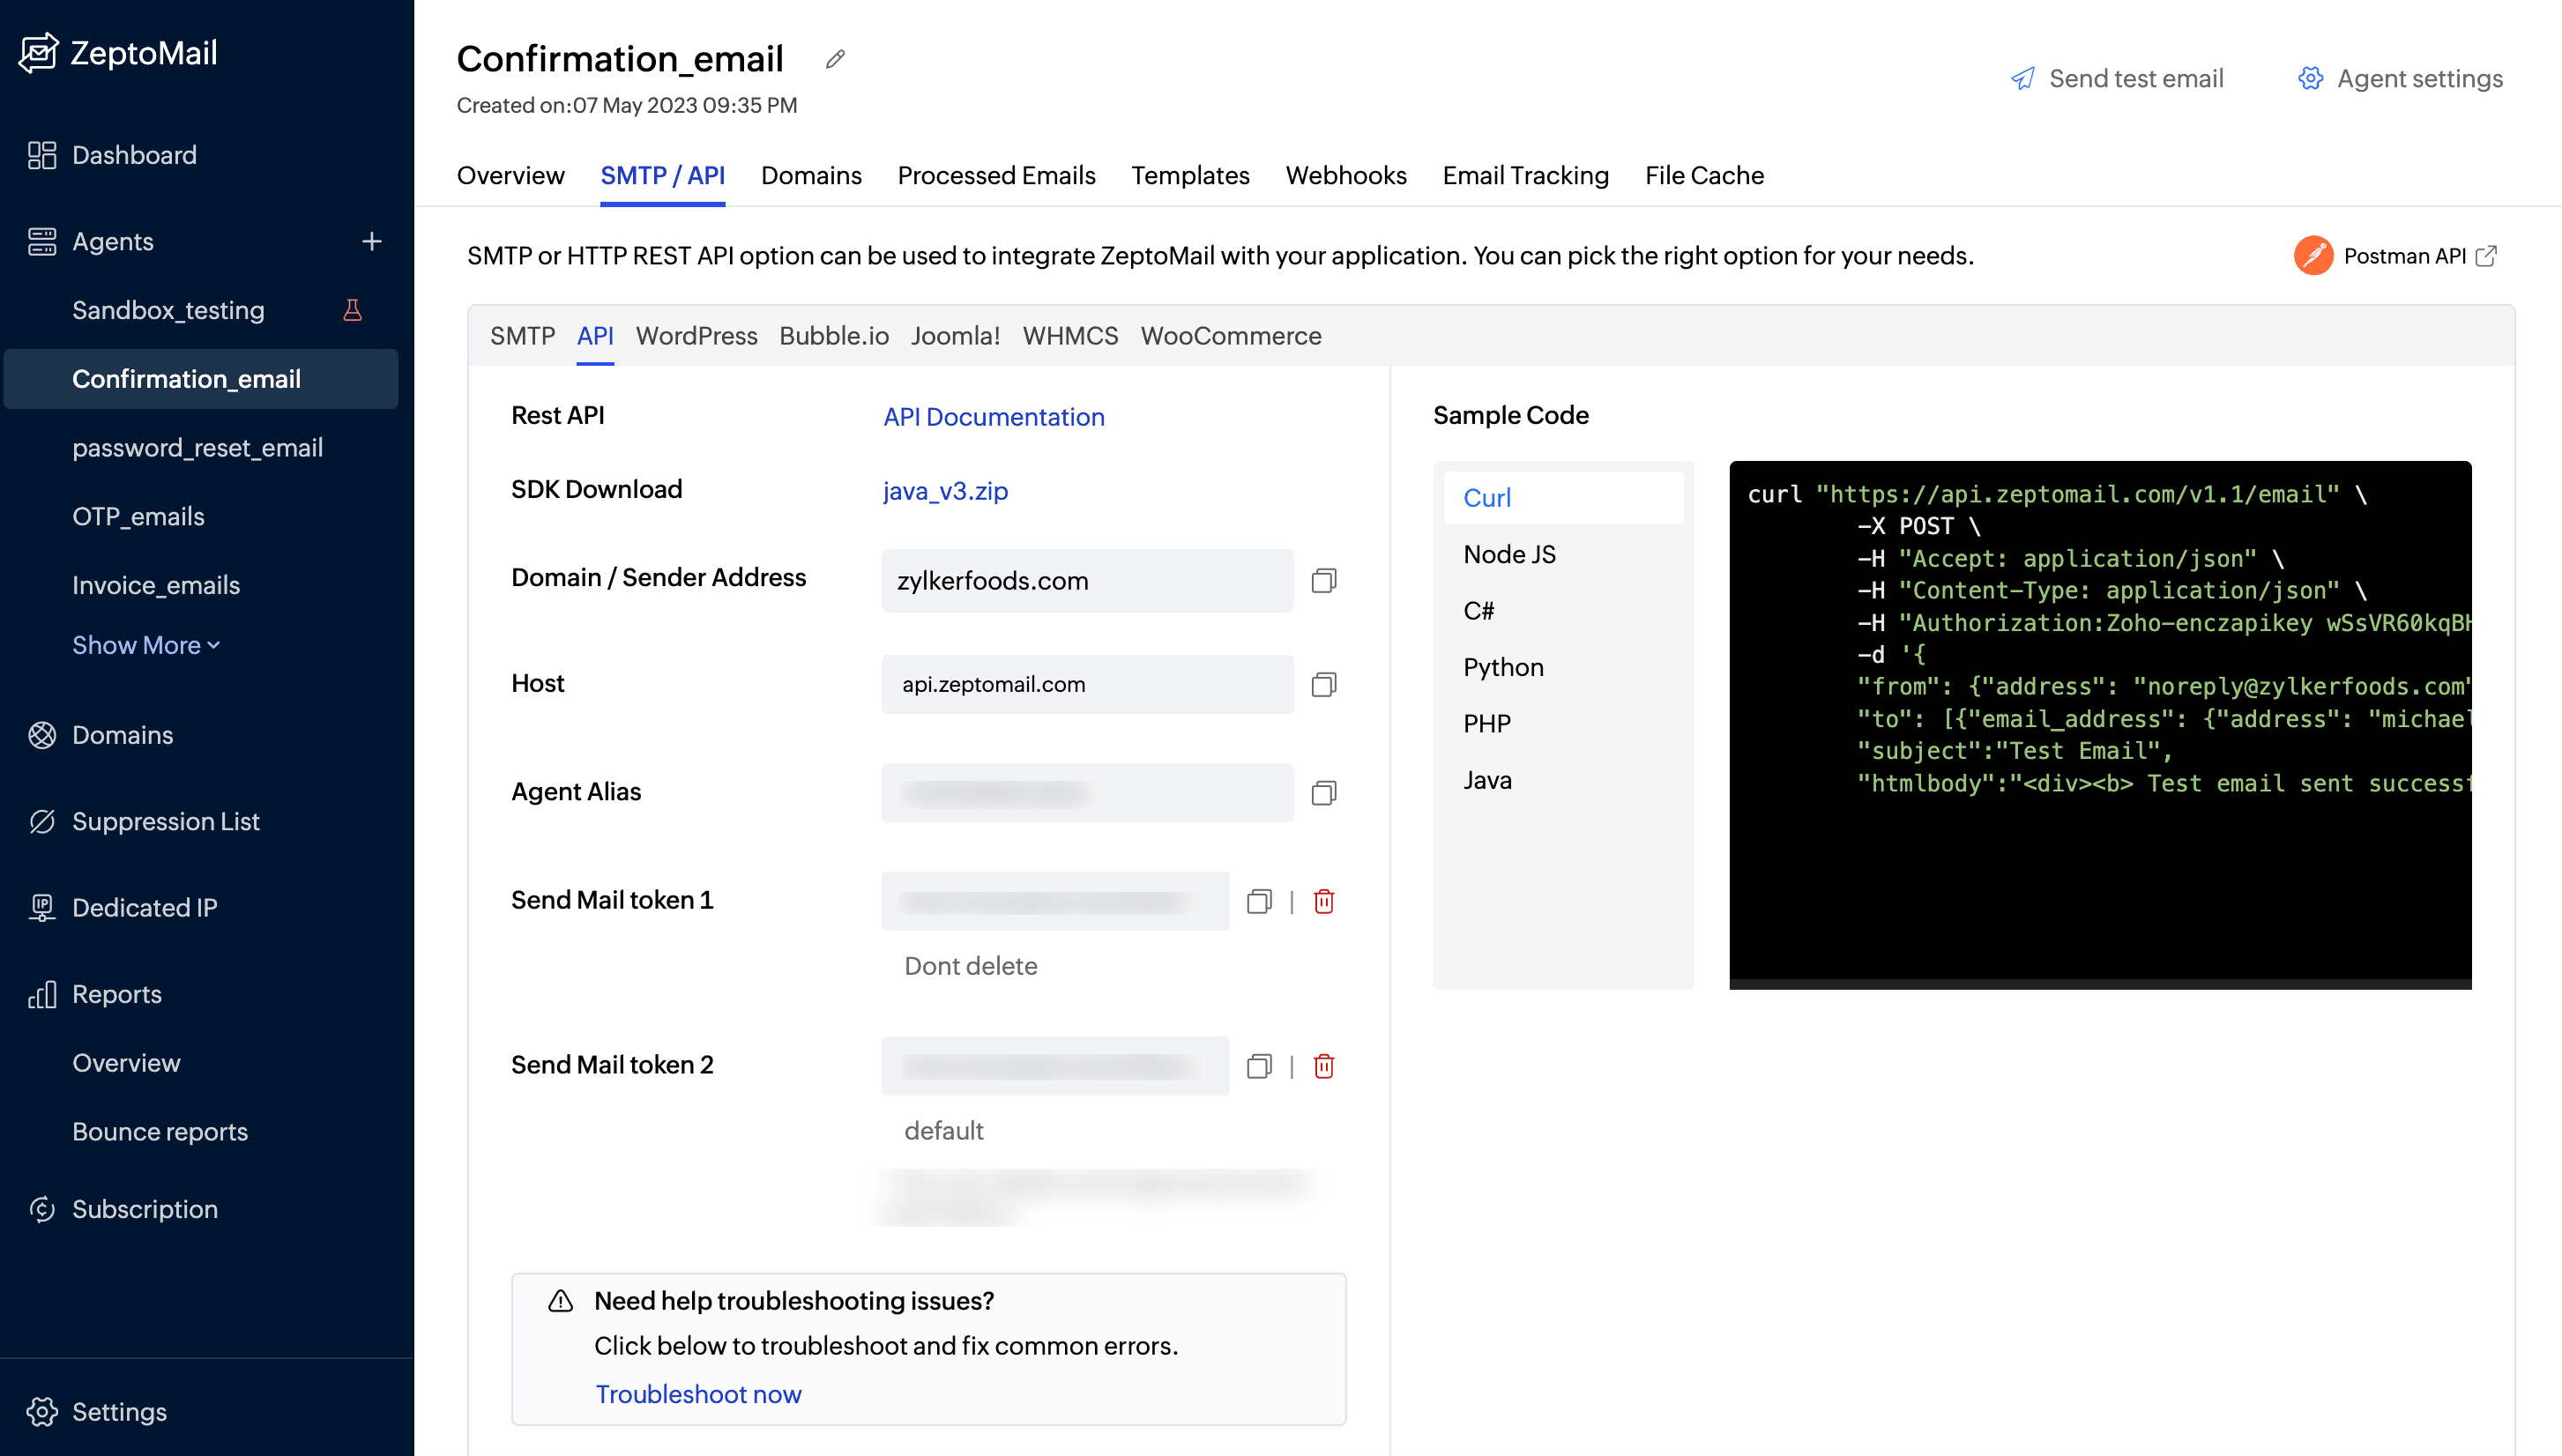
Go to the SMTP/API tab in your Mail Agent.
Copy your Send Mail Token (API key).
Integrate it into your application.
What happens next: When a user performs an action (like placing an order), your system triggers the API and ZeptoMail sends the confirmation email instantly.
Option B: Email sending via SMTP (simpler setup)
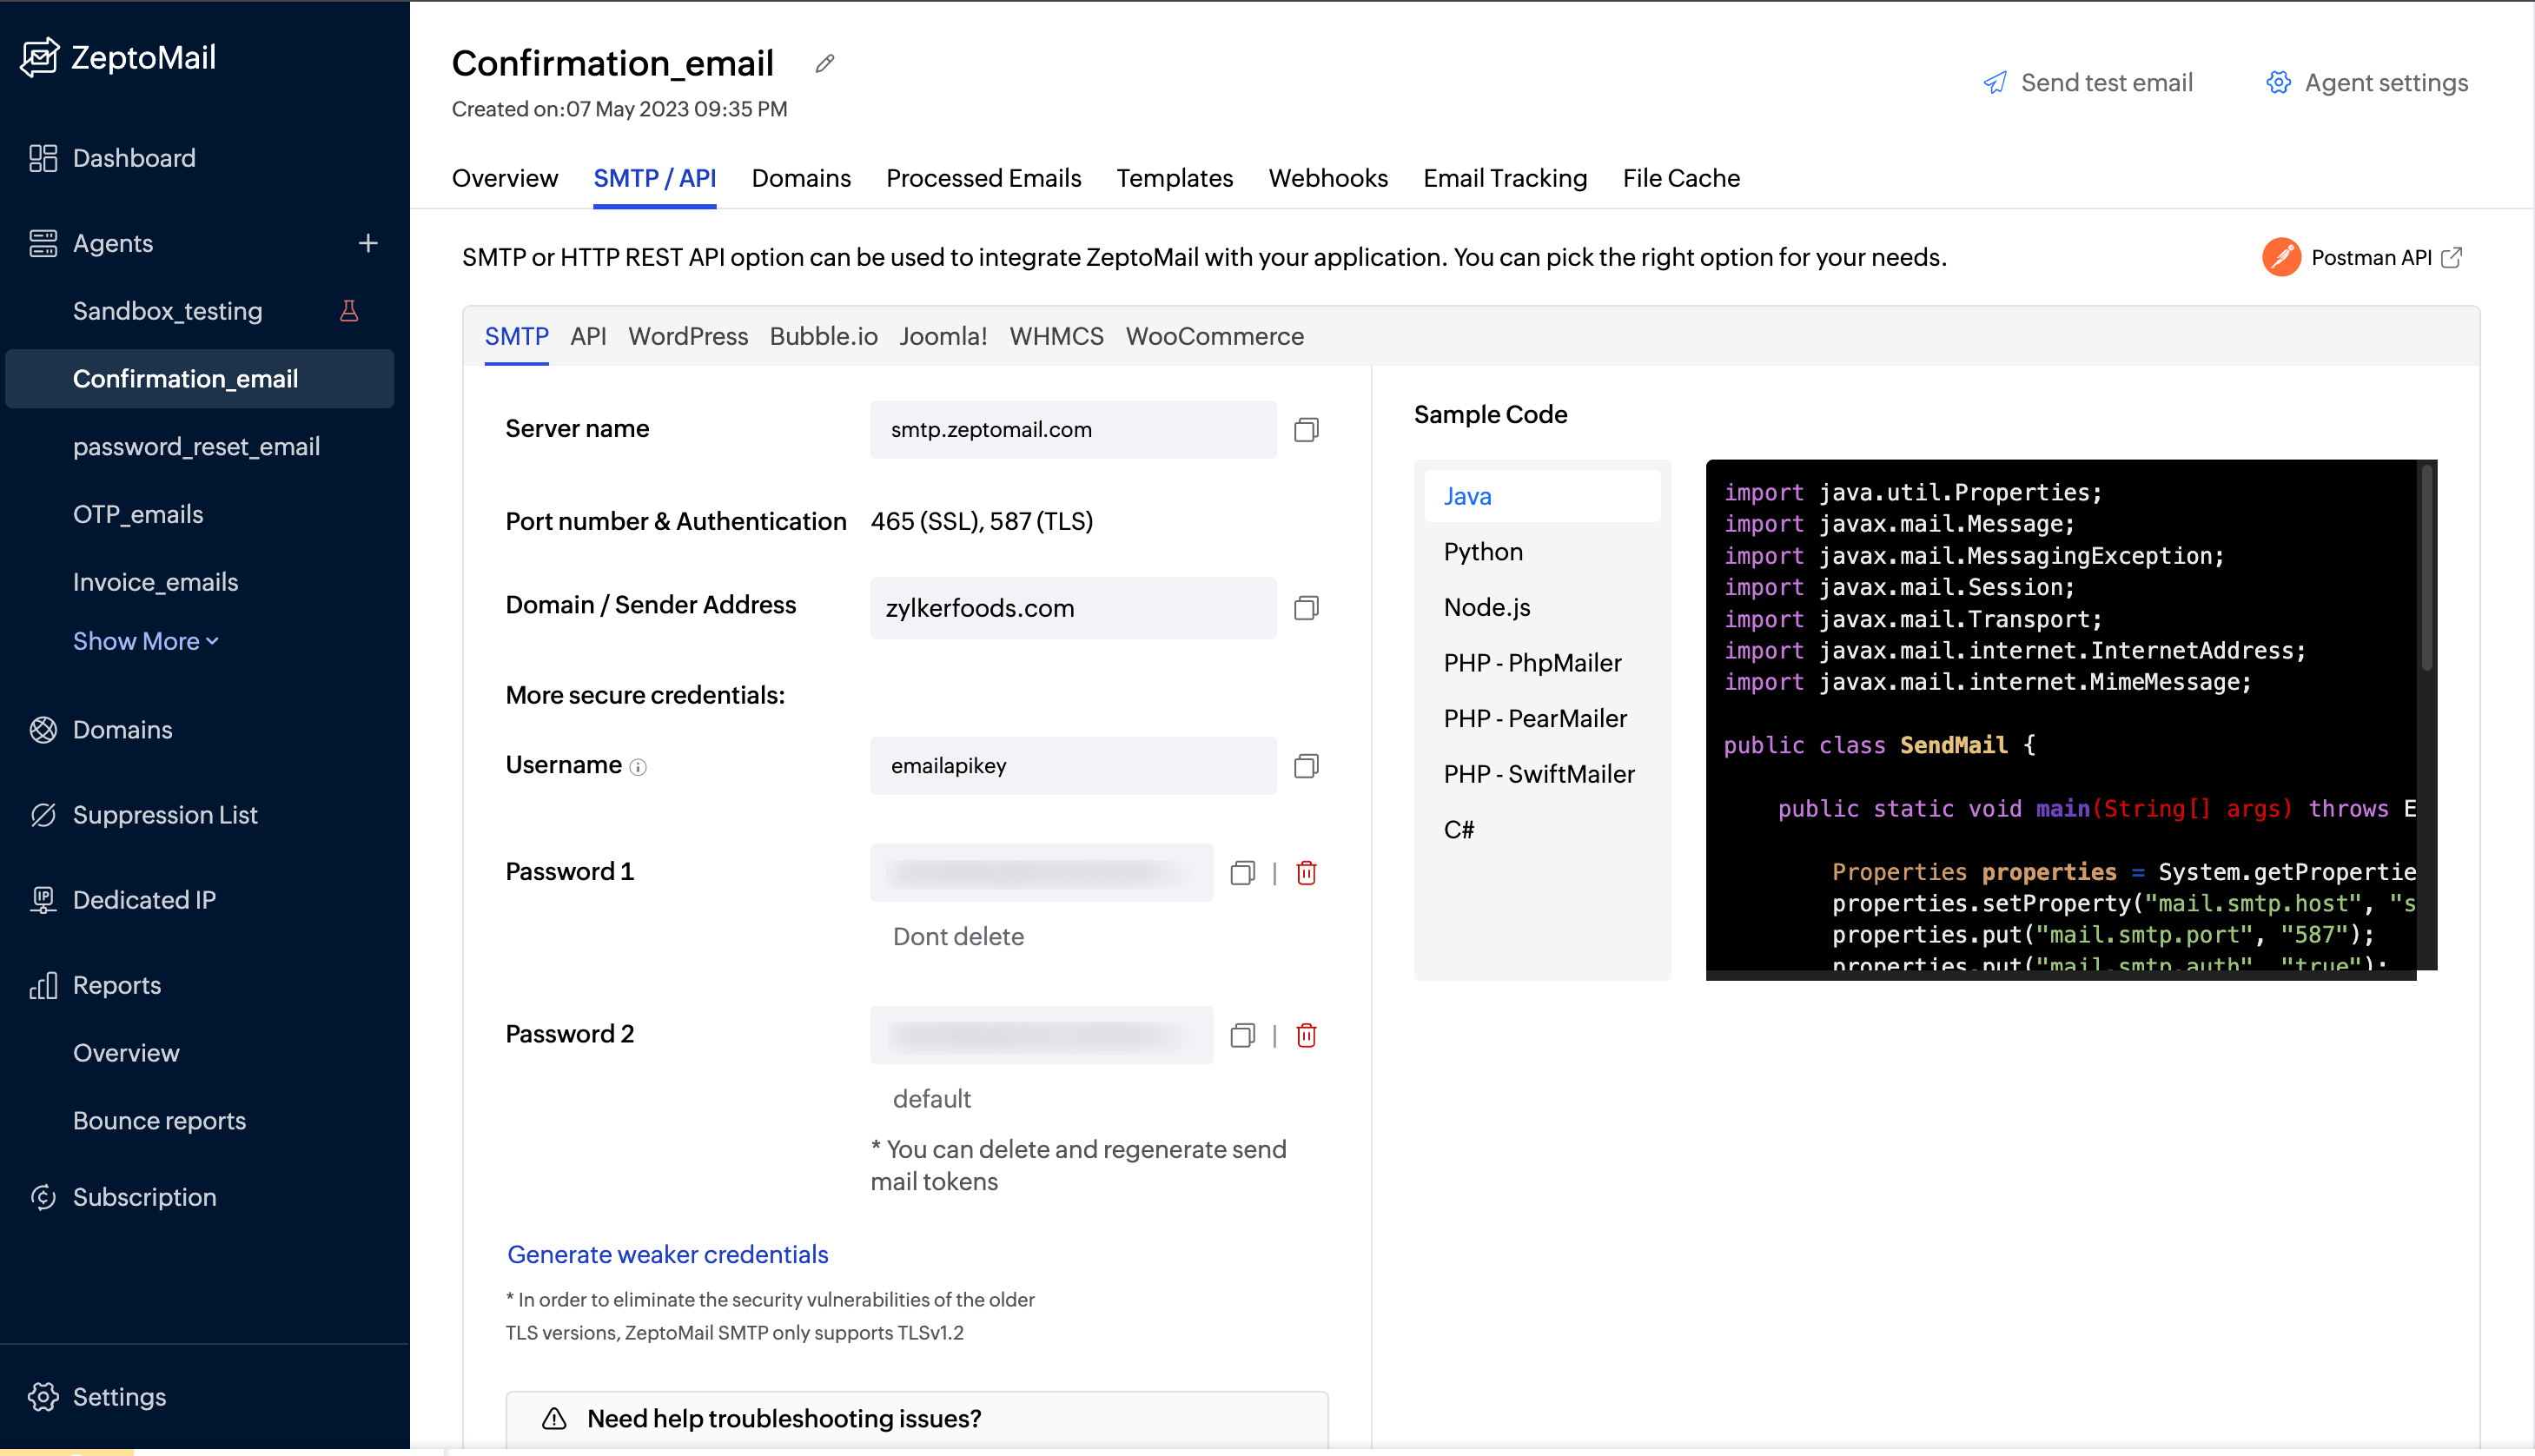
Use these details in your app or backend:
Server: smtp.zeptomail.com
Port: 465 (SSL) or 587 (TLS)
Username: emailapikey
Password: Your Send Mail Token
This works well with platforms that support SMTP-based sending.
Single email, batch email setup, and batch sending in Zoho ZeptoMail
When sending confirmation emails, your approach can vary based on your use case—whether you're sending one email at a time or delivering messages to multiple recipients at scale. Zoho ZeptoMail supports both single and batch email workflows.
Single email setup

A single email setup is used when you want to send a confirmation email to one recipient per action. This is the most common setup for confirmation emails because each message is tied to an individual user action.
How it works:
A user performs an action (e.g., places an order).
Your application triggers an API/SMTP request.
ZeptoMail sends one email to that specific recipient.
Why it matters:
It ensures real-time communication.
It’s highly personalized (name, order details, etc.).
It’s ideal for transactional use cases.
Batch email setup
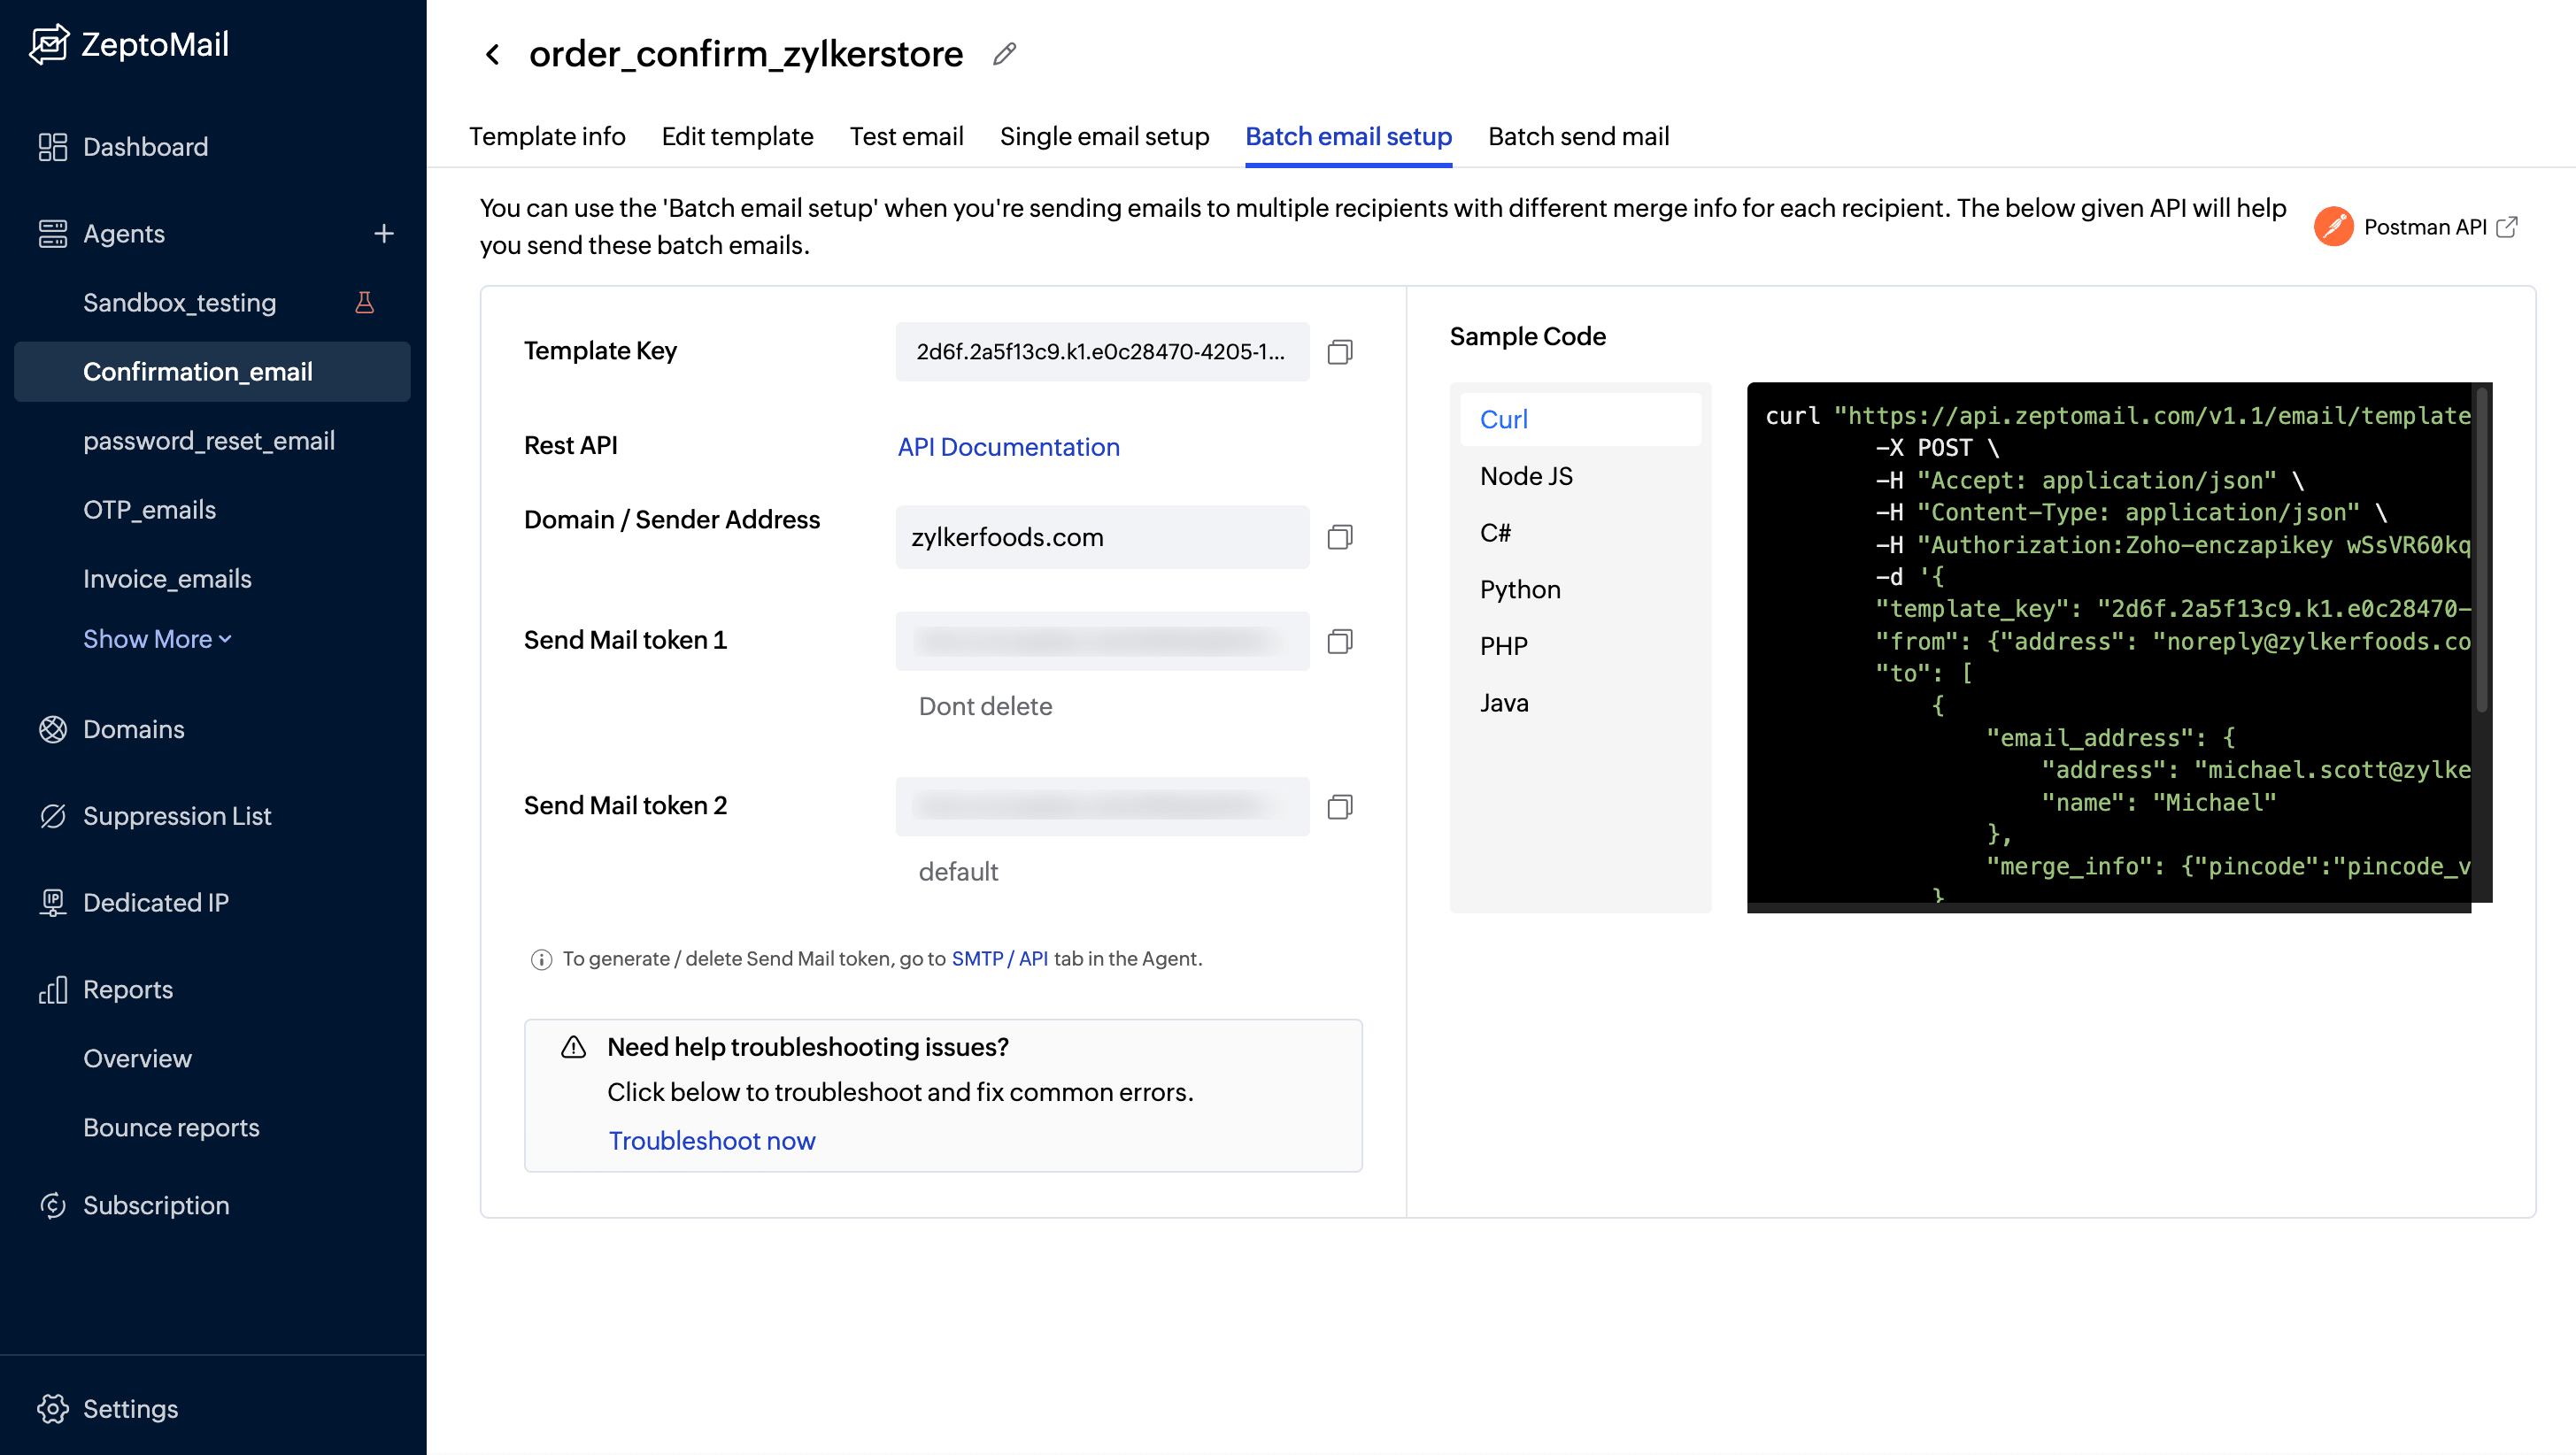
A batch email setup allows you to define multiple recipients and send emails in a structured way using a single configuration.
Use it when:
Sending the same type of confirmation to multiple users.
Processing multiple transactions at once.
Triggering emails from bulk operations (e.g., importing orders).
How it works:
You prepare a list of recipients and corresponding data.
Structure the payload with multiple email objects.
Send them together using a single API call.
Key benefits:
Reduces the number of API calls.
Improves efficiency for bulk operations.
Maintains consistency across emails.
Batch email sending
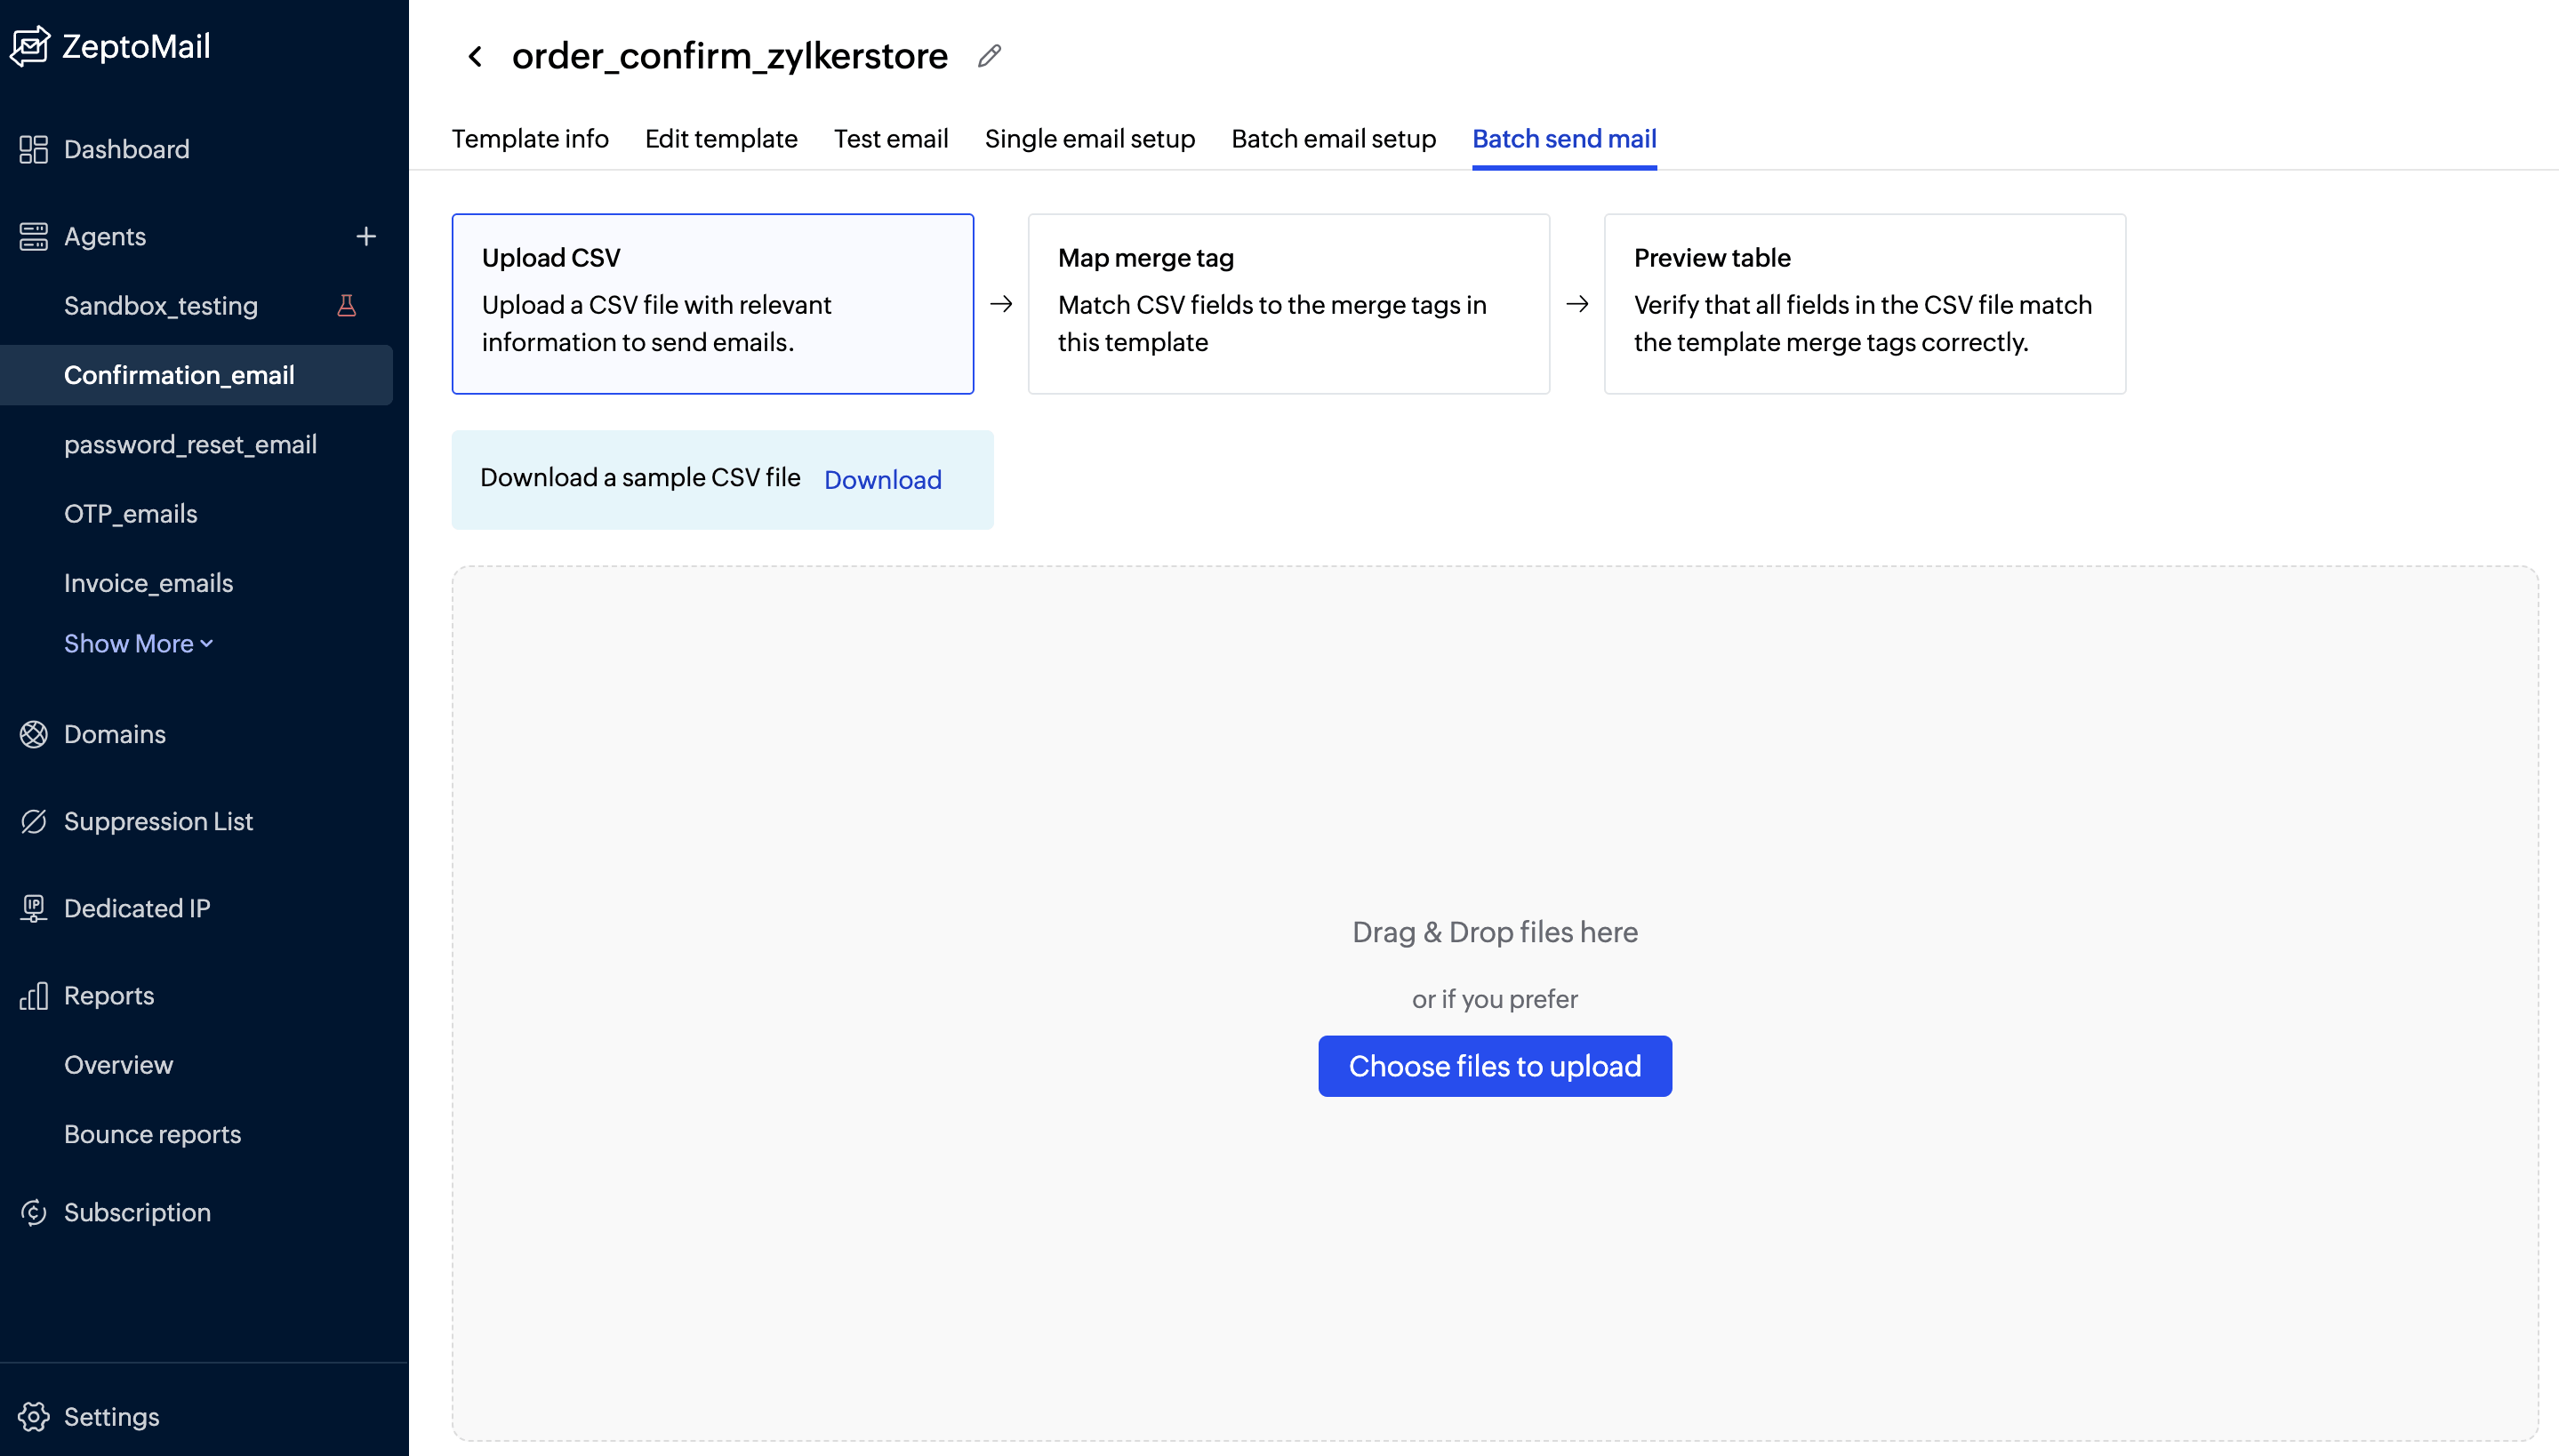
Batch sending is the actual process of delivering emails to multiple recipients in one go.
What happens during batch sending:
Multiple emails are queued and processed together.
Each email can still be personalized with dynamic data.
Delivery is handled efficiently without overwhelming your system.
Things to keep in mind:
Each recipient should only see their own data (avoid exposing others’ information).
Use personalization fields carefully for each email.
Monitor delivery logs to track success, failures, or bounces.
Example use case:
If 100 orders are placed within a short time frame (like during a Black Friday sale), instead of triggering 100 separate API calls, you can send them as a batch. This saves your time and resources.
5 best practices for sending confirmation emails
Here are some of the best practices to keep in mind while sending your confirmation emails.
1. Keep transactional and marketing emails separate
Avoid mixing confirmation emails with promotional or marketing emails content. Use separate infrastructures to send them separately. Using a dedicated infrastructure for transactional emails ensures:
Better deliverability.
Faster sending speeds.
Improved sender reputation.
Platforms like Zoho ZeptoMail are specifically built for transactional emails, helping you manage critical communications without interference from bulk campaigns.
2. Send emails from reputable and warmed-up IPs
Your sending IP plays a major role in whether your emails reach the inbox. If you're using a new IP, it needs to be gradually “warmed up” by increasing email volume over time. You can:
Start with low volumes and scale gradually.
Maintain consistent sending patterns.
Avoid sudden spikes in email traffic.
A well-warmed IP builds trust with mailbox providers and improves inbox placement.
3. Authenticate and verify your domain
Proper authentication helps you prevent emails from landing in spam, protect your domain from misuse, and improve overall deliverability. Authentication tells receiving servers that your emails are legitimate and not spoofed. Make sure to configure:
SPF (Sender Policy Framework).
DKIM (DomainKeys Identified Mail).
DMARC (Domain-based Message Authentication, Reporting, and Conformance).
4. Test your emails before sending
Even small mistakes can impact user experience. Always test your confirmation emails before going live. Keep an eye out for:
Correct dynamic data (e.g., names, order details).
Proper formatting across devices.
Working links and CTAs.
Spam triggers or broken elements.
With Zoho ZeptoMail, you can easily send test emails to validate everything before sending to users.
5. Keep your emails clear, concise, and reliable
Clarity builds trust and reduces support queries. A confirmation email should do one job well: confirm the action. Make sure your email:
Has a clear subject line.
Starts with a strong confirmation message.
Includes all key details (e.g., ID, amount, date)
Avoids unnecessary clutter.
Wrapping up
With Zoho ZeptoMail, you can take things a step further by building a dedicated infrastructure for transactional emails like confirmation emails. From creating and managing templates to ensuring high deliverability with authenticated domains and optimized sending, it helps you send confirmation emails that are timely and dependable.
As your business scales, having a reliable platform like Zoho ZeptoMail ensures that your confirmation emails continue to reach inboxes without delays and keep your communication seamless.