How to authenticate your domain
- Published : April 16, 2023
- Last Updated : May 26, 2025
- 1.7K Views
- 4 Min Read
Billions of emails are sent every day and a large portion of this includes spam emails. To make sure the emails that you send land in your recipient's inbox, it is imperative to protect them from being labeled as spam. This can be done by authenticating your domain using SPF and DKIM. Domain authentication also helps prevent spoofing and phishing attacks.
Domain authentication is nothing but a method by which you tell the receiving server that the emails sent from your account are legitimate and do not have any malicious intent. This reduces the chances of your emails being identified as spam by ISPs, thereby giving you a good deliverability record.
In ZeptoMail, emails will not be sent unless you add the SPF and DKIM records in your DNS and verify your account. DNS (Domain Name System) server contains all the information about domains and their IP addresses. DNS records are stored in the DNS servers and they help in mapping the domain names with their IP addresses. There are different types of DNS records depending on their purposes and they are :
- 'A' records
- CNAME records
- TXT records
- MX records
- NS records
Let us take a look at the different authentications required for ZeptoMail :
SPF authentication :
SPF or Sender Policy Framework helps you establish all the mail servers which can send emails on your behalf. This is done by adding an SPF TXT record to your DNS server mentioning the IPs which are allowed to send emails for your domain. This helps prevent phishing attacks on your domain.
Here's how SPF works :
- As a part of your domain verification process, you are required to publish the SPF TXT record in your domain's DNS server.
- When a recipient server receives an email from you, it looks up the domain name from your 'from address' and then compares your IP address with the IP addresses listed in DNS records.
- If the IP addresses match, then your address has cleared the SPF validation and the email is delivered.
DKIM authentication :
While SPF detects any mismatch in the sender email address, DKIM inspects for any tampering of the message sent. Thus, protecting your domain against any spoofing or phishing attack.
Let us take a look at how this authentication method works.
- The Domain Keys Identified Email (DKIM) method involves two servers performing the action.
- First, you need to publish the DKIM TXT record in your DNS server. This record contains the 'public key', which is nothing but a set of codes.
- Next, when you send an email, the sending server creates a hash value from the message content and encrypts it with a 'private key'. This key will be stored securely in the sending server.
- When your email reaches the recipient, the receiving server then accesses the public key that is published in your domain's DNS server and decrypts the hash value which is sent along with your email. Then, this server then compares the decrypted hash value with the encrypted one sent along with the email.
- If they match, then validation is successful. DKIM is passed.
- If the values don't match, it means that the message has been altered in transit.
This way, DKIM ensures that the message sent from you isn't modified during transit and protects your sender reputation.
Why are SPF and DKIM important?
If you are a business that sends transactional emails, SPF and DKIM not only ensure that your messages are protected against spoofing and phishing attacks, but also help build your sender reputation over time.
ISPs keep track of all the emails sent from domains and having your messages constantly being marked as spam will greatly affect your email deliverability. Authentication will build your brand reputation and also sends a message that you care about your customer's security. This is why, at ZeptoMail, SPF and DKIM authentication are mandated for all email sending domains.
Configure SPF and DKIM authentication of domains
You can easily configure SPF and DKIM for your domains following the steps given below:
- From the left panel, select the Mail Agent. Click the Domains tab.
- Here, you can view all the domains associated with that Mail Agent along with their verification status.
- Select the domain you need to verify. A table containing the SPF, DKIM, and CNAME records appears.
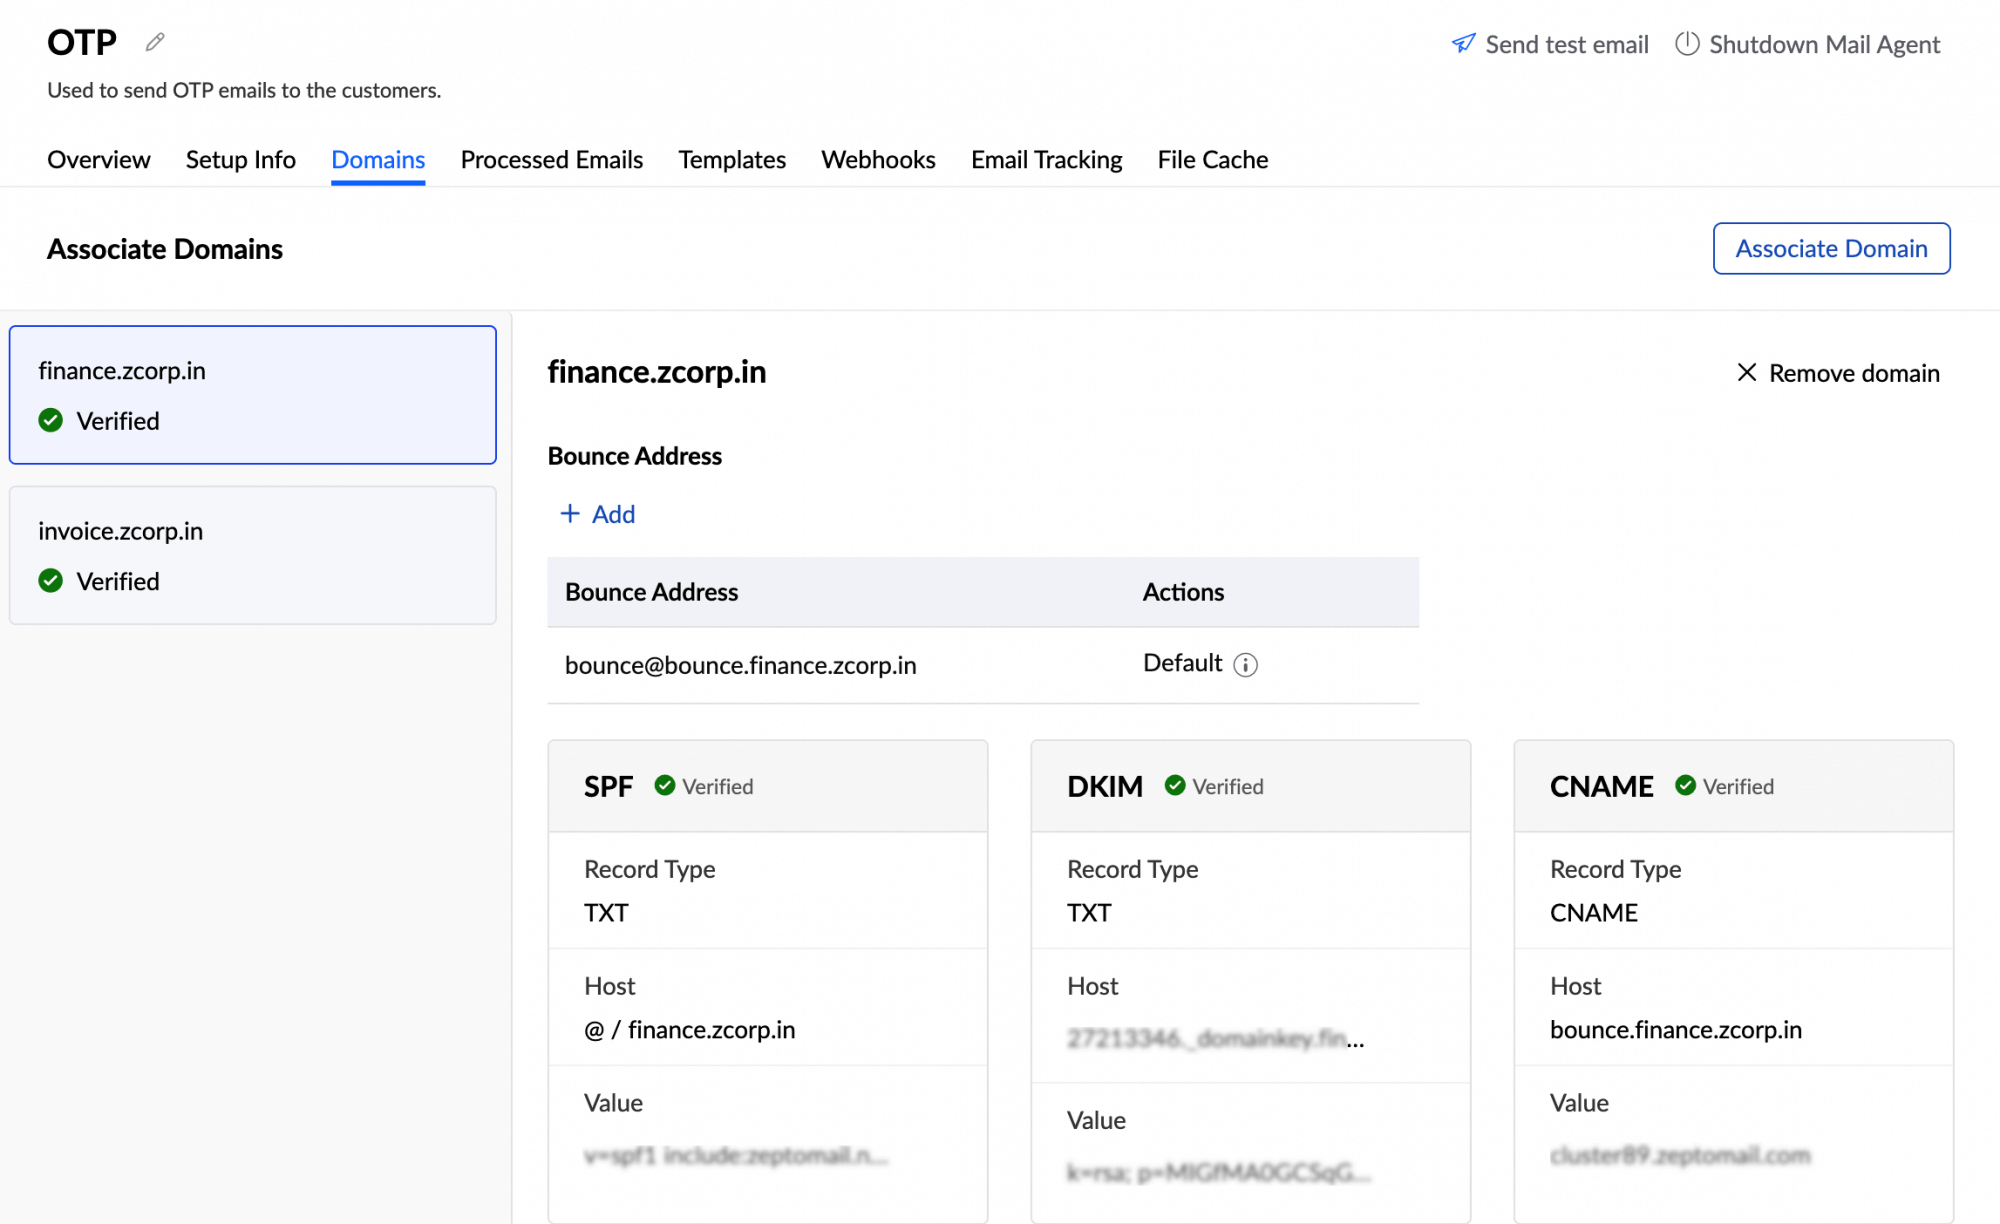
- From the drop-down, choose your DNS provider. The host value will be automatically populated depending on the DNS provider. Select other, if your DNS provider isn't mentioned.
- Copy the record values and publish them in your DNS server. Refer here for DNS-specific instructions to publish the records.
- If your domain has pre-existing SPF values, the value column will have the view SPF value field. Clicking this will open a pop-up containing the updated SPF value. Publish this value in your DNS.
- Once the values are published, click verify. It will take 24-48 hours to verify the information until which you will not be able to send any emails.
Note:
You can also authenticate the SPF and DKIM records with the help of your IT administrator.
- Click share record next to the verify option. An email template pop-up opens.
- Enter the email address of your administrator and fill the body with the relevant information and click send.
- Once these records are added by your IT administrator, click verify.