How to configure an email forwarding inbox in Zoho TeamInbox
- Published : June 27, 2023
- Last Updated : October 23, 2024
- 3.9K Views
- 4 Min Read

Email forwarding is the process of receiving a copy of your incoming emails in any preferred email client. With email forwarding, fetch all your group or individual emails hosted on any email service, and access them in Zoho TeamInbox.
Generating an email forwarding address in Zoho TeamInbox
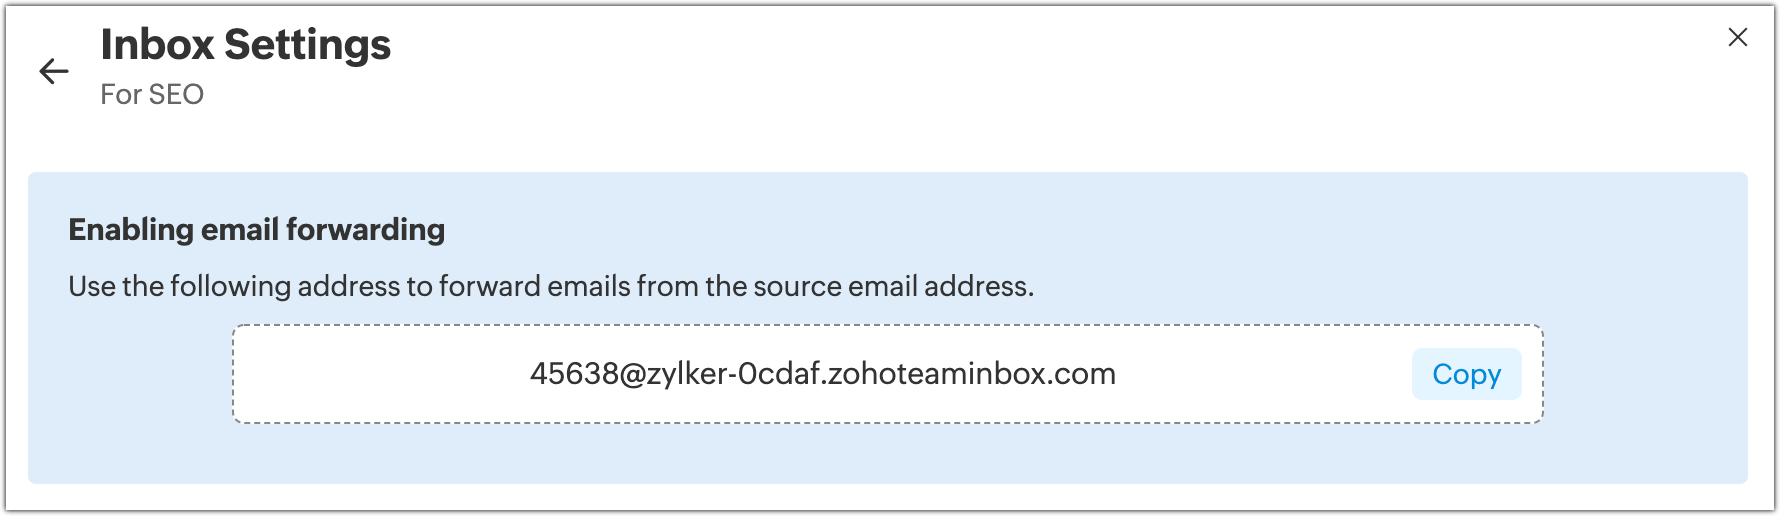
To receive your emails in your inbox at Zoho TeamInbox, you need to first generate an email forwarding address. This address acts as the destination to which all your emails will be received. The email forwarding address will be generated when you create the inbox. You can copy this address either from the final step of inbox creation or from the inbox settings.
Creating an email forwarding inbox
- Login to Zoho TeamInbox. Click the Plus icon in the top left corner and select Create Inbox.
- Select your inbox type as Team or Personal to access your group emails or individual emails.
- Enter the name and description for your inbox.
- For group emails, select the team under which you want to create your inbox. Click Next. For personal emails, simply enter the basic details and click Next.
- Select Email forwarding as your inbox channel, enter the source email address from which you want to fetch your emails, and click Create inbox.
- Associate sender addresses. Select from the list of sender addresses added to your organization or click Add sender address. It is recommended that you set your source address as the sender address. Click Next.
- For group emails, add members to your inbox. Click Save and Next.
- Zoho TeamInbox generates a unique email forwarding address for this inbox. You can copy this address and use it to forward emails.
Copying email forwarding address from inbox settings
If you've missed copying the email forwarding address during the inbox creation, you can copy it from the inbox settings anytime.
- Login to Zoho TeamInbox.
- From the left pane, hover over the inbox that you want your emails to be directed to.
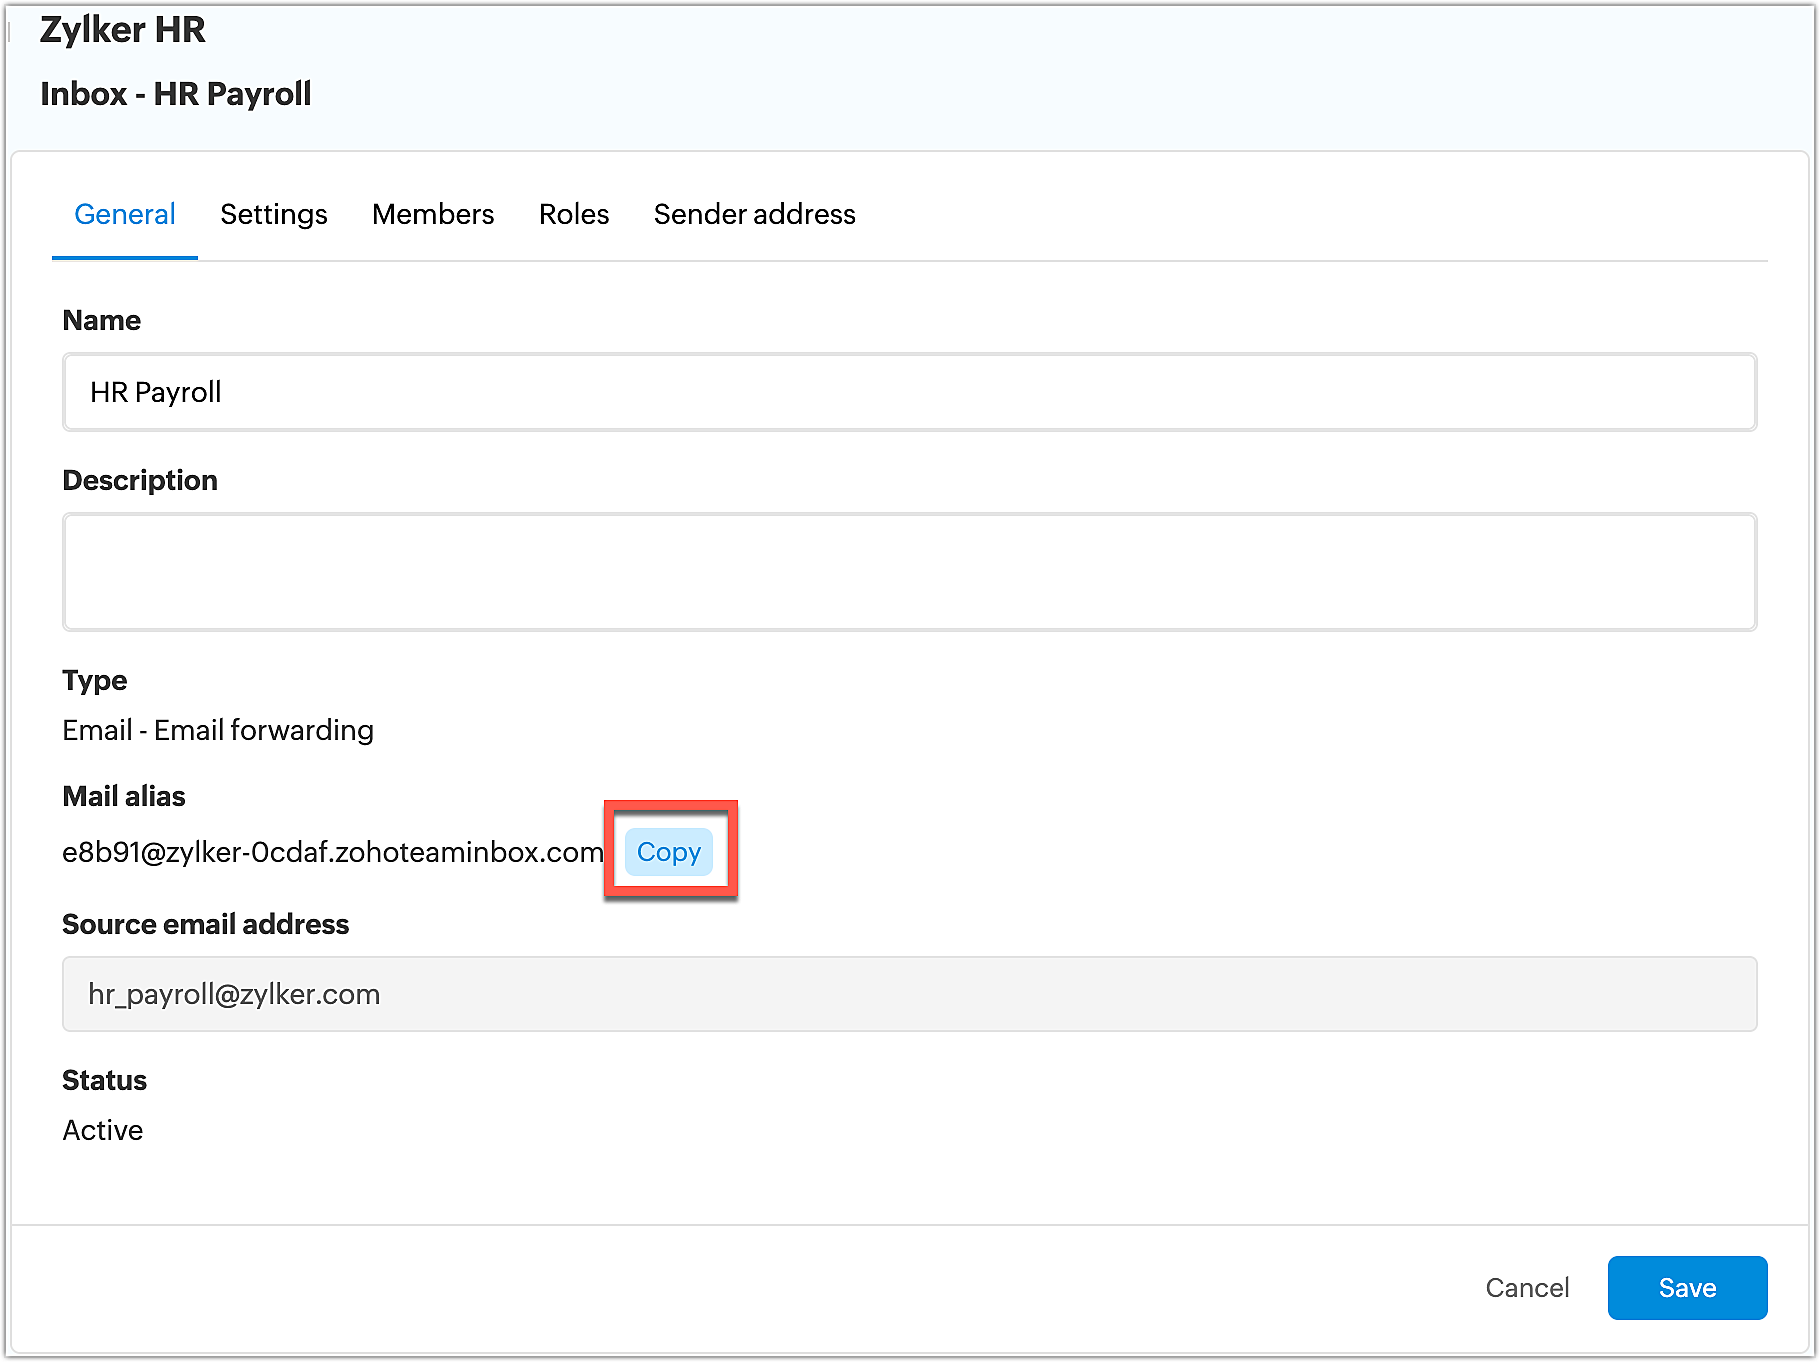
- Click the More icon and click Manage inbox.
- Here you will find the forwarding address in the Mail alias section. You can copy it from here.

Enabling email forwarding for individual email addresses
After you copy the forwarding address generated by Zoho TeamInbox, add it to your email provider so that the emails can be forwarded to your inbox in Zoho TeamInbox. Your emails can be hosted in any emailing service. Click here to learn how to enable email forwarding for individual email addresses.
Enabling email forwarding for group email addresses
To enable email forwarding for group email addresses, add the email forwarding address as a member of the group. Here are the steps to enable email forwarding for group email addresses in some of the major email providers.
Zoho Mail
- Login to Zoho Mail's control panel with the admin or group moderator credentials.
- Select Groups from the left pane and select the group you want to add.
- Select Members tab. Under the Add section, select Add members using email address and paste the Zoho TeamInbox forwarding address. A confirmation email will be sent to this address.
- Go to your inbox in Zoho TeamInbox, find the confirmation email, and confirm membership.
- Ensure that emails are properly received in Zoho TeamInbox, then remove other members from the group who will access Zoho TeamInbox to manage emails. They will then stop receiving these emails in their personal Zoho Mail inboxes.
Gmail
- Login to Google Admin Console. Select Groups.
- Select the group you want to add and add the Zoho TeamInbox forwarding address as a member. Make sure your group allows adding members outside your organization.
- Ensure if emails are properly received in Zoho TeamInbox, then remove other members from the group who will access Zoho TeamInbox to manage emails. They will then stop receiving these emails in their personal inboxes.
Microsoft 365
- Login to your Microsoft 365 account. In the new Exchange Admin Center, go to Recipients and click Contacts.
- Click + Add a contact and configure the settings in the details pane. Settings marked with an * are required. Click Add and then click Close.
- In the admin center, go to Groups > Groups page.
- Select the name of the group you want to add a contact to.
- On the Members tab, select View all and manage members.
- Select Add Members and select the user or contact you want to add to the distribution group.
- Click Save and then click Close.
- Ensure if emails are properly received in Zoho TeamInbox, then remove other members from the group who will access Zoho TeamInbox to manage emails. They will then stop receiving these emails in their personal inboxes.
Other Email Services
- Go to the group settings in your email service provider.
- Make sure your group allows adding members outside your organization.
- Select the option to add a member under the group. Paste the Zoho TeamInbox forwarding address there to add as a member.
- Ensure if emails are properly received in Zoho TeamInbox. You can then remove other members from the group who will access Zoho TeamInbox to manage emails. They will then stop receiving these emails in their personal inboxes.
Now you can access all your group emails from Zoho TeamInbox.
After you have connected your group, we recommend that you add SPF/DKIM records to your DNS to give Zoho TeamInbox the authority to send emails on behalf of your domain. You can access this information from the Deliverability section in your organization settings.
 Vignesh S
Vignesh works as a Marketing Analyst at Zoho Corporation. He is a passionate creator with a penchant for marketing and growth. In his free time, you can see him shuffling between books, movies, music, sports, stories, and traveling, not necessarily in the same order.