The complete guide to Twitter ads for brands
- Last Updated : August 17, 2023
- 7.5K Views
- 9 Min Read

Twitter is arguably the busiest newsfeed of the internet, and plenty of businesses across the globe (we bet even some of you) put a high value on holding onto a Twitter presence. Because Twitter is unlike any other social networks. The network may call itself a “micro-blogging” platform, but it’s evolved into much more than that over the years, taking the creative directions of its users.
It’s an announcement booth, a chat box, an ad space, a customer service portal and even more. The network’s simple layout not only lends to finding creative hacks, but also ensures that it keeps evolving with time while retaining its original identity. Safe to say that, even after stretching to 280 characters, the platform hasn’t stretched itself too thin in terms of its USP.
This brings us to an interesting point—advertising on Twitter is a little different from other networks. While the merits and demerits of advertising on Twitter can vary, the user interface ensures that Twitter ads remain far less intrusive.
This is crucial for marketers and small businesses around the world! Because nobody wants to be attacked by ads, especially not your potential customers. Global sentiment towards social media ads is volatile, and it can get especially bad sometimes when these are retargeted ads, which are usually the ones guilty of triggering the internet.
On Twitter, the ad annoyance is taken a notch down, thanks to the ads integrating better with your homepage.
Additionally, ads on Twitter are not only subtle, and give more control over your spending, but are also relatively easy to set-up. Compared to say, the Facebook Ad Manager, it is far easier to navigate Twitter’s Ad portal and involves fewer setup steps.
In this guide, we are going to take you through the types of advertising options available on Twitter and how to go about each one of them.
Ad positioning
Before we understand the different types of ad mechanisms within Twitter, here’s a note of all the places within the network where ad content is made visible.
a. Timelines – Promoted tweets that show up as part of your Twitter timeline
b. Search results – Promoted content shows up on top of the search bar, this includes hashtag trends that are being promoted by businesses. They’re given prominence on top of the Twitter feed, while organic tweets fall beneath it.
c. User profiles – Shows up near a user’s profile, if they’re relevant to the brand.
d. Twitter clients – Ads displayed on Twitter smartphone apps for iPhone & Android
While setting up ads, you can decide where you want the ads to show up, but each promoted element be it a tweet, a hashtag, or even a profile will carry the ‘Promoted’ tag under it, to distinguish it from the other content around it.
Types of Twitter Ads
There are several ways in which you can advertise on Twitter, as a business. While you can directly Promote individual Tweets made by your handle (by simply clicking on the graph icon under the Tweet, and hitting ‘Promote this Tweet‘), you can run comprehensive ads using two ad management features on Twitter – Promote Mode & Twitter Ads.
There are key differences in both advertising tools despite being natively built by Twitter. Promote Mode is Twitter’s lower-cost automation feature, that was launched in 2017. It picks out select tweets from your profile, and for $99 a month it promotes them across the platform—not unlike the ‘Boost Post’ feature on Facebook.
However, Twitter Ads is a separate, more comprehensive platform where you can define each element of your brand’s Ads including time, cost, targeting, purpose etc, and alter the customizations anytime based on the data that keeps getting generated.
Here is a little table to help you understand some key differences between the two. This can help you decide which is more suited for your business.

Promote Mode
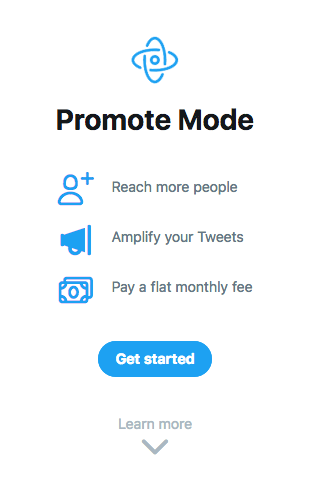
Using ‘Promote Mode‘ will get Twitter to daily circulate 10 tweets from your account, across the platform to relevant recipients for a total one month. To ensure that this doesn’t turn spammy, your account must be actively tweeting while on Promote Mode because, Twitter algorithm takes the 10 most recent tweets from your profile and advertise that content.
All tweets promoted using this feature will carry a small ‘Promoted’ tag at the bottom to indicate to the viewer, that it is ad content. According to Twitter, Promote Mode’s reach is an average of 30,000 new people viewing your tweets, and 30 new followers every month (every promotion cycle).
To set this up, follow these steps:
Step 1 – Click on your profile, and from the drop-down choose ‘Promote Mode’ to be taken to the main menu and from here select ‘Get Started’.
Step 2 – Select country and timezone. While this feature is only available for audience across US, UK & Japan and can target only these demographies, you can set the time-zone to whichever one is most relevant to you.

Step 3 – Next, you can choose from two broad categories of targeting. You can either choose to promote your tweets based on the recipients’ interests, or their current location. The latter is especially useful to businesses operating in smaller towns/cities, trying to get more visibility for their brand.

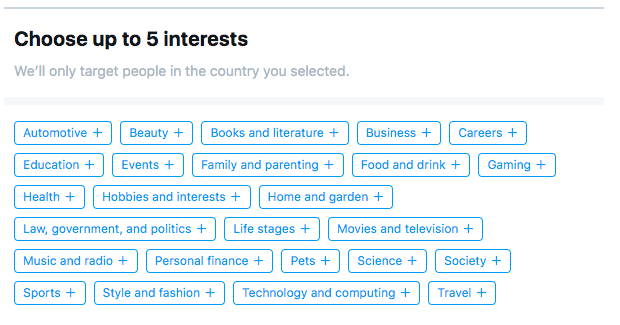
Step 4 – If you chose Interest-based targeting, you can select up to 5 interests among those that Twitter generates.
Step 5 – For the next step, you’ll be taken to a verification page where you can review your selections, before agreeing to terms and conditions and continuing.
Step 6 – From here, you’ll be taken to the payment gateway, wherein you’ll be asked to connect a credit card. Using the Promote Mode feature means getting billed in advance, so any profile using this feature will be billed in USD/GBP/Yen (based on the country of selection).
Notes:
a. You can run the Promote Mode, simultaneously while running Twitter Ads as well.
b. Your tweets must meet the Ad quality guidelines, to be able to use this feature. This would mean that hate tweets, illegal promotions, complaint tweets etc, will be regulated and profiles with such tweets will have trouble using the feature unless they follow Twitter’s ad policies.
Twitter Ads
Twitter Ads can be accessed by any Twitter profile which is logged into by simply navigating to the Twitter Ads Manager or alternatively clicking on ‘Advertise with Twitter‘ button found on the right, bottom corner menu on your Home.
Using Twitter Ads, you can holistically run ad campaigns by either picking out tweets from your existing timeline or creating specific campaign-only content and using the Twitter Ads Manager to promote it.
You can Promote content based on various end-goal objectives that your brand has for running the ad in the first place – ranging from Tweet engagements to Building awareness. Once you know your Twitter marketing strategy, you will be able to decide what campaign you want to build, and what objective it must fulfill.
Step 1 – Select a campaign objective
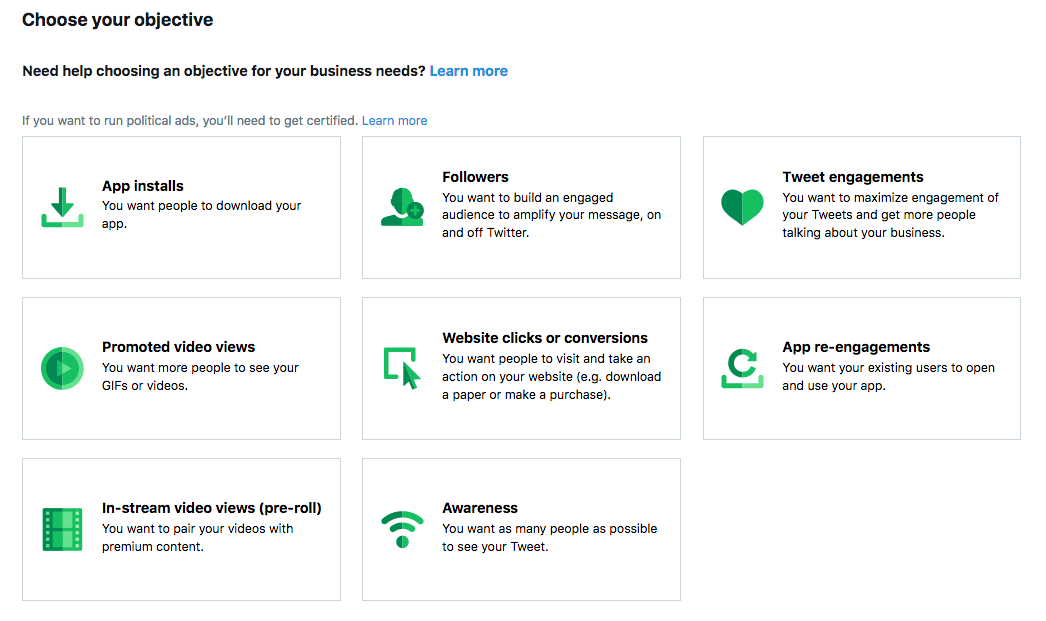
Head to Twitter Ad Manager, and select ‘Create Campaign’ option from the top right corner. Choose one of these campaign objectives for your Twitter ads:
a. App Installs – You can use this campaign layout to get people to download and install your App. You will be paying per click or every time the app is installed on someone’s device.
b. Followers – Promoted Twitter accounts that show up on your or other users’ timelines can be identified as Follower campaigns. Here, you will be charged per follower gained specifically through the campaign.
c. Tweet Engagements – This will help position your tweet amongst those that have high chances of engaging with you. You will be charged per engagement.
d. Promoted video views – This ad campaign is suited for specifically promoting video content, and get optimum views. You are charged per video view and the video tweet appears between your feed with the ‘Promoted tag’.
e. Website clicks or conversions – Helps with promoting websites and landing pages and get more traffic to it. You are charged per link click or per Twitter card click.
f. App re-engagements – Similar to the app install, this campaign targets app engagements and installs by re-targeting people.
g. In-stream video views – In-stream videos are like regular video tweets, that appear between update tweets on your home screen.
h. Awareness – To promote your tweet/brand generally across your target audience. You’re charged for every 1,000 impressions.
 Step 2 – Fill in Campaign details
Once you’ve selected your campaign objective, you’ll be taken to the next screen where you can fill out details like campaign name, duration, payment details. Along with this you can also allot budgets on two levels: a daily budget, and the optional total budget. Even if the daily budget is set high, your overall budget will ensure that the campaign doesn’t cross your spend-ceiling.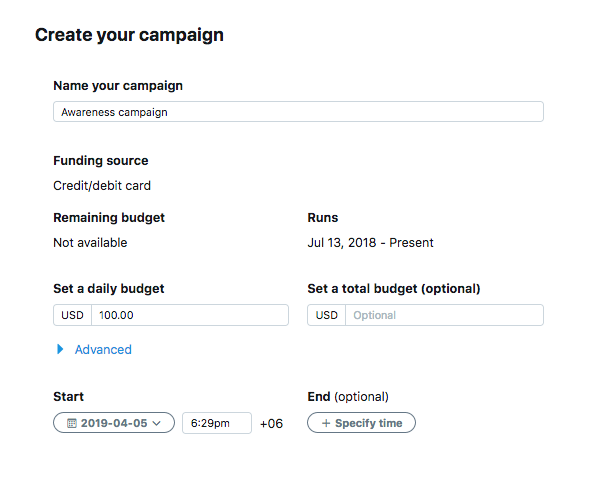
Step 3 – Create your ad-sets under the campaign
Now you can create individual ad sets, under this campaign. For example, if you’re launching a campaign with an individual ad-set for multiple countries, you can group all ad-sets under the single campaign.
Here too, you can name each ad-set, set a budget limit, and define the type of bid you want to choose. You can choose between 3 types of bidding within Twitter Ads – Automatic, Target and Maximum bids. Some campaigns, for instance, Awareness campaigns have only Automatic/Target bid options.
These bidding options will allow you to determine the highest cost ceiling per target activity, that you’re willing to stretch to. The higher your bid ceiling, the more chances of your Ad being displayed more widely and greater takeaways – just like a regular bid!
a. Automatic bid – The ad algorithm will auto-optimize your bid.
b. Target bid – Helps you define a target cost for your bids.
c. Maximum bid – Helps you define a price ceiling for your bids – how much you’re willing to pay.
Step 4 – Set targeting for your ad
In the next step, you can choose all your ad targeting elements. Here you can custom-pick audience based on different categories
a. Demographics – age, gender, location, language spoken
b. Device used – Device, carrier, OS
c. Refined demographics – Here you can add fields like follower lookalikes for specific Twitter handles, keywords and interests.
d. Retargeting – You can retarget people you have targeted via any or all of your older campaigns as well.

You will be notified on the right-side column, the estimate of how many people your ad-set is expected to reach based on your criterion.
Step 5 – Set Creatives for the Ad
Once you’ve set all of these in play, it’s time to fix the creatives. Here you will be able to select any of the Tweet copies you may have preloaded already. To create and save copies, simply click on the feather icon on the top right corner of the Ads Homepage. You can also create a campaign copy at this stage.
From this section, you can either select from the 3 given options: organic(timeline) tweets, promoted-only (older campaign) tweets, or scheduled (pre-created & saved) tweets. Alternatively, you can create a new campaign tweet by clicking on a similar feather icon on the top bar and upload your content.
Step 6 – Review your campaign
The last step of launching a Twitter Ad Campaign is to review all aspects of your ad – budgets, bids, targetting, and creatives.
Once you’ve verified all the details, hit ‘Launch campaign‘ to get your ad out there.
Analytics
Once your ad starts getting noticed, you can check your metrics regularly to see how it’s performing and to see if you need to add more budget or targeting, to increase the ad’s reach. You can find the Ad analytics tab right at the bottom of the homepage of the Twitter Ads Manager.
While your recent Spend and Impressions graphs are displayed on the top, the bottom bar has each ad campaign, and all its ad sets listed as rows.
The general overview of each ad-set will tell you the following details:
a. Campaign status (running/paused/expired)
b. Start/end date
c. Total budget
d. Spend
e. Impressions
f. Campaign daily pacing
g. Result and Results%
Here ‘Result‘ denotes the campaign objective and tracks how much it has been achieved. If your objective was getting more link clicks, it will display the number of clicks and the percentage of people who clicked your Call-to-action link (against the total number of people who viewed the ad).
Further clicking on each ad will let you view the detailed breakup of metrics like:
- Demographics of ad engagers
- When your ad was being viewed the most
- Where all on the network your ad was positioned and viewed
The data you mine out of each ad-set wholly depends on the type of ad campaign you run.
This information not only helps to quantify what your brand’s paid marketing reach on Twitter is like but also helps in knowing what direction you can—and we all know how important that is, of course.
 Amruthavarshinii
Chats & writes about anything from social media, culture, to how chai latte isn't a real thing.


Comments(1)
Hi author Nice explanation on the topic. Quite a few points were not known earlier. I will definitely try to implement it. Thanks for posting such enriched article. Keep posting for us. Thank you