Zoho Sign
I have a Privacy Policy document that I want my website visitors to sign. I want to make them sign it by simply clicking a URL present in the page containing the necessary information. How can I do this?
This can be done using the SignForms feature offered by Zoho Sign. To do so:- Create a template inside the Zoho Sign application by uploading the document and configuring the signer fields. Ensure that there are no prefill fields inserted into the template.
- Create a SignForm and associate it with the saved template.
- Configure response limit and OTP settings, if any.
- Copy the SignForm public URL and place it in your website in the desired page.
My company has sales personnel who operate remotely and often travel to close deals with clients. I want the clients to sign their agreements and sales documents directly on the device that my sales personnel carries. How can I do this?
This can be done using the In-Person Signing feature offered by Zoho Sign. To do so:- In the Zoho Sign application, set up and initiate an in-person signing workflow. Ensure that the host is a Zoho Sign user belonging to your organization.
- When meeting the client in person, the host needs to log in to Zoho Sign on their mobile device and open the document from the dashboard.
- They can then initiate the in-person signing session and pass the device over to the client for signing.
- The client must then agree to the terms and conditions and click Start signing to begin signing the document.
- Once done, the client can pass the device back to the host.
- The host can then end the session by clicking Finish.
I want the Zoho Sign emails sent to my recipients to be sent from my organization's email address. I have already configured it in the account settings page but I am facing an issue where the emails are either not getting delivered or landing in the recipients' spam/junk folder. How can I fix this?
When a third-party service like Zoho Sign sends out an email on your behalf, it may be considered as spoofing or phishing attempts, and be marked as spam by the recipients' email services, or even quarantined or blocked. Verifying your email domain in Zoho Sign using the DomainKeys Identified Mail (DKIM) method will prevent such a situation from arising. To do so:- Visit the Account Settings page inside the Zoho Sign application and click Verify now next to the Email domain verification status option.
- Enter your domain name and generate Hostname and Value.
- Using the Hostname and Value, publish your domain's public key as a TXT record in your domain host's DNS Manager,.
- Verify your domain back in the DKIM verification page inside Zoho Sign to complete the process.
Note: It may take a few hours for your domain to get verified based on the TTL (Time To Live) value specified in the TXT record. The TXT record must not be removed from your domain host console, unless you want to stop using your email address to send Zoho Sign mails.I want the Zoho Sign emails
This can be done using the document recall and delete options offered by Zoho Sign. To do so:- Visit the Detailed Document View page of the document you have sent out that carries the error.
- Recall the document. Once it is recalled, its status changes to Recalled and the recipient will no longer be able to view or sign the document.
- Go to the Documents section and delete the document from the actions dropdown to move it to the trash.
- You can now start a new sign workflow, where you can upload the corrected document and send it out for signature.
As an office secretary, I send several business documents to customers for signing on a daily basis using Zoho Sign. My role requires me to physically validate all signatures by checking them against a copy of a government-issued ID presented by the customer. To do so, I need to ensure that the customers sign the documents only by drawing their signature rather than uploading an image or typing it. How can I do this?
This can be done by modifying the signature filling options inside Zoho Sign. To do so:- Visit the Account settings page under the Settings section on the left navigation panel.
- Uncheck the options Type and Upload next to Allowed options for filling signature and leave only Draw checked. This ensures that recipients can only sign the document by drawing their signature.
Zoho CRM Integration
I have created a document format for a deal/agreement that I want to send to prospective customers for signing when they agree to a deal. I already have data and the numbers discussed with the customer saved in my records, and I want to simply insert this information into the formatted document when I send it for signing. How do I do this?
This can be done from the Deals module inside Zoho CRM by making use of the Zoho Sign extension together with the templates option—either Zoho Sign templates or CRM's mail-merge templates.Using Zoho Sign templates:- Create a template inside the Zoho Sign application by uploading the document and configuring the prefill and signer fields.
- Navigate to the module inside Zoho CRM and open the respective record.
- Click the Send for Zoho Sign button.
- Configure the sign workflow by importing the Zoho Sign template, mapping prefill fields with record fields, adding the recipient, and setting up reminders.
- Click the Quick Send button to send the document out for signing.
Using Mail Merge templates:- Create a mail-merge template inside Zoho CRM by uploading the document and inserting the record fields to be merged.
- Navigate to the module inside Zoho CRM and open the respective record.
- Click the Send for Zoho Sign button.
- Configure the sign workflow by importing the mail-merge template and creating a merged document, adding the recipient, and setting up reminders.
- Proceed with the workflow and verify the details once again in the Zoho Sign interface.
- Add any additional signer fields in the Document Viewer screen, if required, and send the document out for signing.
I am planning to move and maintain my business's sales activities entirely online. I want to store customer records online and use that information to send them quotes or raise invoices and sales orders. I want these documents to be countersigned and sent back to be stored online. Can Zoho help me do this?
This can easily be achieved by using Zoho CRM and the Zoho Sign extension for Zoho CRM. To do this:- Set up your Zoho CRM account and configure the individual modules to store customer records and any associated information.
- Create mail-merge templates and inventory templates by uploading your business documents and inserting the respective record fields to be merged.
- Whenever you have to send a document for signing, navigate to the desired module inside Zoho CRM and open the respective record.
- Click the Send for Zoho Sign button.
- Configure the sign workflow by importing the mail-merge/CRM template and creating a merged document, adding the recipient, and setting up reminders.
- Proceed with the workflow and verify the details once again in the Zoho Sign interface.
- Add any additional signer fields in the Document Viewer screen, if required, and send the document out for signing.
The signed document will be stored back onto the CRM as an attachment in the document record inside the ZohoSign Documents custom module.I use Zoho CRM extensively with several custom modules in place to store additional customer, contact, and reference details. I want to send documents for signature directly from these custom modules. The Zoho Sign extension appears to support only pre-defined CRM modules with a button to send documents for signatures, is there a way to extend its support to the custom modules I use?
Yes, you can extend the Zoho Sign extension's support to custom modules in Zoho CRM. This can be done by creating a custom button similar to the 'Send for Zoho Sign' button in predefined modules which can be used within custom modules to trigger sign workflows.
To create a custom button:
- Open a record in the desired custom module.
- Open the More Actions (...) dropdown at the top right and click Create Button.
- Enter a name and description for the button.
- Select View Page in the Where would you like to place the button? dropdown.
- In the What action would you like the button to perform? dropdown, select Invoke a URL.
- Construct your URL in the following format and insert it into the URL field.
https://extensions.zoho.com/plugin/zohosign/handler?action=createZohoSignDocument&module=<Module_Name>&rec_id=<Record_ID_from_Fields_dropdown>&rec_name=<Record_Name_from_Fields_dropdown>&crmzgid=<Organisation_ID_from_Fields_dropdown>
An example URL for a custom module named References:
https://extensions.zoho.com/plugin/zohosign/handler?action=createZohoSignDocument&module=References&rec_id=${References.ReferenceId}&rec_name=${References.ReferenceName}&crmzgid=1xxxxxxx09
- Configure where the button action is performed and assign button view permissions to user profiles.
- Click Save.
Note: However, do note that creating a button to send documents for signatures from custom modules will not extend the Zoho Sign extension's behaviour of attaching a copy of the signed documents back to the associated record.
Zoho Forms Integration
I have a registration form for journalists planning to attend my company's event. I want to send a Media Disclosure Policy via email to all the journalists who register for them to sign. How can I achieve this?
This can be done by doing the registration via a Zoho Form, and integrating it with a template created inside the Zoho Sign application. To do so:- Create a template inside the Zoho Sign application by uploading the document and configuring the prefill and signer fields.
- Associate the Zoho Form you are using to collect data with the template you created by integrating it with Zoho Sign.
- Map the form data that has to be merged onto the document with the prefill fields in the template.
- Add the recipient details from form data.
- Select the Send the document's link to recipients email. action to take place upon form submission and integrate.
I want to have a consultation form on my website for potential customers to fill when they visit. After they fill and submit the form, I want to make them sign a Non-Disclosure Agreement immediately in the same flow. How can I do this?
This can be done by creating the necessary form on Zoho Forms, creating the document template on Zoho Sign, and integrating it with the form to create a self-serviced sign workflow. To do so:- Create a template inside the Zoho Sign application by uploading the document and configuring the prefill and signer fields.
- Create the required form in Zoho Forms with the necessary input data fields.
- Integrate the form you created with the Zoho Sign template.
- Map the form data that has to be merged onto the document with the prefill fields in the template.
- Add the recipient details from form data.
- Select the Redirect to Zoho Sign document. action to take place upon form submission and integrate.
- Embed the Zoho Form in your website.
Zoho Writer Integration
I want to prepare business documents from scratch using my own formatting and typesetting. I want to do this entirely online and save the documents on the cloud. I also want to send these documents for signing directly from the document screen. How can I do that?
This can be easily achieved by using the Zoho Writer tool, an online word processor, and the Zoho Sign integration for Writer. To do this:- Set up your Writer account and create your business documents.
- Once you finish drafting the document in its intended format and typesetting, open the automation pane and initiate a new sign workflow.
- Add the recipients for the document and the respective the signer fields for each signatory.
- Upon inserting all the required signer fields, configure the workflow for signature collection by adding the signer details and email content.
- Set the document expiration duration, reminder frequency, and actions to be performed on the signed document and send the document for signing.
Zoho Recruit Integration
I have set up a mail merge template for a document in Zoho Recruit that we use with the Zoho Sign extension to initiate a sign workflow, merge data, and send for signatures every time a new candidate record is added. But this process is very repetitive and cumbersome. Is it possible to add a custom button that performs this task in just one click from the record view?
Yes, it is possible to perform the required task from a single click in Zoho Recruit. The functionality can be achieved by the combination of a custom button in the desired module and a custom Deluge function.
To do so:
- Visit the following URL - https://recruit.zoho.com/recruit/Connections.do
- Click Add Connection and select Zoho OAuth.
- Enter the connection name and link name, and select the following scopes:
- ZohoSign.documents.ALL
- ZohoSign.templates.ALL
- ZohoWriter.documentEditor.ALL
- ZohoWriter.Merge.ALL
- Click Create and Connect and grant the necessary permissions in the subsequent pop-up.
- Open a record in the desired Zoho Recruit module.
- Open the dropdown next to the default button at the top and click Create Button.
- Enter a name for the button and select Details Page in the Where would you like to place the button? dropdown.
- In the What action would you like the button to perform? dropdown, select Writing Custom Function.
- In the following Deluge pop-up:
- Enter a function name.
- Click Edit Parameters and add a method parameter by selecting Candidate ID from the Select Field dropdown.
- Enter the following code with the appropriate keys and values inserted, and modify it where necessary.
//Fetching keys for merge fields
getfields = invokeurl
[
url :"https://writer.zoho.com/api/v1/documents/<MailMerge_Template_ID>/mergefields"
type :GET
connection:"<Connection_LinkName>"
];
info getfields;
//Fetching candidate data by ID
candidate = zoho.recruit.getRecordById("Candidates",id);
currentDateTime = now;
sent_on = currentDateTime.getDate();
cand_email = candidate.get("Email");
//Construct key-value variable for mapping all mail merge fields with candidate data
//Example illustrated below is for an offer letter document
fields = Map();
fields.put("Sent_On",sent_on);
fields.put("Lead_Name",candidate.get("First Name") + " " + candidate.get("Last Name"));
fields.put("Lead_Name.First_Name",candidate.get("First Name"));
fields.put("Lead_Name.Posting_Title",candidate.get("Posting Title"));
fields.put("Expected_Joining_Date",candidate.get("Expected Date of Joining"));
fields.put("org.company_name","zoho");
//Construct key-value variable for output settings
output_settings = Map();
output_settings.put("doc_name","Document Name");
//Performing merge and store using Writer
resp = zoho.writer.mergeAndStore("<MailMerge_Template_ID>",fields,output_settings,"<Connection_LinkName>");
info response;
doc_id = response.get("document_id");
//Adding recipient email and configuring sign workflow settings
recipientsList=List();
recipientsList.add("test@example.com");
recipientsList.add(cand_email);
inputMap=Map();
inputMap.put("subject","Please sign this offer letter.");
inputMap.put("is_sequential",true);
//Send document for signatures using Zoho Sign
response=zoho.writer.signDocument(doc_id,"zohosign",recipientsList,"Doc Name",inputMap,"<Connection_LinkName>");
info response;
- Save the function.
- Save the button.
You may refer to the Deluge guide, especially the Writer tasks section, for detailed information on further modification and customization of this function.
Zoho Deluge Integration
How to use Zoho CRM functions as callbacks, using Webhooks in ZohoSign?
This can be done as follows:
- Visit Zoho CRM and click the Settings icon at the top-right corner.

- Click Functions under the Developer Space.
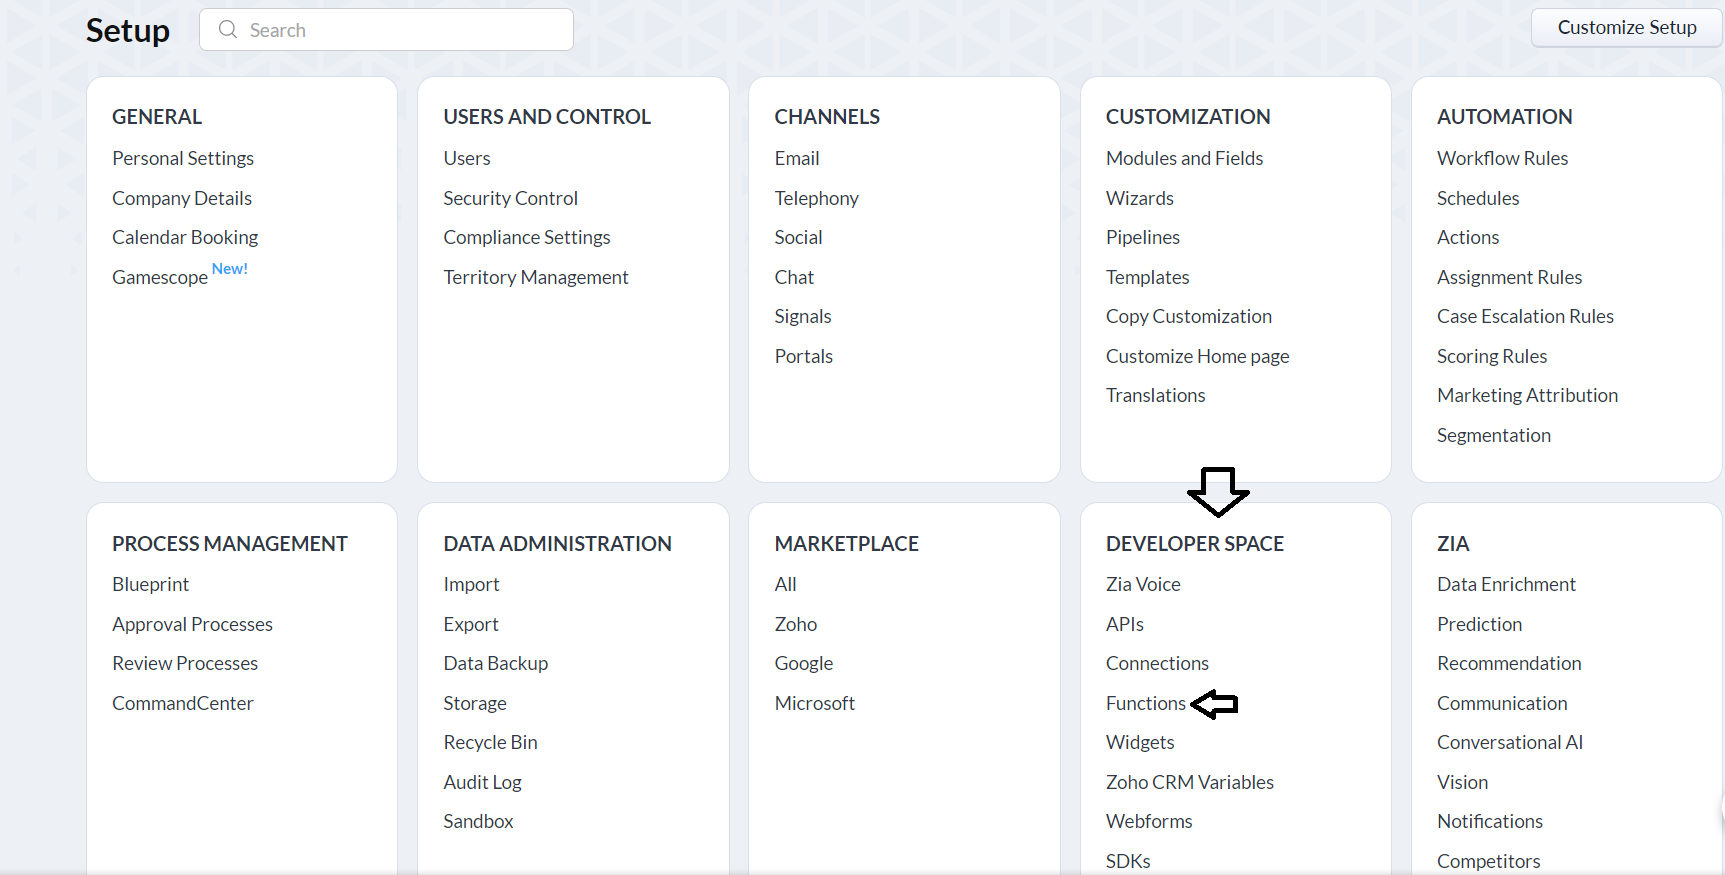
- Click the New Function button.

- Specify the Function Name and Display Name, select Standalone from the category drop down menu, then click Create.
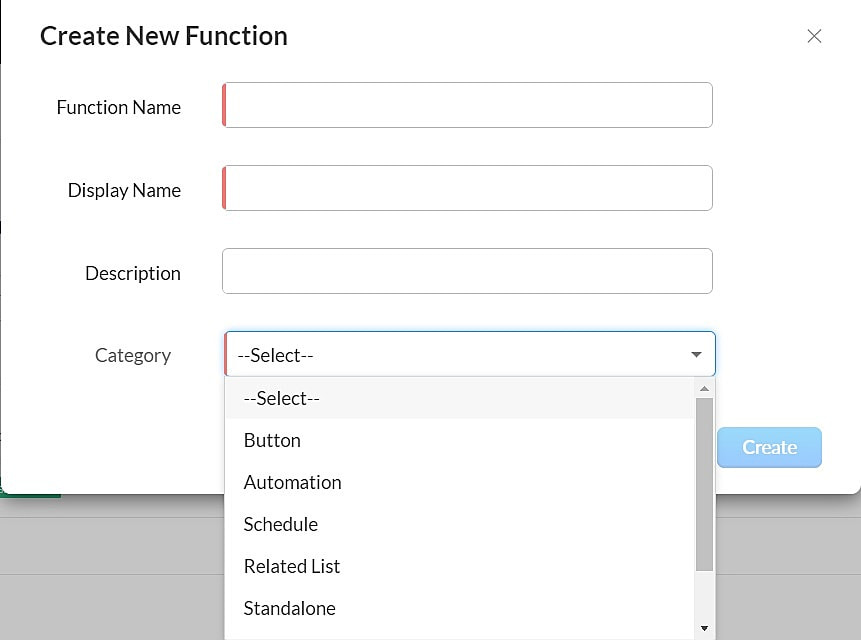
- Click the Edit Argument link on the top of the page, enter the Parameter Name as "crmAPIRequest", and select the Type as String in the drop-down.
- Click Save.
Note:
- Do not click Save and Execute.
- After the function is saved, search for the function using the function's name. Click the ellipses next to the function name and select REST API.
- Enable the API Key option and copy the URL that is generated.
- Paste the URL in a notepad so that it can be used in Zoho Sign, then click the Save button.
- In Zoho Sign, you will need to enable a webhook to be called when documents are completed. In order to do this, open Zoho Sign -> Settings -> API Settings -> Create Webhook. Paste the URLs from the previous step.
- Select the actions you want from those listed for making the webhook calls, then click Save.
Note:
- This can only be done by Zoho CRM admin.
- After saving this function, you will need to make this webhook as an invokable URL. In order to do this, click on setting icon next to the function name and choose Rest API. In the dialog box that appears, turn on the API key option. Copy the generated unique URL and note it for later reference.
- Visit Zoho CRM and click the Settings icon at the top-right corner.
I have set up an automation in ZohoCRM to send documents to Zoho Sign. Each time I want to view the documents, I need to view them at Zoho Sign. It is difficult to view the document status this way. Can I set up a callback function in CRM to add Zoho Sign document details, which is triggered by the Zoho Sign webhook?
When documents are sent for signature from CRM using Zoho Sing's extension, the documents will be updated in CRM. However, in other instances such as automation and workflow, this will not be done.
You need to create a custom callback function, which can be done by following the steps from Question 1.
Paste the following code:
crmAPIRequestMap = crmAPIRequest.toMap();
request_body = crmAPIRequestMap.get("body");
info request_body;
requestMap = request_body.toMap();
response = Map();
response.put("status_code",200);
response.put("Content-Type","application/json");
hasRequests = requestMap.containKey("requests");
if(requestMap.containKey("requests") && requestMap.containKey("notifications"))
{
notificationMap = requestMap.get("notifications").toMap();
requestStr = requestMap.get("requests");
requestObj = requestStr.toMap();
response.put("body",{"what we got":requestObj,"notification":notificationMap});
if(requestObj.containKey("request_status") && notificationMap.containKey("operation_type"))
{
operationType = notificationMap.get("operation_type");
//if(requestObj.get("request_status").equals("completed"))
if(operationType.equals("RequestCompleted") || operationType.equals("RequestSigningSuccess") || operationType.equals("RequestRecalled") || operationType.equals("RequestRejected") || operationType.equals("RequestExpired"))
{
requestStatus = "Out for Signature";
if(operationType.equals("RequestCompleted"))
{
requestStatus = "Signed";
}
else if(operationType.equals("RequestRecalled"))
{
requestStatus = "Recalled";
}
else if(operationType.equals("RequestRejected"))
{
requestStatus = "Declined";
}
else if(operationType.equals("RequestExpired"))
{
requestStatus = "Expired";
}
requestId = requestObj.get("request_id");
//Check if already exists
zsignrecord = zoho.crm.searchRecords("zohosign__ZohoSign_Documents","(zohosign__ZohoSign_Document_ID:equals:" + requestId + ")");
if(zsignrecord.size() > 0 && zsignrecord.get(0).containKey("zohosign__DeleteEdit_Preview_or_Position_Signature_Fields"))
{
info "Record already present";
response.put("body",{"message":"Record already present, updating"});
if(zsignrecord.get(0).get("zohosign__DeleteEdit_Preview_or_Position_Signature_Fields") == false)
{
//Needs to be updated
zsrecordId = zsignrecord.get(0).get("id");
recordInfo = {"zohosign__Document_Status":requestStatus};
resp = zoho.crm.createRecord("zohosign__ZohoSign_Documents",zsrecordId,recordInfo);
if(resp.containKey("id"))
{
response.put("body",{"message":"Updated record"});
}
}
else
{
return {"crmAPIResponse":response};
}
}
else
{
response.put("body",{"request_id":requestId});
associatedModule = "Contacts";
associatedModuleKey = "zohosign__Contact";
actions = requestObj.get("actions");
email = actions.get(0).get("recipient_email");
records = zoho.crm.searchRecords("Contacts","(Email:equals:" + email + ")");
if(records.size() <= 0)
{
records = zoho.crm.searchRecords("Leads","(Email:equals:" + email + ")");
if(records.size() > 0)
{
associatedModule = "Leads";
associatedModuleKey = "zohosign__Lead";
}
}
if(records.size() > 0)
{
info "Record found";
leadid = records.get(0).get("id");
recordInfo = {"Name":requestObj.get("request_name"),associatedModuleKey:leadid,"zohosign__Document_Status":requestStatus,"zohosign__ZohoSign_Document_ID":requestId,"zohosign__Date_Completed":today,"zohosign__Module_Name":associatedModule,"zohosign__Module_Record_ID":leadid};
//Create ZohoSign Record in CRM
resp = zoho.crm.createRecord("zohosign__ZohoSign_Documents",recordInfo);
if(resp.containKey("id"))
{
zsDocId = resp.get("id");
respDoc = zoho.sign.downloadDocument(requestId);
zoho.crm.attachFile("zohosign__ZohoSign_Documents",zsDocId,respDoc);
response.put("body",{"attached to record":zsDocId});
//Create zoho sign recipients record for all recipients
for each action in actions
{
recpStatus = "Waiting for Signature";
if(action.get("action_status").equals("SIGNED"))
{
recpStatus = "Signed";
}
else if(action.get("action_status").equals("DECLINED"))
{
recpStatus = "Cancelled";
}
recpRecordInfo = {"Name":action.get("recipient_name"),"zohosign__Email":action.get("recipient_email"),"zohosign__ZohoSign_Document":zsDocId,"zohosign__Recipient_Order":action.get("signing_order"),"zohosign__Recipient_Type":action.get("action_type"),"zohosign__Recipient_Status":recpStatus};
zoho.crm.createRecord("zohosign__ZohoSign_Recipients",recpRecordInfo);
}
}
else
{
response.put("body",{"error":resp});
}
}
}
}
else
{
response.put("body",{"not completed":requestObj});
}
}
else
{
response.put("body",{"no request status":requestObj});
}
}
else
{
info "Error";
response.put("body",{"error":"No requests key"});
}
return {"crmAPIResponse":response};


