Initializing Your Application
Now that you have defined the OAuth configuration file and OAuth persistence handler class, you can move on to the next step, which is initializing your app. Copy the SDK configuration key-value pairs required and paste them into a property file. Enter the path of the file as the value of the desk.sdk.config system property key.
On your first attempt to get the ZohoOAuthClient instance using ZohoOAuthClient.getInstance();, the SDK is automatically fetched values from the desk.sdk.config system property and initialized.
Generating the grant token
The Zoho API Console gives you the option to directly generate grant tokens for users. This option comes in handy if your application is configured to use only one Zoho Desk user's credentials for all operations. This option also proves to be useful while testing your application.
To generate the grant token, perform the following steps:
- First, login to your account.
- Then, visit the Zoho API Console.
- Click the Add Client button.
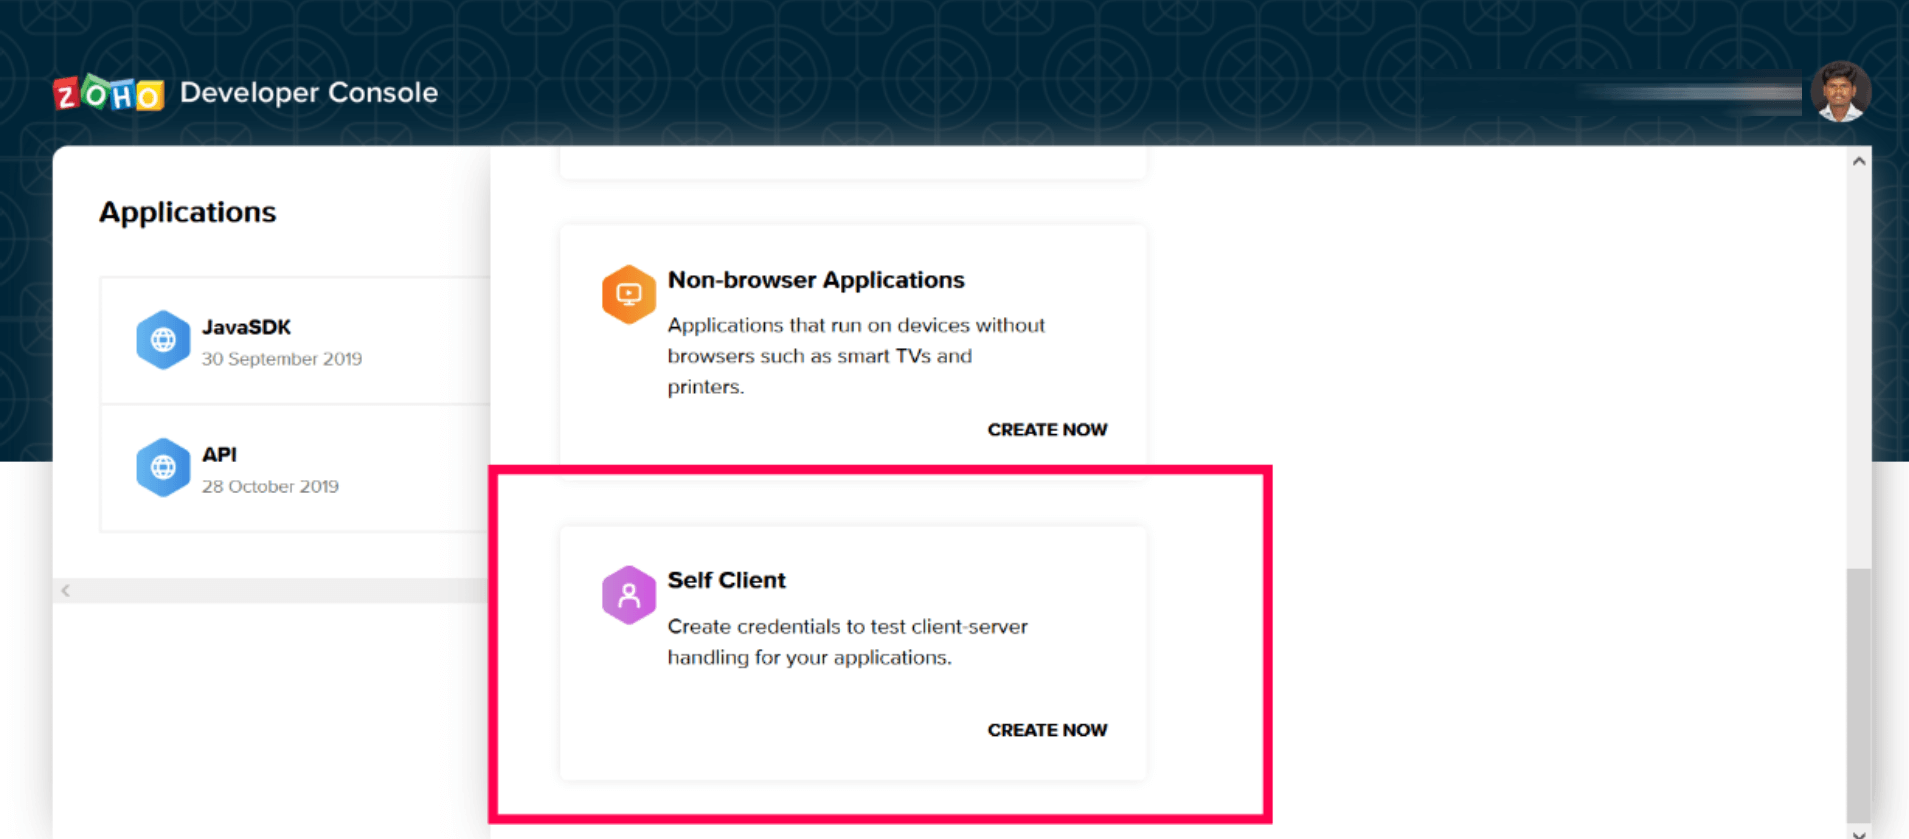
- On the Choose a Client Type screen, click the Self Client option.
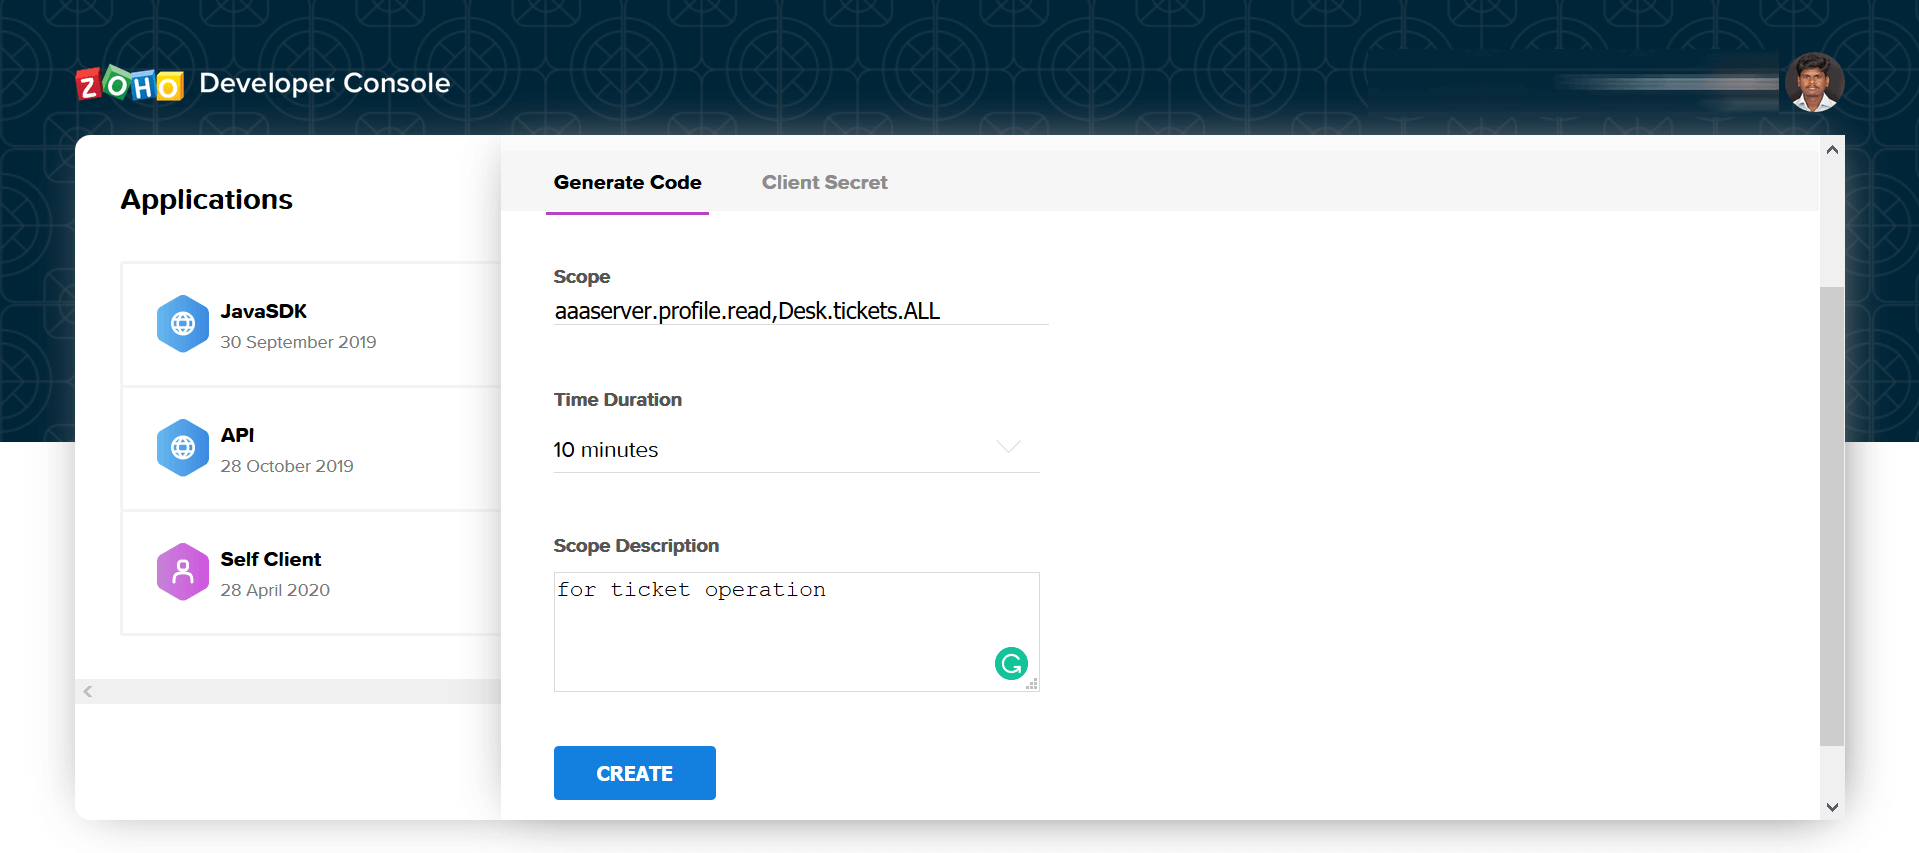
- In the Scope field under the Generate Code section, enter the Zoho Desk scopes (comma-separated) you want to authorize and the aaaserver.profile.read scope.
- In the Time Duration field, enter the period of validity for the token.
- In the Scope Description field, enter a brief description of the scopes you want to authorize.
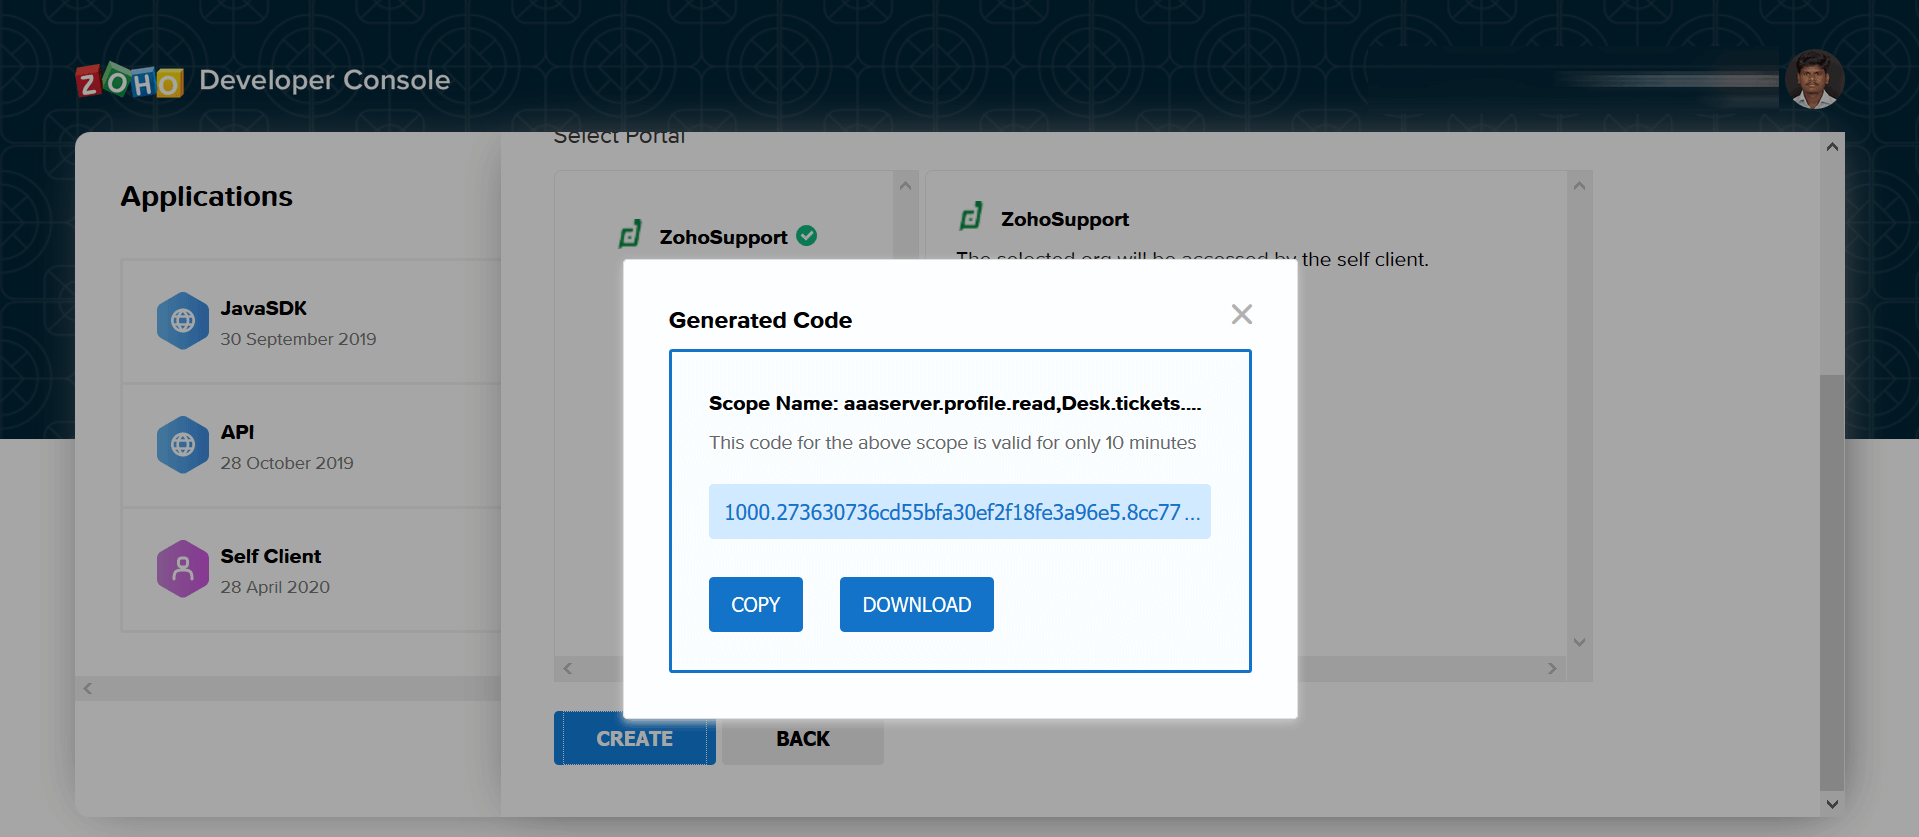
- Then, click the Create button and choose the portal required. Now the portal becomes accessible by the Self Client.
- Click Create. The grant token is displayed.
- Copy or download the grant token for your reference. If you download the token, make sure to store it in a highly secure location.
Generating the Grant Token Using Your Java Client
Alternatively, you can also generate the grant token using your Java client, through the SDK. Here's how you do it.
To generate the grant token in this method, perform the following steps. We used a Java servlet to help you understand the procedure better.
- Use the ZohoOAuthClient.getInstance().getLoginWithZohoUrl() method to form a URL for generating the grant token and redirect the servlet to this URL.
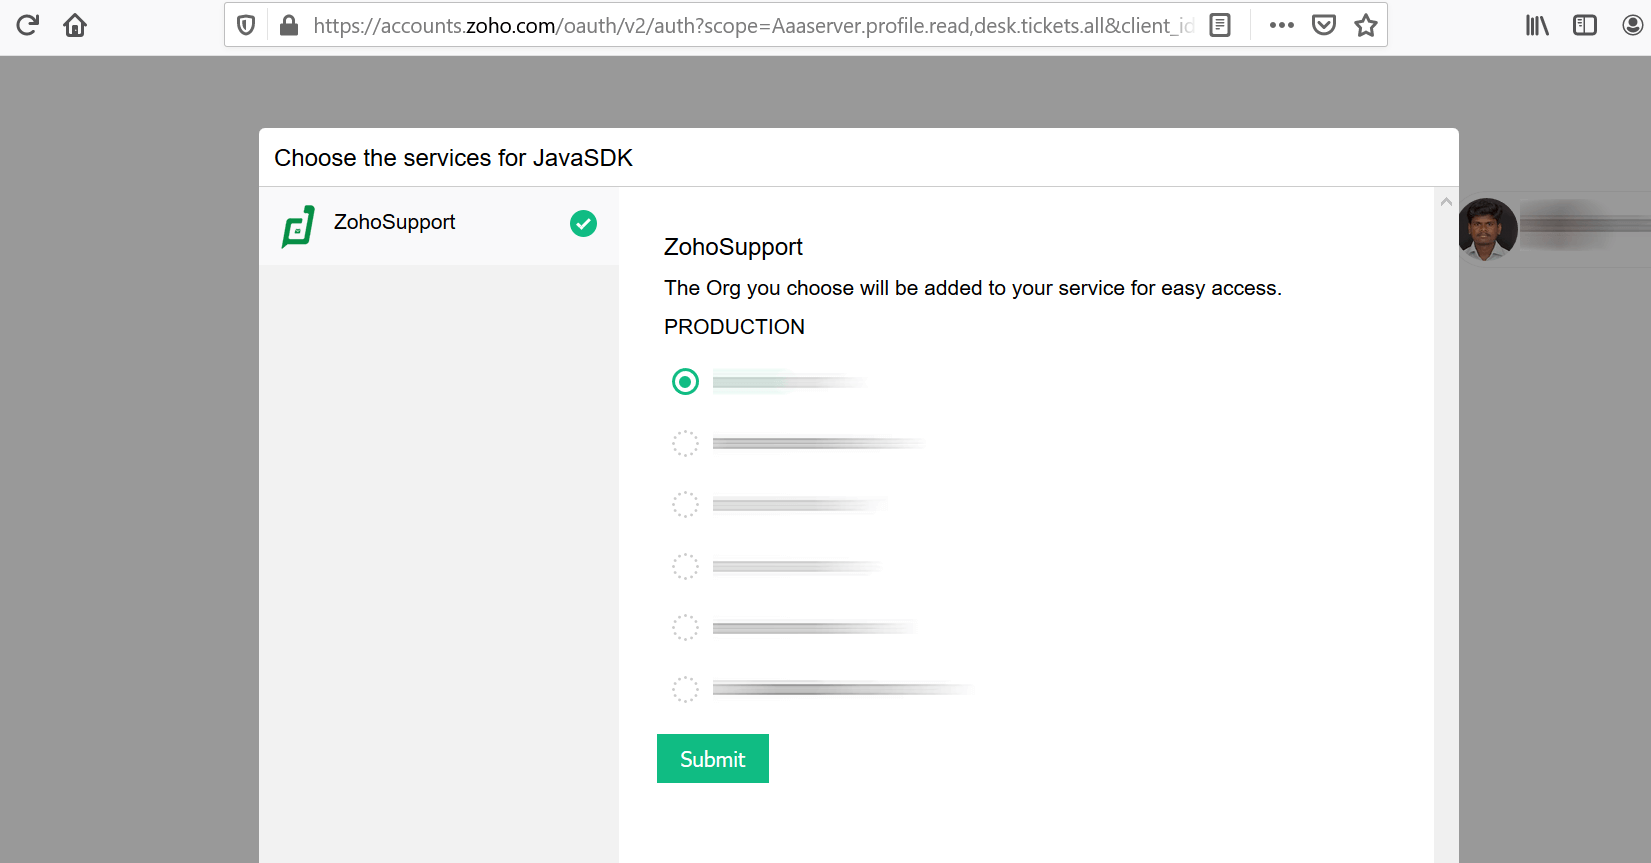
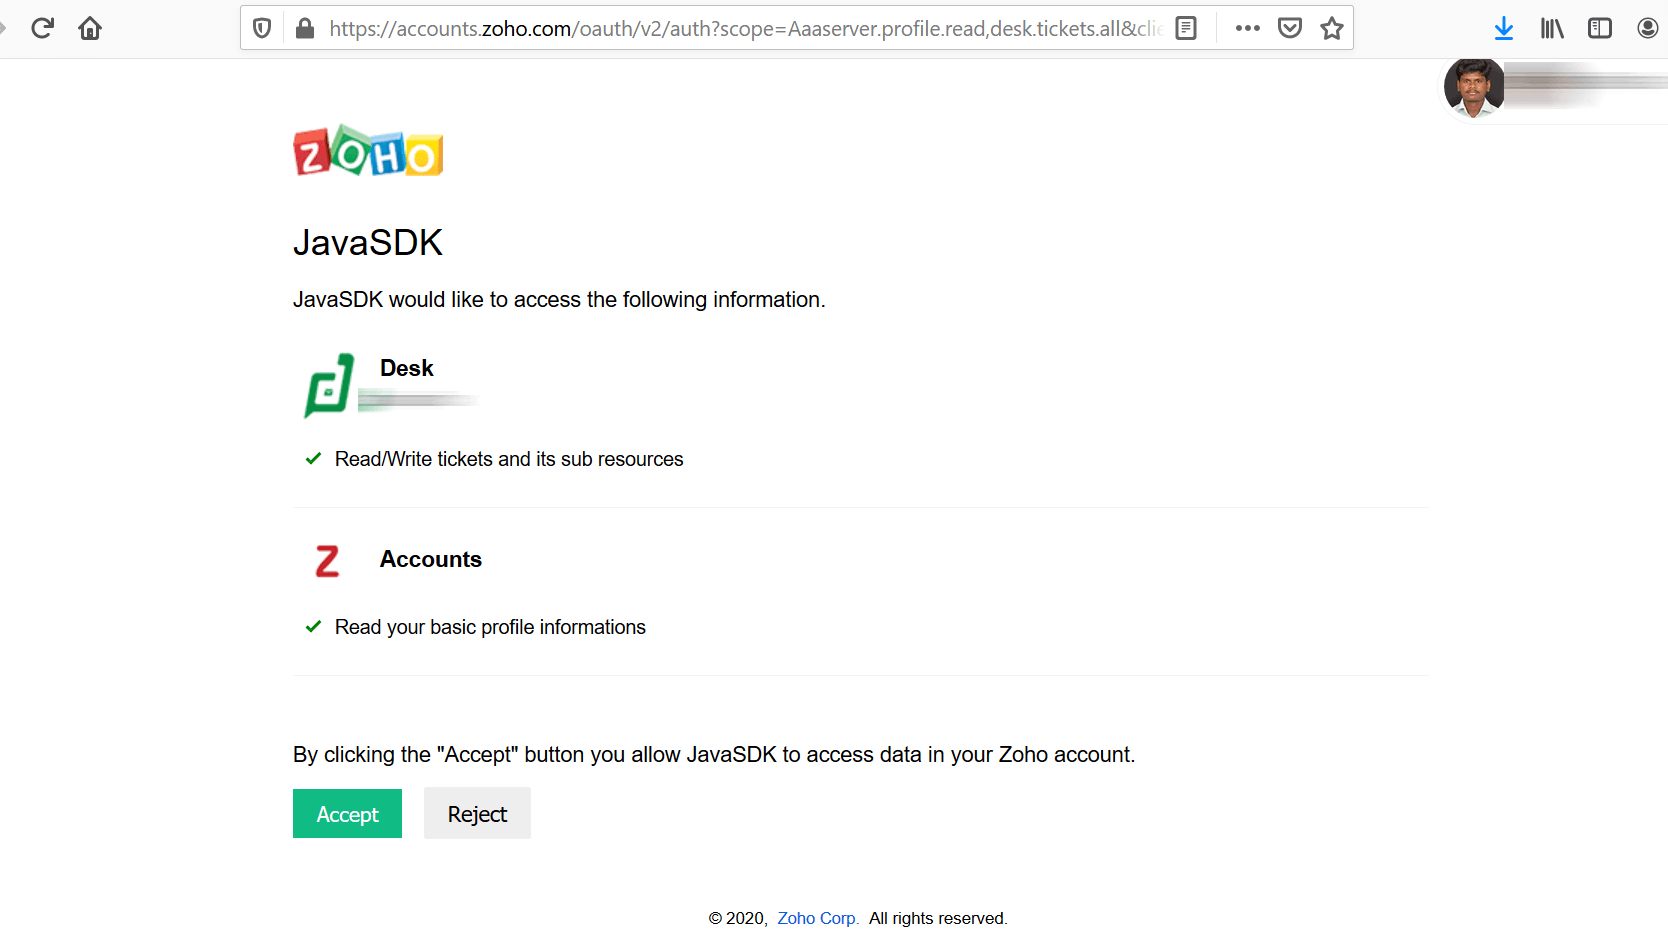
- The different Zoho Desk portals associated with your account are displayed. Select the portal that you want to connect to your client.
- Click the Submit button.
- Then, click the Accept button to provide your client with access to the Zoho Desk portal.
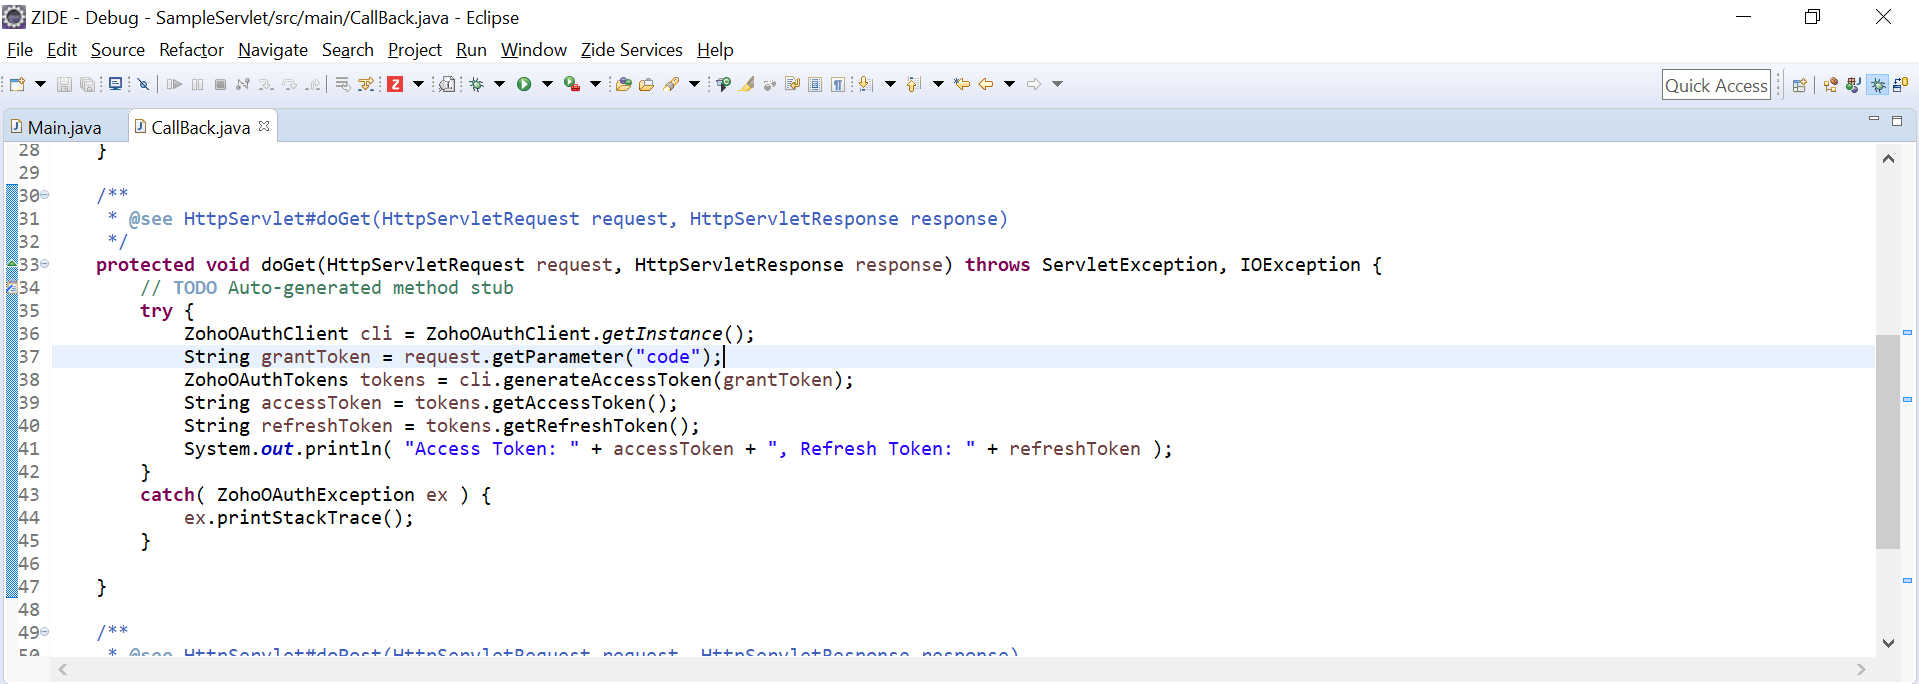
- Now, Zoho Accounts calls your redirect URI and appends the grant token to the request using a query param called code. You can retrieve the grant token from the request and then generate the access and refresh tokens, as shown below.
- The access and refresh tokens are created and stored in a location that varies according to the persistence class you use.
Note:
- The grant token is valid only for the duration you choose while generating it. Therefore, the access and refresh tokens should be generated within that period.
- Both OAuth client registration and grant token generation must be done through the same Zoho account login in the Developer Console.
Generating Access and Refresh Tokens from the Grant Token
To get the access and refresh tokens after obtaining the grant token, include the following code snippet in a Java file and execute it from your main class.
If you generated the grant token through the API Console (Self Client option), the client ID and client secret are separately generated. Use these client ID and client secret details to configure the SDK.
ZohoOAuthClient  client  =  ZohoOAuthClient.getInstance();
String  grantToken  =  "paste the self authorized grant token here";
ZohoOAuthTokens  tokens  =  client.generateAccessToken( grantToken );
String  accessToken  =  tokens.getAccessToken();
String  refreshToken  =  tokens.getRefreshToken();
System.out.println("access token:  "  +  accessToken  +  ",  refresh token:  "  +  refreshToken);
After this code is executed, the access and refresh tokens are created and stored in a location that varies according to the persistence class you use.
Note:
- The above code snippet is valid only once per grant token. Upon its successful execution, the generated access and refresh tokens would have been persisted through your persistence handler class.
- Once the OAuth tokens have been persisted, subsequent API calls would use the persisted access and refresh tokens. The SDK will take care of refreshing the access token using refresh token, as and when required.
Generating Access token from the Refresh token
To generate an access token from the refresh token, use the following code snippet.
ZohoOAuthClient  client  =  ZohoOAuthClient.getInstance();
client.generateAccessTokenFromRefreshToken( refreshToken, userMailId );