Scenarios
Product Implementation Blueprint
Objective: To guide Zylker’s implementation team through their installation and demo process when a new product is installed for the customer. This process also documents the challenges faced by the technician during implementation for collective reference and process refinement.
Pre-requisites
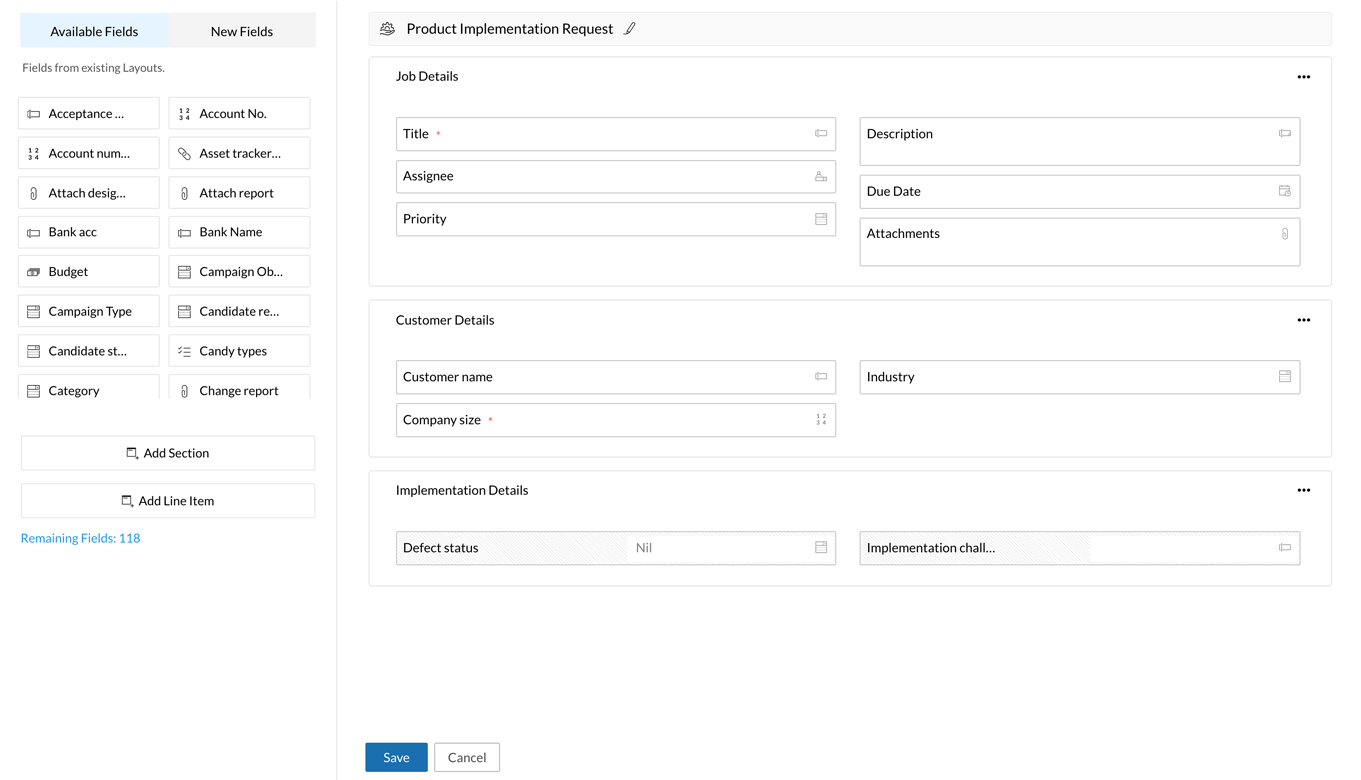
Before designing the blueprint, create a new layout or update an existing layout with the fields listed below.
Navigate to Settings > Customization > Layouts.
Add the following custom fields:
Field Name Field Type Properties Company size Integer Mandatory Defect status Dropdown Options: Nil, Open, Closed Visibility: Off Implementation challenges Multi-Line Visibility: Off
Details
and Transitions
Blueprint
Blueprint
Step 1: Blueprint Details
Now that the layout is set, we can create a blueprint to design the end-to-end process.
- Navigate to Settings > Automation > Blueprint.
- Click Add Blueprint.
- Enter the following details in the pop-up:
- Layout: Select the layout updated in the previous step
- Name: Product Implementation Blueprint
- Description: This blueprint captures the product installation and faulty product replacement workflow
- Criteria: Company Size < 100
- Click Save.
As the criteria is set for company size < 100, only jobs meeting this condition will be mapped to this blueprint. This criteria can be customized or removed according to the requirement.
Details
and Transitions
Blueprint
Blueprint
Step 2: Configure Stages and Transitions
Let us now view the stages and transitions to be configured for the process.
Stages:
Request product replacement
| Stage Deadline | Send early reminder | Send day-of reminder | Send escalation alert |
| 15 days | Set time: 3 days Notify to: Assignee | Notify to: Assignee, assignee’s line manager | Set time: 1 days Notify to: Team manager |

Transitions:
Check dependencies
| Before | During | After |
Who can perform this transition? Assignee Which jobs can pass through this transition? All Jobs | None | None |
Start execution
| Before | During | After |
Who can perform this transition? Assignee Which jobs can pass through this transition? All Jobs | Widgets: Checklist | None |
Report issue
| Before | During | After |
Who can perform this transition? Assignee Which jobs can pass through this transition? All Jobs | Add New Fields: Issue description | Update Fields: Defect status = Open |
Report implementation
| Before | During | After |
Who can perform this transition? Assignee Which jobs can pass through this transition? All Jobs | None | Update Fields: Defect status = Replaced |
Execution success
| Before | During | After |
Who can perform this transition? Assignee Which jobs can pass through this transition? All Jobs | None | Send Email: Send execution report to the team involved |
Provide product demo
| Before | During | After |
Who can perform this transition? Assignee Which jobs can pass through this transition? All Jobs | None | None |
![]()
Send feedback form to customer
| Before | During | After |
Who can perform this transition? Assignee Which jobs can pass through this transition? All Jobs | None | Send email: Send implementation feedback form to customer |
Report challenges faced during implementation
| Before | During | After |
Who can perform this transition? Assignee Which jobs can pass through this transition? All Jobs | Add Fields: Implementation challenges | None |
Transfer details to maintenance team
| Before | During | After |
Who can perform this transition? Assignee Which jobs can pass through this transition? All Jobs | None | Associate custom functions: Custom function to create new job in Maintenance team's blueprint to follow up with monthly maintenance |
Abort implementation
(Common transition for the stages: Start implementation, Dependencies resolved, Execution underway, Setup complete, and Request product replacement)
| Before | During | After |
Who can perform this transition? Assignee Which jobs can pass through this transition? All Jobs | Add New Field: Reasons for aborting implementation | Send email: Send an email about the aborted implementation to the customer and team manager |
Details
and Transitions
Blueprint
Blueprint
Step 3: Publish Blueprint
Once the stages and transitions are configured, the blueprint is ready to publish.

Details
and Transitions
Blueprint
Blueprint
Step 4: Execute Blueprint
Once the blueprint is configured and published, we can execute it by creating a new job.
- Navigate to Jobs.
- Click Add Job.
- Select the layout used in Step 1.
- Fill the form and click Save.
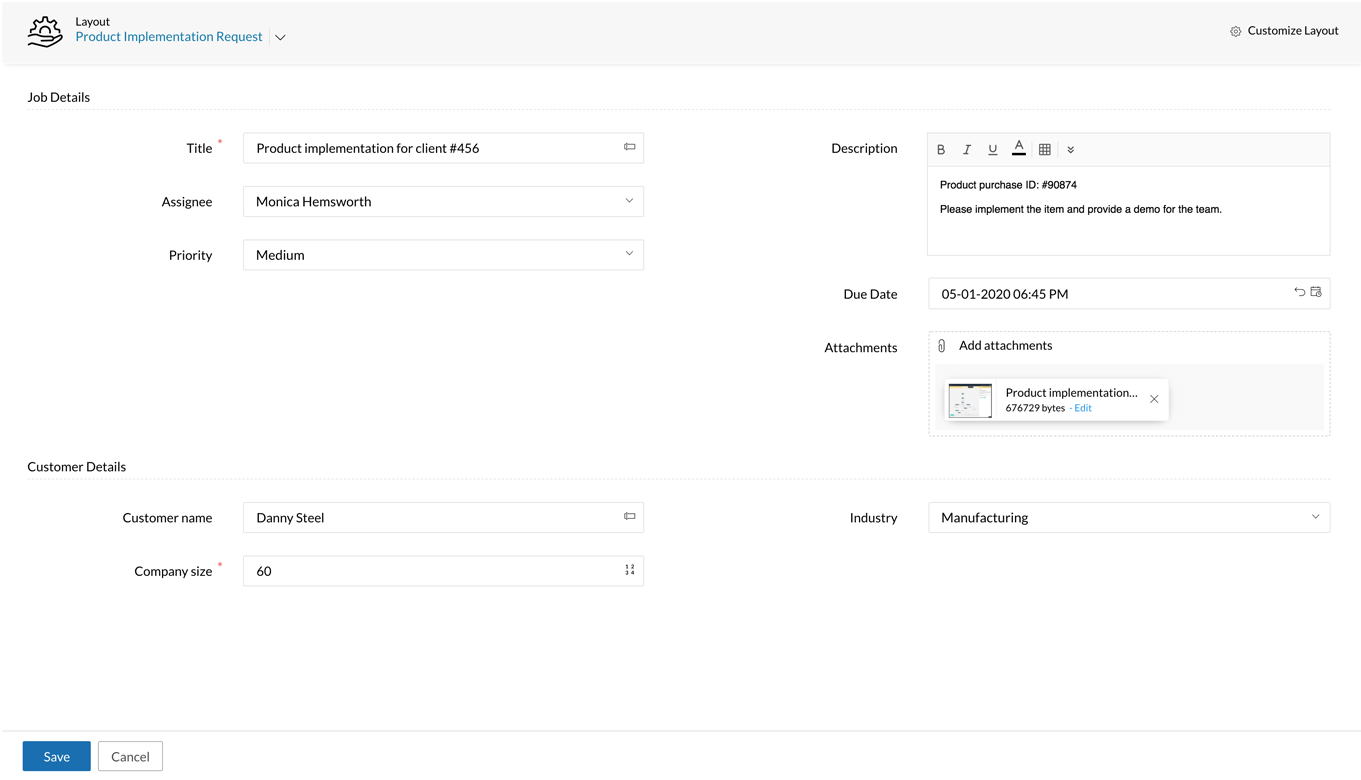
Since the blueprint is created with the criteria Company Size < 100, only the jobs meeting this condition will be routed through the Product Implementation Blueprint.
Once the job is created, it lands in the first stage: Start implementation. The user will be able to perform two transitions from this stage: Check dependencies and Abort implementation.
Abort implementation is a common transition and can be performed from any of the following stages: Start implementation, Dependencies resolved, Execution underway, Setup complete, and Request product replacement.
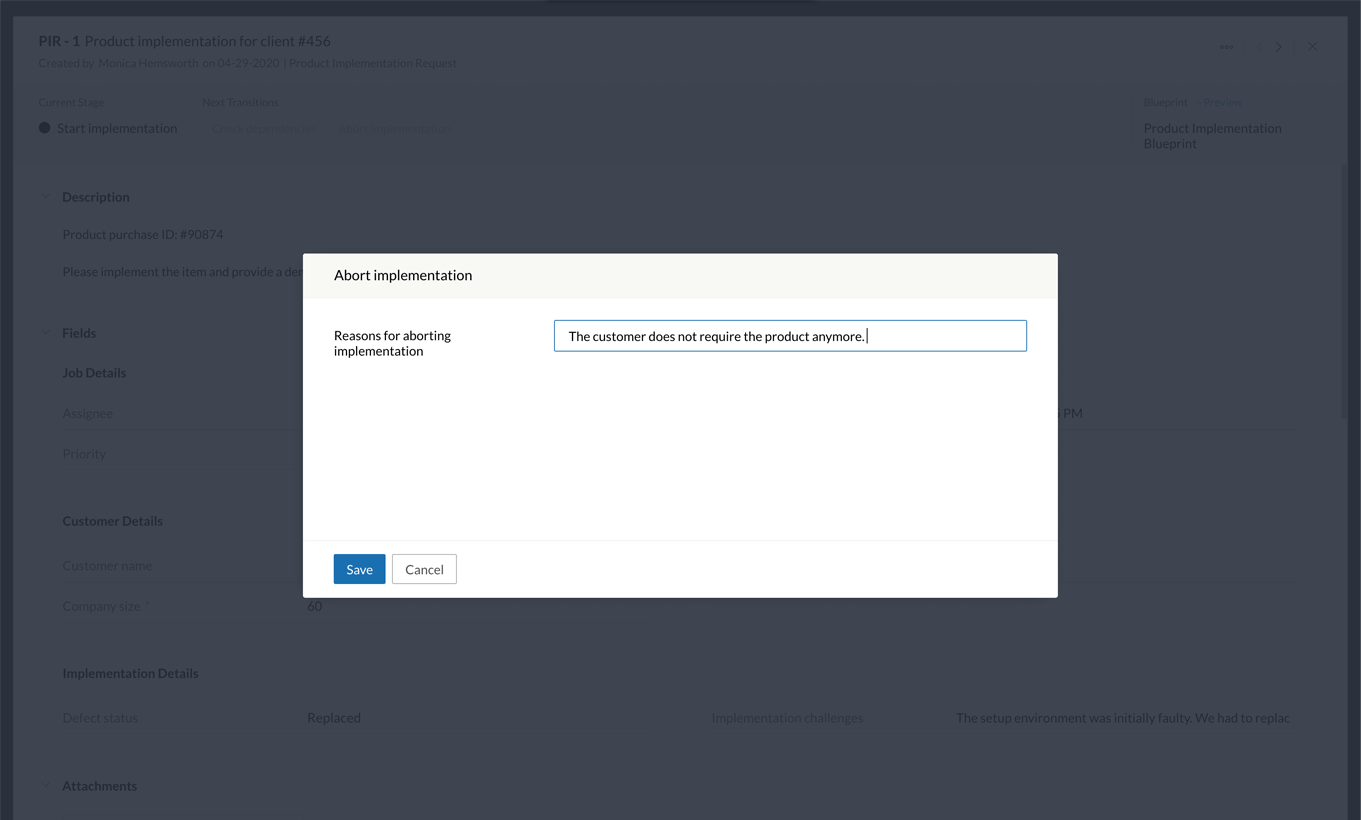
The job can only be aborted by the technician or the team manager. While performing this transition, the user is prompted to fill the Reasons for aborting the implementation field. After the job is aborted, an email is sent to the customer and team manager.

If the job is not aborted, the technician can continue installing the product.
First, the technician checks external dependencies by clicking Check dependencies. If there are no dependencies involved or after the available dependencies are resolved, the technician clicks Start execution. A checklist pop-up will appear. The technician can check the items that are completed and then click Save.

When the execution is underway, the technician can either declare Execution success or Report an issue.
While reporting an issue, they will be prompted to fill the Issue description field. After the transition, the Defect status field is updated to Open.
Once the issue is filed, the job moves to Request Product Replacement stage.
SLA:
A job can only stay in this stage for 15 days.
On the 3rd day, an early reminder email is sent to the assignee.
On the 15th day, a reminder is sent to the assignee and their line manager.
On the 16th day, an escalation email is sent to the team manager.
Once the product is replaced, the technician goes back to implementing the product again by clicking Restart implementation. Here, the Defect status field is updated to Replaced.
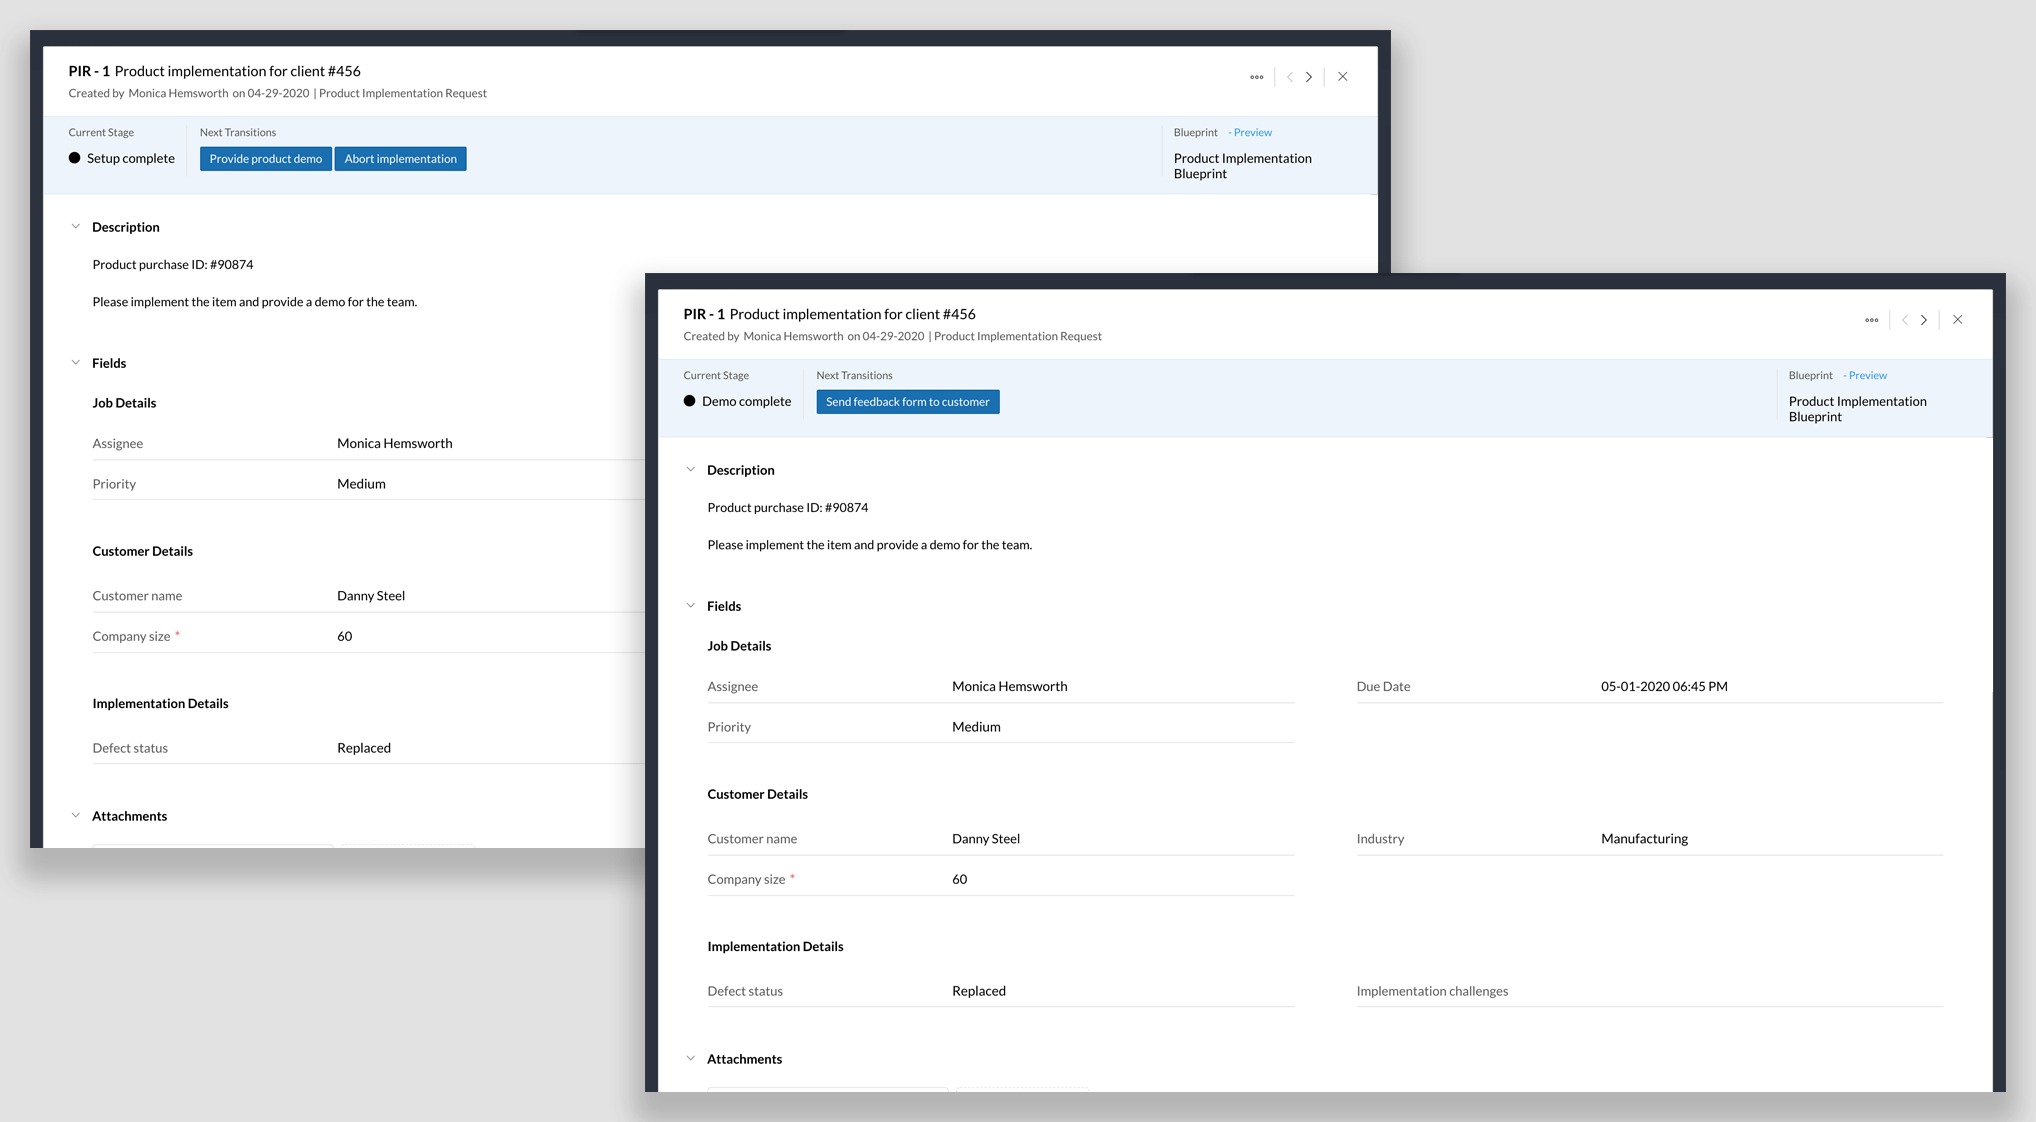
If the execution succeeds, the technician proceeds with the product demo by clicking Provide product demo. Once the demo is complete, the technician clicks Send feedback form to customer which triggers a feedback email to the customer.
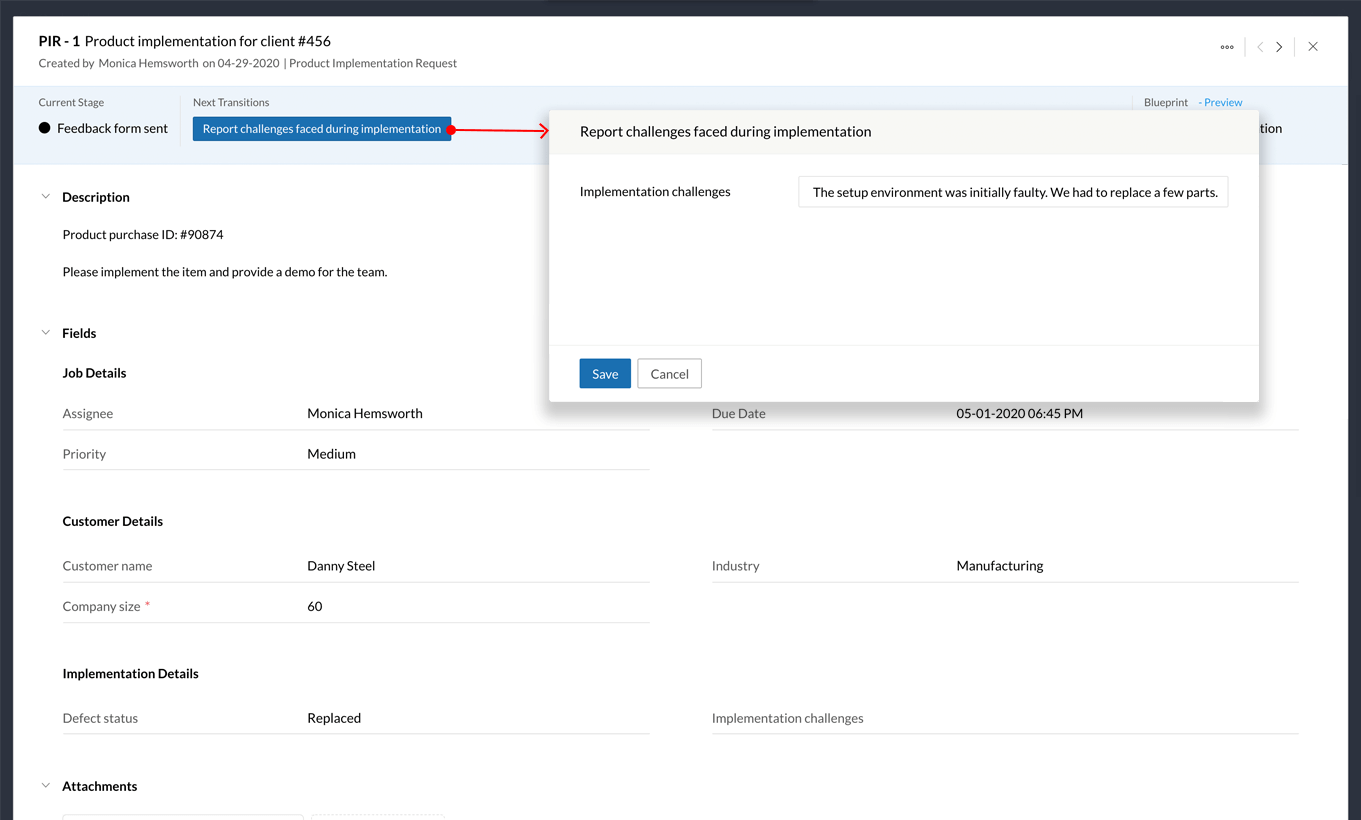
Once the implementation steps are complete, the technician can record any implementation challenges by clicking Report challenges faced during implementation. This helps the team fine tune the process and resolve issues before future installations.
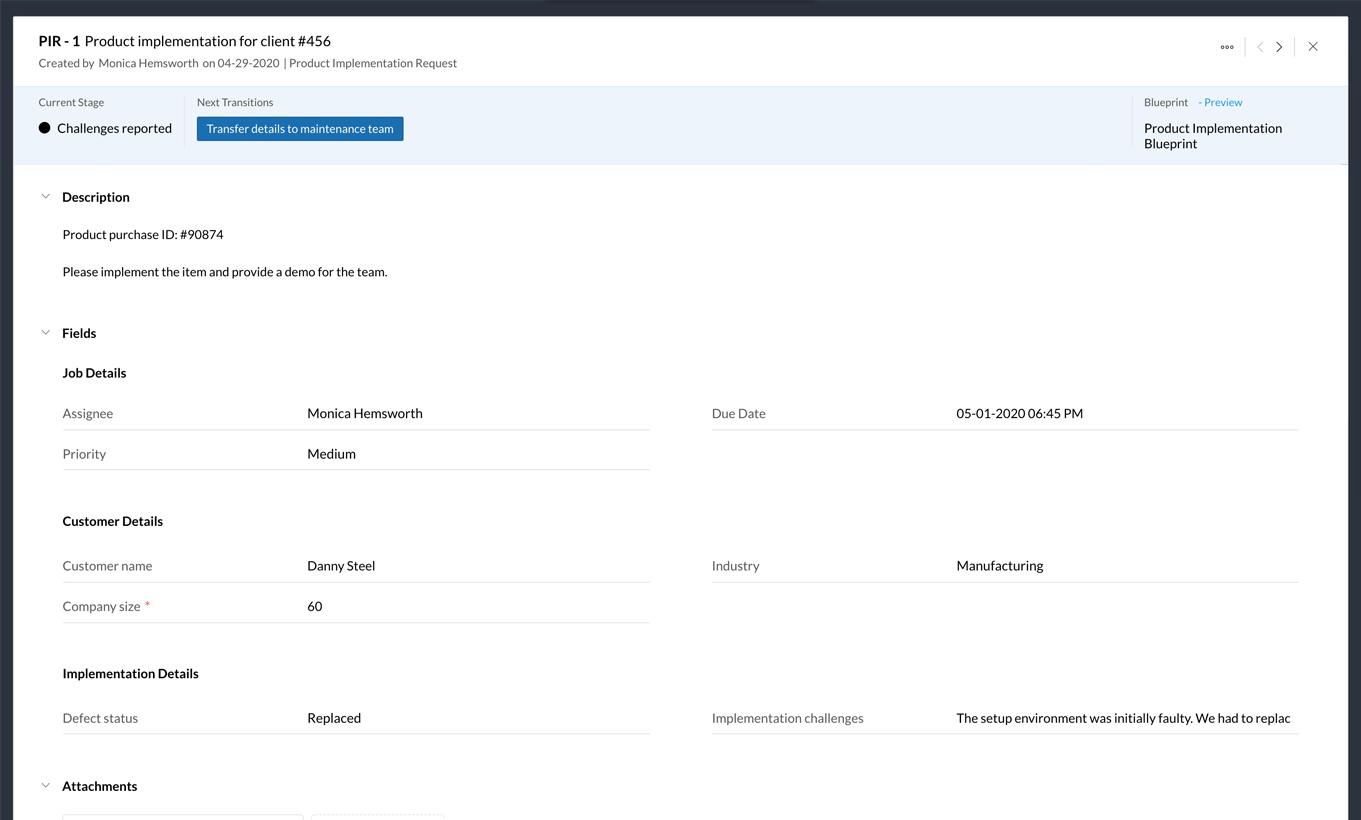
After the implementation team's job is done, the maintenance team can follow up for periodic maintenance and support. To transfer responsibility for the job, the technician performs the Transfer details to maintenance team transition. After this transition is performed, a custom function is triggered to create a new job under the maintenance team's blueprint briefing the customer details.
Finally, the job moves to the Implementation complete stage.
We have successfully configured and executed the Product implementation Blueprint. Let's explore the next scenario.