Scenarios
Order manufacturing Blueprint
Objective: To guide Zylker’s design and manufacturing team through their process when a new order is placed. The process can track multiple phases of review, prototype testing, packaging, and delivery.
Pre-requisites
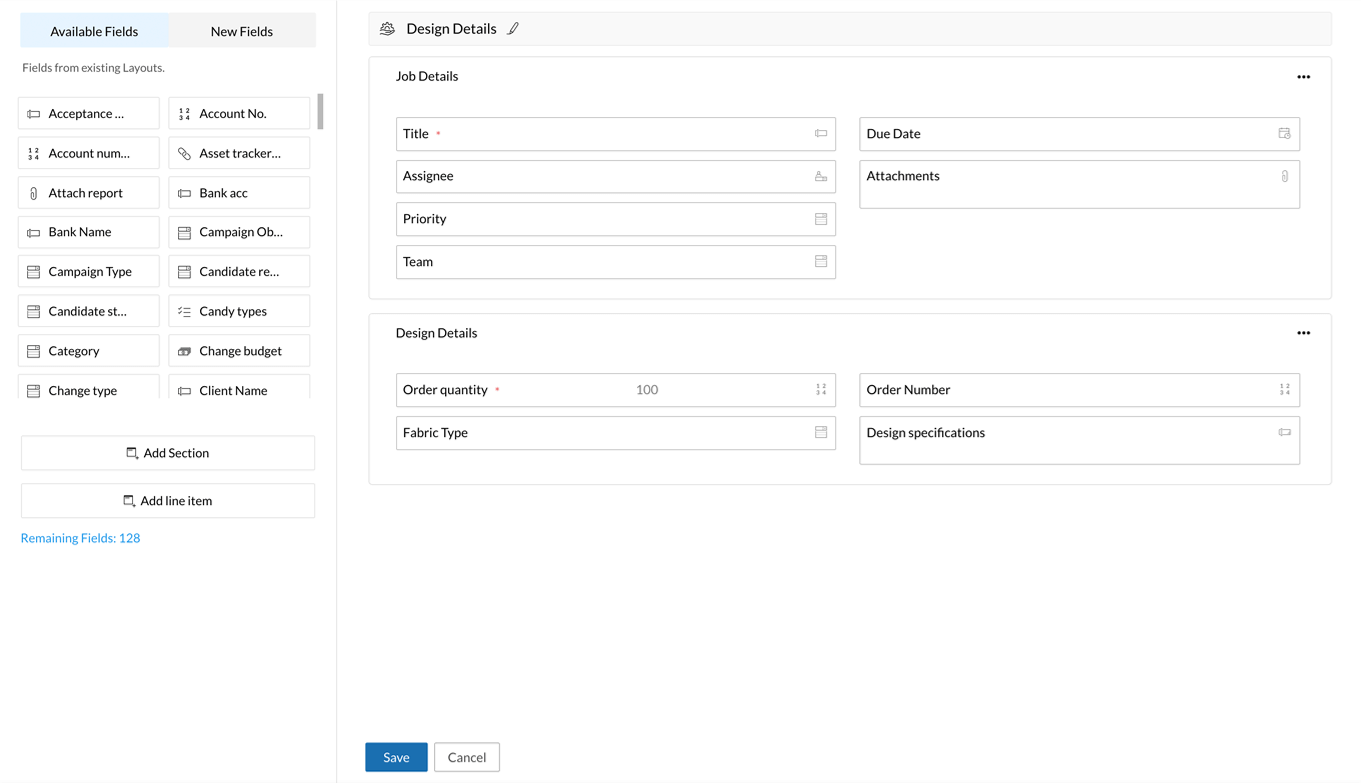
Before designing the blueprint, create a new layout or update an existing layout with the fields listed below.
Navigate to Settings > Customization > Layouts.
Add the following custom fields:
Field Name Field Type Properties Order quantity Integer Mandatory Fabric Type Dropdown Mandatory Options: Rayon, Linen, Cotton, Polyester Design specifications Multi-Line
Details
and Transitions
Blueprint
Blueprint
Step 1: Blueprint Details
Now that the layout is set, we can create a blueprint to design the end-to-end process.
- Navigate to Settings > Automation > Blueprint.
- Click Add Blueprint.
- Enter the following details in the pop-up:
- Layout: Select the layout updated in the previous step
- Name: Order Manufacturing Blueprint
- Description: This blueprint automates the design and manufacturing flow in the organization
- Criteria: All Jobs
- Click Save.
Details
and Transitions
Blueprint
Blueprint
Step 2: Configure Stages and Transitions
Let us now view the Stages and Transitions to be configured for the process.
Prerequisite:
Navigate to Settings and select Users. Create two teams: Design and Engineering and associate users with the teams.
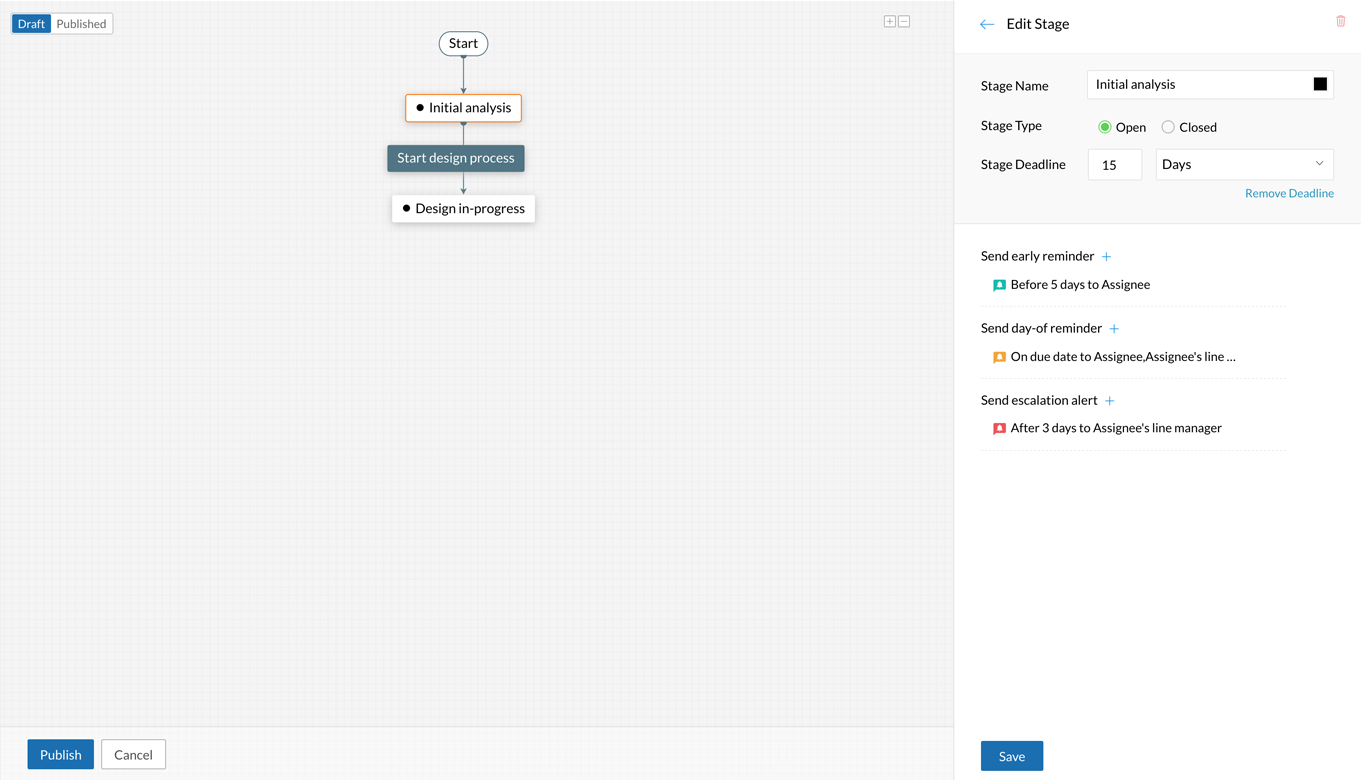
Stages:
Initial analysis
| Stage Deadline | Send early reminder | Send day-of reminder | Send escalation alert |
| 15 days | Set time: 5 days Notify to: Assignee | Notify to: Assignee, Assignee’s line manager | Set time: 3 days Notify to: Assignee's line manager |
Reviewing
| Stage Deadline | Send early reminder | Send day-of reminder | Send escalation alert |
| 5 days | None | Notify to: Design head | None |
Transitions:
Start design process
| Before | During | After |
Who can perform this transition? Assignee Which jobs can pass through this transition? All Jobs | None | None |
Submit for review
| Before | During | After |
Who can perform this transition? Assignee Which jobs can pass through this transition? All Jobs | Add new field: Attach design for review | None |
![]()
Approve design
| Before | During | After |
Who can perform this transition? Role: Head of Design Which jobs can pass through this transition? All Jobs | Comments | None |
Reject design
| Before | During | After |
Who can perform this transition? Role: Head of Design Which jobs can pass through this transition? All Jobs | Comments | Send email: Send rejection email to Assignee |
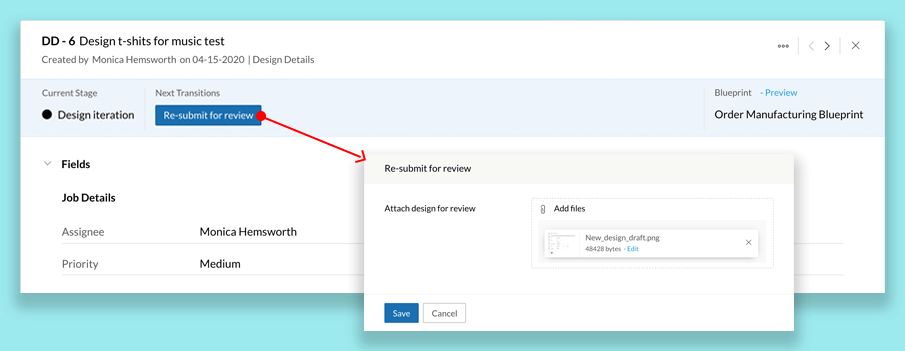
Re-submit for review
| Before | During | After |
Who can perform this transition? Assignee Which jobs can pass through this transition? All Jobs | Add new field: Attach design for review | None |
Create prototype to analyze design
| Before | During | After |
Who can perform this transition? Assignee Which jobs can pass through this transition? All Jobs | None | None |
Prototype successful
| Before | During | After |
Who can perform this transition? Assignee Which jobs can pass through this transition? All Jobs | None | Send email: Forward design and prototype to manufacturing team Update fields: Team: Engineering |
![]()
Manufacturing complete
| Before | During | After |
Who can perform this transition? Assignee Which jobs can pass through this transition? All Jobs | Add field: Attachments | Associate custom functions: Integrate_with_logistics_application |
Product delivered
| Before | During | After |
Who can perform this transition? Assignee Which jobs can pass through this transition? All Jobs | None | Configure webhooks: Notify customers |
Details
and Transitions
Blueprint
Blueprint
Step 3: Publish Blueprint
Once the stages and transitions are configured, the blueprint is ready to publish.
Details
and Transitions
Blueprint
Blueprint
Step 4: Execute blueprint
Once the blueprint is configured and published, we can execute it by creating a new job.
- Navigate to Jobs.
- Click Add Job.
- Select the layout used in Step 1.
- Fill the form and click Save.
Note:
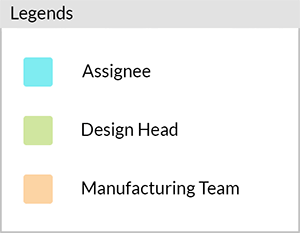
- Since the job moves through different teams, we've color coded the images to differentiate the actions of each user.
Initially, the job will land in the first stage of the blueprint and the transition will be displayed as a blue button. Here Initial analysis is the first stage.
SLA:
A job can only stay in this stage for 15 days.
On the 5th day, an early reminder email is sent to the assignee.
On the 15th day, a reminder is sent to the assignee and their line manager.
On the 18th day, an escalation email is sent to the assignee’s line manager.
To start the process, click the Start design process transition button.
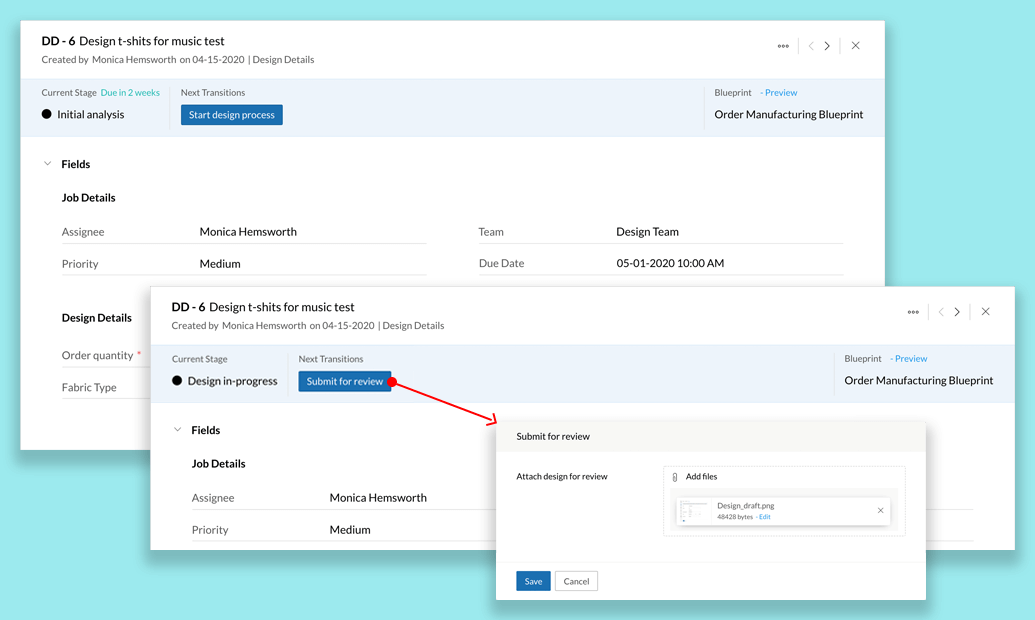
Once the design is complete, click the Submit for review button and attach the design. On submission, the job will move to the Head of Design for approval and the stage will be changed to Reviewing.
SLA:
A job can only stay in this stage for 5 days.
On the 5th day, a reminder email is sent to the Head of Design.
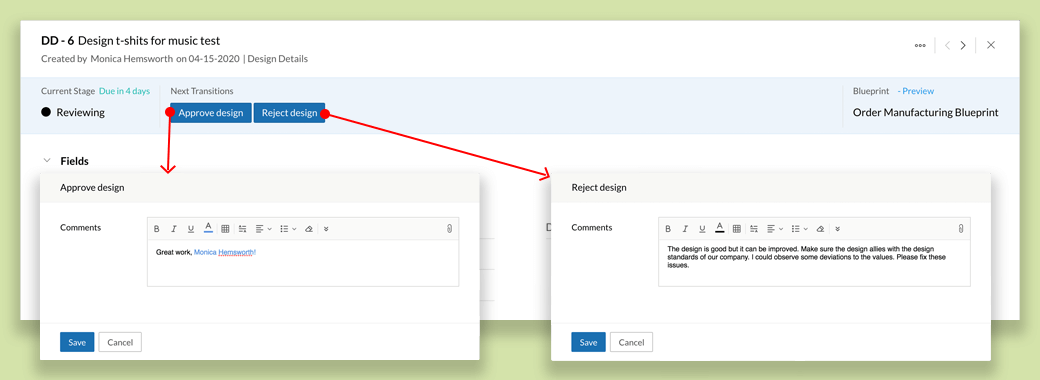
The design can be either approved or rejected. If it is approved, the job moves to the Design Approved stage. If the design is rejected, the job moves back to the assignee and a rejection email is triggered after the transition. The assignee can resubmit a new design by clicking the Re-submit for review button. Thus, the job loops between the assignee and the Head of Design until the design is approved.
After the design is approved, the job is taken on by the assignee, who can create a prototype and analyze its success or failure.

Once a successful prototype is created, the job moves to the manufacturing team and an email is triggered after the transition forwarding the design and prototype details to the manufacturing team. The Team field is updated to Engineering Team. Any user from the Engineering team can pick up the job.
If the prototype does not work, the job goes for another iteration of design.
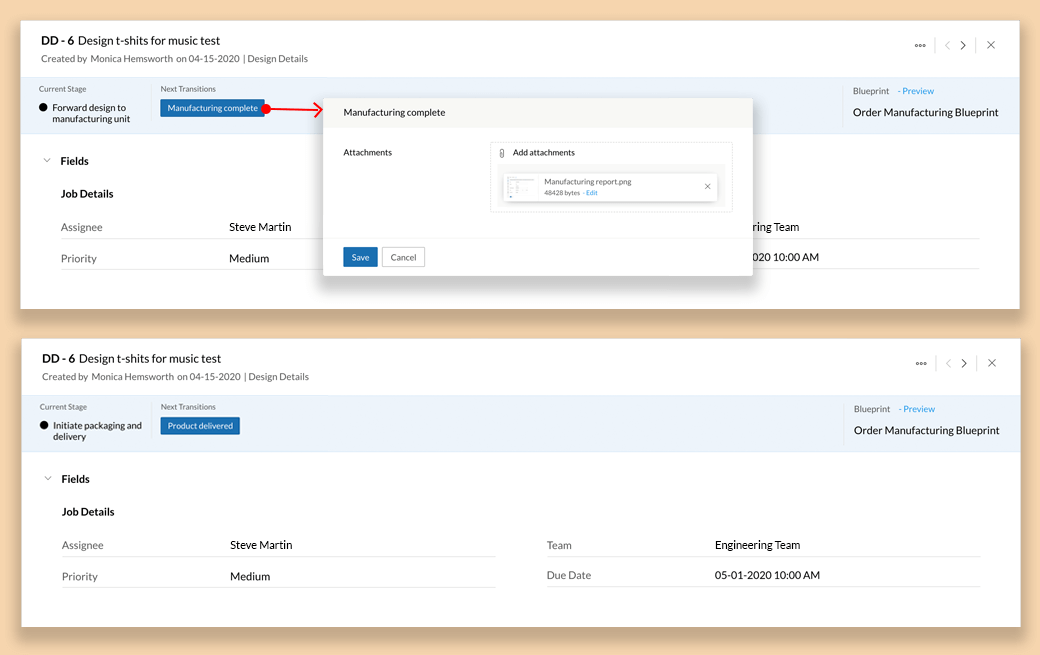
The manufacturing team will be notified when the job reaches their dock which indicates that they can start manufacturing the product. Once manufacturing is complete, a custom function is triggered to update the details in the logistics application used by the company.
Finally, after the product is delivered to the customer, a webhook is triggered to send an SMS to the customers to acknowledge the order delivery.
We have successfully configured and executed the Order Manufacturing Blueprint. Let's move on to the next scenario.