Zoho Desk - Telephony Integration
This integration between Zoho Voice and Zoho Desk empowers support teams to streamline communication and improve productivity. With this setup, agents can access click-to-call functionality, caller look-up, and screen pop-ups directly within Zoho Desk. All calls are logged automatically, and you can configure the settings to auto-generate tickets for selected call types. Additionally, agents can create new tickets and contacts during live calls.
This guide walks you through the steps to configure Zoho Voice in both Zoho Desk and Zoho Voice, import users, assign roles and numbers, and make the most of the integration's core features.
Note
- Only super admin and admins have permission to configure this integration.
- Integration with Voice is allowed only with Desk's Professional and Enterprise editions.
Steps to configure in Zoho Desk
Click the Setup icon in the top bar.
Click Phone under the Channels menu.
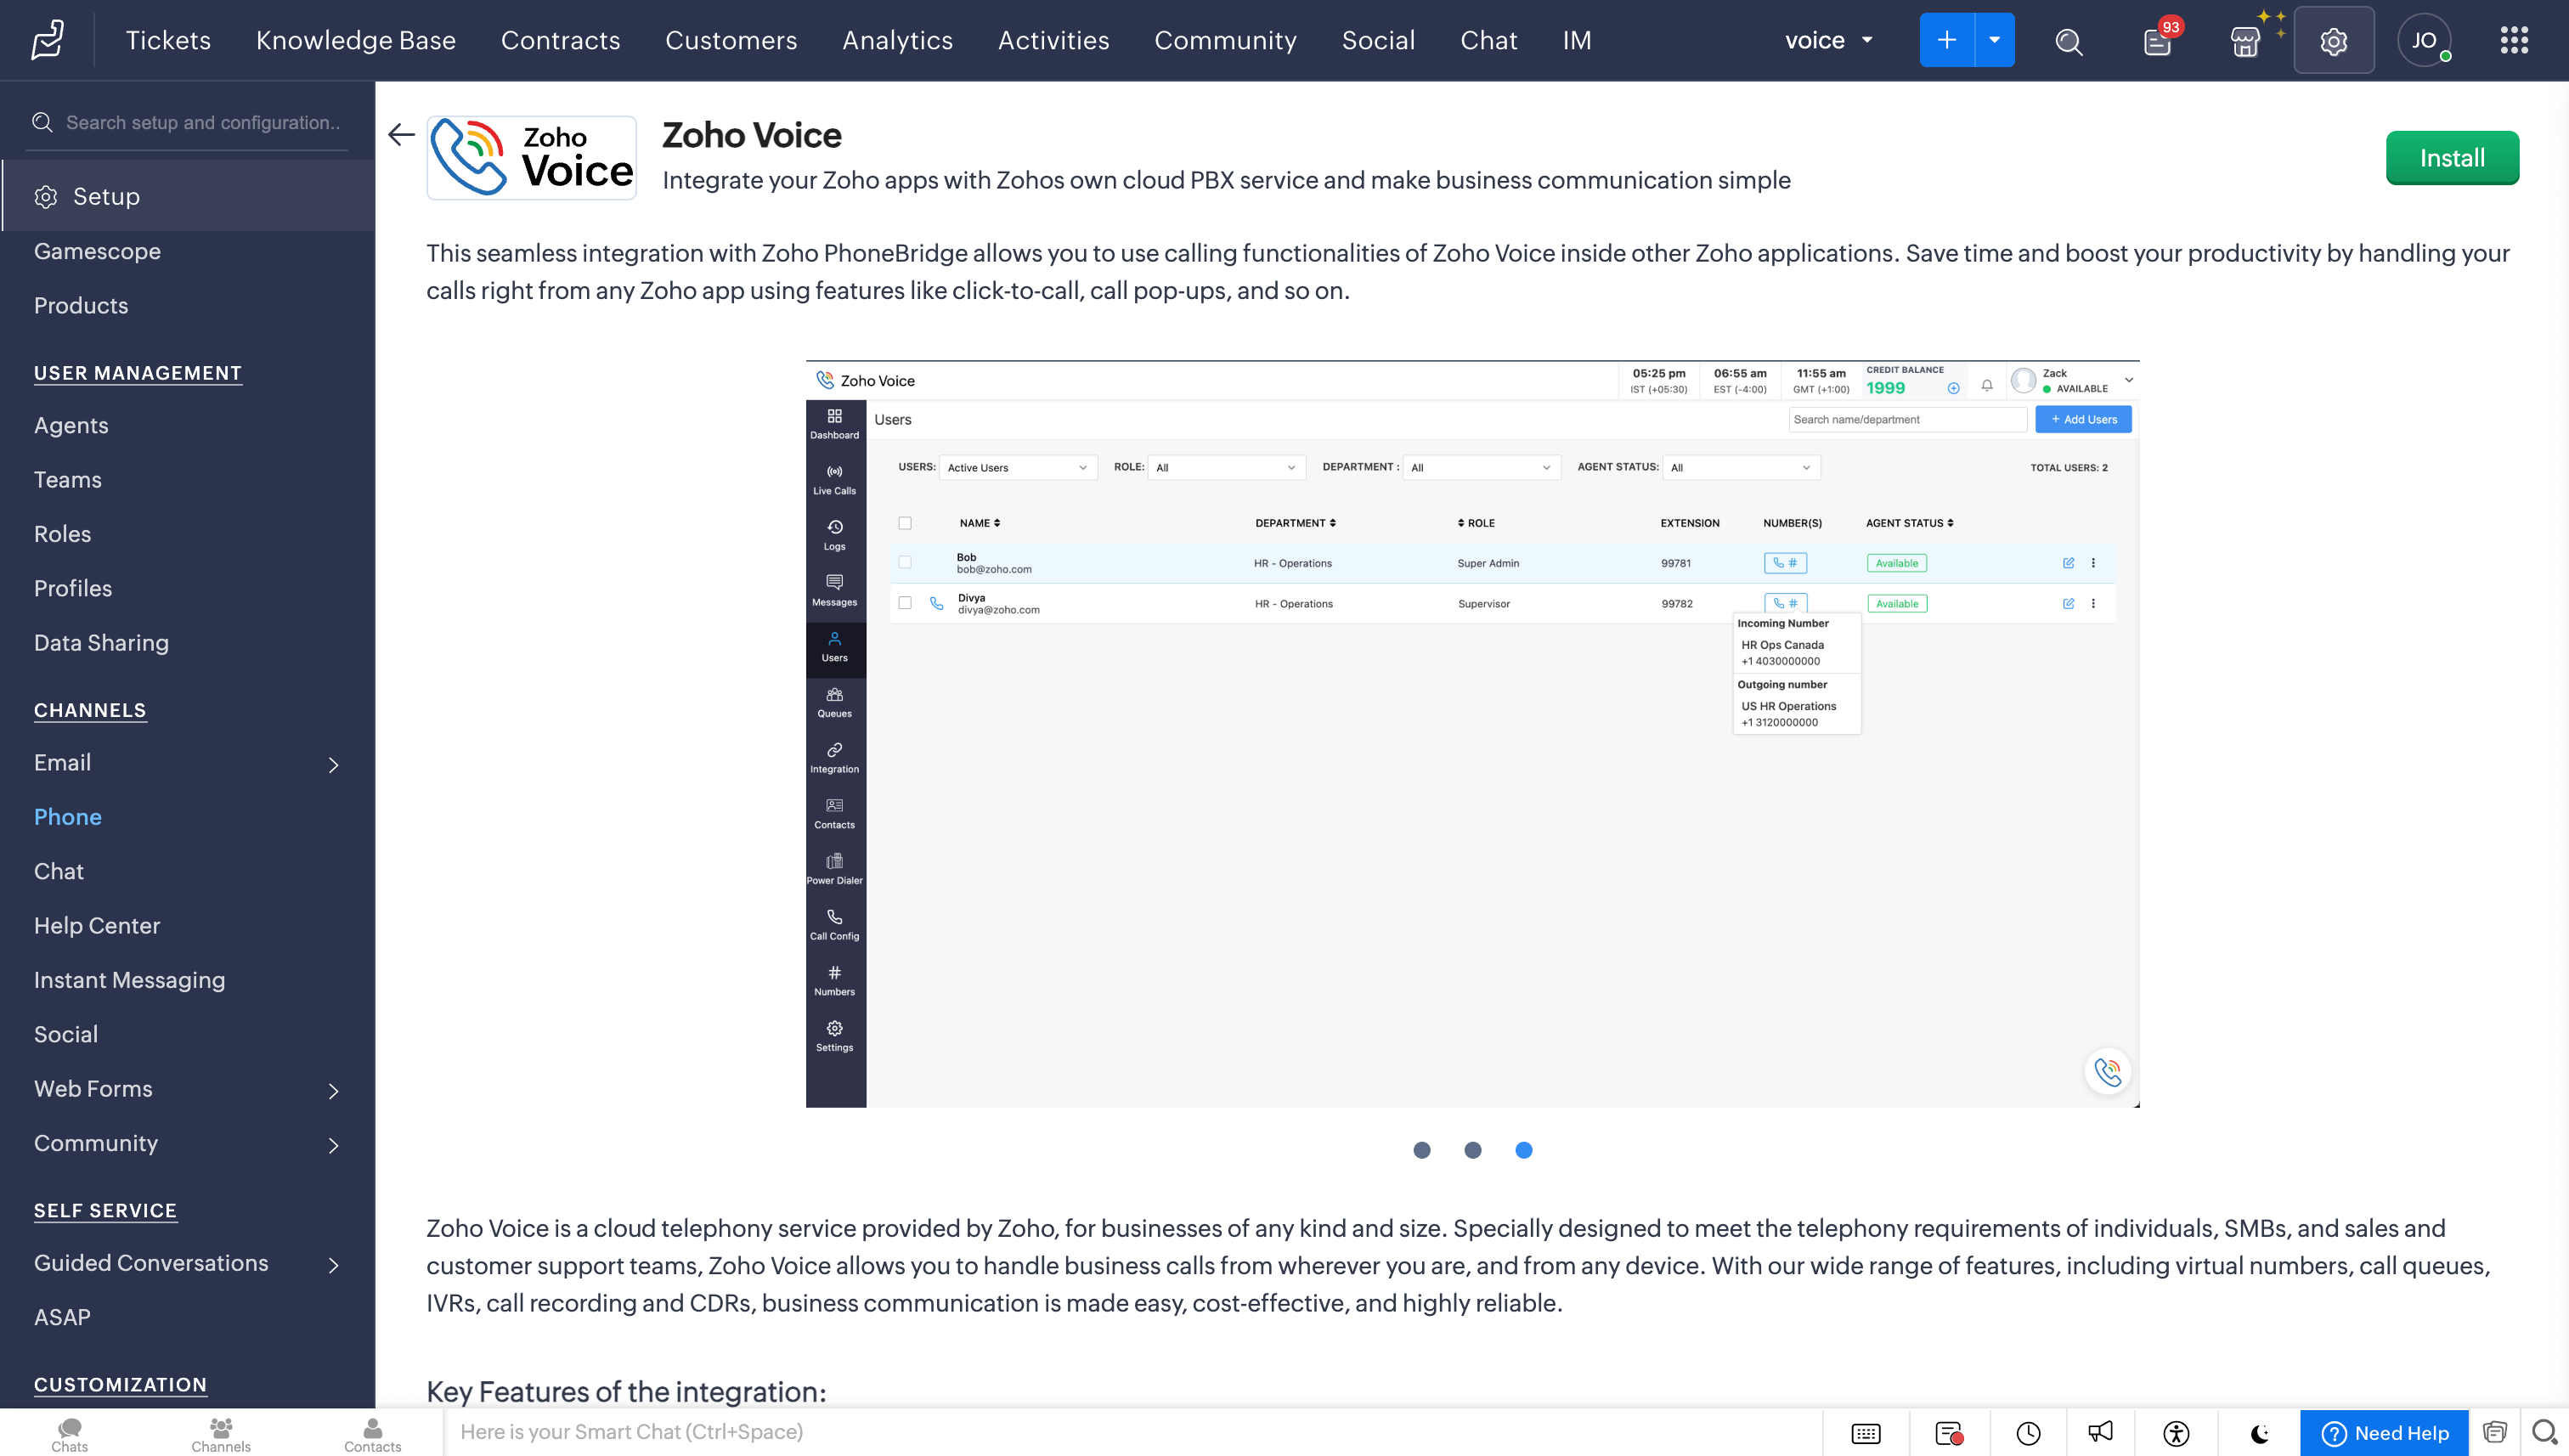
In the Telephony Marketplace, select Zoho Voice from the listed apps.
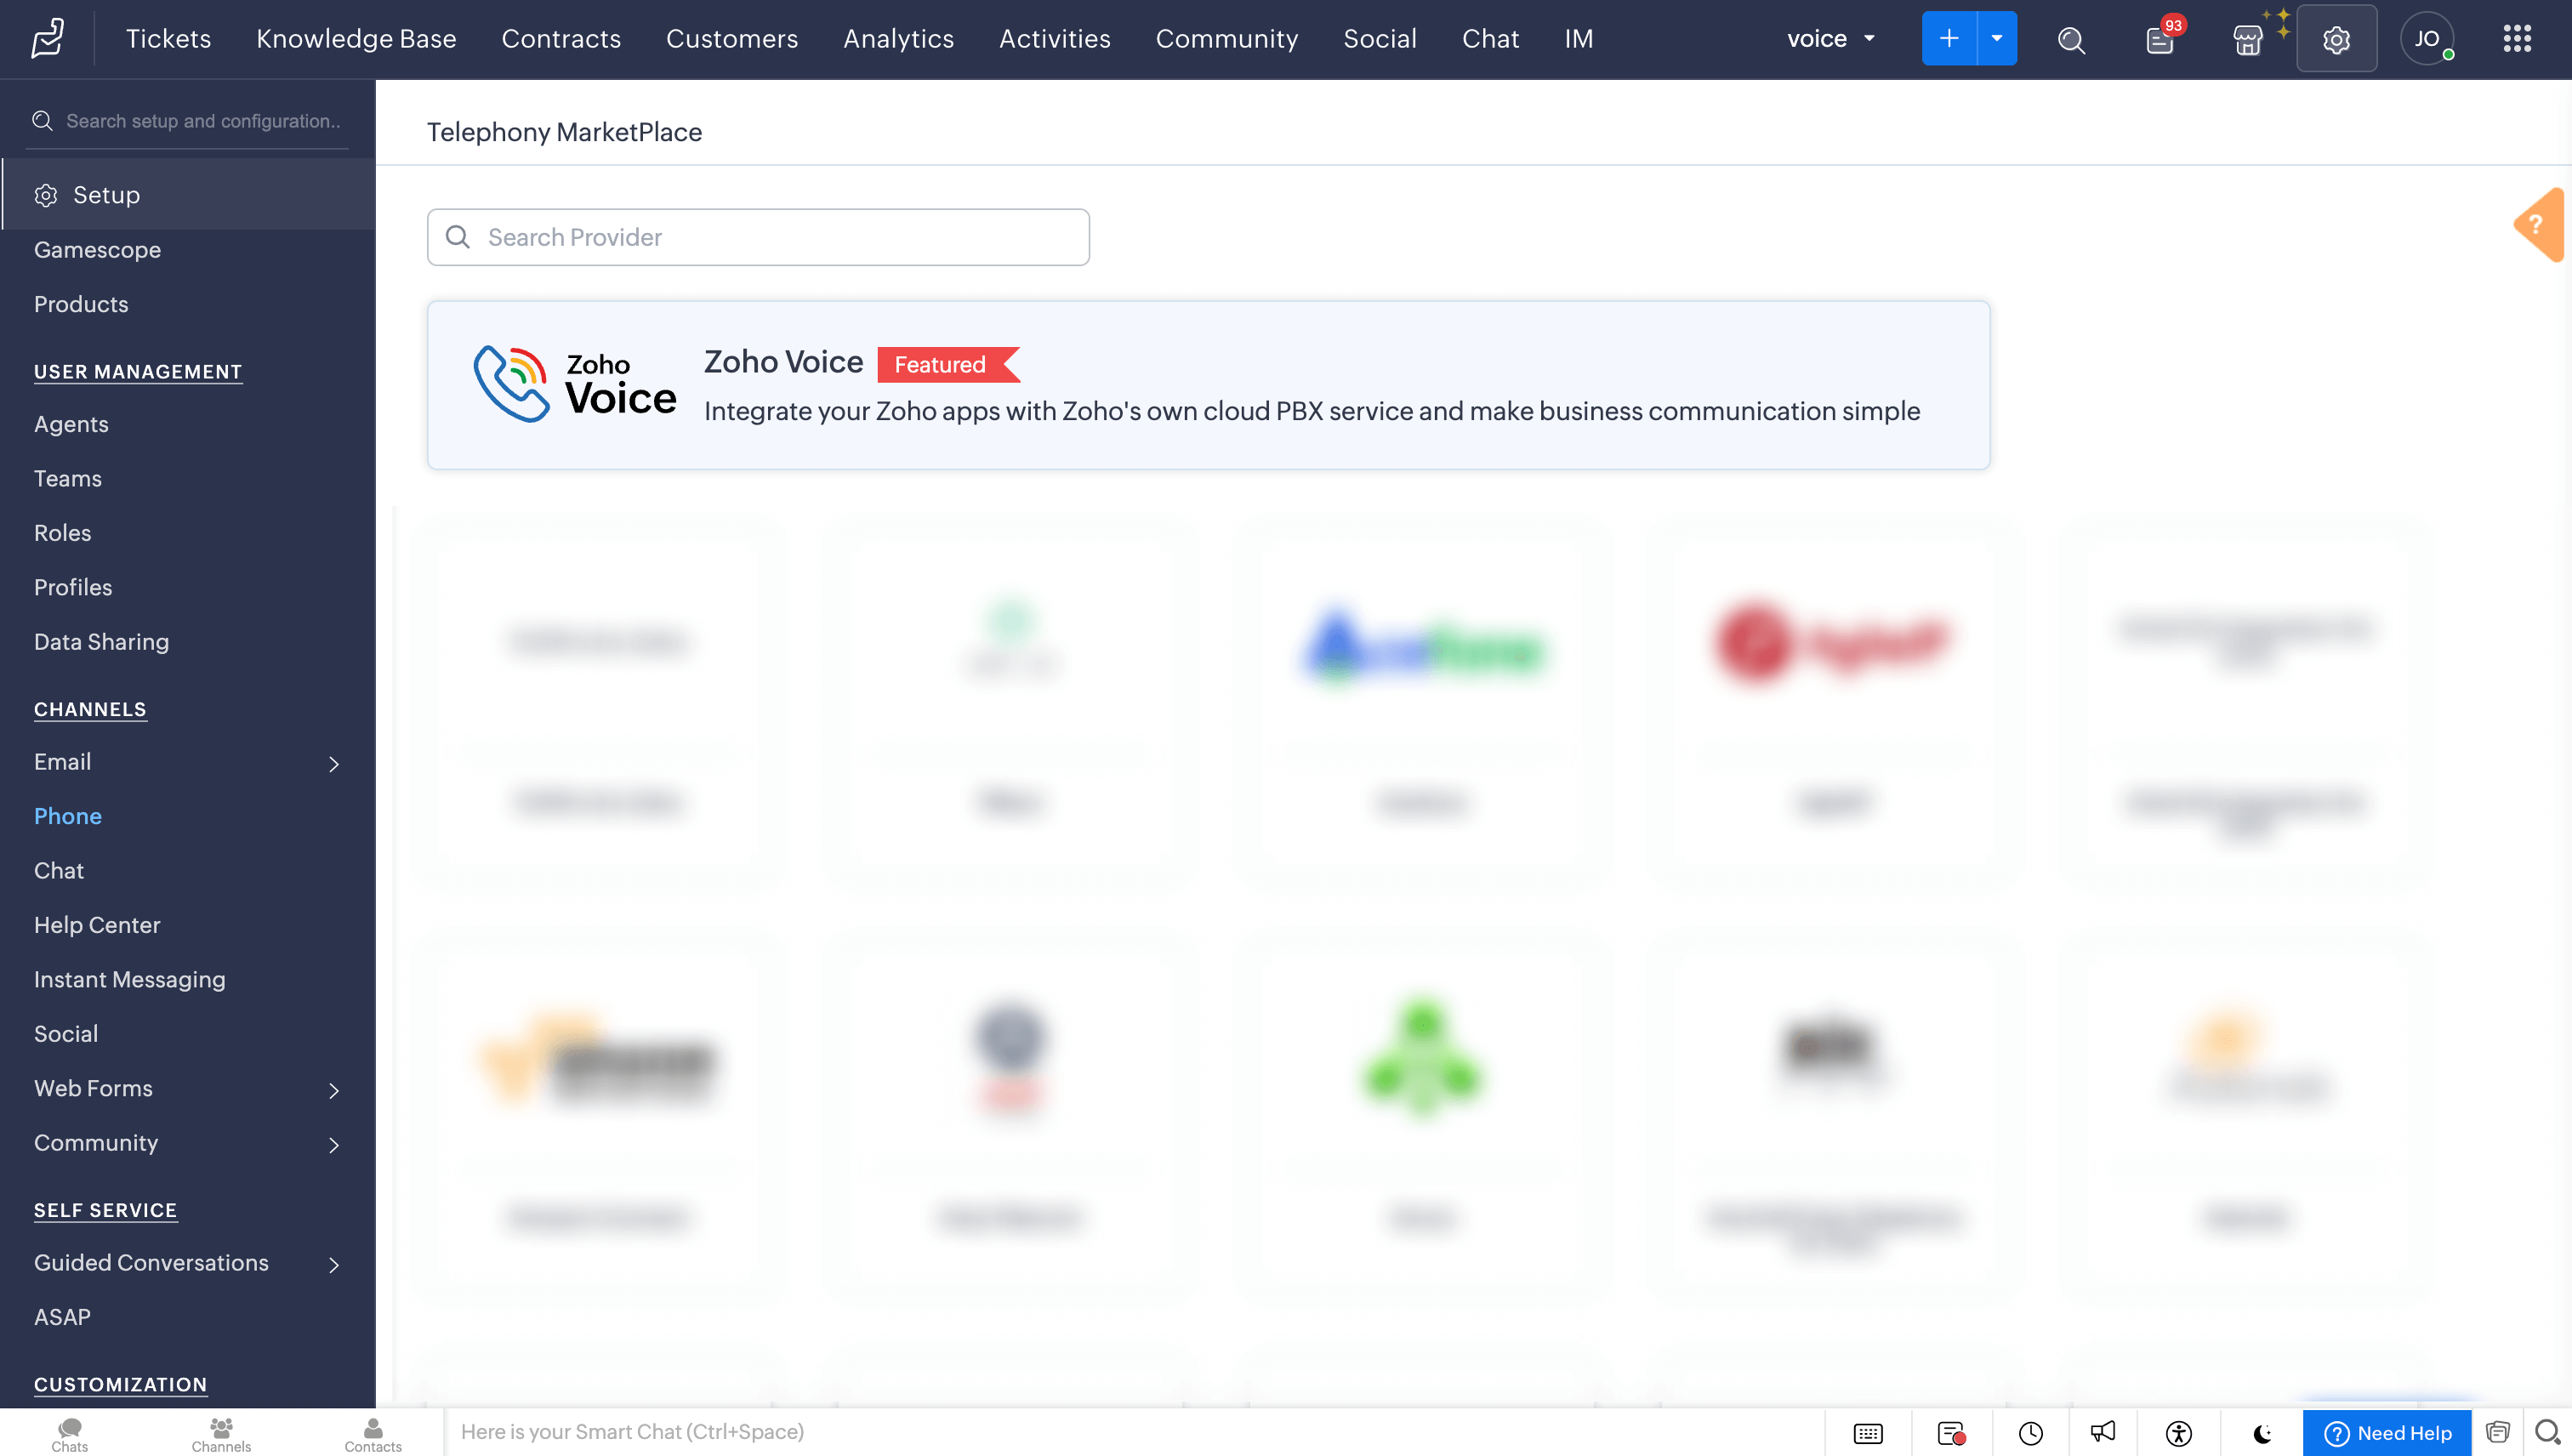
Click Install of Zoho Voice.
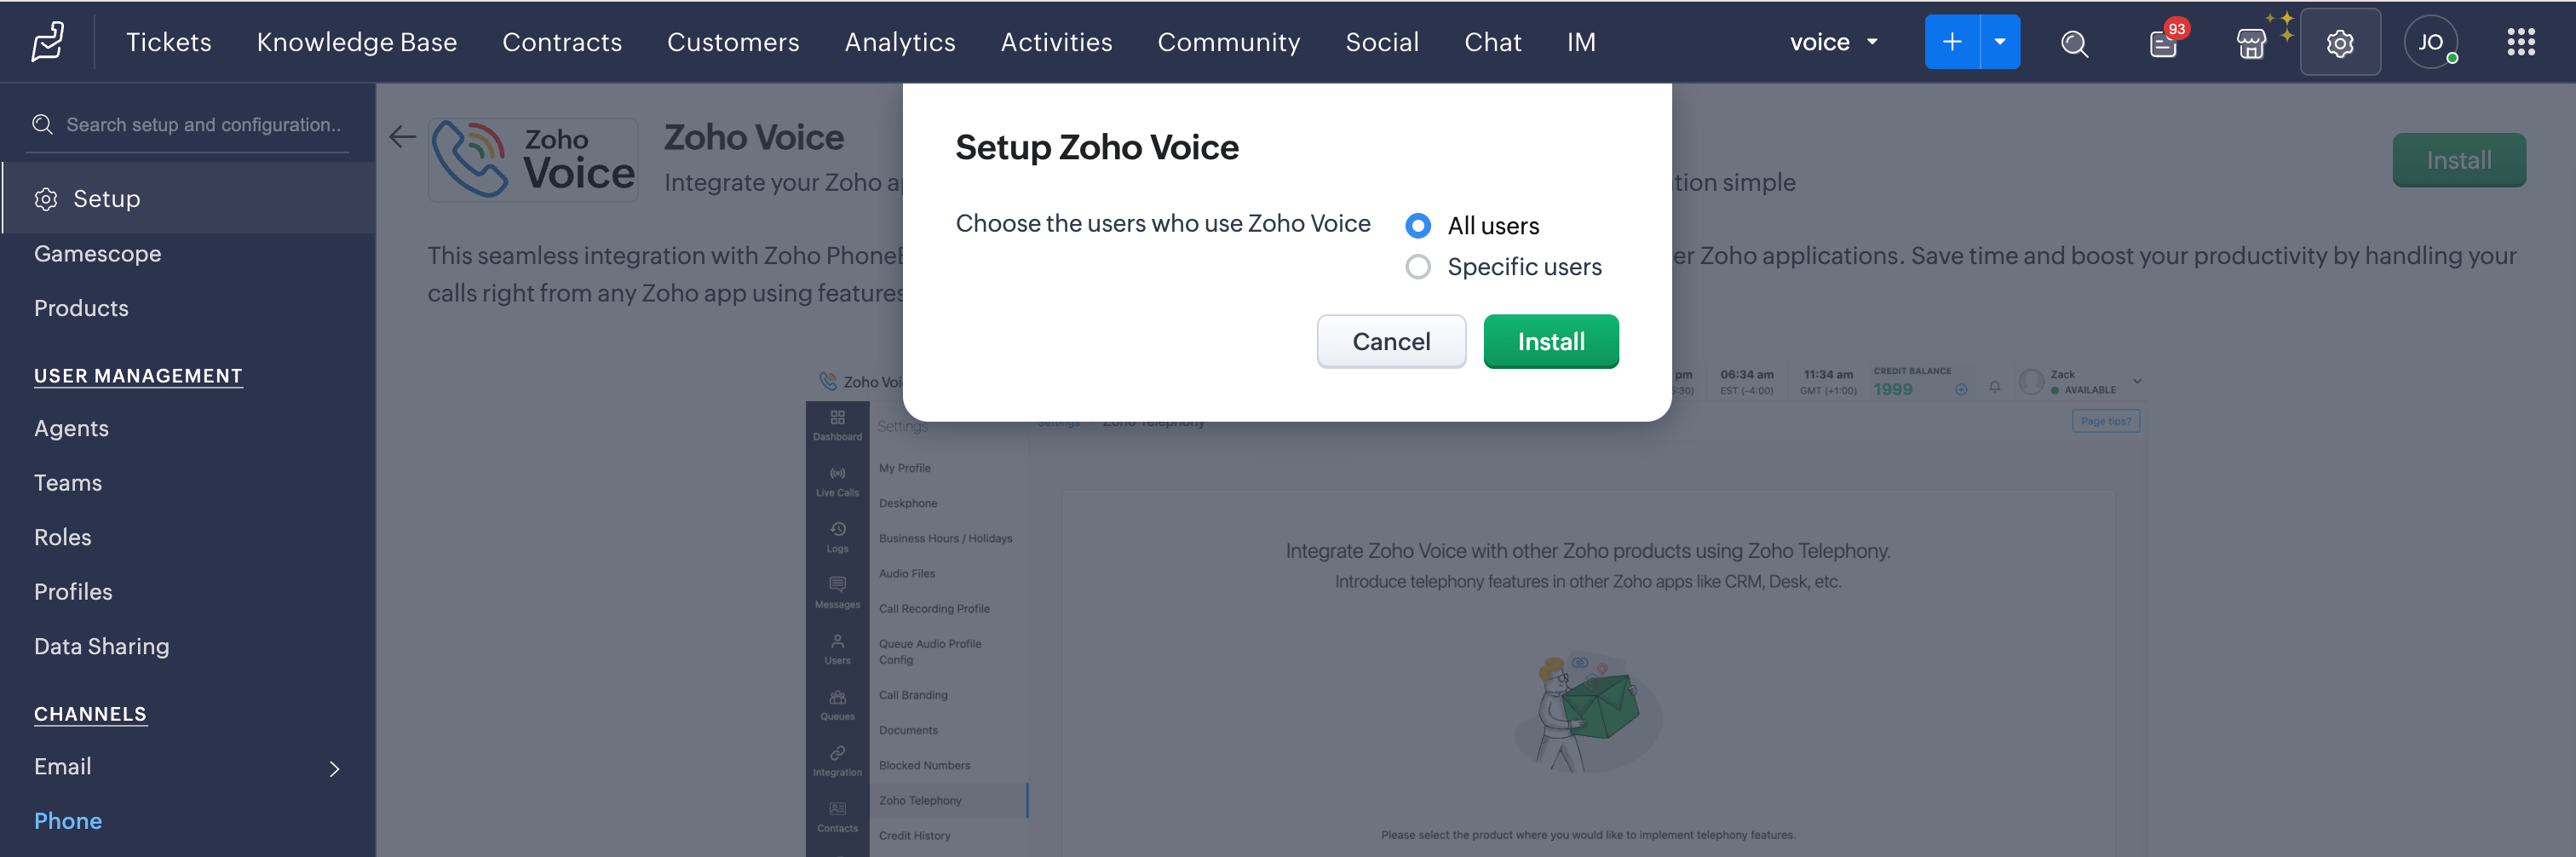
In the Setup Zoho Voice prompt, choose the type of users (All Users/Specific Users) to access Zoho Voice, then click Install.


Steps to configure in Zoho Voice
Once you have enabled Telephony(PhoneBridge) in Zoho Desk, follow the below steps in Zoho Voice:
Log in to your Zoho Voice account.
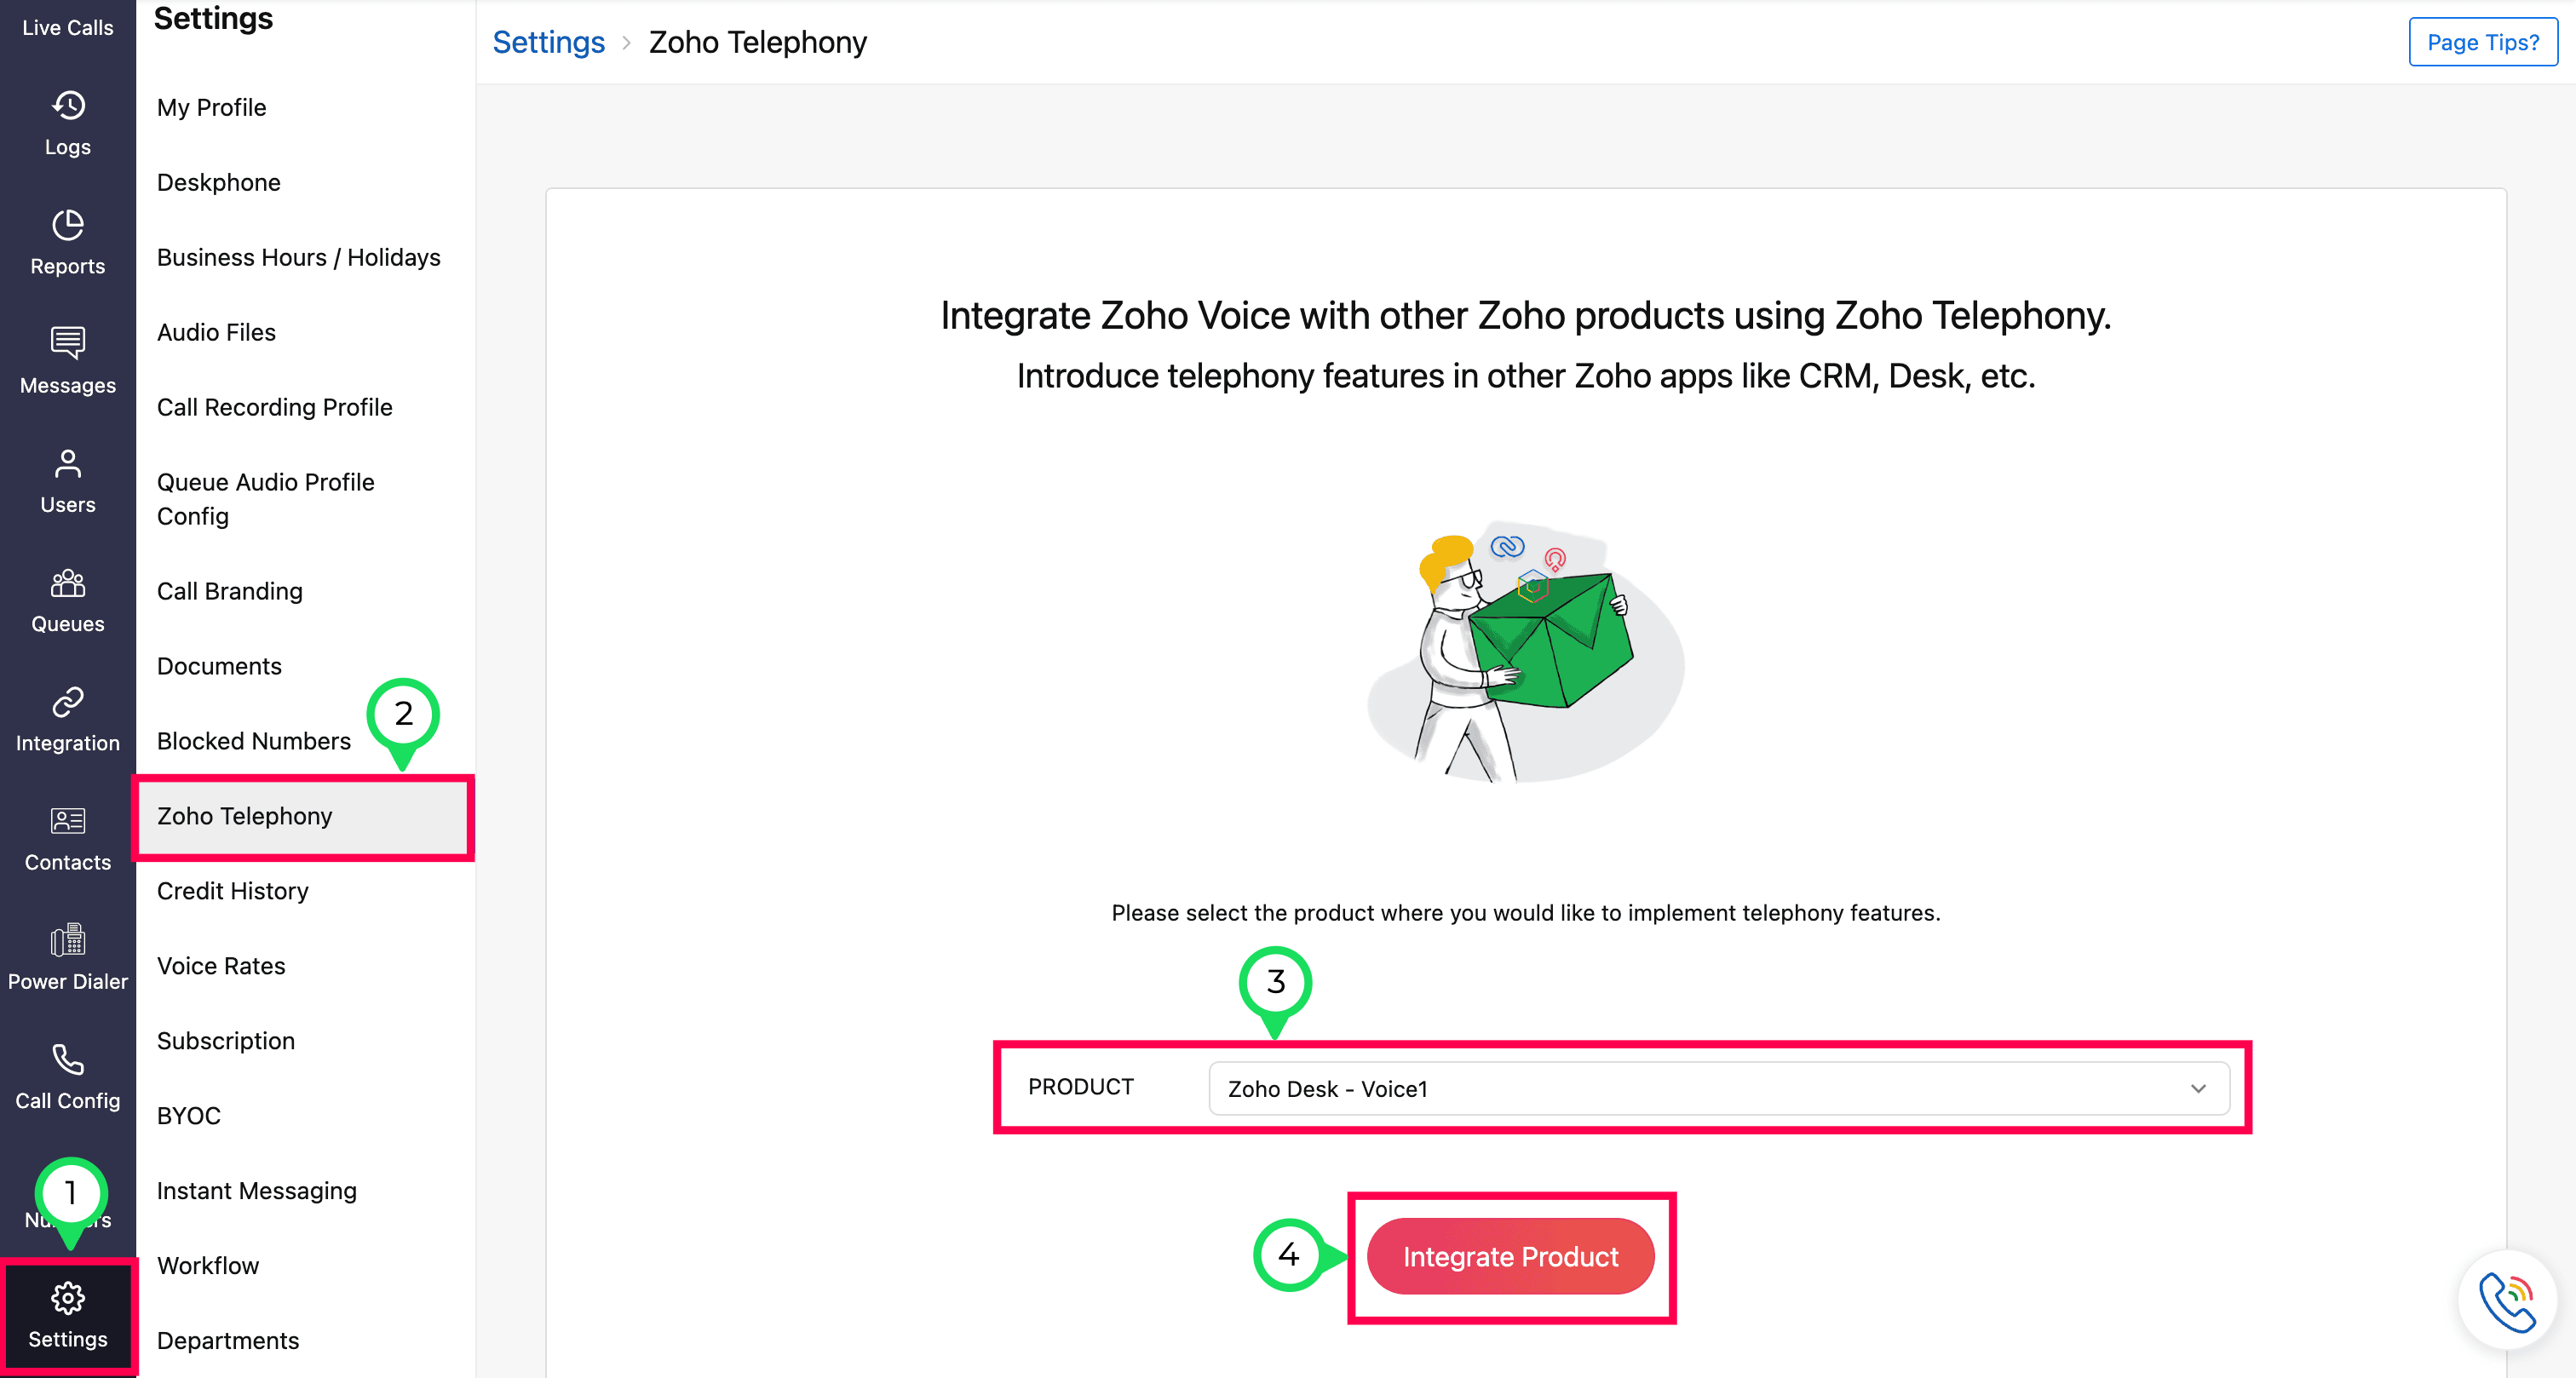
Go to Settings and click Zoho Telephony.
Select the Zoho Desk portal you want to integrate with Zoho Voice and click Integrate Product.
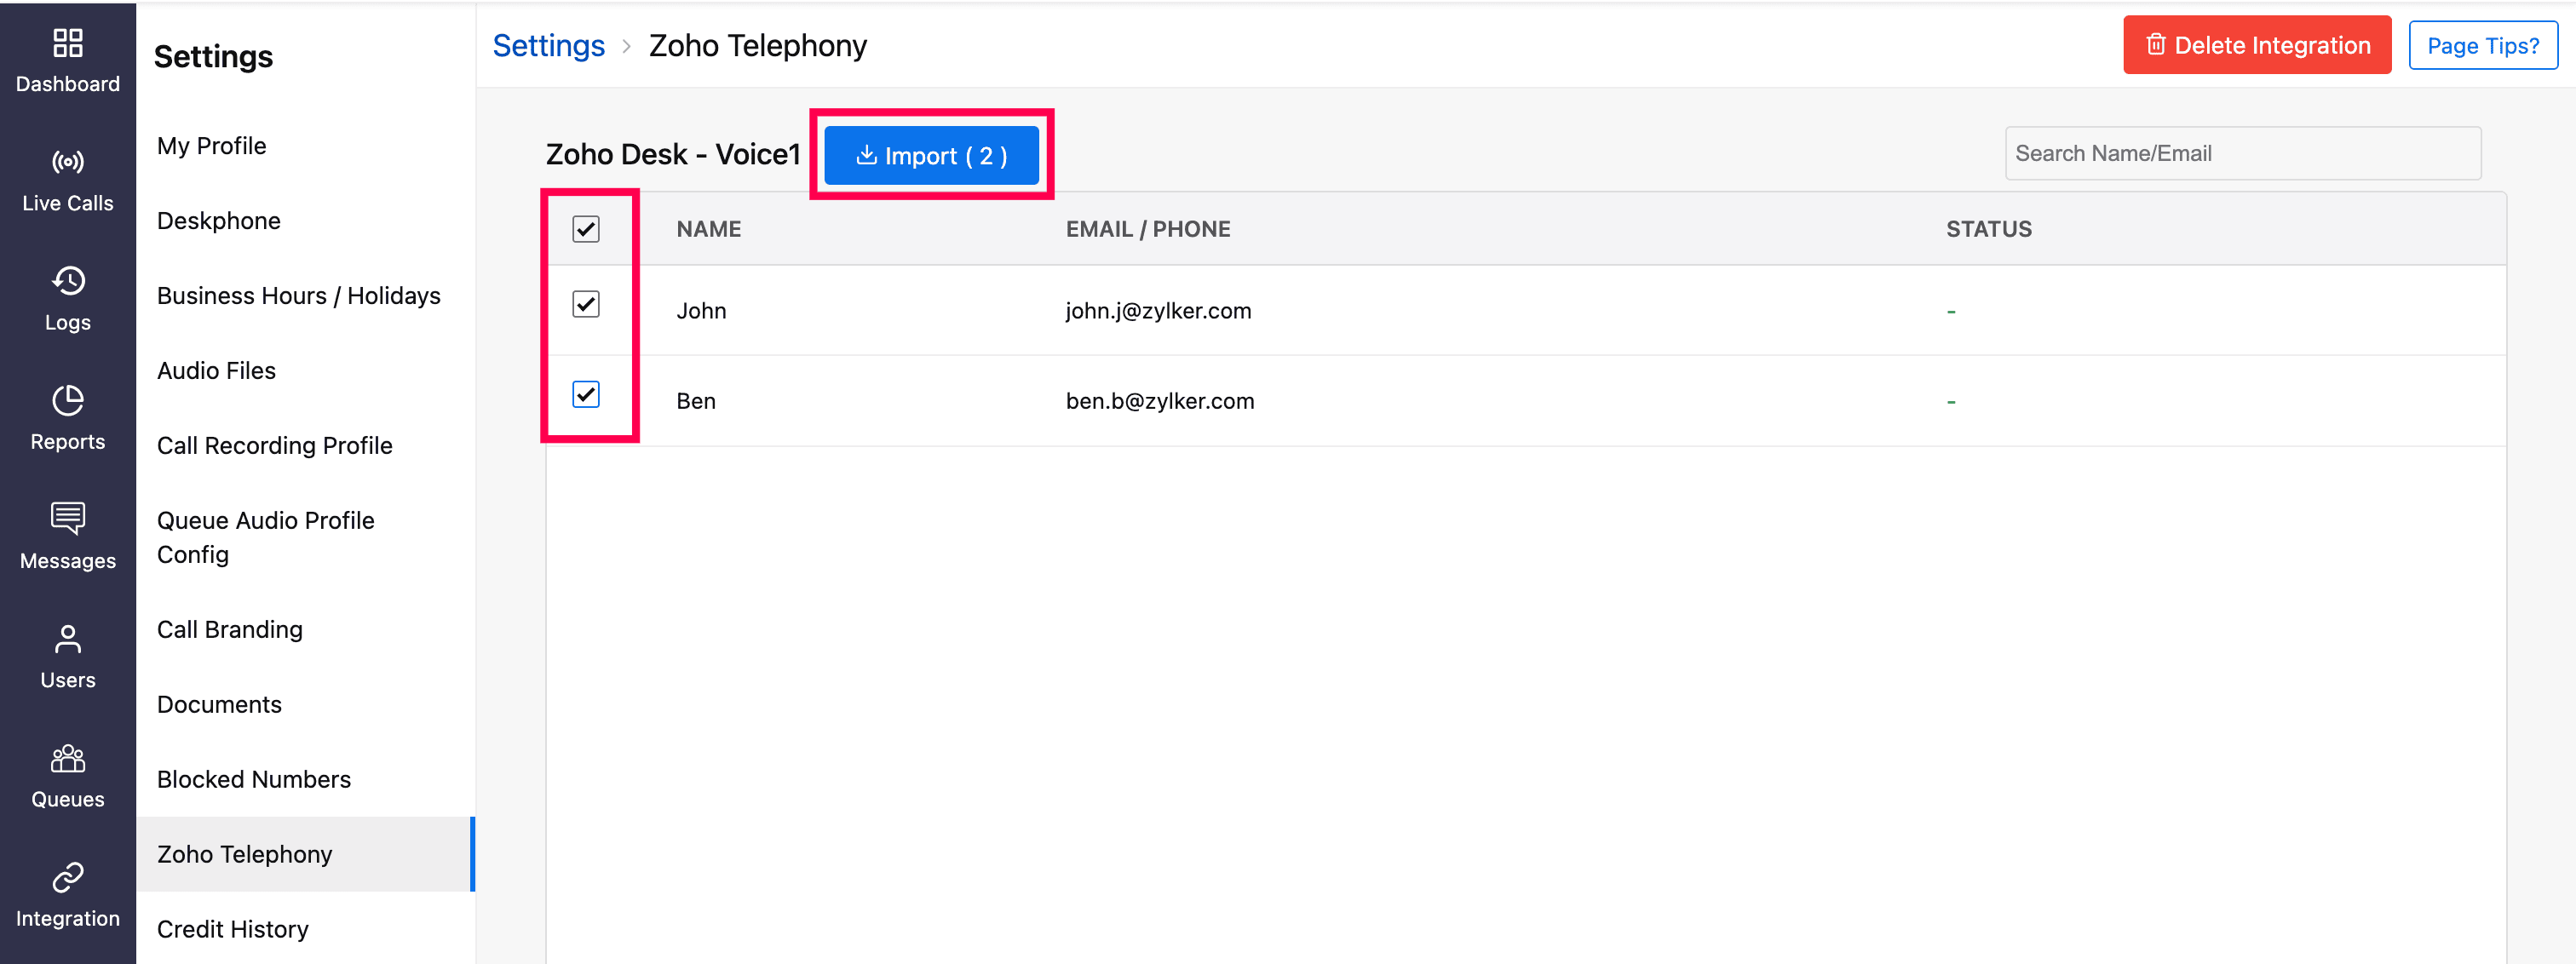
All your agents from the selected Zoho Desk portal will be listed. Select the users you want to import, then click the Import button.
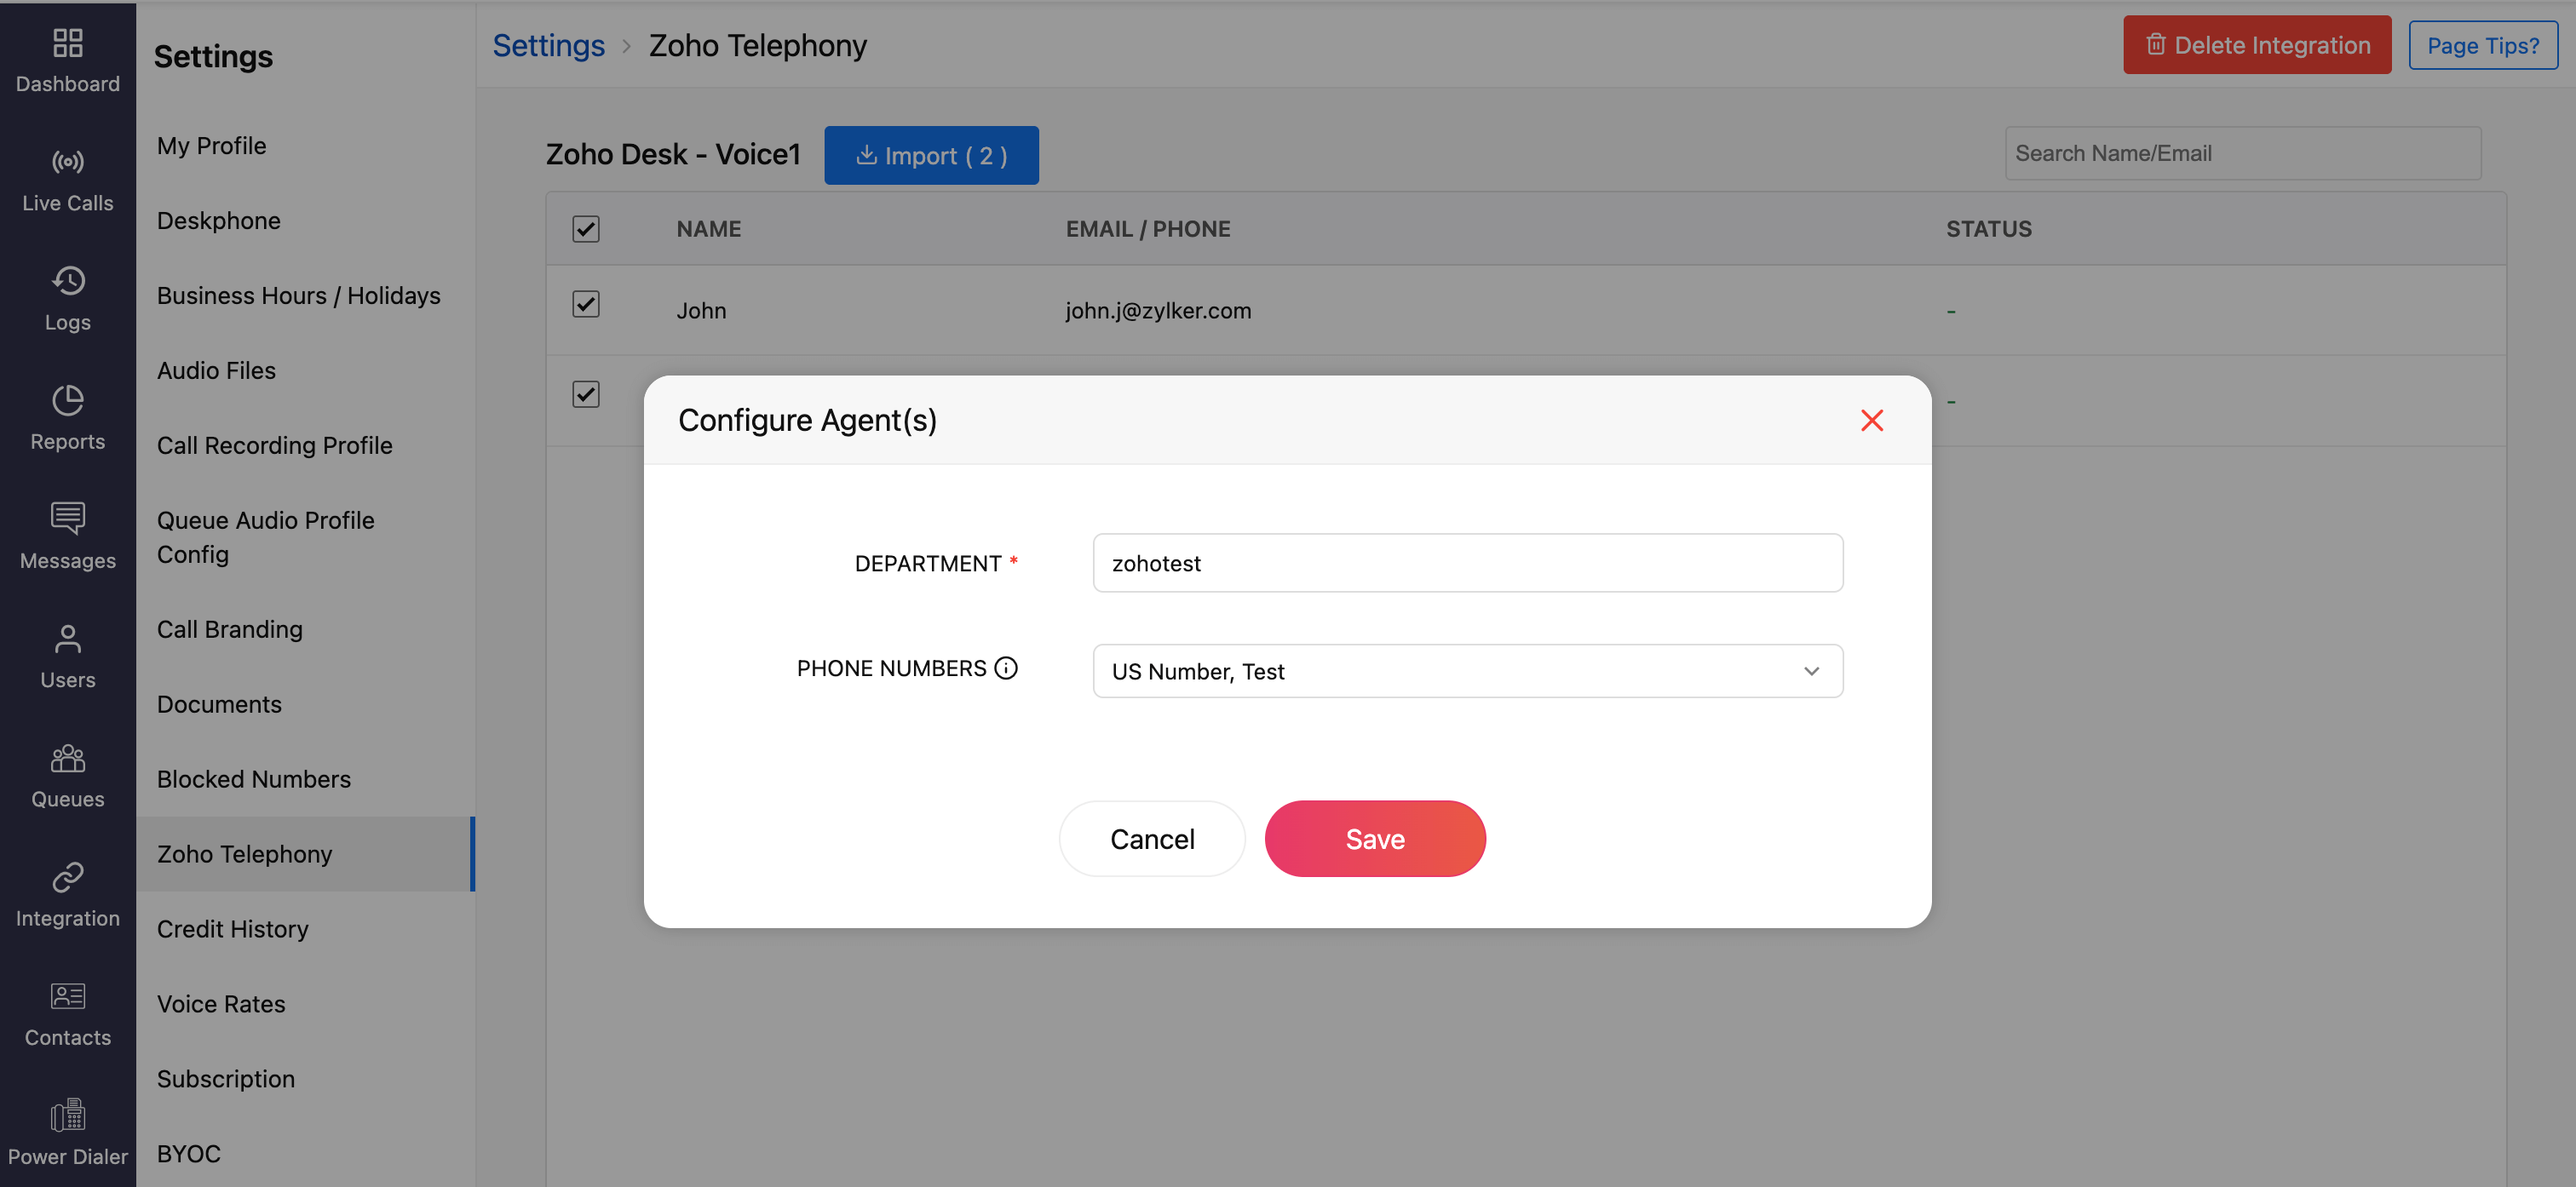
In the Configure Agents prompt, select the Department name for the selected agents for identification within Zoho Voice.
Optionally, assign outgoing phone numbers to agents and click Save.
Note
You can also assign phone numbers later in the Call Config module.


Once you have imported your agents, they will be displayed as Telephony Agent (for Standard & Contact Center plans) in the Users module.

Importing Users
Basic plan - When you import your Zoho Desk agents to Zoho Voice, each agent will be created as a licensed user in Zoho Voice. Users will receive an email invitation to join your Zoho Voice account. On accepting that, they will be added to your account. You can then assign user privileges based on your requirements: Admin, Supervisor Plus, Supervisor, or Technician.
Standard & Contact Center plans - When you import your Zoho Desk agents to Zoho Voice, they will be added as free Telephony users without any access to Zoho Voice web app. Once the integration is complete, the click-to-call button and call pop-ups will be enabled in their Zoho Desk accounts. They can make use of the ZDialer mobile app and browser extensions.
Note
Calls will work in Zoho Desk only if you assign phone numbers to your admin and telephony agents in Zoho Voice. To assign numbers:
- Go to the Call Config page.
- Under the Incoming tab, choose whether to route calls to Agents, Queues, or IVRs.
- Under the Outgoing tab, assign numbers to agents who will place outbound calls.
- Click Save after making changes.
You can purchase phone numbers, assign them to agents, configure IVRs, queues, etc. Learn more about Call Config.
Features and Functionalities of the Integration
Auto-generate tickets
Based on the predefined settings configured during the Zoho Voice - Zoho Desk integration, tickets can be automatically created for specific call events.
To configure this:
In your Zoho Desk account, click the Setup icon in the top bar.
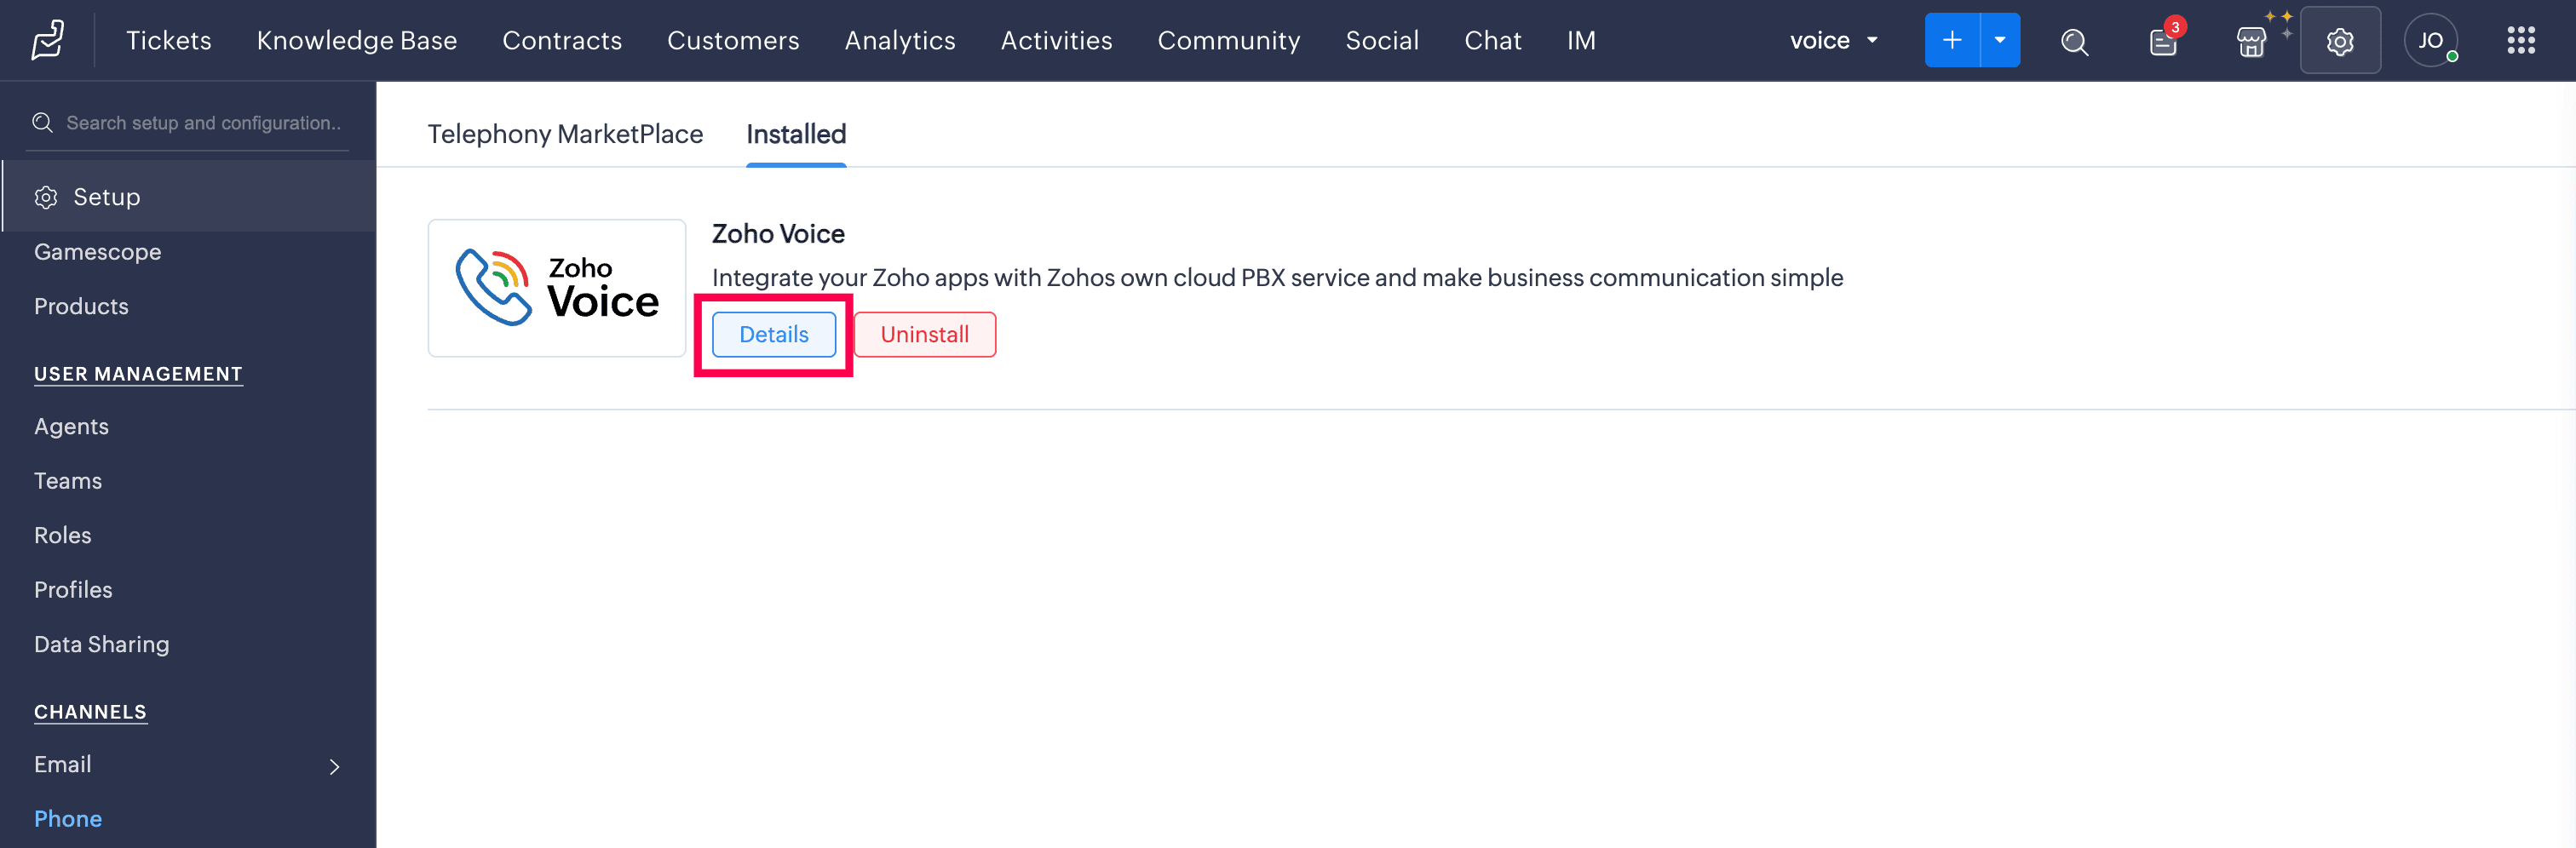
Under the Channels menu, select Phone and navigate to the Installed tab.
Click Details for Zoho Voice.
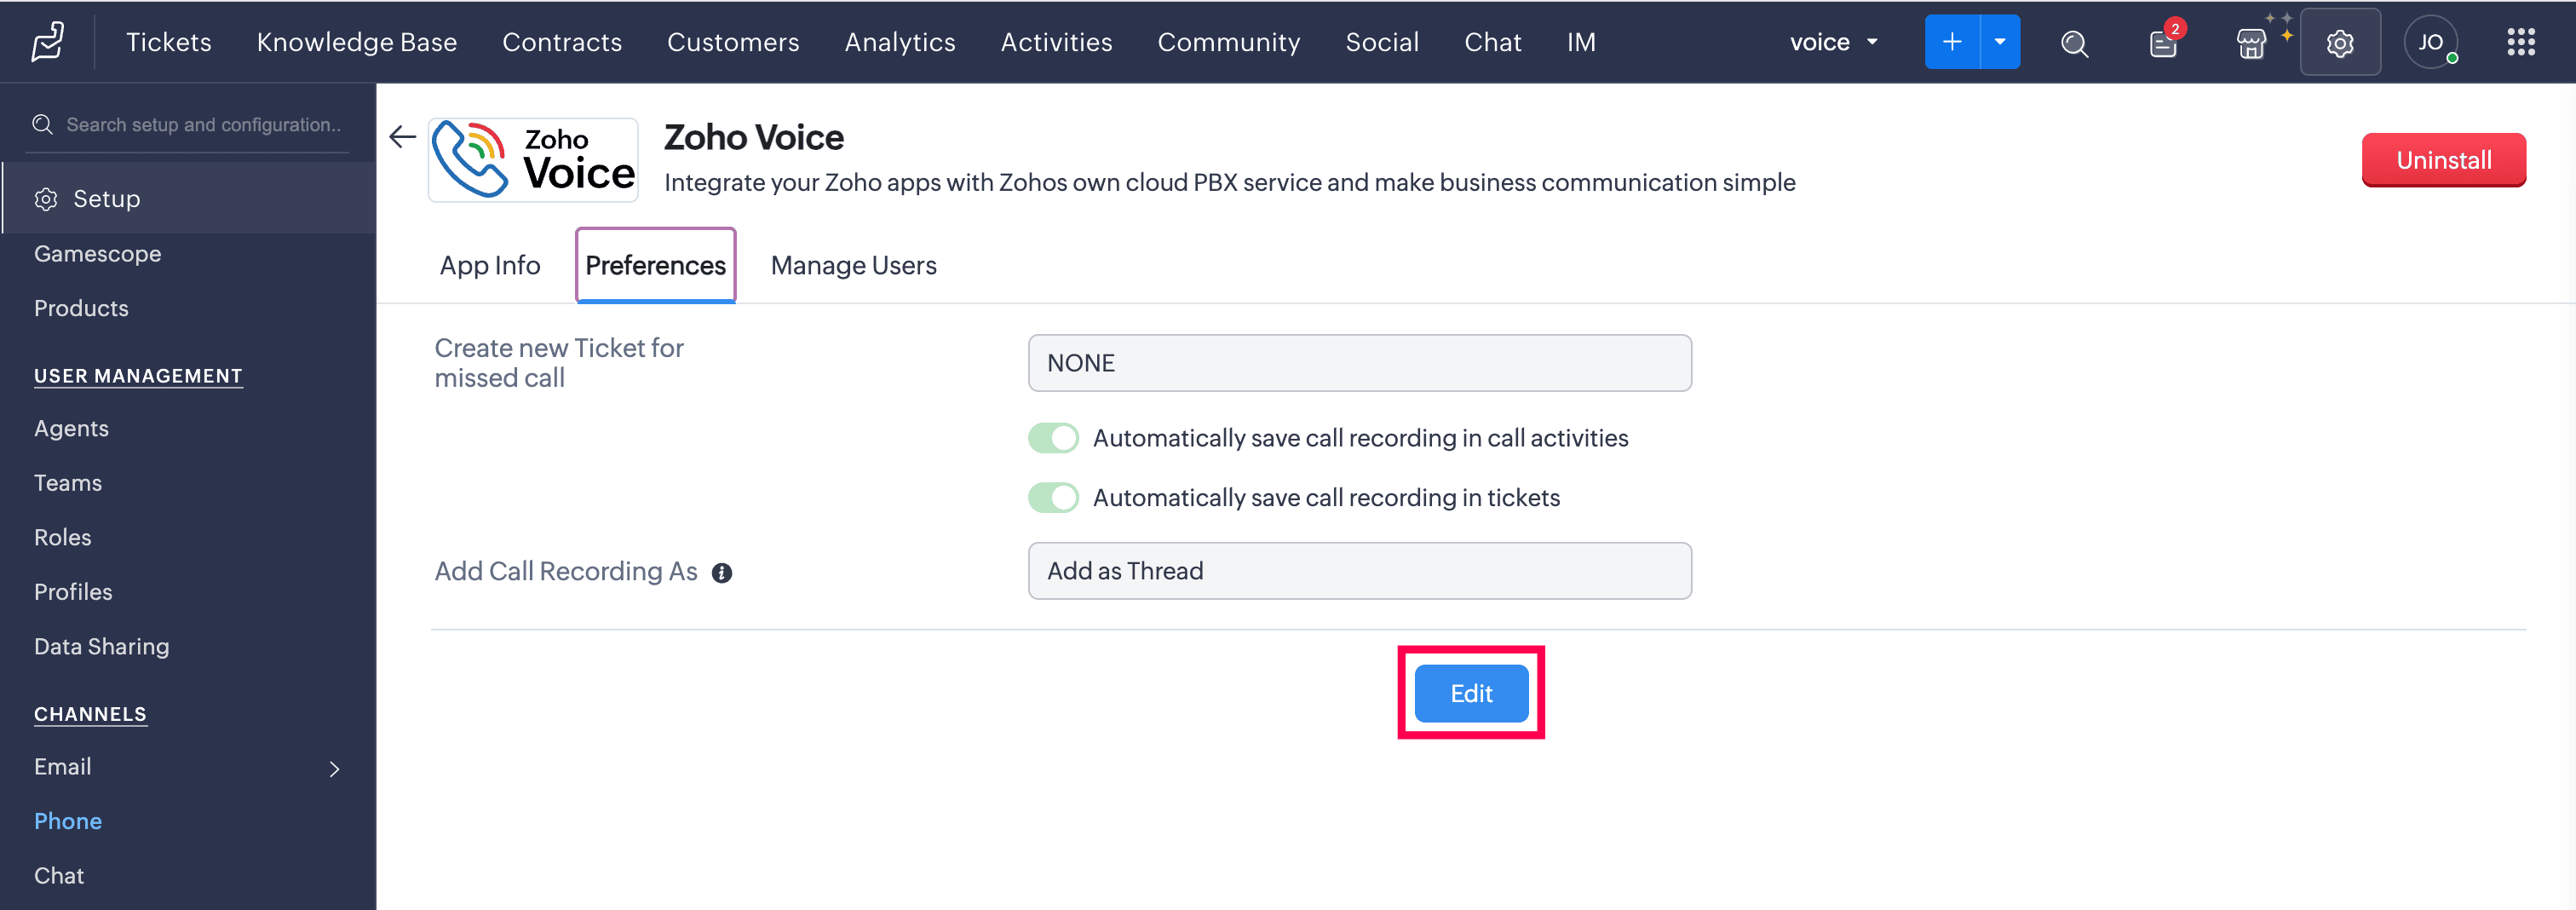
Under the Preference tab, click Edit.
Select the call events (missed calls, inbound calls, or outbound calls) for which tickets should be created automatically.
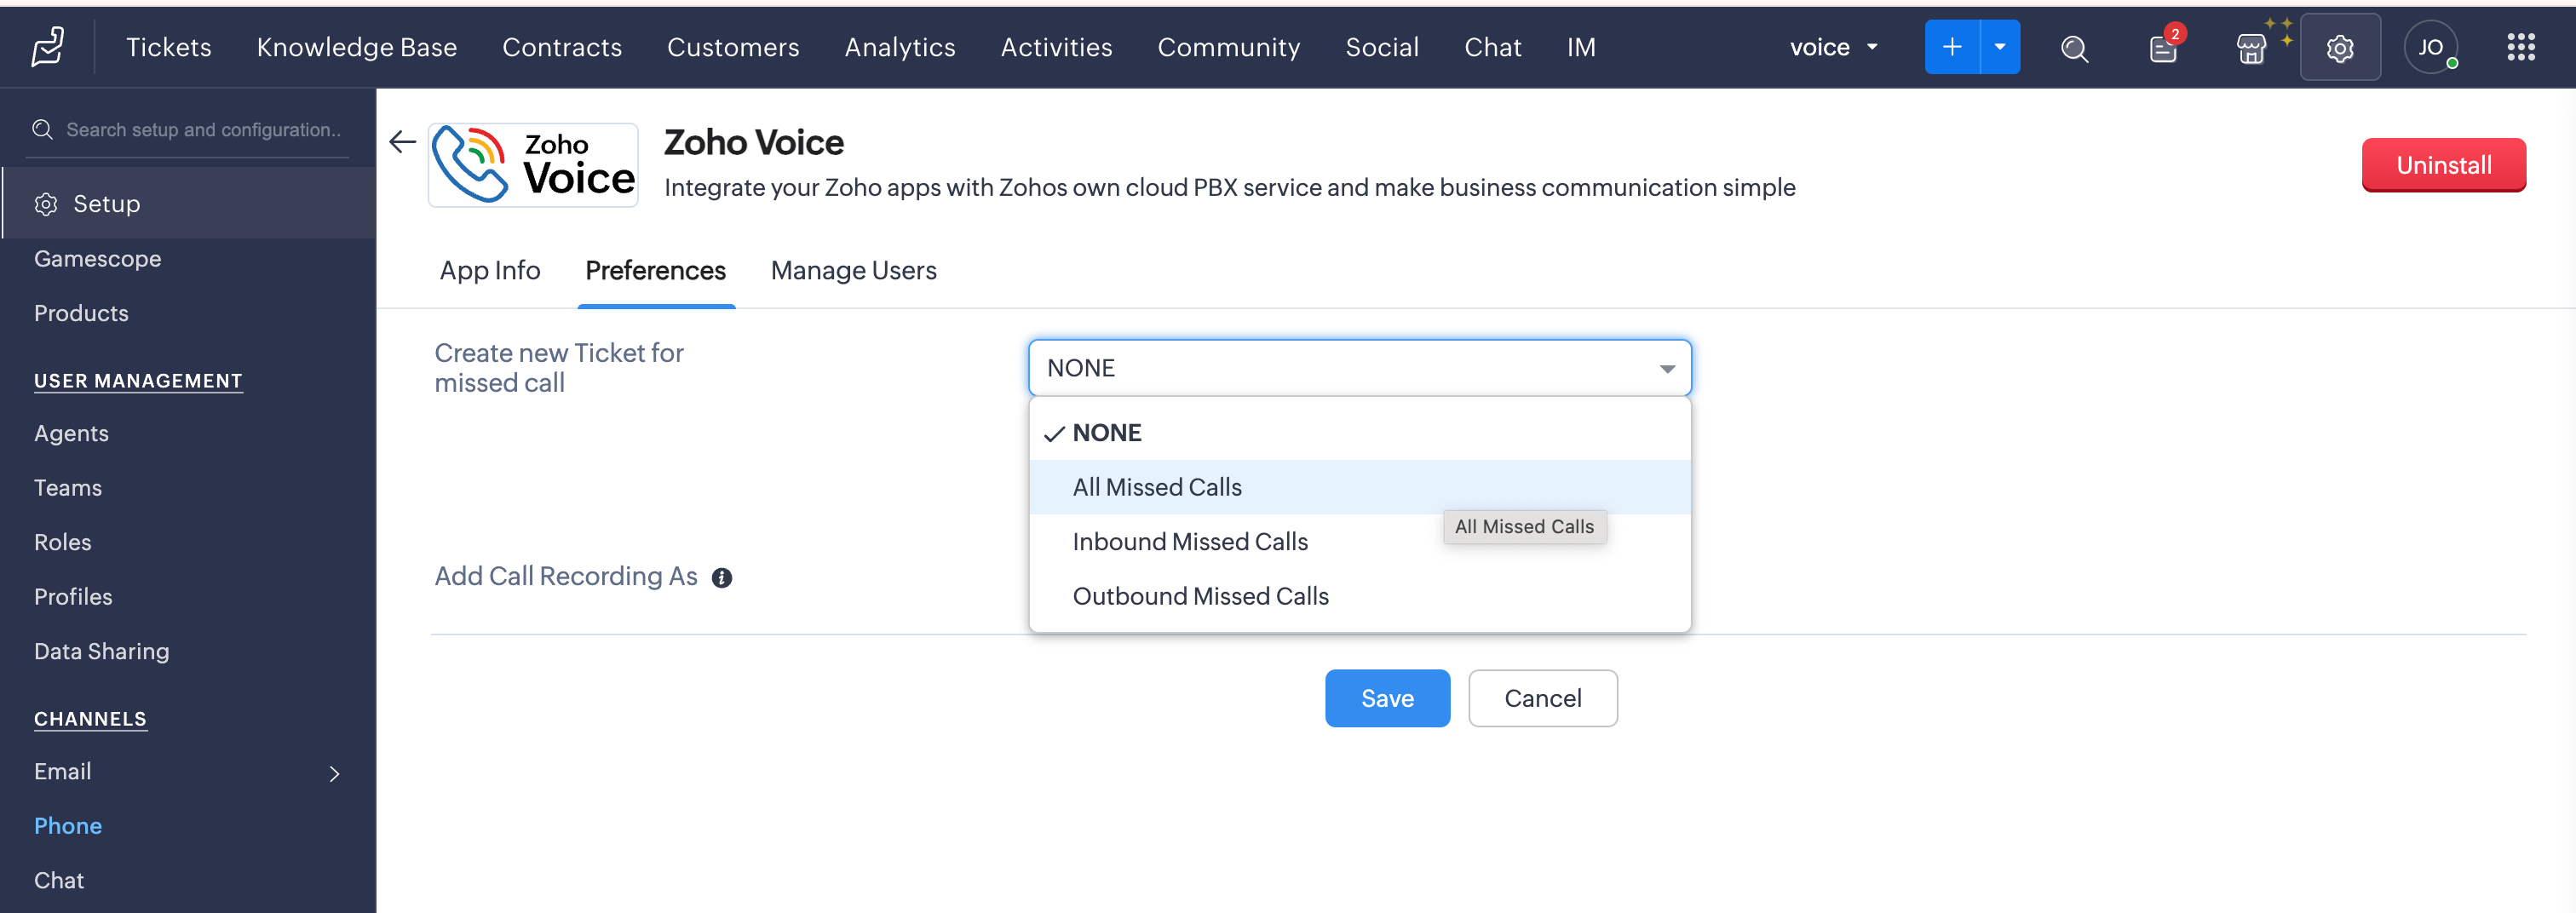
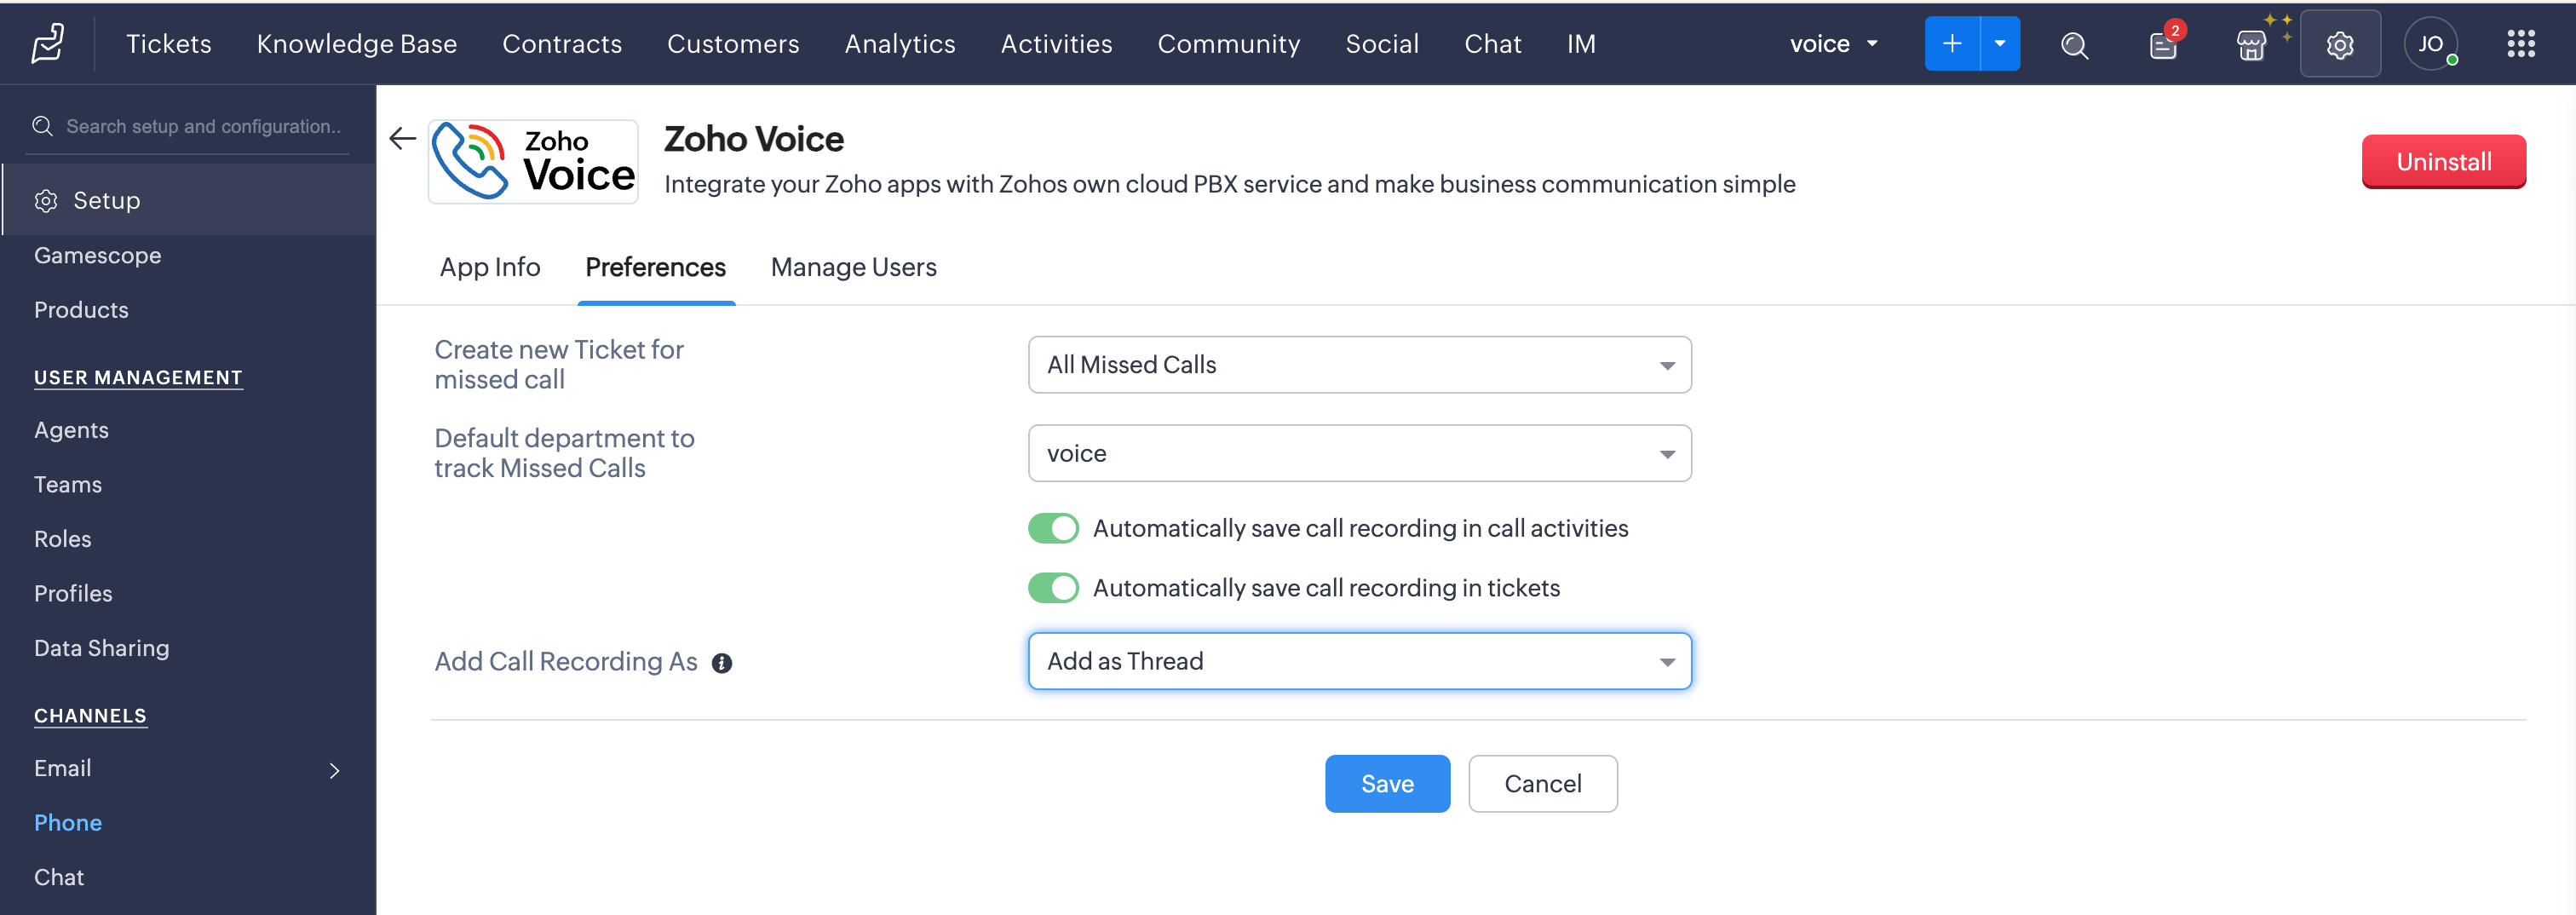
Choose the Department under which these tickets should be created.
Enable or Disable the additional options: Automatically save call recordings in call activities and Automatically save call recordings in tickets.
For Automatically save call recordings in tickets, if enabled, specify where the recording should be added under the Add Call Recordings As field:
Add as Thread
Add as Private Comment
Add as Public Comment
Once the preferences are set, click Save.


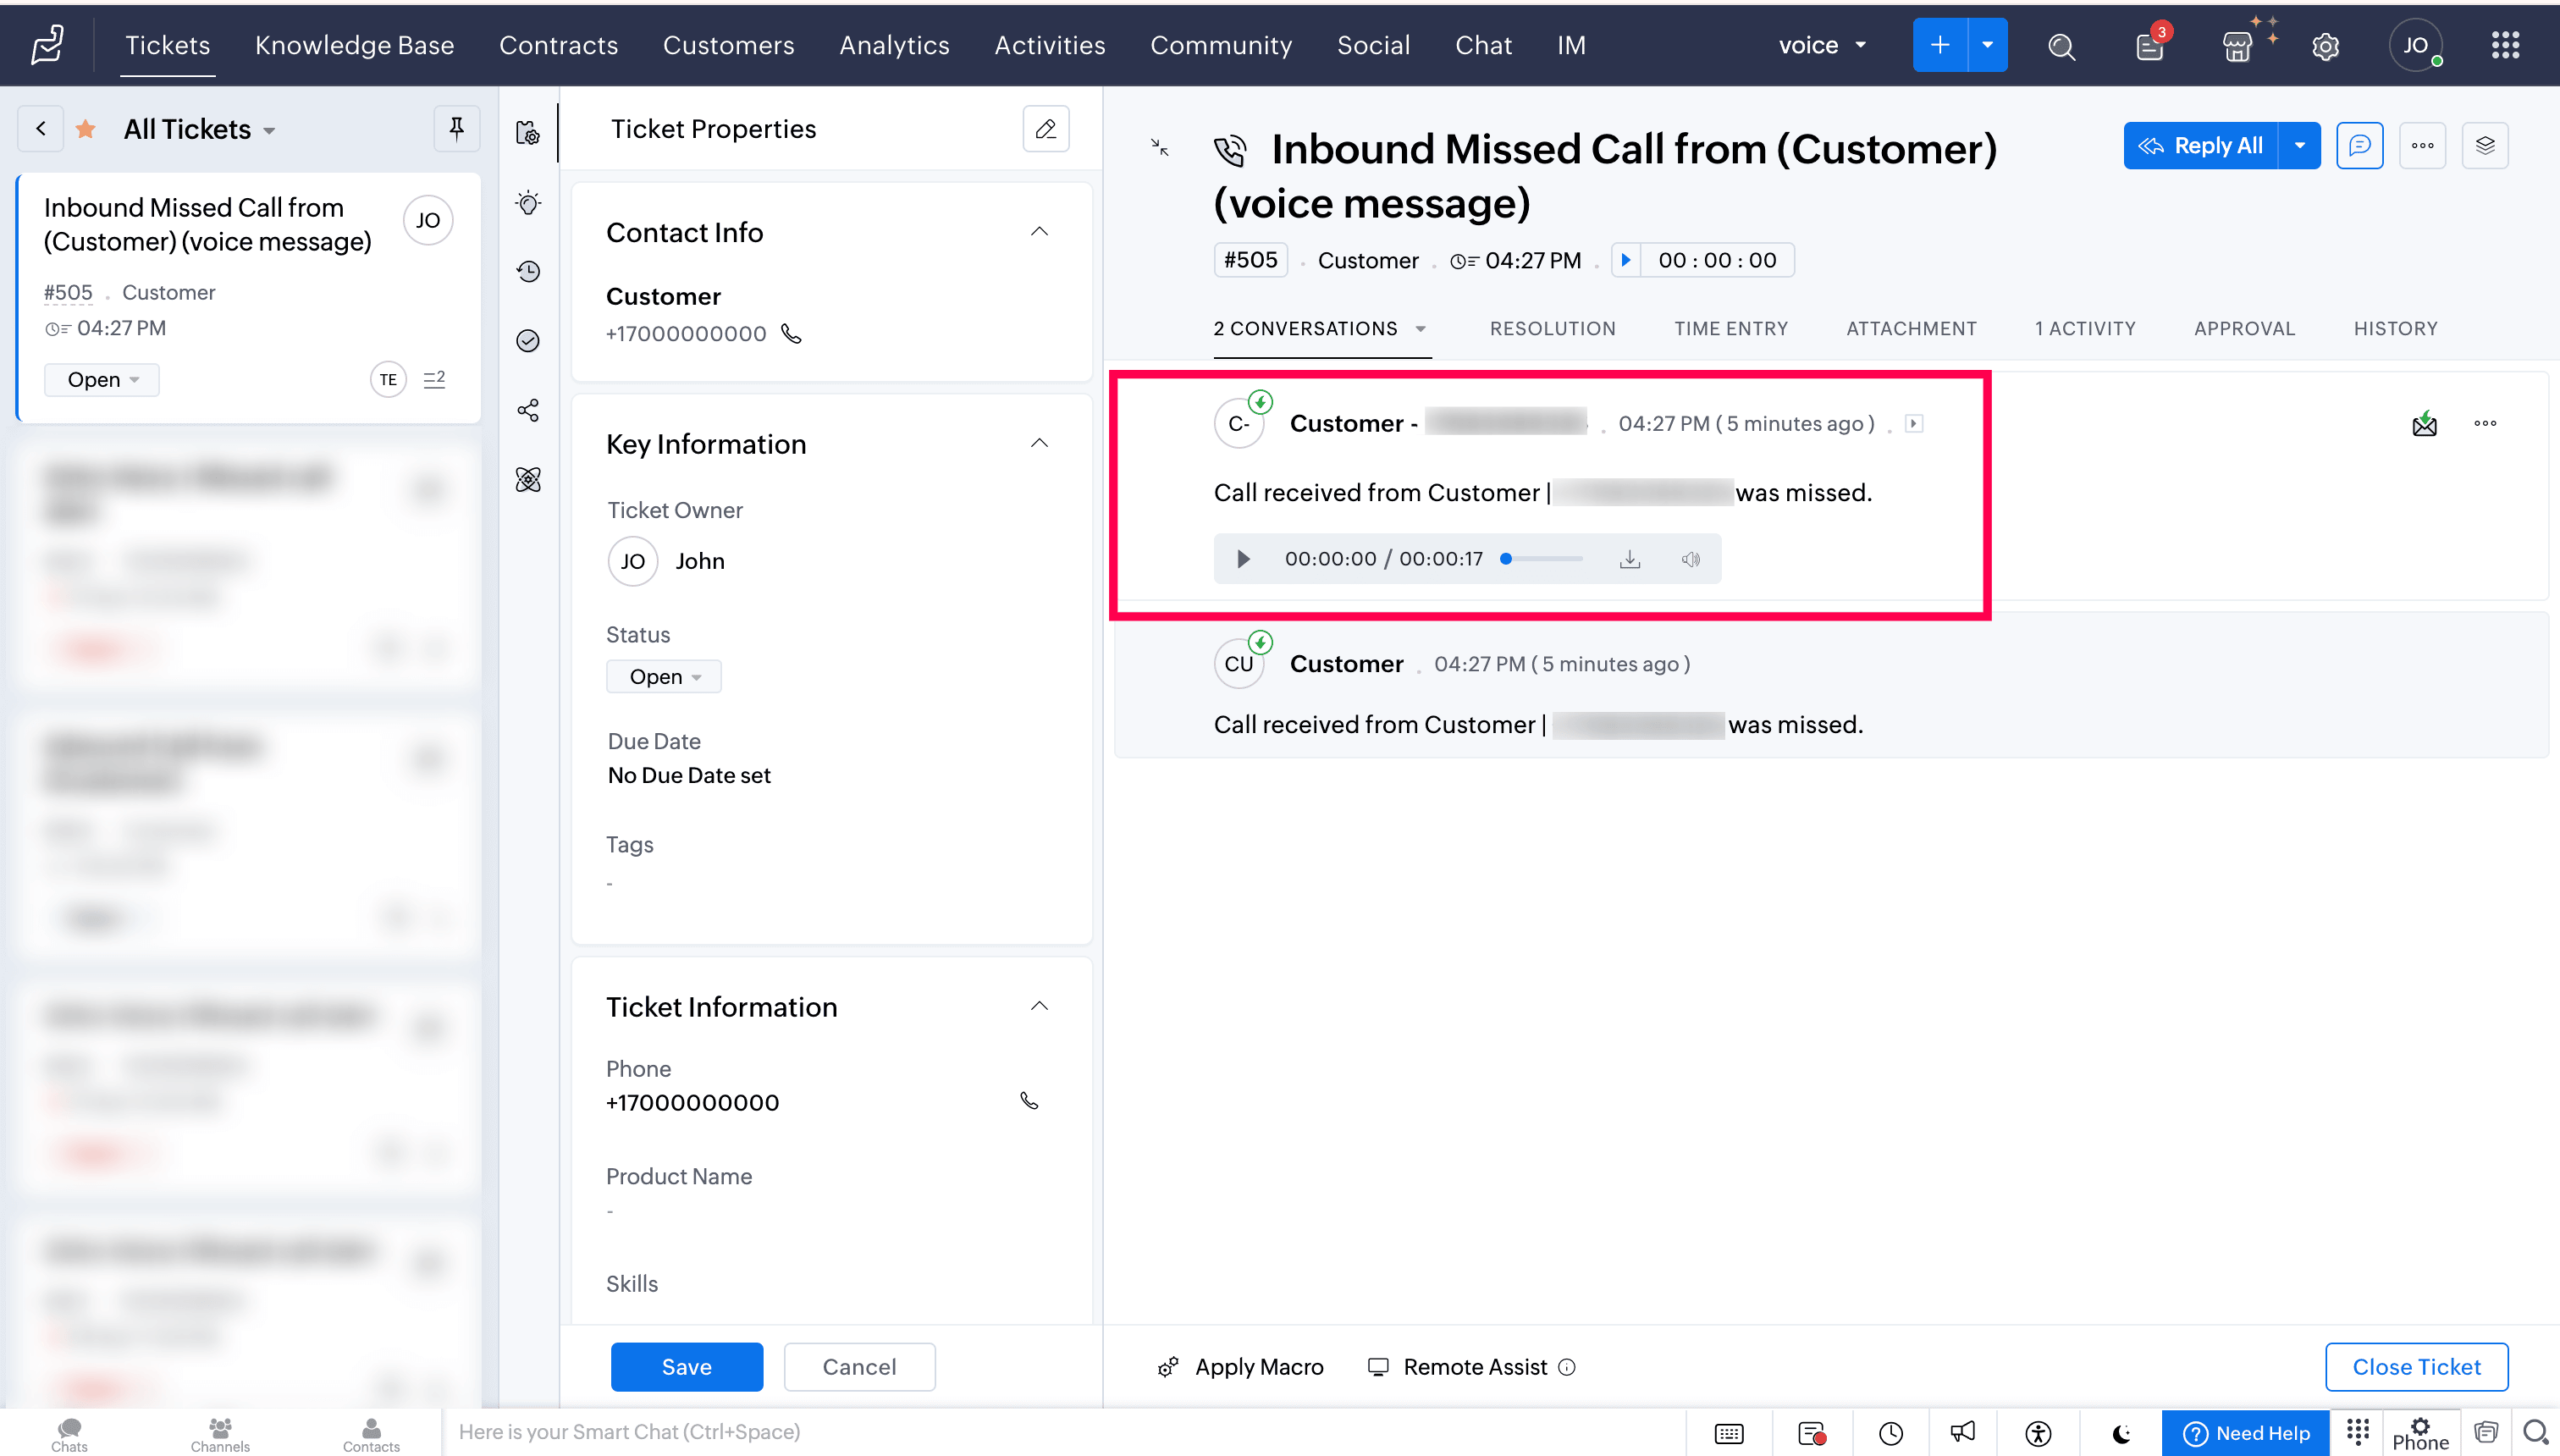
Based on your selected preference, the generated tickets will appear in the Tickets/Activities module of your Zoho Desk account.
When a voicemail is left by the caller, you can listen to and download the voicemail directly from the ticket.

Click-to-call
You can initiate calls using the click-to-call icon found next to phone numbers in Zoho Desk.

Call pop-ups
Caller information is displayed through on-screen pop-ups, enabling you to identify the caller immediately. The details are automatically retrieved from Zoho Desk.

Call Description
After a call ends, you can add notes related to the current call in the Call Disposition → Description tab. These notes will be saved against the corresponding call log entry in the Activities module of Zoho Desk.

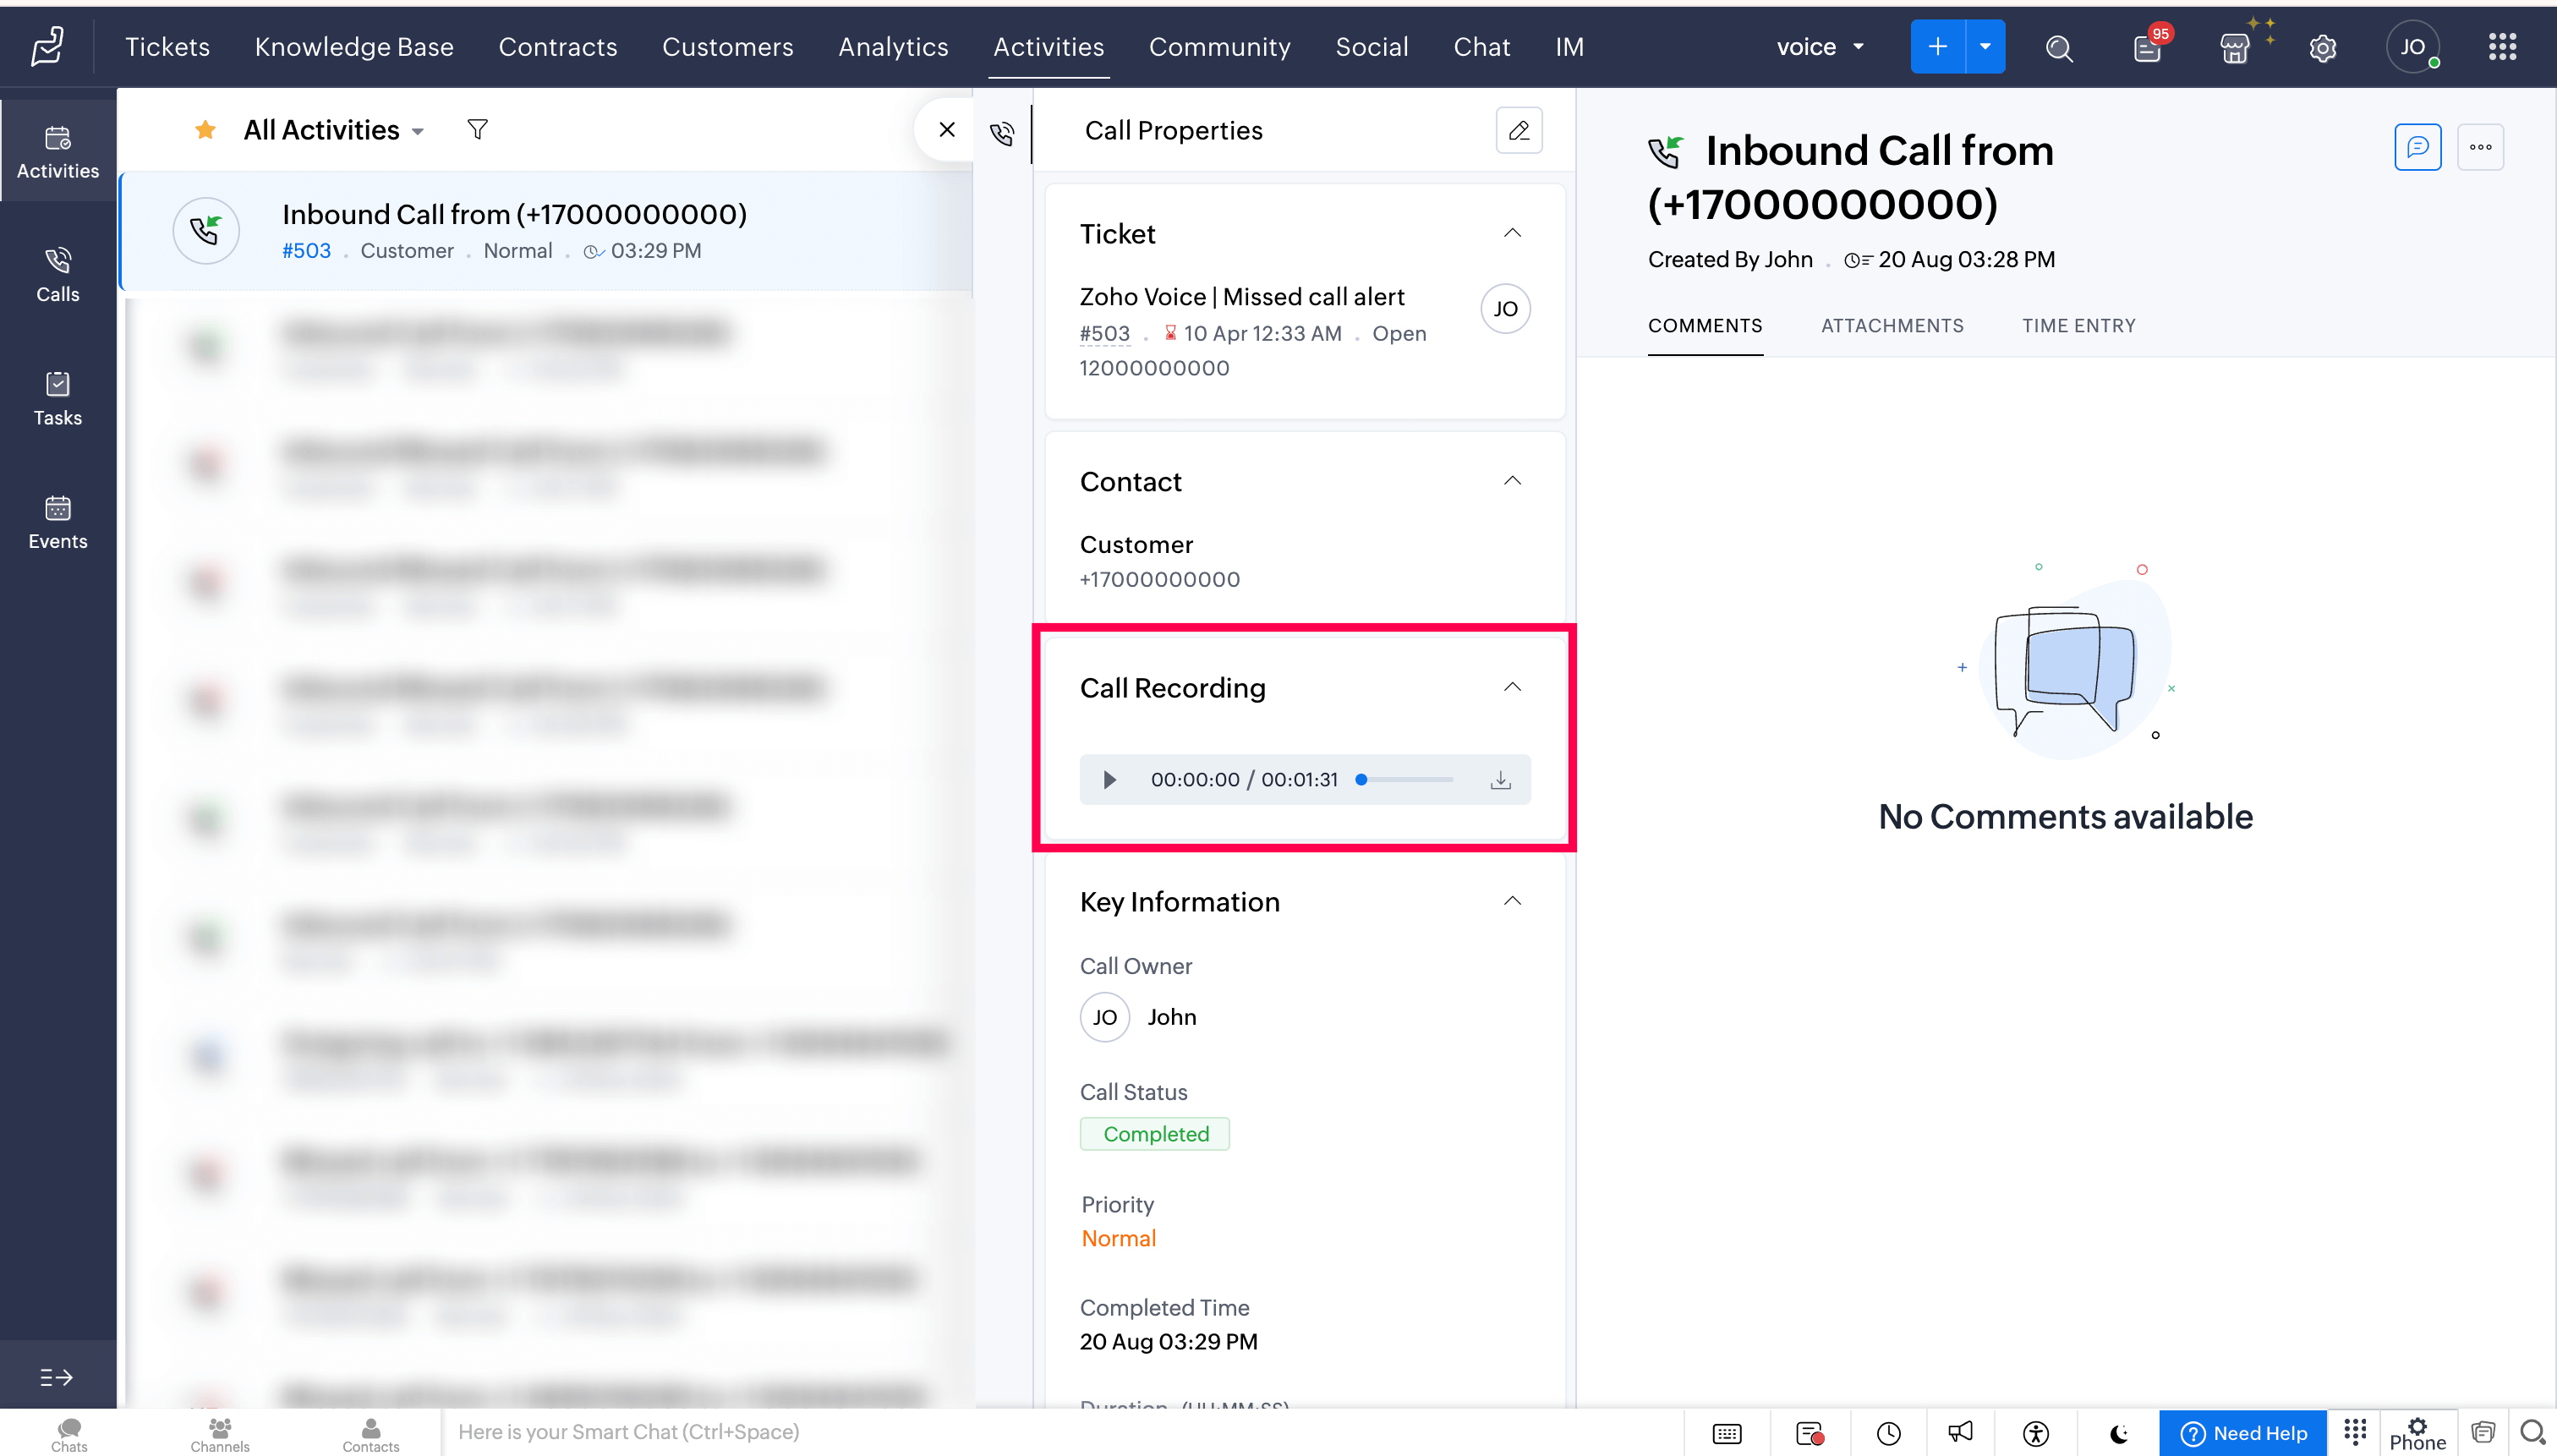
Auto-call logging
Call logs will be updated automatically under the Activities modules in Zoho Desk.
If the caller leaves a voicemail, you can listen and download the recording.
Similarly, for recorded calls, you can access the recordings once they are available.

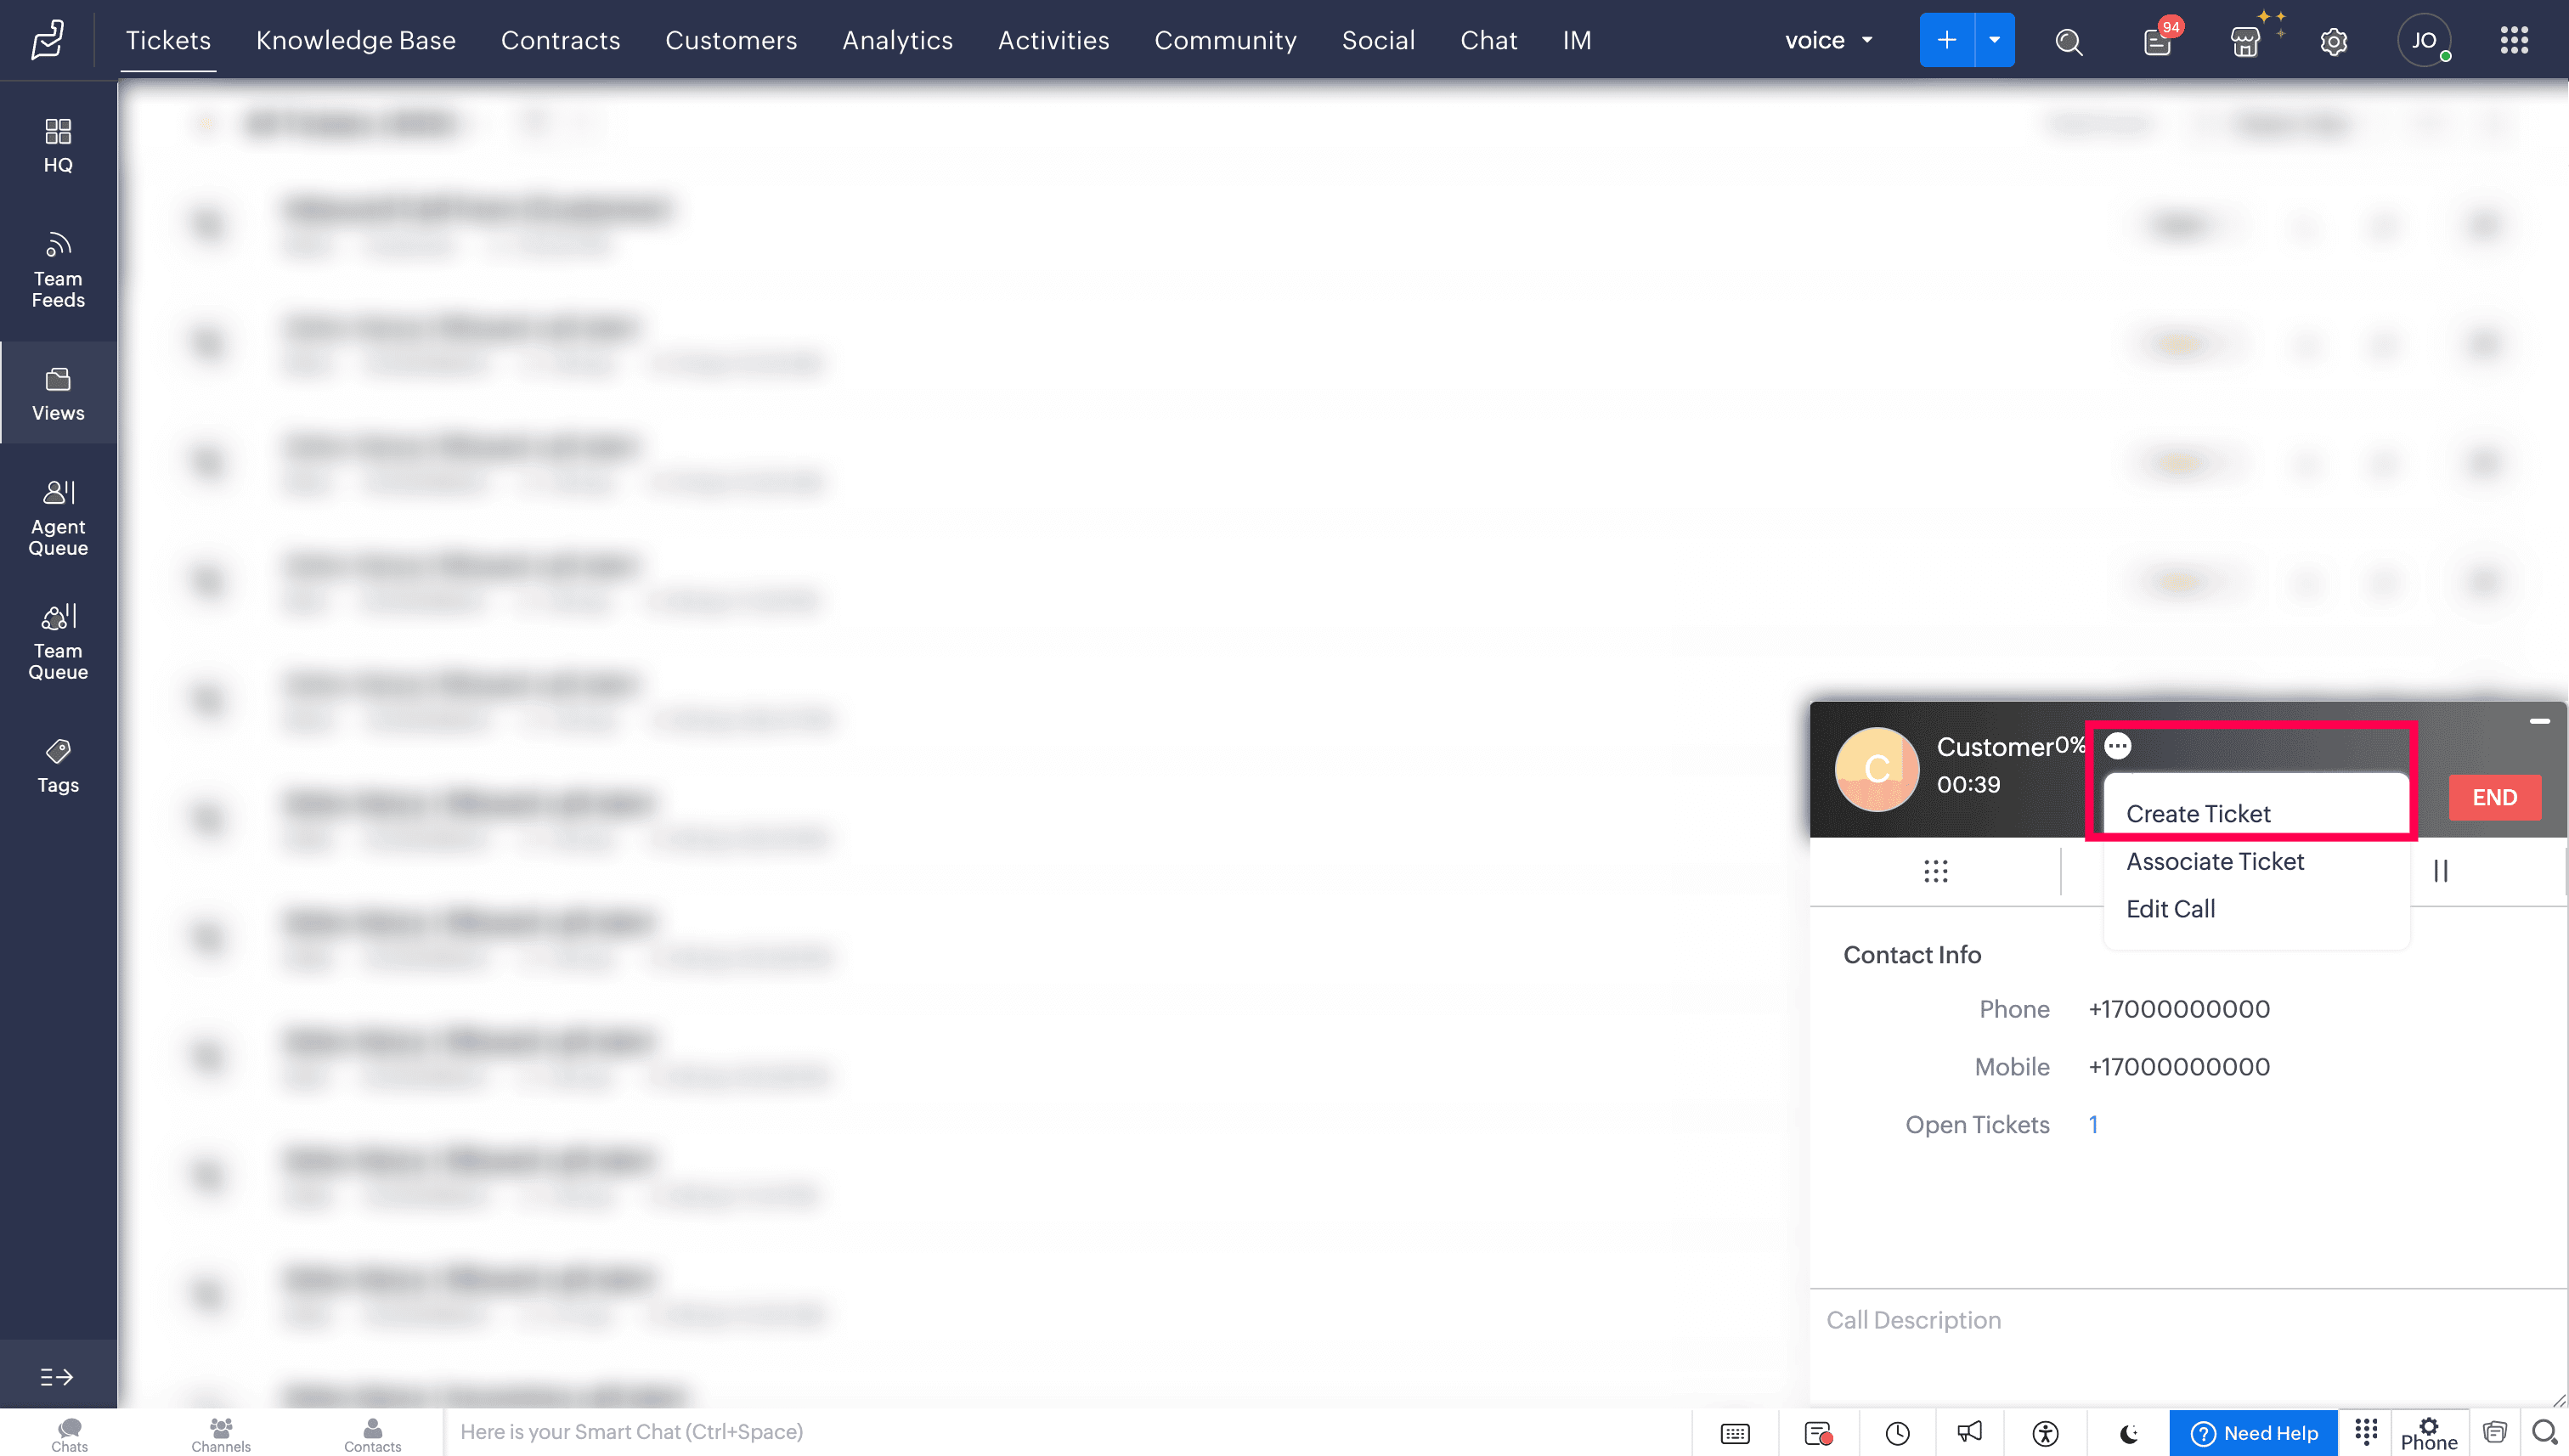
Create Ticket on-demand
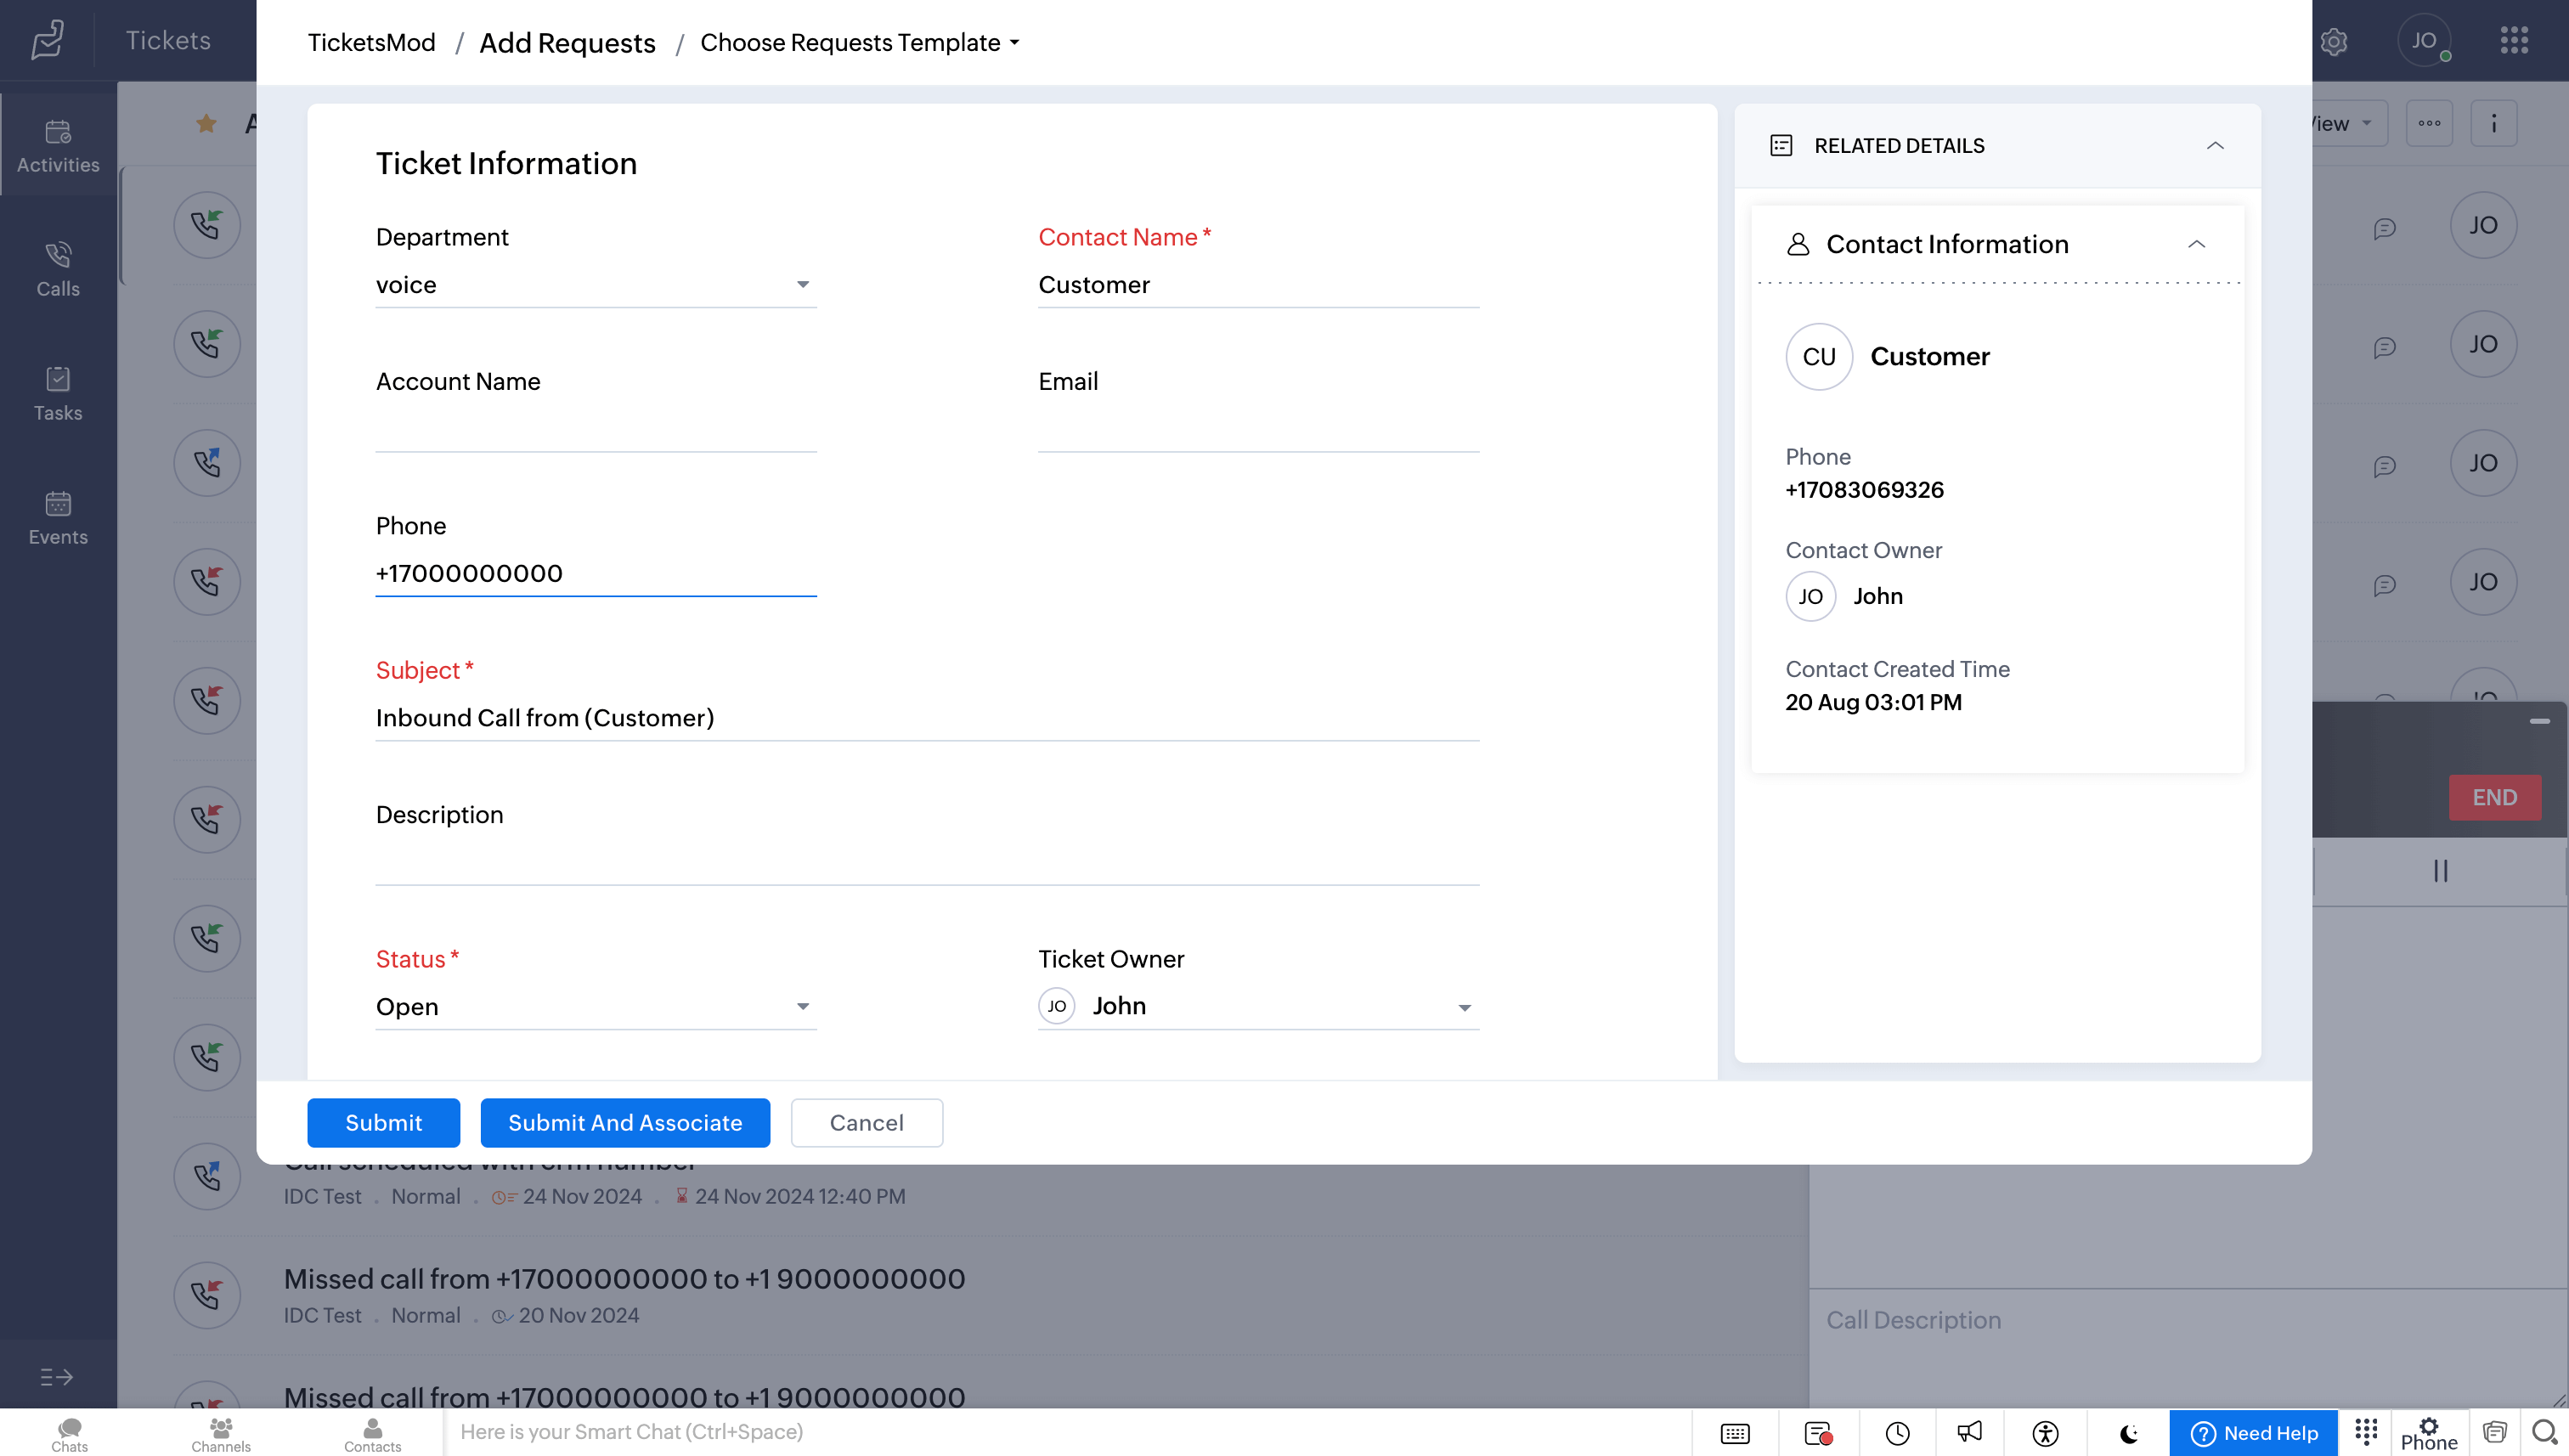
During a call, a new ticket can be created in Zoho Desk with the call details.
Click the ellipsis (three dots) icon in the Telephony (PhoneBridge) dial pad and choose the Create Ticket option.
Enter the required details, and then click Submit or Submit and Associate.


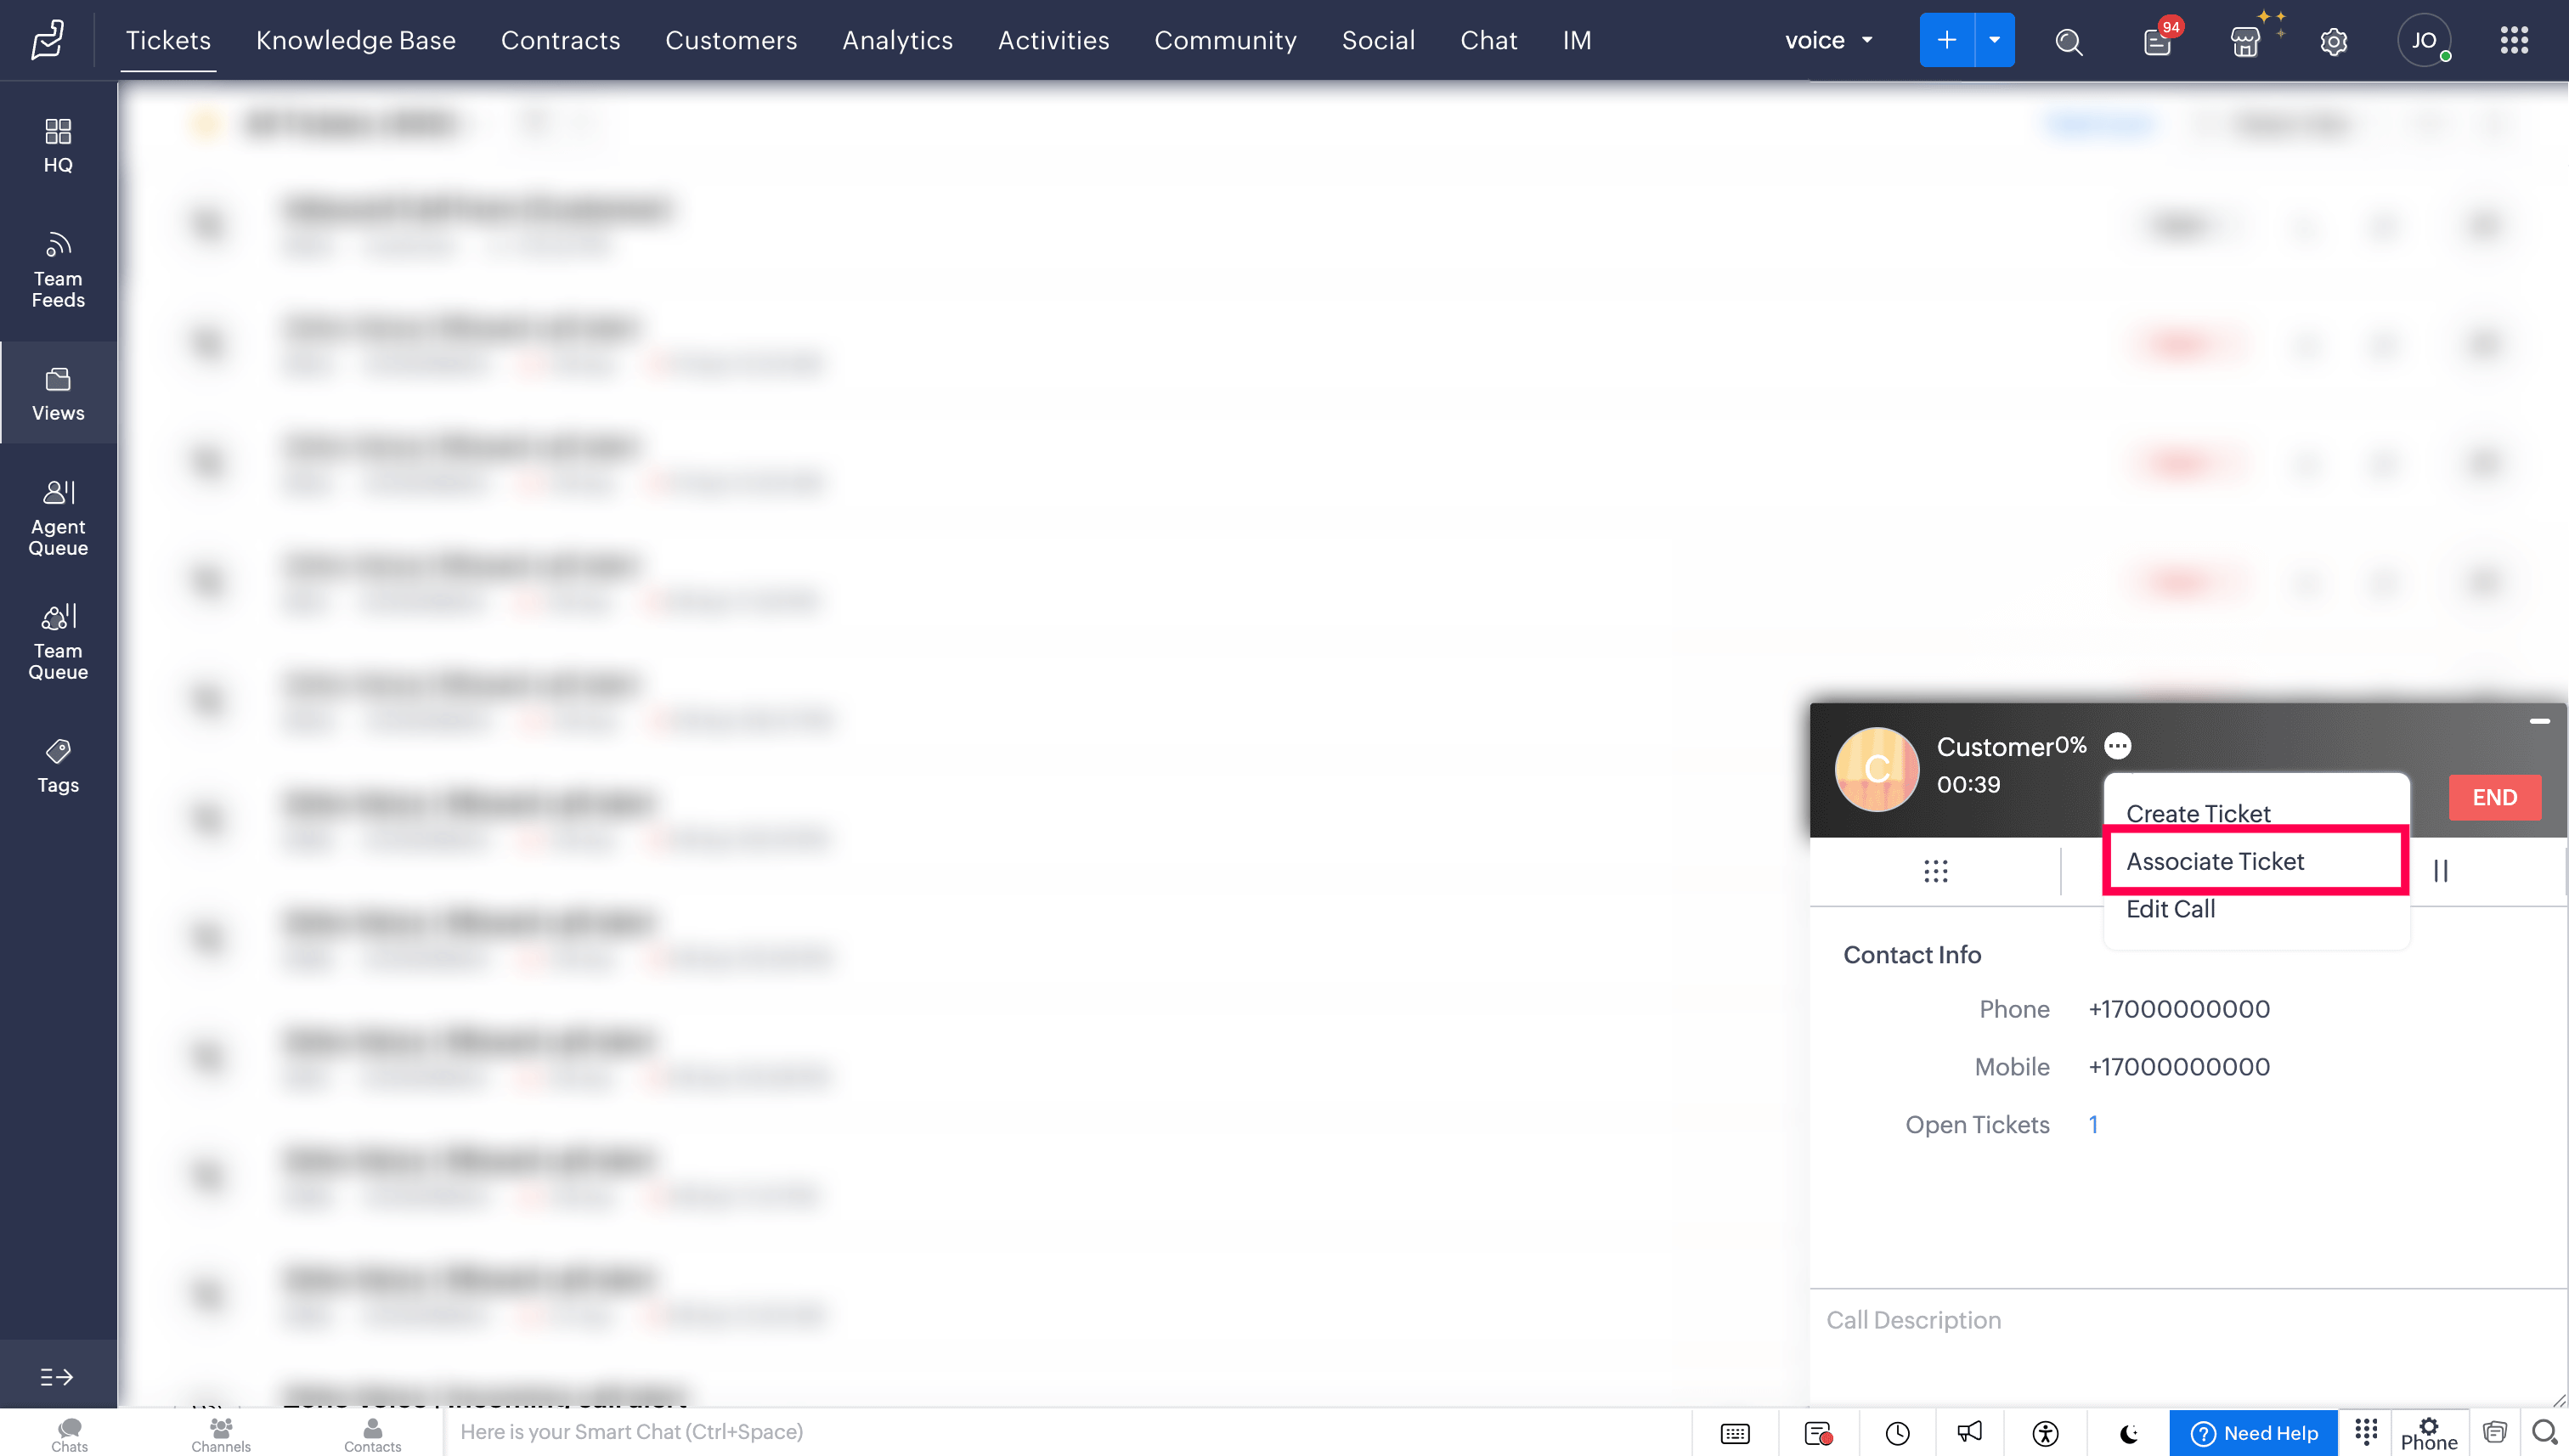
Associate Ticket on-demand
During or after a call, the ongoing call can be linked to an existing ticket in Zoho Desk
Click the ellipsis (three dots) icon in the Telephony (PhoneBridge) dial pad and choose the Associate Ticket option.
Search for and select the required ticket, and the call details will be associated with it.


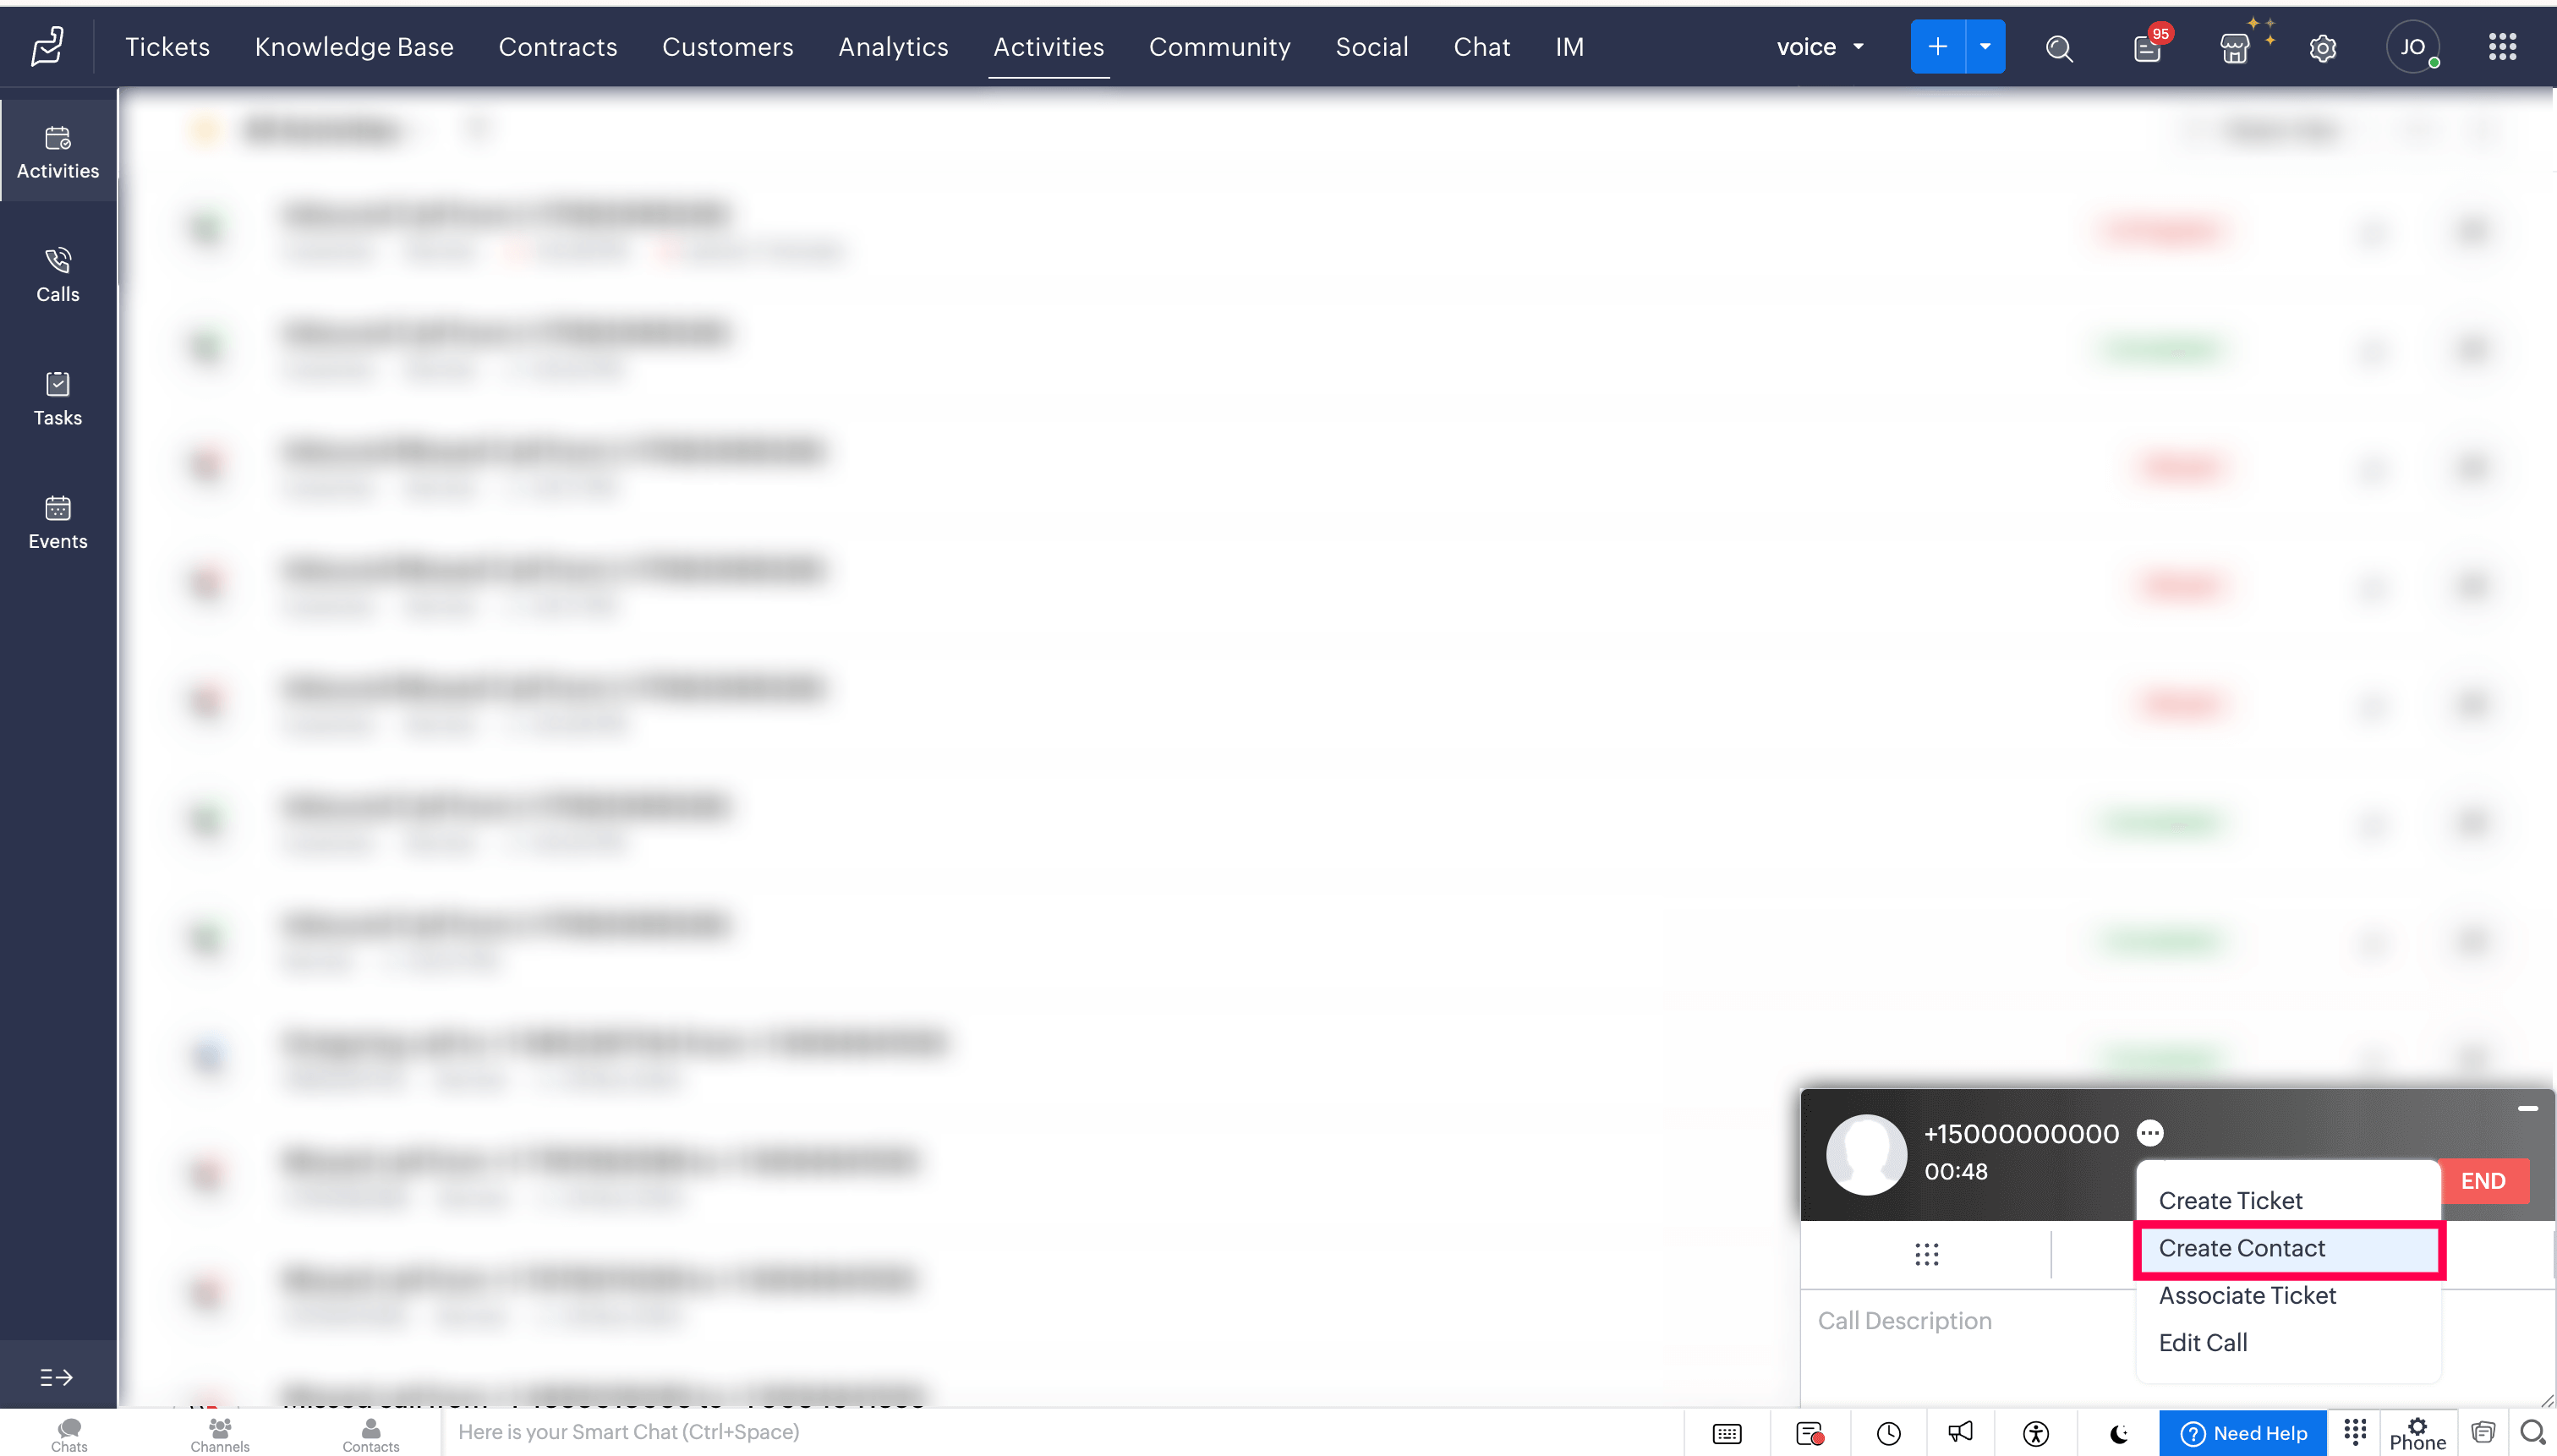
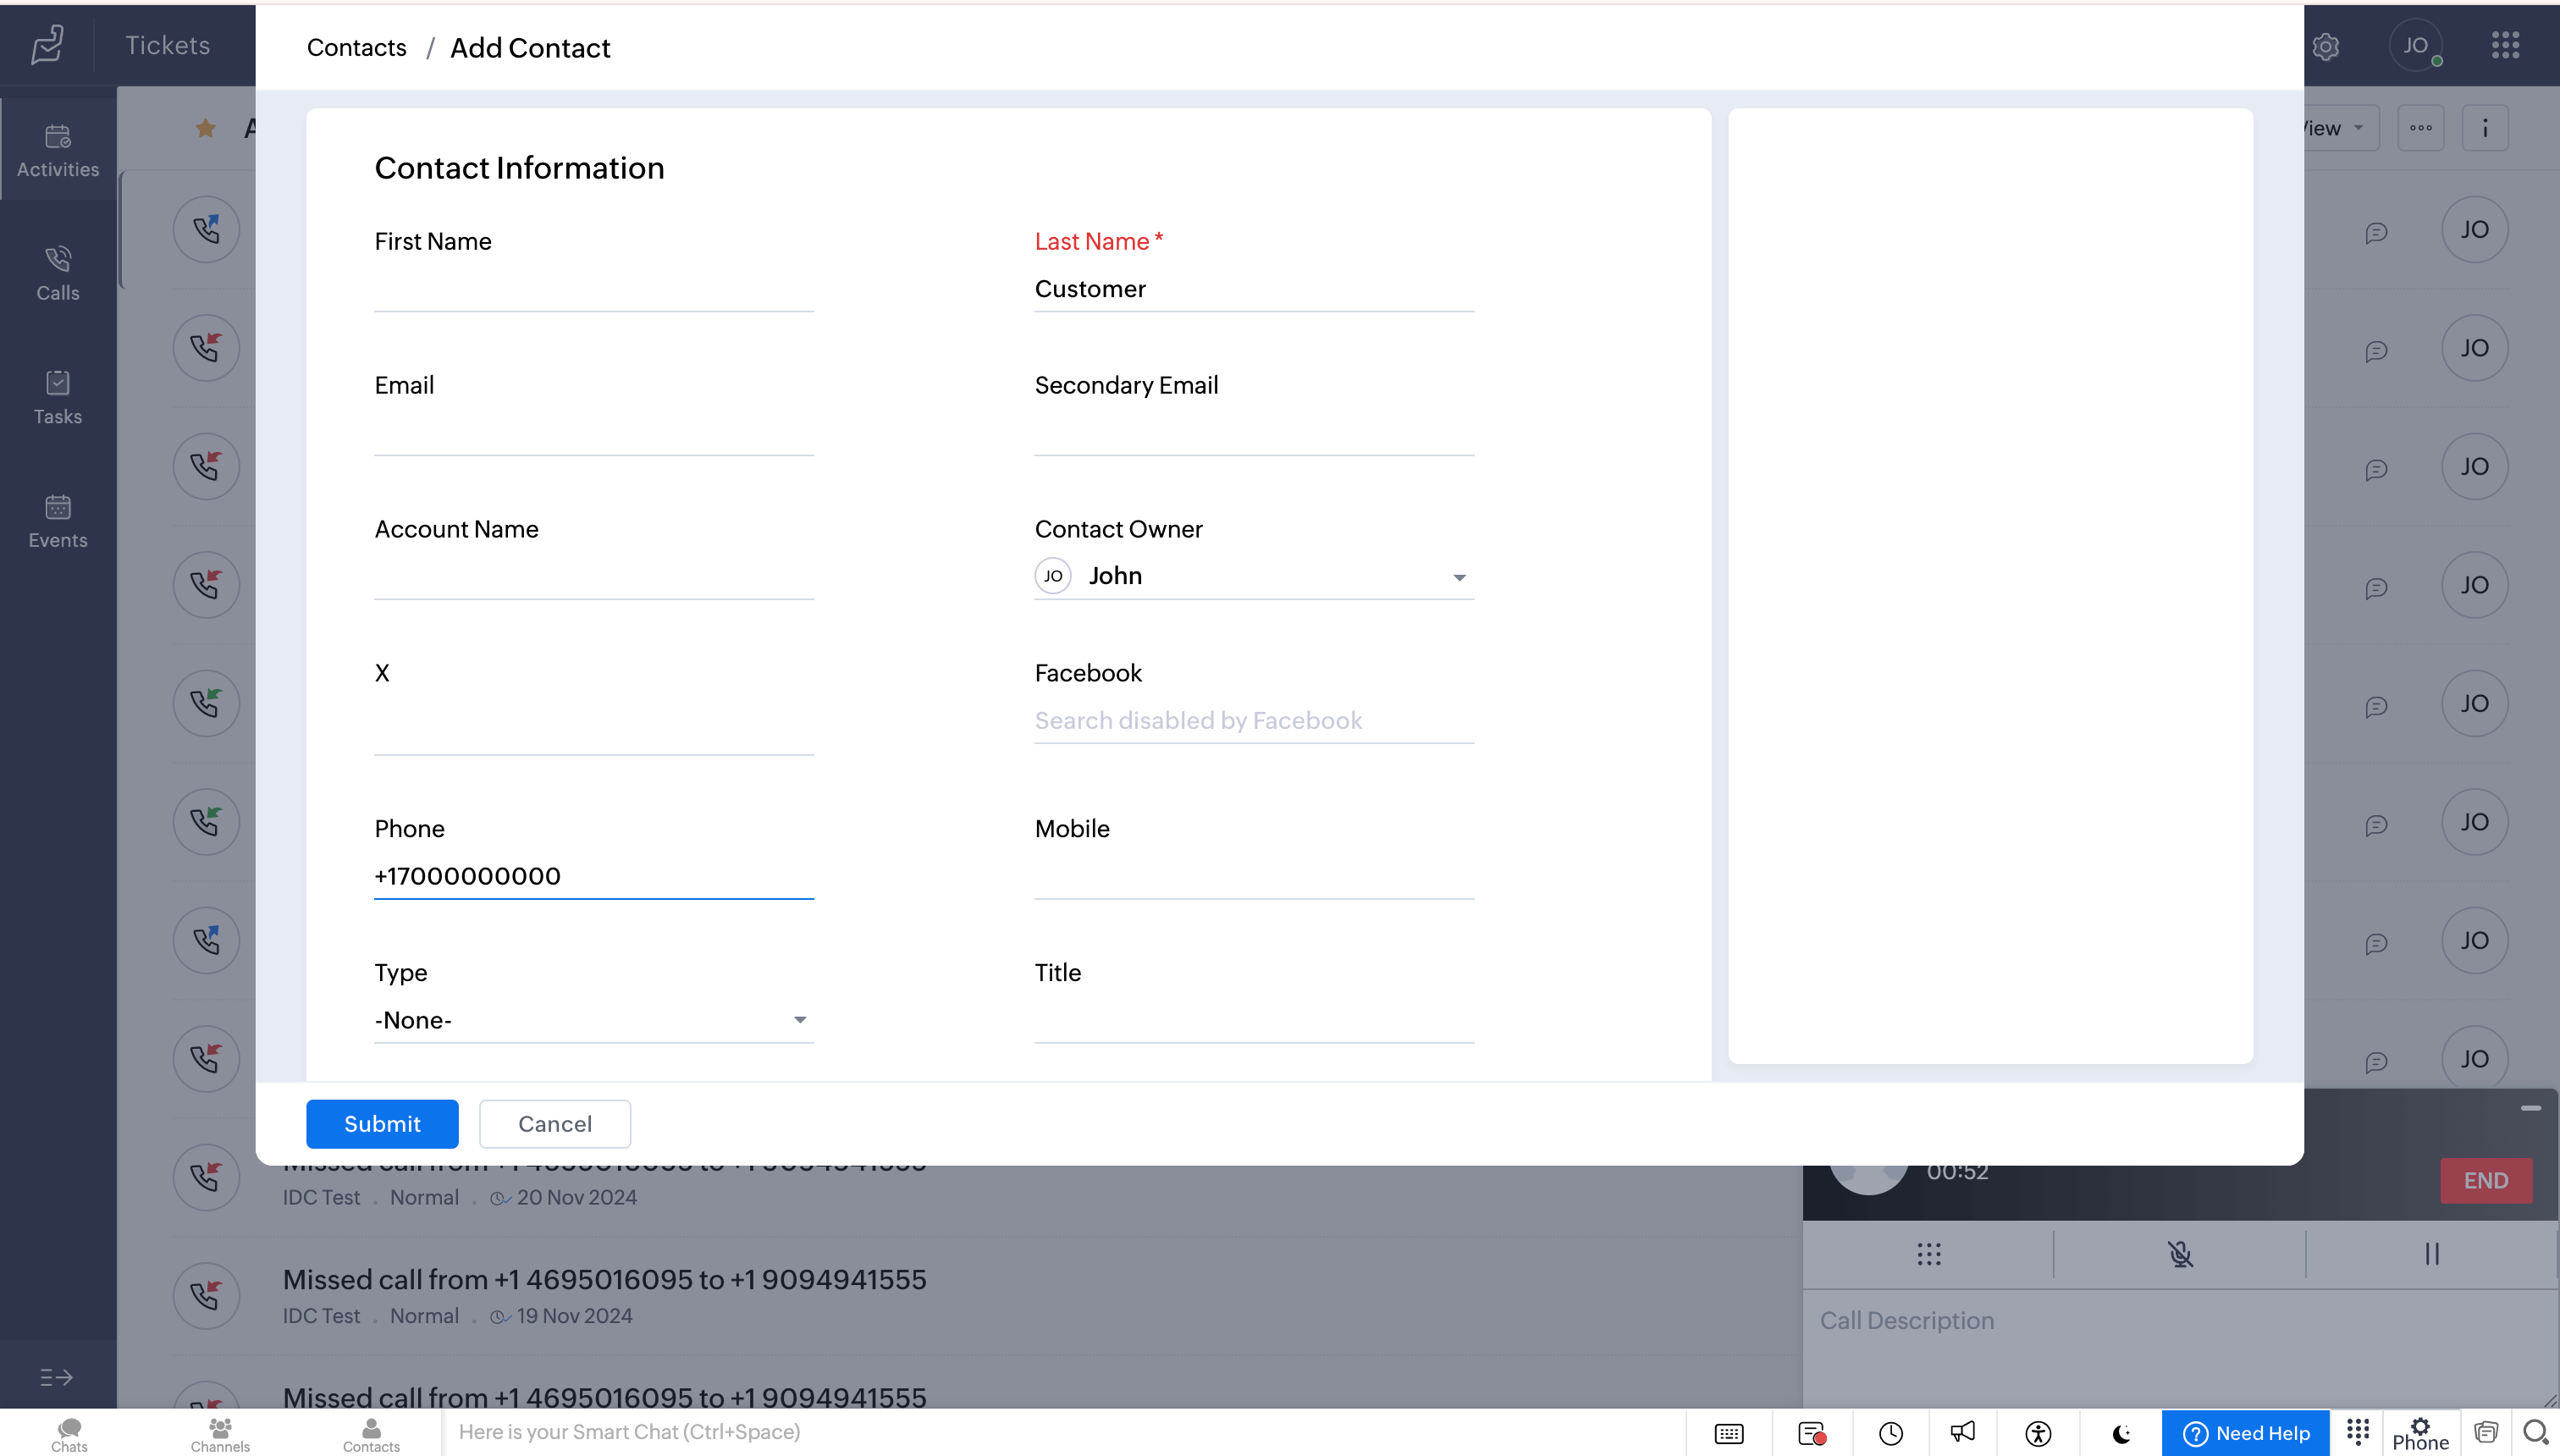
Create Contact on-demand
During or after a call, a new contact can be created in Zoho Desk with the call details
Click the ellipsis (three dots) icon in the Telephony (PhoneBridge) dial pad and select the Create Contact option.
Enter the required details, and then click Submit.


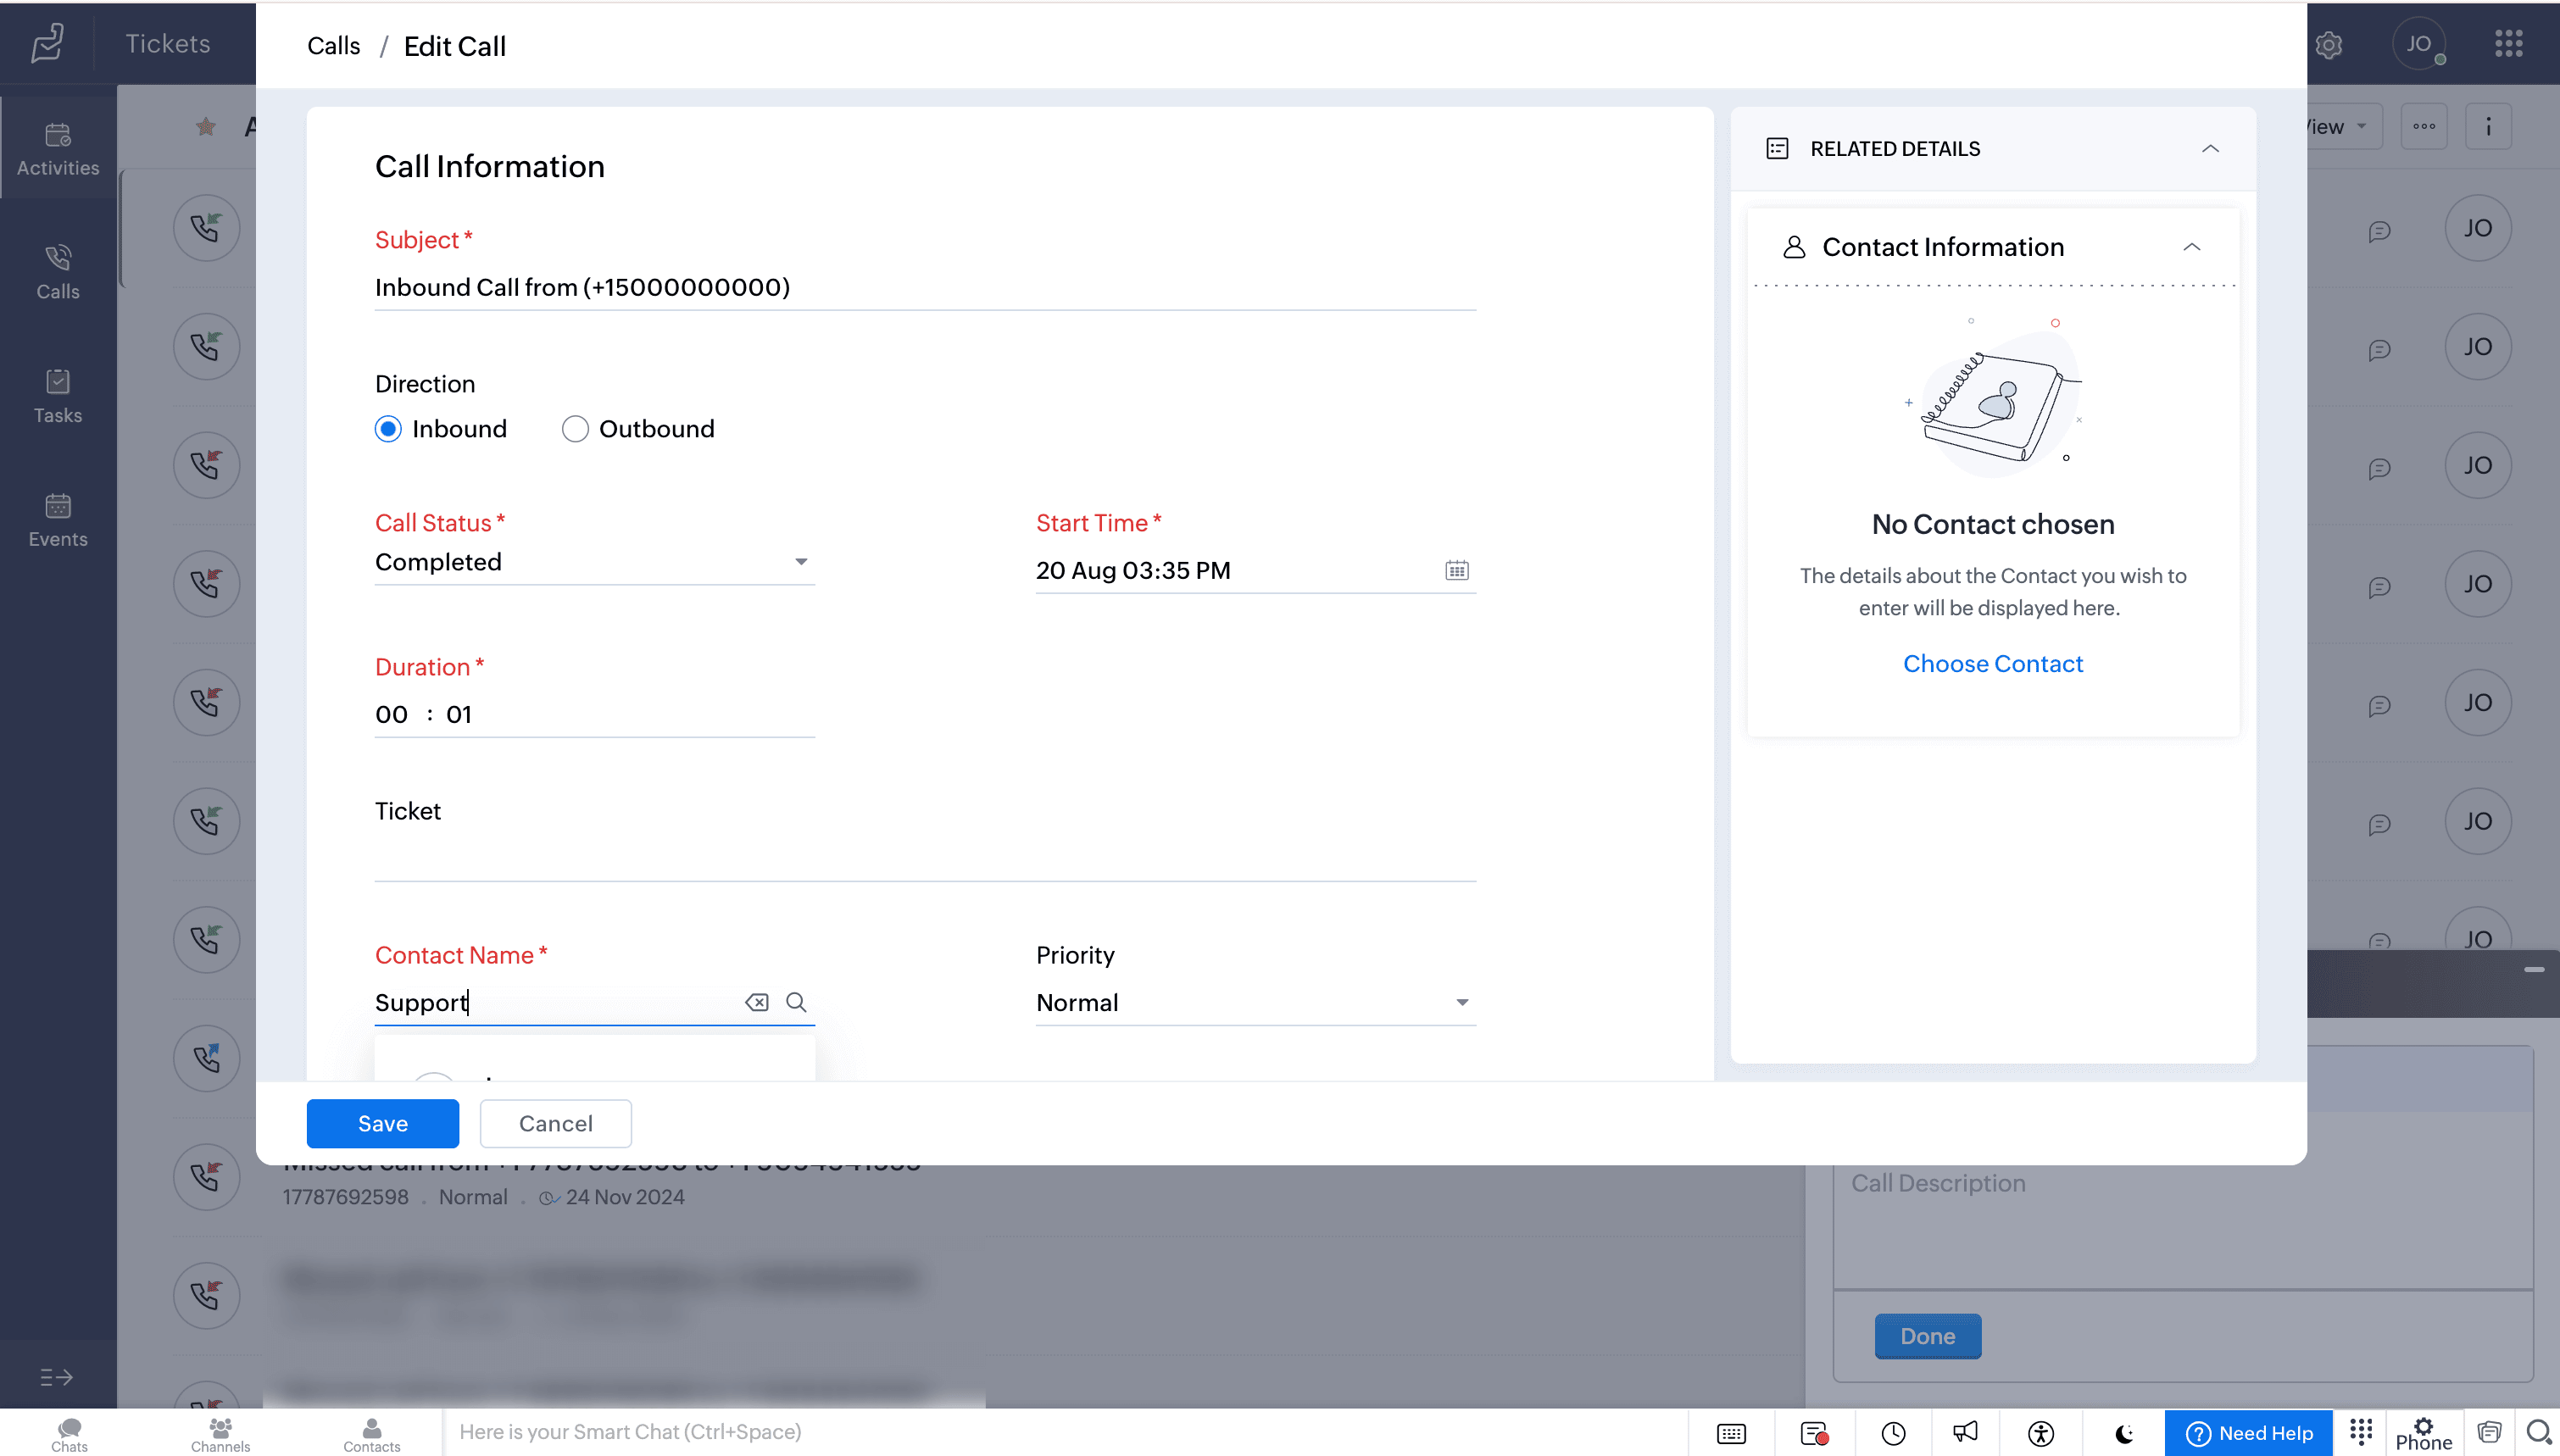
Edit Call details
During or after a call, you can
Click the ellipsis (three dots) icon in the Telephony (Phonebridge) dial pad and select the Edit Call option to edit the call information in Zoho Desk.
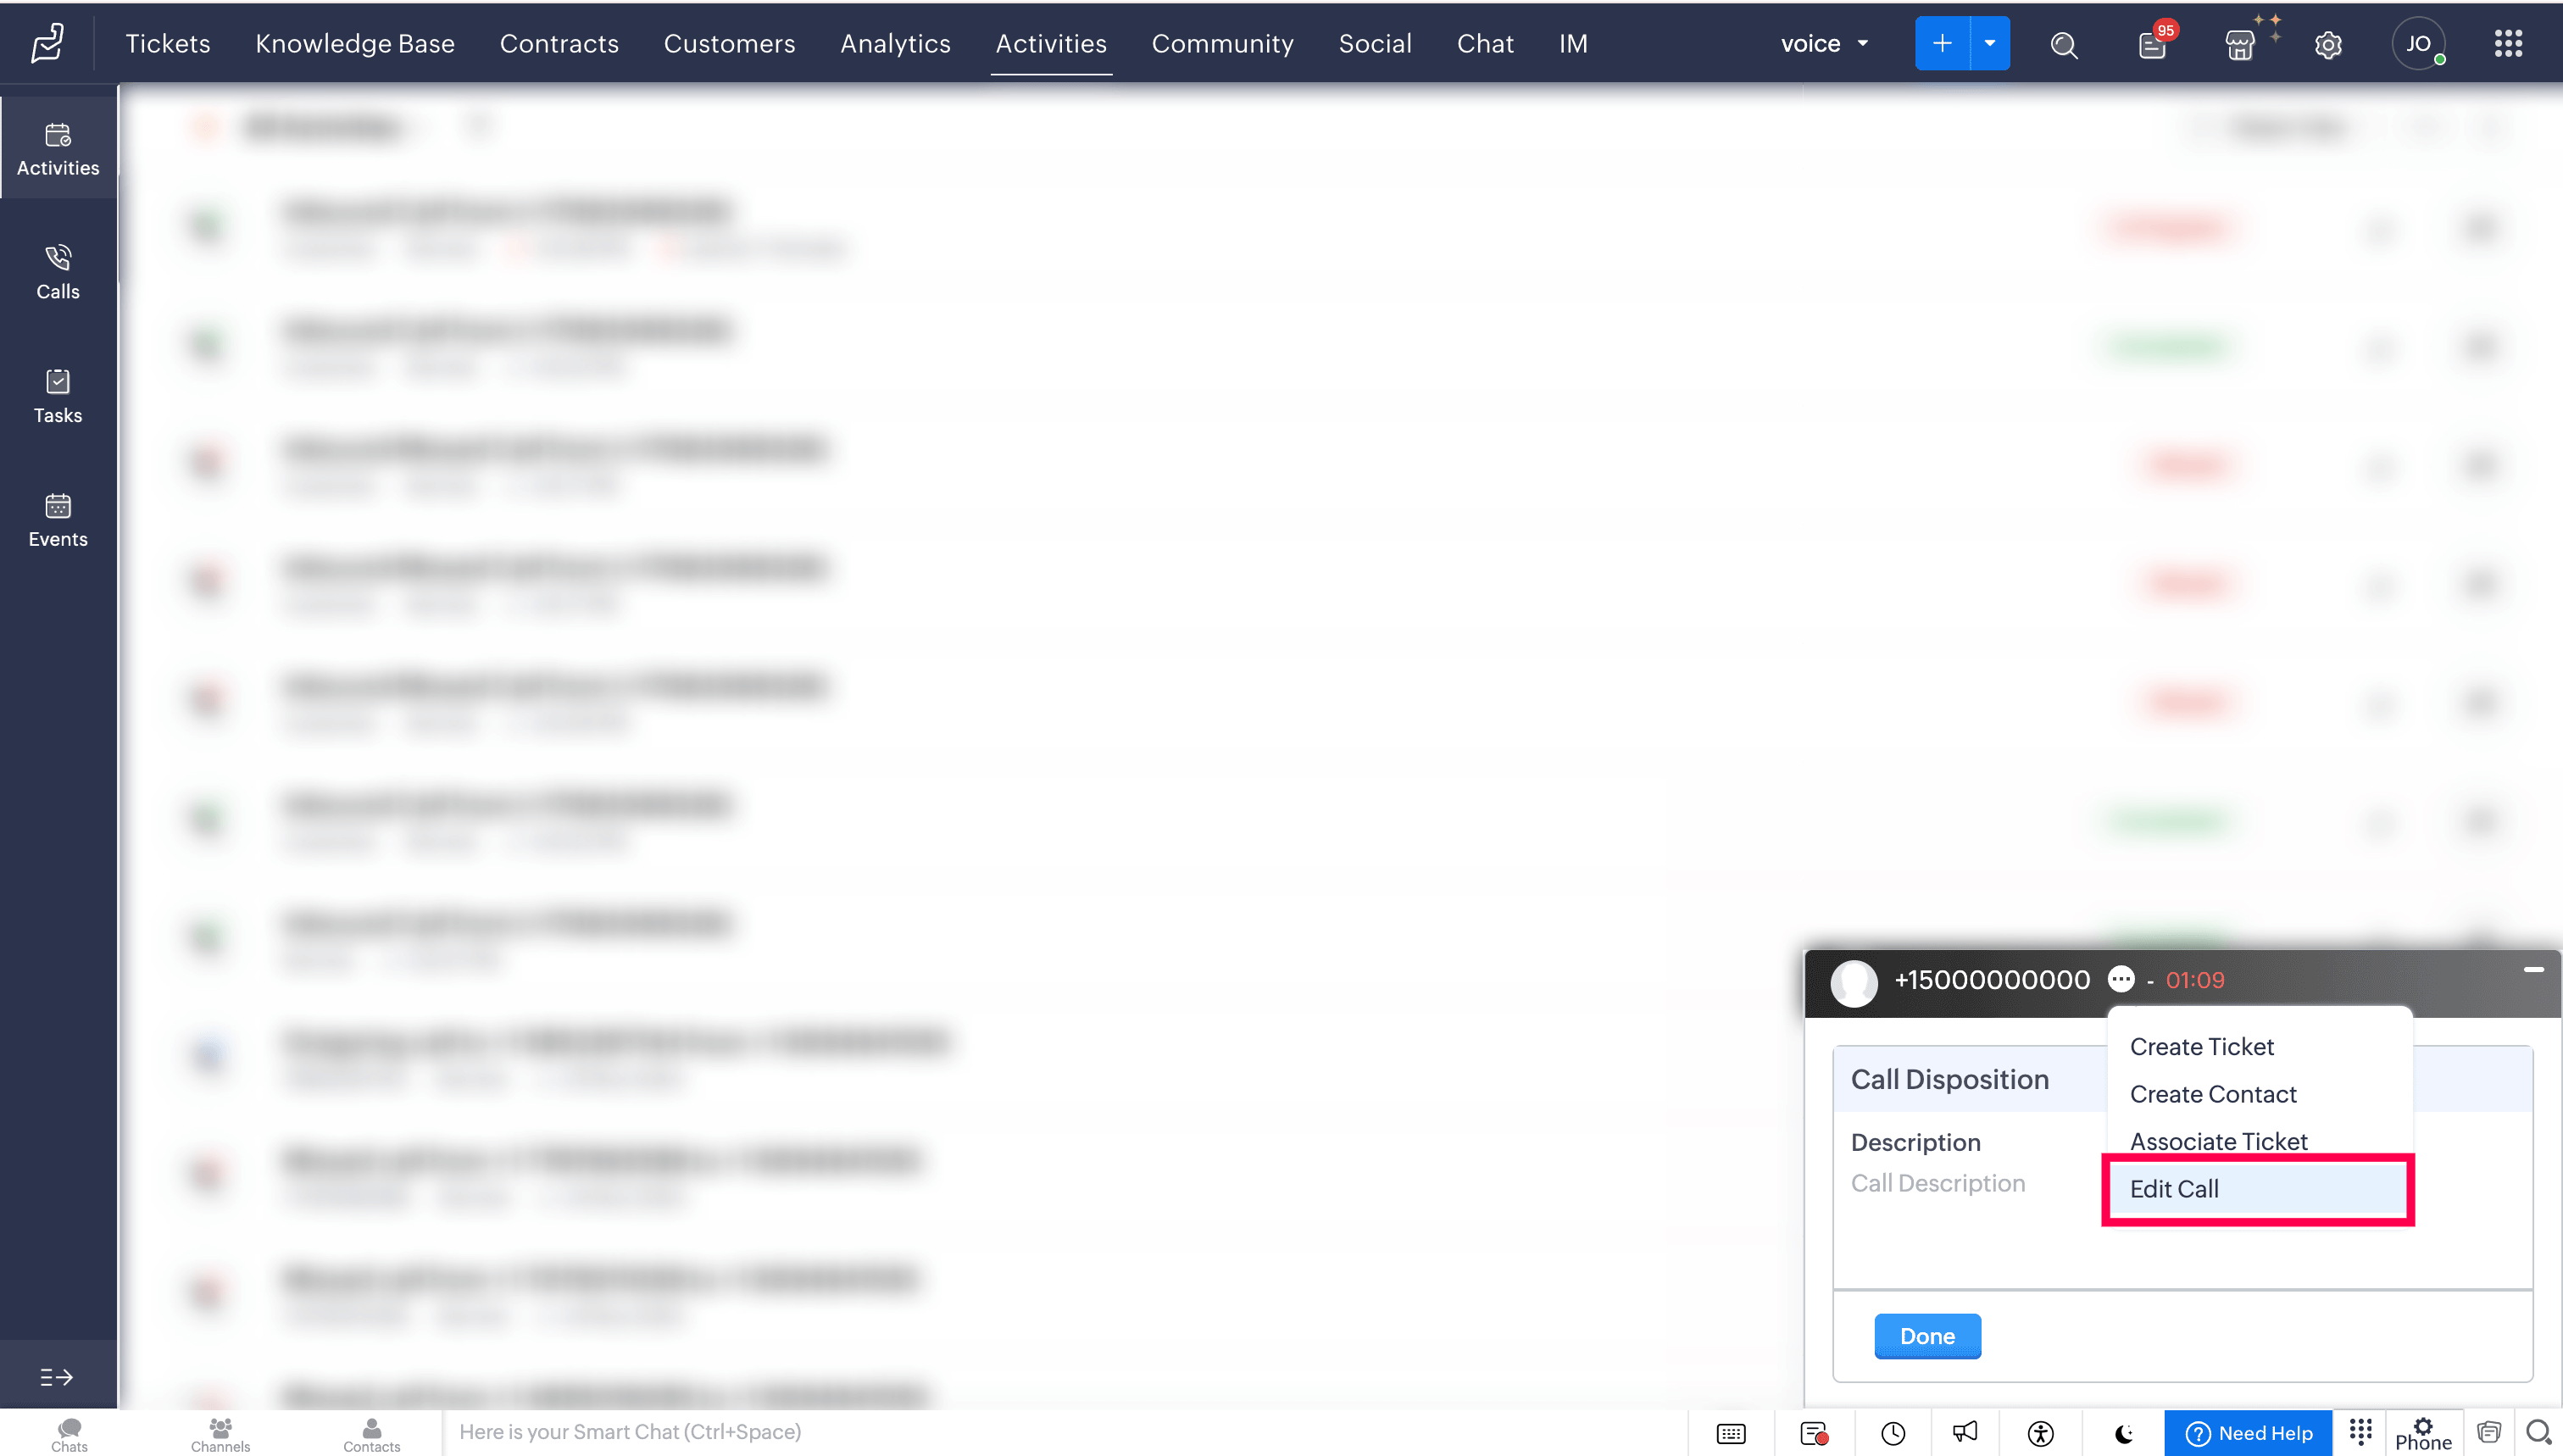
Make the required changes, and then click Save.


Users who want to access ZDialer's features and functionalities are encouraged to download the ZDialer extension for your browser (Chrome, Firefox, or Edge) using the relevant links. [Learn more about setting up ZDialer]