Application Settings
The administrator can control the settings for other Zoho apps and third-party applications and integrations from the Other App Settings section in the Zoho Mail Admin Console.
Integrations and Extensions
The Integrations and Extensions section in Admin Console allows administrators to view and manage extensions that are available for integration with Zoho Mail. The options available under the Integrations and Extensions section are:
Extensions
The applications or extensions that are available for the organization members to use can be viewed here. This section has three tabs that follow:
Extensions
The Extensions tab provides a list of extensions that are available for your organization. From the listed applications, you can choose to allow or deny specific applications or extension. The extensions can be enabled for all users or selected users or groups based on your requirements. When enabled for specific users or groups, the extension will only be accessible to the added users or groups.
The associated users/groups will be able to configure the extensions that you've enabled here from the eWidgets section in Zoho Mail Settings
Follow the below steps to allow or deny applications:
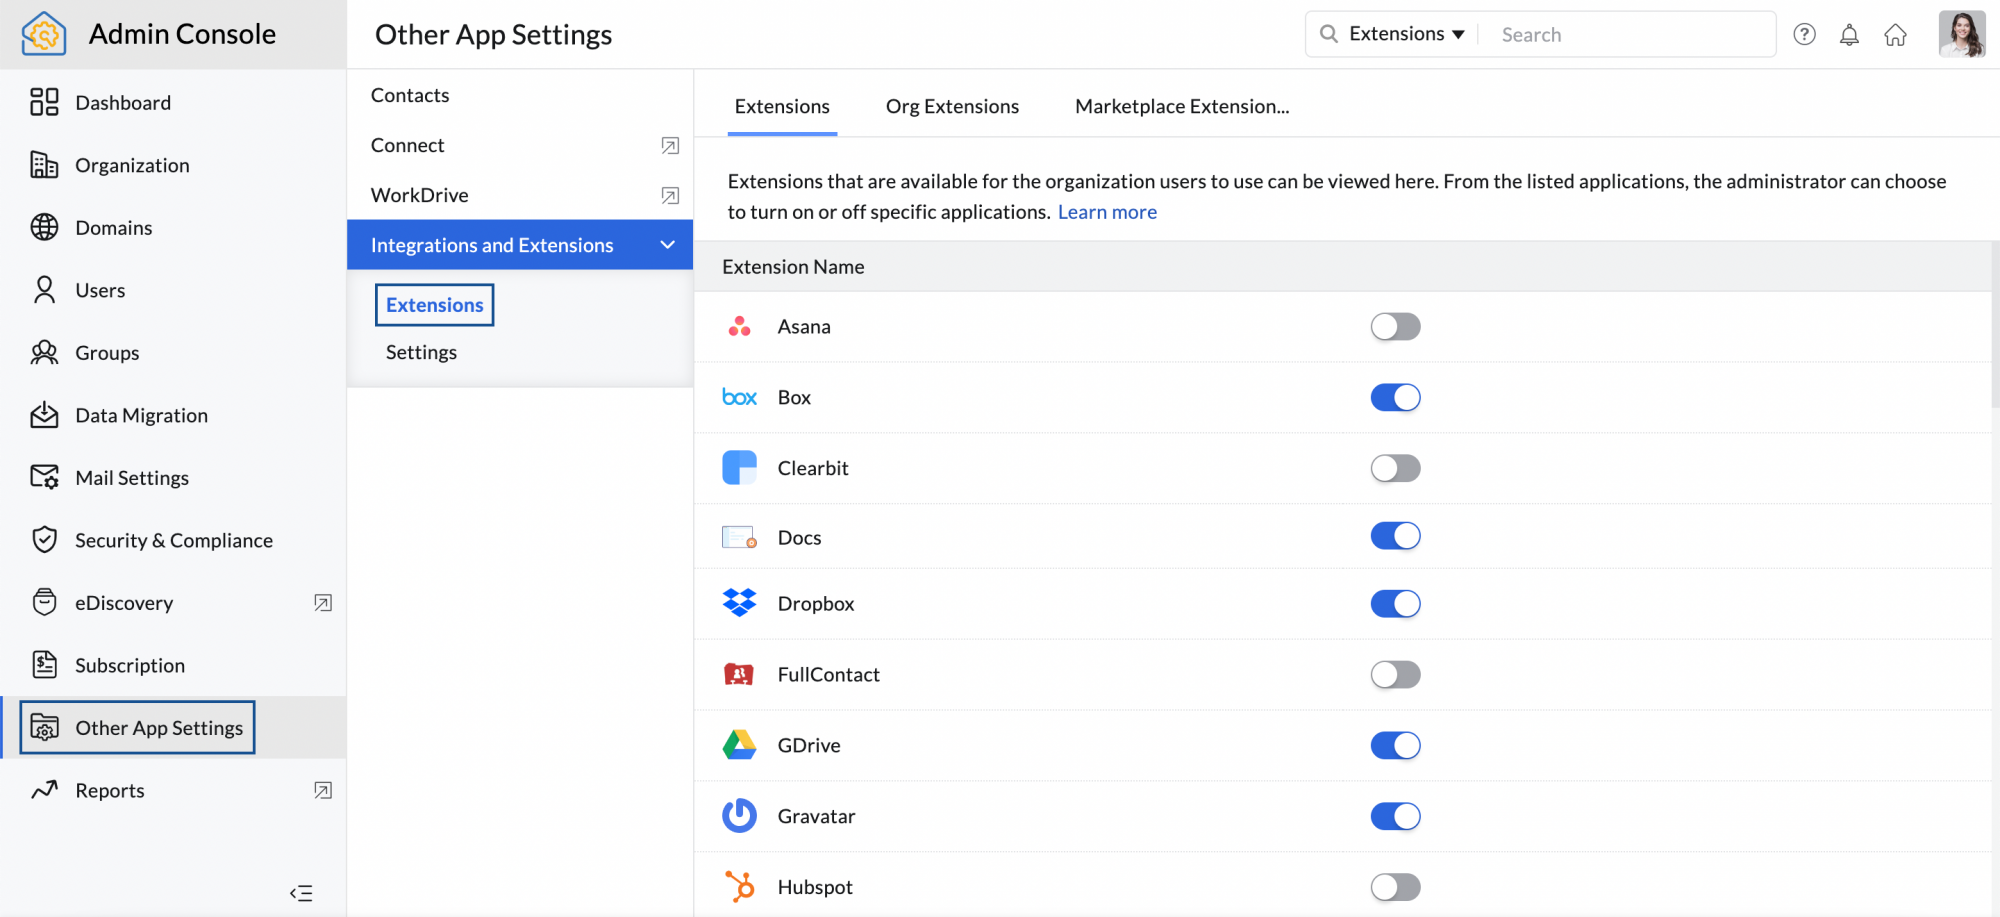
- Log in to the Zoho Mail Admin Console, and select Other App Settings in the left pane.
- Select Integrations and Extensions. The Extensions tab appears by default. All the applications that your users can configure as extensions will be listed here.
- Click on the toggle bar corresponding to the specific applications to enable or disable them.
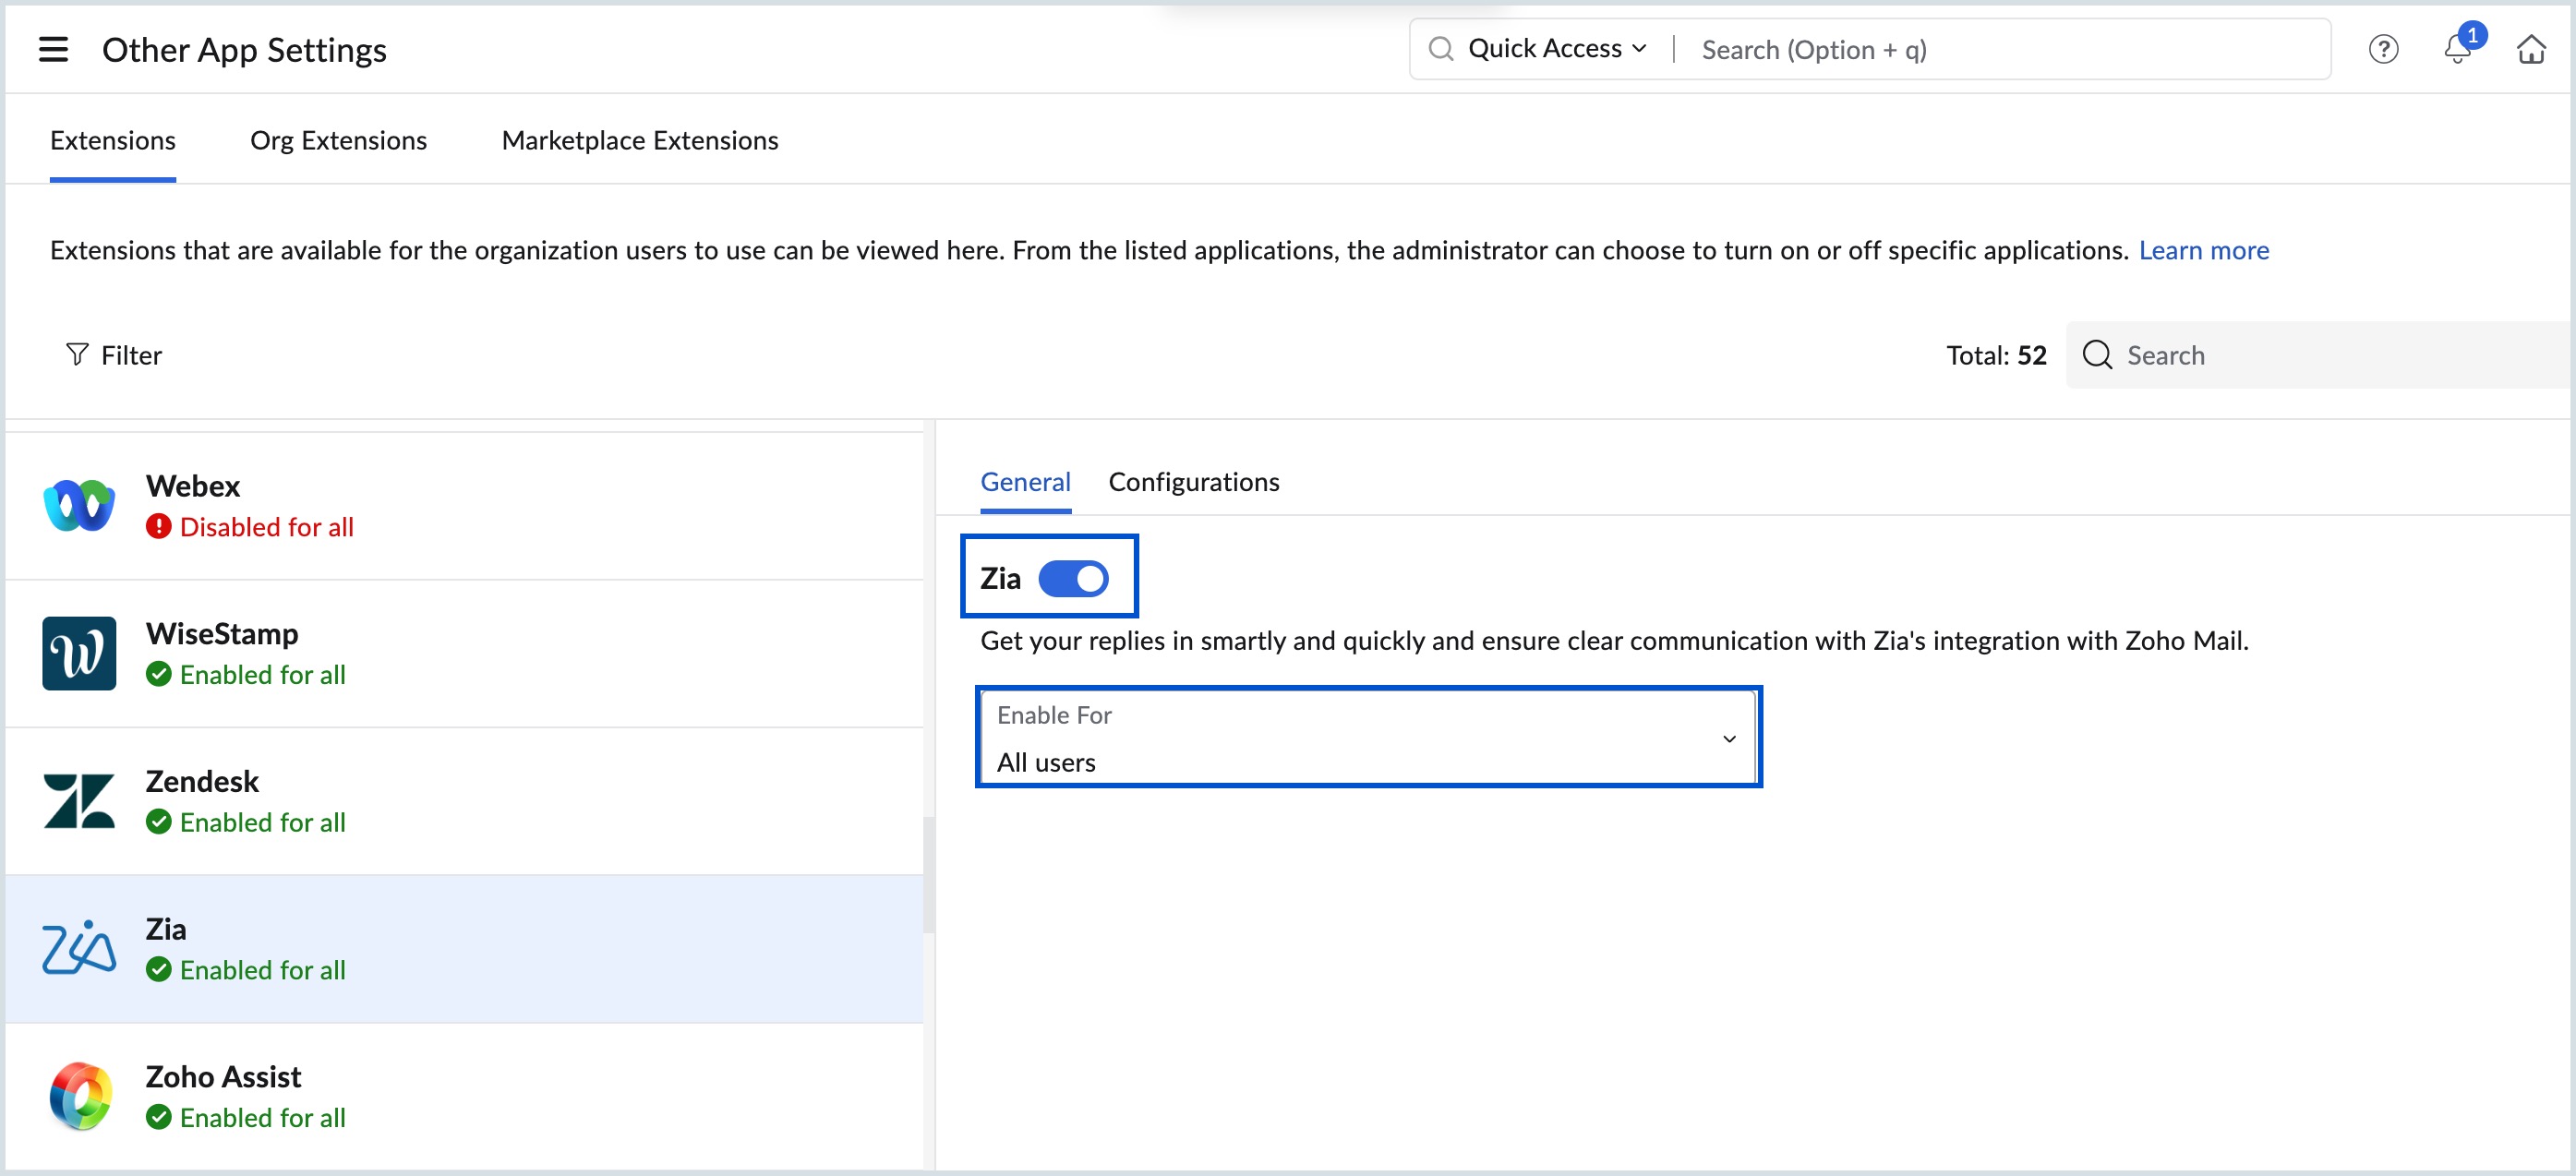
- Choose the users to whom you want to enable the extension from the Enable For drop-down:
- All users - The extension will be applied to all the users in your organization.
- Selected users/groups - The extension will be applied to the specific set of users/groups you add.
- If you have chosen Selected users/groups, select whether you want to associate Users or Groups from the top menu, and click Add.
- Select the users/Groups you want to add to the list and click Submit. You can also remove a user/group from the list by clicking the Delete icon next to the user/group name.
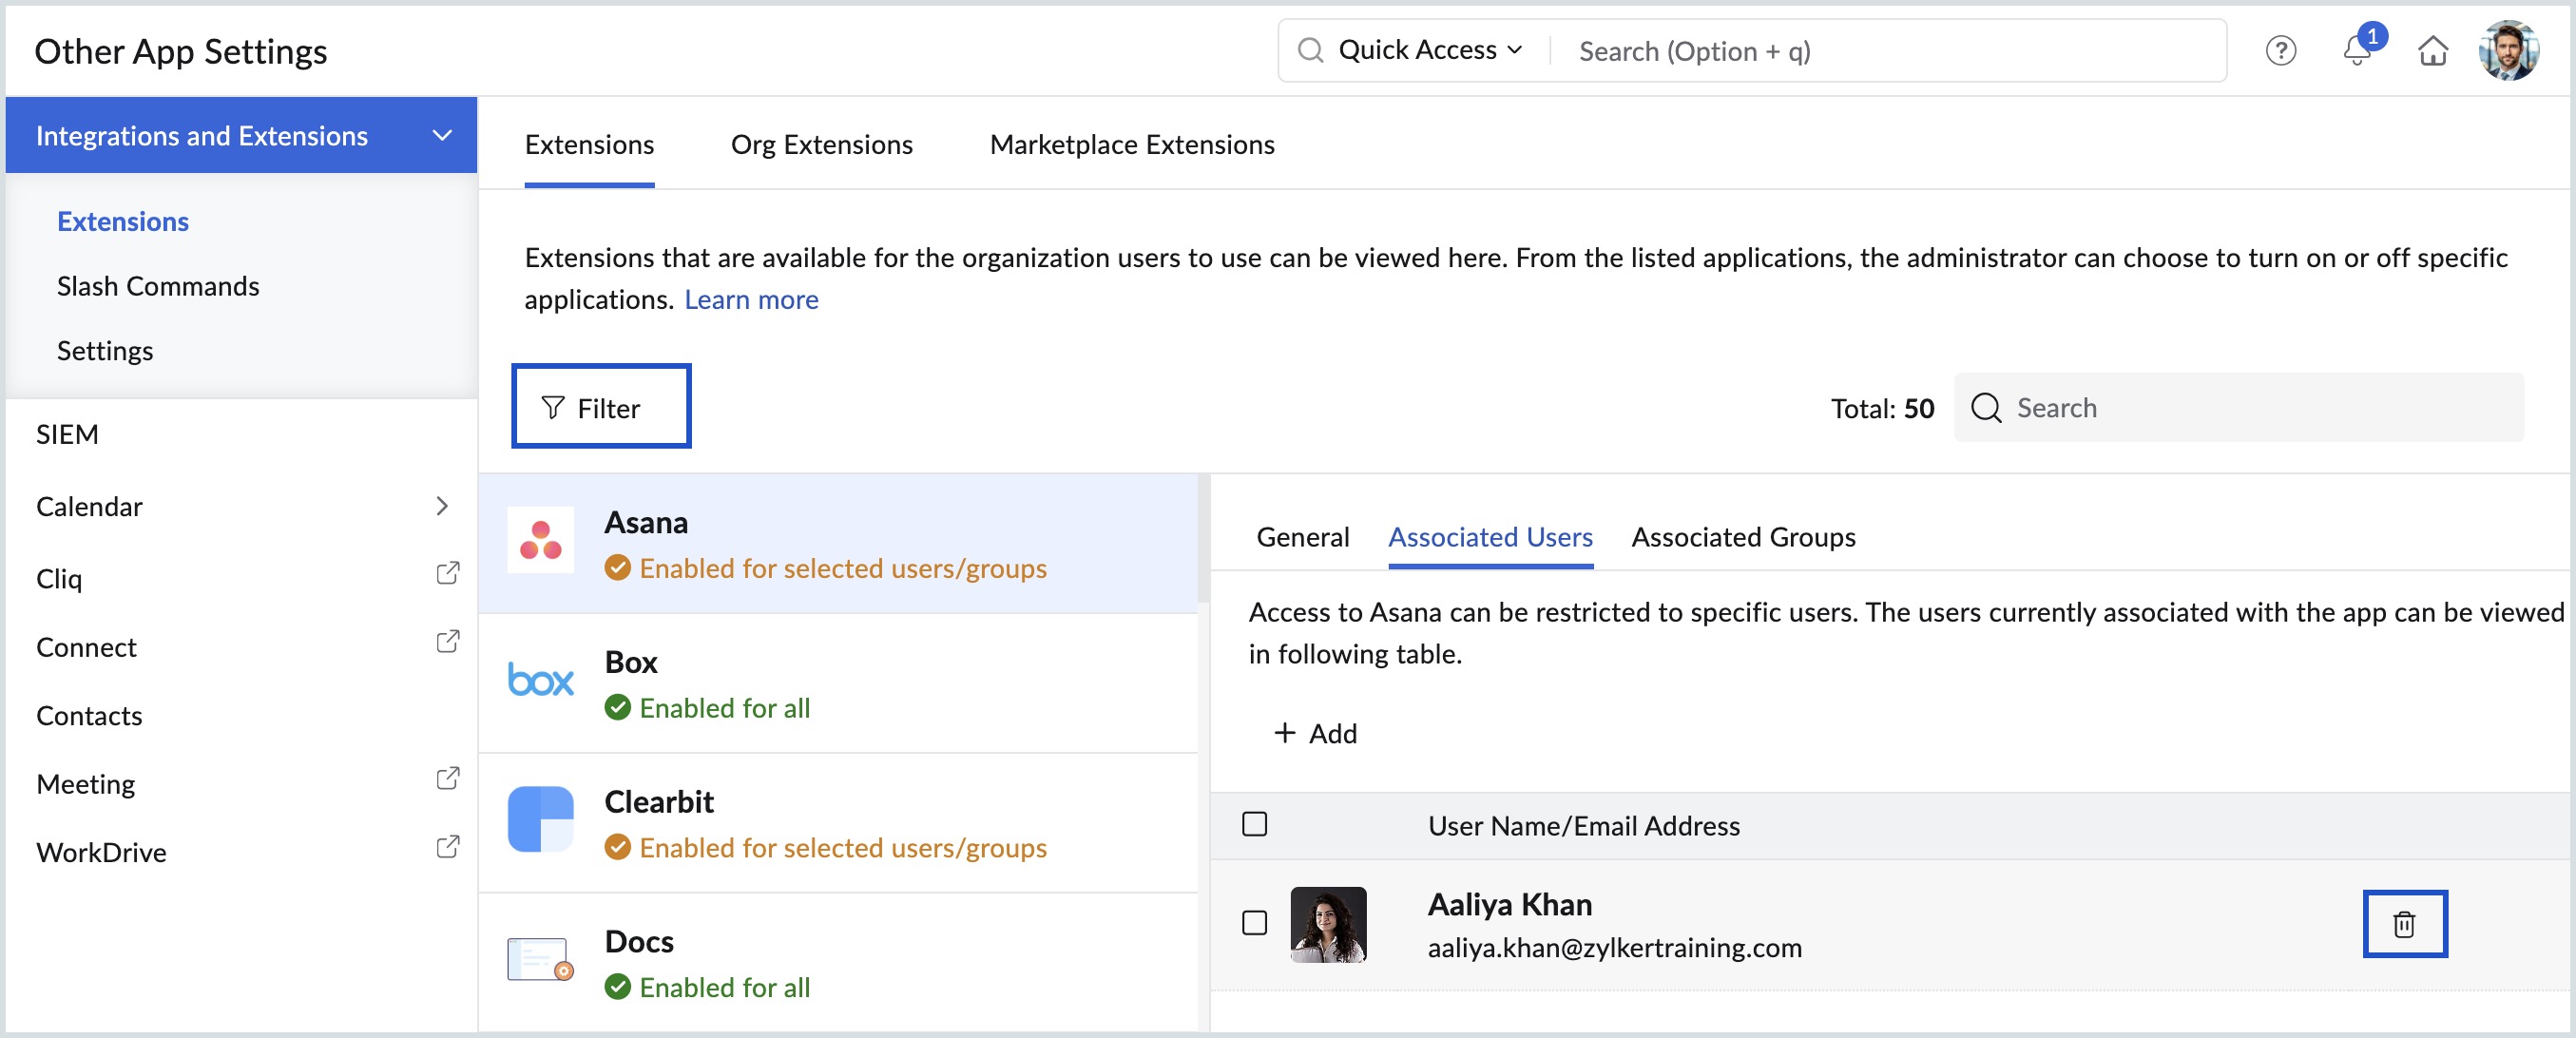
You have the option to filter extensions in the extension listings by selecting the Filter button in the top menu. With the Filter option, you can sort extensions based on their Type (Zoho and non-Zoho apps), Status (Enabled and Disabled), and the Category of the extension.
Note:
For specific extensions requiring additional configuration settings, a Configuration tab will be displayed in the Admin Console. Refer to the respective help documentation for detailed information on configuring these extensions.
Steps to enable Zia extension from Zoho Mail Admin Console
The Zia extension can be enabled for the entire organization only by the Super Administrator/ Administrators of the organization. Once enabled, all the users in the organization will be able to easily access Zia AI's capabilities to generate and summarize email content.
Region-specific availability of Zia extension
- Zia for Mail feature is currently available only in IN DC and will be rolled out to other DCs in a phased manner. If Zia for Mail is available in your region, click the Access Zia for Mail button under the Zia Extension to configure different AI providers for your organization.
- If Zia for Mail is not yet available in your region, you can still continue to configure Zia extension (only GPT) directly by entering an OpenAI API key under Extensions > Zia > Configuration.
Follow the below mentioned steps to configure Zia for Mail as an extension to your organization.
- Log in to Zoho Mail Admin Console with your Super Administrator/ Administrator credentials.
- Navigate to Other App Settings > Integrations and extensions > Extensions > Zia.
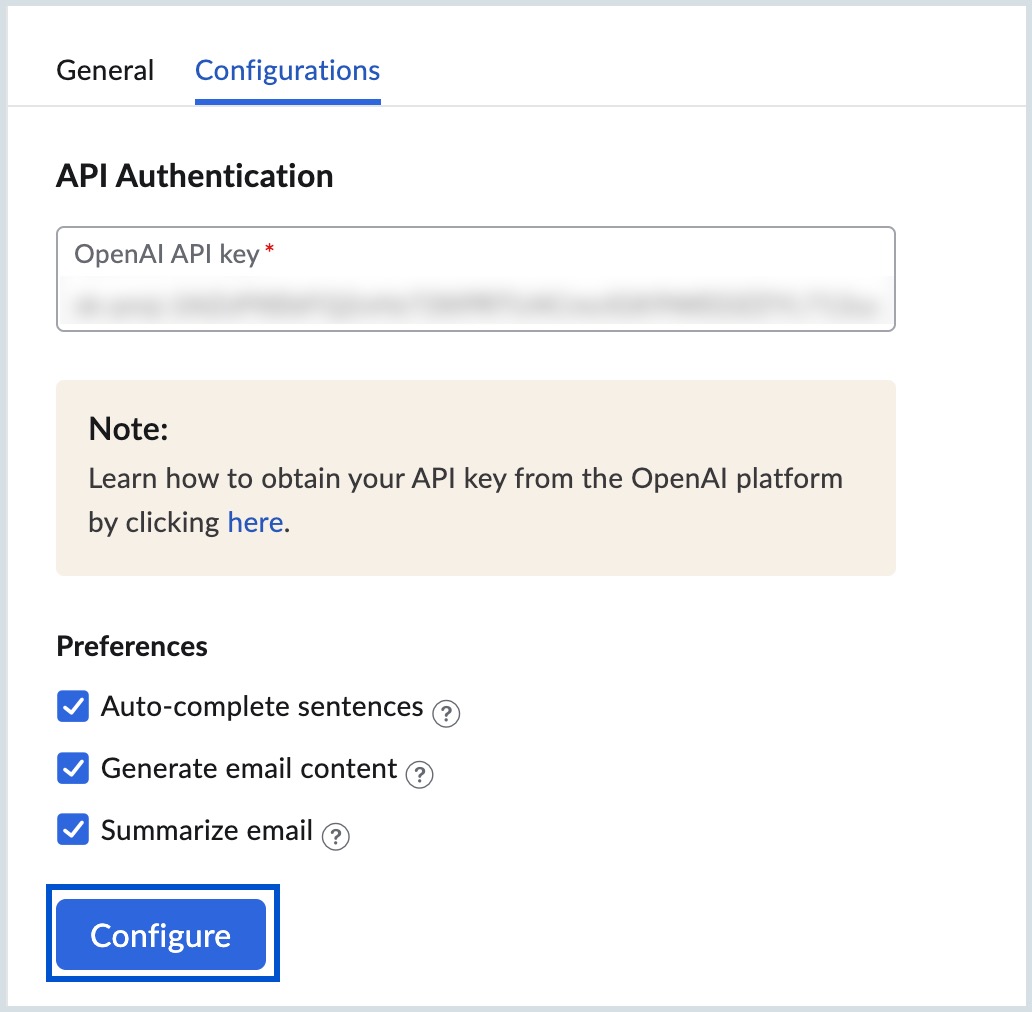
- Move to Configurations tab and provide the OpenAI API key. Refer here to generate the API key from the OpenAI site.
- Choose the preferred services you want to enable for your organization's users using the options provided. The available options are:
- Auto-complete sentences - Zia will suggest contextual content as you type in the compose window based on the preceding text provided by you.
- Generate email content - You can generate engaging email content based on your requirement by providing the context.
- Summarize email content - You can generate a summary of the email content to know the gist of lengthy emails.
- Click Configure.
- Read and Accept Open AI's Data Privacy Notice.
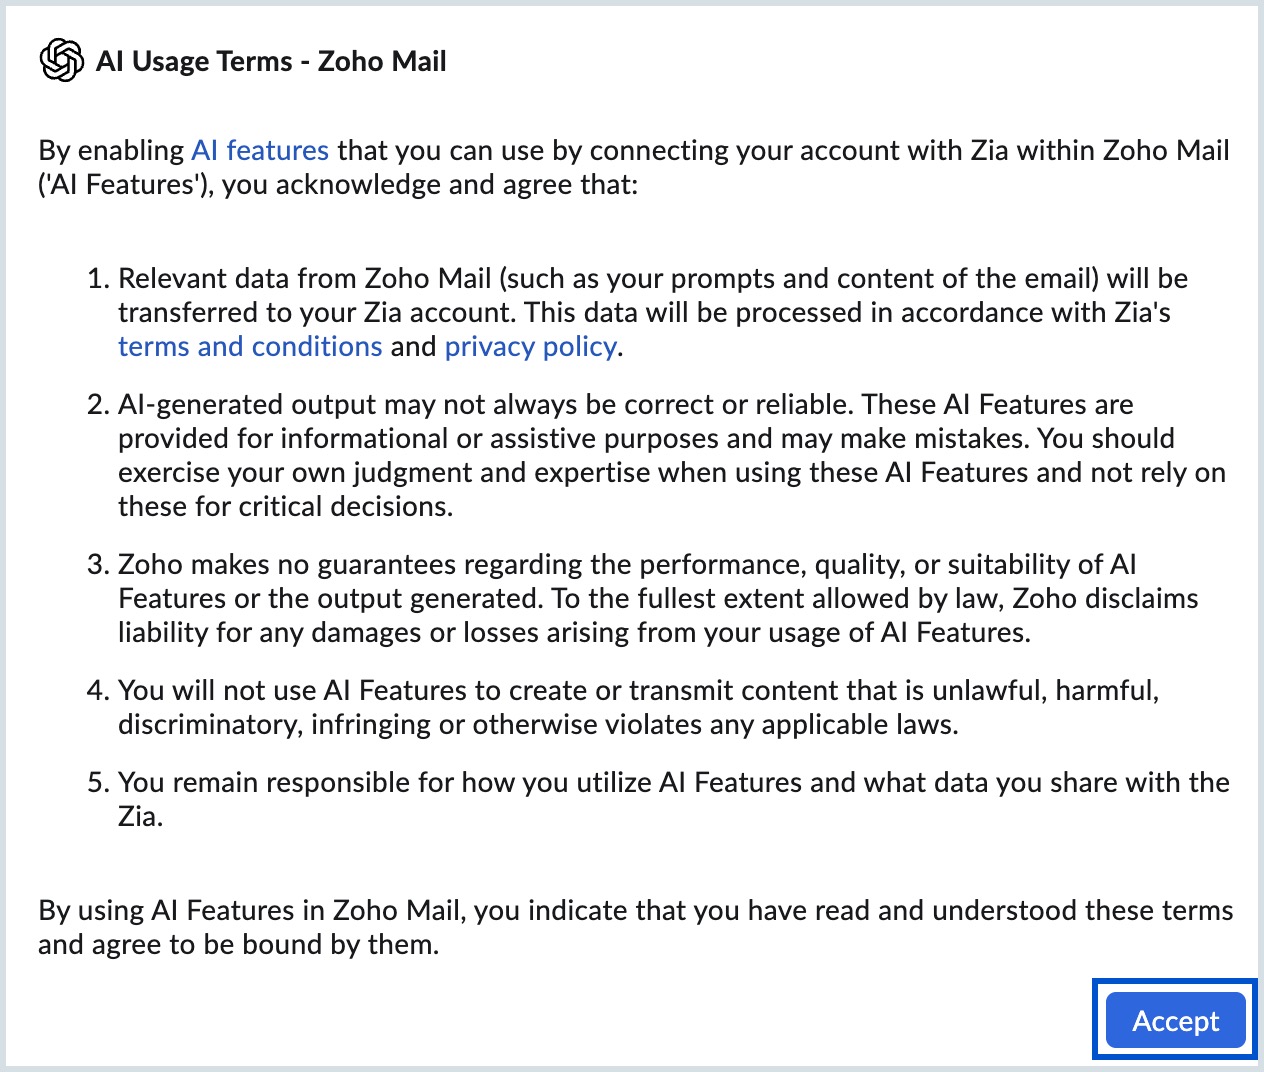
Once accepted, the Zia extension will be enabled for your organization and the users can use the integration to generate/ summarize email content based on the configuration.
Org Extensions
The Org Extensions tab under the Integrations and Extensions section lists all the applications submitted by your organization members. You can approve or reject the submitted apps depending on whether or not you want it to be available for your users to install it. Follow these steps to approve or reject the extensions:
- Log in to the Zoho Mail Admin Console and select Other App Settings from the left pane.
- Select Integrations and Extensions and navigate to Org Extensions tab. All the apps submitted by your organization's users will be listed here.
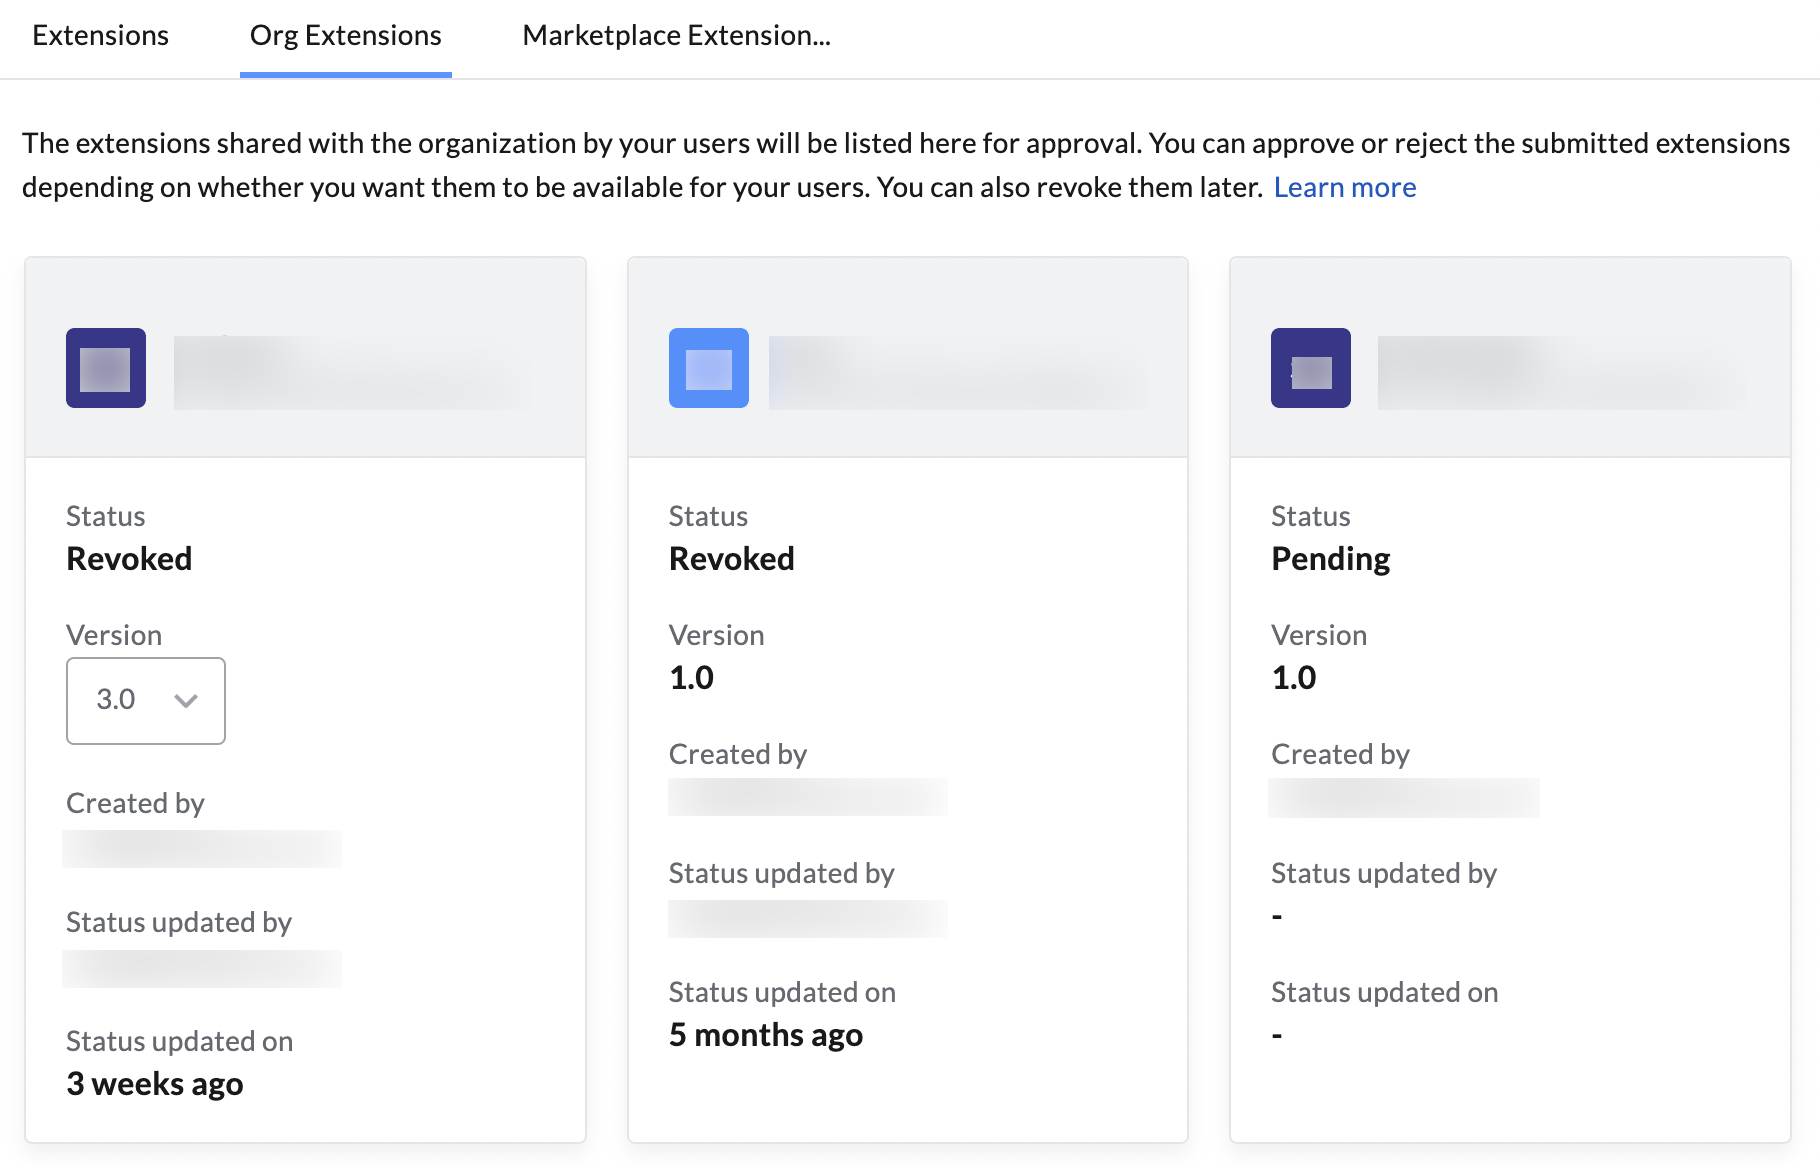
- Hover over the desired extension and select the Approve or Reject icon based on your organization's requirements.

- A confirmation dialog appears based on your selection. Click Approve or Reject.
- Once you have approved an extension, you can choose to Revoke the permission by clicking on the Revoke button. Once revoked, your organization users will not be able to install the extension any longer.
If you revoke the permission for an extension, everyone in your organization, including the existing users will not be able to use the extension any longer.
Marketplace Extensions
To manage the permission level for the Marketplace Extensions, follow these steps:
- Log in to the Zoho Mail Admin Console and select Other App Settings from the left pane.
- Select Integrations and Extensions and navigate to Marketplace Extensions tab.
- You can apply one of the following options for the marketplace extensions:
- Users should not install Marketplace extensions
- Users can install any of the Marketplace extensions
- Users can install only specific allowed extensions
If you choose to allow specific extensions, click on the Add button, select the apps that you'd like to allow, and finally click Proceed. Your org users will be able to access only the selected apps.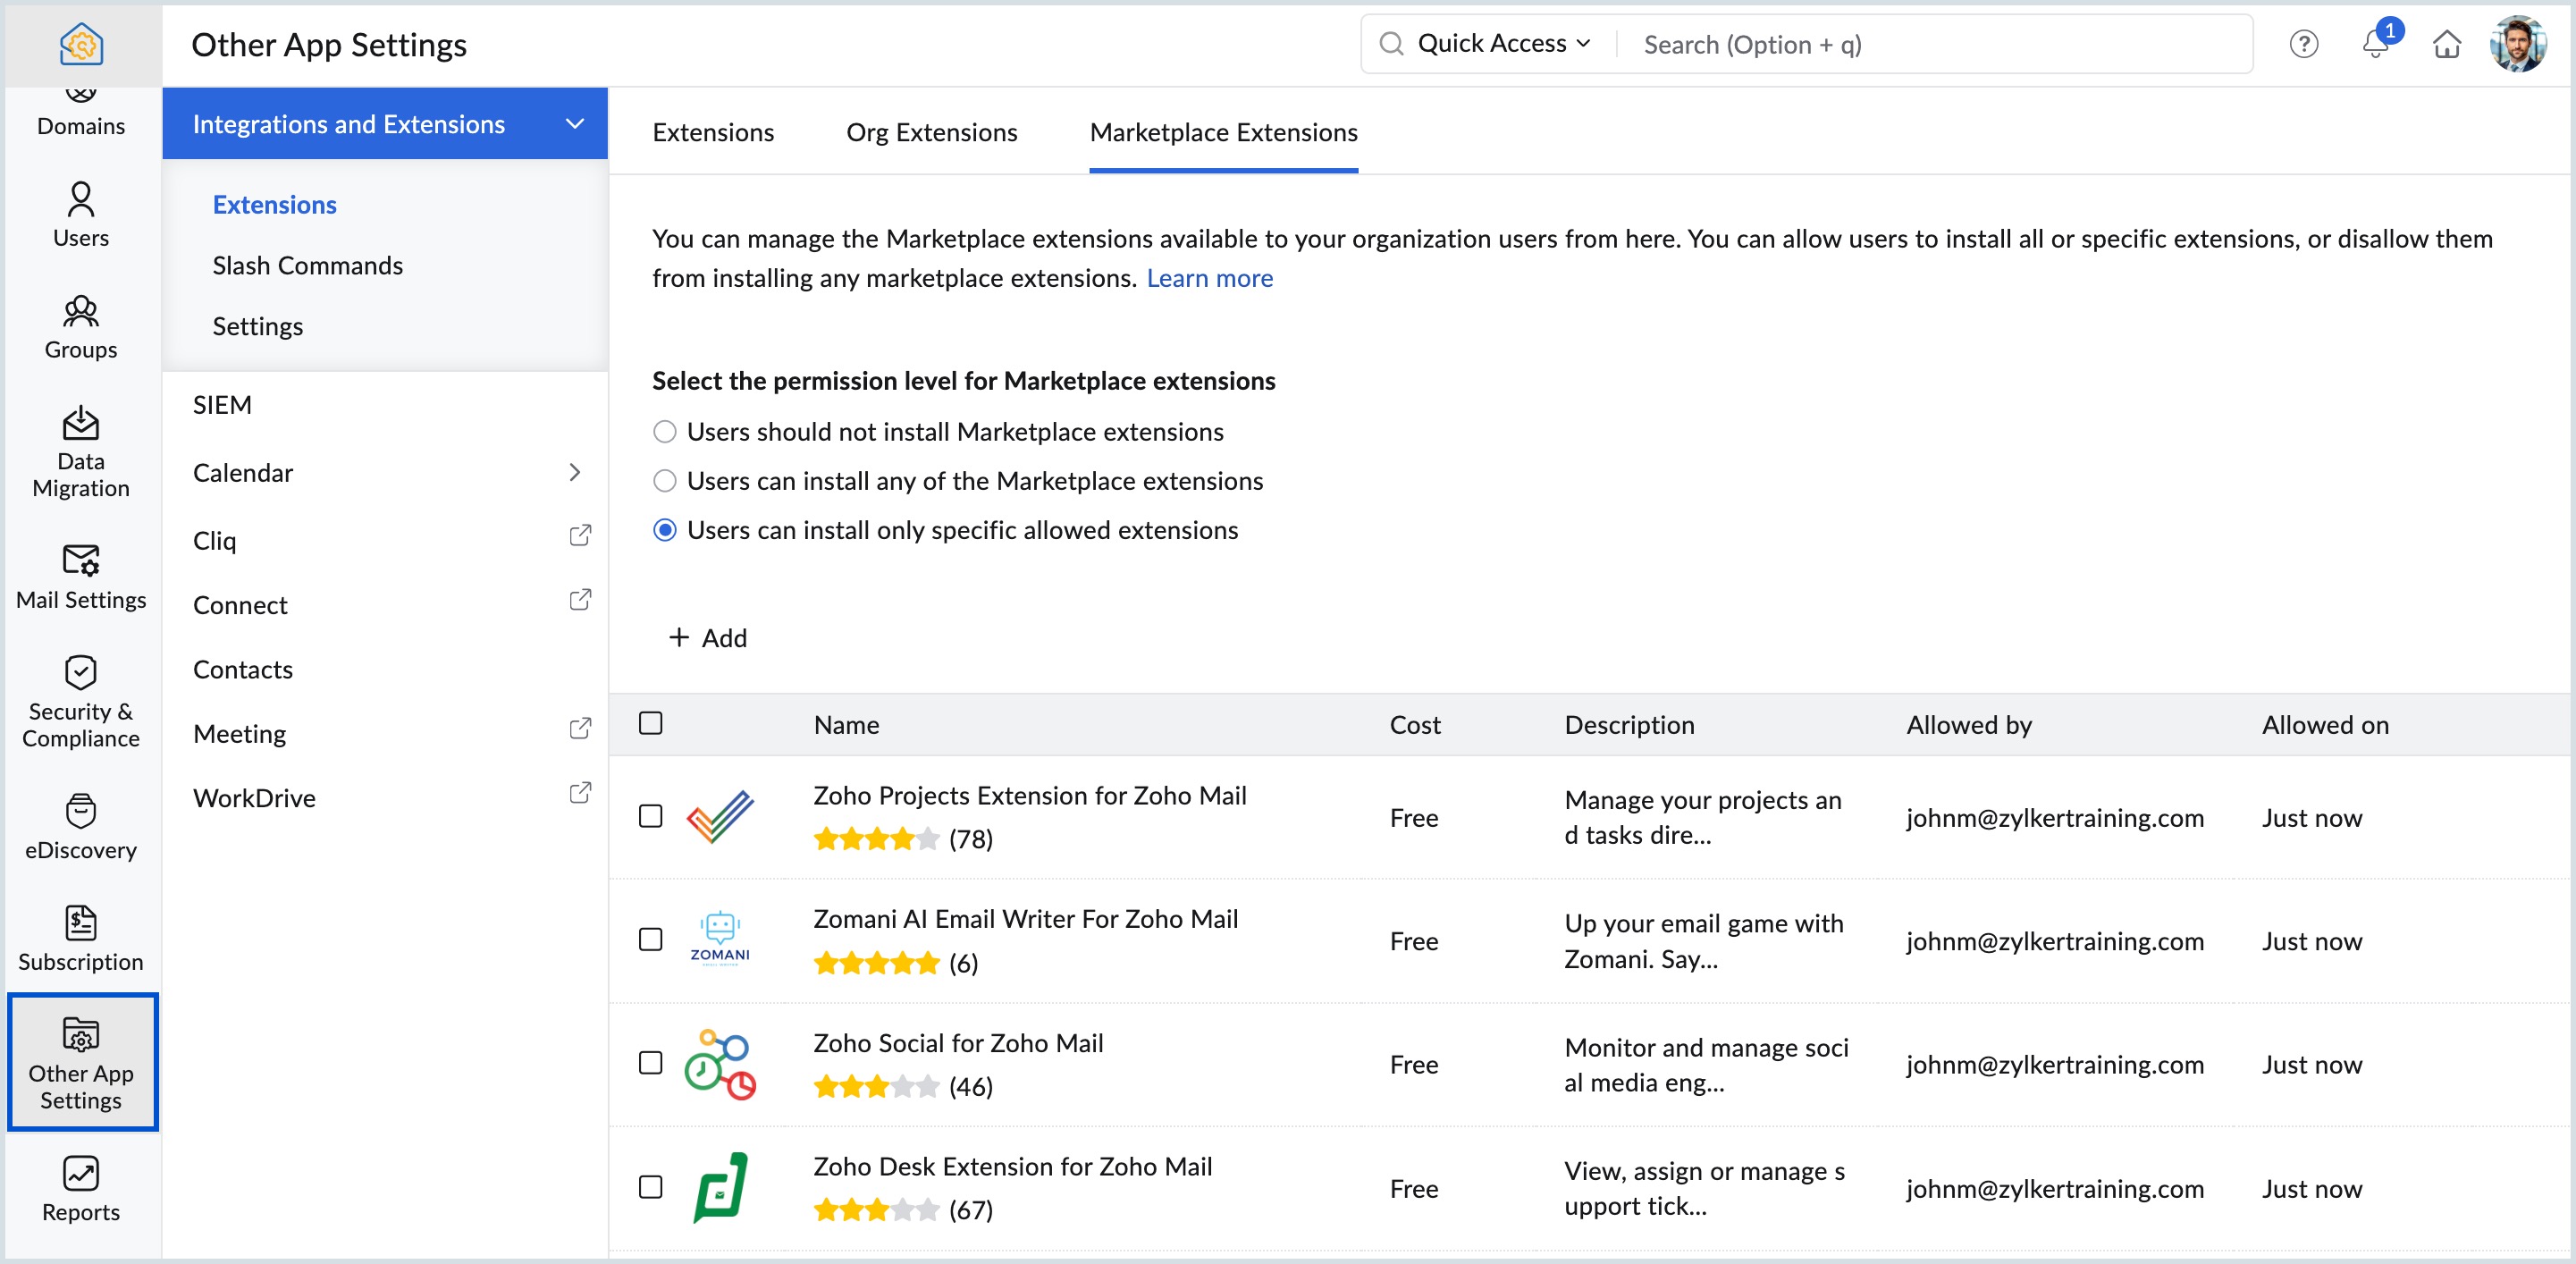
Slash Commands
Slash commands are textual instructions for quick access to specific features or for performing certain actions within Zoho Mail. Slash commands offer a convenient way to perform specific actions, bypassing menus or lengthy navigation. These commands typically start with a forward slash ("/") followed by a specific keyword or action. To enable slash commands for your organization follow the below steps:
- Log in to the Zoho Mail Admin Console and select Other App Settings from the left pane.
- Select Integrations and Extensions and select Slash commands.
- This section has two tabs that follow:
System Slash Commands
System slash commands are predefined commands available within the Zoho Mail interface. These commands are designed to provide users with quick and convenient ways to perform specific functions or operations with just a few steps. You can enable System slash commands for your organization's users using the toggle button. Once enabled, all users will be able to access these commands. Click View the system slash commands to view all the System commands available within Zoho Mail.
Custom Slash commands
The users in the organization can create Custom Slash commands and share them within the organization. This section displays all the slash commands shared by users for admin approval. Administrators can then choose to approve or reject the Slash commands. Once approved, those commands will be available for access to all organization users under the Org commands section in Zoho Mail. Users can install or uninstall the commands based on their requirements. Follow the steps below to approve or reject slash command requests:
- Login to the Zoho Mail Admin Console and select Other App Settings in the left pane.
- Navigate to Integrations and Extensions and select Slash Commands.
- Select the Custom slash commands tab from the top menu. All the slash command requests submitted by your users will be listed here.
- Hover over the slash commands that are pending for approval and select the Approve or Reject icon based on your organization's requirements.
- Click the Test run icon to view the detailed information about the slash command.
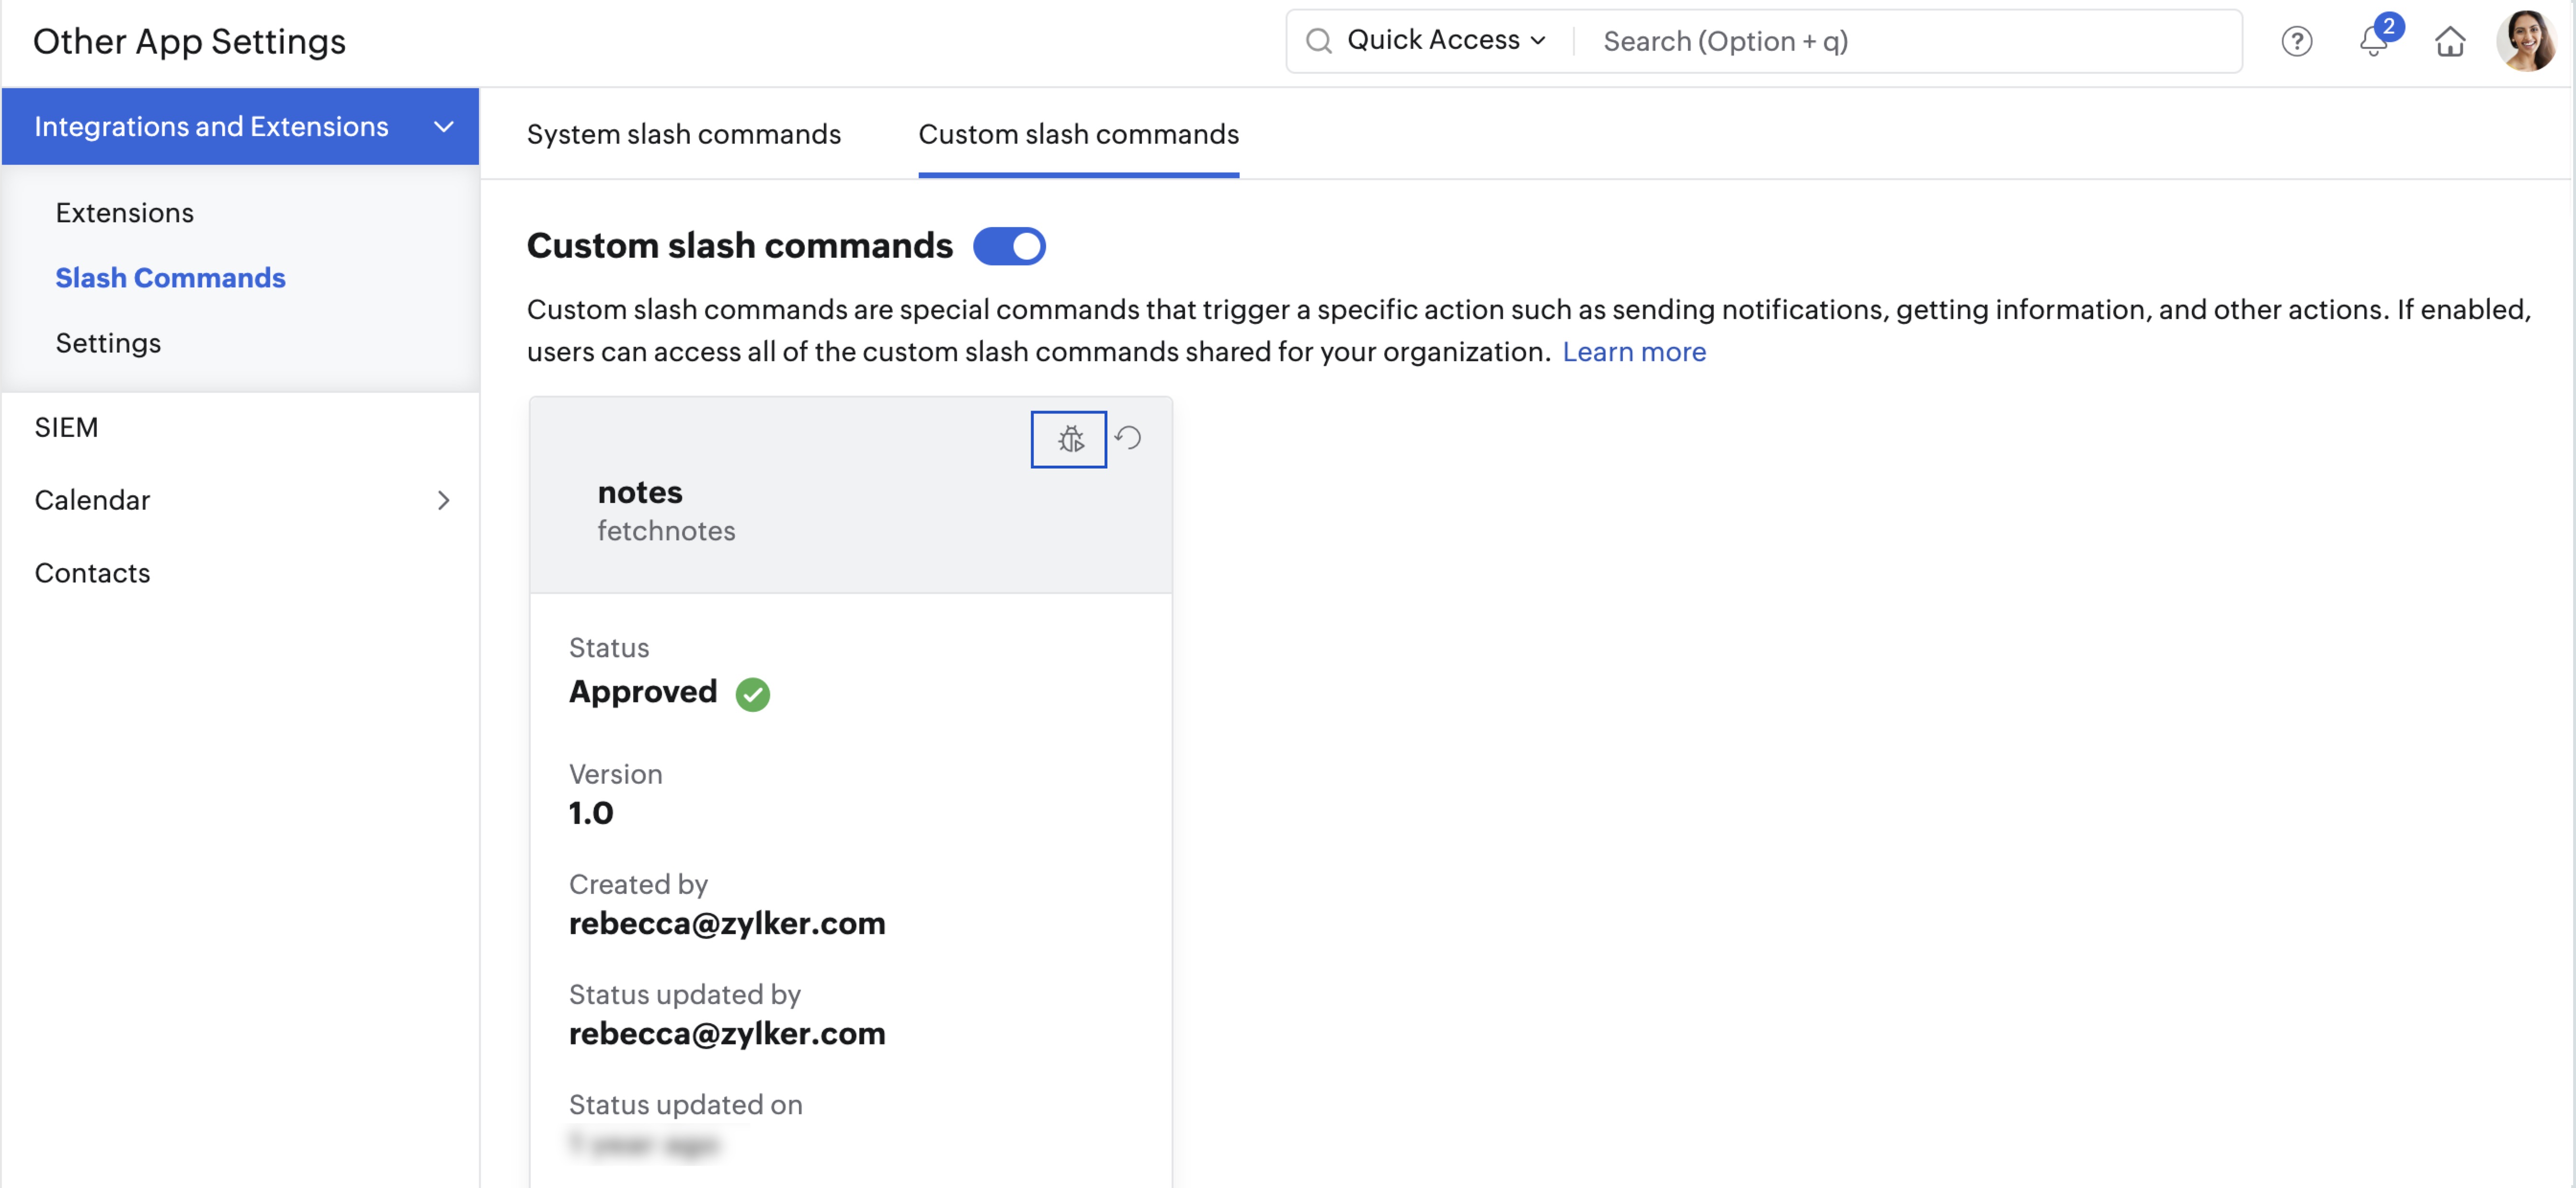
Once you have approved a slash command, you can also choose to revoke the permission by clicking on the Revoke button. Once revoked, your organization users will not be able to use that particular slash command any longer.
Settings
Extensions are enabled for all users by default. If you do not want your users to configure any of the available extensions follow these steps to disable them:
- Log in to the Zoho Mail Admin Console, and select Other App Settings in the left pane.
- Select Integrations and Extensions and select Settings.
- Click the Enable Integrations toggle bar. Your organization users will no longer be able to use any extension.

To manage your organization's data with other SIEM tools, use the SIEM configuration option in the Admin Console. Learn more.
Calendar Admin settings
Zoho Calendar is an efficient workplace tool that helps you stay on track with your schedule, meetings and holidays. It helps you create events, add calendars, share your calendars, subscribe to external calendars and also book meeting rooms from within your organization using the Resource Booking option. Zoho Mail allows administrators to manage and configure their organization's calendar settings directly from the Admin Console.
Follow the below steps to access the Zoho Calendar Admin Console.
- Log in to the Zoho Mail Admin Console.
- Navigate to Other App Settings in the left pane and select Calendar.
- The list of options available under Calendar Admin Settings are:
- Organization Settings - You can allow or restrict permissions for your organization's users in this section. From event invitation, calendar subscription, to import/export calendar, or sharing availability on calendar, all these are managed using organization settings.
- Interoperability - Calendar interoperability allows you to have seamless collaboration even when users have different calendar platforms. With this feature, you can view user's free/busy status and schedule meetings without switching between platforms.
- Resource Booking - Under Resource booking section of calendar admin console, you can manage resources within your organization efficiently. Once the configuration of branches, buildings, floors, and rooms are done, the resources will be visible for the users to avail at their convenience.

Zoho Cliq
Zoho Cliq is a business messaging platform that enables real-time communication within teams. Team members can create channels for specific projects or groups, and make audio and video calls to enhance collaboration and productivity. If you are a Zoho Workplace user, you can access your Zoho Cliq settings from the Admin Console.
- Log in to the Zoho Mail Admin Console.
- Select Other App Settings in the left pane and choose Cliq from the left pane.
- Make the necessary settings in the Cliq Admin Panel page that opens up.
Sync Org Contacts for EAS
When users or groups are created in an organization, their email addresses and details in their Exchange account are automatically added to the organization contacts. The admin can choose whether or not to sync these organization contacts when the account is configured via Exchange ActiveSync protocol in mobile devices or Outlook 2013 & above. If enabled, those email addresses will automatically appear in the autofill and their address book when the users compose emails.
When the user contacts are synced using ActiveSync, the organization contacts can also be synced to the devices. The administrator can choose to enable or disable EAS Org Contacts Sync from the Admin Console.
- Log in to the Zoho Mail Admin Console.
- Go to the Other App Settings section, and select Contacts.
- Click on the toggle bar to Enable/ Disable across EAS Org Contacts Sync to sync organization contacts to the mobile devices of users.

The organization contacts or the global address book will be available on the mobile devices of users if the setting is enabled. Otherwise, users will be able to sync only their personal contacts using mobile Exchange ActiveSync.
Connect
Zoho Connect is a team collaboration software that helps teams ideate, discuss, and work together, from any place, on any device. If you are a Zoho Workplace user, you can access your Zoho Connect settings from the Admin Console.
- Log in to the Zoho Mail Admin Console.
- Go to the Other App Settings section and navigate to the Connect tab.
- Make the necessary settings in the Connect setup page that appears.
Meeting
Zoho Meeting is a powerful web-based conferencing solution that enables seamless online meetings and webinars without requiring downloads. It supports phone dial-ins, making it accessible even in areas with limited internet connectivity. The platform offers a range of features, including scheduling, RSVPs, reminders, private meetings, co-hosting, virtual backgrounds, whiteboards, live polls, and dedicated meeting rooms to enhance collaboration. If you're a Zoho Workplace user, you can manage your Zoho Meeting settings through the Admin Console:
- Log in to the Zoho Mail Admin Console.
- Navigate to Other App Settings and select the Meeting tab.
- Make the necessary settings in the Zoho Meeting settings page that appears.
WorkDrive
Zoho WorkDrive is a content collaboration platform designed for teams to store, share, manage, and work together on files of any size. If you are a Zoho Workplace user, you can access your Zoho WorkDrive settings from the Admin Console.
- Log in to the Zoho Mail Admin Console.
- Go to the Other App Settings section and navigate to the WorkDrive tab.
- Make the necessary changes in the WorkDrive settings page that appears.
If you are still using Zoho Docs for file storage, it is recommended that you migrate to Zoho WorkDrive, Zoho's revamped file storage application. To migrate, follow the steps given below:
- Log in to the Zoho Mail Admin Console.
- Navigate to the Data Migration menu, and click on the Docs to WorkDrive Migration option.
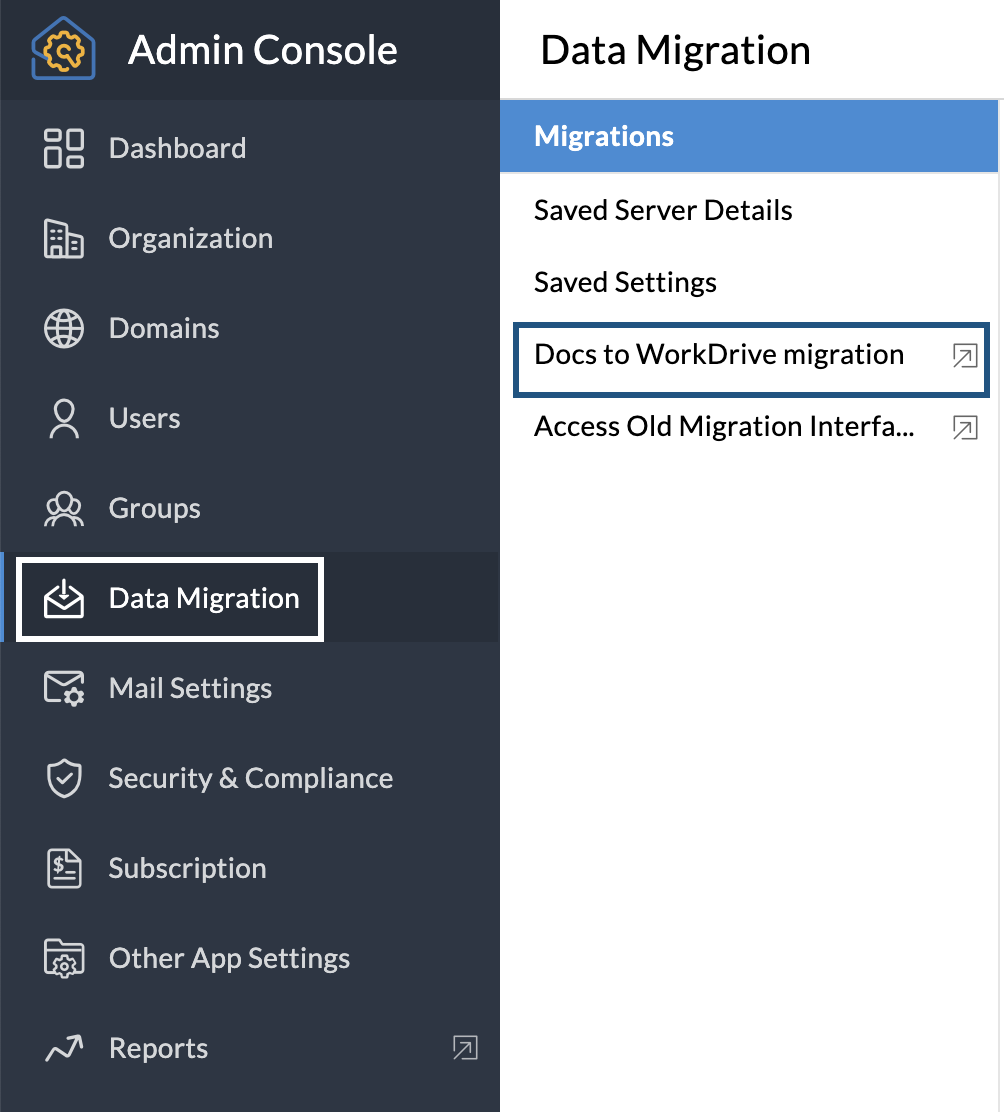
You can view the detailed instructions to migrate to WorkDrive in this link.


