DNS Record Configuration for Google Domains
Zoho Mail provides multiple options to verify your domain ownership and configure email delivery in Google Domains.
Google Domains - Add TXT Records for Verification
If your domain is hosted with Google Domains, follow the below steps to add a TXT Record in your Google Domains DNS for verification.
Go to your Google Domains page.
Note:
If you are logged in to your Google Account, proceed to the next step. If not, click Sign In and log in to your Google Account.
- If you manage only one domain in your Google Domains account, you will be directly taken to that domain's page. In case you manage multiple domains, click Manage next to the domain you would like to add a TXT record to.

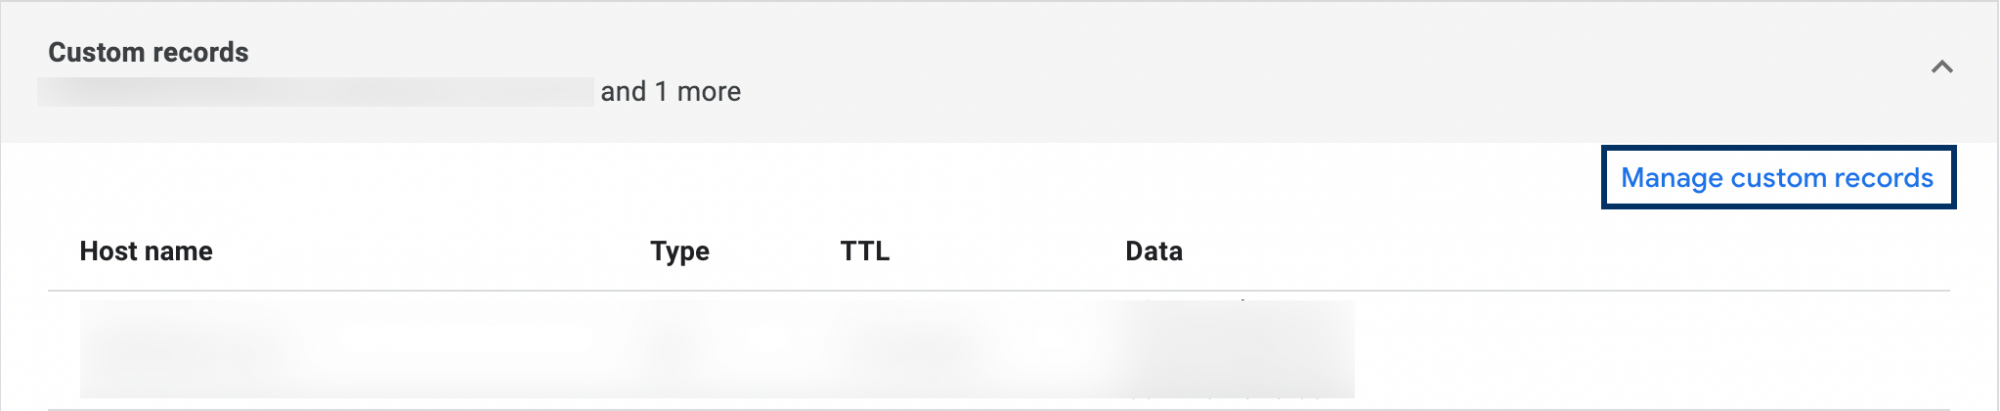
- Select DNS from the left pane to access the Resource records section and click Custom records.

- If you haven't added any records to your domain, you can proceed with the next step. If you have DNS records added to your domain, click Manage custom records.
- Follow these steps to add a new TXT record:
- In the Host name field, enter @ or leave it empty.
- In the Type drop-down, select TXT and enter the TXT value generated in the Zoho Mail Admin Console.
- In the TTL drop-down, select 10 minutes (600).
Follow these steps to manage custom records:
Note:
It is recommended that you delete the existing DNS records and add a new TXT record for domain verification.
- Locate the existing TXT record for which the Host name is @ or empty.
- Click Add more to this record.
- Enter the TXT value generated in the Zoho Mail Admin Console.
- Click the Save button.
- Switch to the Zoho Mail Admin Console domain verification page and click 'Verify TXT Records'.
- If the DNS information is correctly propagated, the domain will be verified. You can also check the status on the DNS lookup tool and proceed with the next steps to create user accounts.


Google Domains - Add CNAME Records for Verification
If your domain is hosted with Google Domains, follow the below steps to add a CNAME Record in your Google Domains DNS for verification.
Go to your Google Domains page.
Note:
If you are logged in to your Google Account, proceed to the next step. If not, click Sign In and log in to your Google Account.
- If you manage only one domain in your Google Domains account, you will be directly taken to that domain's page. In case you manage multiple domains, click Manage next to the domain you would like to add a CNAME record to.
- Select DNS from the left pane to access the Resource records section and click Custom records.
If you haven't added any records to your domain, you can proceed with the next step. If you have DNS records added to your domain, click Manage custom records and click Create new record.
Note:
It is recommended that you delete existing CNAME records if any and add a new record for domain verification.
- In the Host name field, enter the unique code generated in your Zoho's domain verification page (Example: zb12345678).
- Select CNAME from the Type drop-down list.
- In the TTL drop-down select 10 minutes (600).
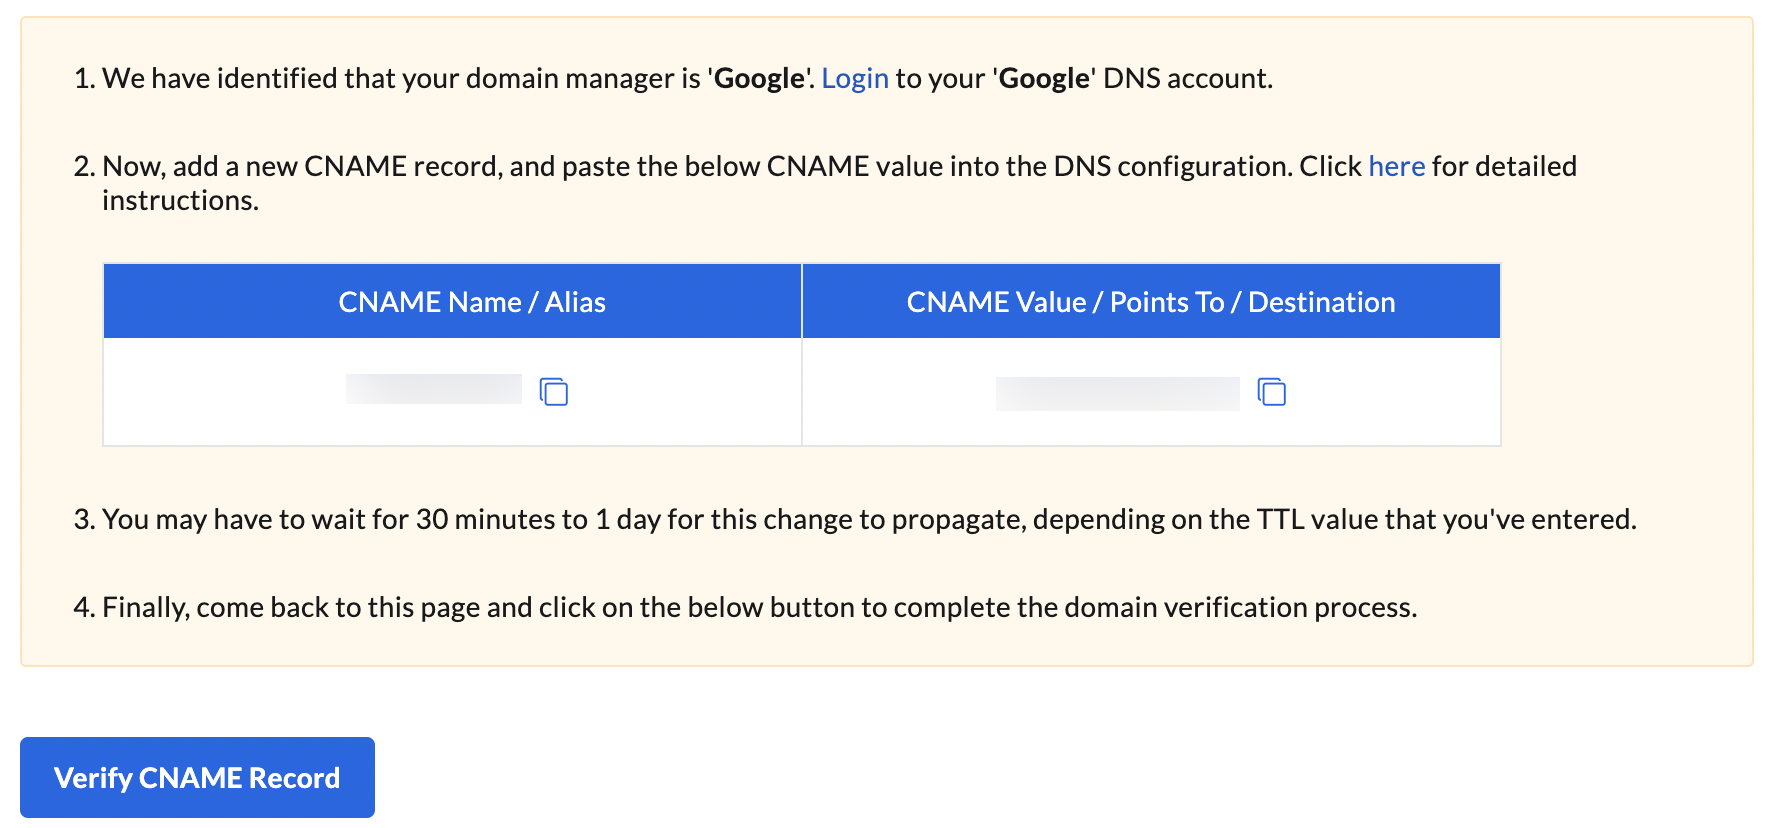
- In the Data field, enter the value generated in the CNAME Value/ Points To/ Destination field from Zoho Mail Admin Console.
- Click Save.


You have now added the CNAME successfully. You may have to wait for at least two hours for the changes to take effect in the DNS Servers. After two hours, login to your Zoho Mail Admin Console and click Verify CNAME Record. Once your domain is verified, you can start adding users and creating mail accounts.
Note:
- Check your Zoho's domain verification page for the values of Host name and Data (Value). These values are unique to your domain.
- In case of any errors, refer to this page to troubleshoot domain verification failure.

Google Domains - Add MX Records to receive emails
If your domain is hosted with Google Domains, follow the below steps to add MX Records in your Google Domains DNS for email delivery.
Go to your Google Domains page.
Note:
If you are logged in to your Google Account, proceed to the next step. If not, click Sign In and log in to your Google Account.
- If you manage only one domain in your Google Domains account, you will be directly taken to that domain's page. In case you manage multiple domains, click Manage next to the domain you would like to add a MX record to.
- Select DNS from the left pane to access the Resource records section and click Custom records.
If you haven't added any records to your domain, you can proceed with the next step. If you have DNS records added to your domain, click Manage custom records and click Create new record.
Note:
It is recommended to delete the existing MX records before you proceed to the next step.
- In the Host name field, enter @ or leave it empty.
- Select the Type as MX from the drop-down list.
- In the TTL drop-down select 10 minutes (600).
- In the Data field, enter the MX record—10 mx.zoho.com—along with its Priority.
- Once done, click Save.


Similarly, add all three MX records.
| Host name | Type | TTL | Data |
| @ | MX | 600 (10 minutes) | 10 mx.zoho.com |
| @ | MX | 600 (10 minutes) | 20 mx2.zoho.com |
| @ | MX | 600 (10 minutes) | 50 mx3.zoho.com |
You have now added the MX Records successfully. You may have to wait for at least 12 to 24 hours for the changes to take effect in the DNS Servers. Once the MX reflects in the DNS servers, go to the Admin Console and click Verify. But, you will start receiving emails at your Zoho Account as soon as the MX gets reflected.
Note:
- The data in above table is generic. MX records change from one DC to another. To make sure you have the correct MX records for your domain, we recommend you get that information from this page of Zoho Mail Admin Console.
- If case of any errors, refer to this section of the configure MX records help page.
- You can also check if the correct MX details are reflected using Zoho Mail's Toolkit.
Google Domains - Add SPF Records
If your domain is hosted with Google Domains, follow the below steps to add SPF records in your Google Domains DNS.
Go to your Google Domains page.
Note:
If you are logged in to your Google Account, proceed to the next step. If not, click Sign In and log in to your Google Account.
- If you manage only one domain in your Google Domains account, you will be directly taken to that domain's page. In case you manage multiple domains, click Manage next to the domain you would like to add an SPF record to.
- Select DNS from the left pane to access the Resource records section and click Custom records.
- If you haven't added any records to your domain, you can proceed with the next step. If you have other DNS records added to your domain, click Manage custom records.
- Click Create new record and follow the below steps to add a new SPF record:
- In the Host name field, enter @ or leave it empty.
- Select the Type as TXT from the drop-down list.
- In the TTL drop-down select 10 minutes (600).
- In the Data field, enter the SPF value generated in Zoho Mail Admin Console.
- If you already have other DNS records, follow the below steps:
- Delete the existing SPF records, if any.
- Locate the TXT record for which the Host is @ or empty.
- Click Add more to this record.
- Enter the SPF value generated from Zoho Mail Admin Console.
- Once done, click Save.
You have now added the SPF record successfully. You may have to wait for at least 12 to 24 hours for the changes to take effect in the DNS Servers. Once the SPF reflects in the DNS servers, go to the Admin Console and click Verify.
Note:
- The SPF values differ from one DC to another. For more specific configuration information for your domain, refer to this section in Admin Console.
- If case of any errors, refer to this section of the SPF records help page.
- You can also check if the correct SPF details are reflected using Zoho Mail's Toolkit.