Accessing Creator On-Premise
- Starting the service in Windows
- Starting the service in Linux
- Accessing the web client in Windows
- Accessing the web client in Linux
Starting Creator service in Windows
You can start the service in any one of the following ways:
- If you have selected Start Zoho Creator Service now in the InstallShield Wizard for Zoho Creator, the service will start once the installation is completed.
- Alternatively, you can navigate to the installed folder/Creator/bin/ via the command prompt and use the server commands in this page to start and stop the service.
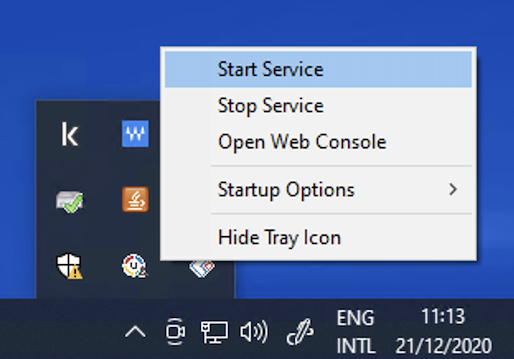
- You can also click on the tray icon at the bottom-right corner of your desktop, select the Zoho Creator icon and follow the below steps.
- Select Start Service.
- Hover on the Zoho Creator icon and view the service status.
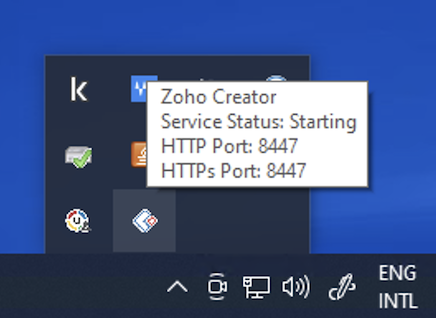
Select Stop Service to stop the service.
- Select Start Service.
- (Optional) You can type "Services" in the search bar and open the Services app (or) Press Windows+R to open the Run box, enter services.msc, and then press Enter or select OK.
- You should see the Zoho Creator service listed in the Services tab.
- To start the service, choose Start from the service's shortcut menu. You can also right-click and select Start.
- To stop the service, choose Stop from the service's shortcut menu. You can also right-click and select Stop.


Starting Creator service in Linux
You can start the service in two ways as mentioned below:
- If you have selected Start Zoho Creator Server in the InstallShield Wizard for Zoho Creator, the service will start once the installation is completed.
- Alternatively, you can navigate to the installed folder/Creator/bin/ via the command prompt and use the server commands in this page to start and stop the service.
Accessing the web client in Windows
Once the service has successfully started, follow the steps below to access your Creator On-Premise:
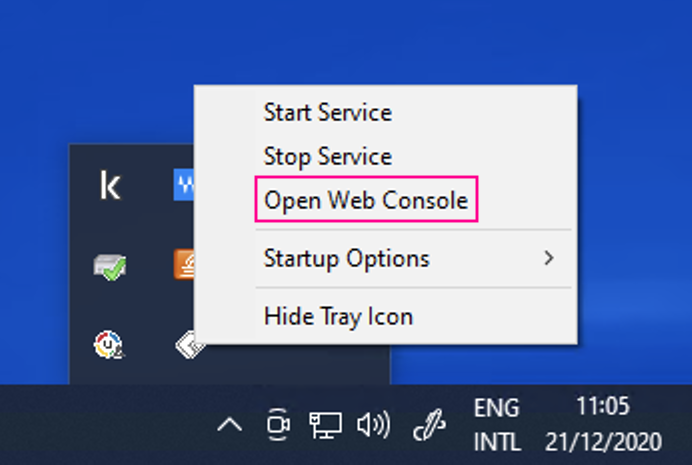
- Navigate to the tray icon at the bottom-right corner of your desktop and right-click the Zoho Creator icon.
- Select Open Web Console.
- The page will load in a new window with the URL address in the format:https://<Hostname>:<Web server port>
For example,
https://CreatorServer:8443
where, CreatorServer is the name of the machine on which Zoho Creator runs, and 8443 is the default web server port. Replace <Hostname> tag with the hostname or IP address of the server and <Web server port> tag with the web server port chosen at the time of installation.Note: The hostname of the server where Zoho Creator On-Premise is to be installed should not contain the underscore ( _ ) symbol in it. The underscore may affect the application startup and make certain services inaccessible on TCP/IP networks. Use the server hostname: https://zoho-creator:8443 instead of https://zoho_creator:8443 - Log in to Creator using the default username/password combination of admin/admin. These credentials must be changed after your first login.

Accessing the web client in Linux
Once the service has successfully started, follow the steps below to access your Creator On-Premise:
- Open a supported web browser window.
- Type URL address in the below format:https://<Hostname>:<Web server port>
For example,
https://CreatorServer:8443
where, CreatorServer is the name of the machine on which Zoho Creator runs, and 8443 is the default web server port. Replace <Hostname> tag with the hostname or IP address of the server and <Web server port> tag with the web server port chosen at the time of installation. Users can install Creator in a domain and access it with a different domain. To know the exact URL you want to access, refer the file:installed_folder/Creator/conf/onpremise_configurations.ymlNote: The hostname of the server where Zoho Creator On-Premise is to be installed should not contain the underscore ( _ ) symbol in it. The underscore may affect the application startup and make certain services inaccessible on TCP/IP networks. Use the server hostname: https://zoho-creator:8443 instead of https://zoho_creator:8443 - Log in to Creator using the default username/password combination of admin/admin. These credentials must be changed after your first login.