How to Sync your Zoho Calendar with iPhone/ mac OS using CalDAV Sync
How often have you missed your meetings/appointments or been late because you use multiple calendars or even multiple calendar applications altogether? It is important to stay organised by keeping your various calendars in sync. Ever wondered how to sync and access all your calendars from one place?
No more worries. Using CalDAV, you can now sync your work calendar or personal calendar with any device.
What is CalDAV?
CalDAV is an internet protocol used to sync your calendar data with multiple devices. It enables you to access and manage your calendar like editing an event, sending RSVPs, receiving notifications, etc. from any device. The standard CalDAV is compatible with Android, Gmail, Mac OS X, iOS, Thunderbird lightning and eM client which uses Apple's iCalendar format.
How CalDAV sync make your life easier?
- Offline access - Even without the Internet you can access all your calendar data from your device. Any modifications you make to your calendar are instantly synced across all of your devices when you go online.
- Create/ Edit events - You can quickly edit and create new events right from your mobile device.
- Multiple calendars- Multiple calendars can be synced with your device at once. Additionally, you can sync the same calendar across multiple devices.
- Get notified- You will receive notifications and reminders from all your calendars in one place.
Setting up CalDAV sync in Zoho Calendar
CalDAV sync provides either a one-way or two-way sync between your Zoho Calendar and calendar apps that support the CalDAV format. You can access Zoho Calendar through the local apps on your device while you are offline and make changes using your device's calendar app by creating a CalDAV account and enabling CalDAV sync.
What are the calendars you can sync via CalDAV?
- Personal Calendars (My Calendars)- Two-way sync: Personal Calendars can be synced in two-way mode. The events in these calendars can be edited/updated from your device anytime and the changes will be synced across Zoho Calendar.
- Group Calendars - Two-way sync: Group Calendars can be synced in two-way mode and the events in these calendars can be edited from your device.
- Other Calendars (Shared Calendars) - Two-way sync: Shared Calendars will be synced in two-way mode and the events in these calendars can be edited on your device.
- Other Calendars (Subscribed Calendars) - Read-only mode: Subscribed Calendars can be synced in read-only mode and the event in these calendars cannot be edited on your device.
How to configure CalDAV sync between Zoho Calendar and your device
The primary calendar under My Calendars in your Zoho Calendar account will be enabled for CalDAV sync by default. In case, you want to sync secondary calendars also from your account using CalDAV, follow these steps:
- Go to Settings > Calendar > Synchronize > CalDAV.
- In the My Calendars tab under CalDAV, the default calendar will be auto-selected for CalDAV sync. You can also select other personal calendars listed below in My Calendars for sync using CalDAV.
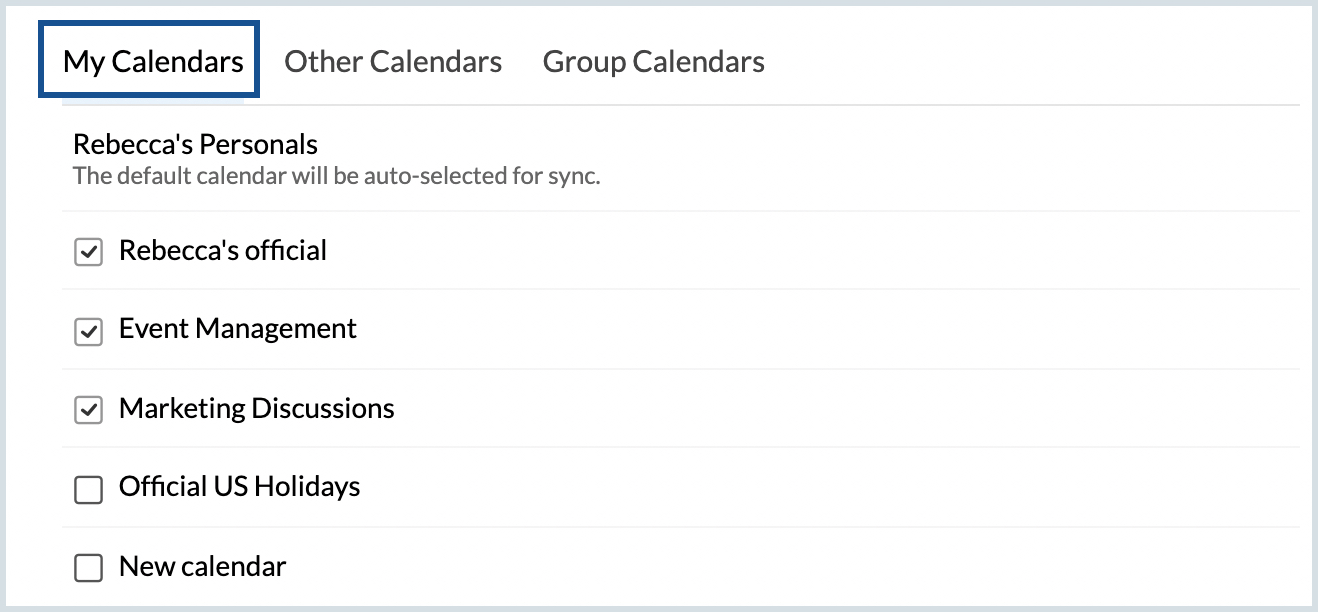
- To sync your Other Calendars (Subscribed Calendars and Shared Calendars), navigate to the Other Calendars tab in CalDAV sync and select the calendars you want to sync.
- To sync your Group Calendars, navigate to the Group Calendars tab in CalDAV sync and select the respective calendars.
Note:
CalDAV sync for Other Calendars (Shared and Subscribed Calendars) and Group Calendars is available only for Paid Org users and Personal users.
Steps to configure CalDAV sync for OS X Calendar
- Open the OS X Calendar on your device
- Go to Calendar > Settings > Add Accounts
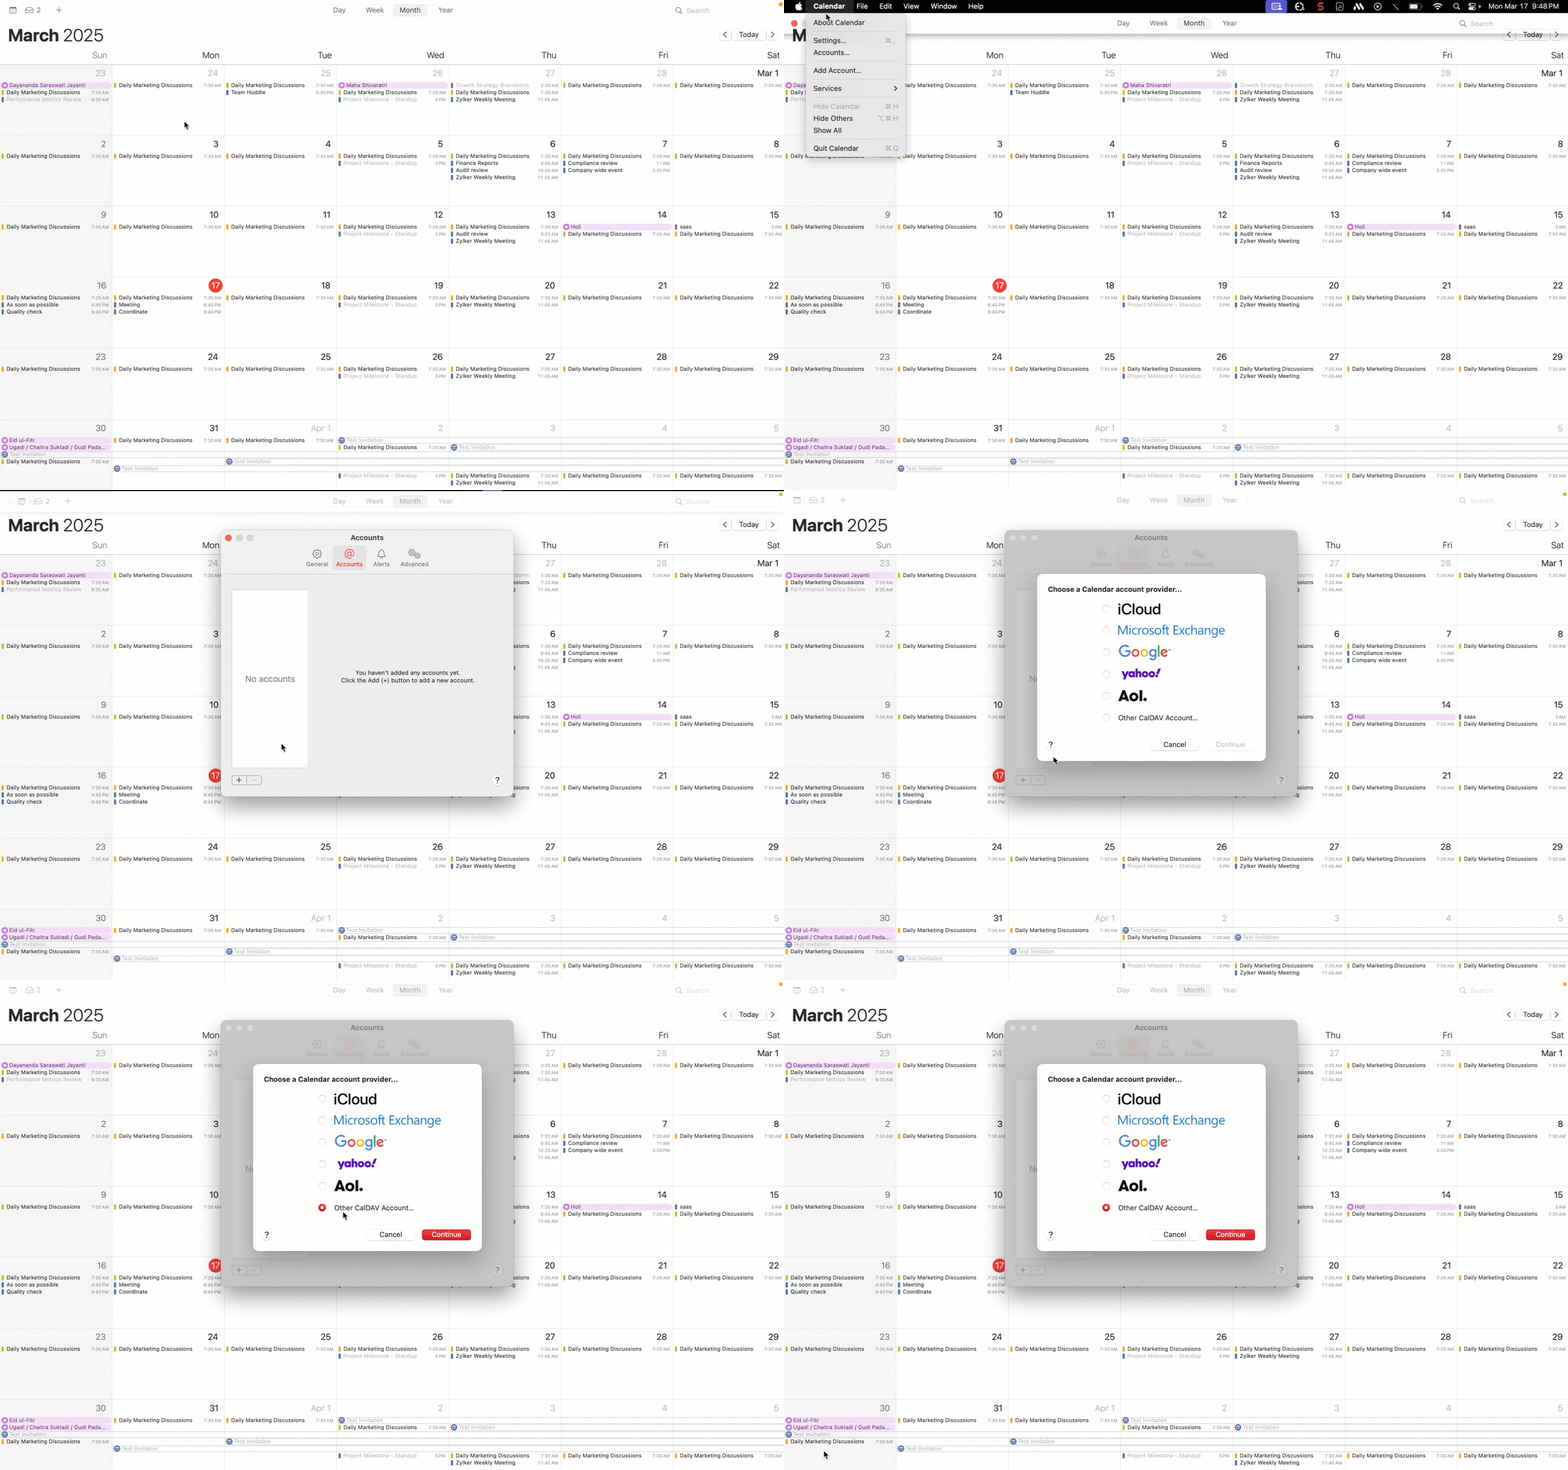
- Choose Other CalDAV account option and press Continue.
- Choose the account type as Manual.
- Fill in the Username field with the email ID of your Zoho account and the password.
- Enter the server address as https://calendar.zoho.com/ (The server address after https:// will vary for different data centres. Refer here.) and Sign in.
- The events will be automatically synced between both calendars.
- To delete the CalDAV account, go to Calendar > Settings > Accounts, click on the account you want to delete, click the Remove icon and click Ok.
Steps to configure CalDAV sync for iPhone and iPad
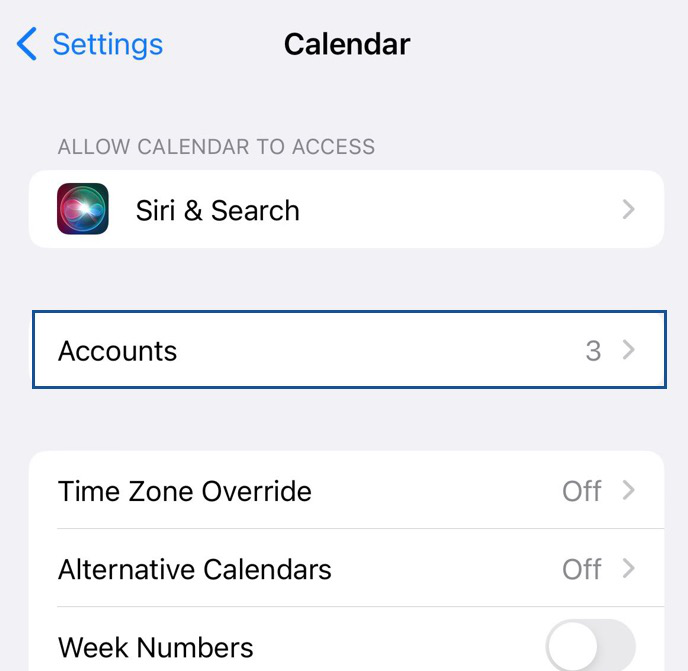
- On your device, navigate to Settings > Calendar > Accounts > Add account.

- Click on the Other option on the Add account page.
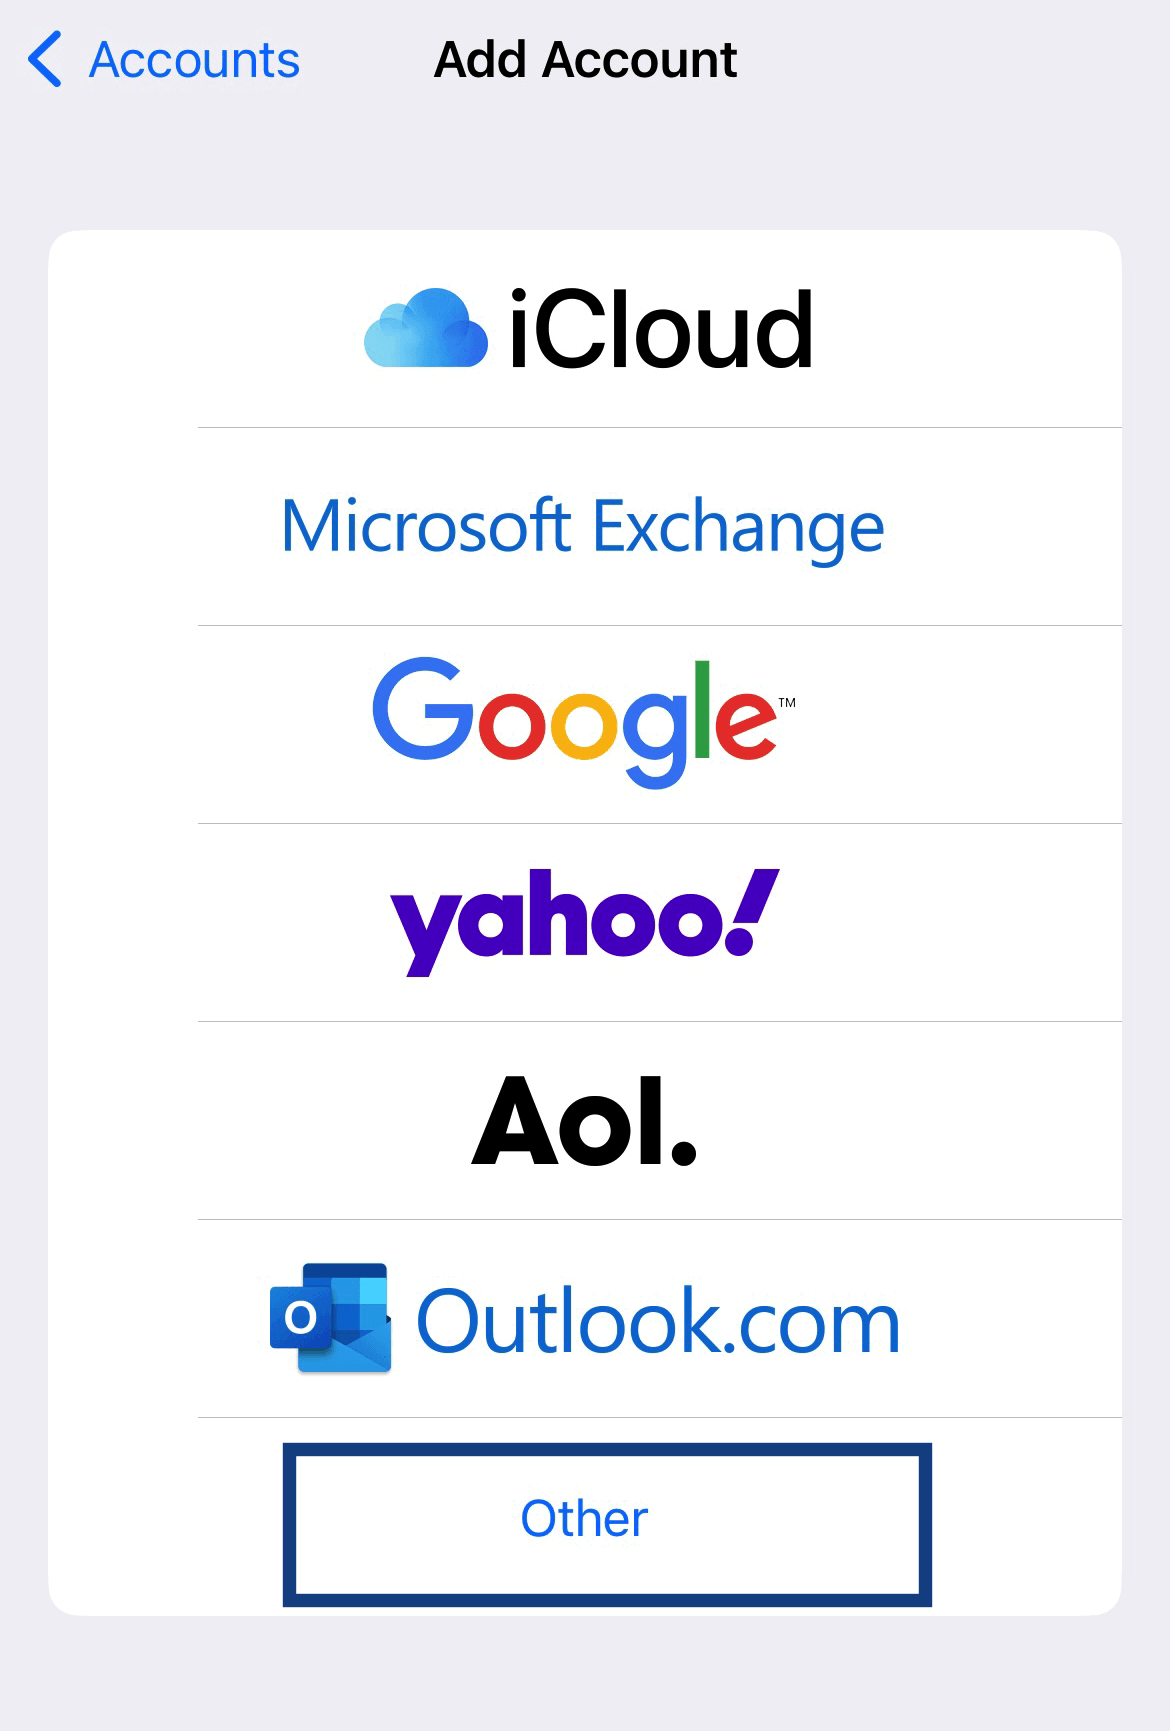
- Select Add CalDAV account to proceed.
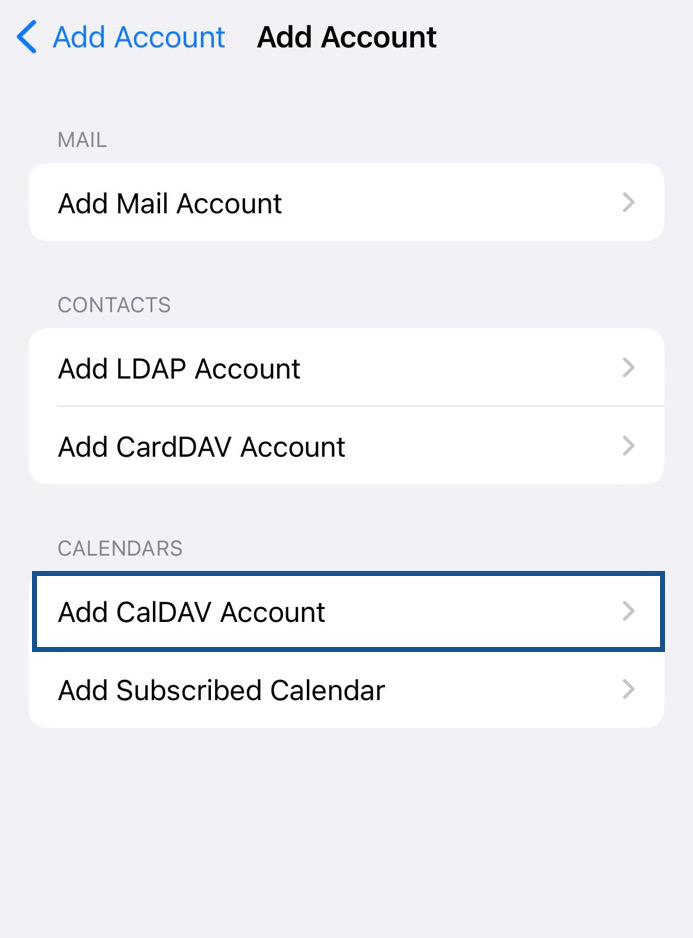
- Enter the server as https://calendar.zoho.com/ (The server address after https:// will vary for different data centres. Refer here.)
Enter your Zoho account email ID in the Username field and your Password.
Note:
If you have enabled Two Factor Authentication (TFA), you have to generate an Application Specific Password to proceed.
- Type your choice of Description for this CalDAV account and click Next.
- Turn on/off the notifications for Reminders and click Save.
- To check if your CalDAV sync was successful, open the Calendar app on your iPhone/iPad and click on Calendars from the bottom centre of the screen.
- You will be able to see the list of calendars from your Zoho account that is currently synced with your iPhone/iPad calendar app.
- Go to your Zoho Calendar web version, create an event in a specific calendar and refresh the page.
- The recently added event will be synced with your iPhone/iPad calendar app.
- In case you want to delete your CalDAV account, go to Settings > Calendar > Accounts, click on the account you want to delete and press the Delete Account option.
Apart from the iPhone/ mac OS calendars, you can also sync your Zoho Calendar to your Google calendar/ outlook calendar using CalDAV synchroniser/ with Thunderbird or eM client using CalDAV
Top Articles


