POP Accounts
Configure POP Accounts in Zoho Mail
You can add your external accounts as POP in Zoho Mail. Different accounts can be managed from the same window, but with individual settings for Signatures, Vacation Reply etc. Zoho Mail supports the configuration of external accounts via POP and IMAP protocol.
Note:
- The storage space for the POP account will be utilized from the overall mail storage available in your plan. Learn More.
Table of Contents
POP Retrieval Settings | Signatures | Templates | Filters | Mail Add-On | Manage Account Storage
Add POP Accounts using password authentication
To add your other POP Mail accounts in Zoho Mail, you need to check whether your Mail server supports the POP3 protocol for retrieving emails. If your Mail server supports POP access, you need to get the server details from your Administrator or service provider.
Incoming Server Details for Receiving Email:
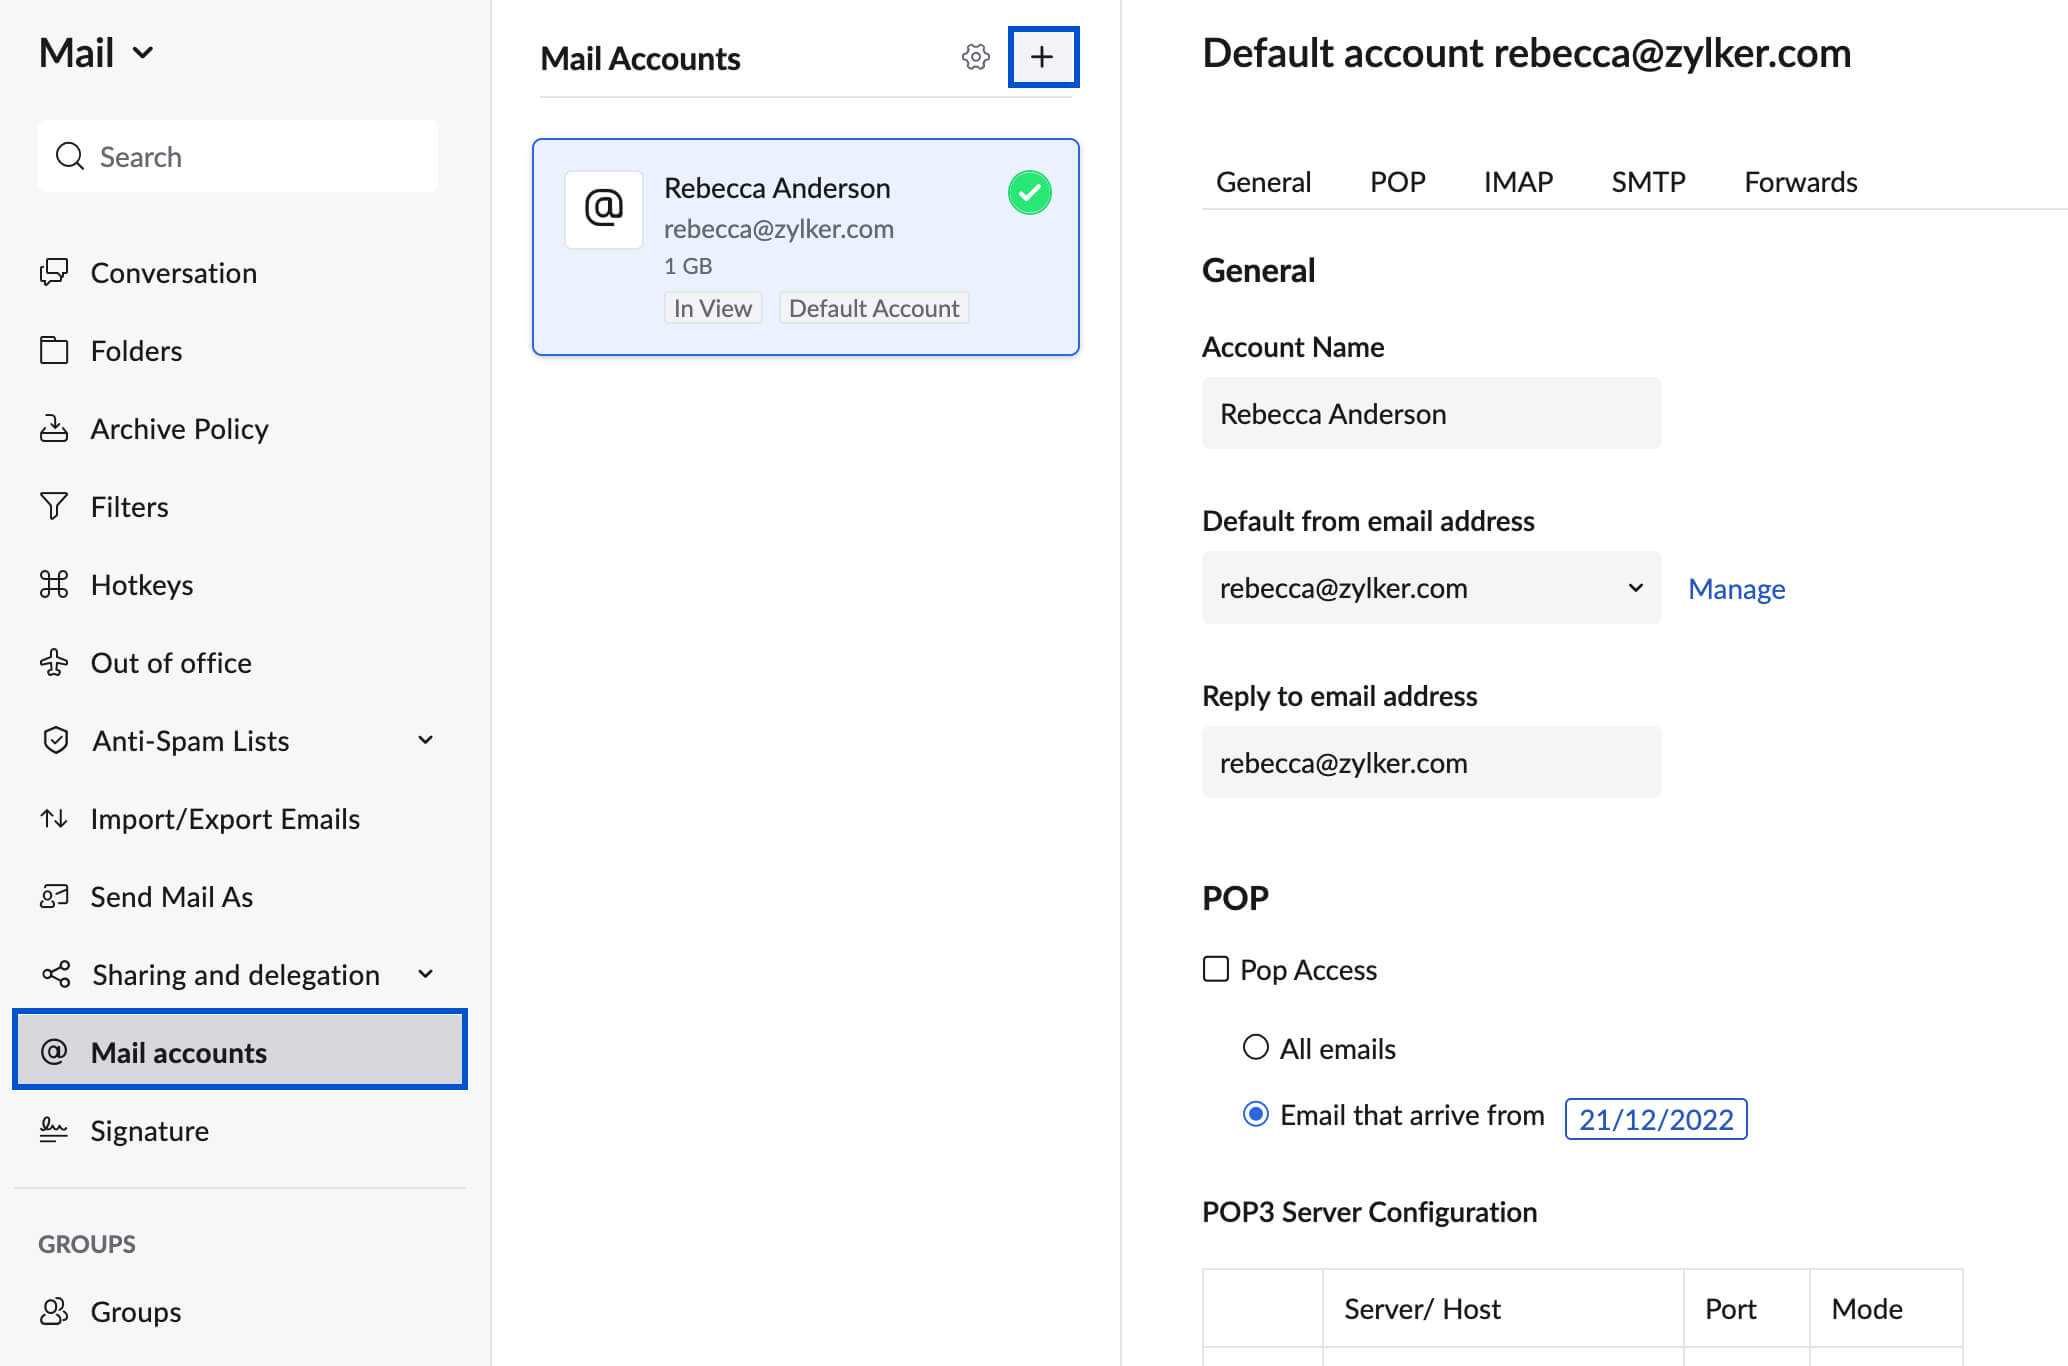
- Login to your Zoho Mail account.
- Go to Settings
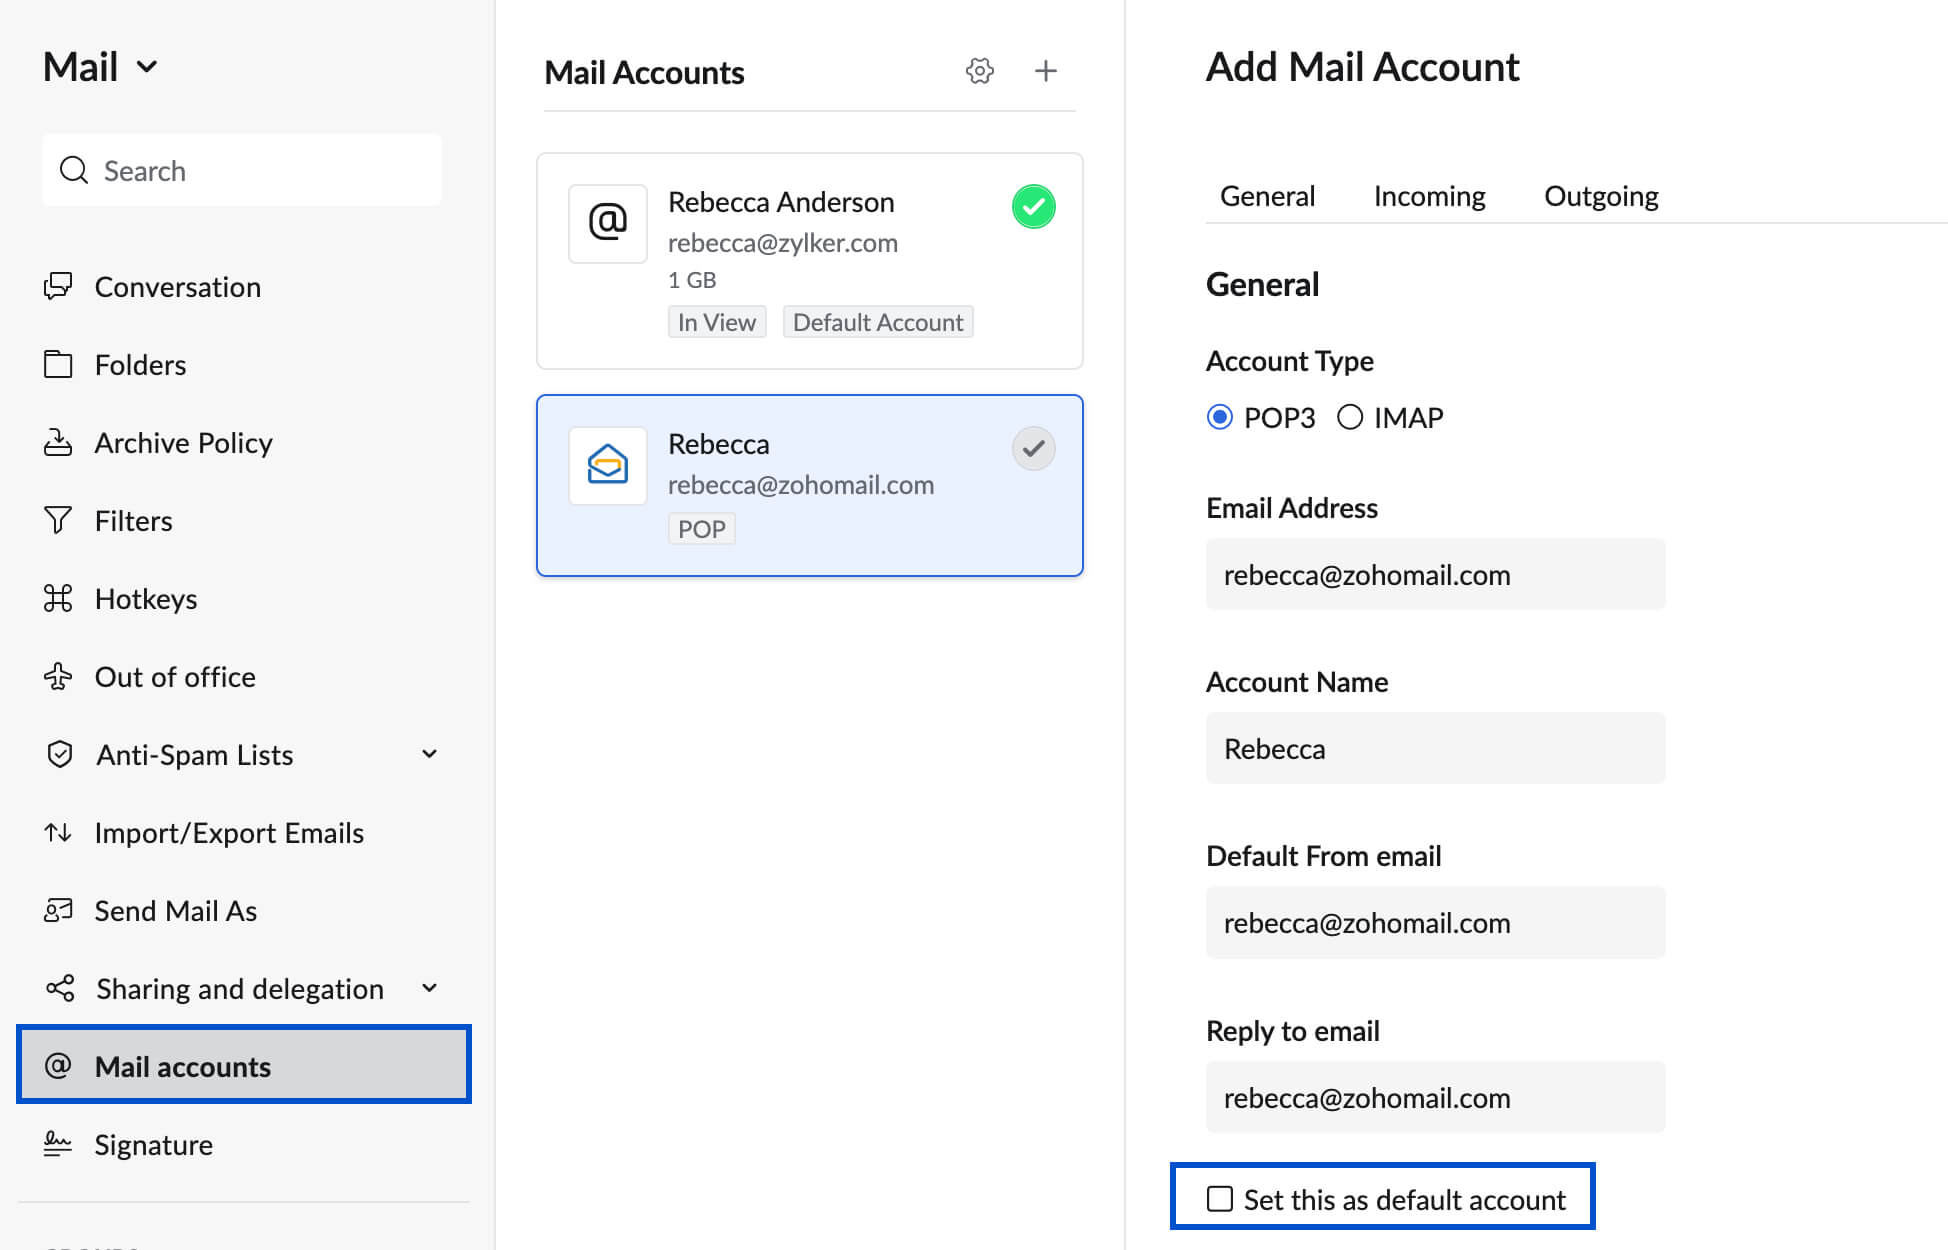
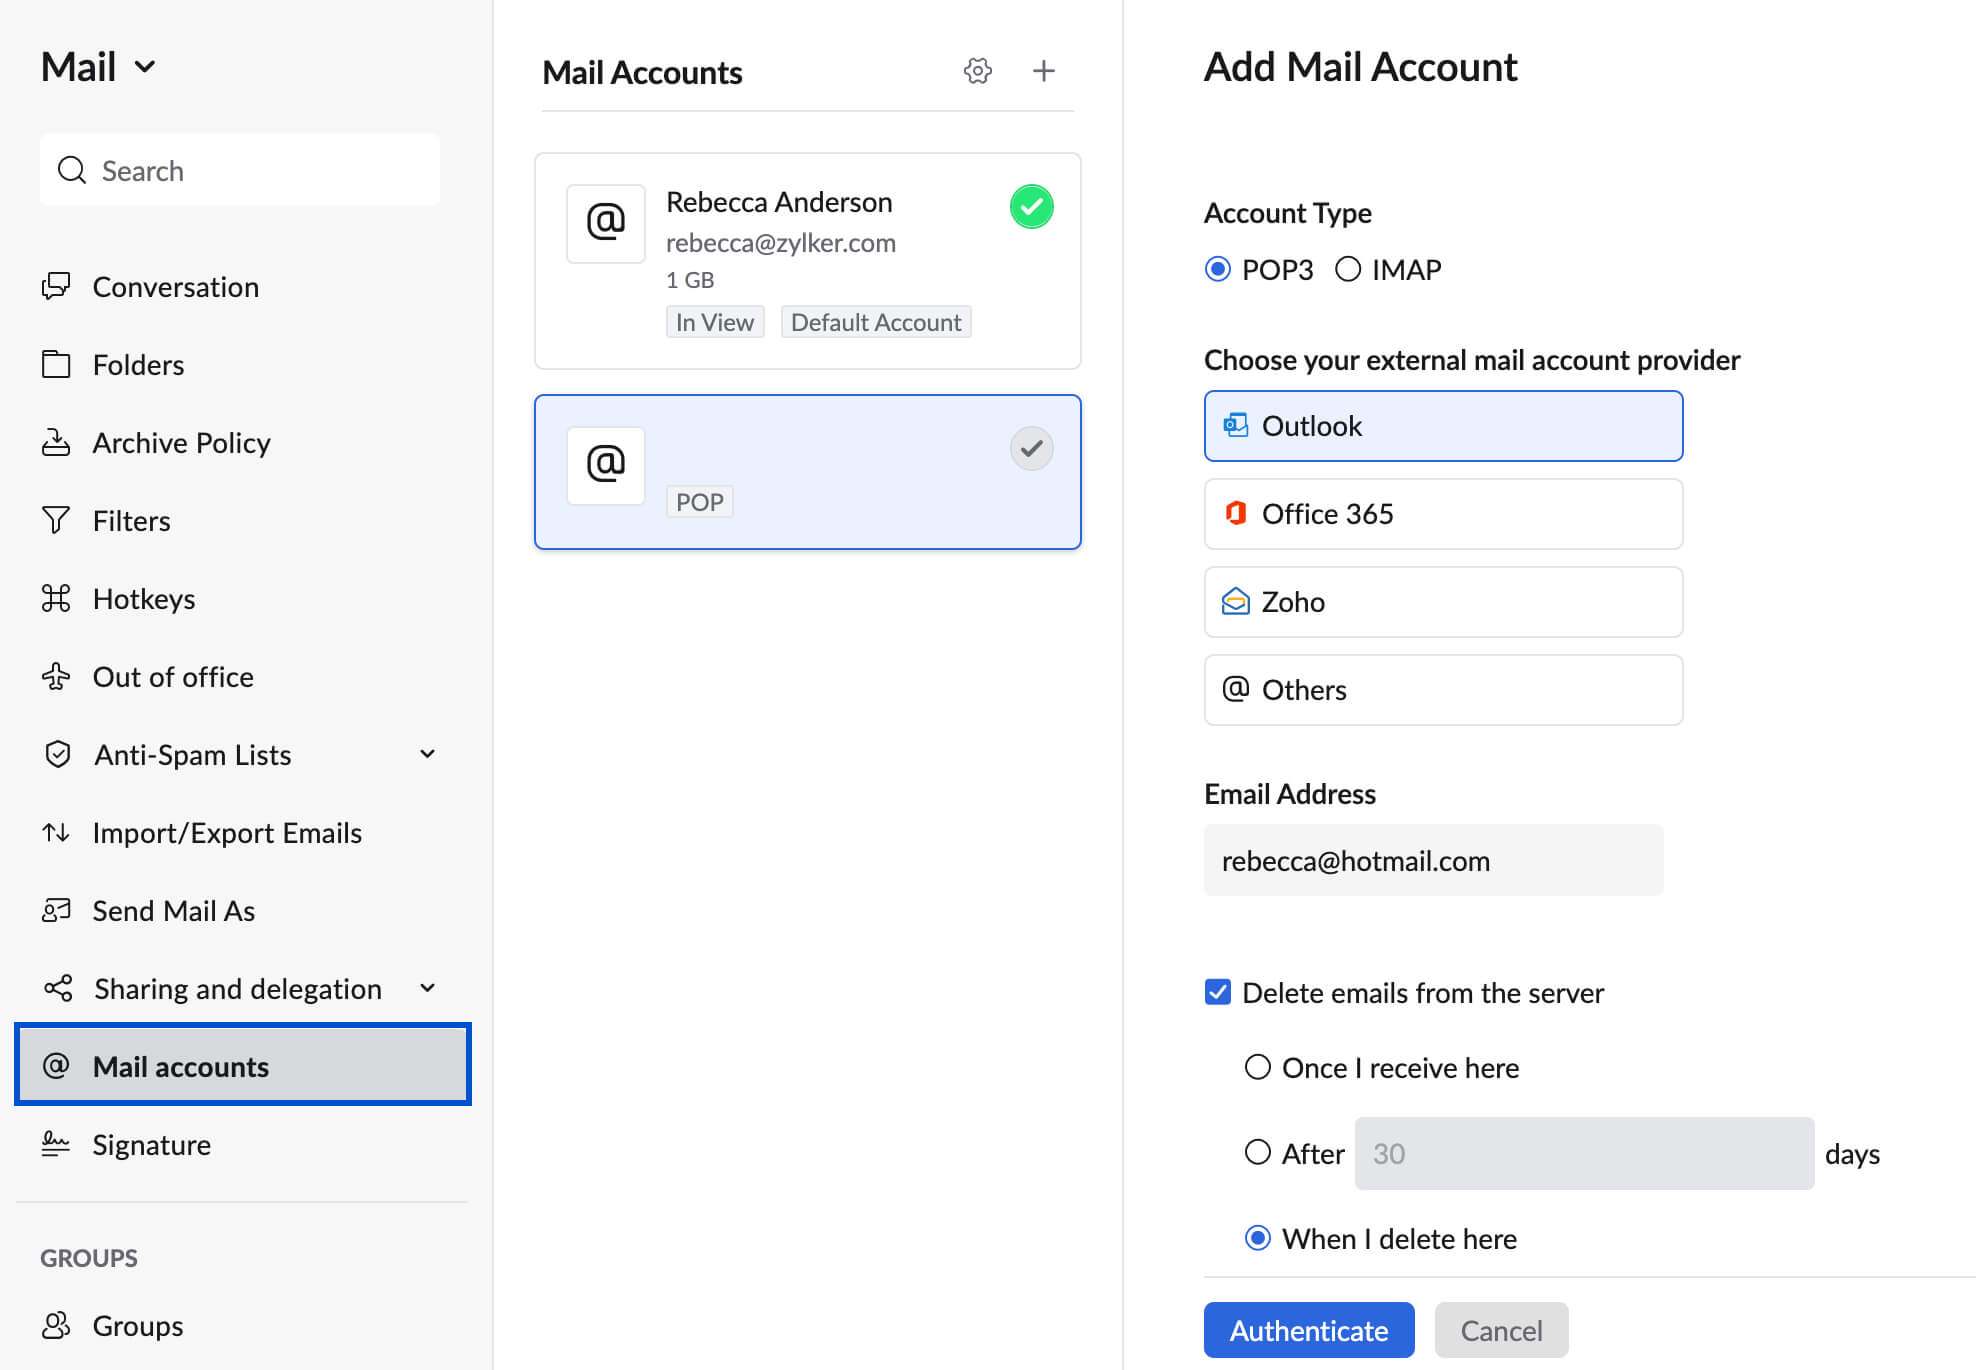
- Navigate to Mail Accounts and click the + (Add account) icon.
- Choose POP3 as the account type.
- Select your external mail account provider. If you want to configure Office 365 or Outlook accounts, follow the OAuth authentication method. Click Zoho if you want to configure another Zoho account and Others for any other service provider.

- Specify the Email address, Account Name, Default From email, and Reply to email for the Account.
- You can also set this to be your default address by checking the Set this as default account option.
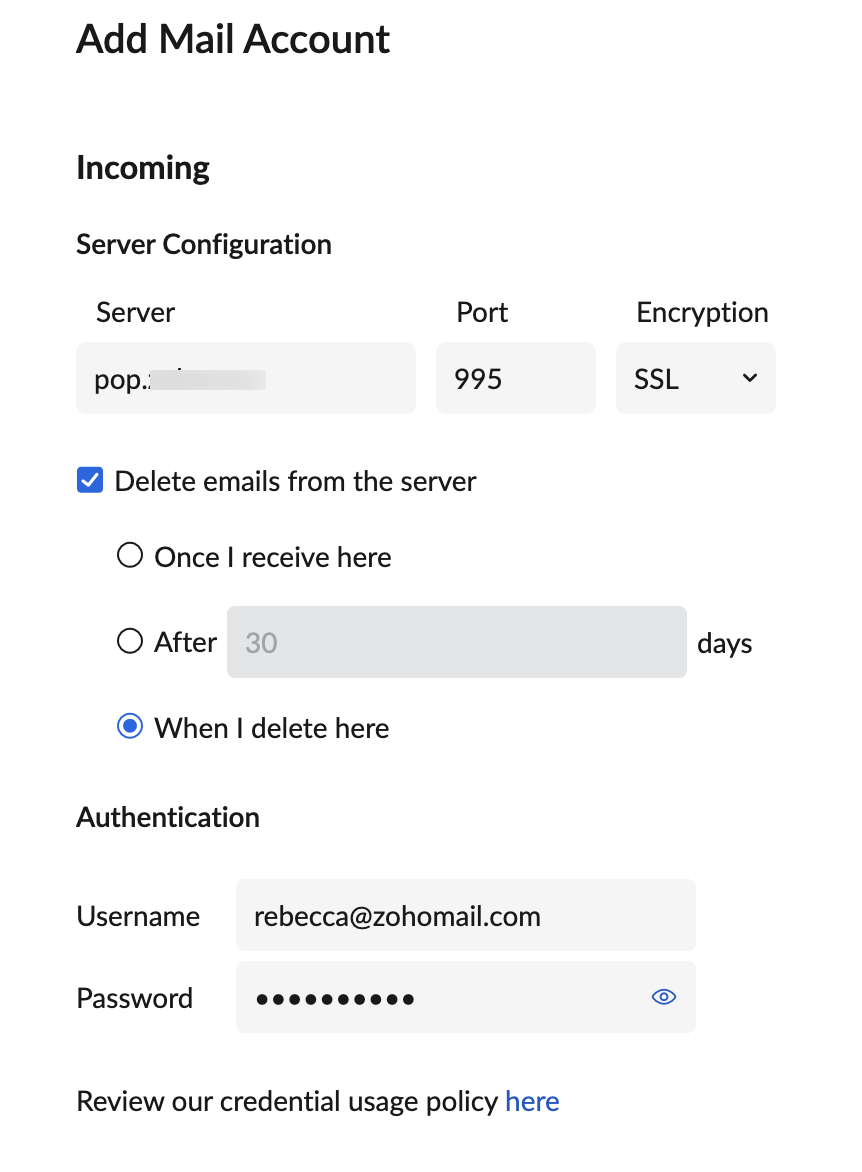
- In the incoming section, provide the POP3 Incoming server details and the Port number (Refer to your email service provider's Help documentation or support). Zoho Mail supports standard ports 110 and 995 for the Incoming server.
- You can select the Encryption type to be SSL or Plain, depending on your requirement. We do not support servers with self-signed certificates.
- Specify the User name and Password for the account, used in your email service provider's server.
- Check the option Delete emails from the server to delete emails from the server based on your requirement. The deletion provided in the option works based on your Mail server behavior. Check with your Email service provider before you set this option.


Make sure you update the 'Password' details in Zoho if you change it in the actual account. If you fail to do so, the account will be disabled and you need to update the 'Password' and enable it. Once the Test Account succeeds, you will see the section to update your Outgoing Mail server details for sending email from the account.
Outgoing Server Details for Sending Email
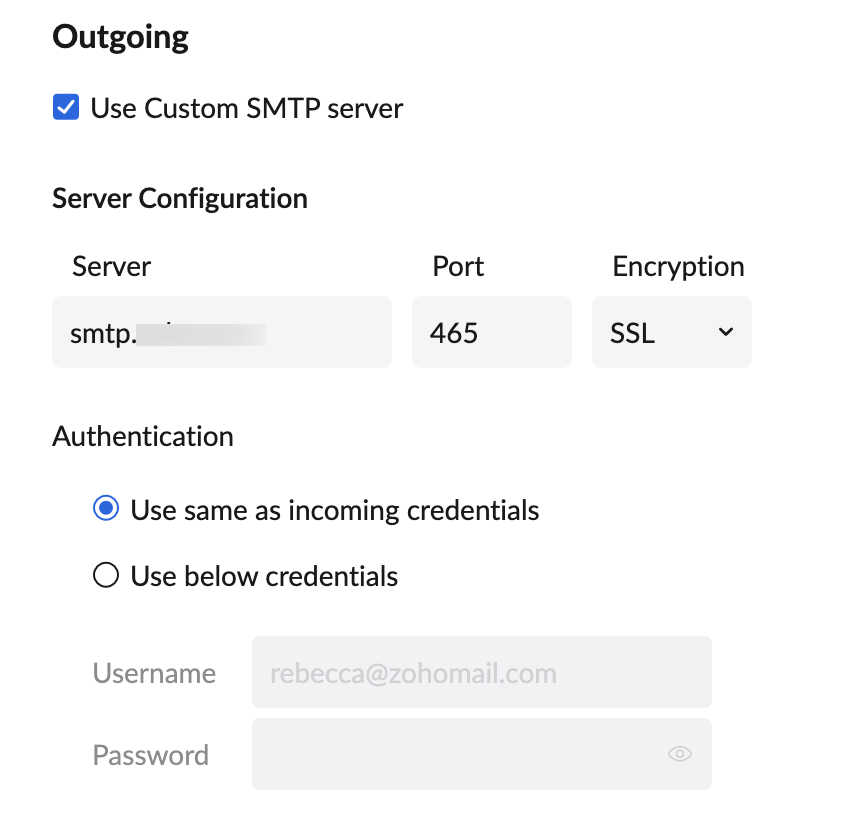
After the Incoming POP server details are successfully verified, you will be prompted to enter Outgoing SMTP server details.
- Check Use Custom SMTP server option if you want to send an email via the Custom SMTP server. You may refer here for detailed information regarding adding Outgoing servers.
- In the Authentication section, you can select either Use same as incoming credentials or Use below credentials.
- Once done, click Save.

Once both Incoming and Outgoing server details have been verified successfully, the account will be listed in the POP Accounts page. If the Outgoing server details could not be authenticated directly, you will receive a verification email to the address provided. Only after the verification, you will be able to send emails using that particular email address.
Configure POP Accounts using OAuth authentication
OAuth (Open standard Authorization protocol) is a framework that provides secured designated access. That is, OAuth does not require a password rather provides authorization tokens to authenticate a user. You can authorize your Outlook and Office 365 email accounts using OAuth without providing any password.
- Login to your Zoho Mail account.
- Go to Settings
- Navigate to Mail Accounts and click + (Add account) icon
- Choose POP as the Account Type and then choose your external mail account provider.
- Enter your email address in the respective field.
- Check the option Delete emails from the server to delete emails from the server based on your requirement. The deletion provided in the option works based on your Mail server Behavior. Check with your Email service provider before you set this option.
- Once done, click Authenticate.

You will be taken to your email service provider's login page in the pop-up window.
- Login to your external email service provider's account.
- You will be required to grant Zoho permissions to read, write, and access your emails.
After a few seconds, your account will get added successfully. It may take some time for the emails to sync completely. Once done, you can access the emails of your POP account in Zoho Mailbox.
Configure a Google account using POP
Earlier you could configure your Google account in Zoho Mail as a POP account using a Less secure app or App-specific password. Now, the support for the Less secure apps has been deprecated by Google.
If you want to configure a Google account as a POP account, follow the steps given here. Use the App-specific password generated from Google in the Password field under the Authentication section to authenticate Zoho Mail to add your Google account as a POP account.
Configuration of a Google account via IMAP can be done using only the App-specific password as the support for Less secure apps has been deprecated. Learn more.
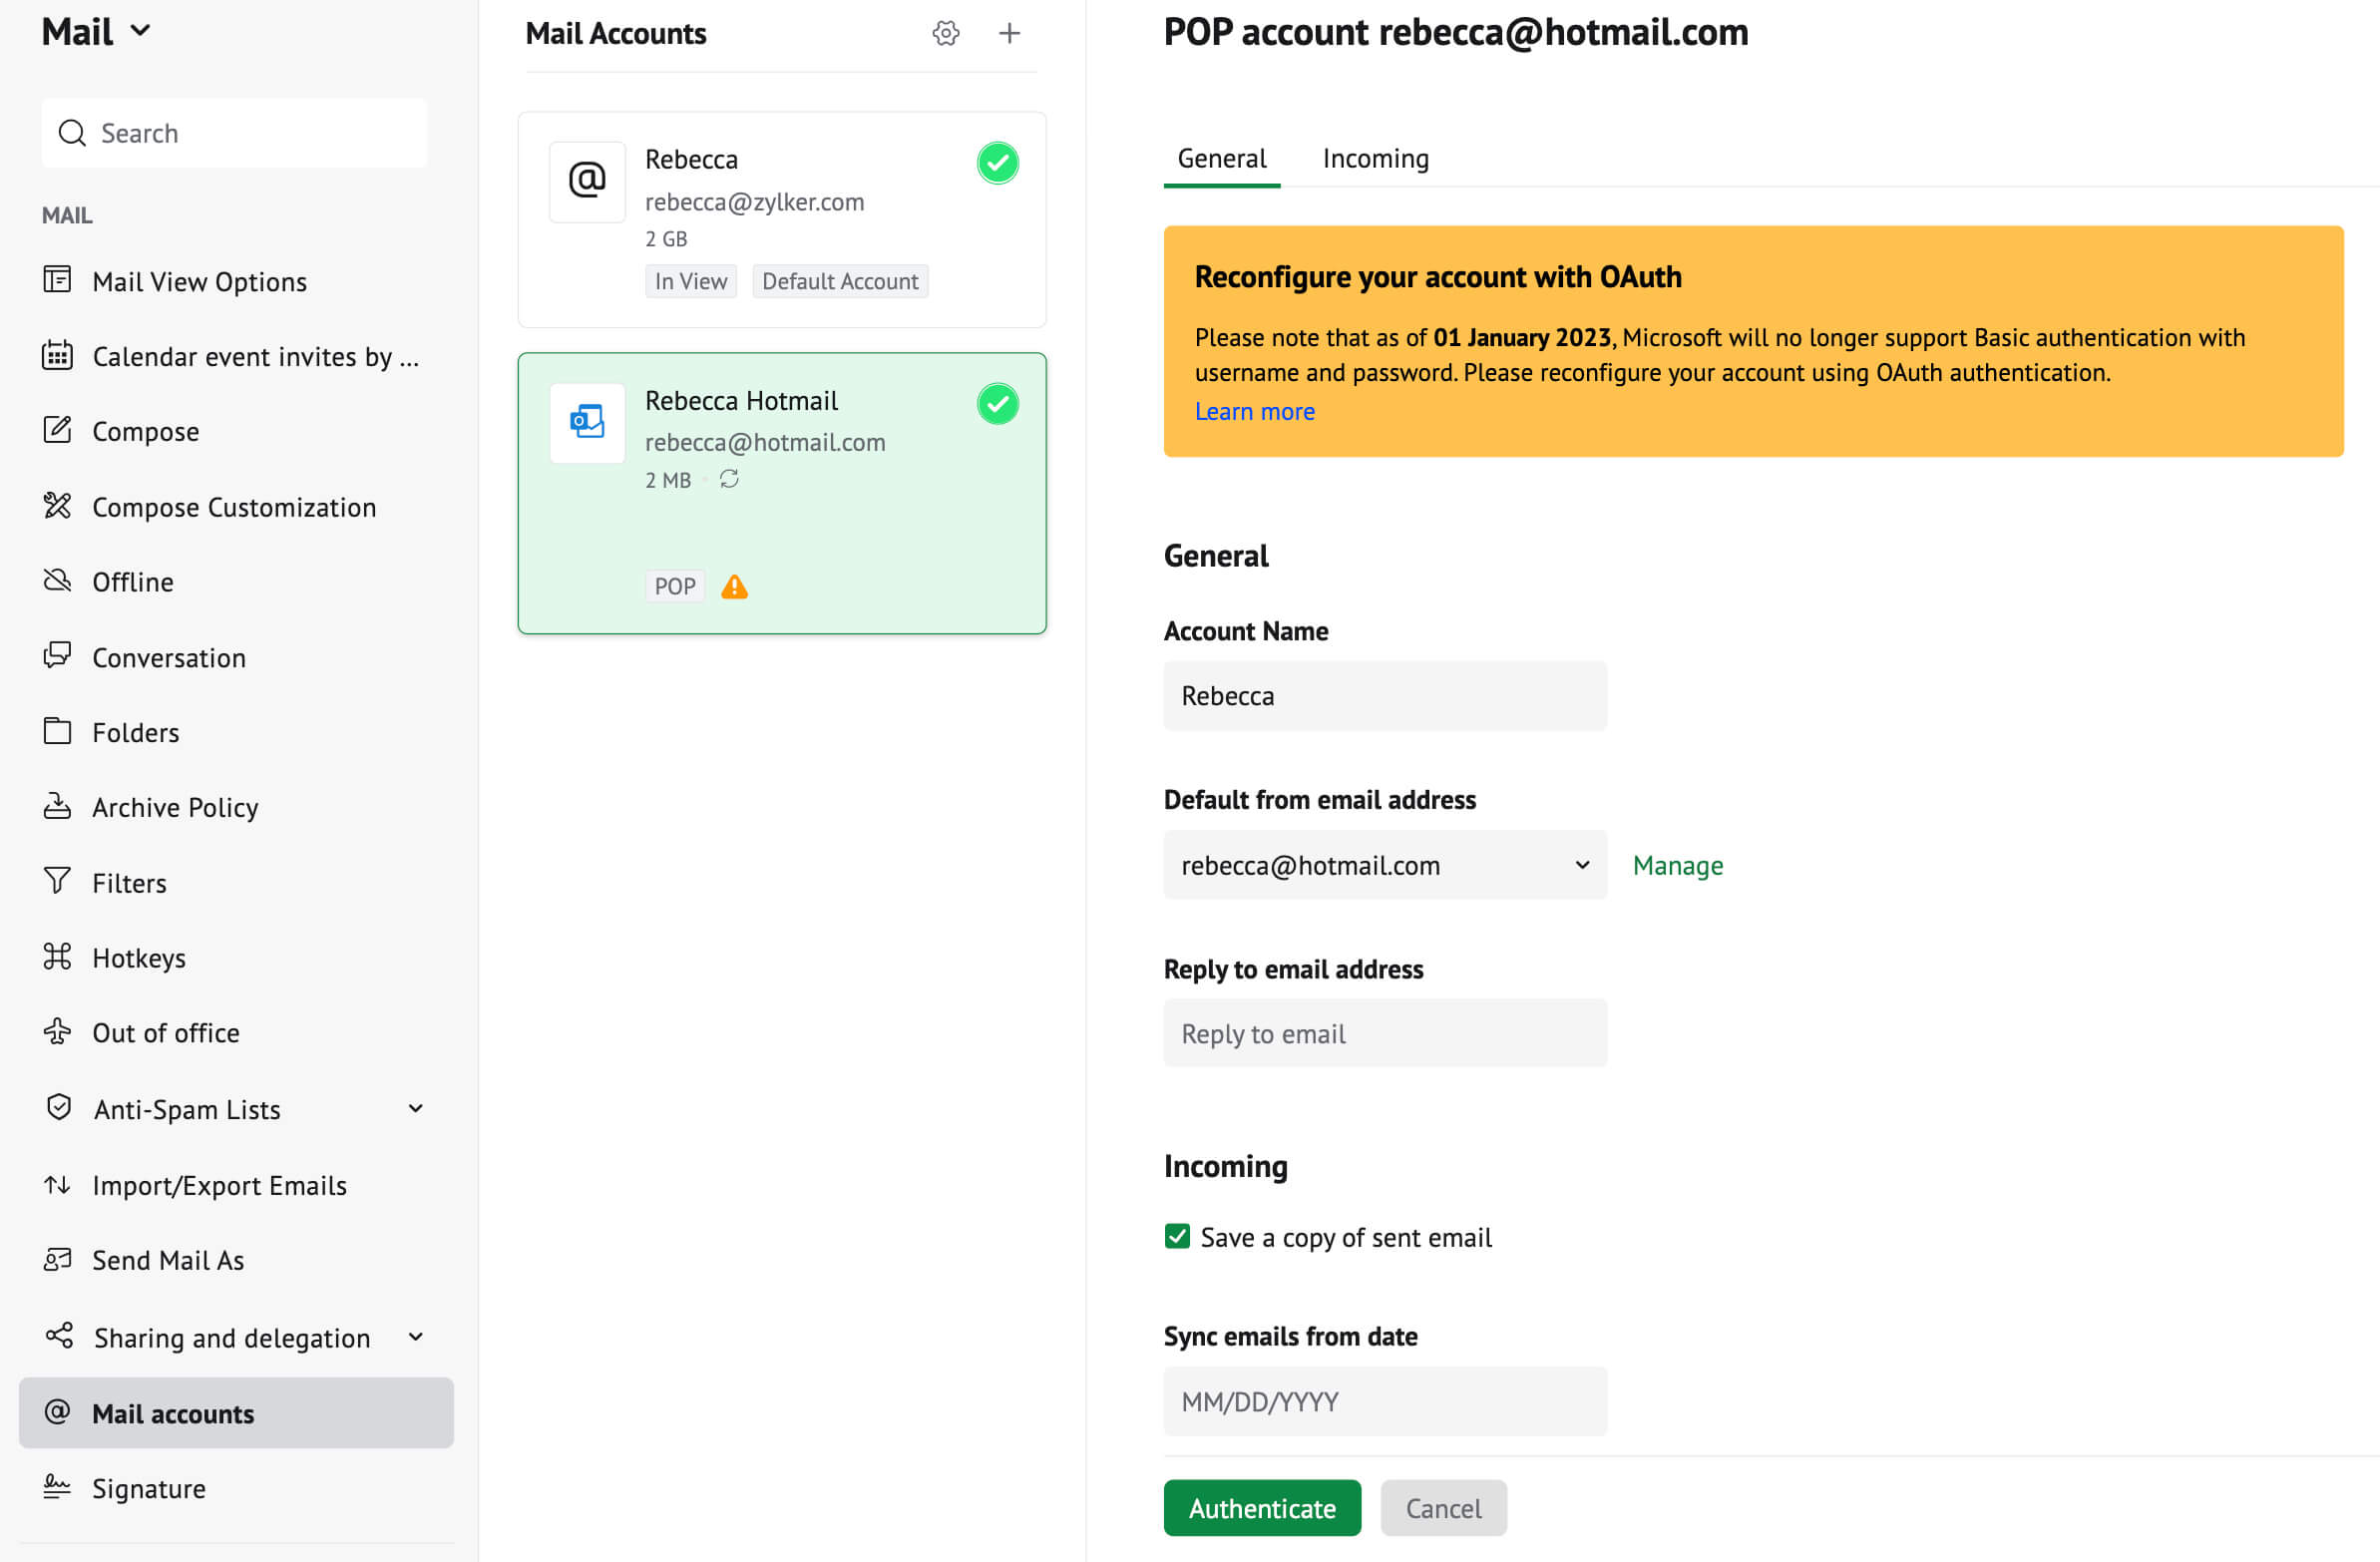
Reauthenticate your accounts using OAuth
Some email service providers like Outlook and Office 365 are updating their authentication methods from passwords to OAuth. In such cases, Zoho Mail can't fetch your emails until you reauthenticate your external account with OAuth.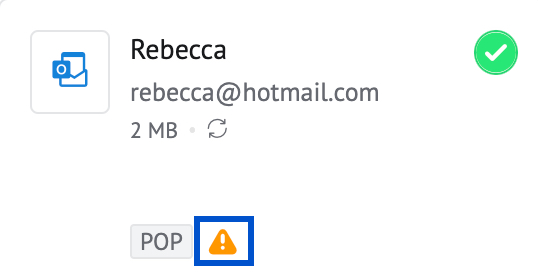
To re-authenticate your account,
- Login to your Zoho Mail account.
- Go to Settings
- Navigate to Mail Accounts and choose the account you want to reauthenticate.
- On the page of your respective external account, click Authenticate.

You will be taken to your external email service provider's login page in the pop-up window.
- Login to your external email service provider's account.
- Grant Zoho permissions to read, write, and access your info.
Once done, you would have successfully re-authenticated your account.
Reply To Email Address
When you configure your POP account with a different Reply To address, you need to verify the Reply-To address to start sending emails. A verification email will be sent to the Reply-To address during configuration, with a confirmation code.
Steps to verify the Reply-To email address:
- Login to Zoho Mail
- Go to Settings
- Navigate to Send Mail As
- Click the ‘Verify’ icon corresponding to the email address.
- A dialog box requesting the confirmation code appears.
- In the specified email address, you would have received a confirmation email from Zoho.
- Provide the confirmation code in the text box.
Switch POP Accounts
Once you add the POP accounts, the accounts will be added to the left pane. Select the particular POP account to switch to the account and view the emails in the account.
You can switch to any of the POP accounts by clicking on the Switch accounts icon displayed on the account card in the Mail Accounts settings page.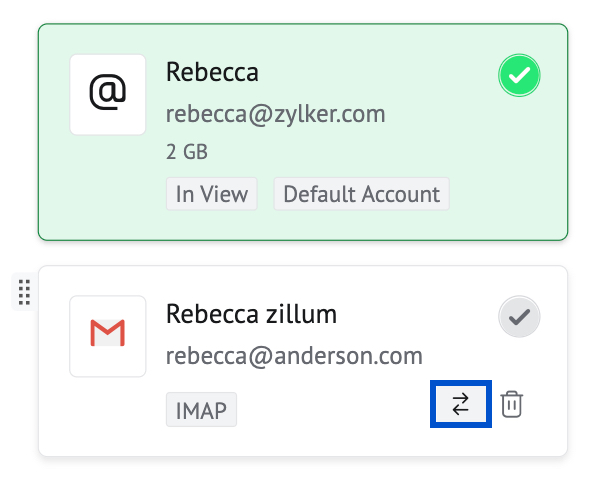
- Once you have set up your account, the server will be connected to retrieve the emails.
- The emails will be retrieved, as per the emails provided by the server and based on your retrieval settings.
- If you have a huge mailbox, it may take some time to download the emails from the Server.
- The POP client cannot retrieve emails based on folders/ dates/ status.
- By default, all the emails will be retrieved unread and sorted as per the 'Sent Date' available in the email.
Configuration Errors
The following are the common configuration errors that occur during the POP account Setup:
Connection Failure
The server which you have added could not be connected to the given port number. You need to check with your Email service provider Help or Support for the exact Incoming POP server and Outgoing SMTP server details and port numbers.
Authentication Failure
Sometimes you would notice that your emails are not being fetched to your inbox despite the server of your email service being connected without any issues. This can happen due to various reasons.
- Your email service's server might not accept the authentication credentials you have provided. In this case, verify the User Name and Password of your account.
- You changed the password of your external email account and did not re-authenticate using the updated password in Zoho Mail.
Apart from this, some providers expect you to enable POP access at their end. If you are confident that there's no error in the credentials you provided, contact your email service provider for further steps.
Certificate Errors
If your server supports SSL but provides an invalid certificate, you may get an 'Invalid Certificate Error'. You may need to contact your Email service provider, to check if the server has a valid registered SSL certificate from a certified vendor.
Generally, for any errors during configuration, check the following details.
- Check the Incoming Server name, port number details you use with your provider.
- Confirm with your Email Administrator whether you have the permission to retrieve emails via POP in Zoho Mail and the format of 'User name'. (For some accounts it is domain/username and in certain accounts, it is your email address).
- Only standard ports are allowed (110, 995). If your email service provider allows POP access via non-standard ports, you need to contact your provider to get that corrected.
- If your server has a self-signed certificate, you need to get a standard and valid SSL certificate from a vendor, without which you will not be able to configure your account in port 995.
- If your provider uses a standard SSL certificate, and you still receive Certificate Errors during configuration, please contact support@zohomail.comwith your Mail server Details and port number.