Zoho Recruit - Native Integration
The native integration between Zoho Voice and Zoho Recruit equips recruiters with built-in voice capabilities to enhance communication and productivity throughout the hiring process. Once configured, users can make and receive calls using the Zoho Voice dial pad, access real-time caller details, and utilize key features such as click-to-call, incoming call pop-ups, automatic call logging, and after-call actions, directly within the Zoho Recruit interface. This integration ensures all call activities are tracked and accessible within your recruitment workflow, reducing manual effort and improving response times.
This guide outlines the steps to set up the integration and explains the features and functionalities available after integration.
Note
Only super admin and admins have permission to configure this integration.
Steps to set up this integration
Download the ZDialer extension for your browser (Chrome, Firefox, or Edge) using the links. [Learn more about ZDialer]
Log in to your Zoho Voice account.
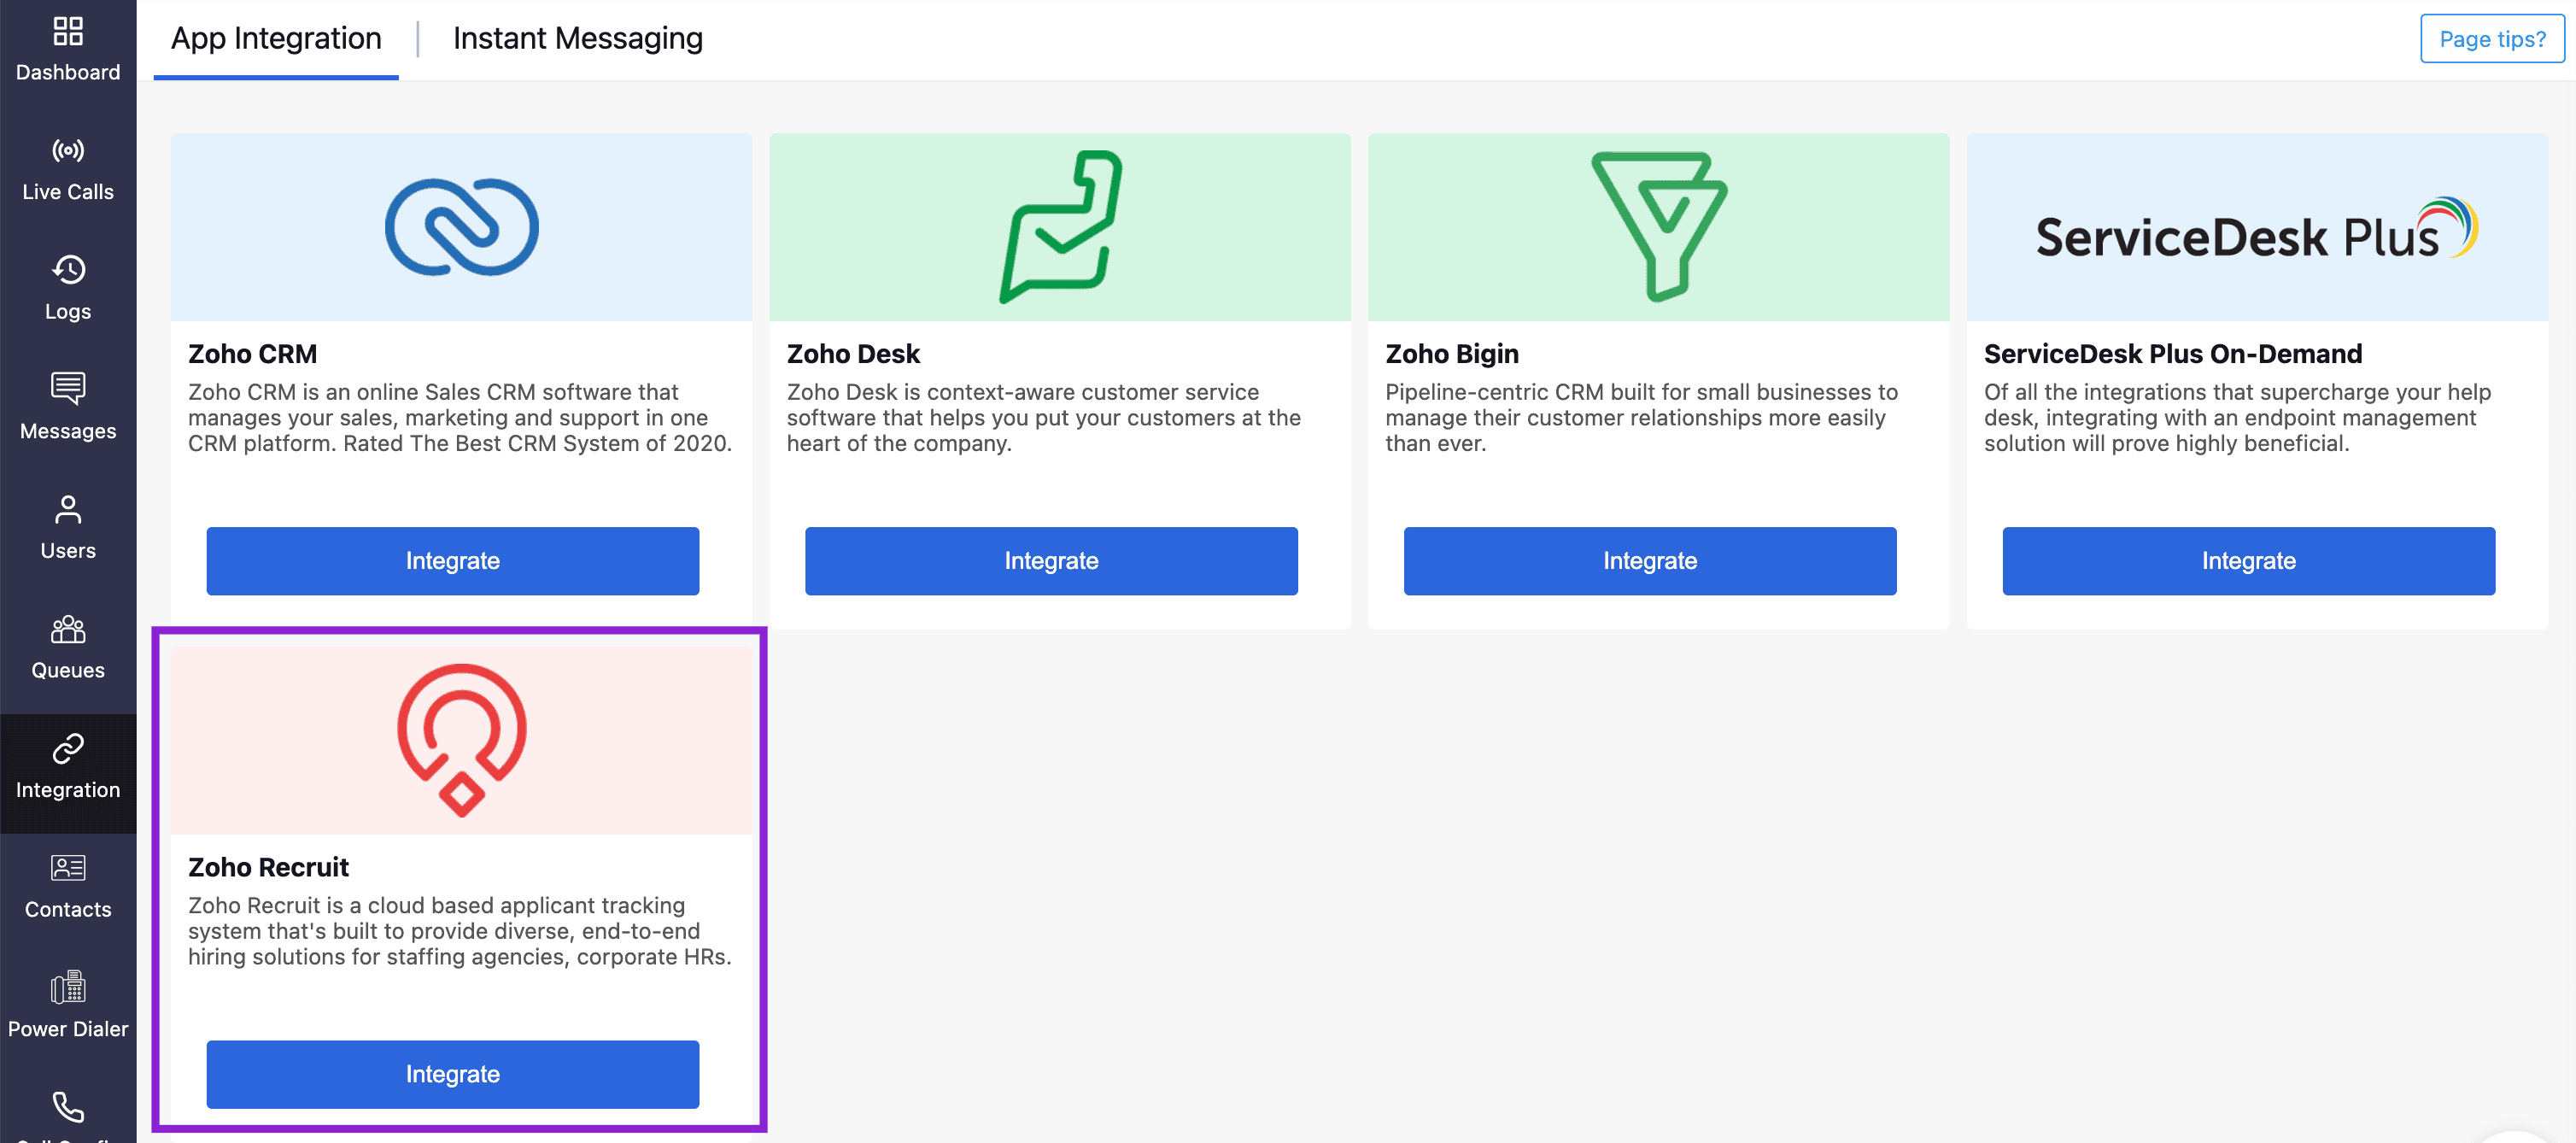
Go to the Integration module, and click Integrate of Zoho Recruit.
Click Next.
Choose the required Portal and Submit.
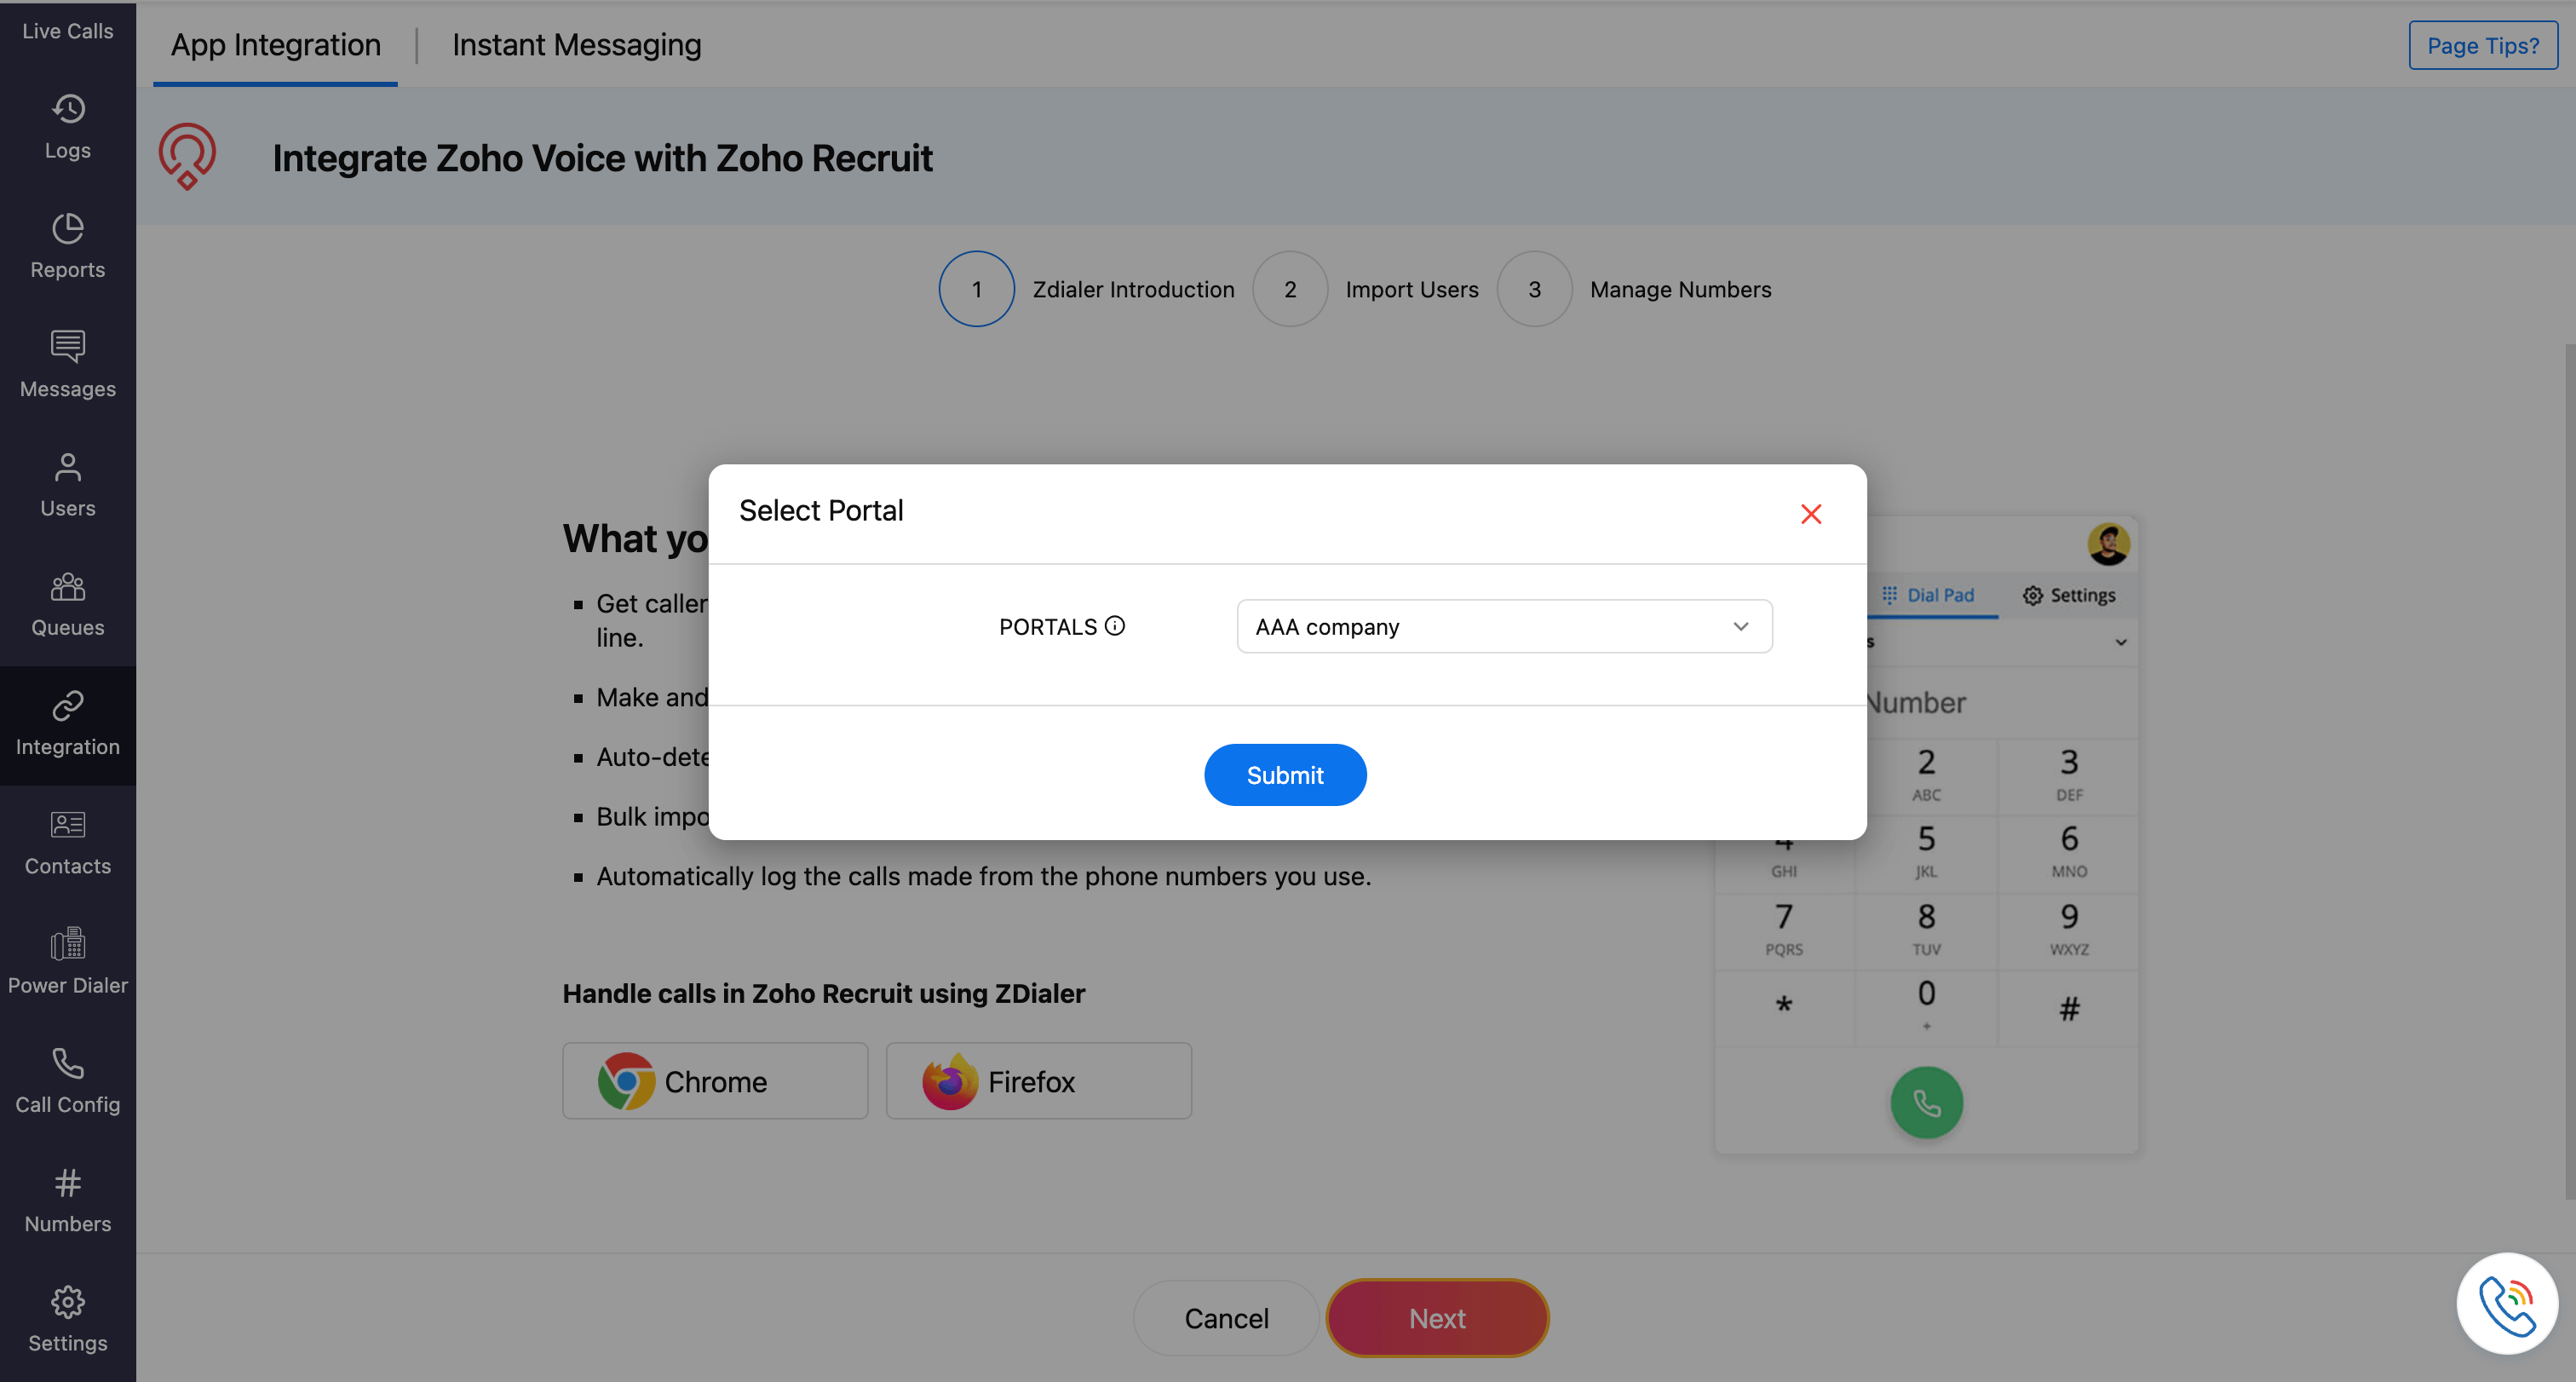
Click Next.
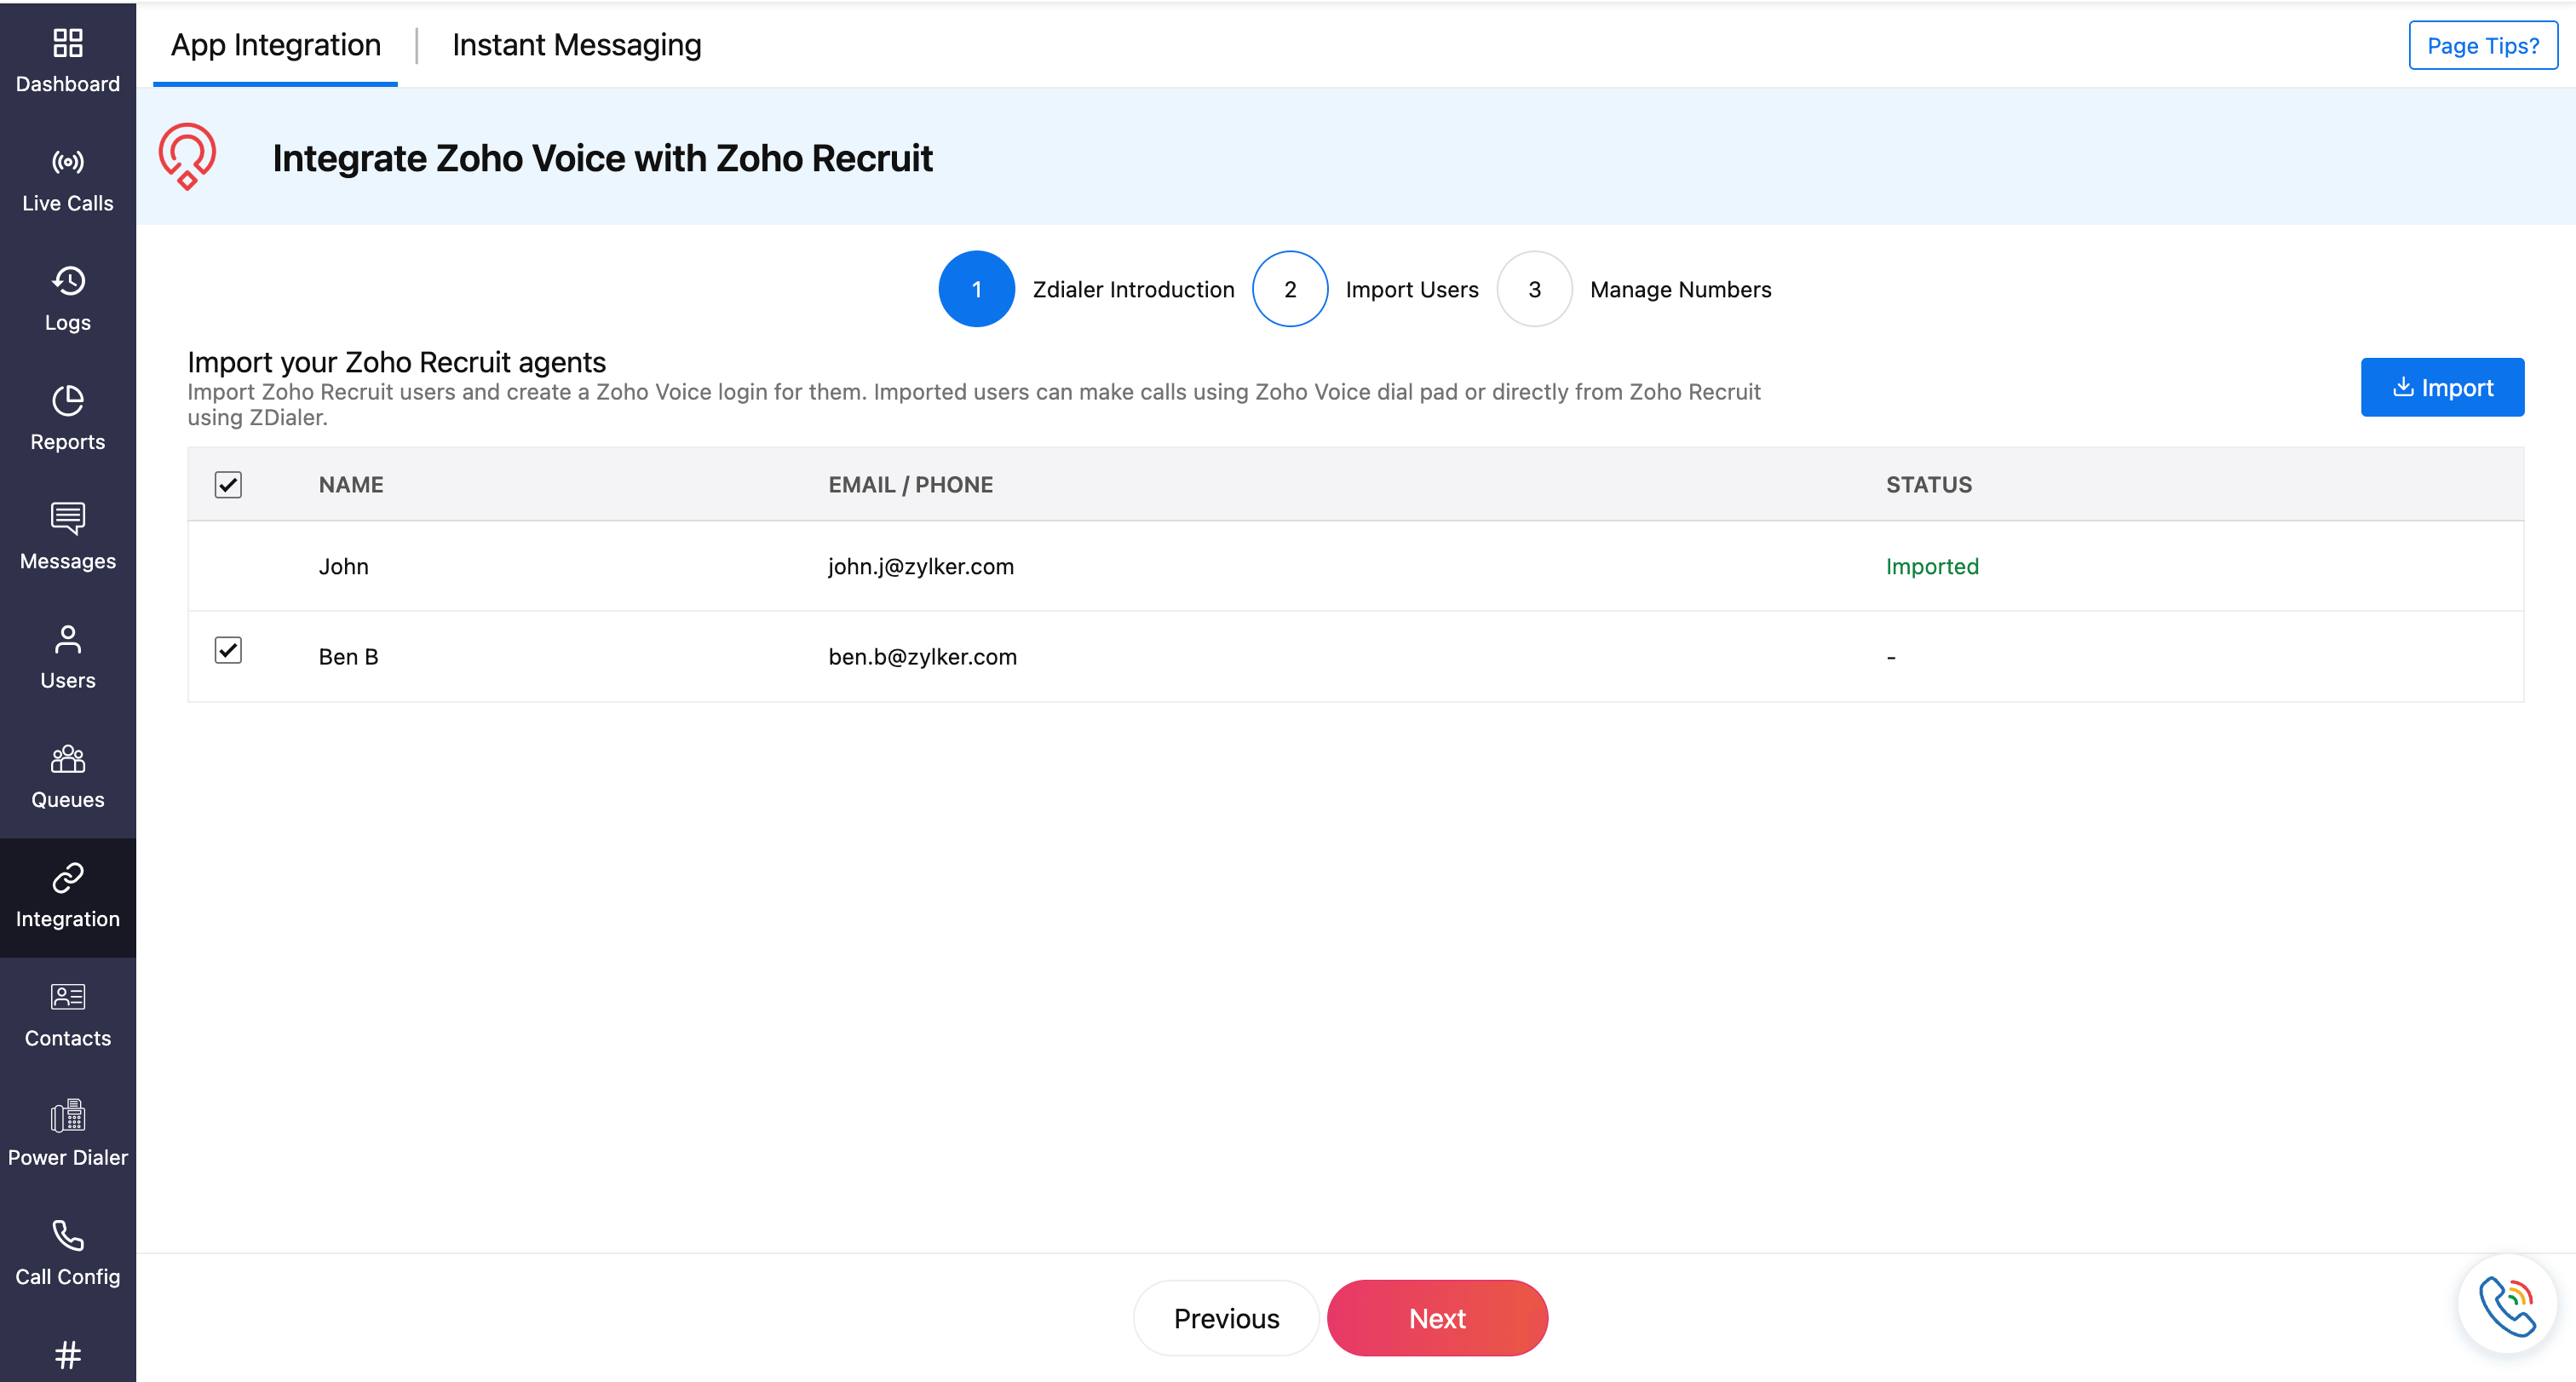
Select the users to be imported, then click Import.
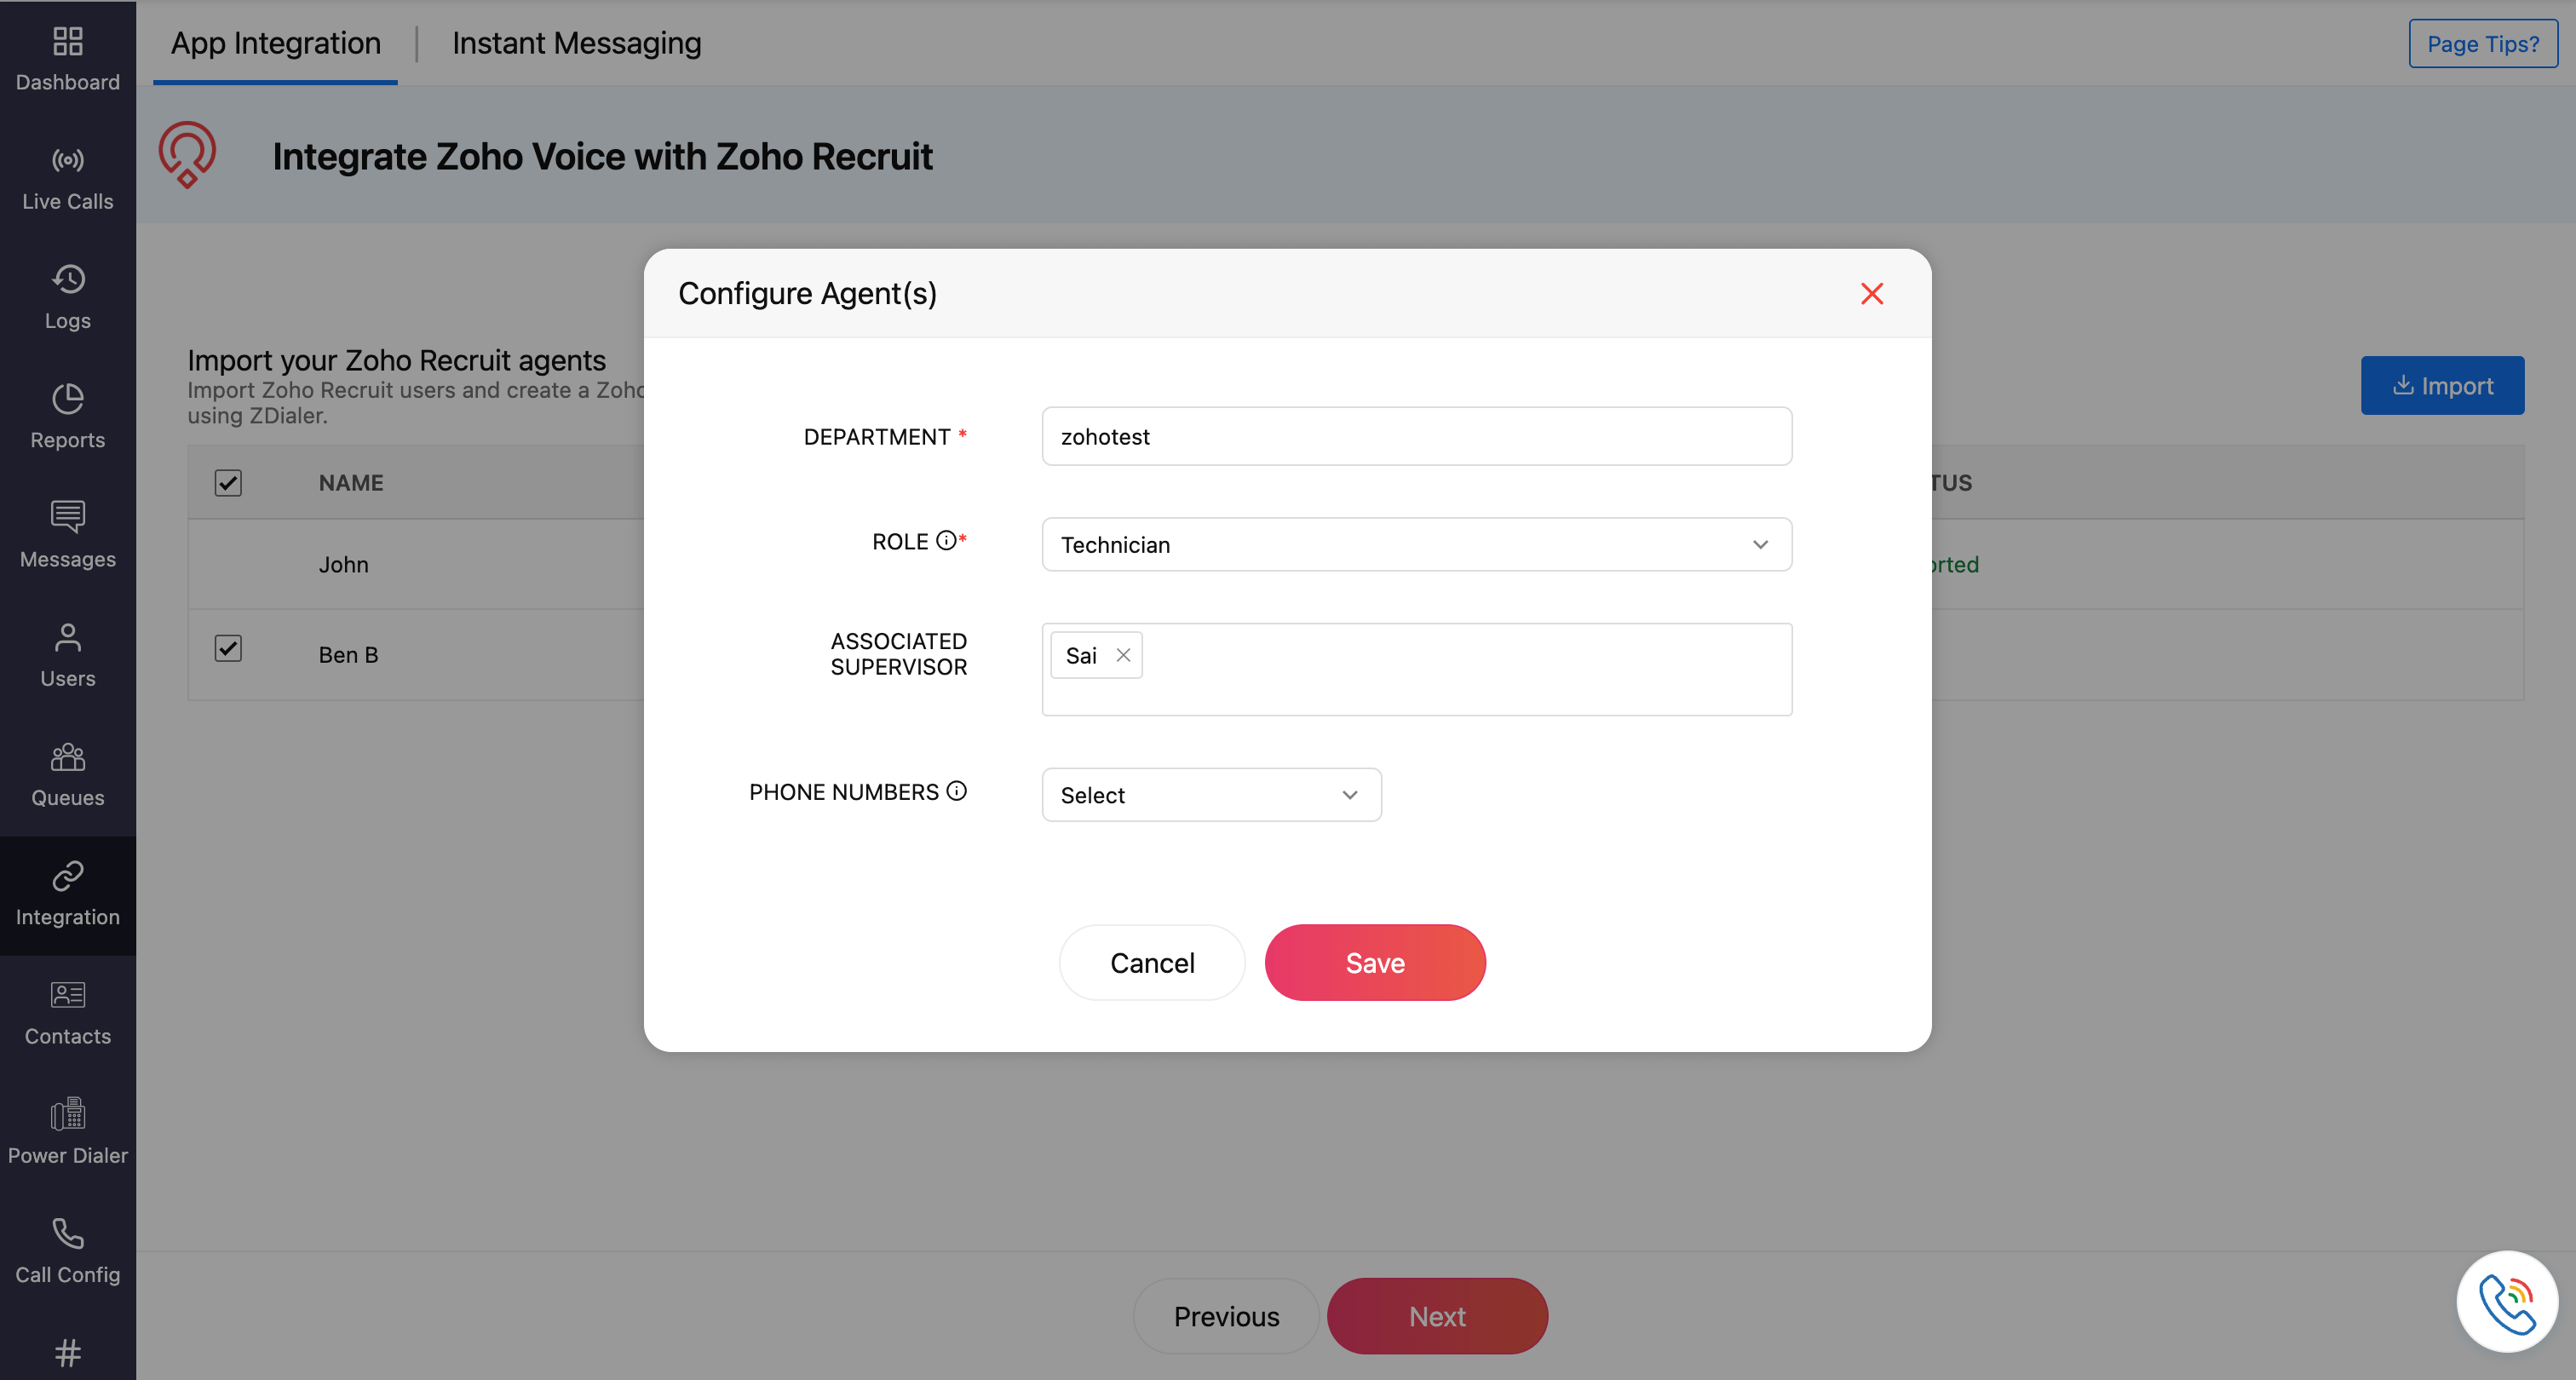
In the Configure Agents prompt, assign users with a Department and Role (admin, supervisor, supervisor plus, and technician).
Additionally, assign phone numbers for the supervisor, supervisor plus, and technician.
For technician, associate supervisor in-charge.
Important Note
Admins have all the privileges and have access to all the call logs and recordings. Supervisors have access to the call logs and recordings of technicians assigned to them. Technicians will have access to their call logs and recordings only.
Note
You can associate multiple supervisors with a technician. Ensure the supervisors are already added to the system beforehand; only then will their names be available while searching and assigning here.
Click Save.
Click Next.
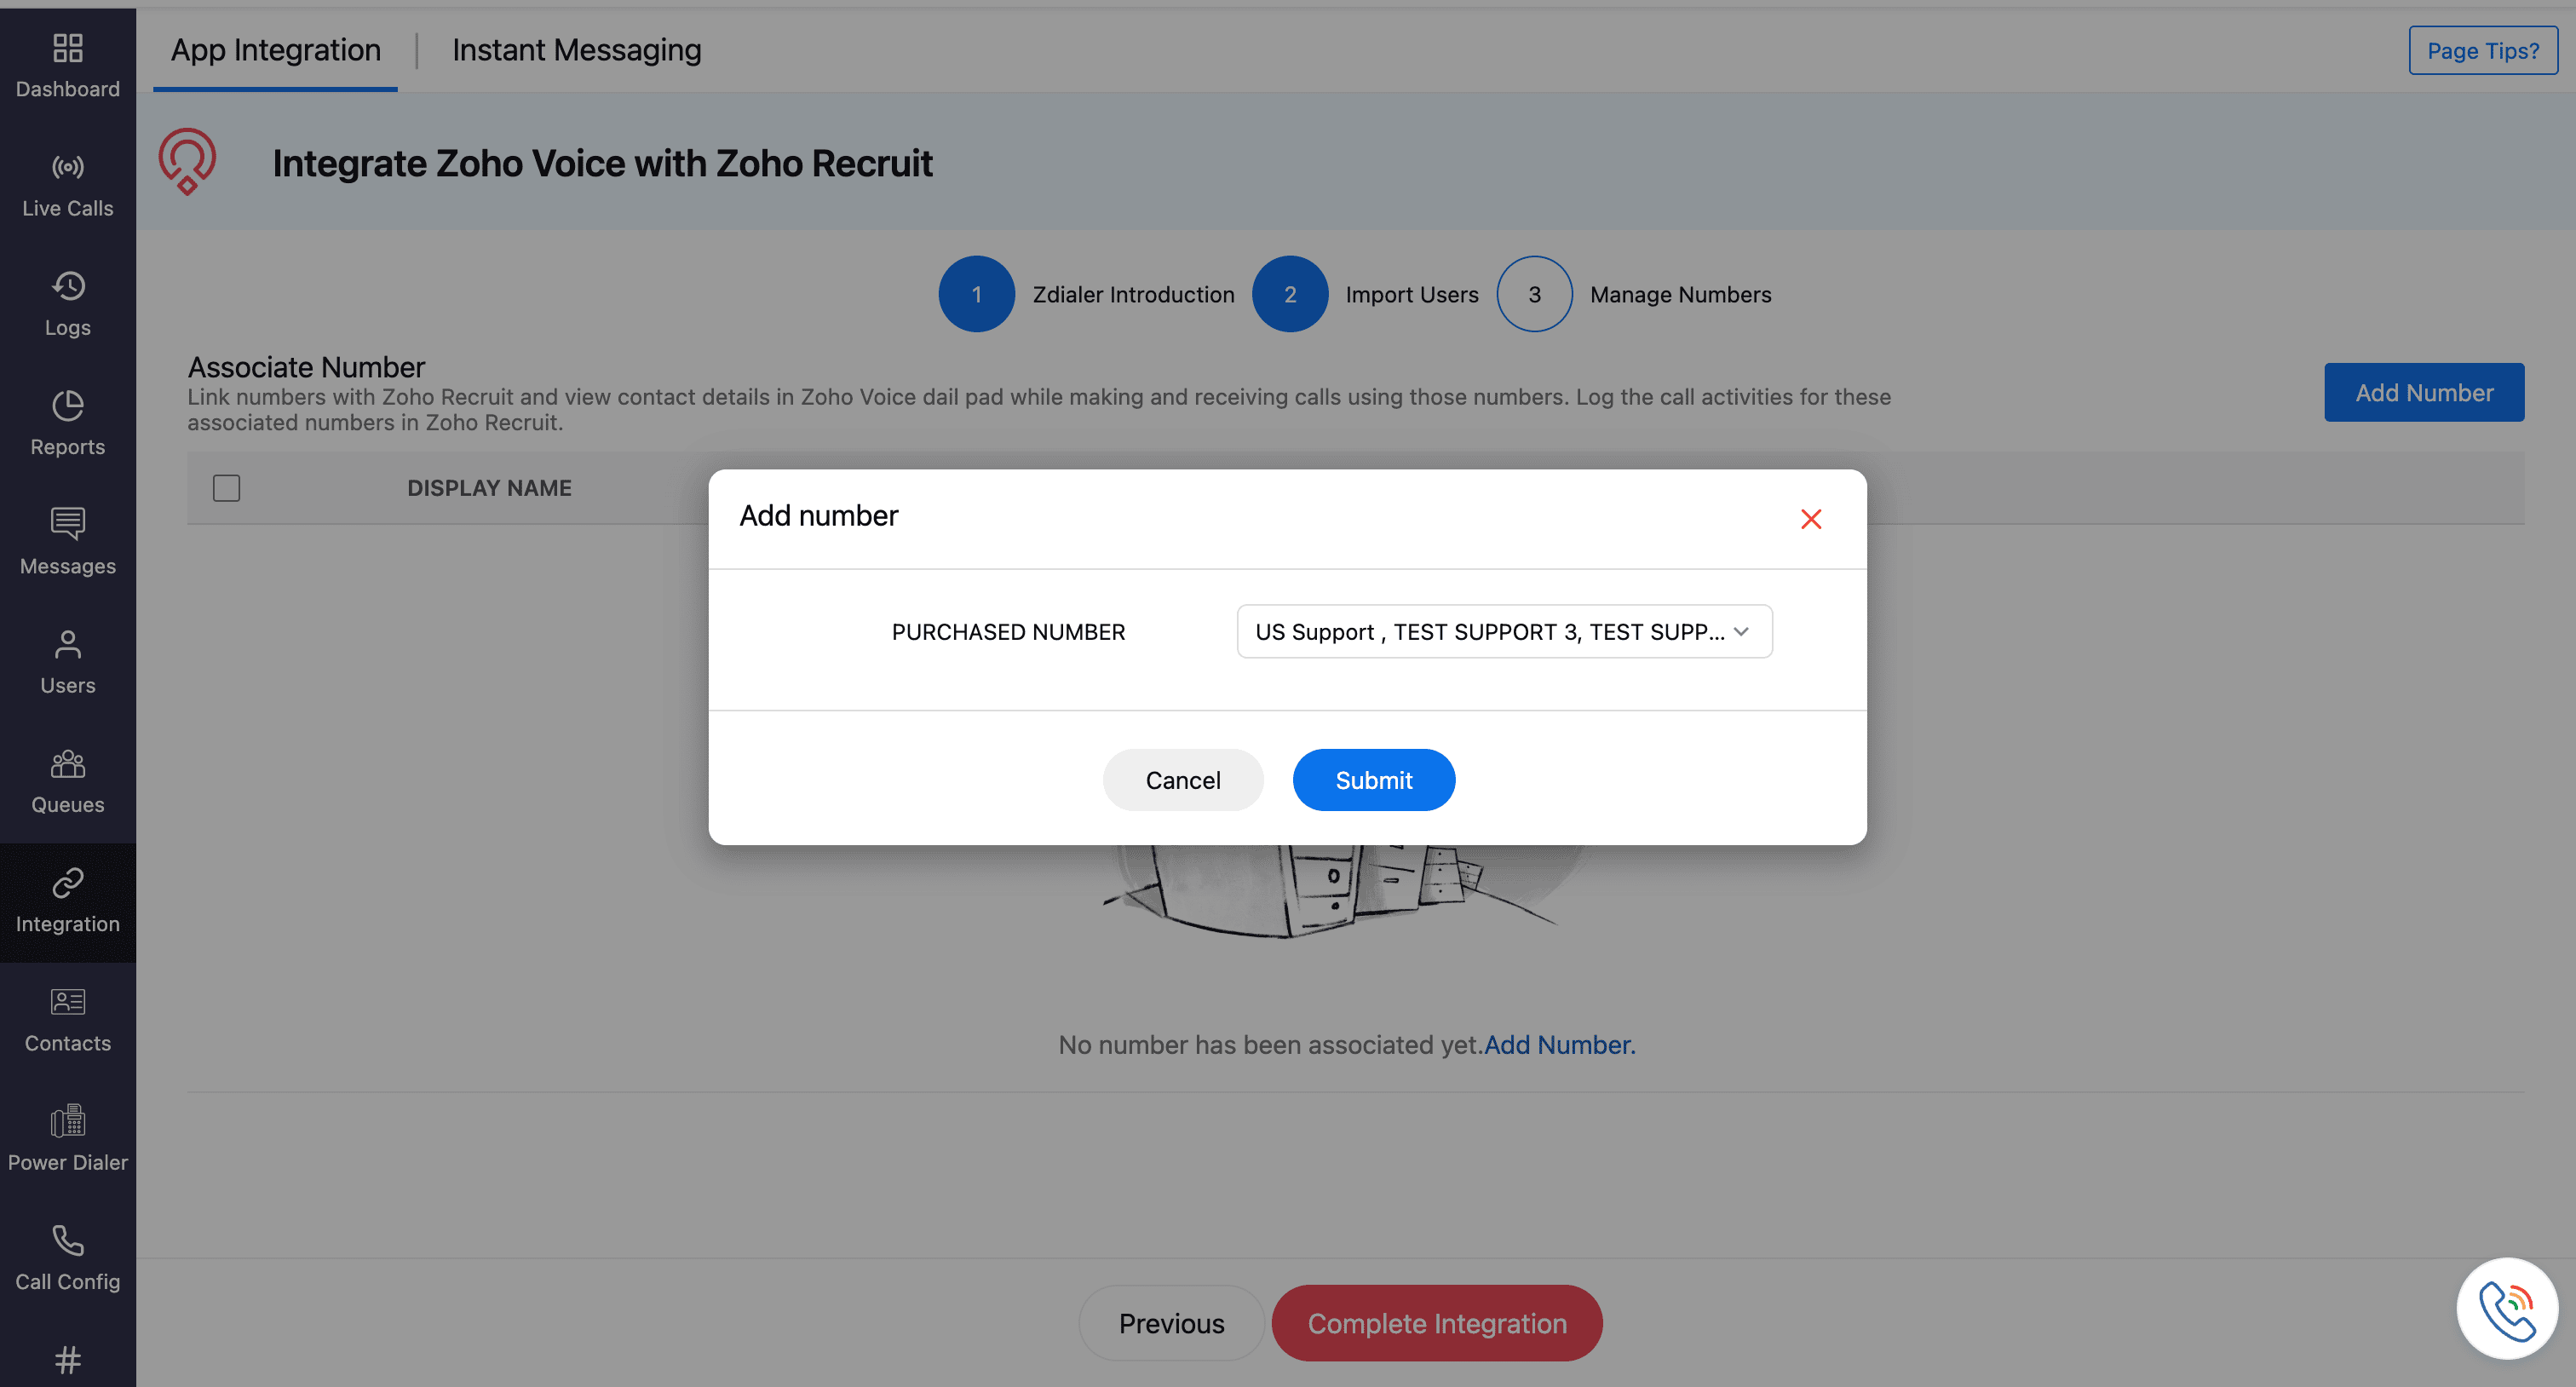
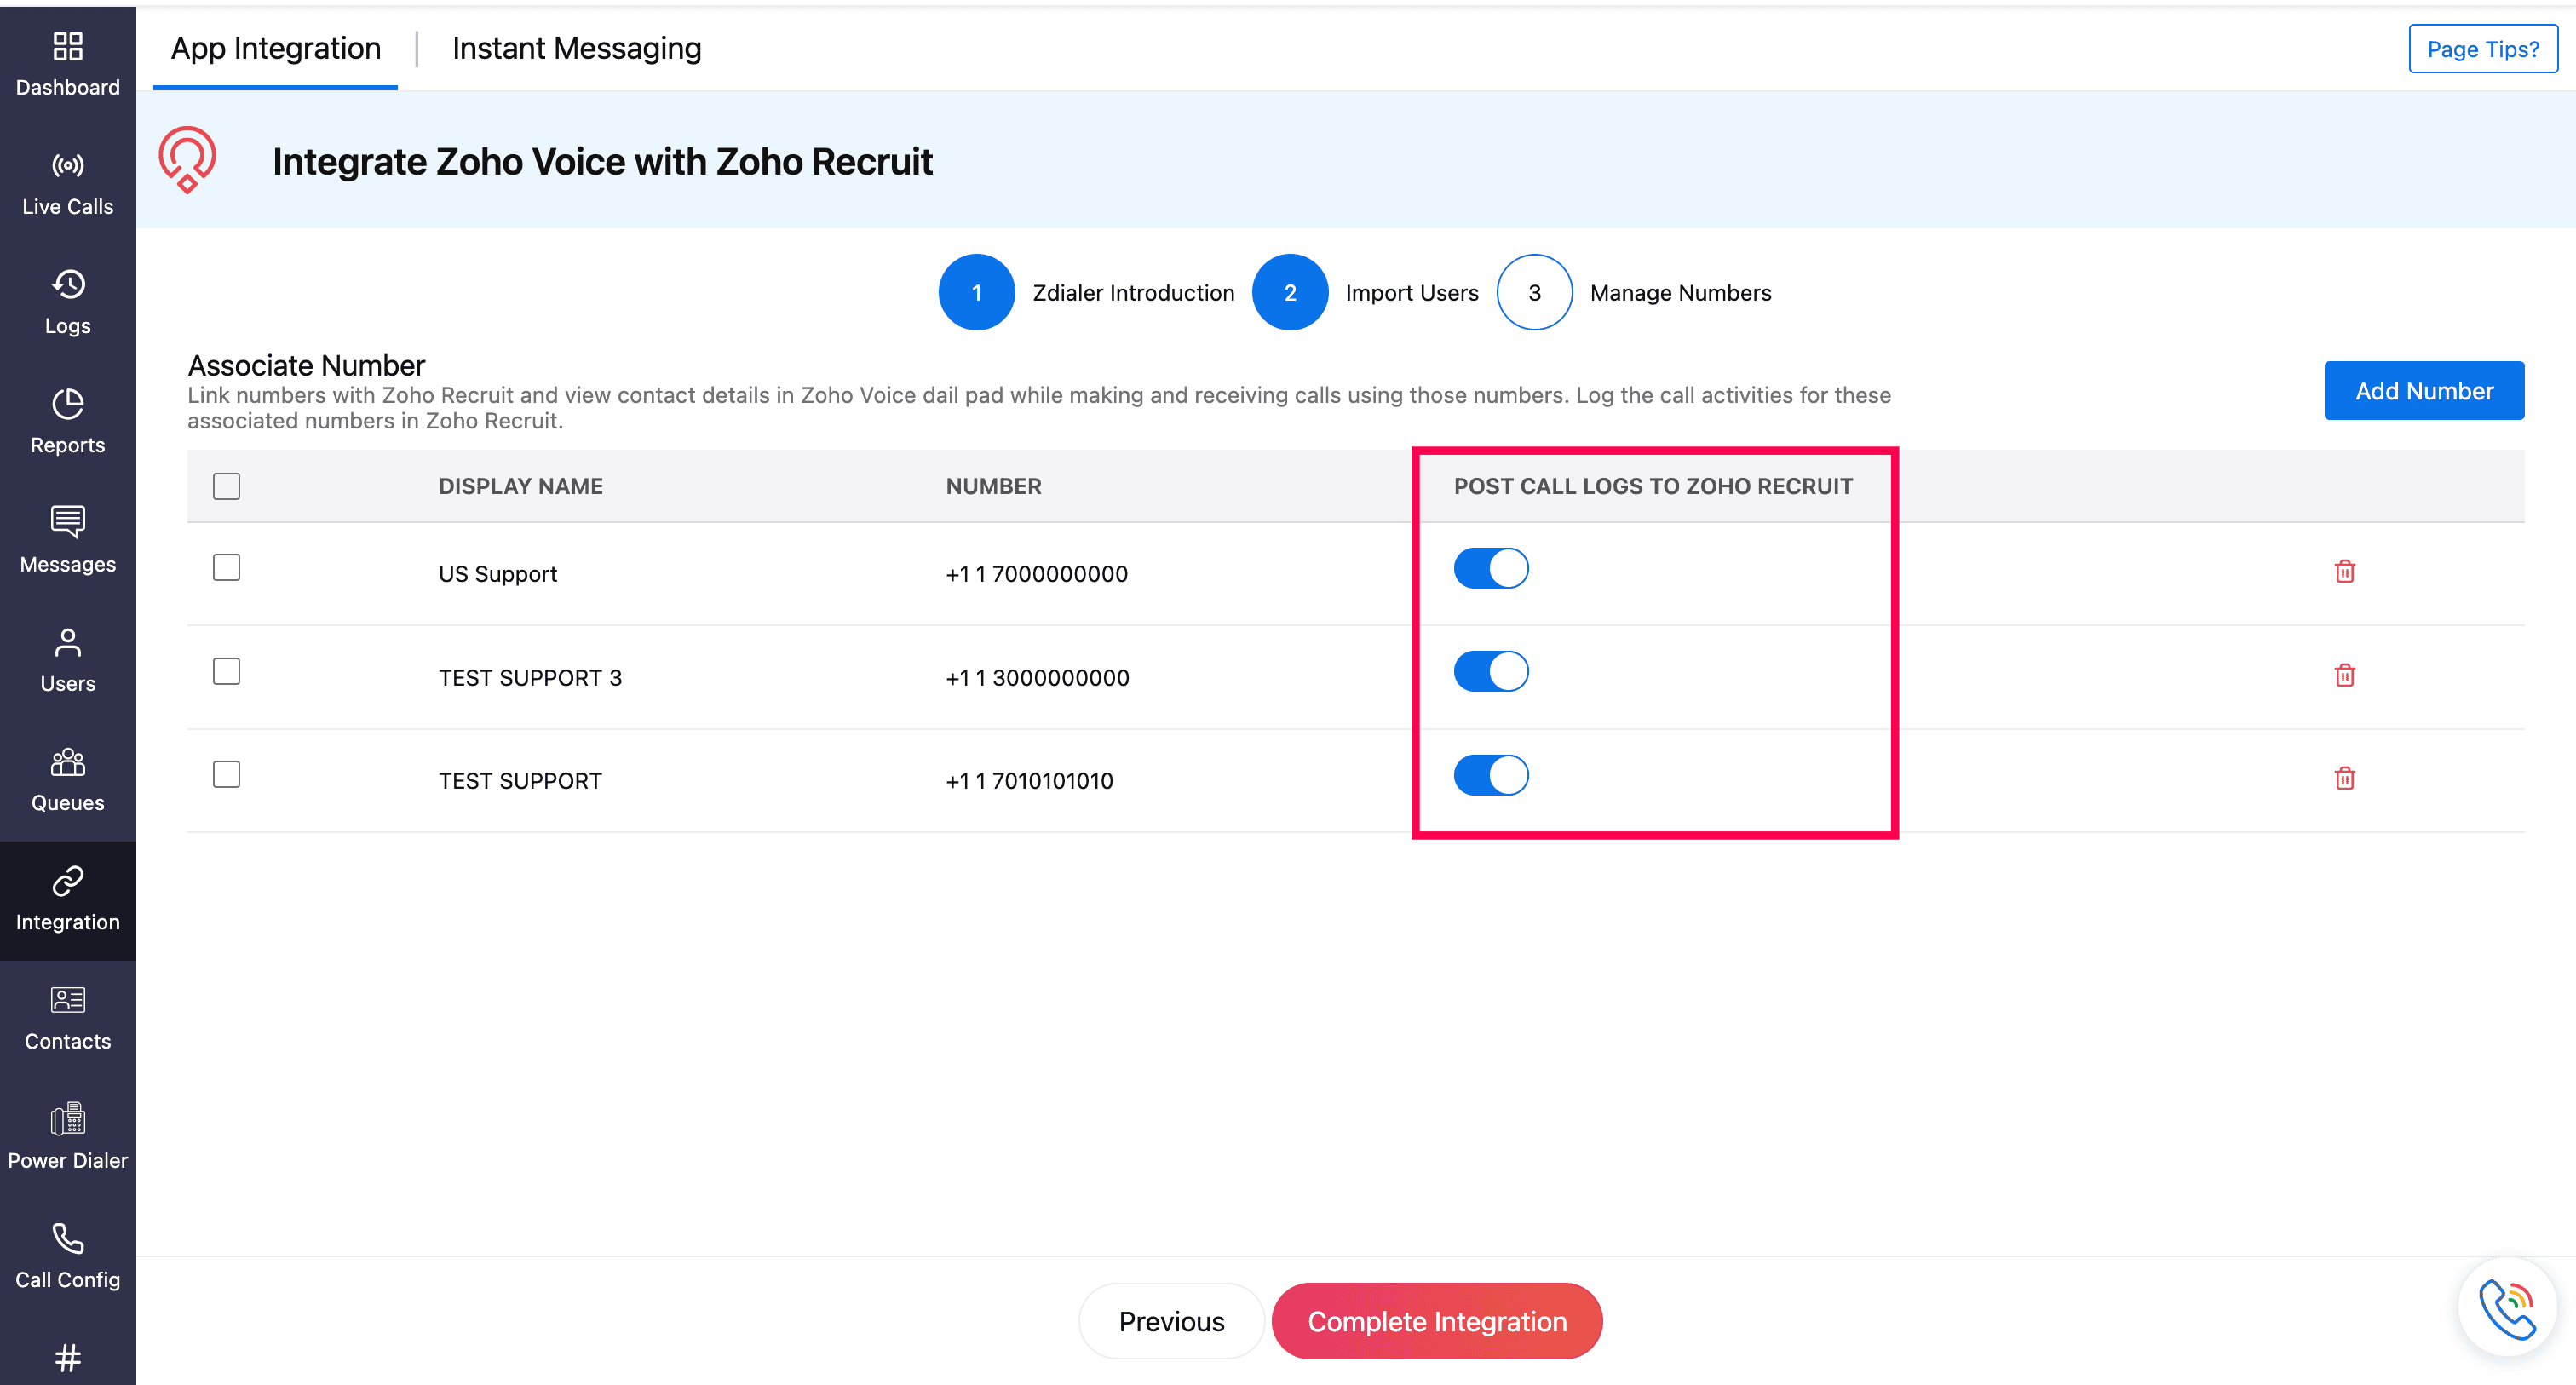
In the Manage Numbers page, Click Add Number.
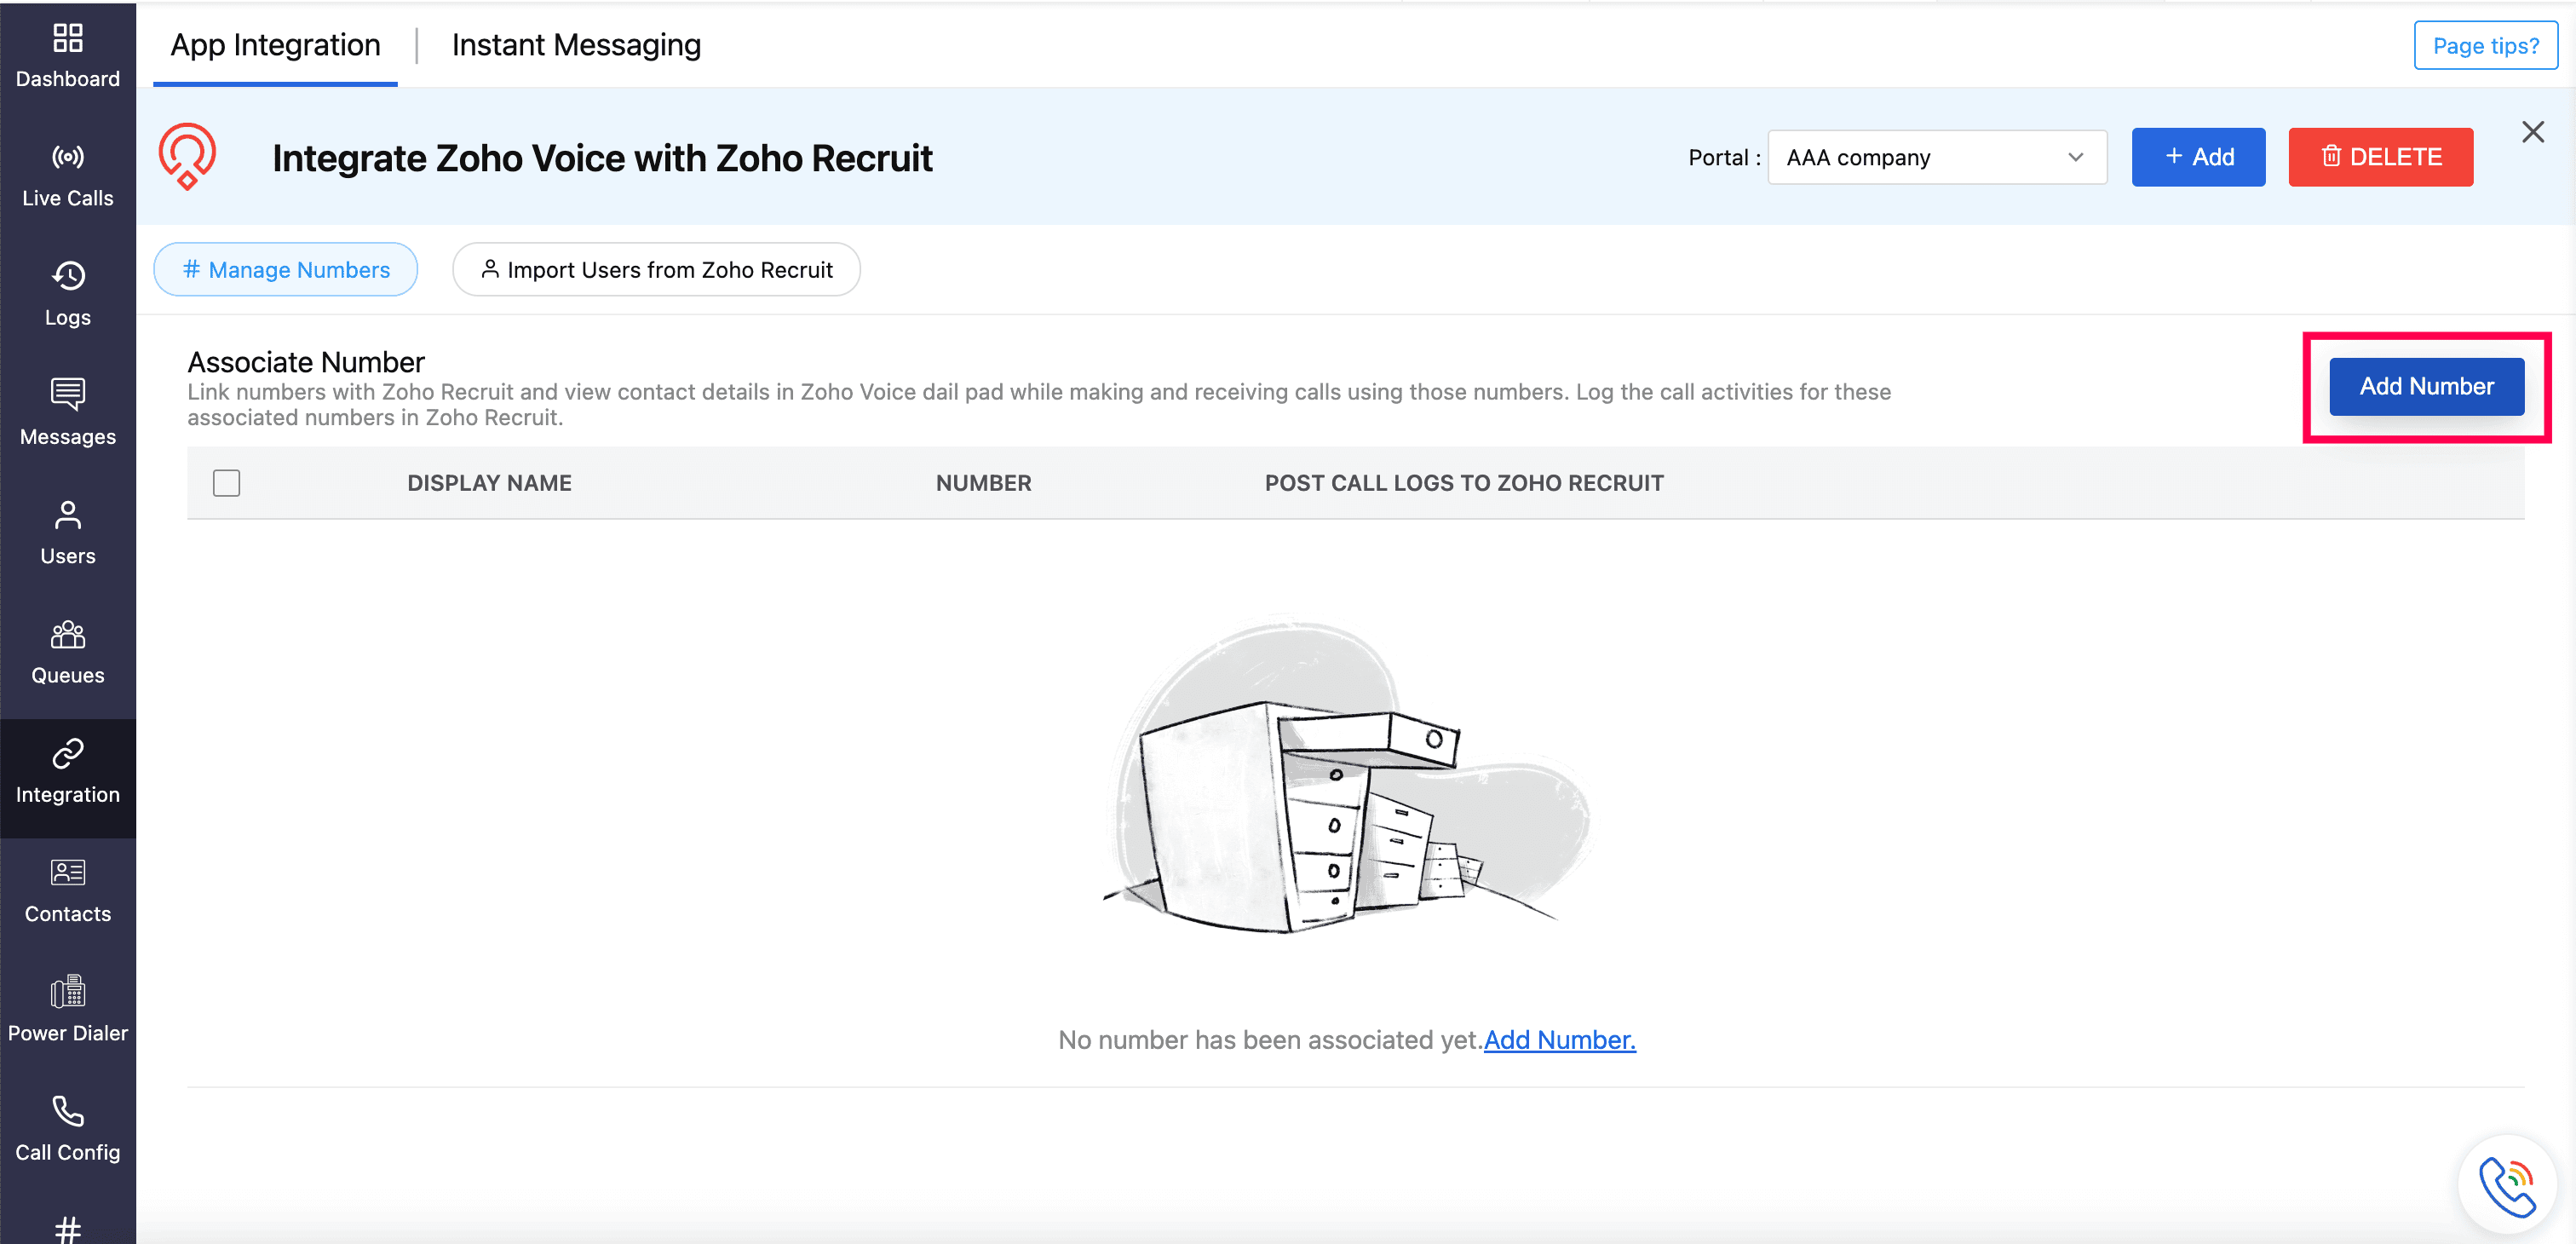
Select the required purchased numbers, and click Submit.
Note
Make sure that the Post Call Logs to Zoho Recruit is enabled. This ensures that the call logs are automatically logged in your Zoho Recruit account.
Click Complete Integration.


Imported users will receive an email invite. Once they have accepted, they’ll be added to your Zoho Voice account.

Ways to make calls post integration
Using ZDialer Widget
Open the ZDialer widget within Zoho Recruit.
Enter the desired phone number or select a contact.
Click on the call icon to initiate the call.
Using ZDialer Browser Extension icon
Use the ZDialer browser extension to make calls directly from your browser.
![]()
Click-to-Call icon
All phone numbers in the Zoho Recruit's web interface will have click-to-call icon powered by Zoho Voice, allowing you to instantly start a call.
![]()
Note
When making or receiving a call using the ZDialer widget in Zoho Recruit, the caller details will be automatically fetched from the respective contacts (if available).
Features and Functionalities of this Integration
Add new candidate from ZDialer Widget
While on a call, if a caller’s number isn’t linked to an existing Recruit contact:
Click More and select Apps in ZDialer.
Choose Zoho Recruit and select the Recruit portal.
Choose Create New Candidate.
Fill in the required details and click Done.


The created candidate will be displayed in the Candidate module of your Zoho Recruit account.
Access call logs in Zoho Recruit
After a call is made or received through ZDialer, the call logs will be automatically recorded and available in the To-do module of your Zoho Recruit account.

Adding call notes and disposition
While on call:
Click More and select Notes in ZDialer.
Select your Disposition from the dropdown and add your notes.
Click Save.
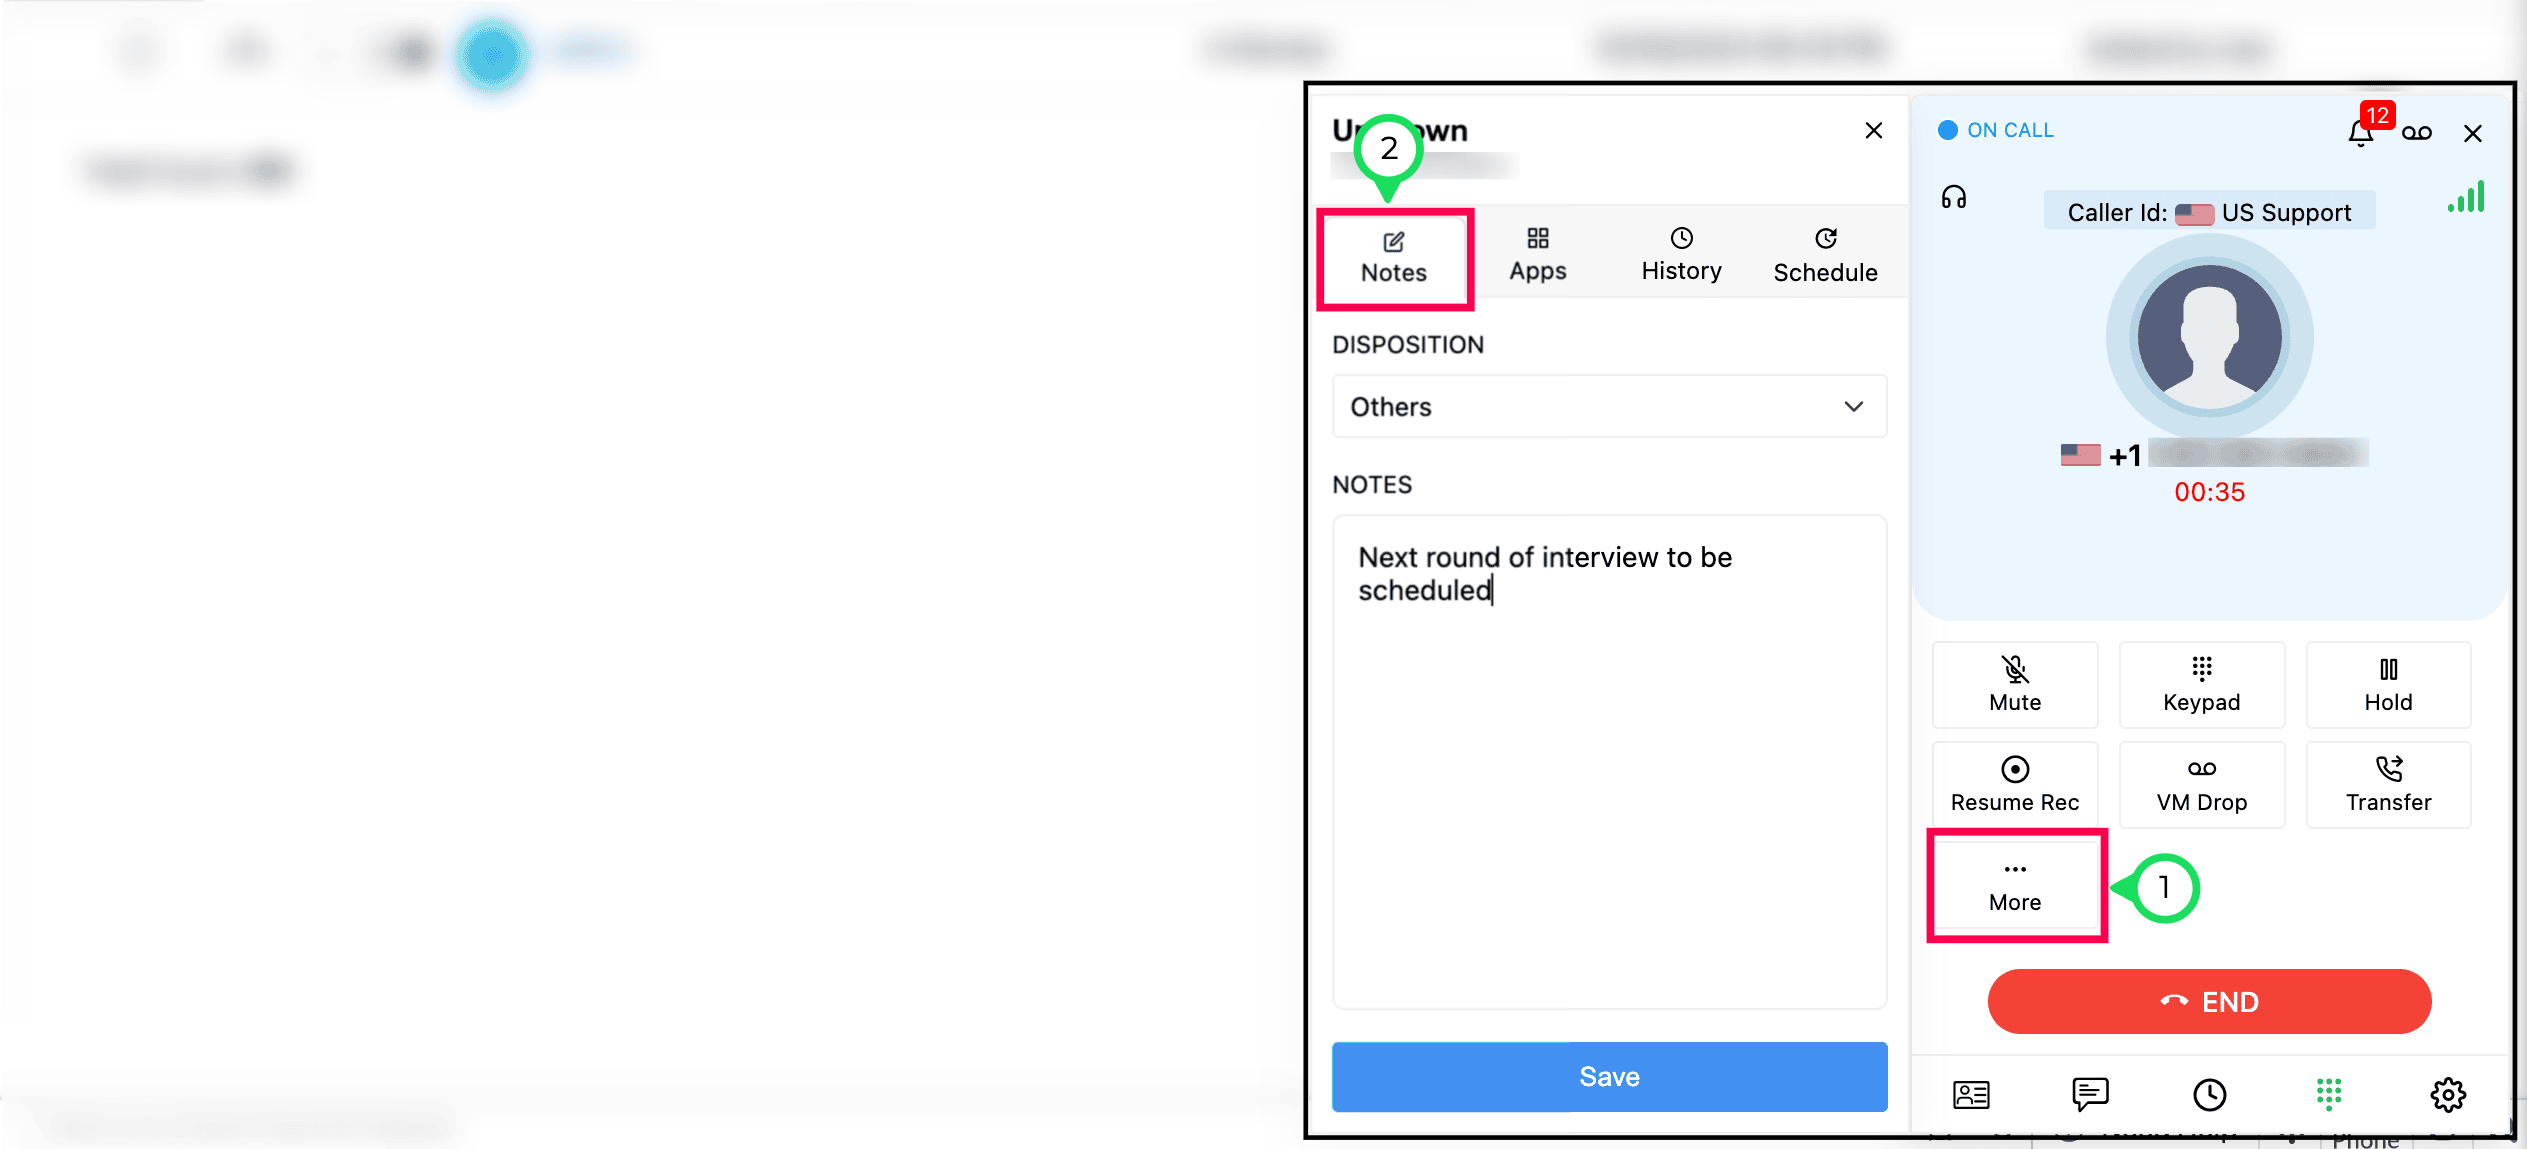

The notes and disposition added for a call will appear in the respective call log within the To-dos module.

Scheduling call from ZDialer
While on a call, if the caller's number is associated with a contact the candidate is linked to an application in Zoho Recruit, you can easily schedule a follow-up call using the following steps:
Click More and select Schedule in the ZDialer.
Mention the date, time, subject, purpose of call, and agenda if any.
Click Schedule.
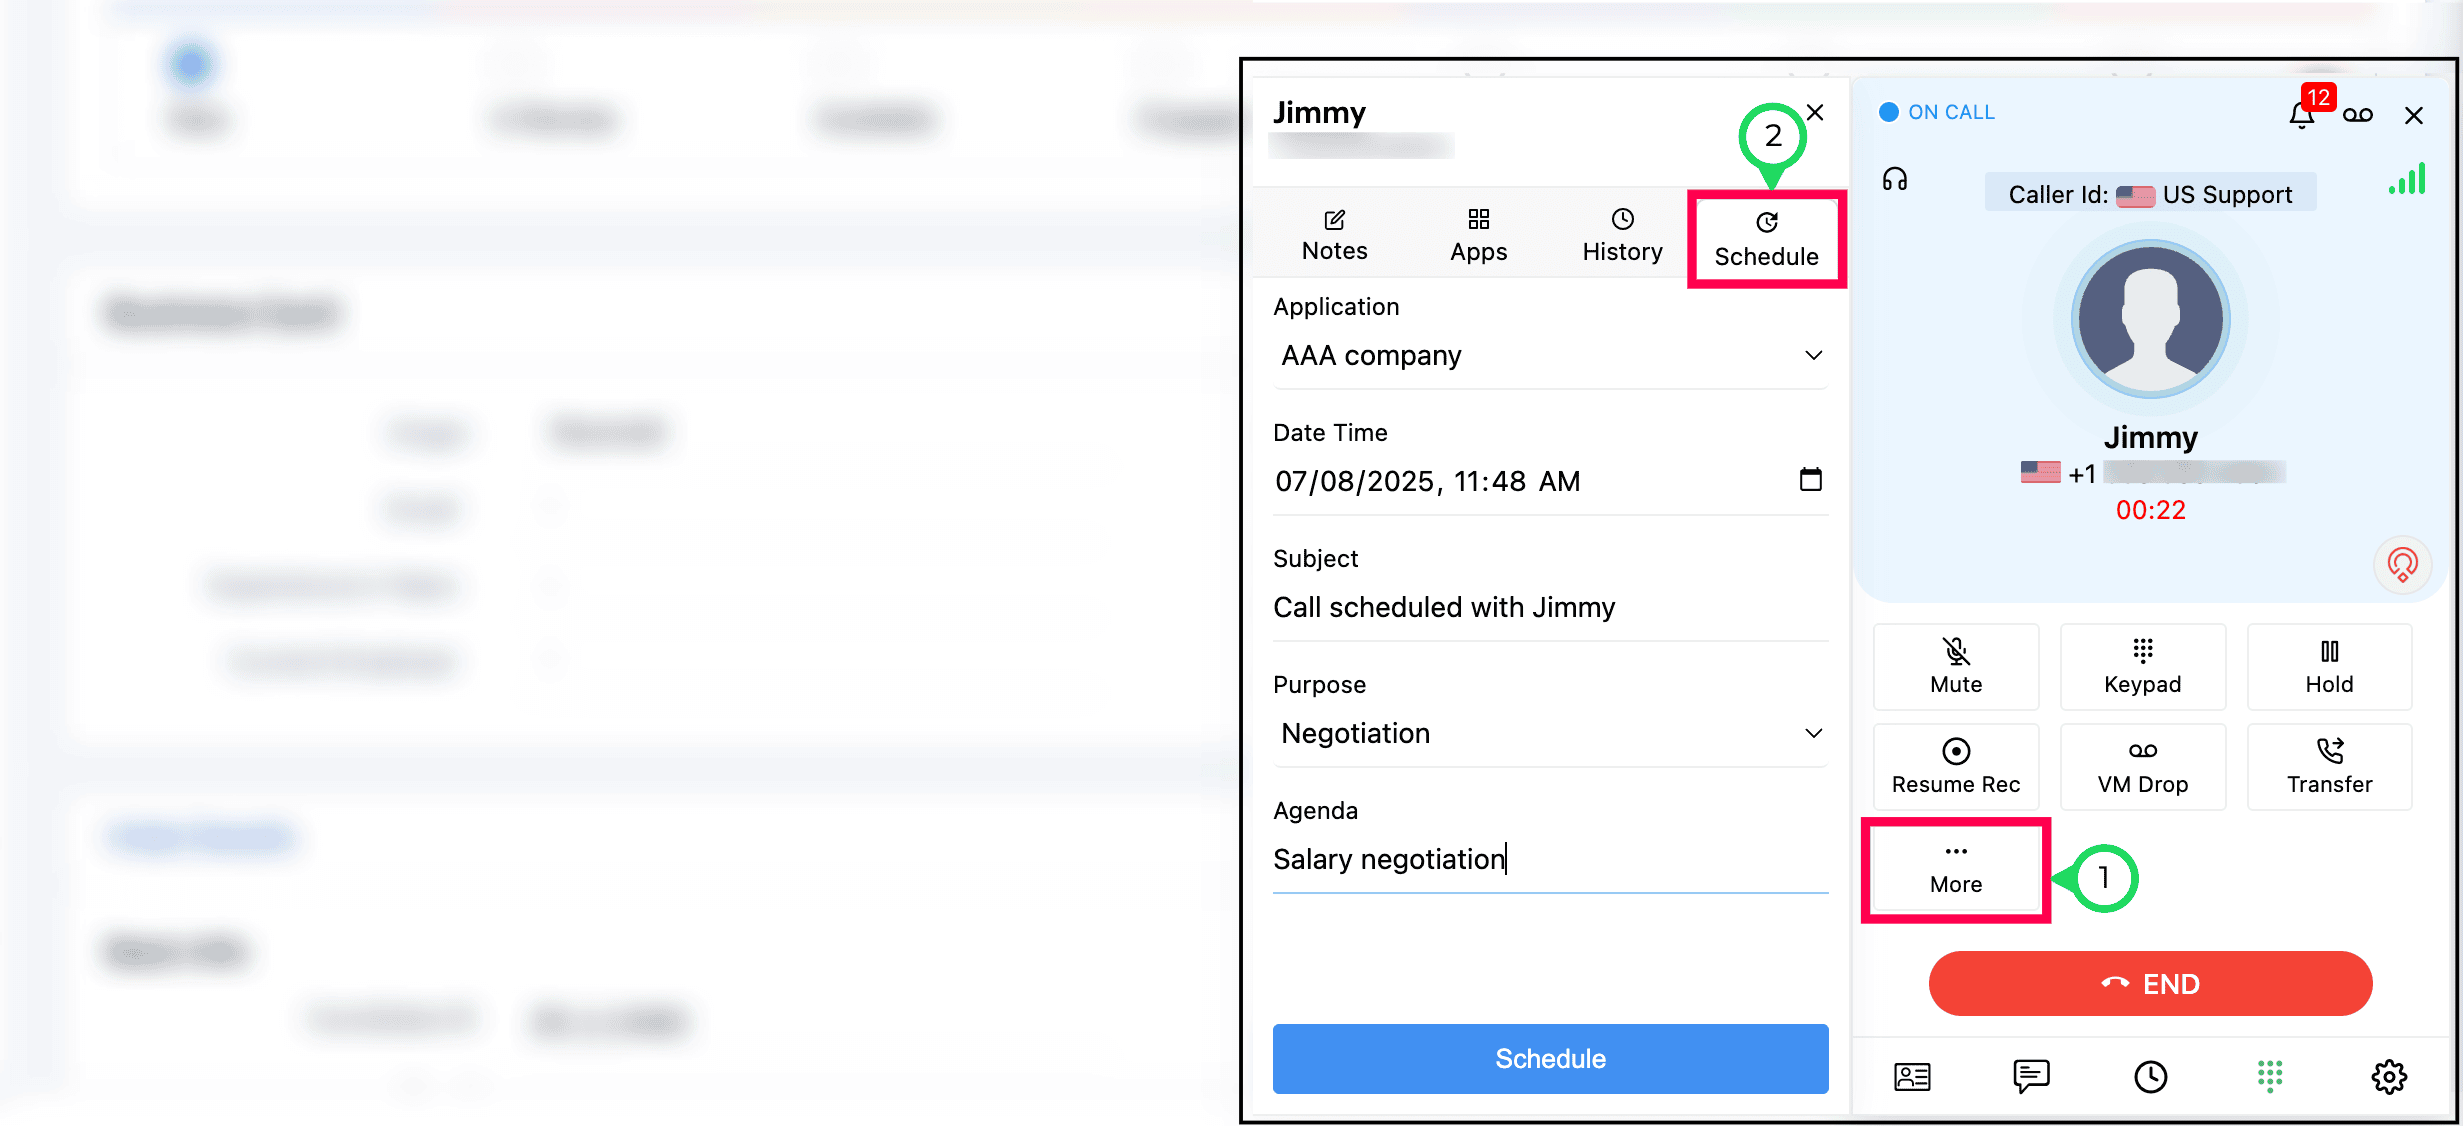

The scheduled call added for a call will appear in the respective call log within the To-dos module.

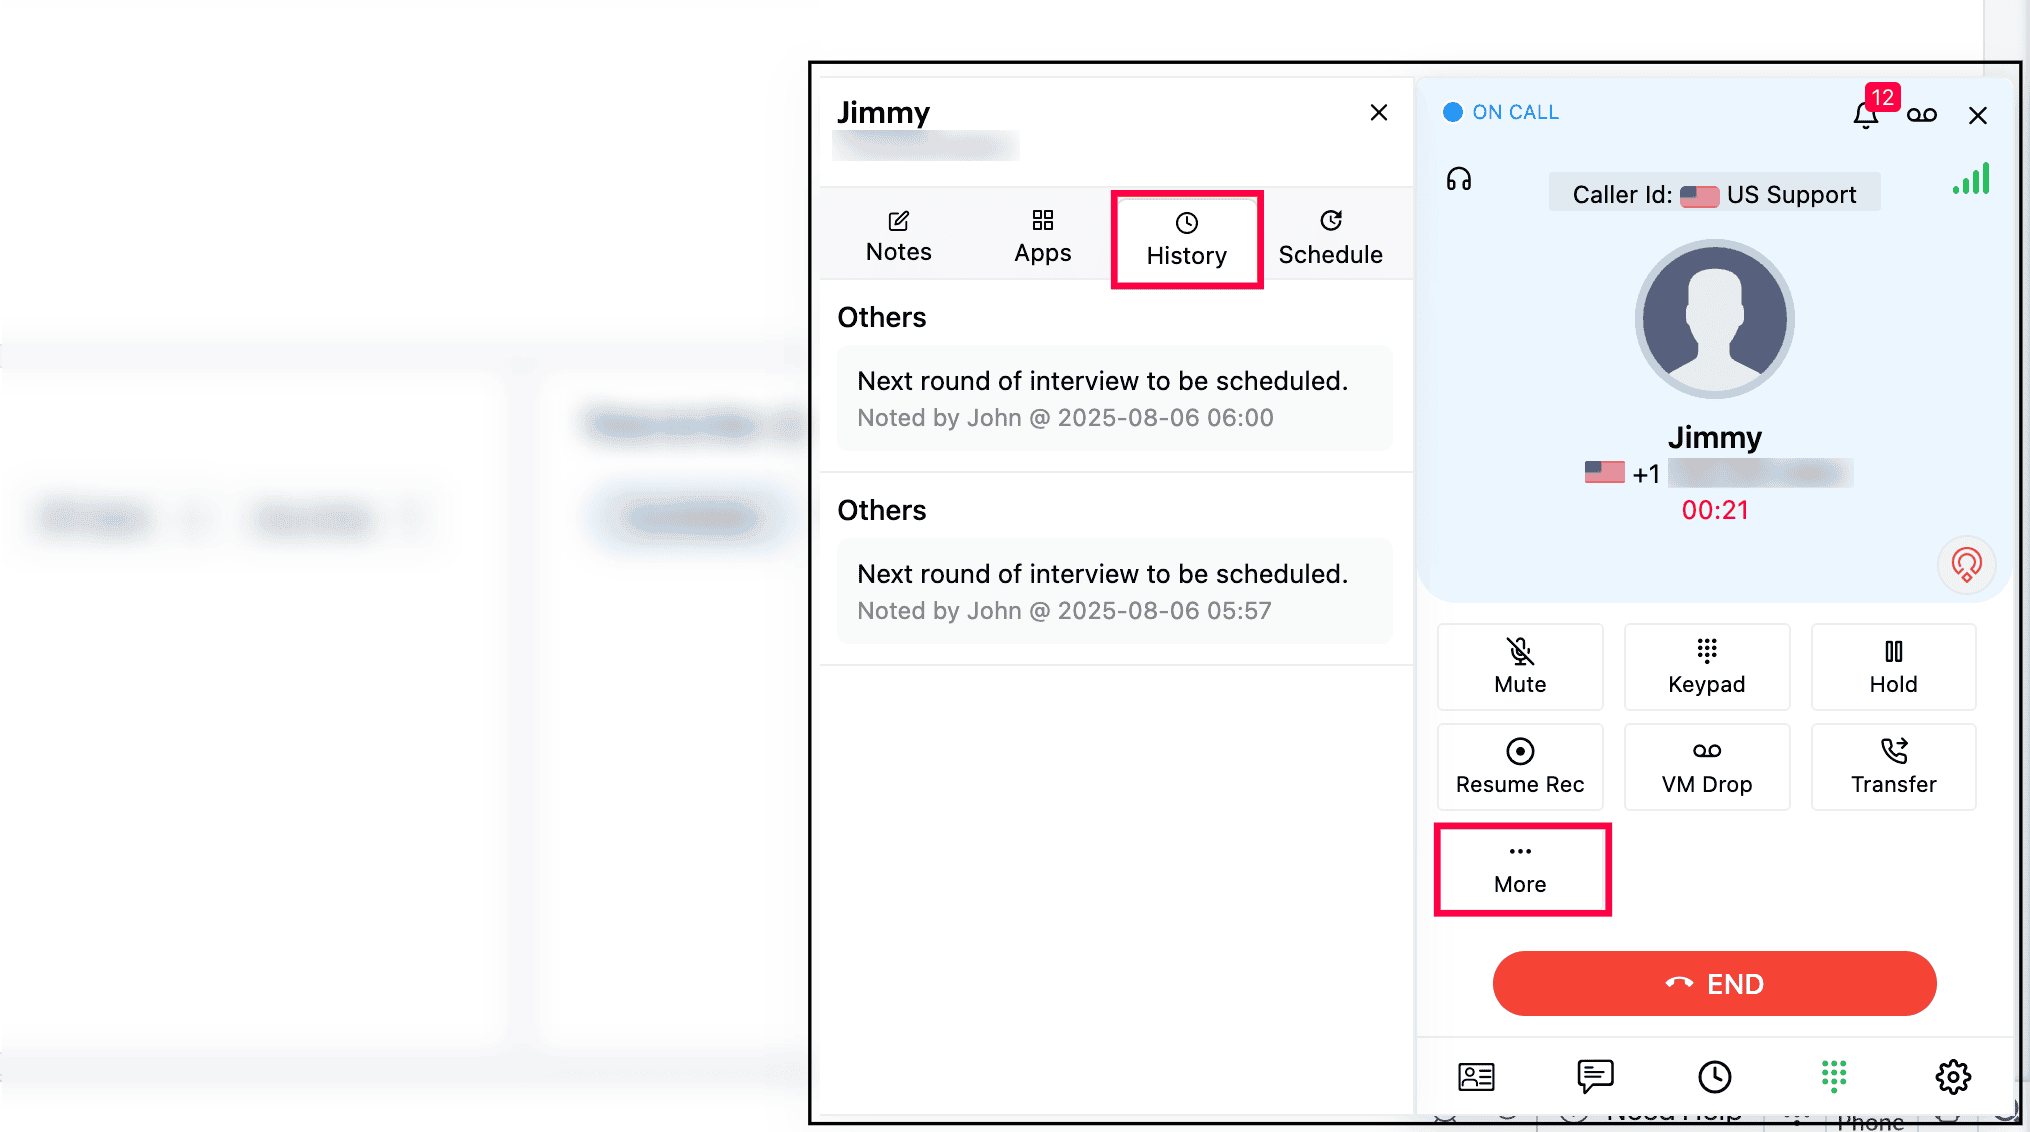
View call history from ZDialer
You can view the previous notes and dispositions linked to this call log.
Click More → History on ZDialer to access the call history.

Transferring call from ZDialer
While on a call, the agent can transfer the calls to other agents/queues/contacts using the following steps:
Click Transfer in ZDialer.
Select the Agents or Queues or Contacts.
Choose Speak & Transfer or Blind Transfer.

With Speak & Transfer, you can speak with the agent to whom the call is transferred, and with Blind Transfer, the call is just being transferred without the need to communicate with the transfer agent.
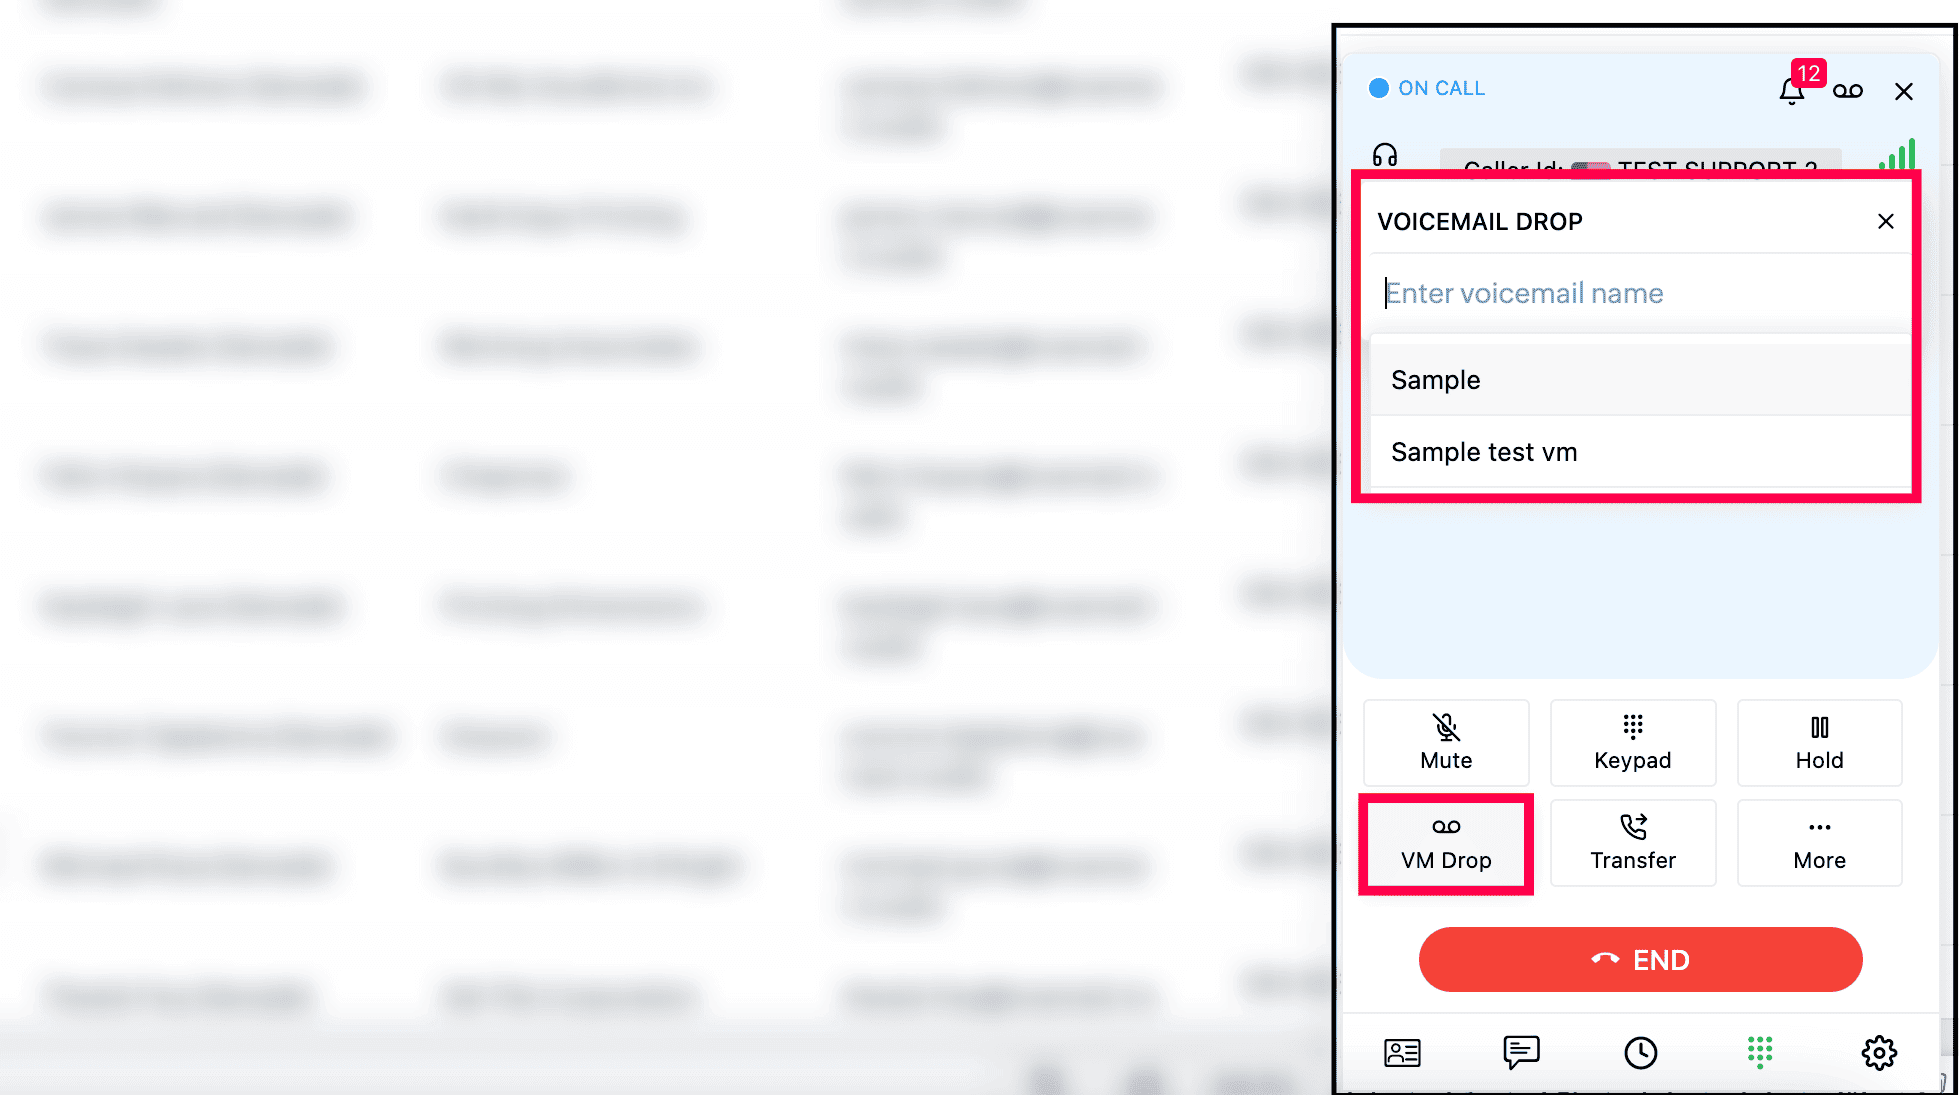
Voicemail Drop from ZDialer
The agent can drop the pre-uploaded voice mail in a single click while/after call ringing.
Click VM Drop in the ZDialer.
Search and select the saved Voicemail.
Note
You must have pre-uploaded the voicemail in the Settings → Audio files → Voicemail Drop of your Zoho Voice account.
