Services
Services is a central point in Zoho People where all the HR processes can be accessed. It is a digital HR service provided to an employee. Under Services, all system services such as Leave, Attendance, and Timesheet will be available.
Additionally, admins can create custom services for the use of the employees in their organization. The person who creates a custom service automatically becomes the Service Owner. The Service Owner can be changed while editing the service.
- Using Existing Services
- Adding New Services
- Service Settings
- Adding FAQs for the service
- Enabling or disabling a Service
Using existing services:
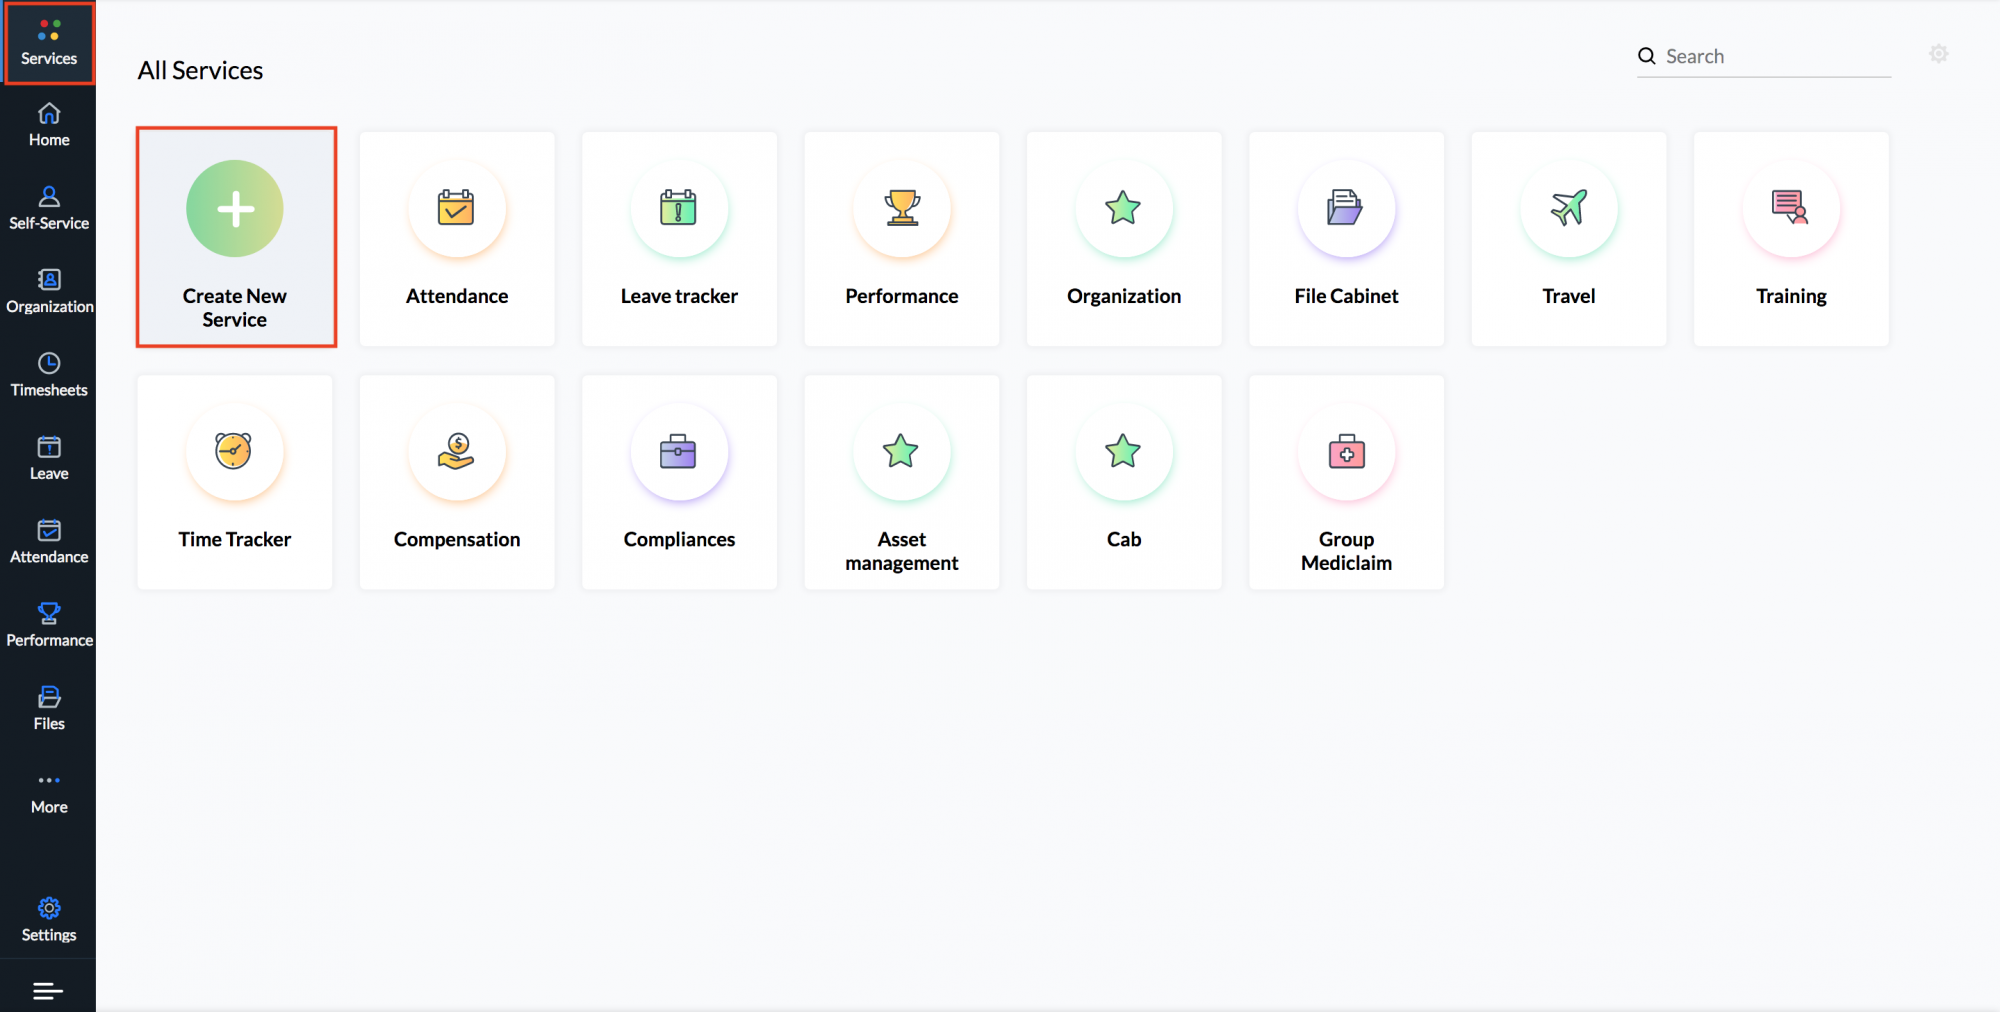
- Navigate to Services on the left-hand side menu. You will be able to see all the default services.
- Click on the service you want for a detailed view and to perform related actions.
Adding new services:
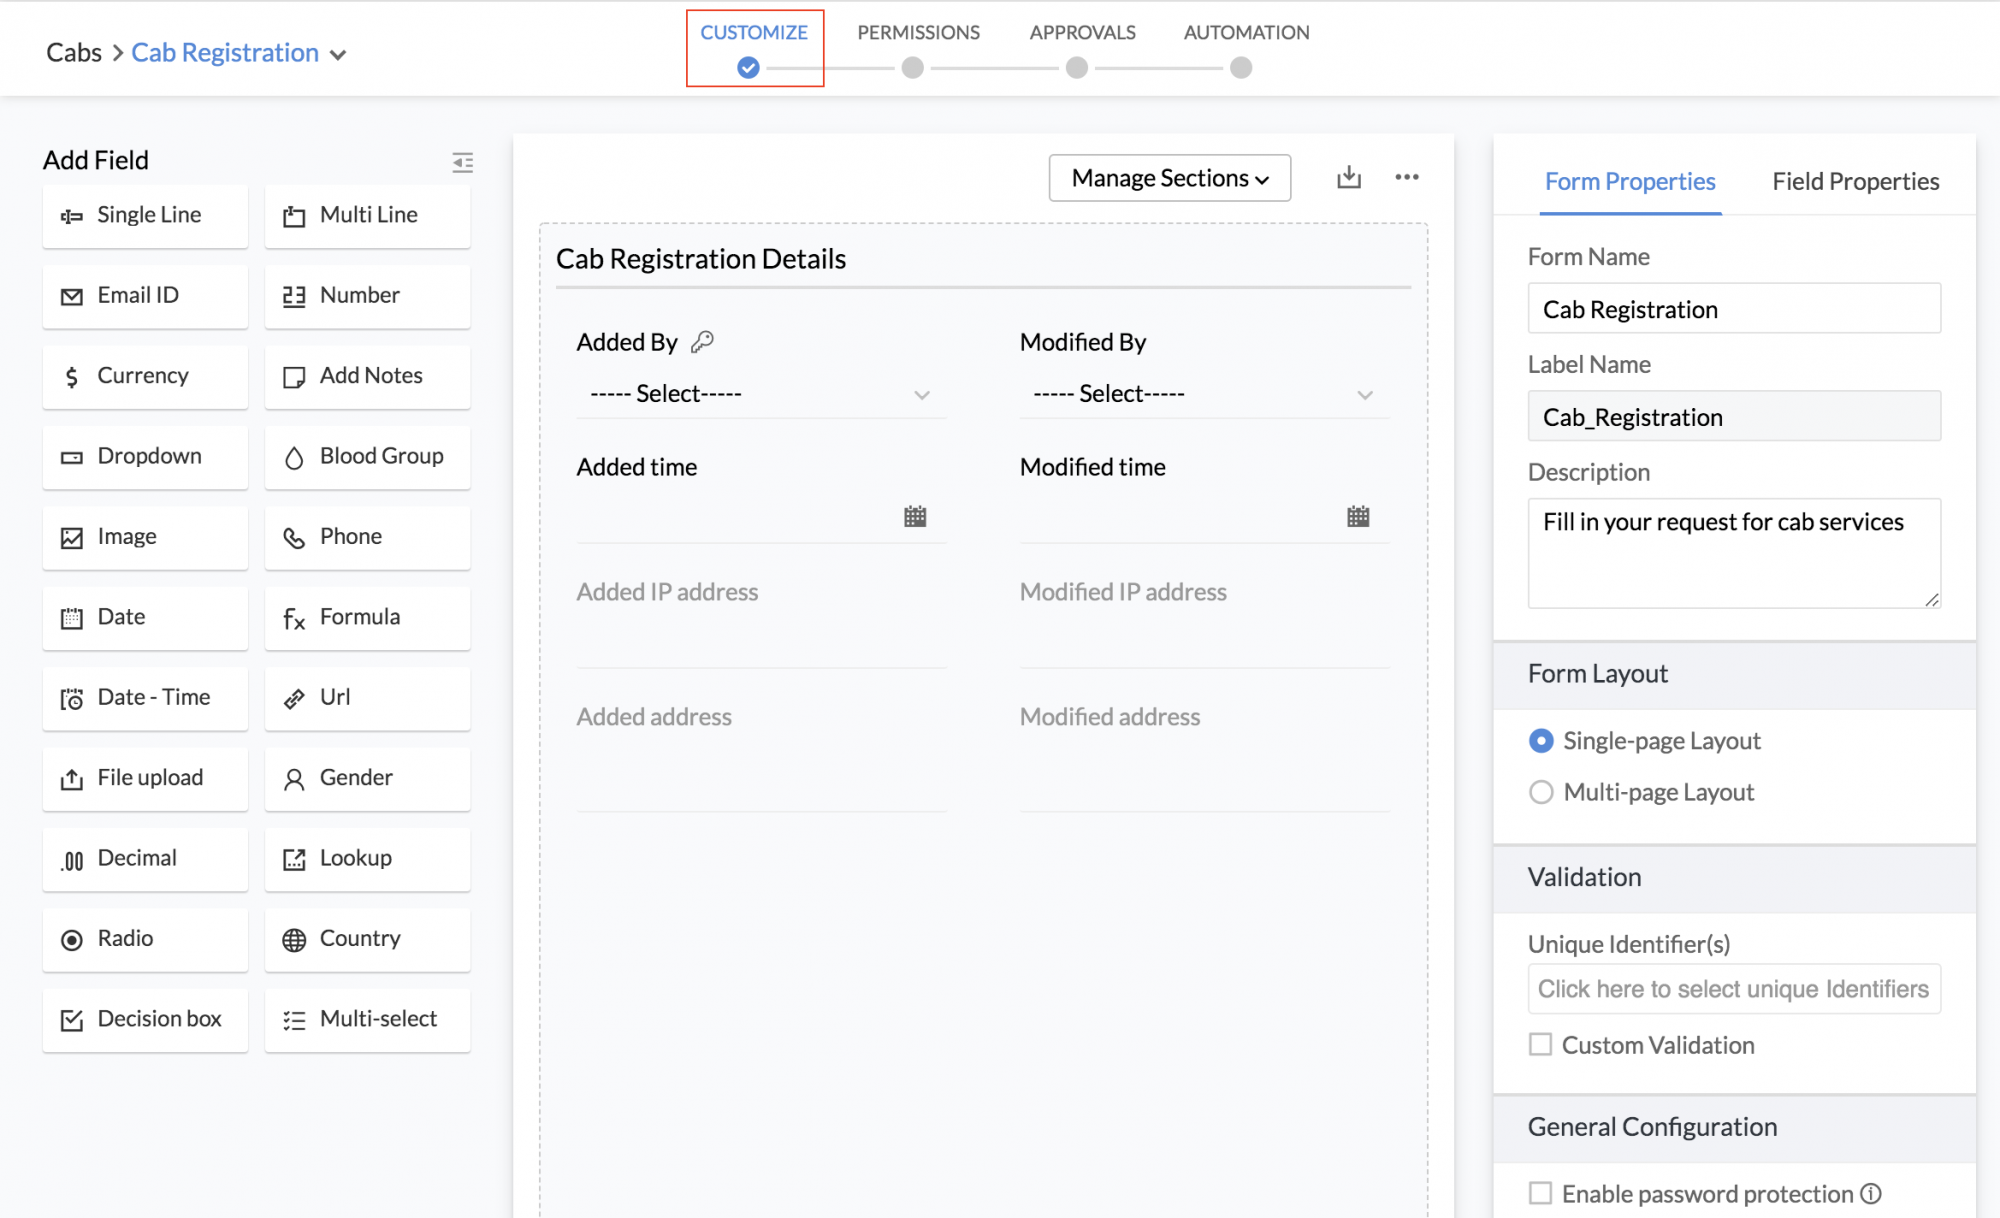
Adding a new end-to-end service involves 4 key steps - Customize, Permissions, Approvals, and Automation. Let's look at the steps to create a new service.
- Navigate to Services on the left-hand side menu
- Click Create New Service
- Give a name, icon, and description
- Click Save
You have now created the service successfully.
Adding Forms
You can either add existing forms or create new forms for the service.
Move Form:
- If you have a form in any other service that you would like to move to the service that is newly created, click Move Form
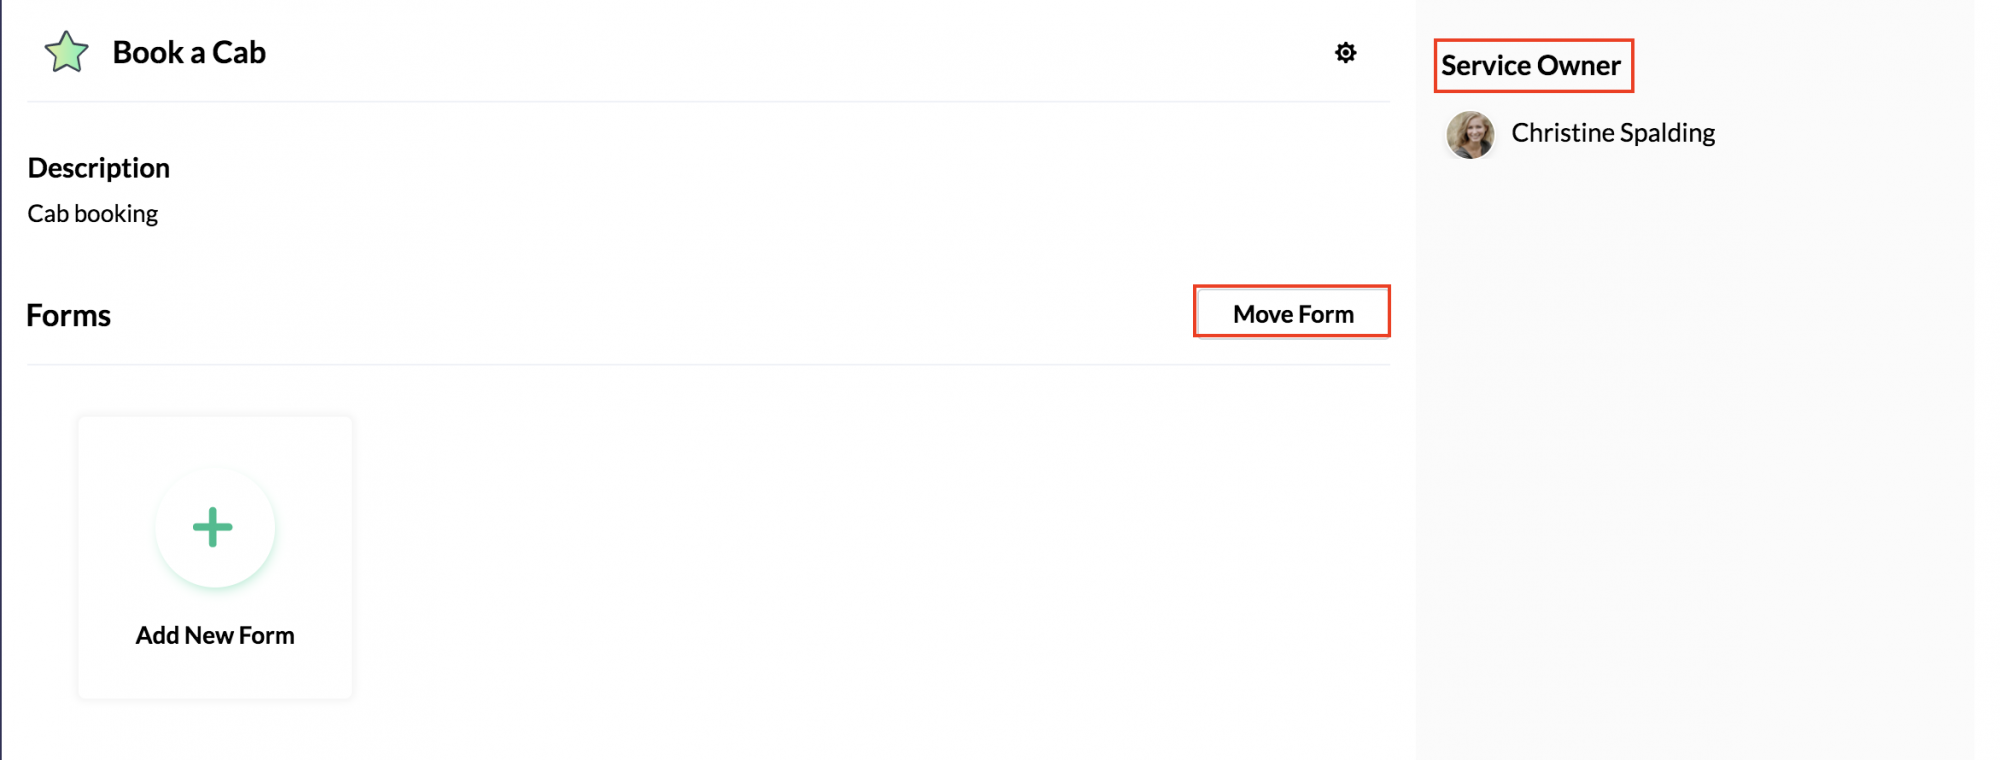
You will see the list of other services. Click on the service and drag and drop the relevant fields.
Add New Form:
- Click on Add New Form
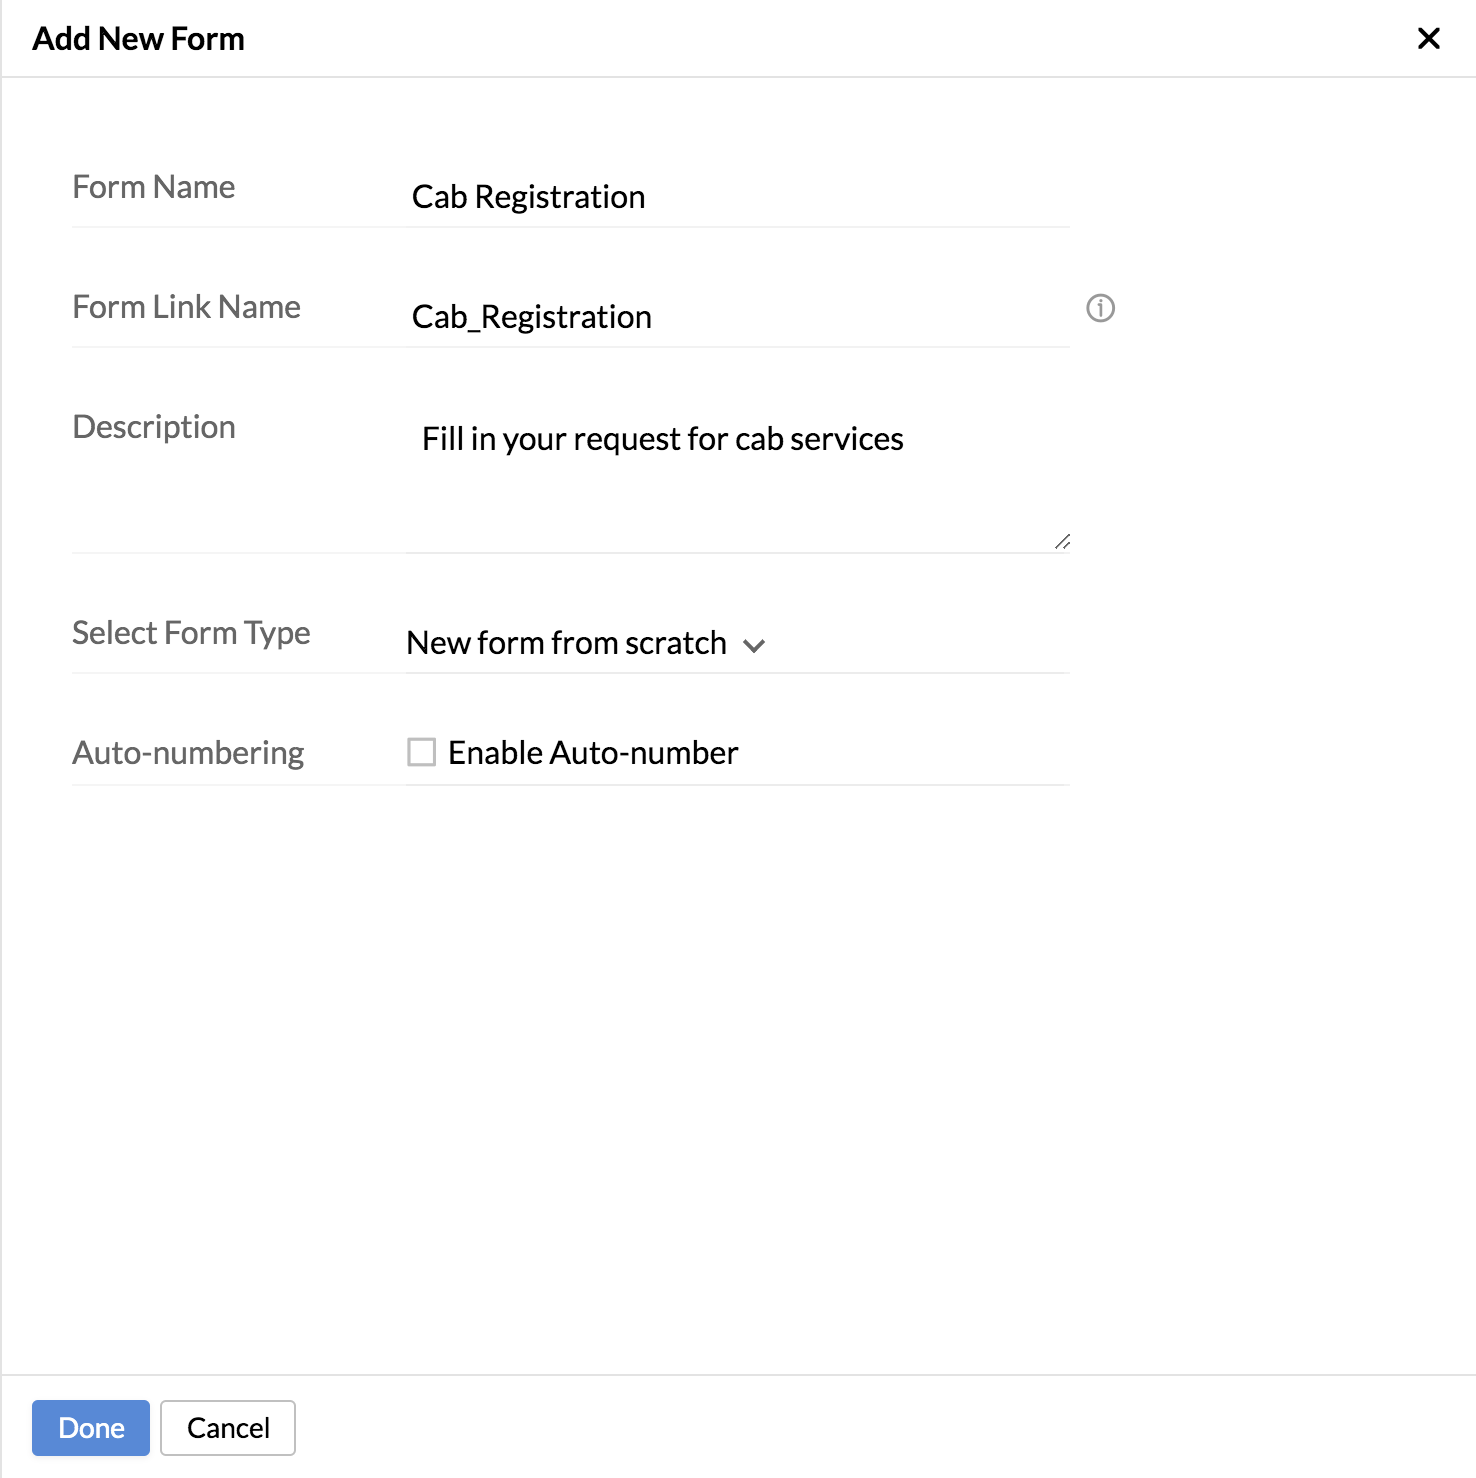
Enter the required details and click Done.
Customize the form
Drag and drop the required fields in the form and customize it according to your needs.
Learn more about Forms.
Add Permissions to the service
Here, you can add roles and assign specific record, field and action permissions.
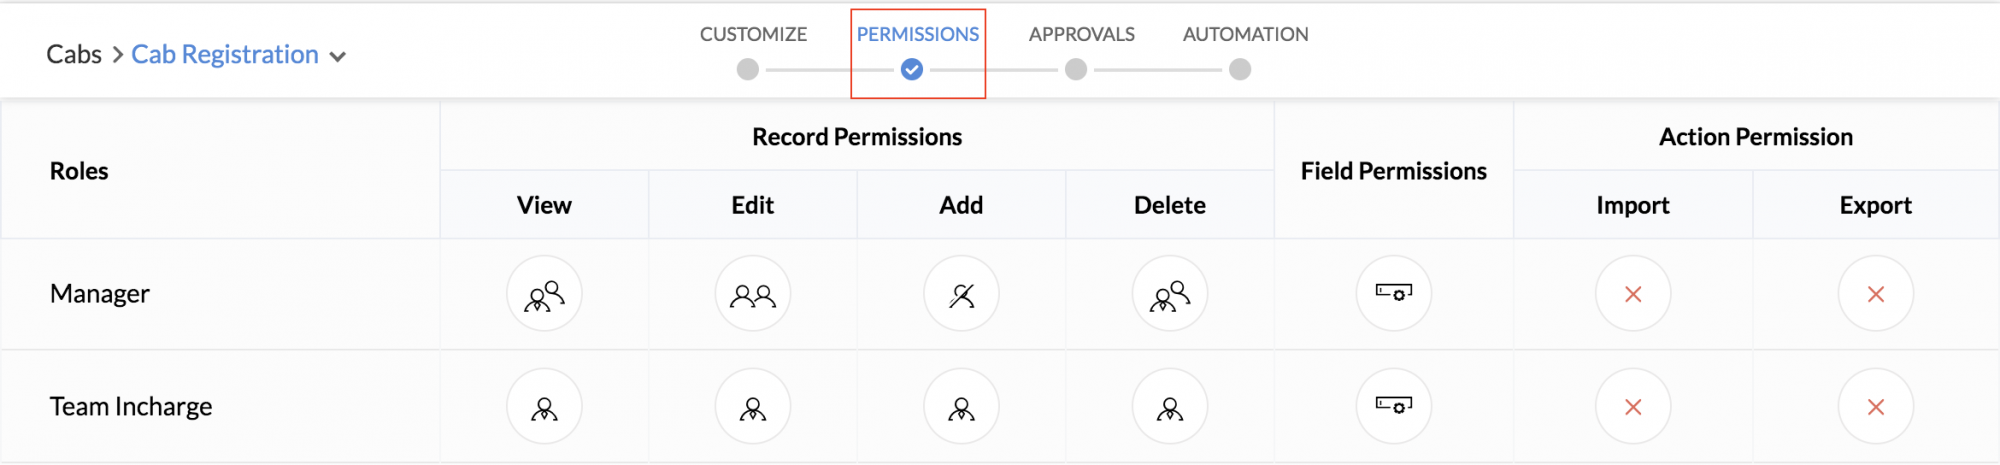
Learn more about Permissions.
Configure Approvals for the service
Give a name for the approval and configure a simple single-level approver or multi-level according to your organization's needs.
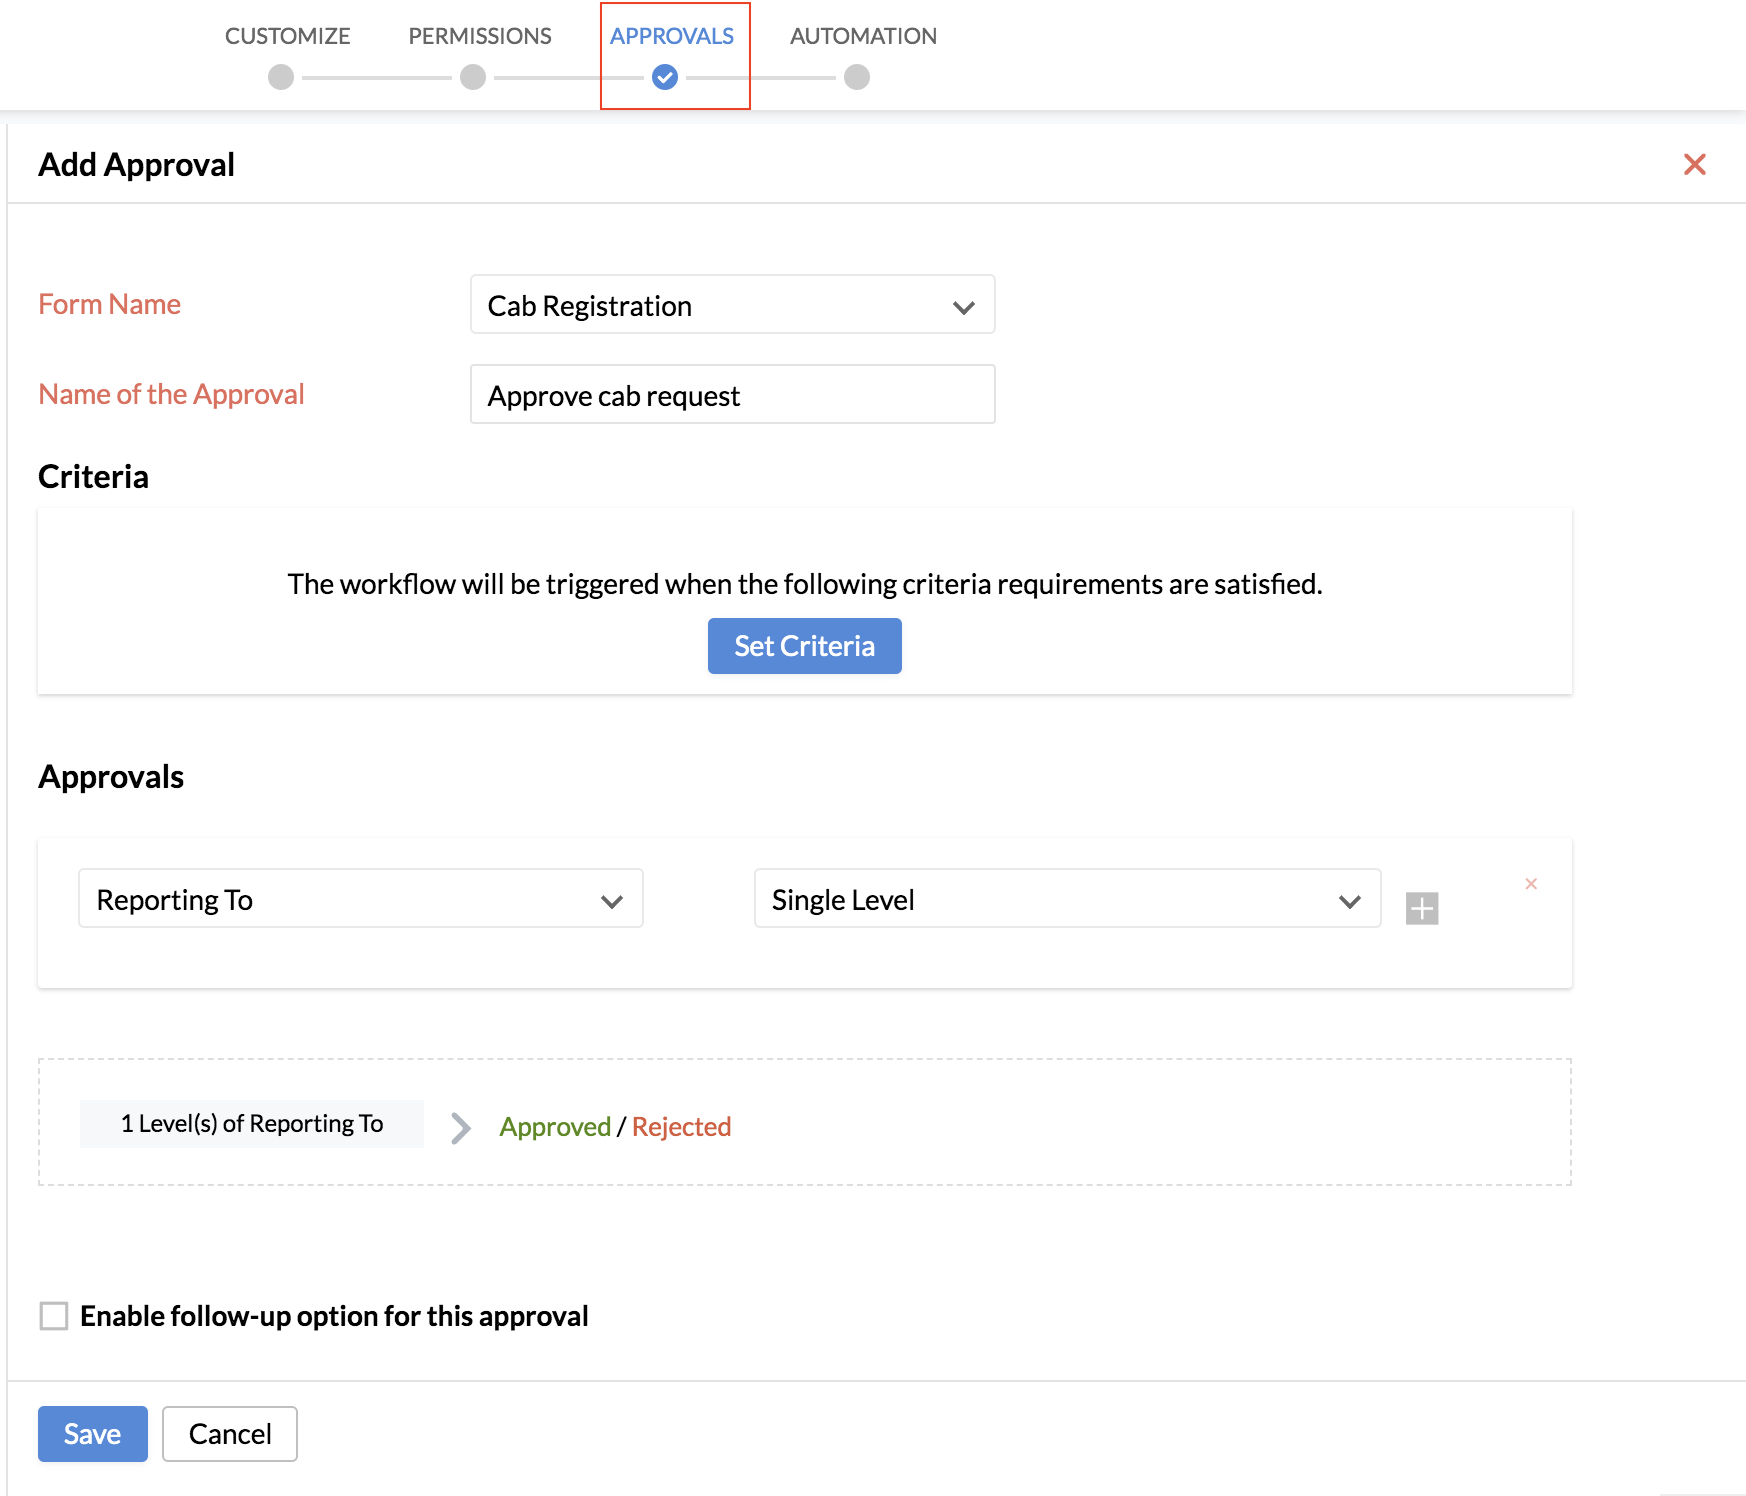
Learn more about Approvals.
Automate related actions
As a part of the service, you can also configure workflows to automate processes in the service.

Learn more about Automation.
With customized forms, permissions, approvals and automatic actions in place, an employee will be able to use a Service seamlessly.
Service Settings
To configure service related settings,
- Go to the specific service > Settings
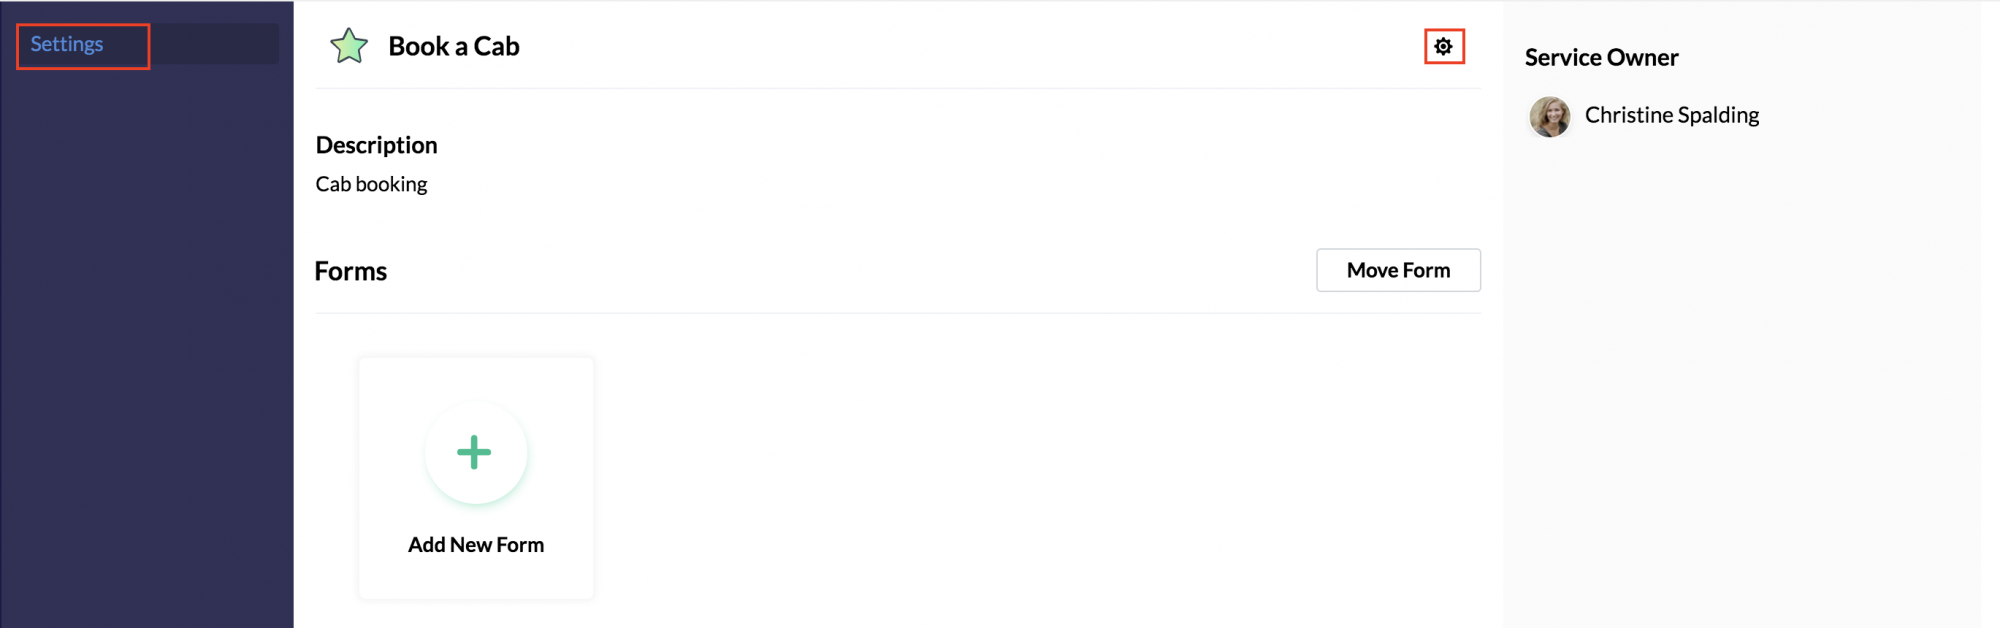
- Click the gear icon on the top right corner.
- Modify the name, icon, and description if needed.
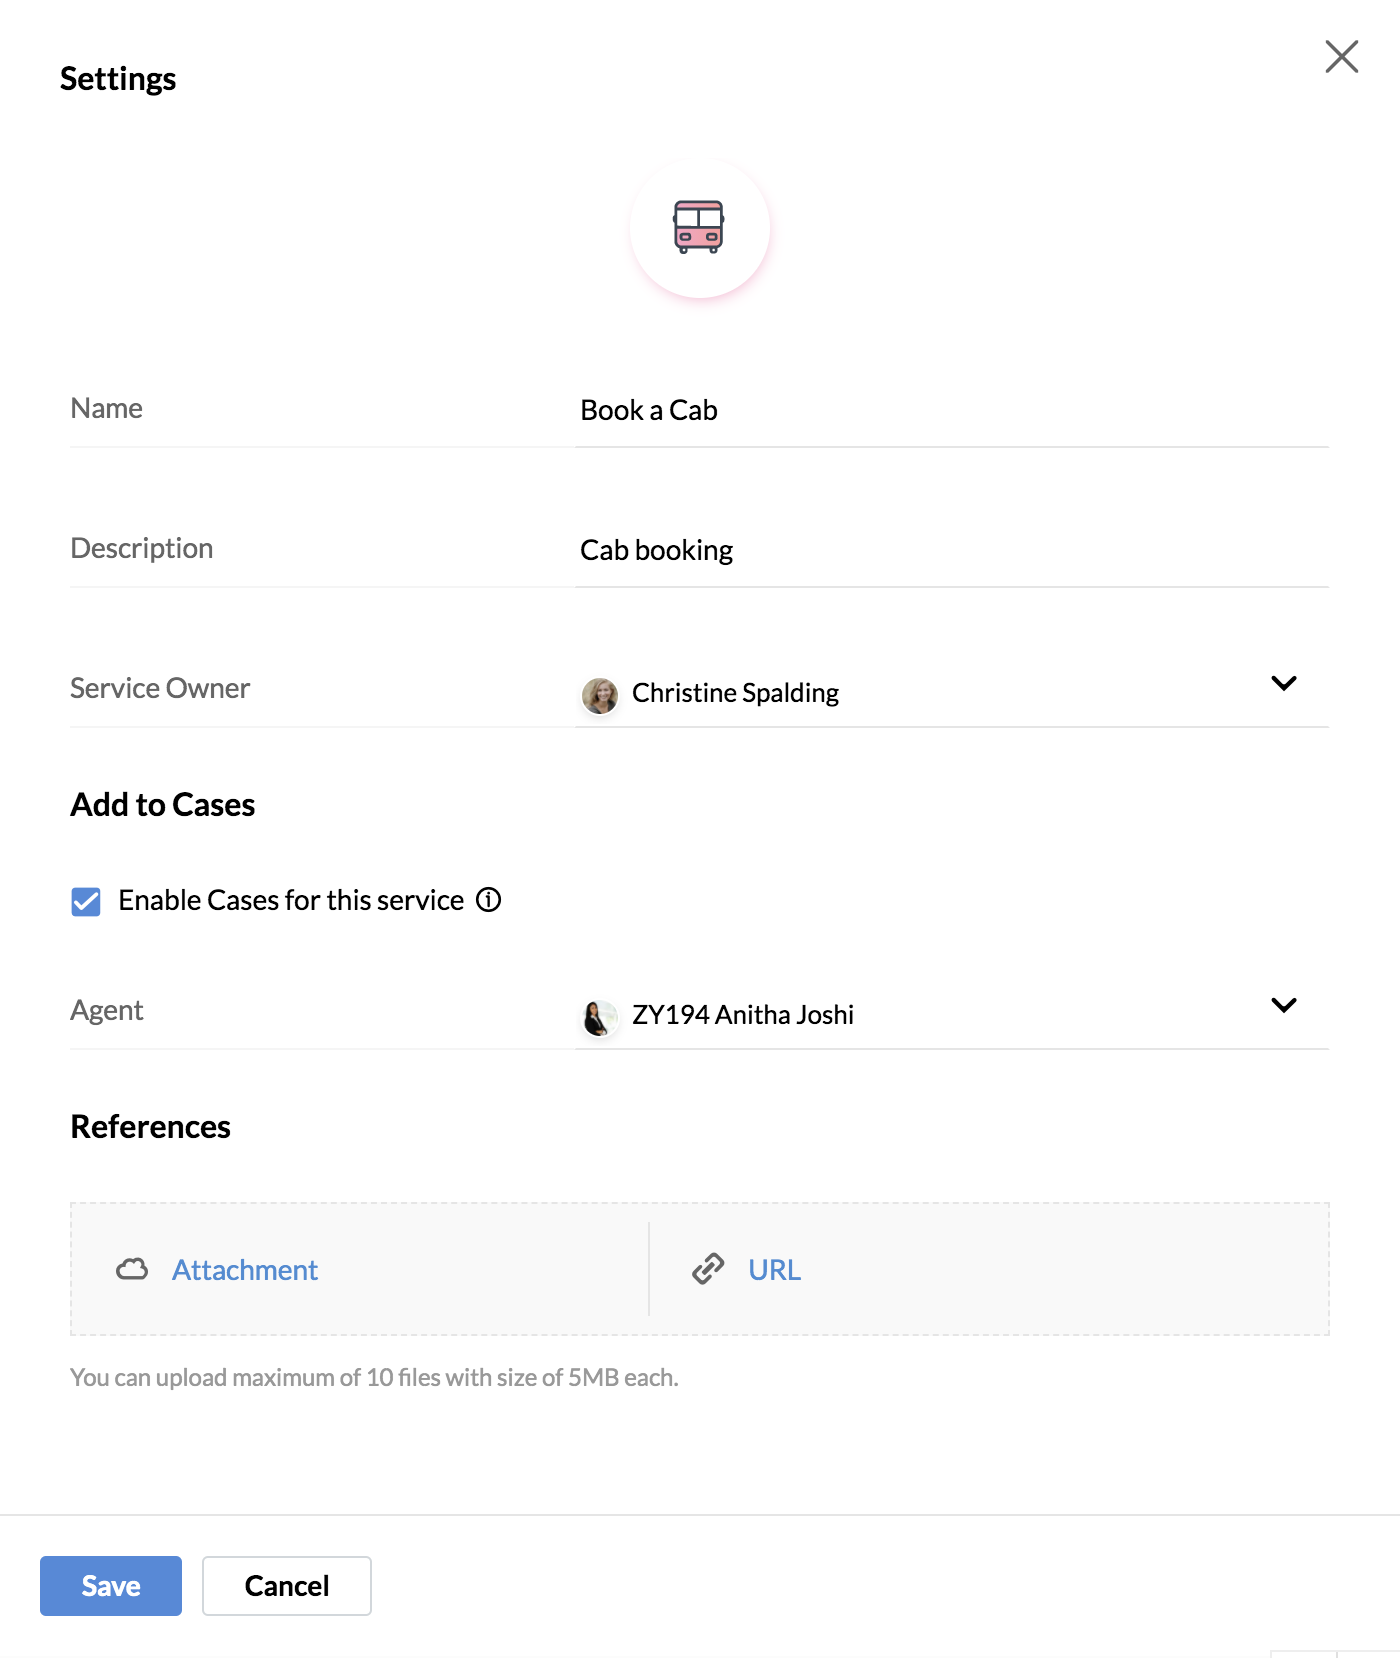
- Select the Service Owner.
- If you want to add this service as a category in Cases, check Enable Cases for this service.
- Select an Agent for the category in Cases.
- Attach references if required.
- Click Save.
Learn more about Cases.
Adding FAQs for the Service
An employee may have some basic questions about the service. FAQs can be added to address these common questions.
To add an FAQ to a Service
- Go to Service name > Settings.
- Click Add beside FAQ.
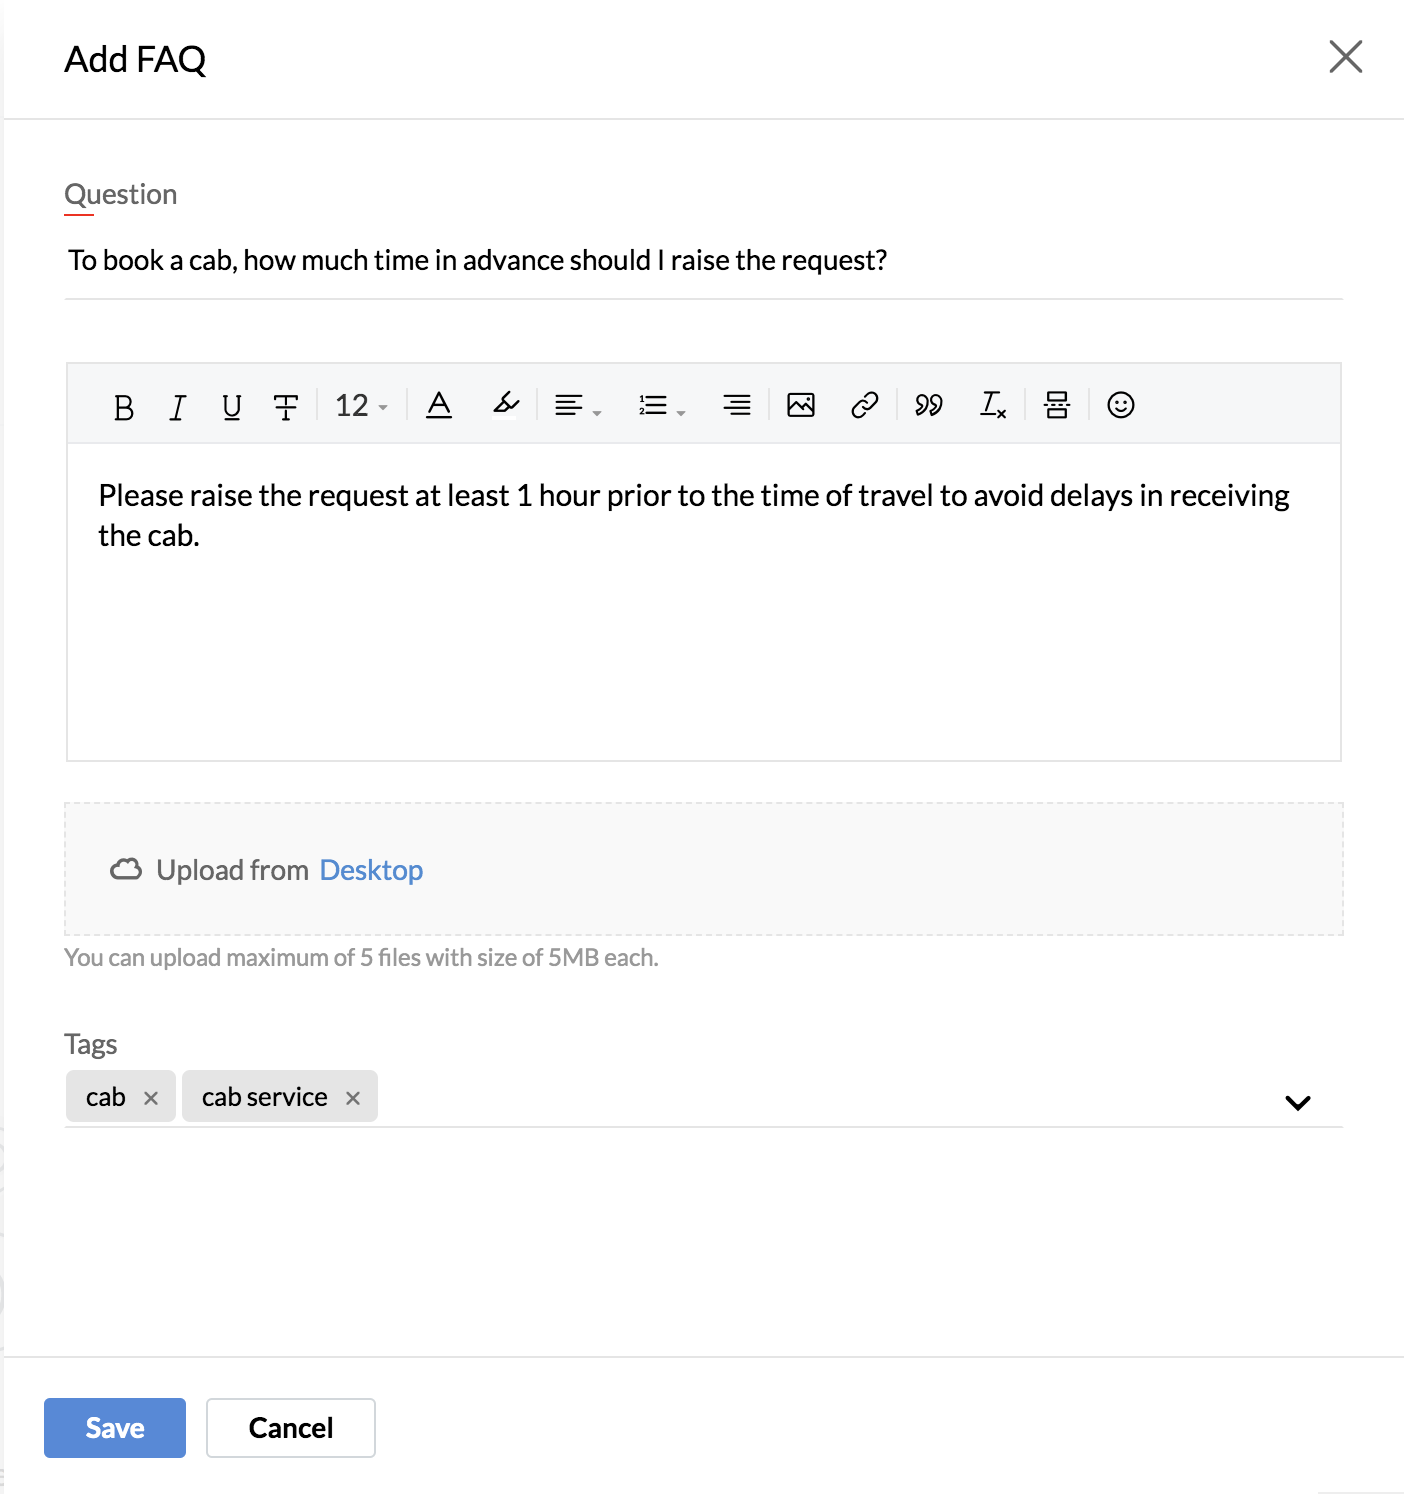
- Fill in the question and the answer.
- You can also attach files if required.
- Click Save.
To create reports based on the service, go to Analytics. Learn more about Analytics.
Enabling or disabling a service
Click on the Settings icon at the right top corner.
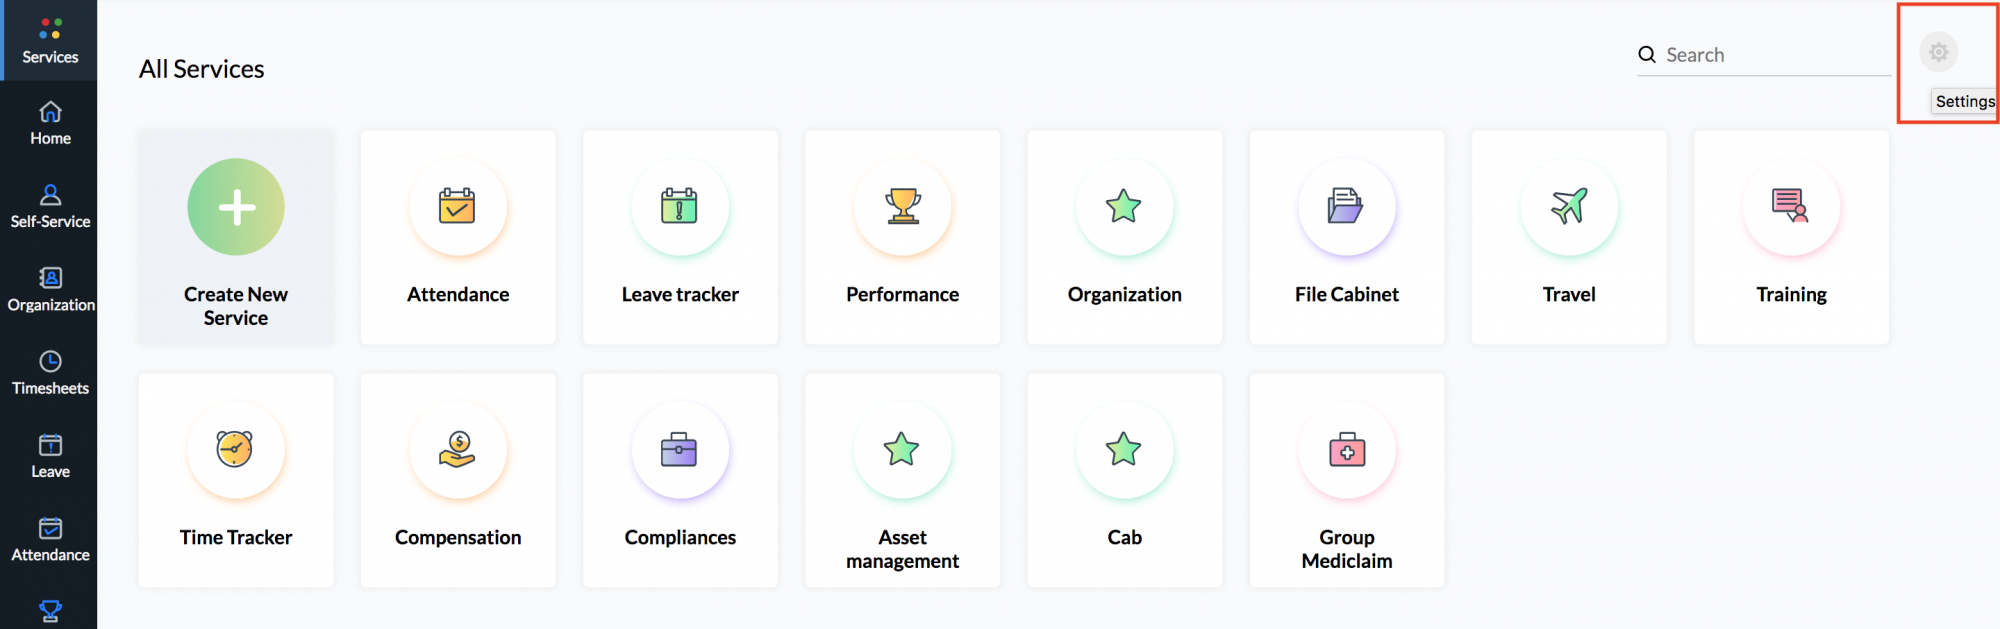
You will be redirected to the Services customization page. You can enable/disable the service or the forms within the service.