Groups
Table of Contents
Groups
Zoho Mail Groups helps teams and groups of people coordinate and communicate better while also minimizing the email clutter caused by internal emails. A single user can be part of many groups. It can either be an email-enabled Organization Groups, Shared Mailbox or Personal Groups. An email enabled group is an Organization Group that has an email address associated with it. Creating organizational groups(email-enabled groups) is a permission-based action, requiring administrator approval through the Admin Console, ensuring only selected users have this privilege. While Shared Mailboxes can only be created by Admins and Super Admins, Personal Groups can be created by all users.
Groups can be classified into two different categories such as:
- Distribution Lists (DLs)
- Shared Mailbox
Distribution Lists
A DL can either be Streams enabled groups or Streams disabled groups. Groups for which Streams is disabled are listed separately under the Disabled Groups listing. You can post messages, notes, tasks, and events and share emails in Streams-enabled groups to collaborate with your team. Streams groups can be disabled by the Admins or moderators of the groups. Users will not be able to create new posts in these groups but they will still be able to view, tag, and favorite existing posts.
Shared Mailbox
Zoho Mail offers a shared mailbox feature which is different from the conventional distribution lists. Click here to learn more about Shared Mailbox.
Groups Listing
All the groups you are a part of are listed on the left menu pane under the Streams section. The groups for which Streams is enabled are listed first. If you have groups for which Streams is not enabled, you can click on the Disable groups option on the Groups listing.
Right-click on any group on the left menu to view options for the group.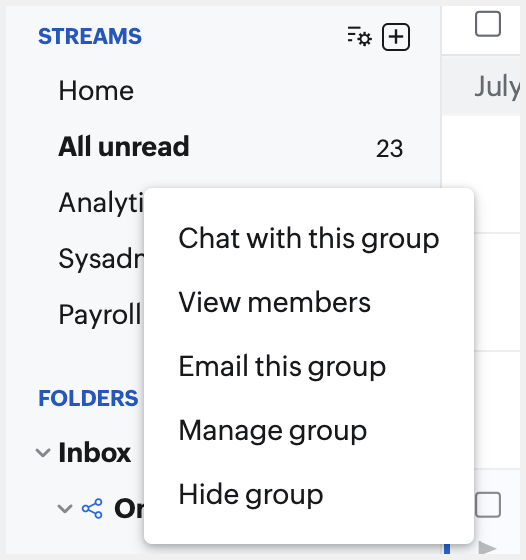
- You can start a chat with the entire group by selecting the Chat with the Group option.
- A list of all the group members will be displayed if you select View Members.
- If the group is an email-enabled Organization Group, you also have the Email this Group option when you right-click.
- Click on the Manage Group option to view and edit the details of the Group. The manage group option will be present only for the Groups that you are a moderator/ owner of.
- Click on the Hide Group option if you want to remove the group from the left menu.
Manage Groups
The Manage Groups section in Zoho Mail helps you handle all your DLs from one place. Except for the shared mailboxes, all the groups you are a part of are displayed here. You will also be able to add new groups, edit/ view group members, and edit the Group within the confines of your role in the group.
Click on the Manage Groups icon at the top of the Streams Group listing to navigate to the group management page.
Creating Groups
Personal groups
You can create personal groups from the Manage Groups page by following the below instructions.
- Log in to your Zoho Mail account.
- Navigate to the Group management page using the Manage Groups icon.
- Click on the Add new group icon to create a new group.

- Provide the desired Group name, Group members, and Group description, and click Create Group.
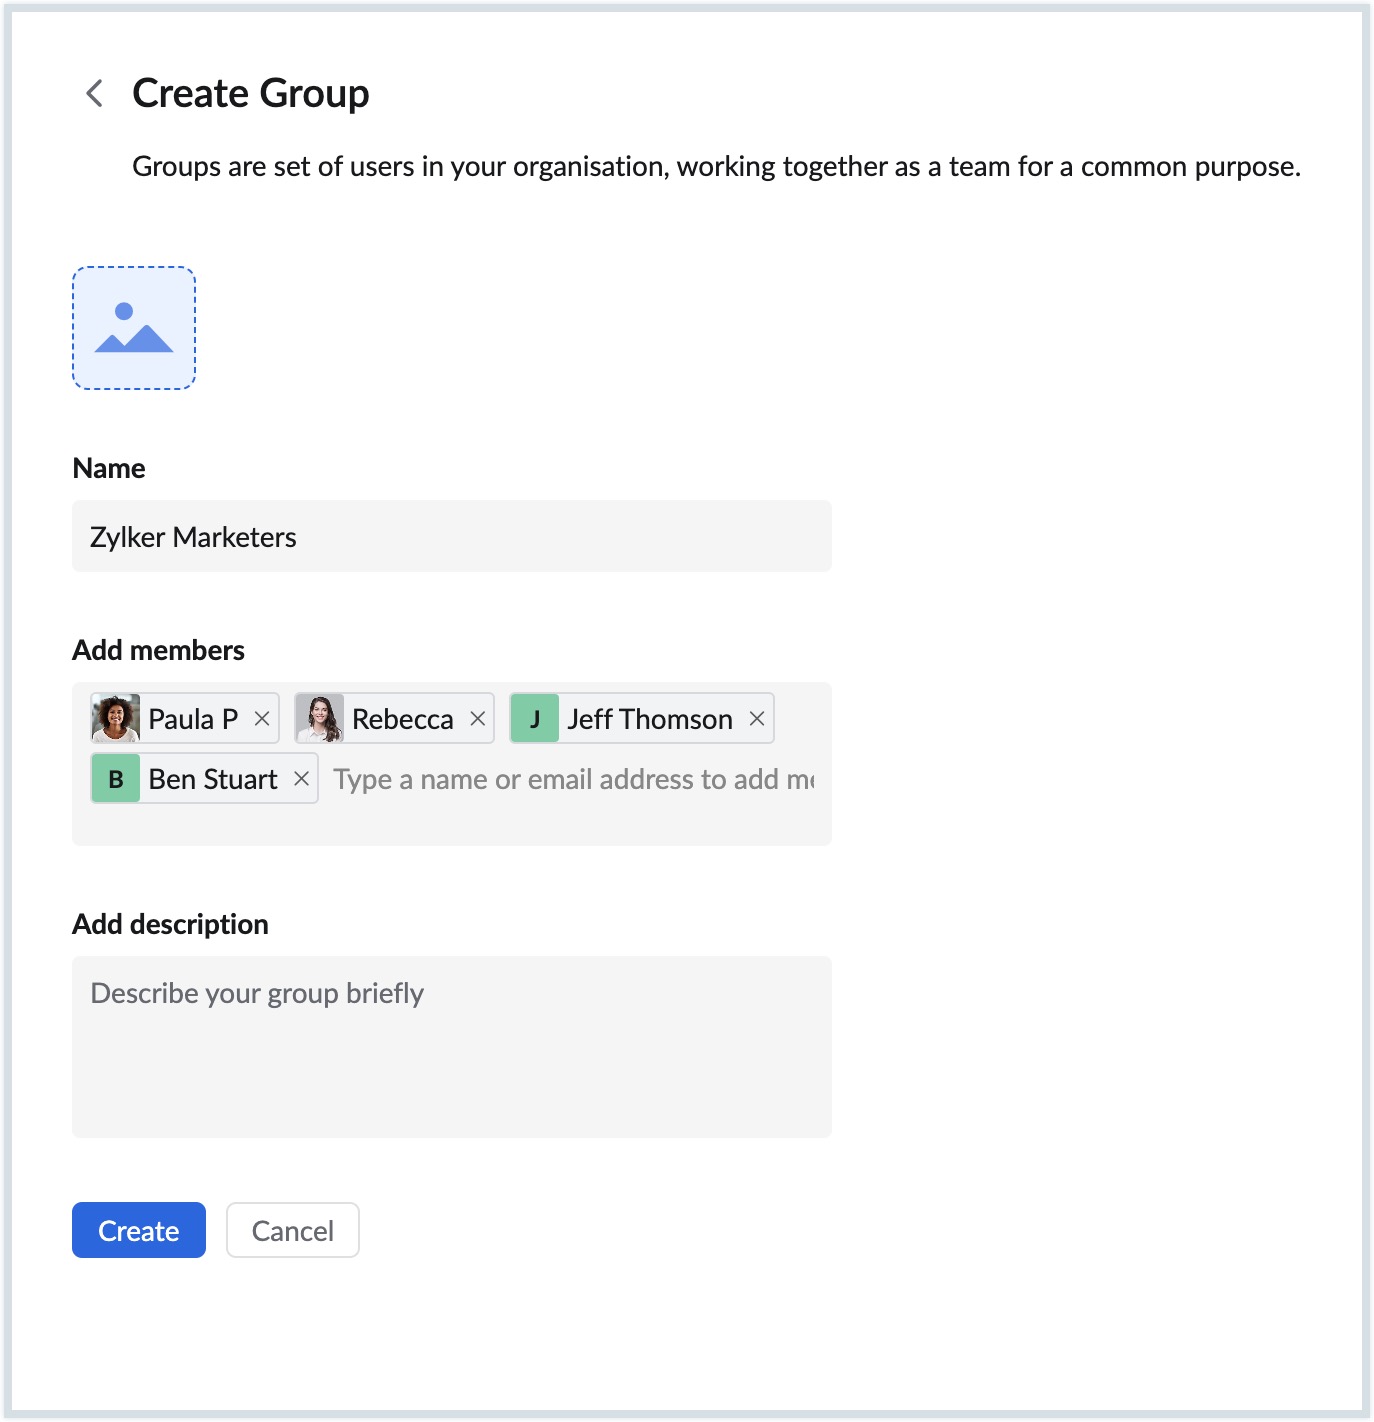
A Personal Group of the entered specifications will be created.
Organization groups
Administrators and users, given that the admin has granted permission, will have the option to create email-enabled Organization Groups from the Add new group section.
- Log in to your Zoho Mail account.
- Navigate to the Group management page using the Manage Groups icon.
- Click on the Add new group icon to create a new group.
- Enter the Group name, Group members, and Group description.
- Toggle the Create it as email group button, to create an email-enabled group.
- Enter the preferred group email address.
- Select who can send emails to your group from the options given below.
- You can choose the option to enable or disable Streams for your group and click Create.

An Organization Group with a common email address will be created.
You can perform other activities like adding moderators, changing access levels, managing the calendar and task permissions of the group, and enabling mail moderation for the created group in the Edit Group section. Administrators can also create email-enabled groups directly from the Admin Console. Click here for detailed instructions for creation of groups by administrators.
Note:
- Admin has to grant permission for the users to create email-enabled organization groups from the Admin Console.
- The option to select whether the Group Type must be an Email Distribution List or Shared Mailbox will only be available for administrators.
Groups view
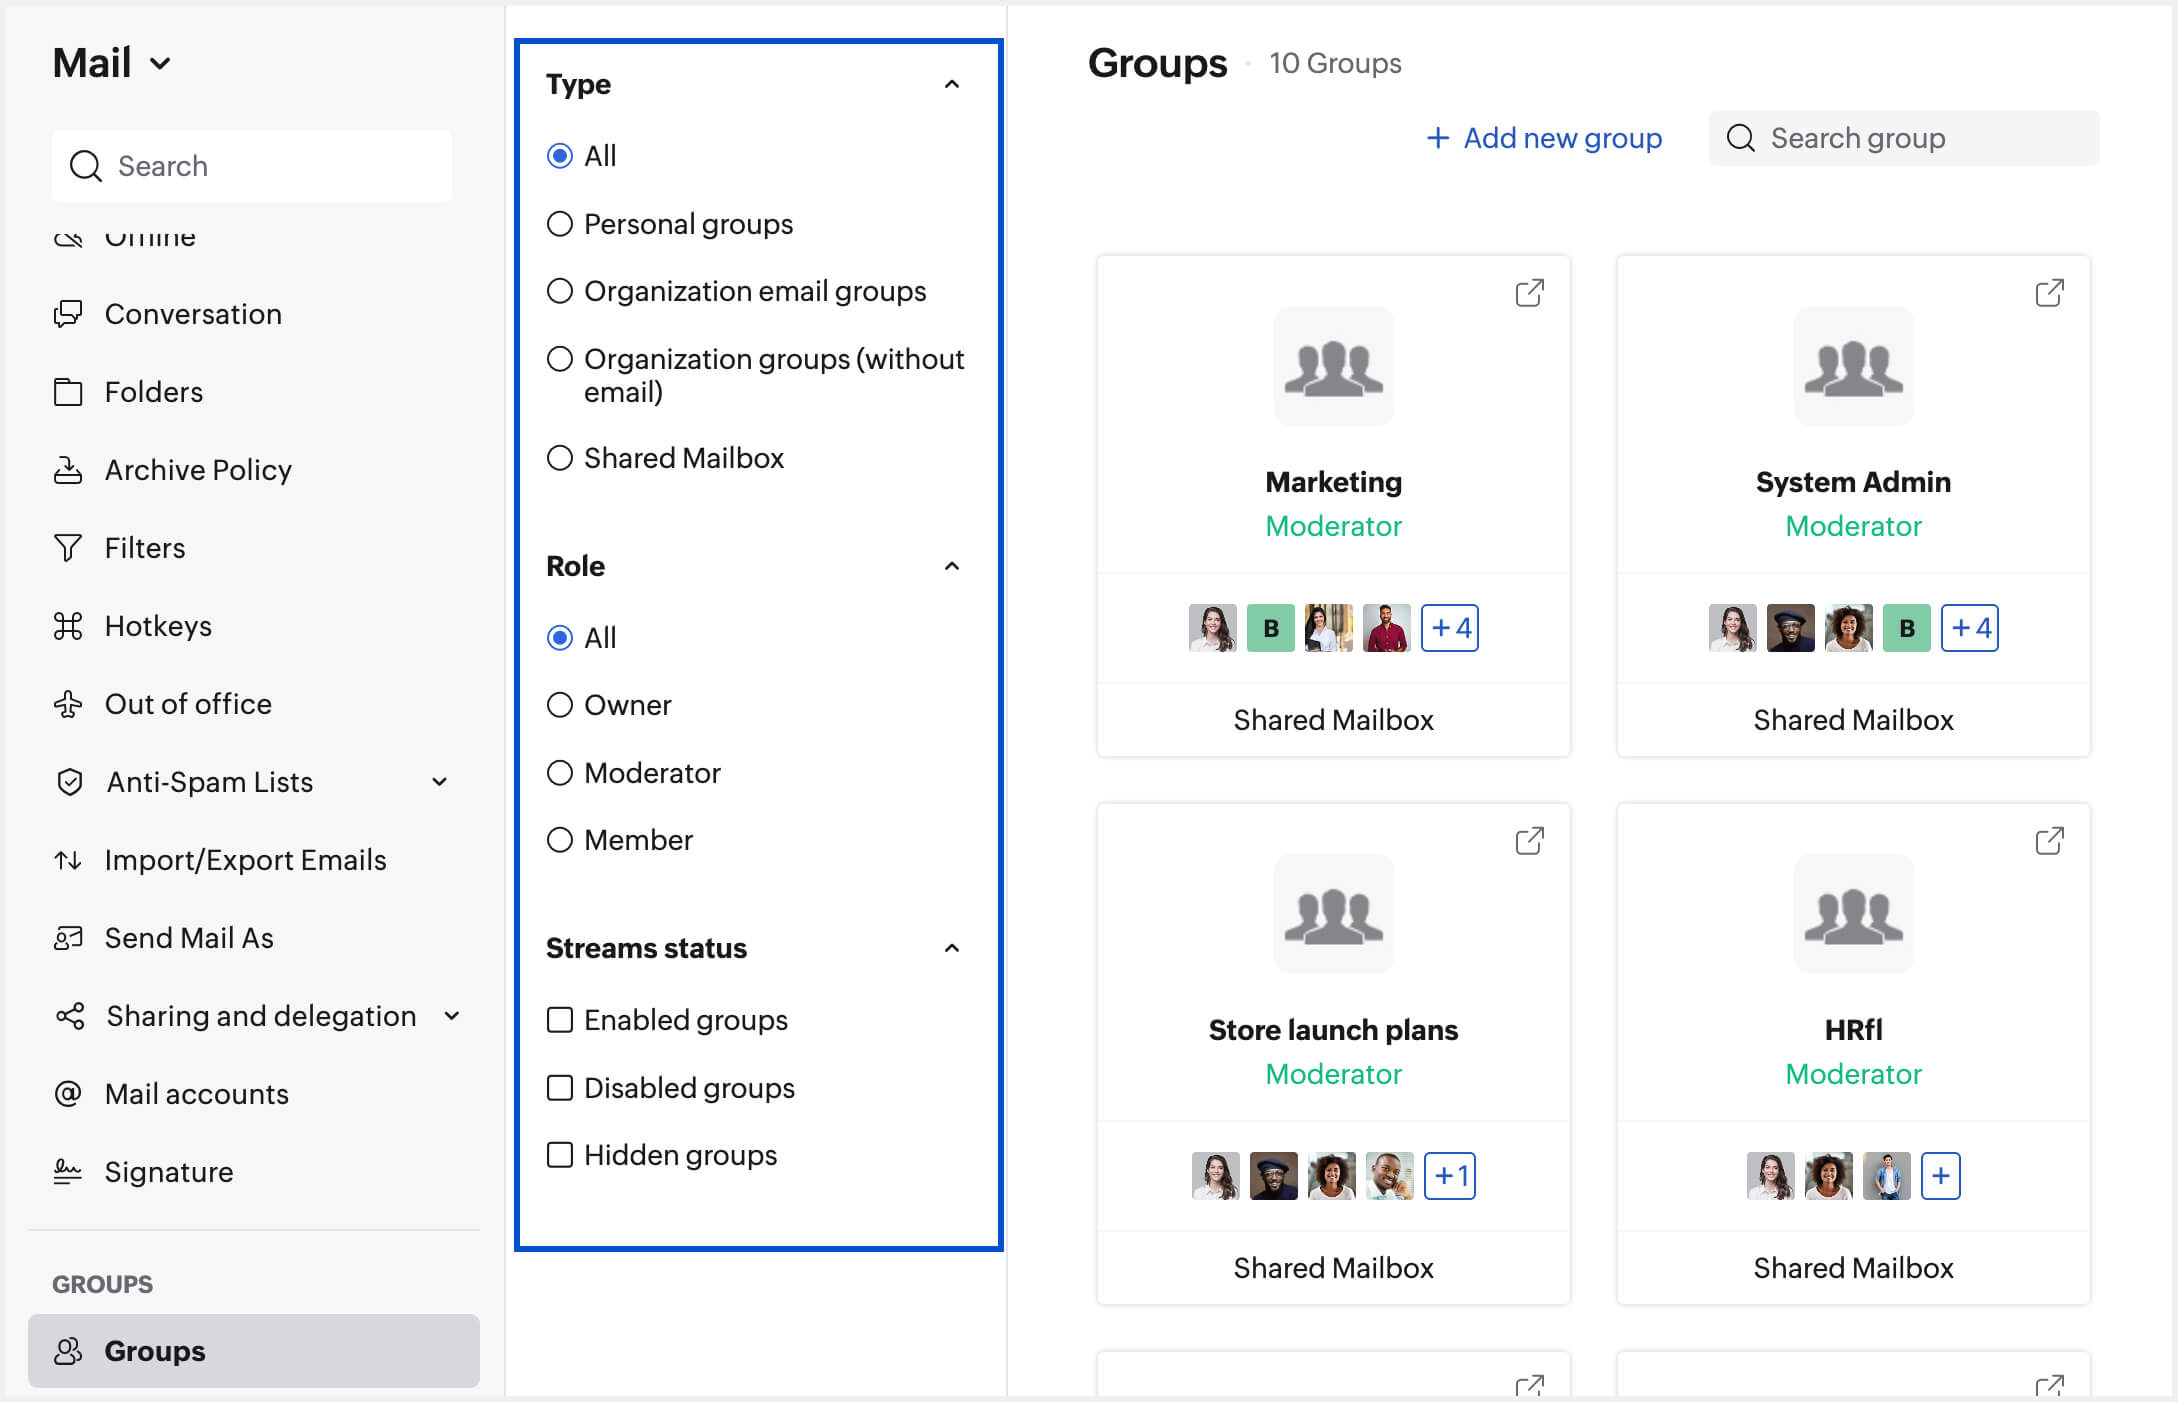
A summary of each of your groups is displayed as a separate card. The group card displays the following details about the particular group:
- Name and Icon of the group.
- Your role in the group.
- Members of the group.
- Streams/ Shared Mailbox status of the group.

You can access any of the streams enabled groups directly by clicking on the relevant group on the Manage Groups page.
Add/View Members
You can view a list of the members of a group by clicking on the View Members icon in the Group card view. If you are the Moderator or Owner of a group, you will also be able to add members to the group using the search bar. All the members of the groups will be listed along with their availability status.
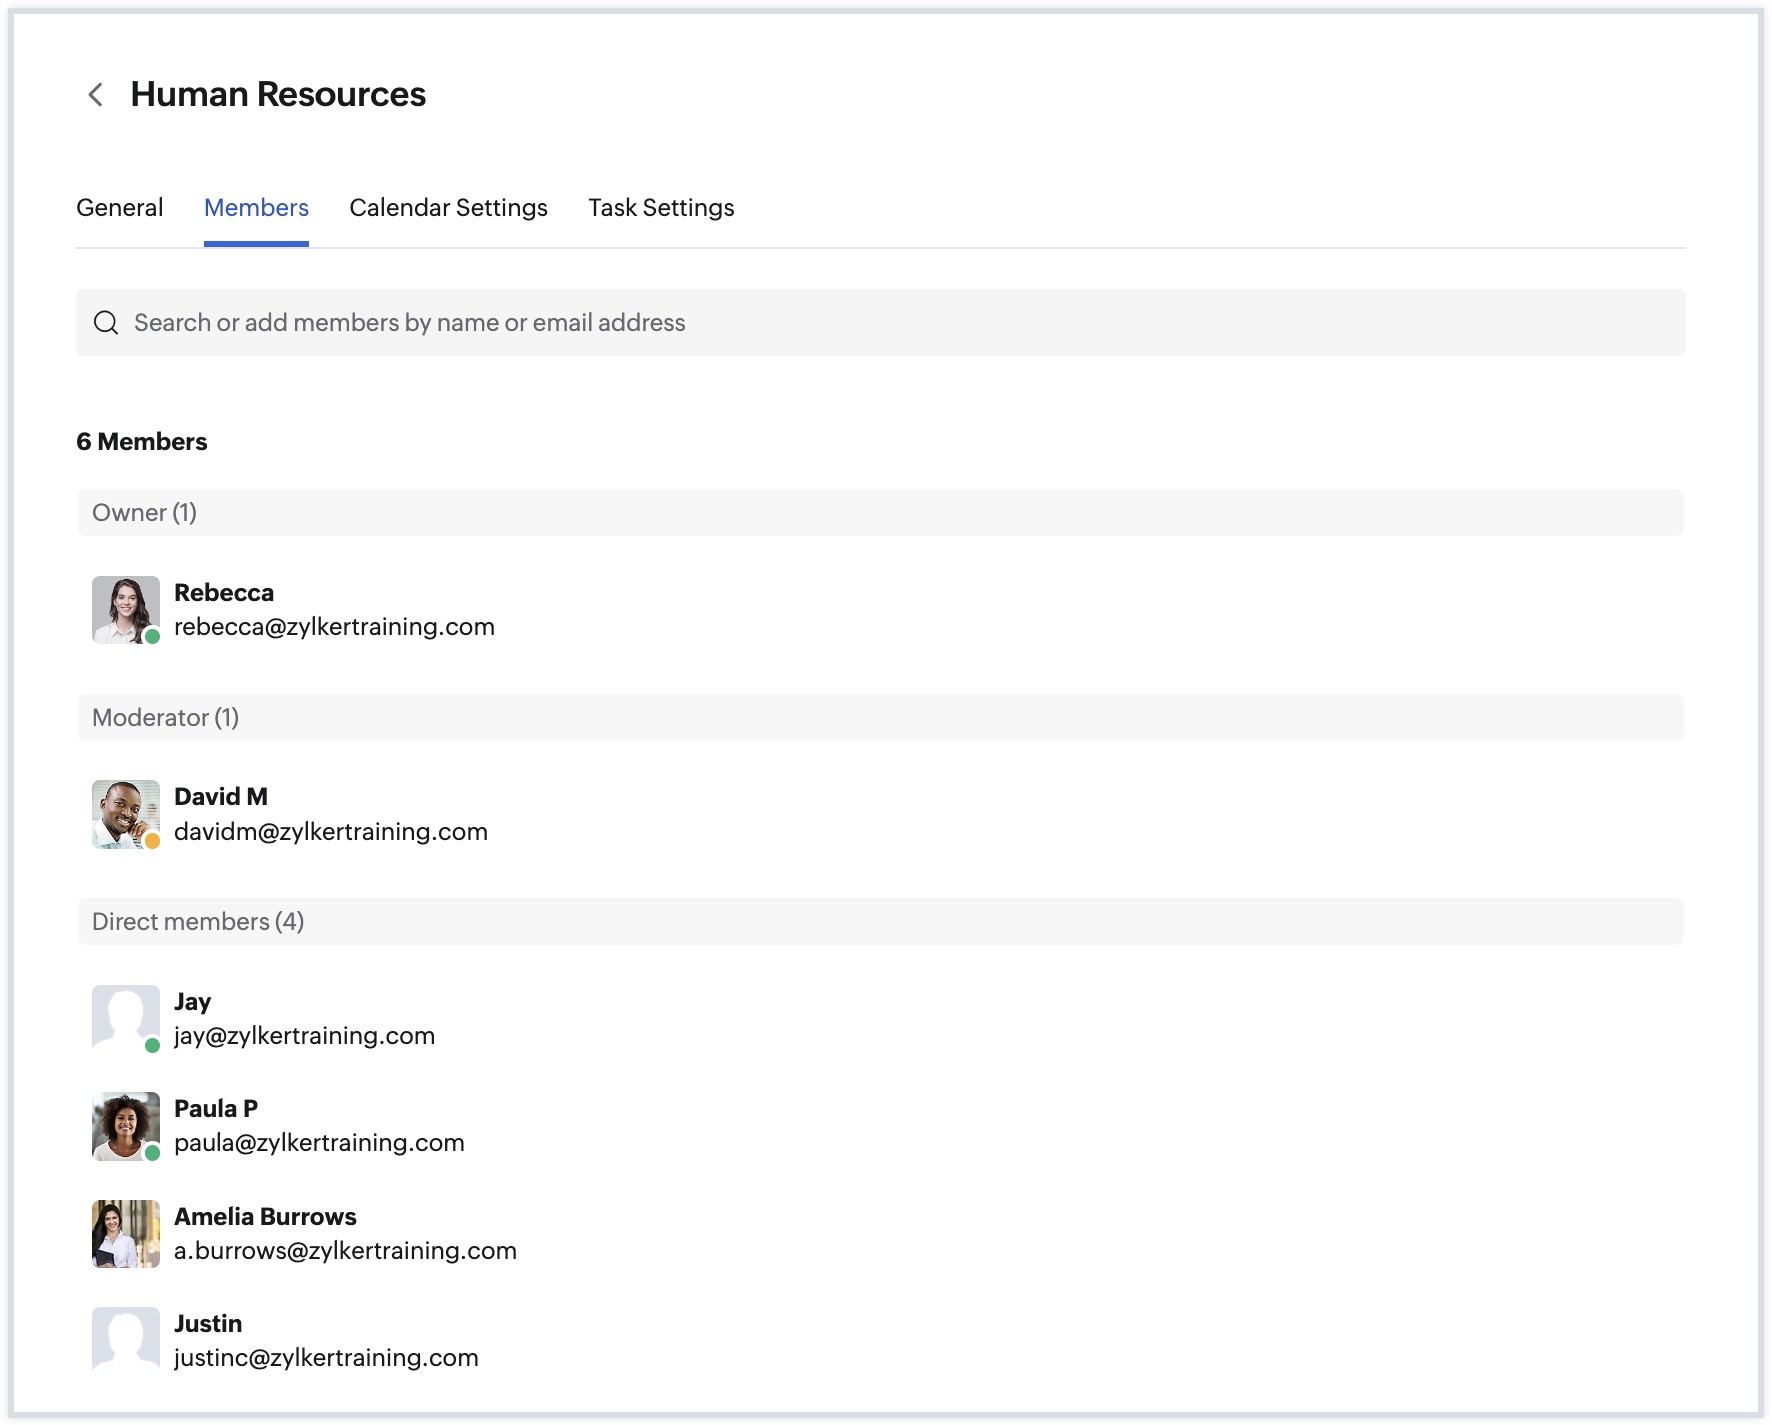
You can choose to use the Cliq integration to chat and make audio/video calls with the members from the group listing. Additionally, if you are a Moderator or Owner of a group, you can also edit the roles of members or remove them from the group.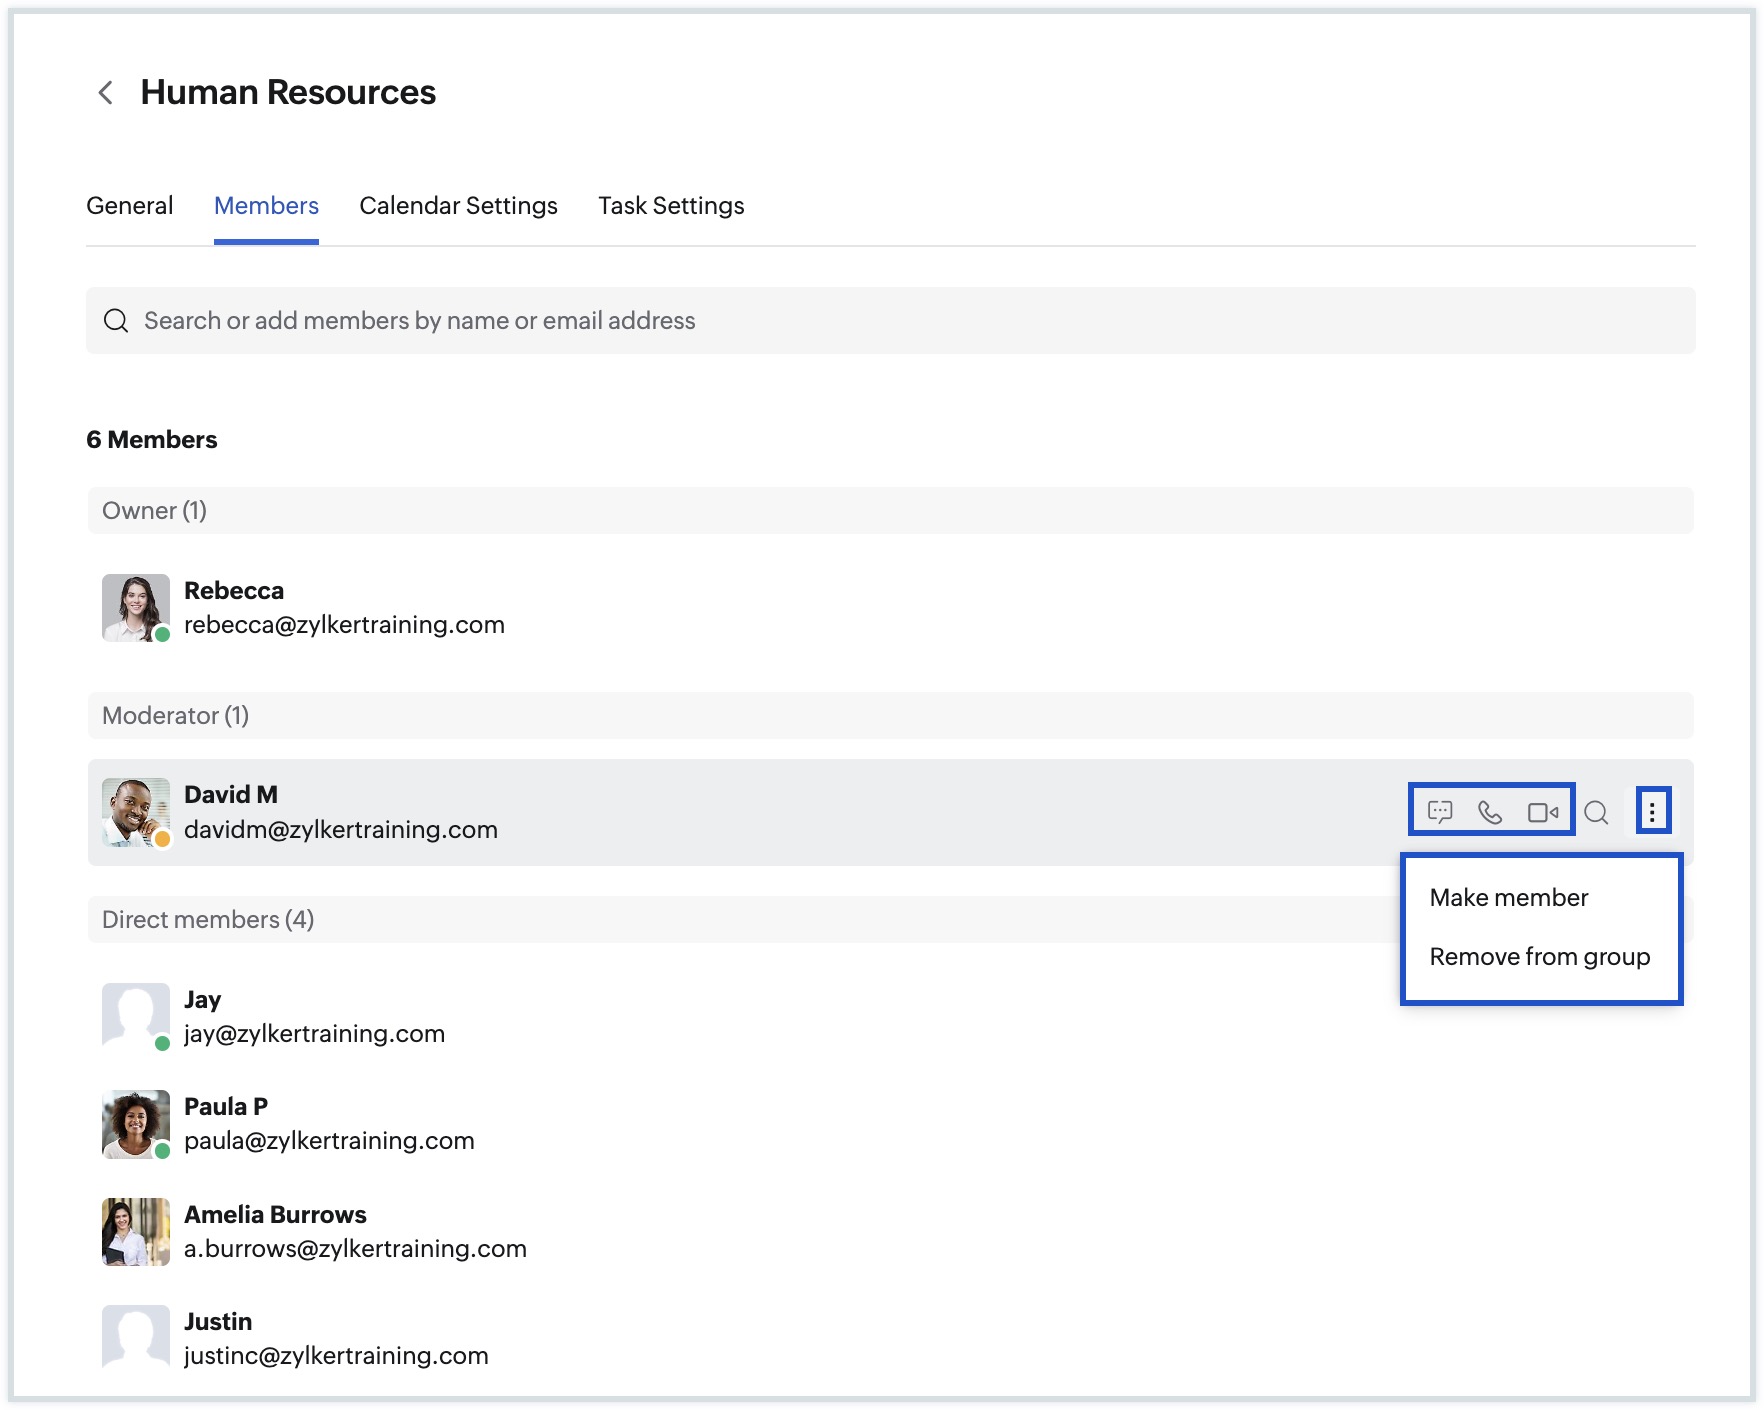
Edit Group
You can edit the groups in which you are the Moderator or Owner by clicking the Group card. You can also select the Manage Groups option by right-clicking on the relevant group or from the Group header in Streams. You can change the Group Name, Group Description, and Group icon. Streams can be enabled/ disabled for the group by checking/unchecking the Enable Streams checkbox.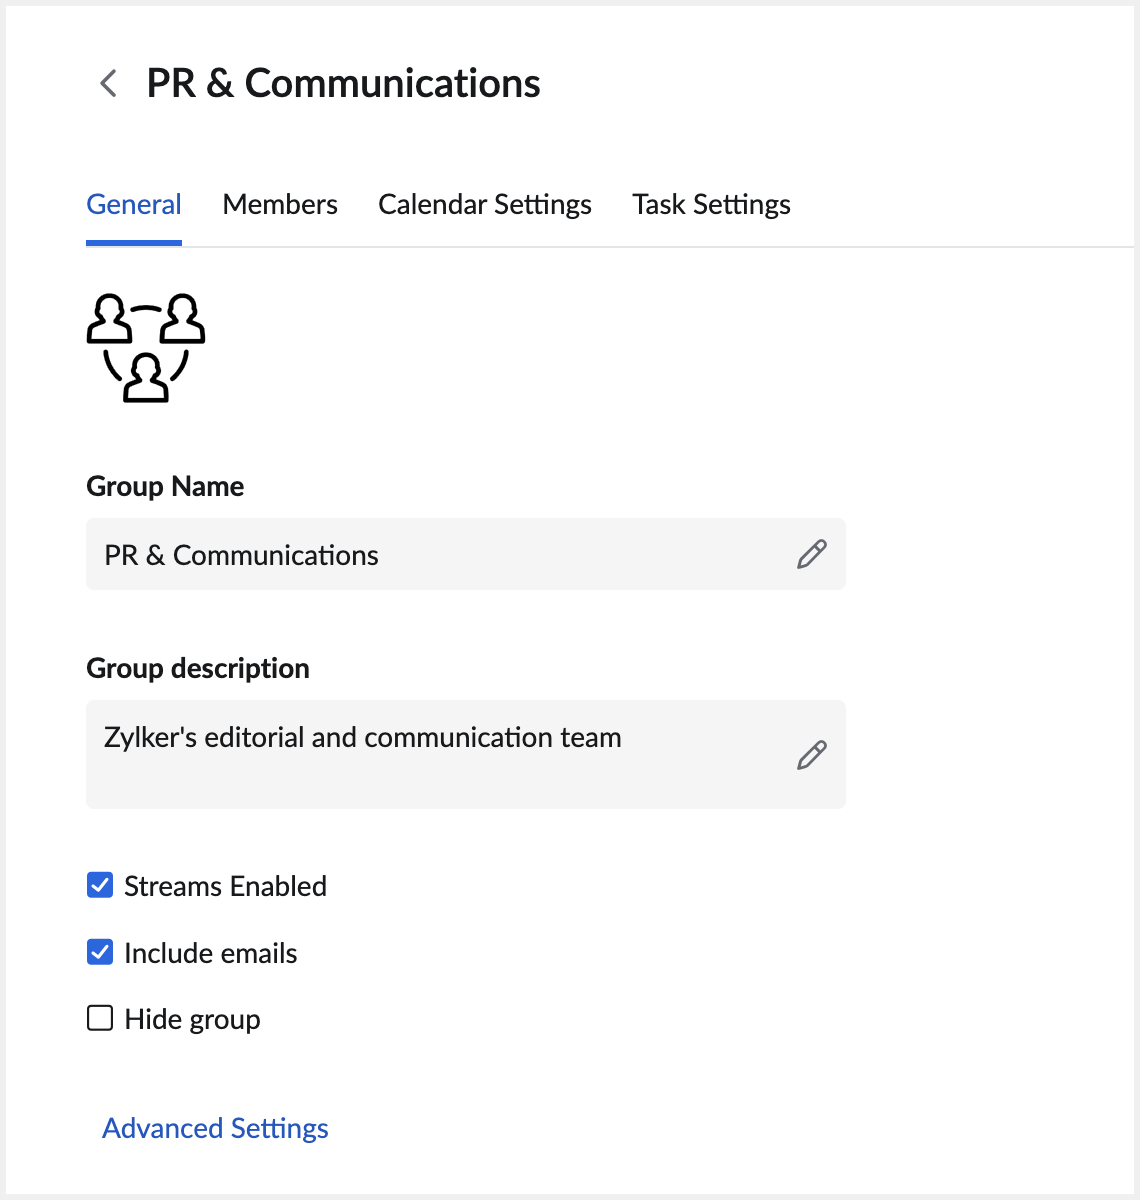
For Organization Groups, an Include emails will also be present in the Edit Group section which will allow emails sent to the group to be posted in Streams. The Advanced settings option will also be present next to the checkbox which will navigate to the Admin Console from where the group permissions can be modified. To learn more about a group's advanced settings, click here.
Note:
Streams for a group can also be disabled/enabled using the Enable Streams checkbox present in the edit group tab.
Calendar Settings
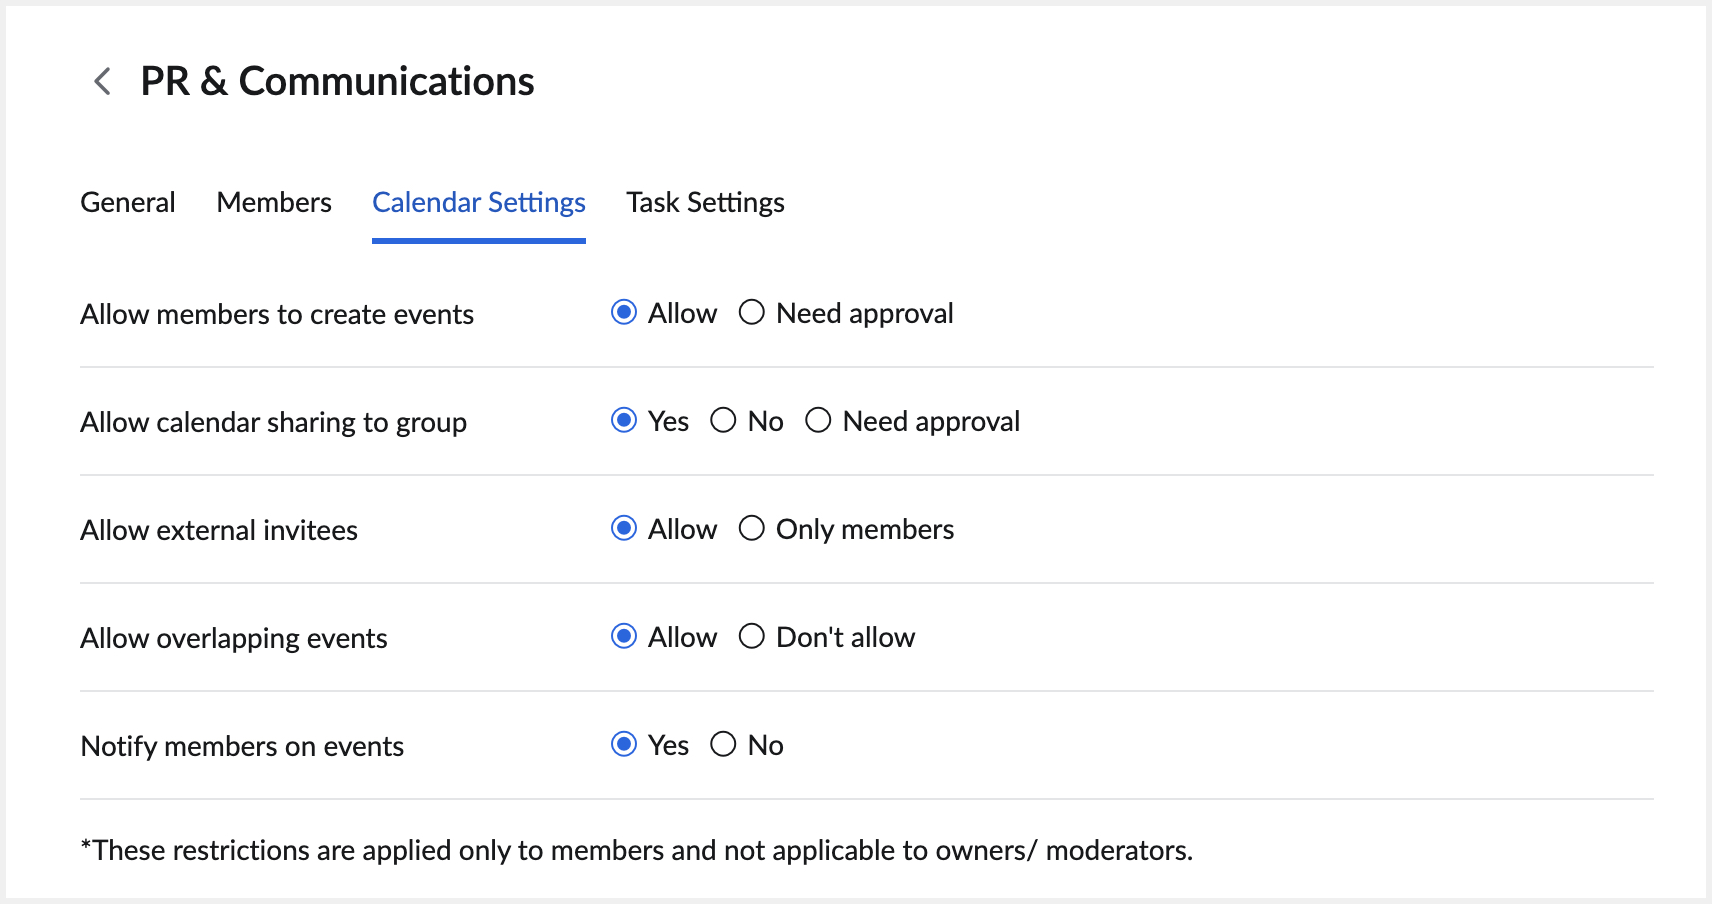
The Calendar Settings for Streams groups can be edited by the Owner or Moderator of the Streams groups. Click the Manage Groups icon in the left pane. Locate the group whose settings you want to edit. Click the group you want to manage. Go to the Calendar Settings menu bar. Choose the preferred configurations.
Admin Approval for Event creation
Members can create events in the group calendars by default. You can choose whether these events need approval by the group admin before the event gets added to the group calendar.
Sharing Personal Calendars with the Group
Personal calendars that have been created by the group members can be shared with the group if required. The permission can be enabled, disabled, or set such that the calendar is shared after approval by the admin.
Permission to Invite External Users to Group Events
When a group event is created, you can restrict the members who are allowed to be invited to the event. You can set the permissions such that invites are sent to group users alone, to the group and organization users, or to everyone in the organization.
Event Overlap
You can make a choice about whether you want to allow or disallow multiple calendar events to be created for the same date and time.
Enable / Disable Group Calendar Notifications
You can either enable or disable notifications for activities such as event addition, event update, or when an event is deleted from a group calendar.
Delete Group
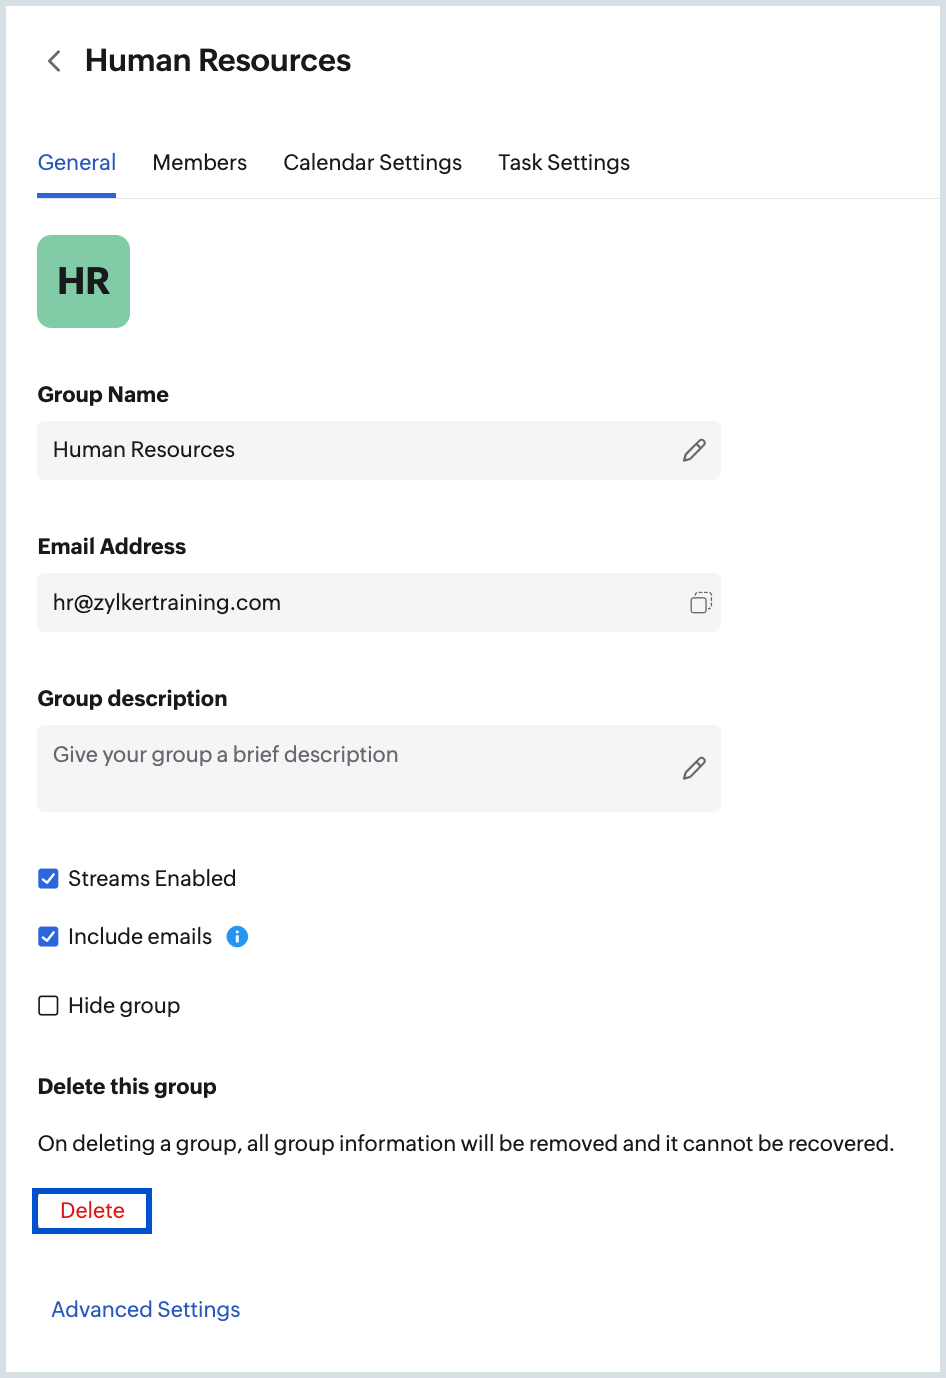
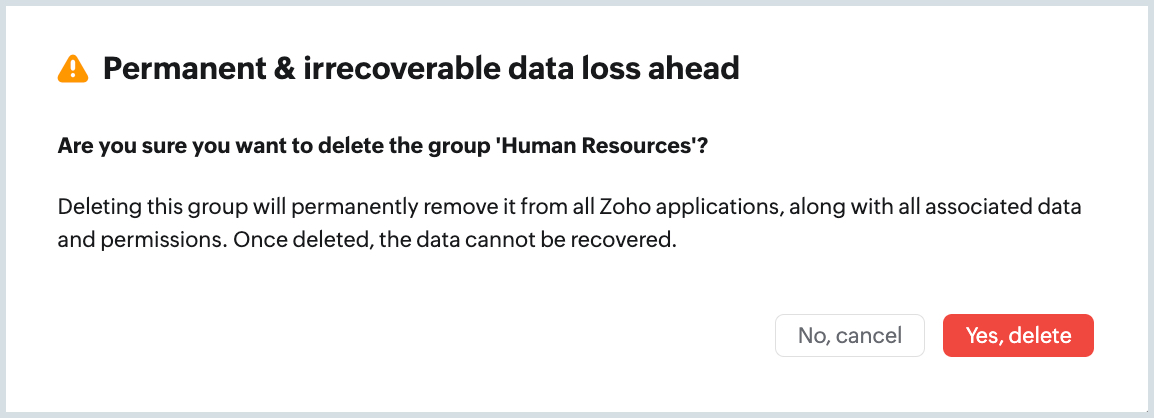
You can also delete a group for which you're a owner of or a moderator. To delete a group, go to Groups in settings and click on the group you want to delete. Click on the Delete button under the Delete this group section.
Note:
When you delete a group (distribution list, personal group, streams group, or a shared mailbox) from Zoho Mail, it will be deleted from other associated applications such as Zoho Calendar, Connect, etc. The data cannot be retrieved once deleted.
Filter Options
You can alter the Manage Groups view to show groups of any one or more categories. Groups can be categorized based on the type of the group, your role in the group, and/or whether Streams is enabled for that group.
