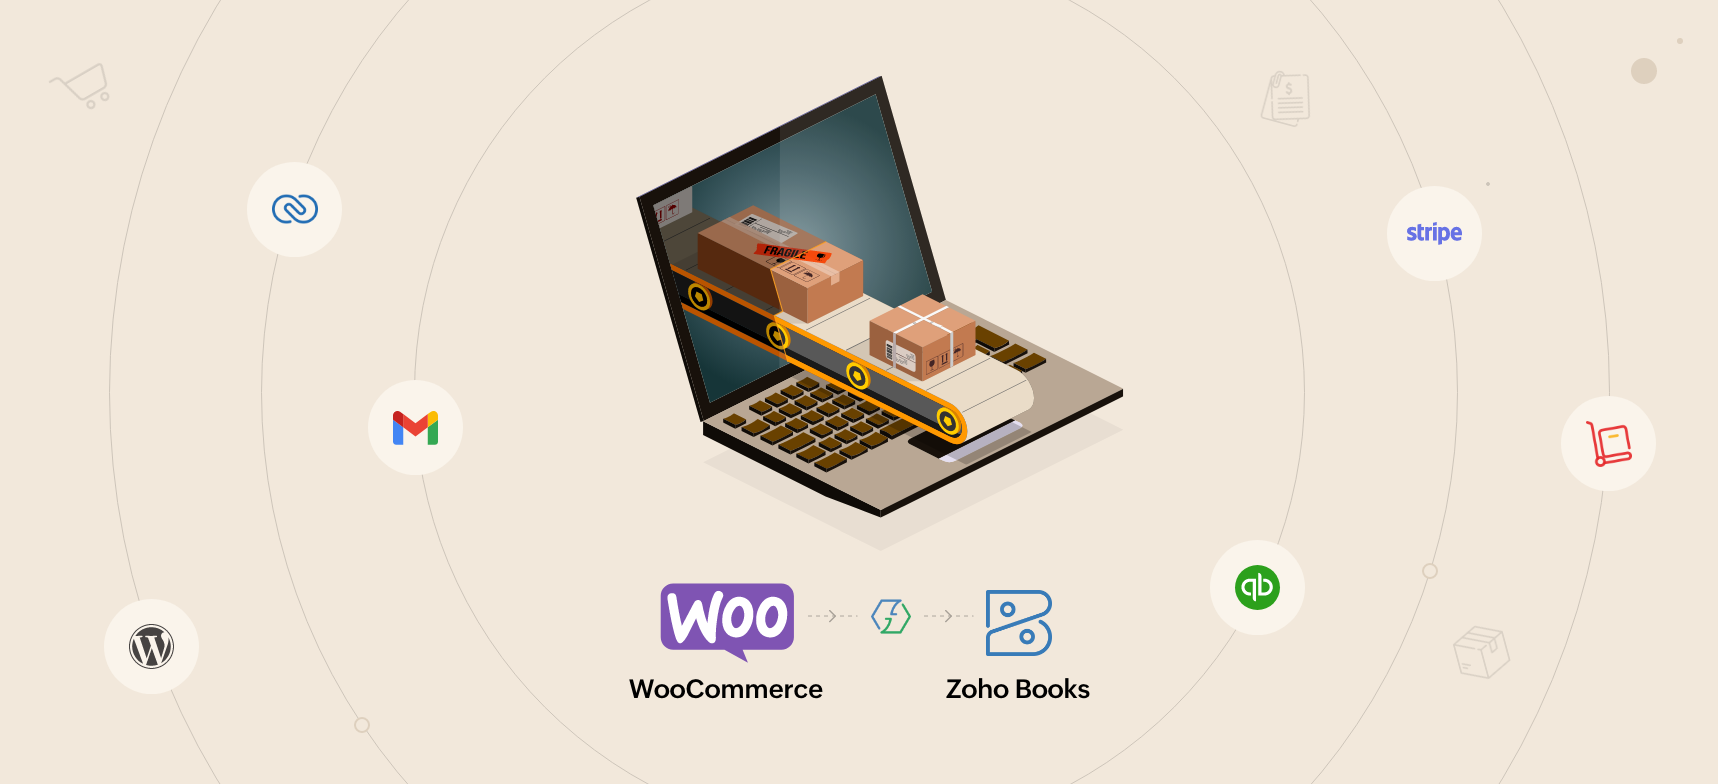
How to automatically add your WooCommerce customers in Zoho Books
- Last Updated : October 14, 2025
- 4.6K Views
- 4 Min Read
Summary:
- WooCommerce is a free ecommerce plugin for WordPress with which you can set up an online store in minutes.
- With the store live, managing customer details, finances, and orders across applications can be tiring, and this is where Zoho Flow helps.
- With Zoho Flow, you can automate repetitive tasks by connecting WooCommerce with different business applications, like Zoho Books.
- For example, whenever a new order is created in a WooCommerce online store, a corresponding new customer can be created in your Zoho Books account instantly.
Managing an online business is difficult, and we understand the effort that it takes to build an online store from scratch. This was especially the case when you needed to either have programming knowledge or hire a developer to set one up. Ecommerce platforms such as WooCommerce have made setting up and running an online store easier than ever before. Just add the WooCommerce plugin to your WordPress site and you can set up a new store in minutes, with secure payments, configurable shipping options, and more.
However, you still need to take care of marketing, order fulfillment, customer relationships, and financial records—which means you still have to use a variety of other applications to help you manage everything. At Zoho Flow, we believe that the time and effort saved by these modern apps shouldn't be wasted on moving data between them manually.
At every business, there are tasks that are repetitive in nature. A workflow integration platform like Zoho Flow can integrate your apps and create workflows around them—automating some, or all, of these repetitive tasks, and saving you hours. You just need to set them up once, and you can relax, or better, focus on more important tasks that need your attention.
In this article, we'll go through how to set up a workflow in such a way that whenever a new order is created in your WooCommerce online store, a corresponding new customer is created in your Zoho Books account.
How to create this workflow in Zoho Flow
- Log in to your Zoho Flow account.
- In the My Flows section, click CreateFlow in the top right corner, or the + button on the left.
- Enter the flow name and a description (optional), then click Create to be directed to the flow builder.
Configuring the trigger:
- Click Configure in the App trigger box.
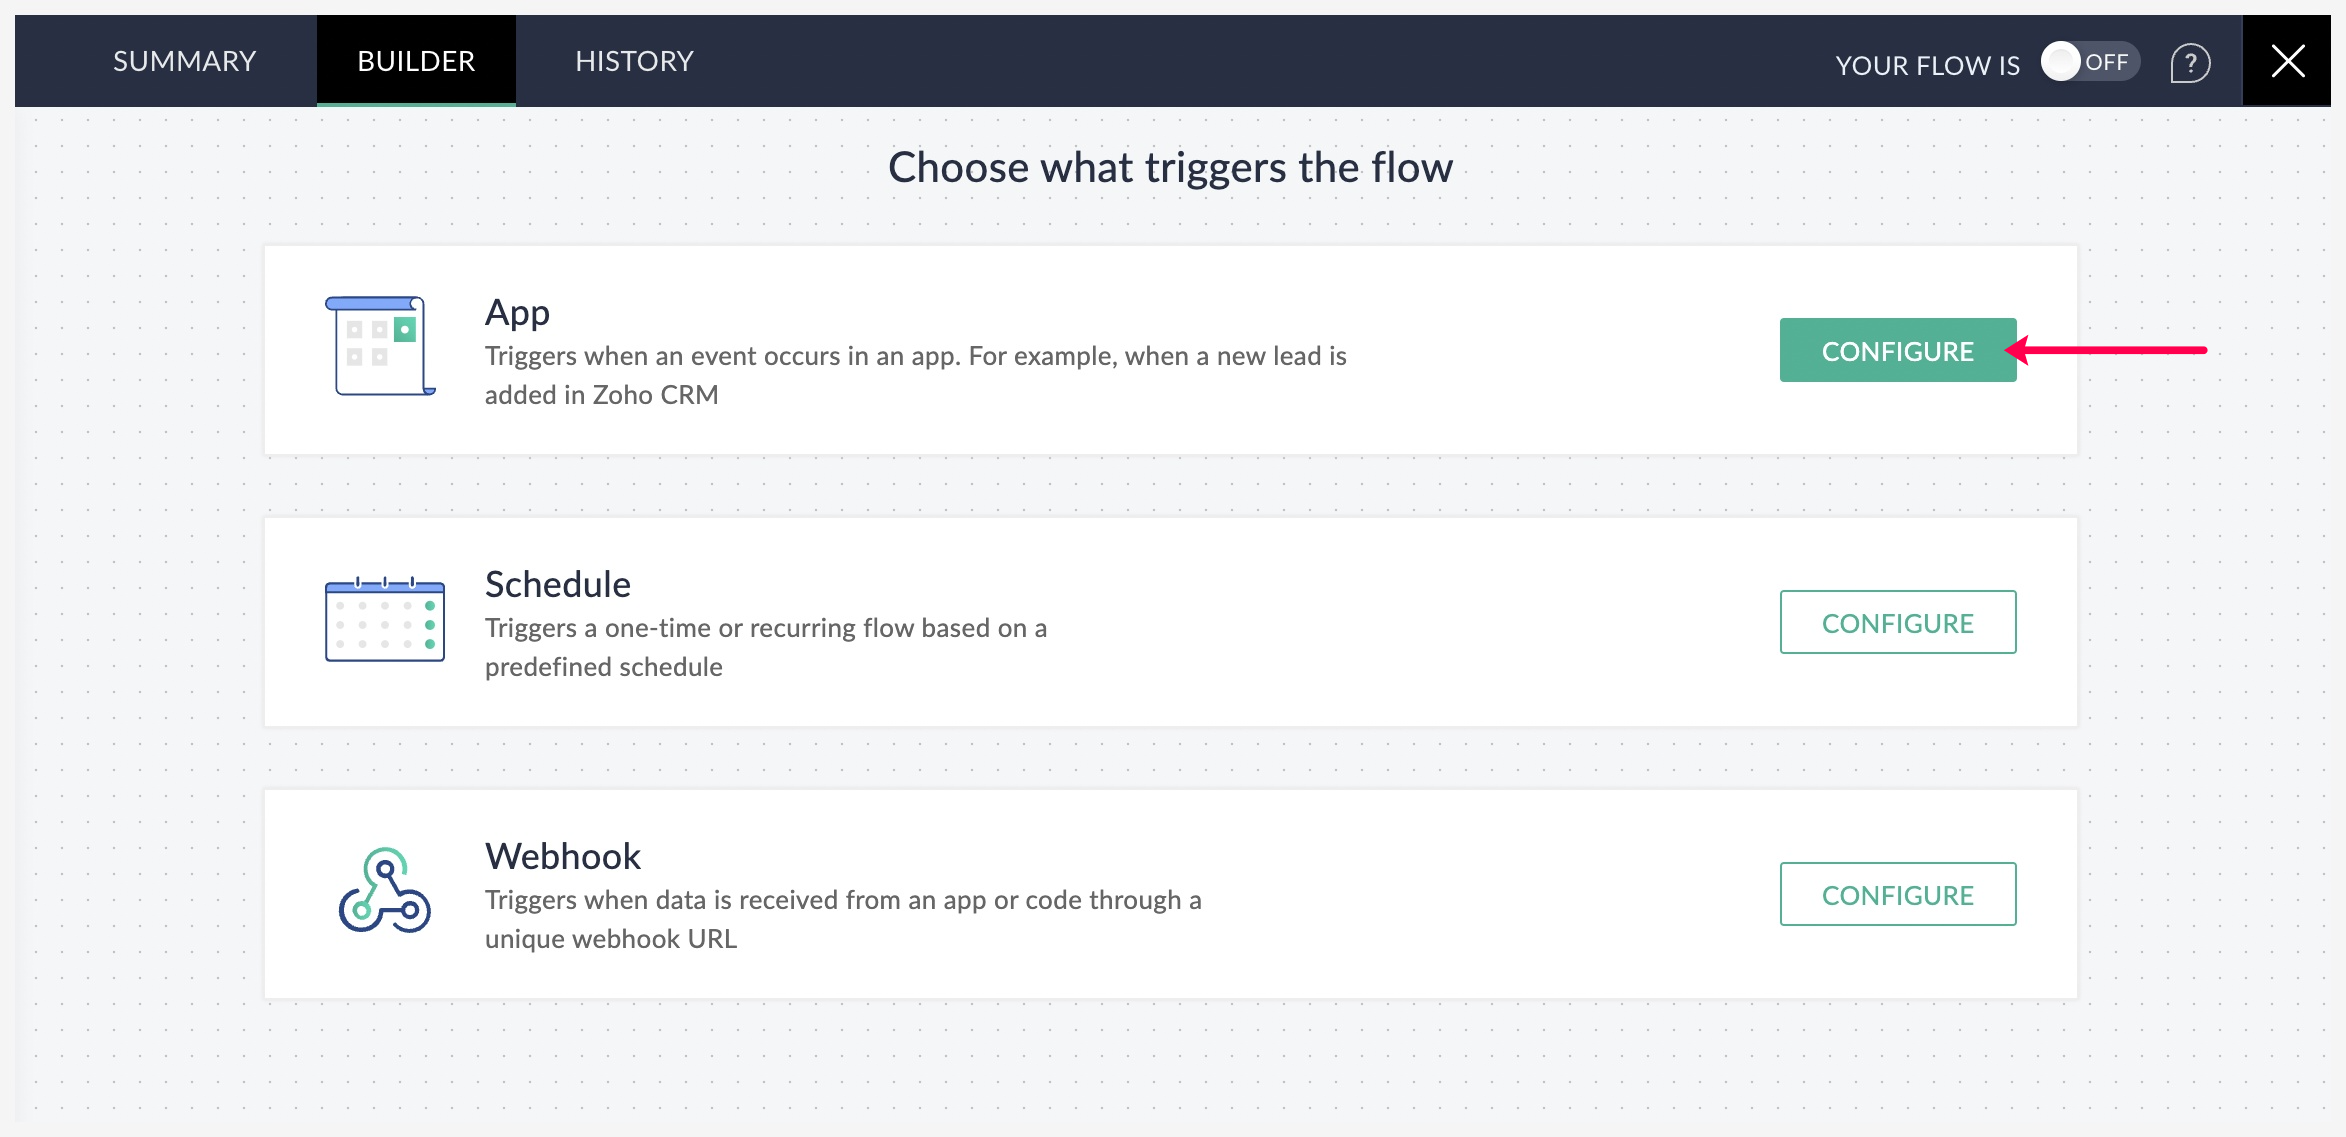
- Select WooCommerce and click Next.
- Choose Ordercreated.
- Next, click Connect to create a new connection.
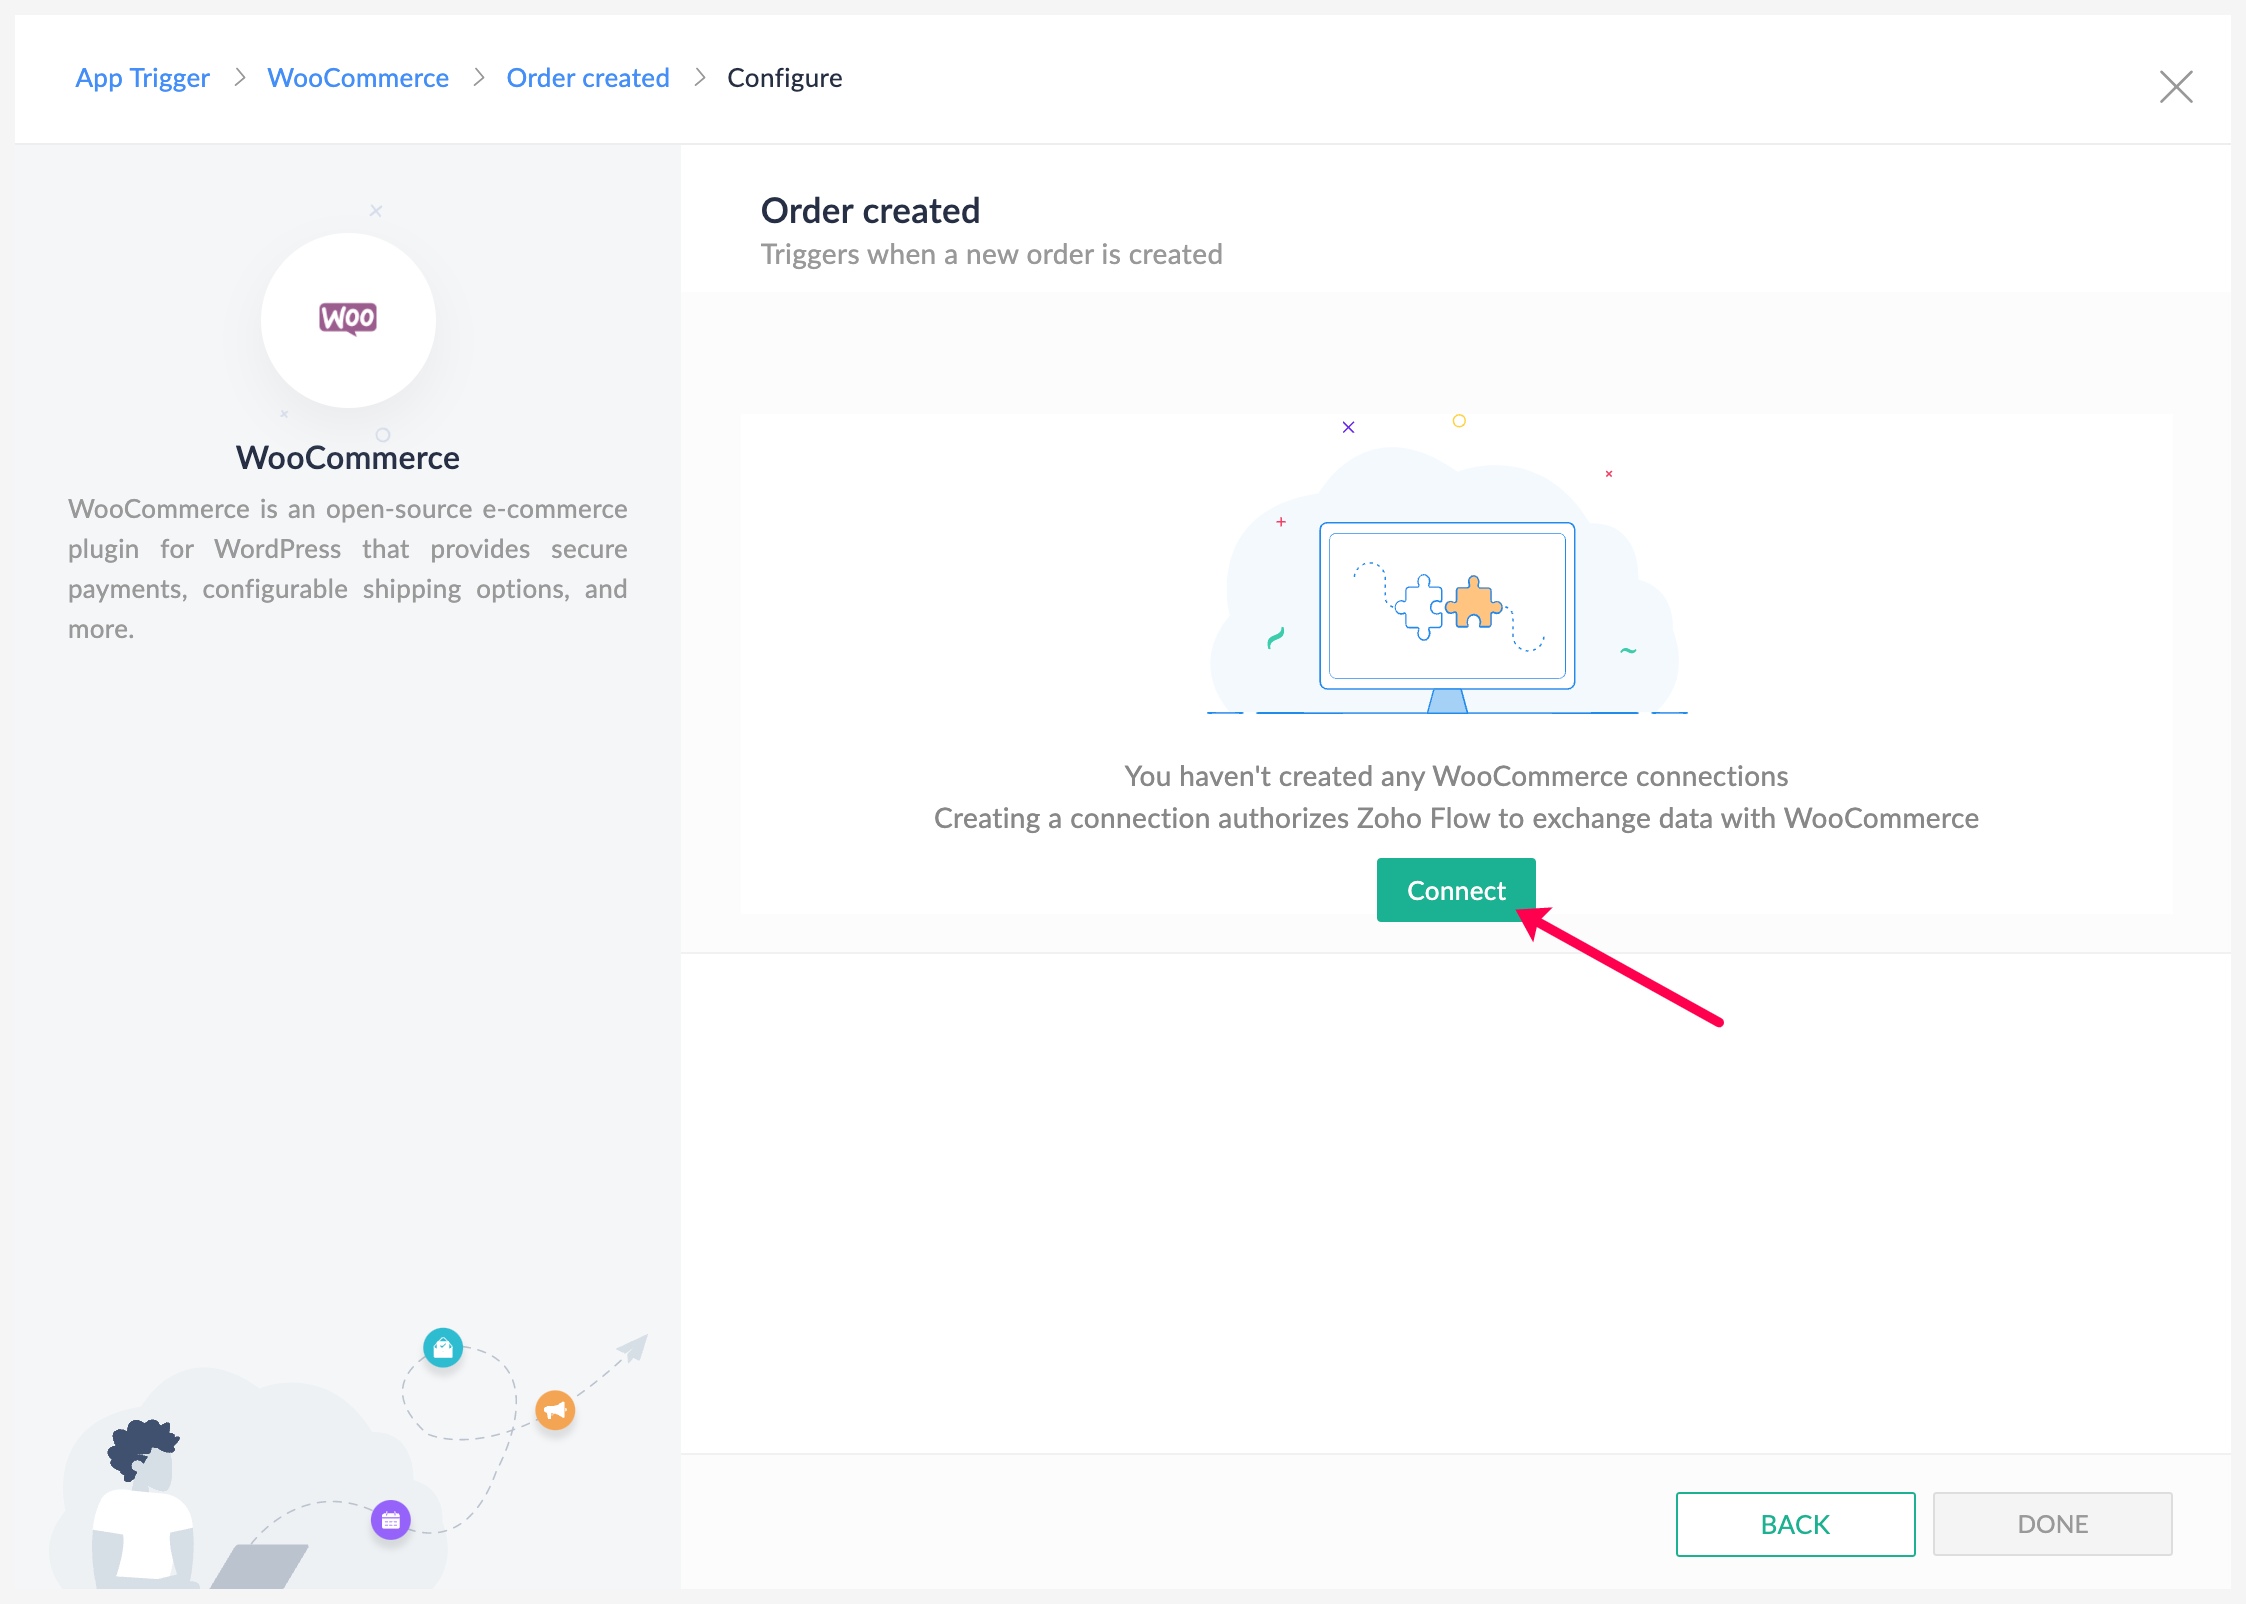
- Follow the on-screen instructions to fill in the required fields, then click Authorize.
Configuring the actions:
- Now, on the left section of the builder, search for ZohoBooks under Apps.
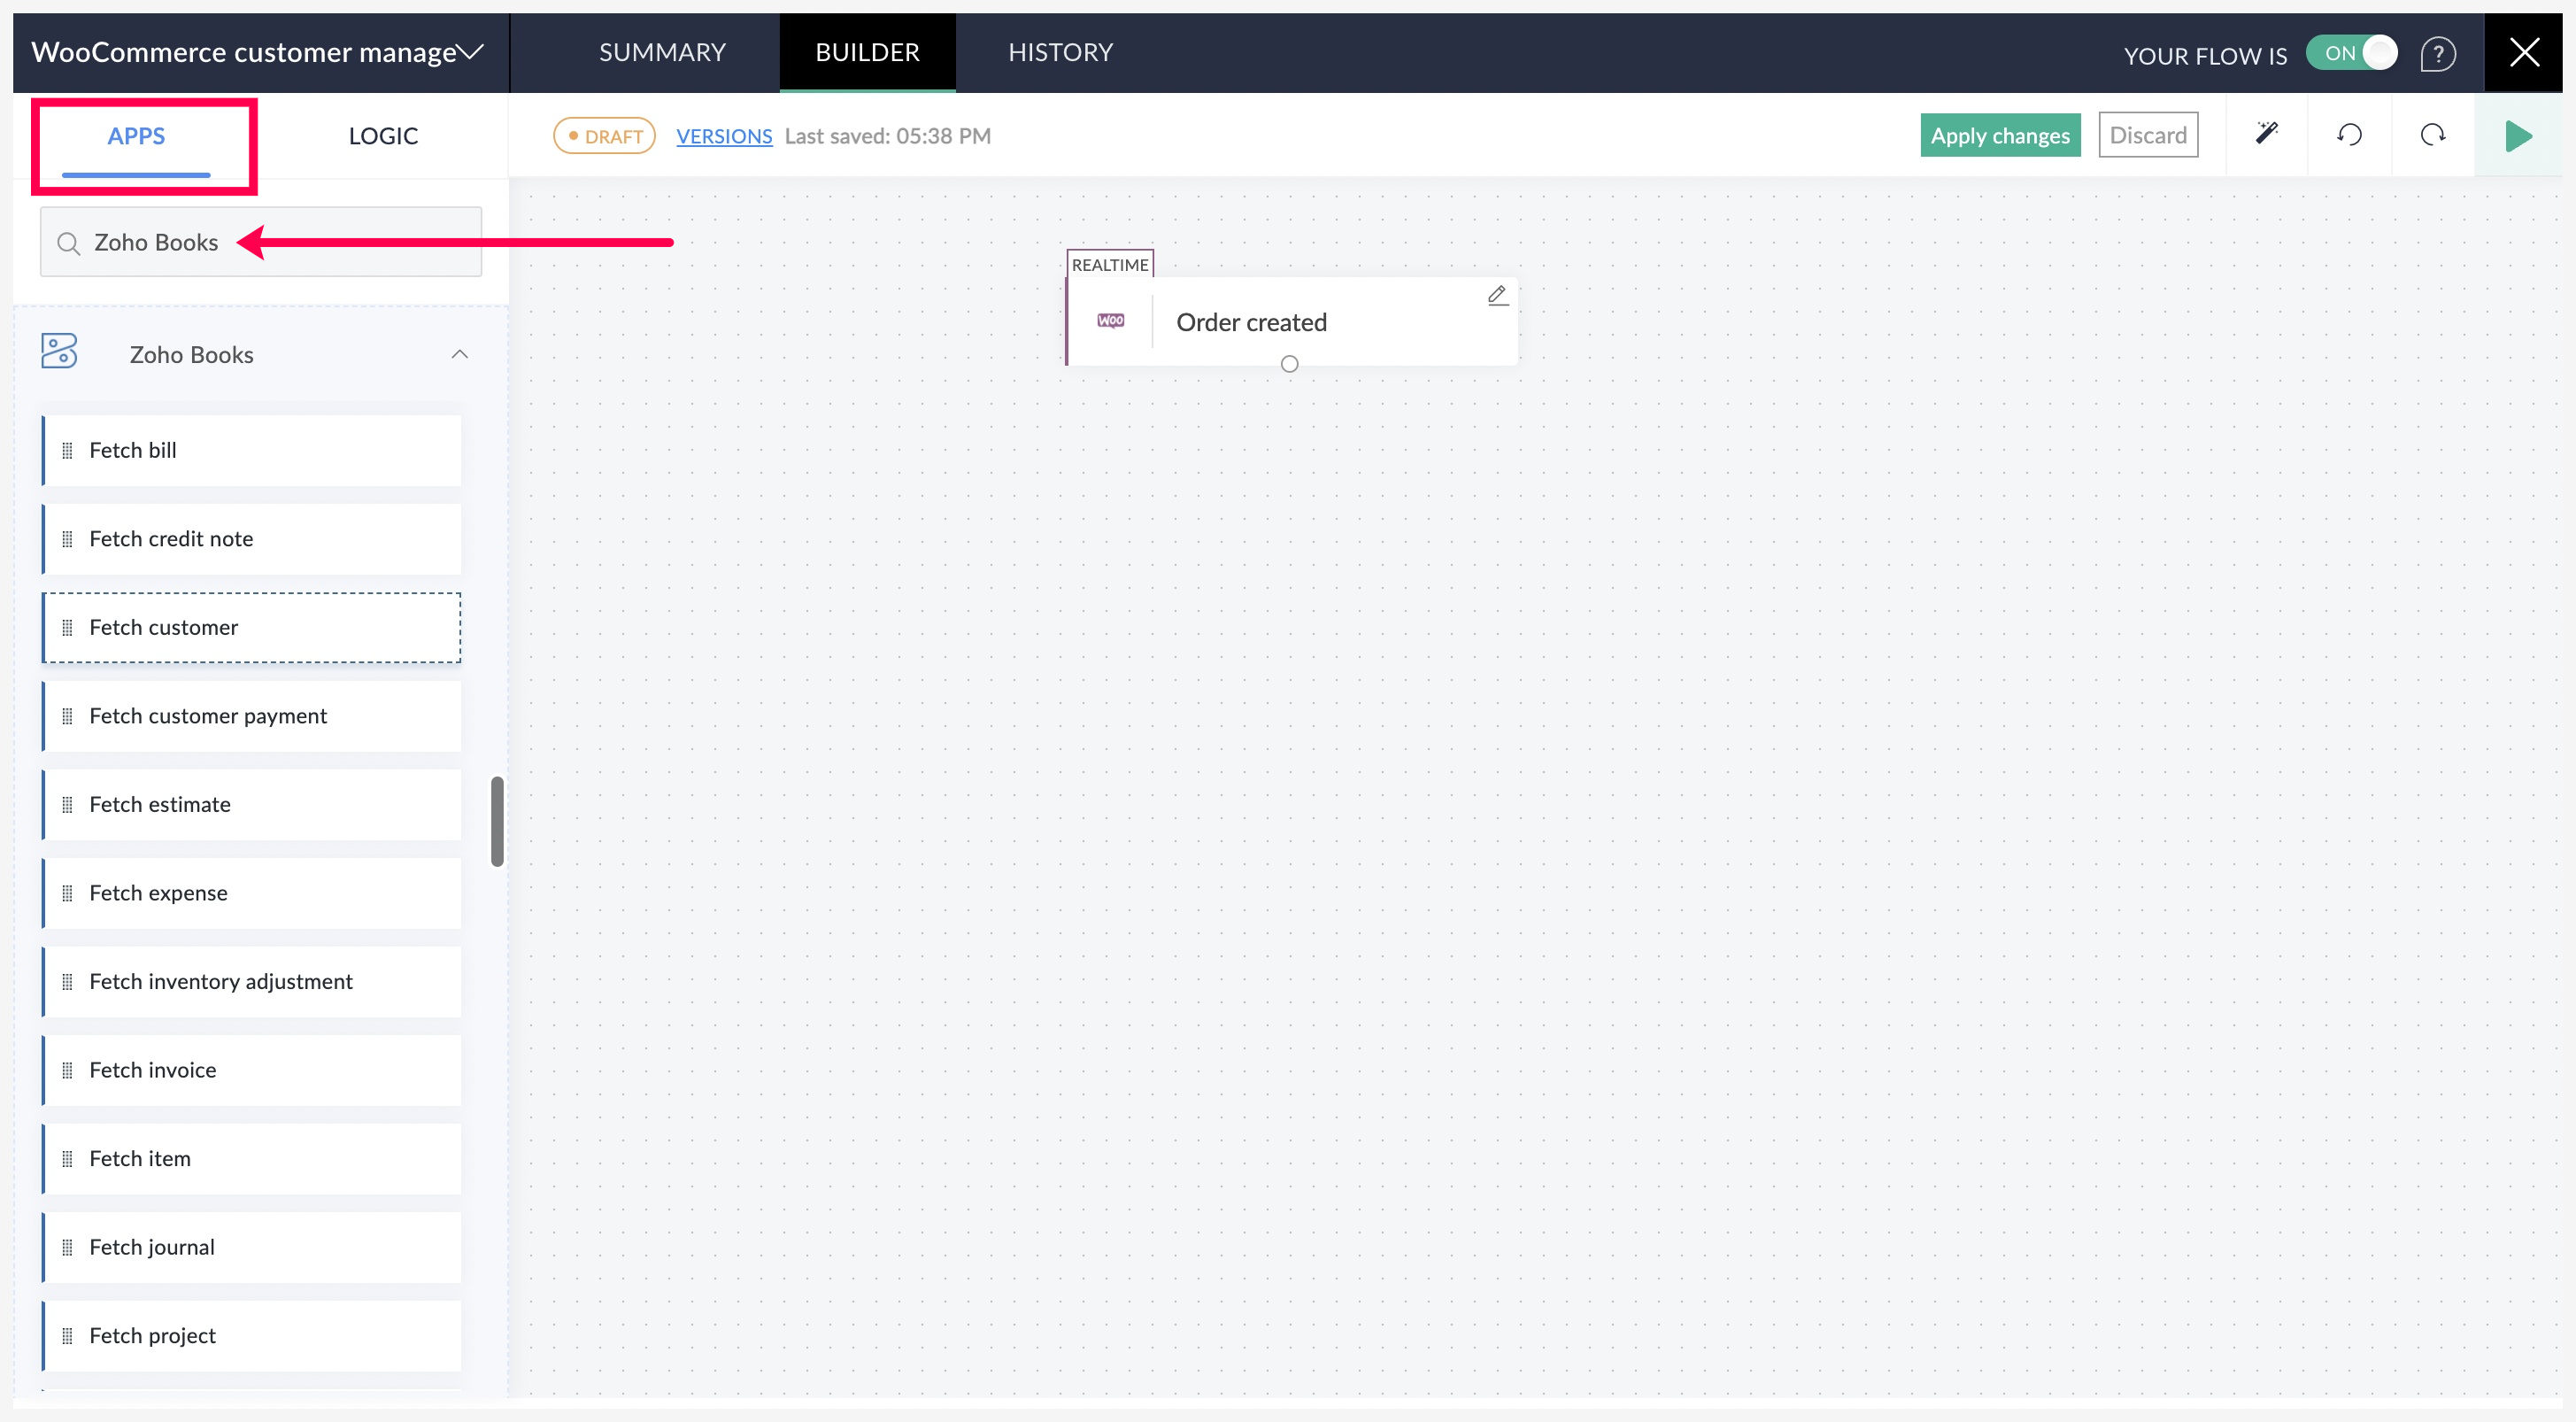
Before you create a contact in Zoho Books with the information obtained from WooCommerce, you need to check if that contact already exists in your Zoho Books account. In that way, you can add logical steps to ensure that duplicate entries are not added. For this, we use a type of action called Fetch that can extract the details of a module entry using a unique identifier (for example, Contact ID or email address). - Drag and drop the Fetch customer action into the builder.
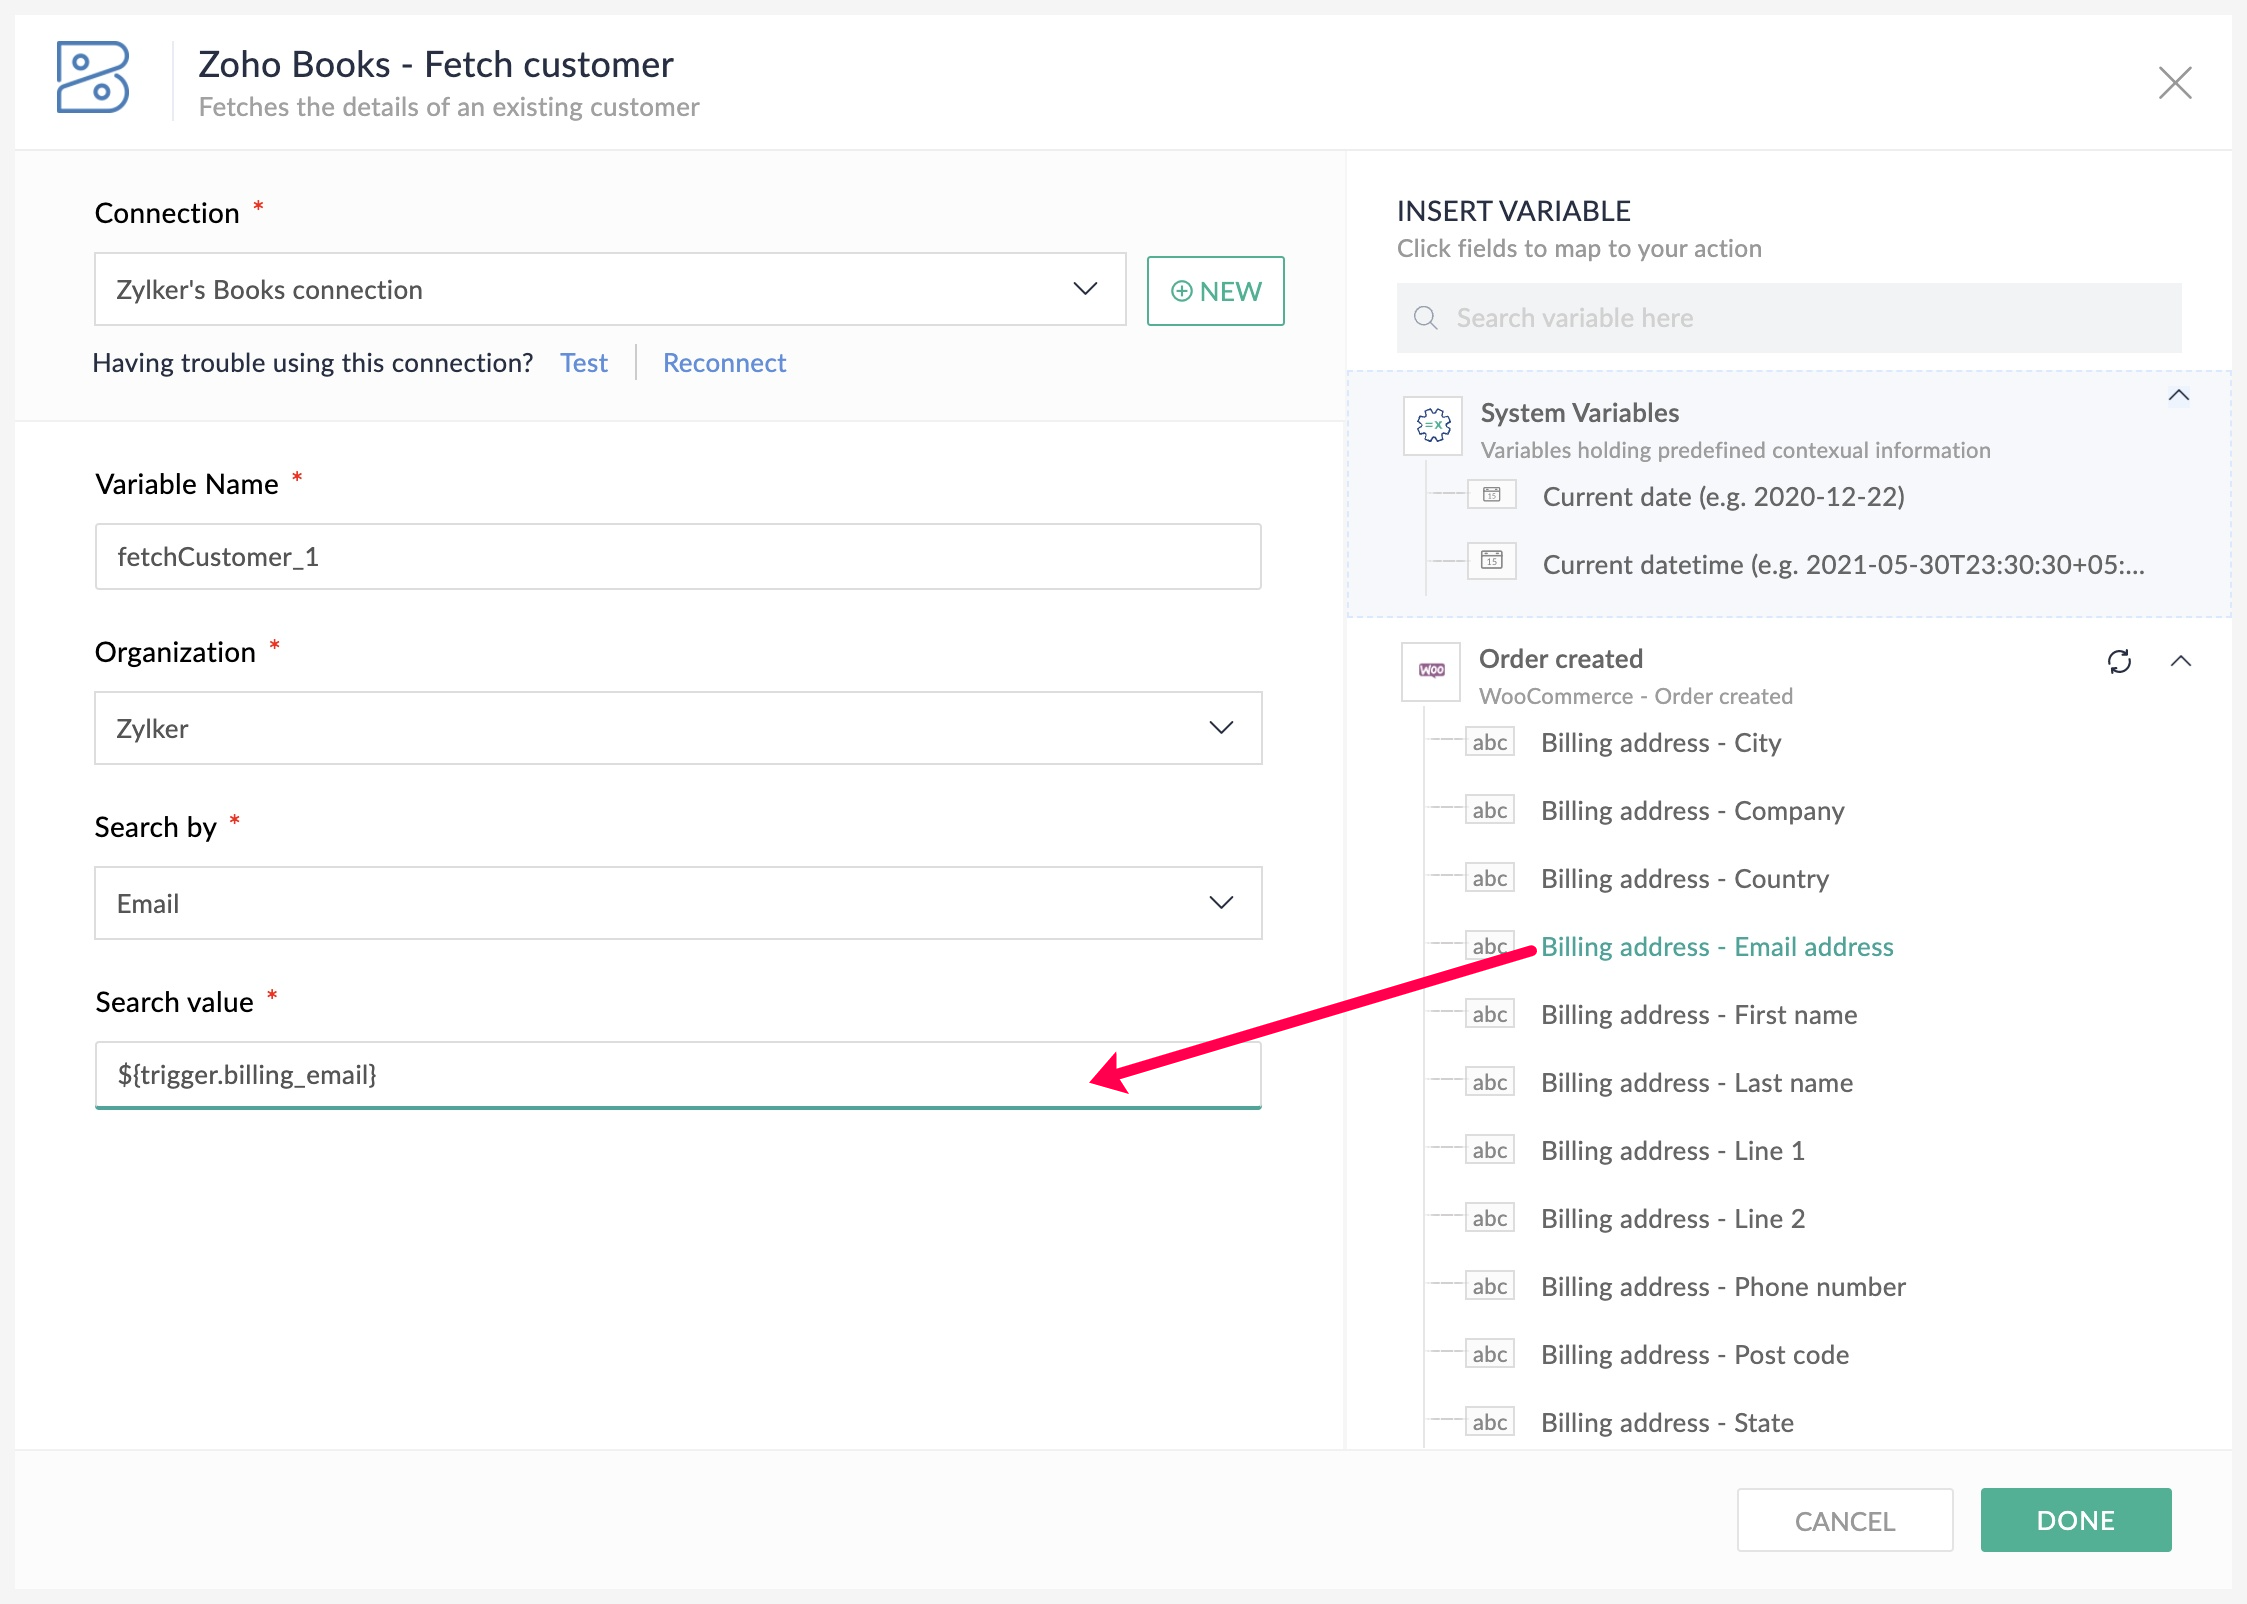
- To configure it, provide a variable name, then select your organization from the drop-down.
- In the Searchby field, select the unique identifier by which you want to search for the customer in Zoho Books. Emailaddress is a good choice, as it is unique for each customer.
- Then, for Search value, map the value passed from the WooCommerce trigger from the Insert Variable section on the right. Then, click Done.
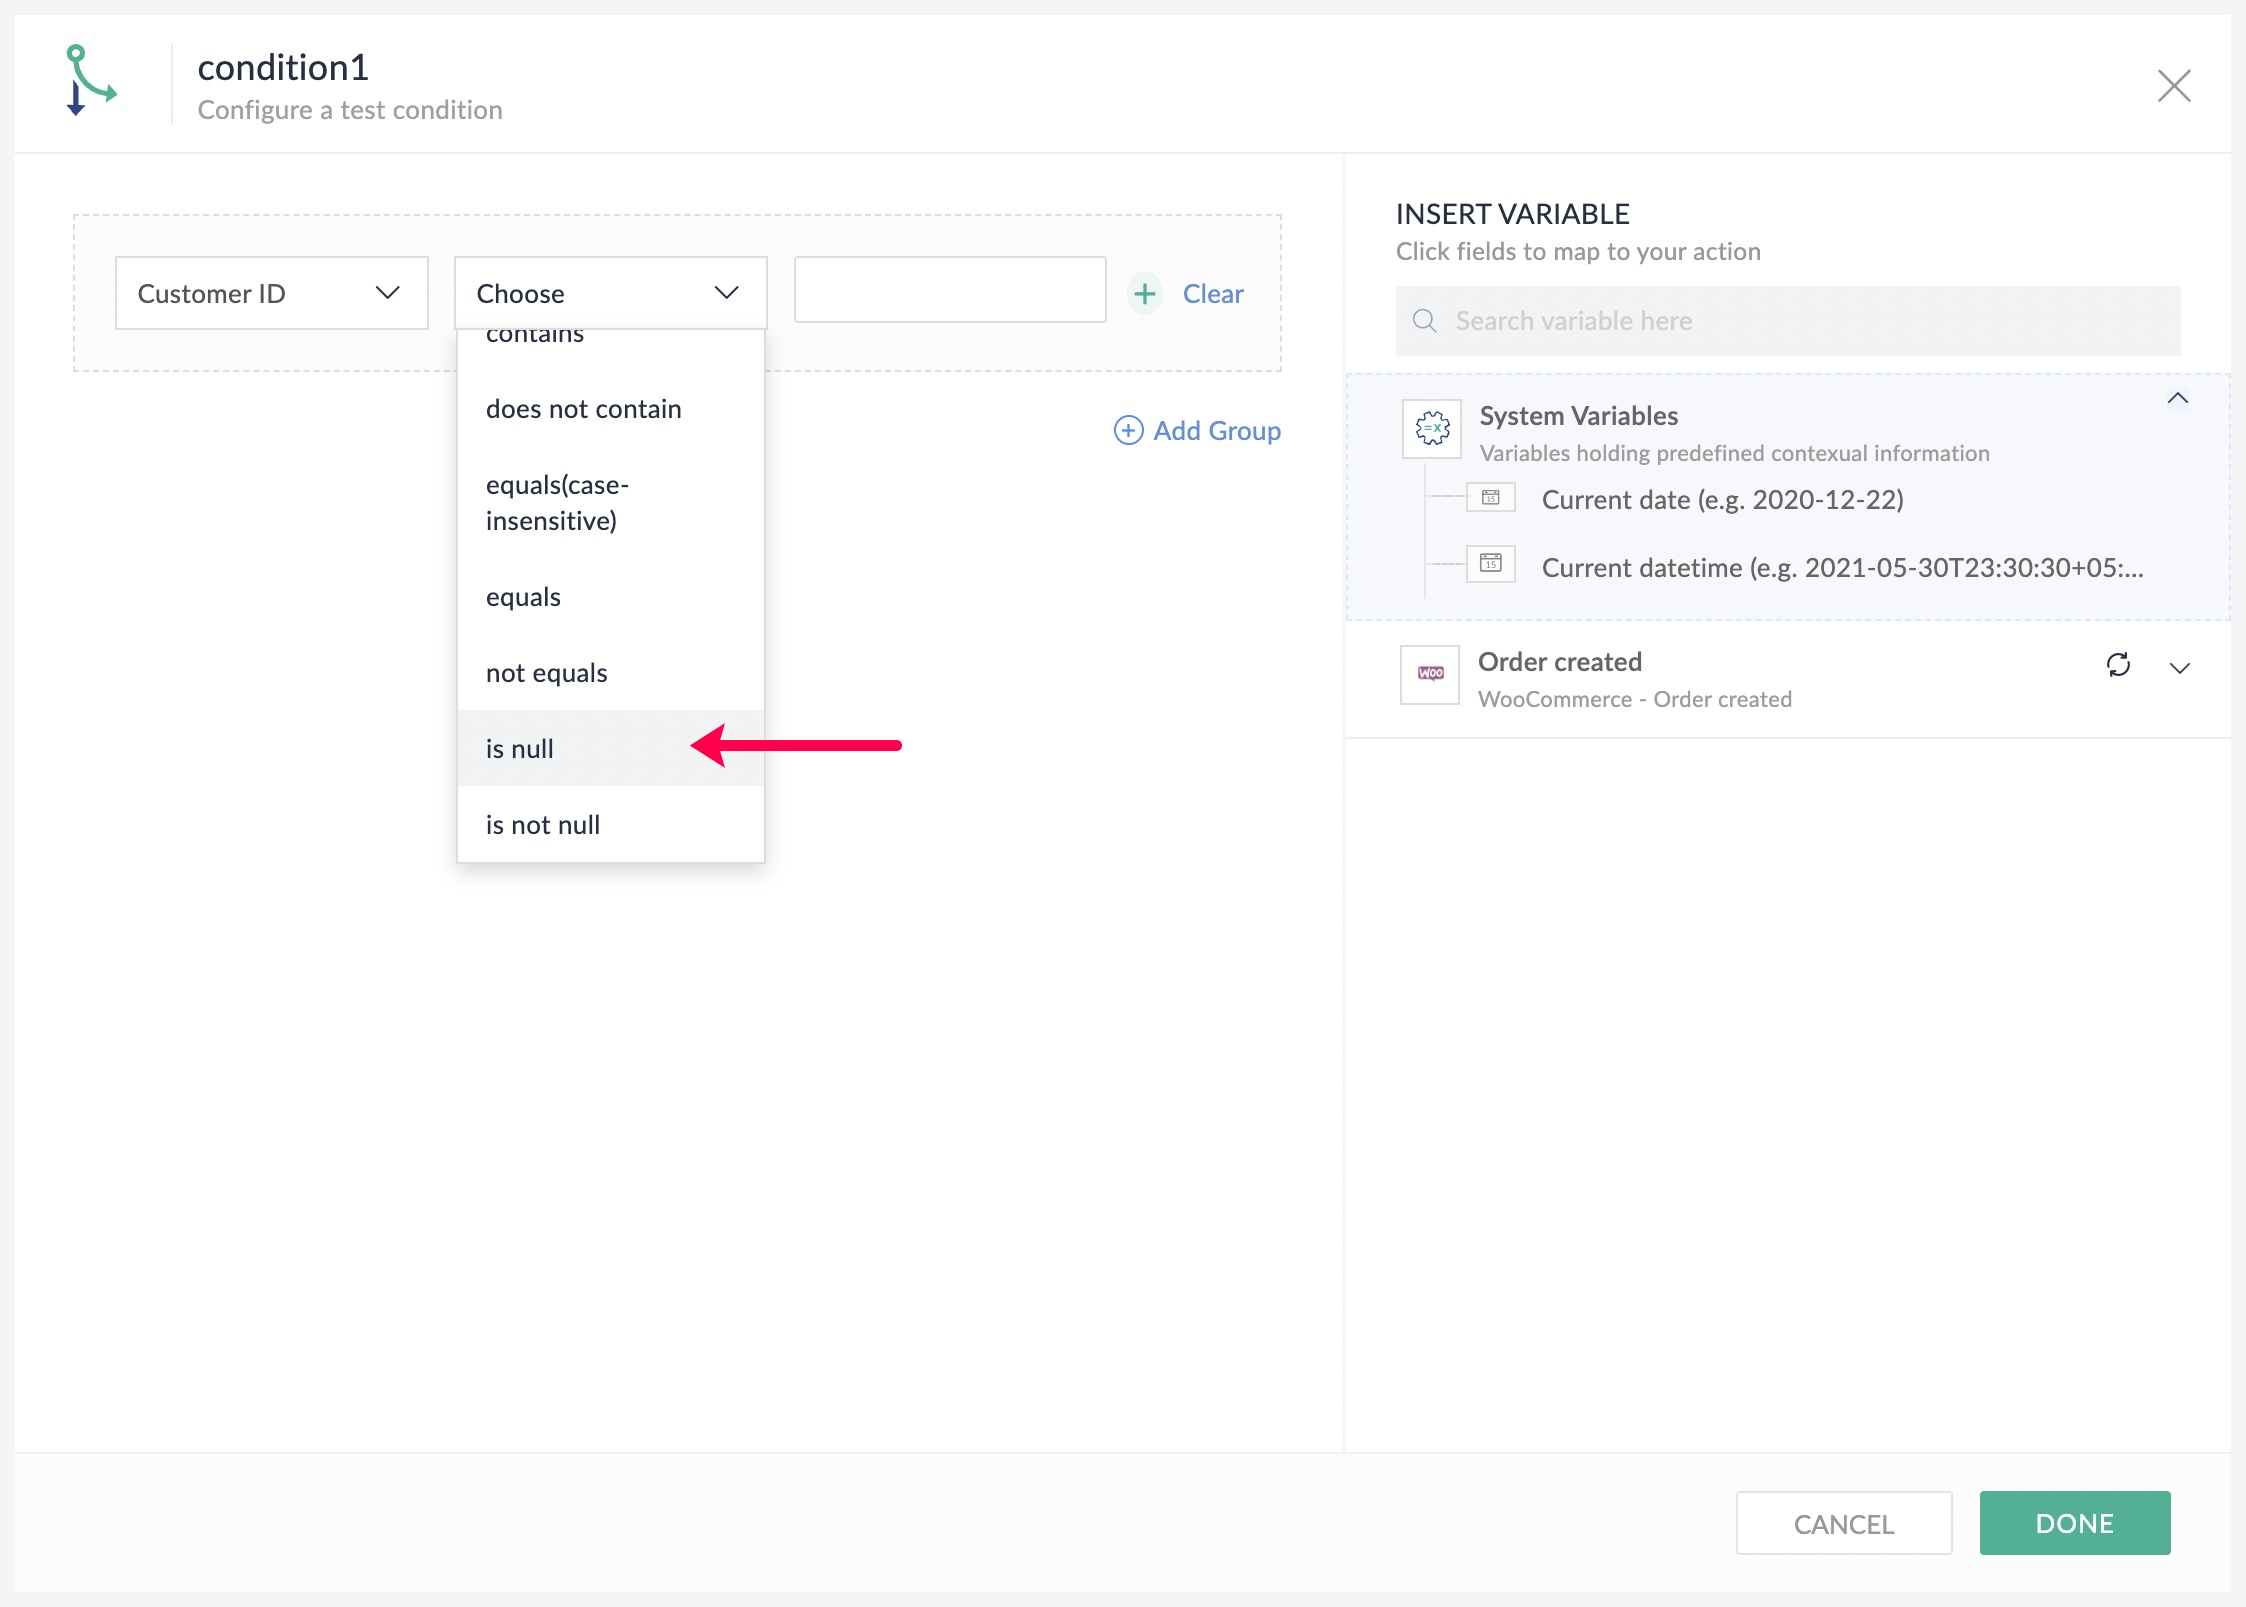
The Fetch customer action will check for a customer in Zoho Books with the mapped email address. If it returns any information (for example, Customer ID), it means the same customer exists in Zoho Books. Otherwise, it doesn't. The same logic can be used in Zoho Flow using conditional decisions. - On the left section of the builder, navigate to Logic. Then, from Flow control, drag and drop Decision to the builder.
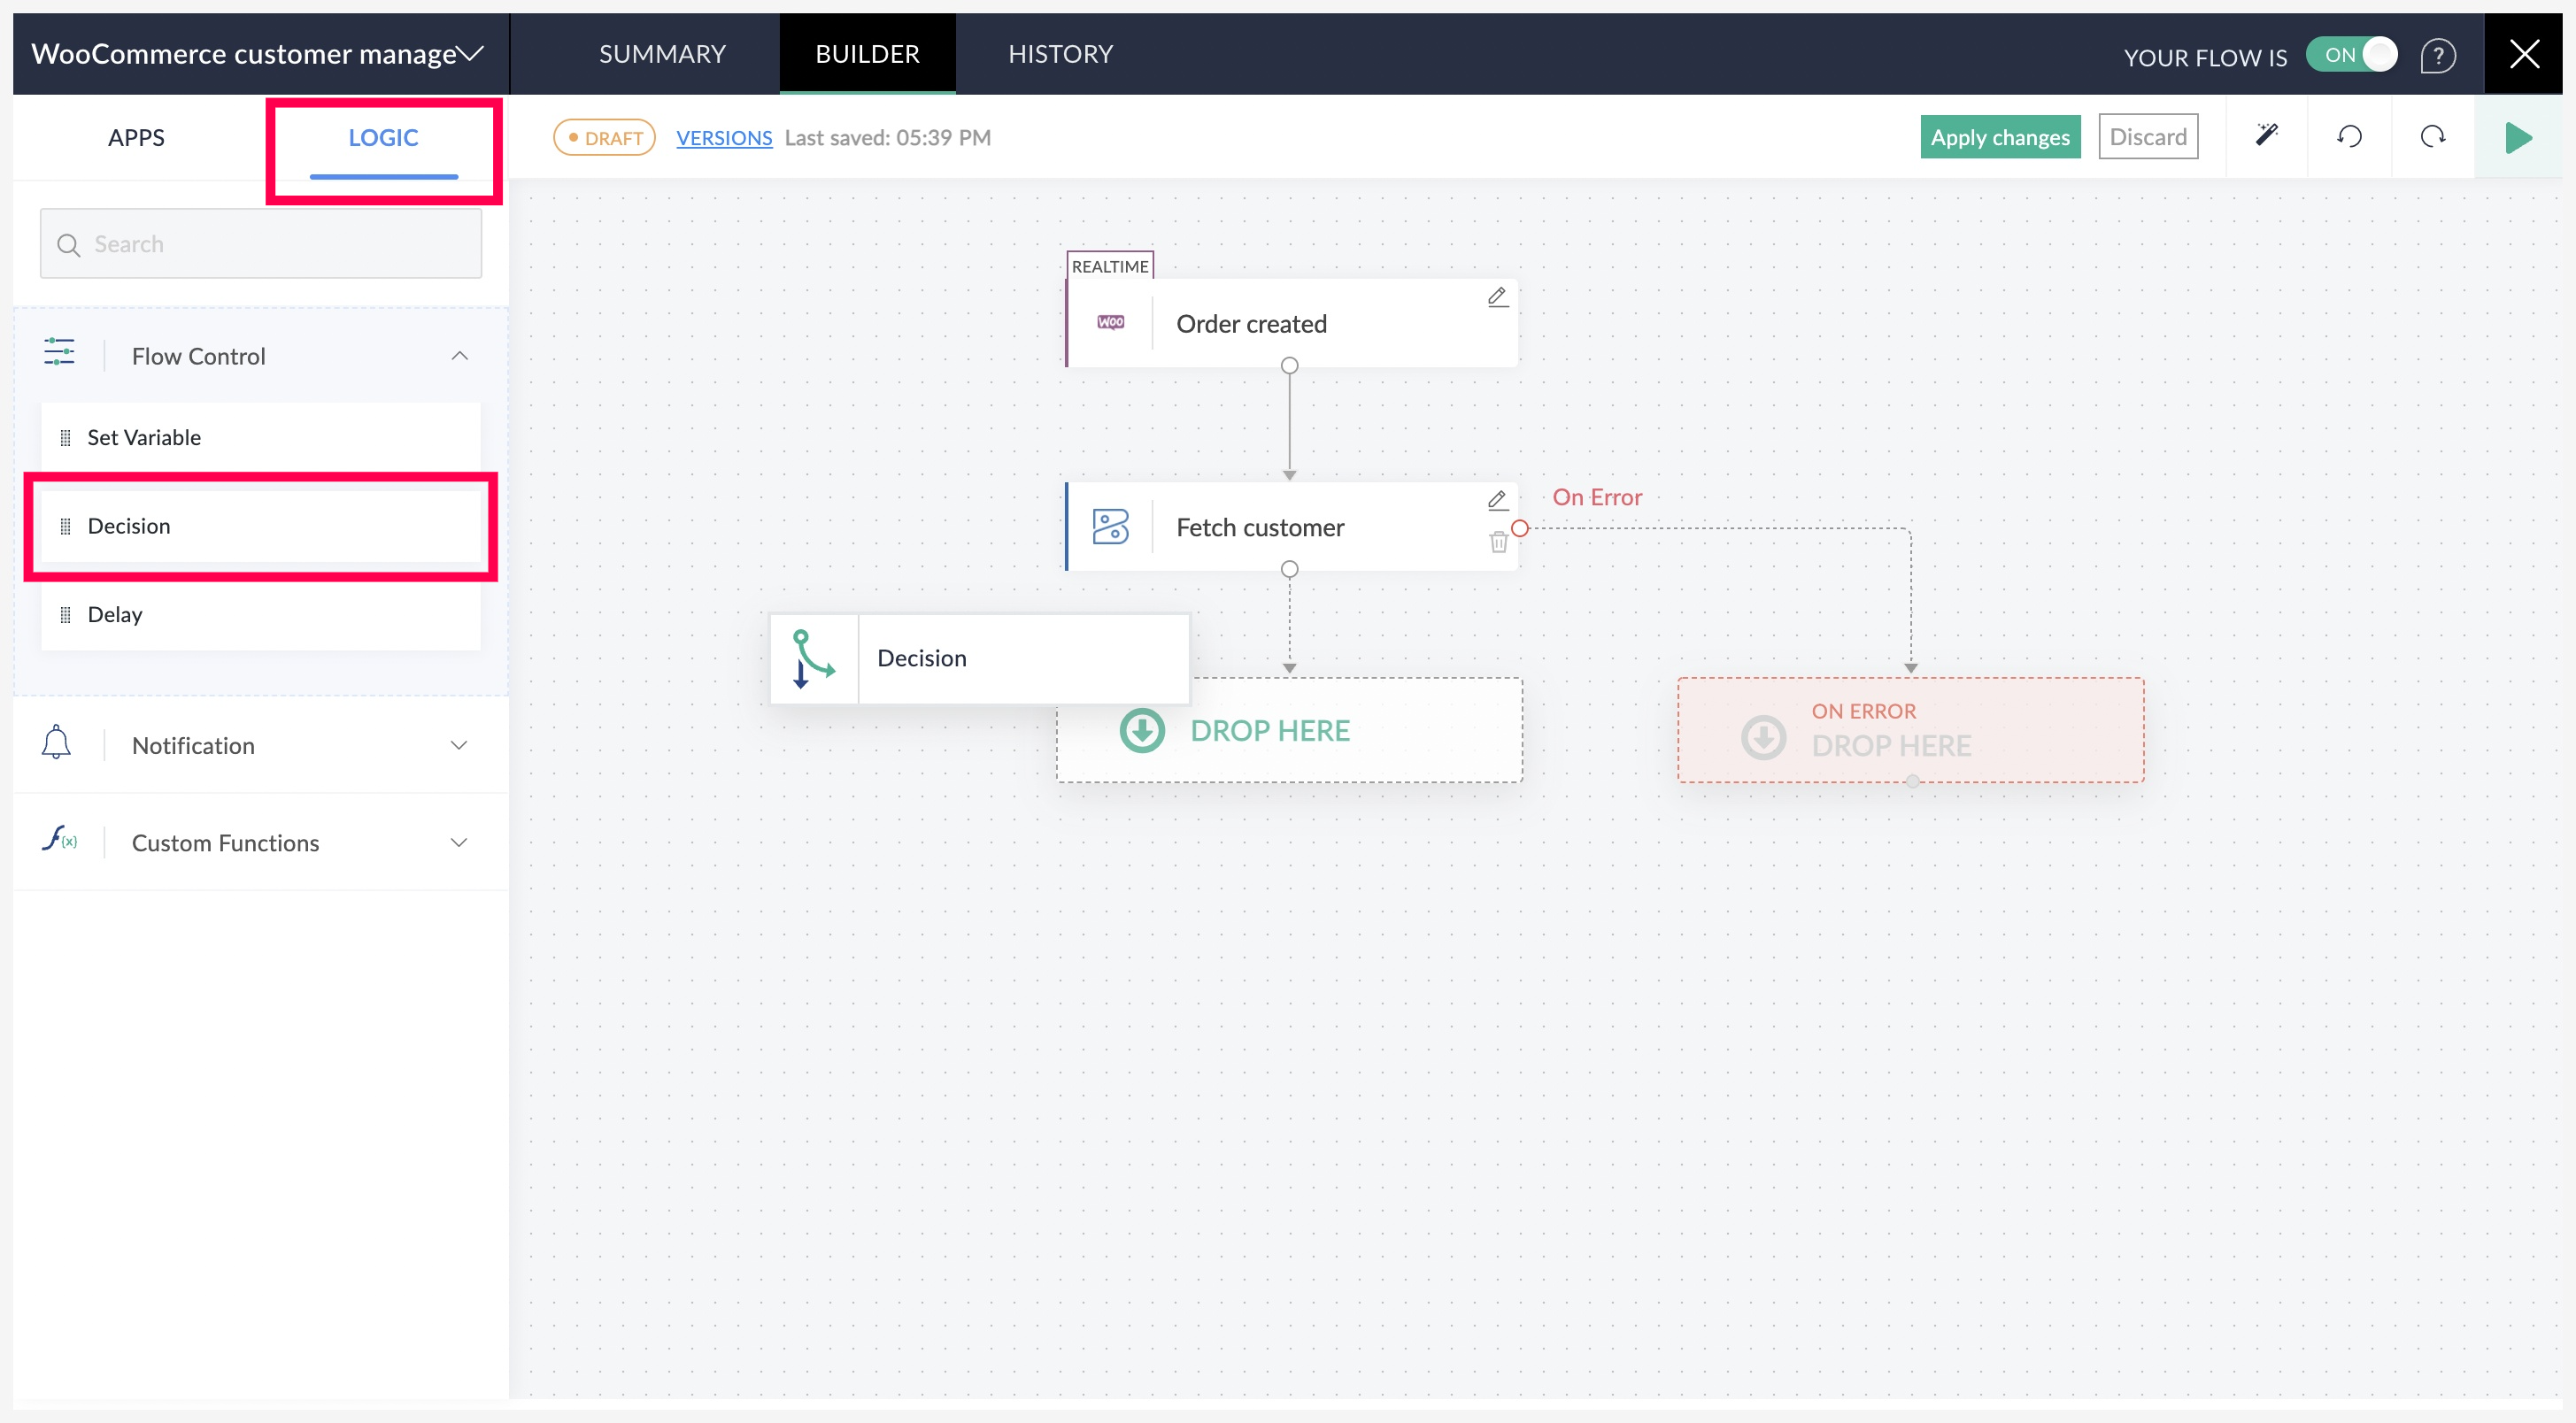
- Configure the condition as Customer ID is null. Then, click Done.
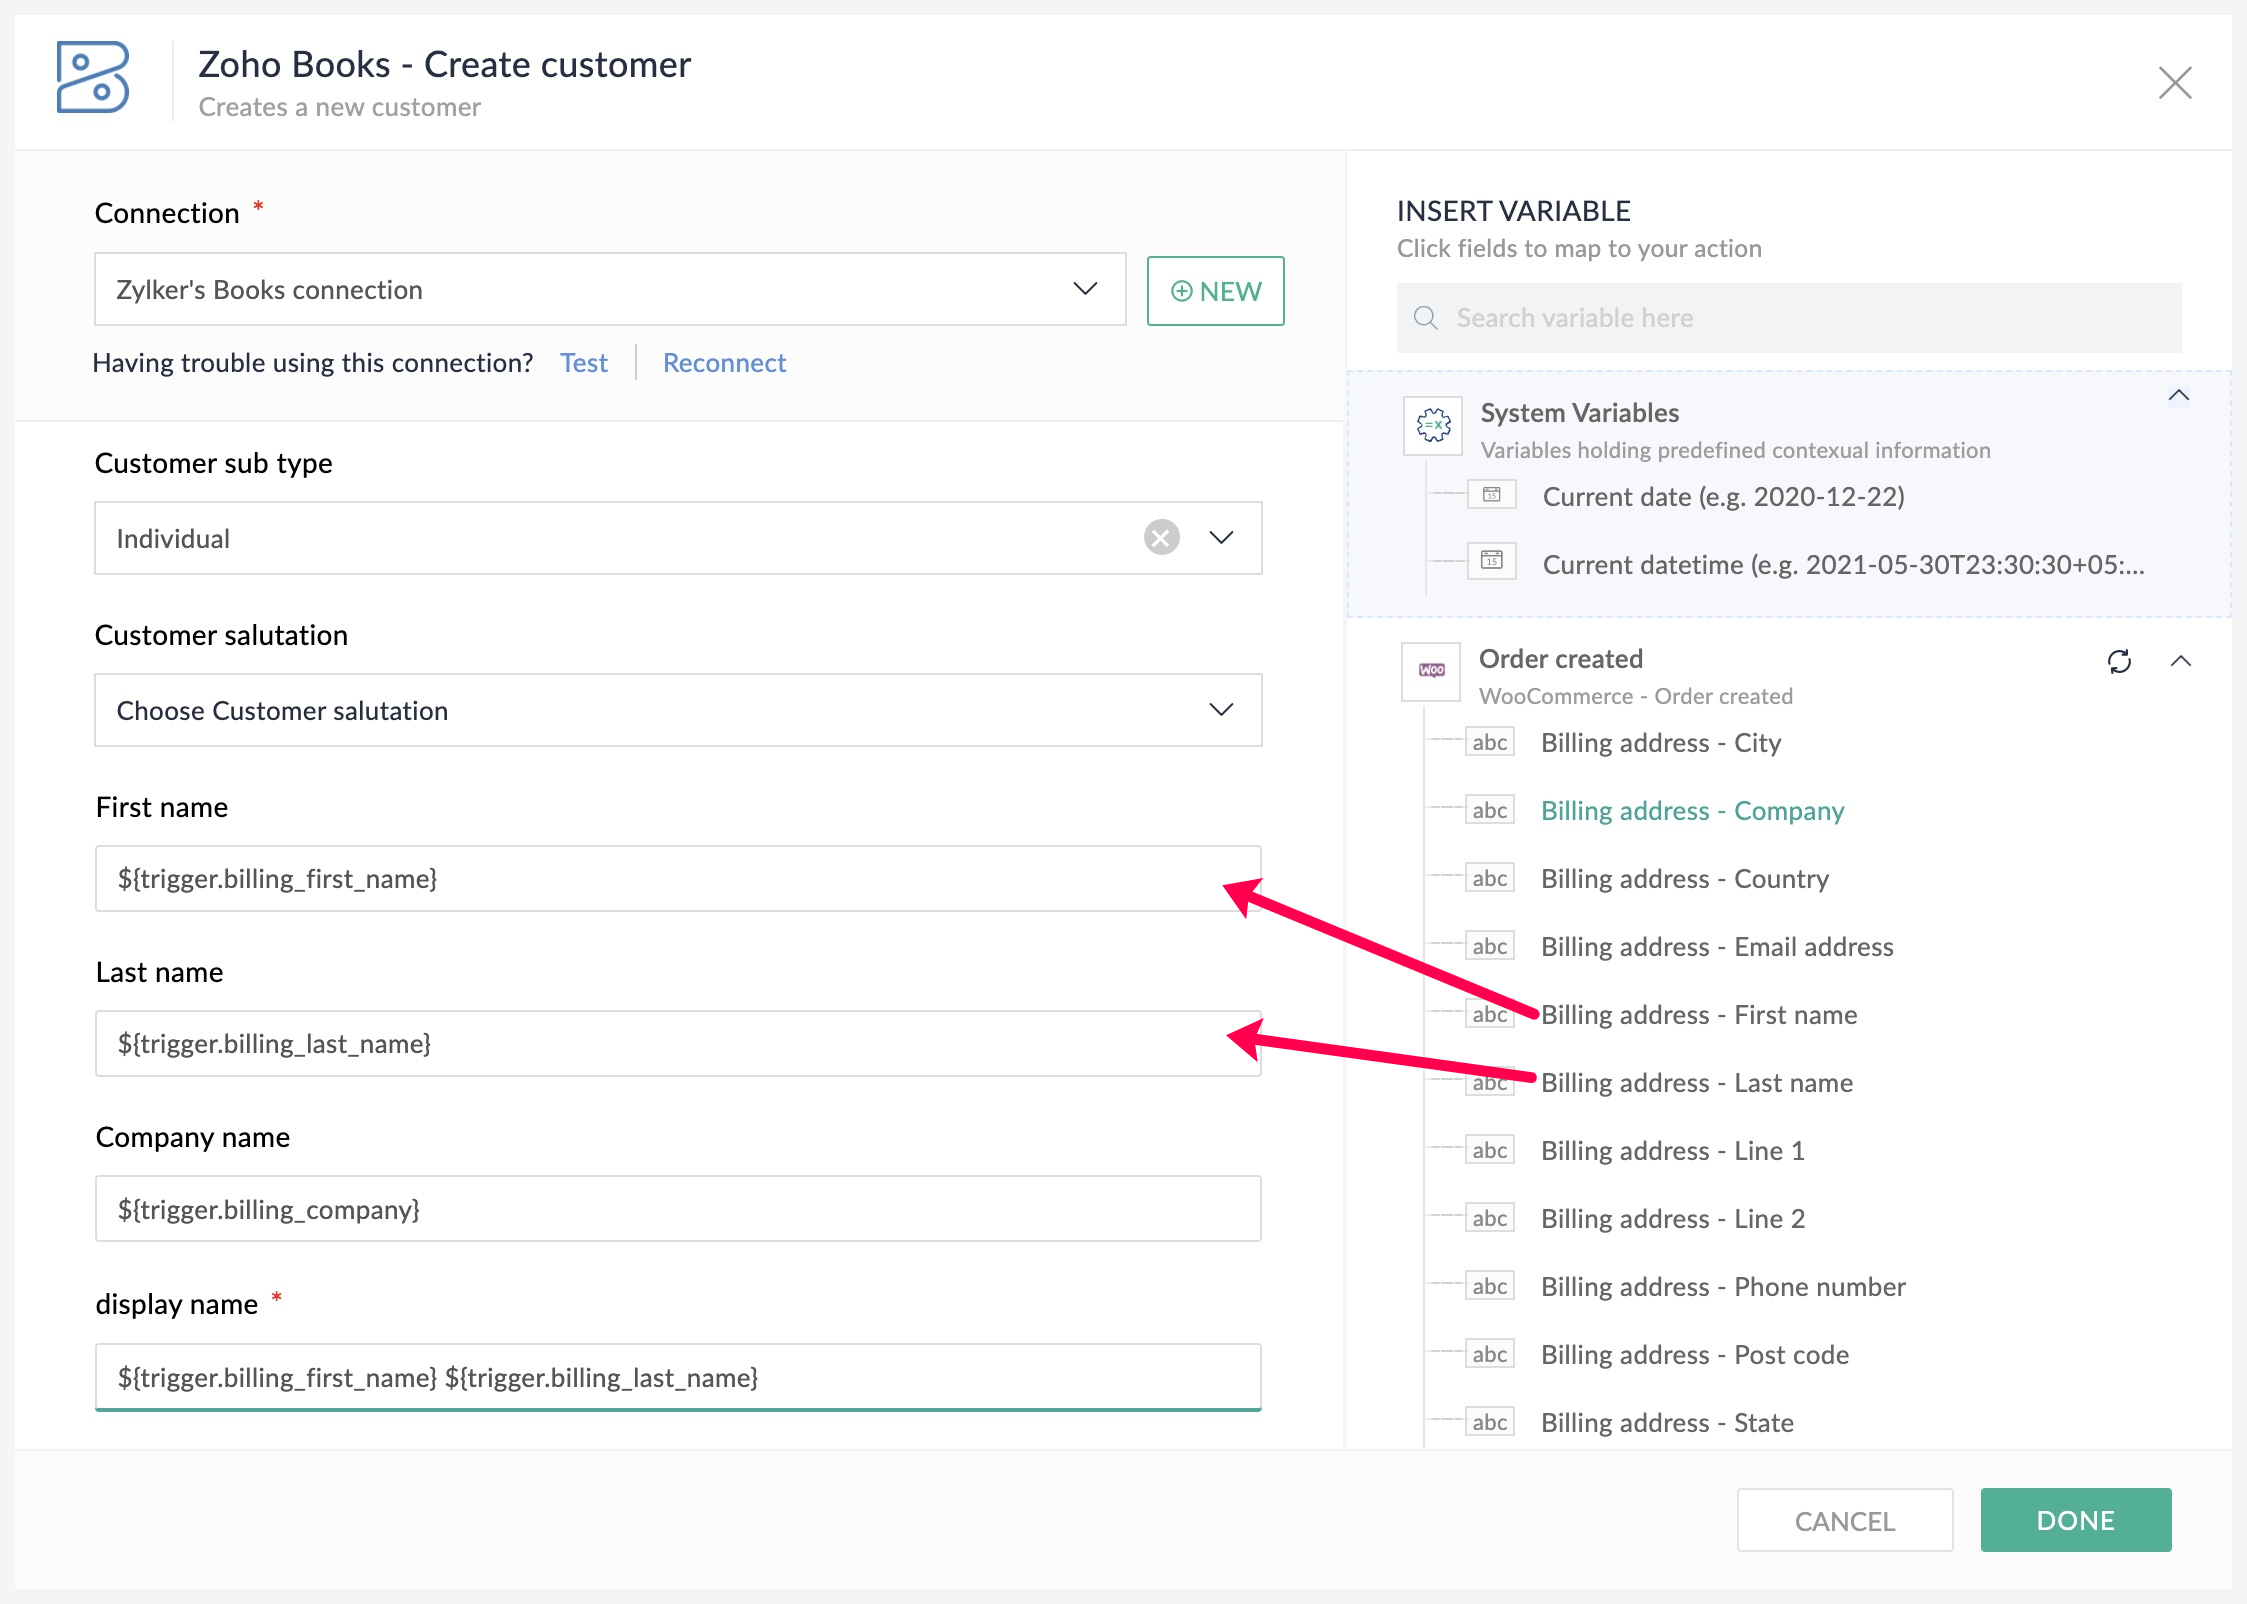
- Now on the right side of the decision box, attach the Create customer action (Zoho Books).
- Map the variables from the WooCommerce trigger to the respective fields that are required, then click Done.
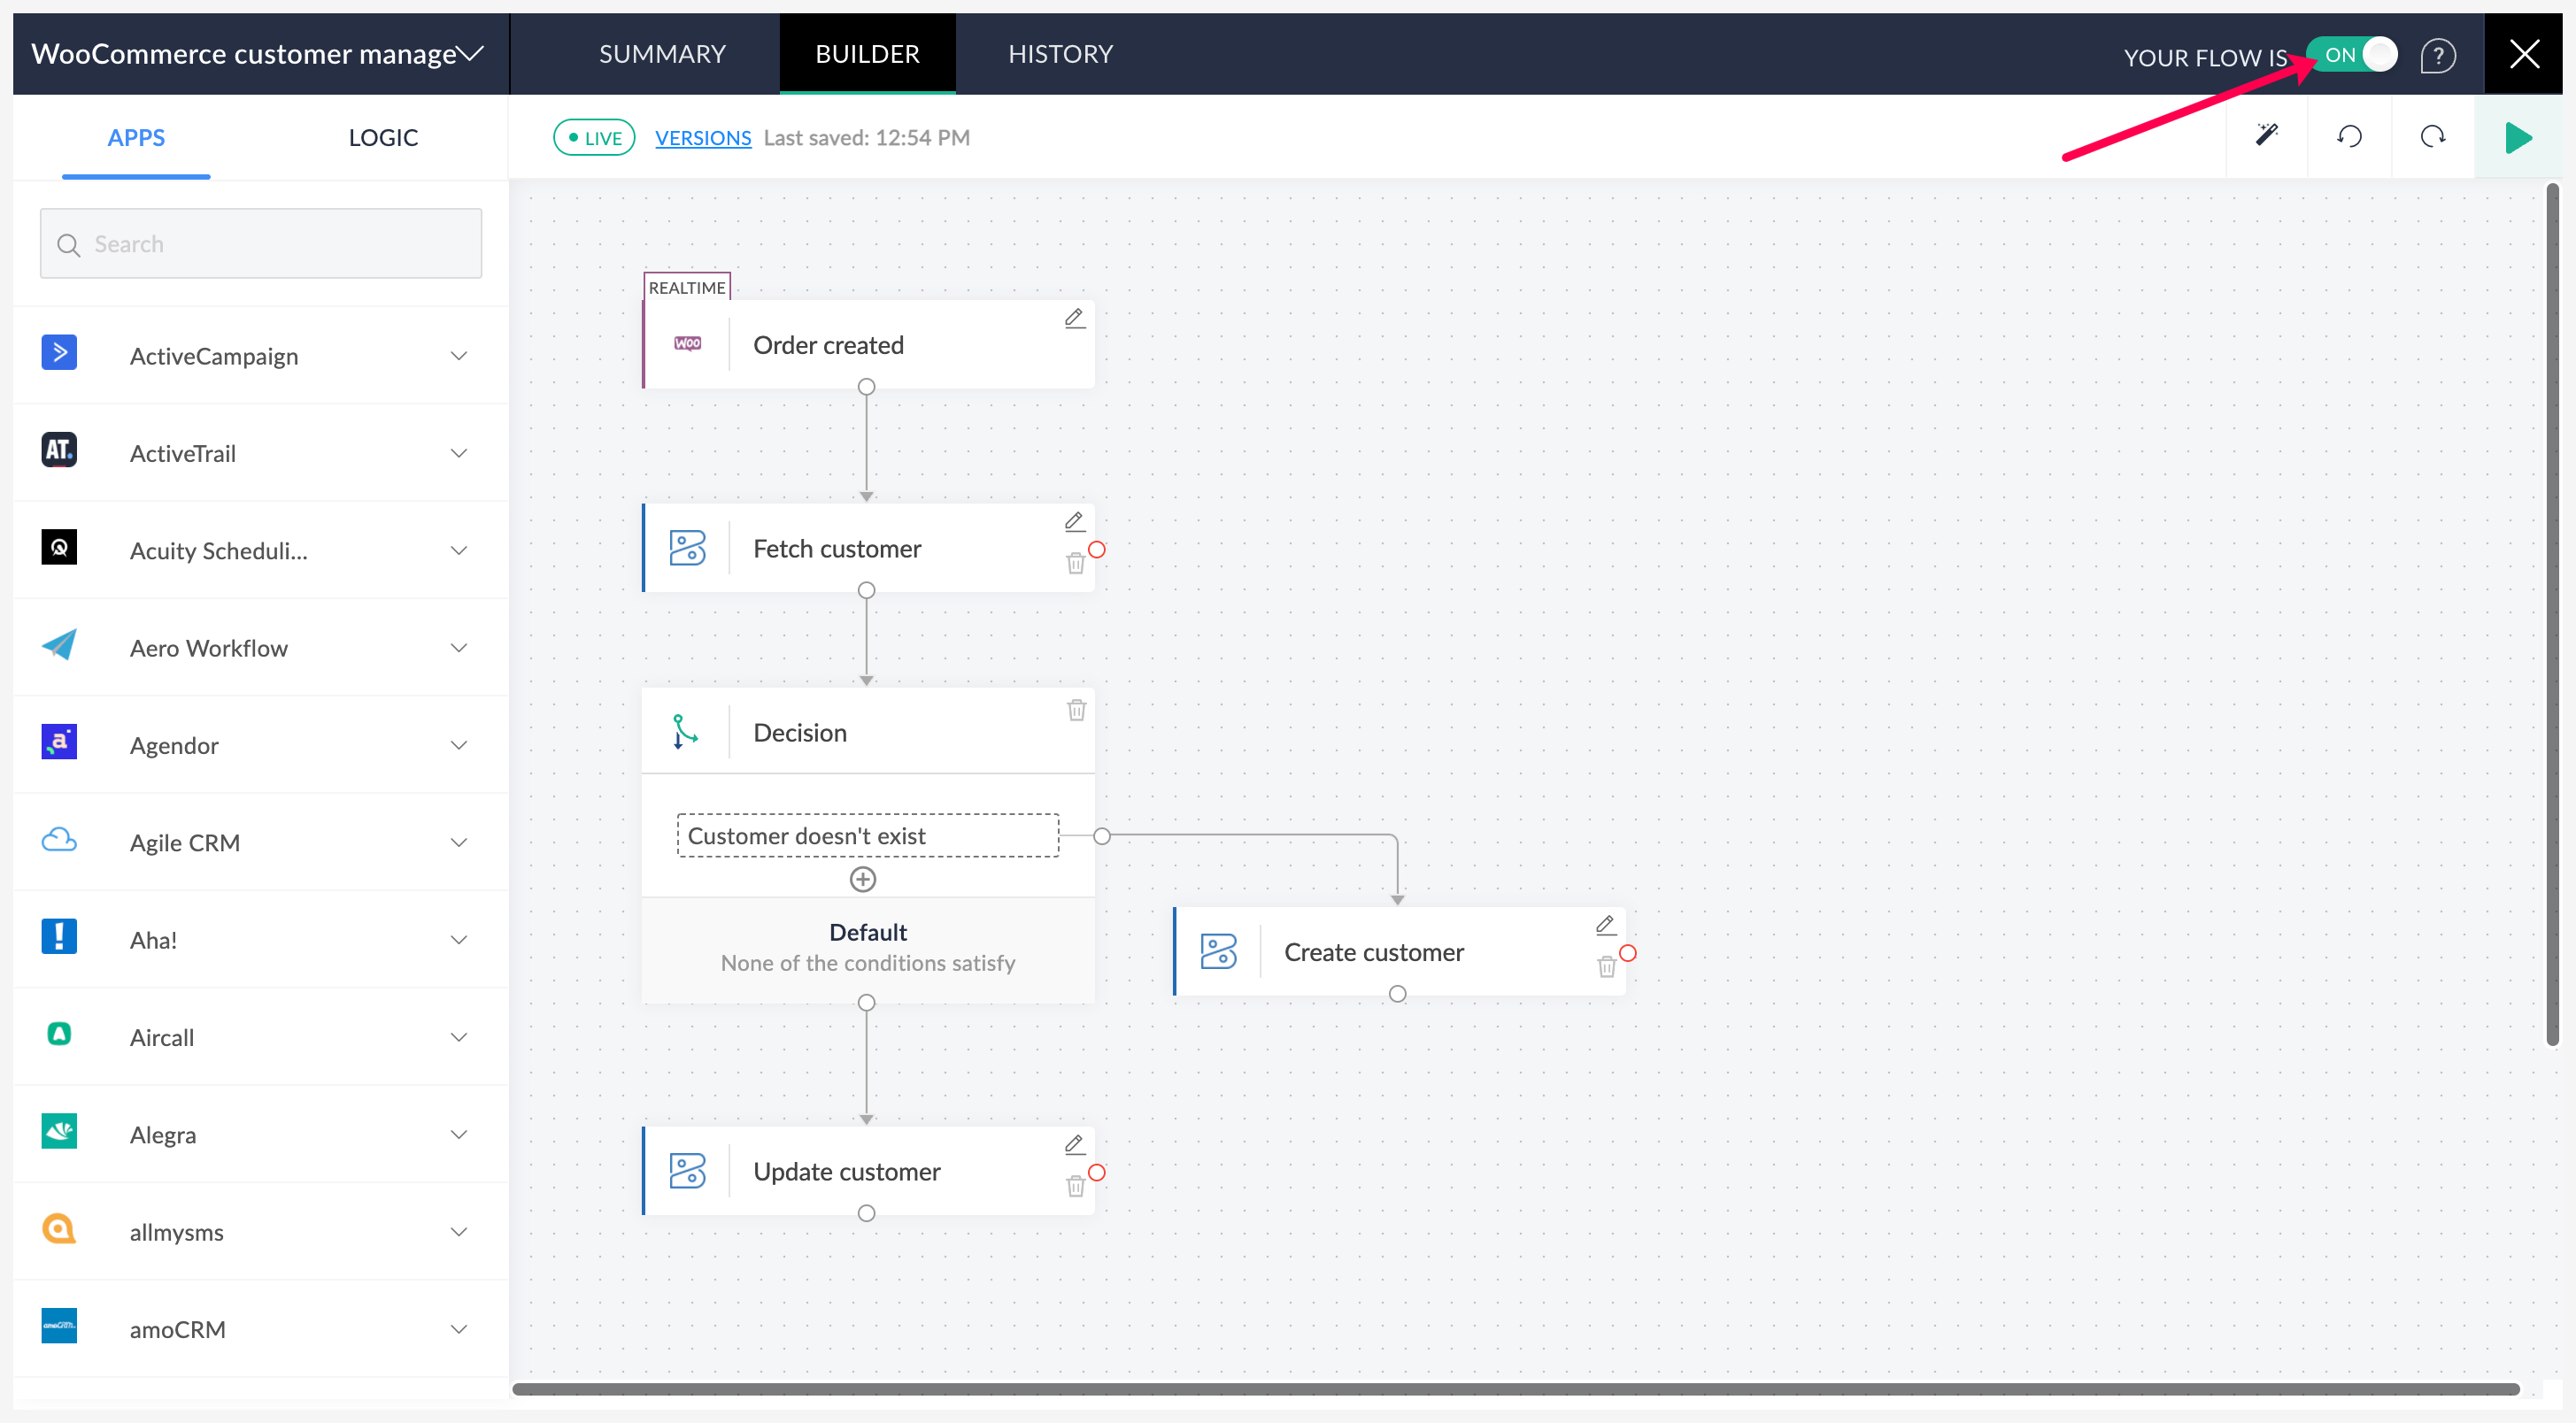
- Similarly, attach the Update customer action to the bottom of the decision box, and follow the same steps performed on the Create customer action.
The above step ensures that if the same customer exists in Zoho Books, their details are updated with the latest information passed from their WooCommerce order. If you don't want the customer details to be updated, skip the Updatecustomer action. - Next, click Test and Debug on the top-right of the builder to check for any possible errors. You'll need to create a sample test order in WooCommerce to test the flow.
- Once everything is configured correctly, switch the flow on.
You can add more steps to the above flow if there are other tasks that accompany customer creation in Zoho Books. For example, you may need to create a new contact, or check the customer against an existing lead in your CRM. 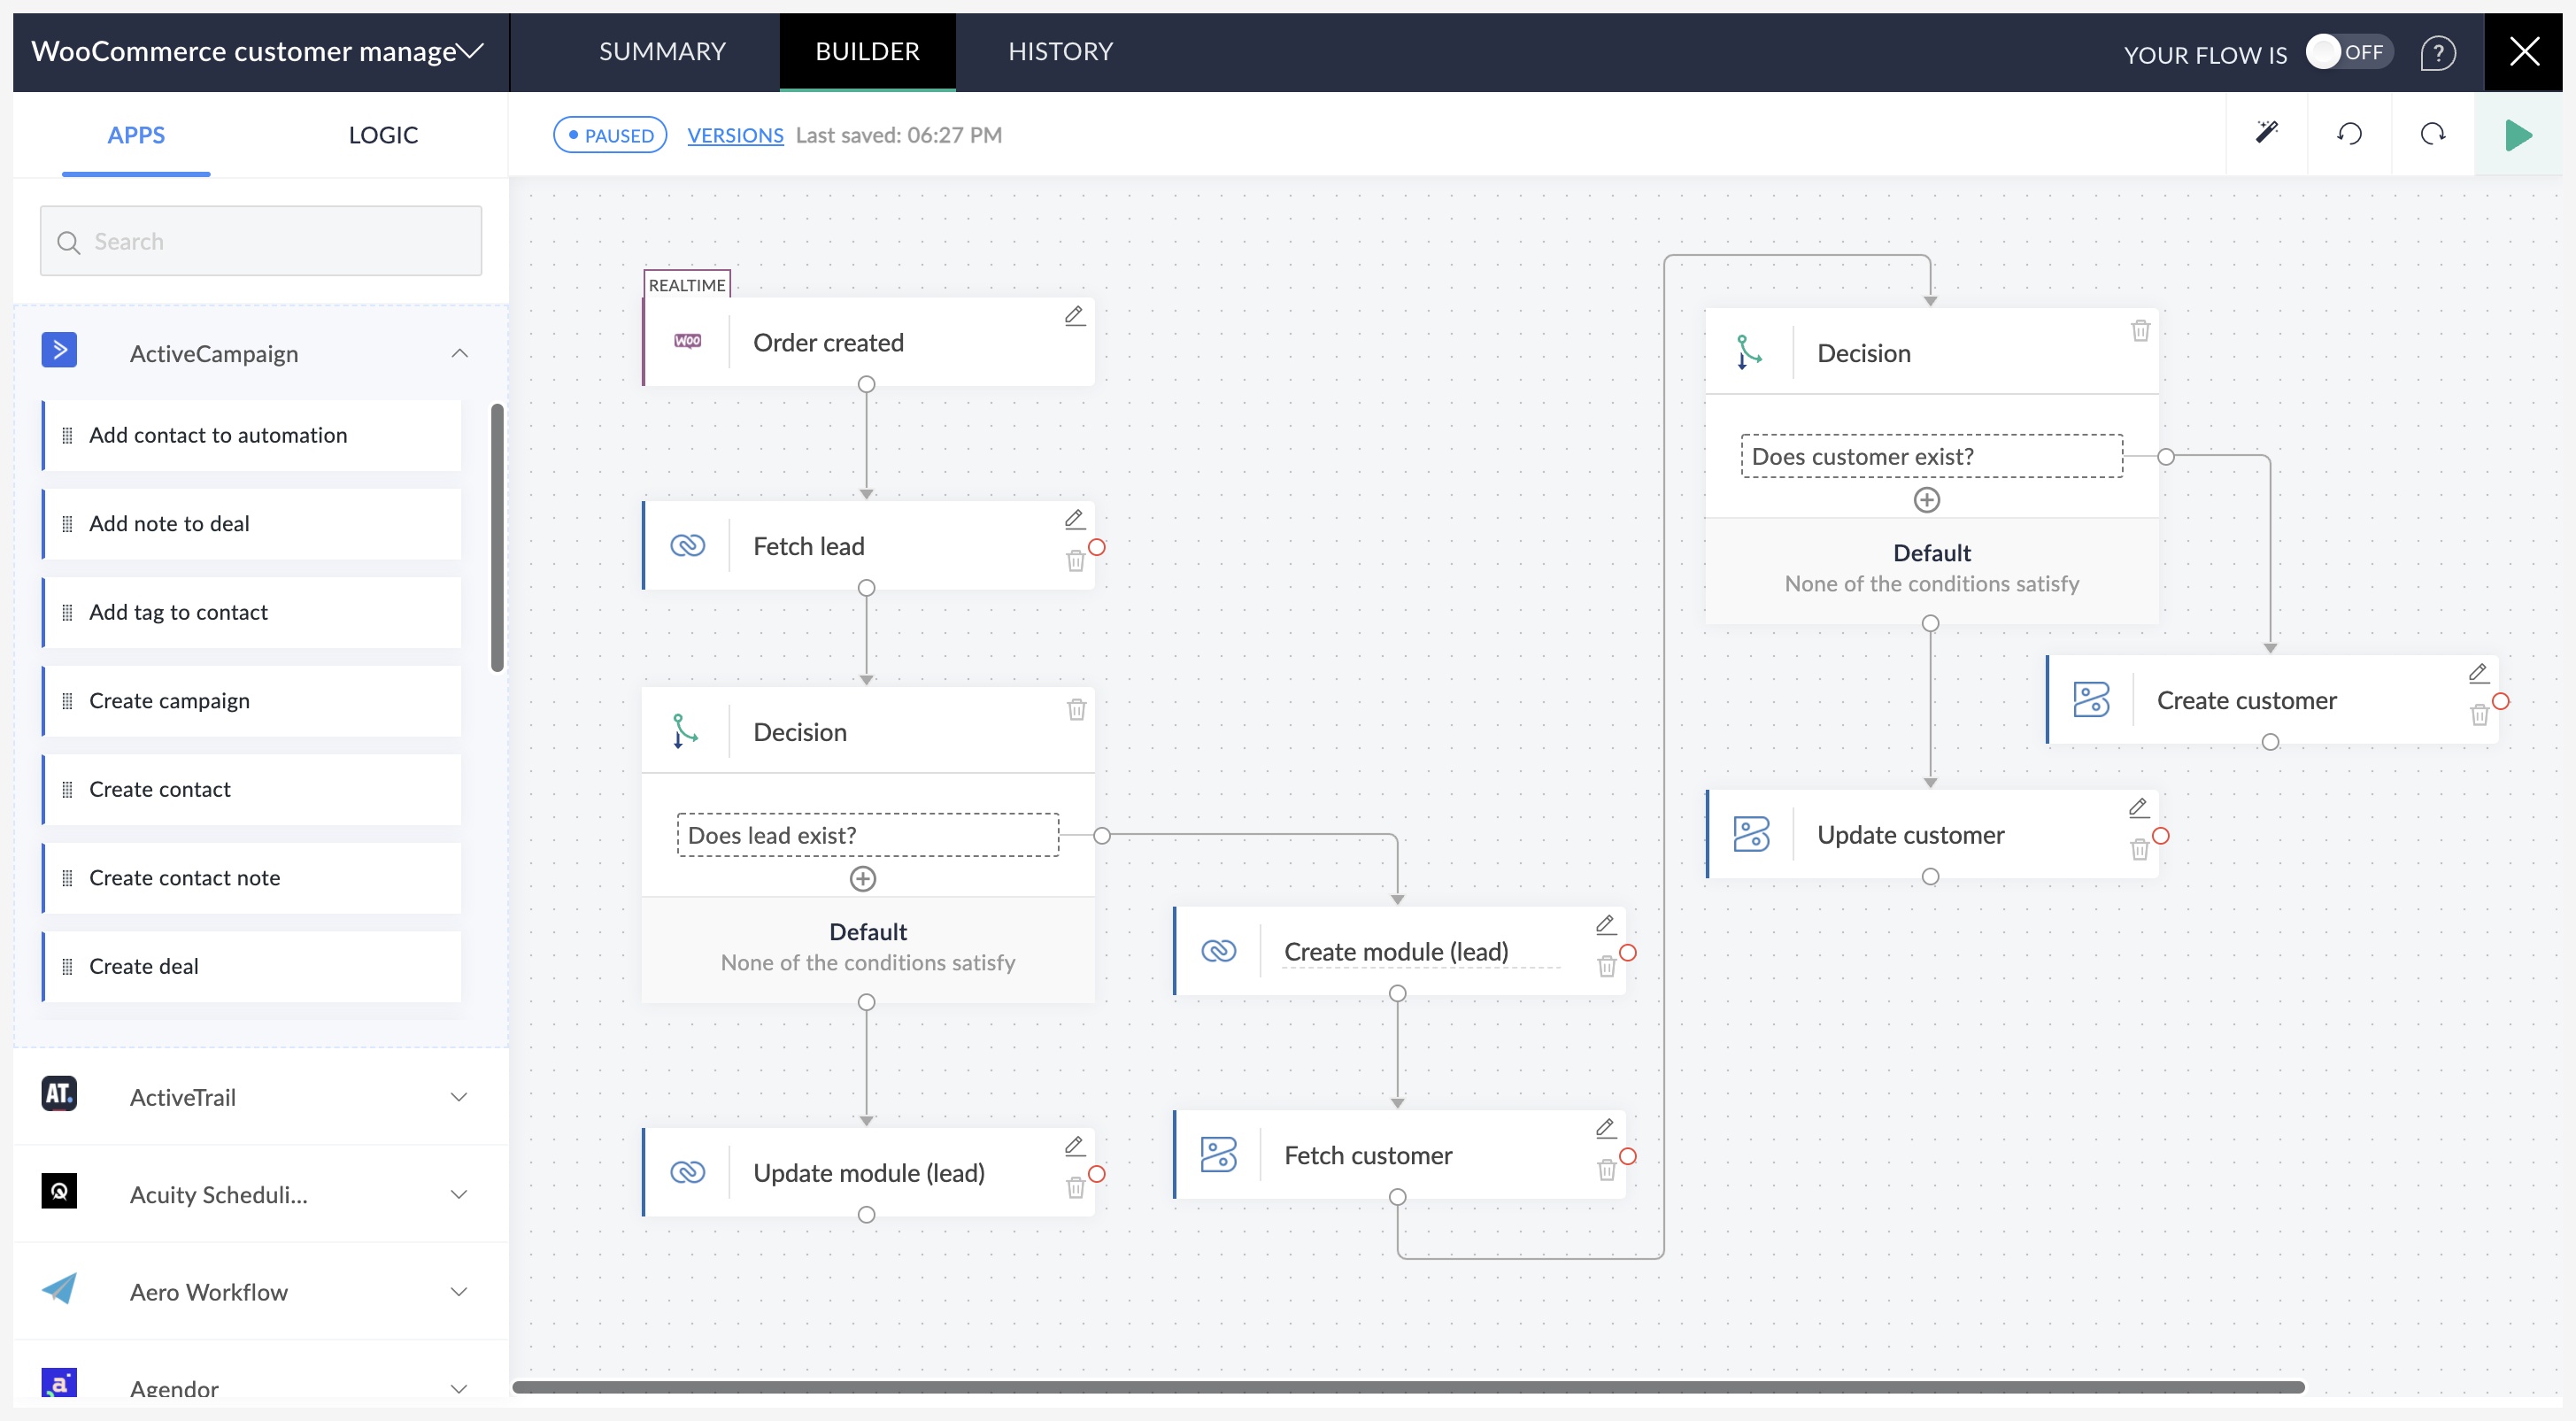
This is just one of the many tasks that can be automated for a business running an online store. You can also set up flows to automate inventory management, payment gateways, notifications, and more. You can use the Flow Builder in Zoho Flow to create customized workflows exactly the way you want.
If you need any help setting up these workflows for your business, or would like to know more about how Zoho Flow can help in building your SaaS ecosystem, please write to us at support@zohoflow.com.
 Arjun
ArjunProduct Marketer at Zoho Flow: Passionately curious, with a love for thinking, writing, and exploring creative ways to connect people with science and technology.