How to integrate Ninja Forms and Zoho CRM to automate lead management
- Last Updated : March 17, 2025
- 2.5K Views
- 5 Min Read
If you're a business owner and use WordPress to power your website, you're most likely using an online form builder to generate leads, collect contacts and feedback, and conduct surveys. Among them, generating and managing leads would be one of your biggest marketing challenges. That's probably why 50% of marketers say inbound marketing strategies, such as onsite forms, are their primary source of leads.
When it comes to online form builders for websites powered by WordPress, Ninja Forms is a hugely popular choice because of its beginner-friendly interface, attractive form designs, and advanced features.
When you capture contacts from web forms on your website, they should be properly and quickly recorded in your CRM platform to initiate communication and potentially convert them to customers. You also need to ensure that your CRM is up to date with the latest contact information, as well as avoid any duplication. You'd also want your team to be notified instantly about new leads, so they can act on them immediately. Did you know that firms that respond to leads within an hour were nearly seven times more likely to have quality conversations with important decision makers?
Such a workflow, if performed manually, would be immensely laborious, and will rack up human errors. However, if you use an automation platform such as Zoho Flow, you can not only automate this particular workflow, but also numerous others—saving you hours of otherwise unproductive time. You can set up these workflows (we call them flows) once, and your data will securely move between the connected apps going forward.
Prerequisites
- Your WordPress account must have the Ninja Forms plugin installed
- Your WordPress account must have the Zoho Flow plugin installed
- A Zoho CRM subscription
- A Zoho Flow subscription
How to set up the flow
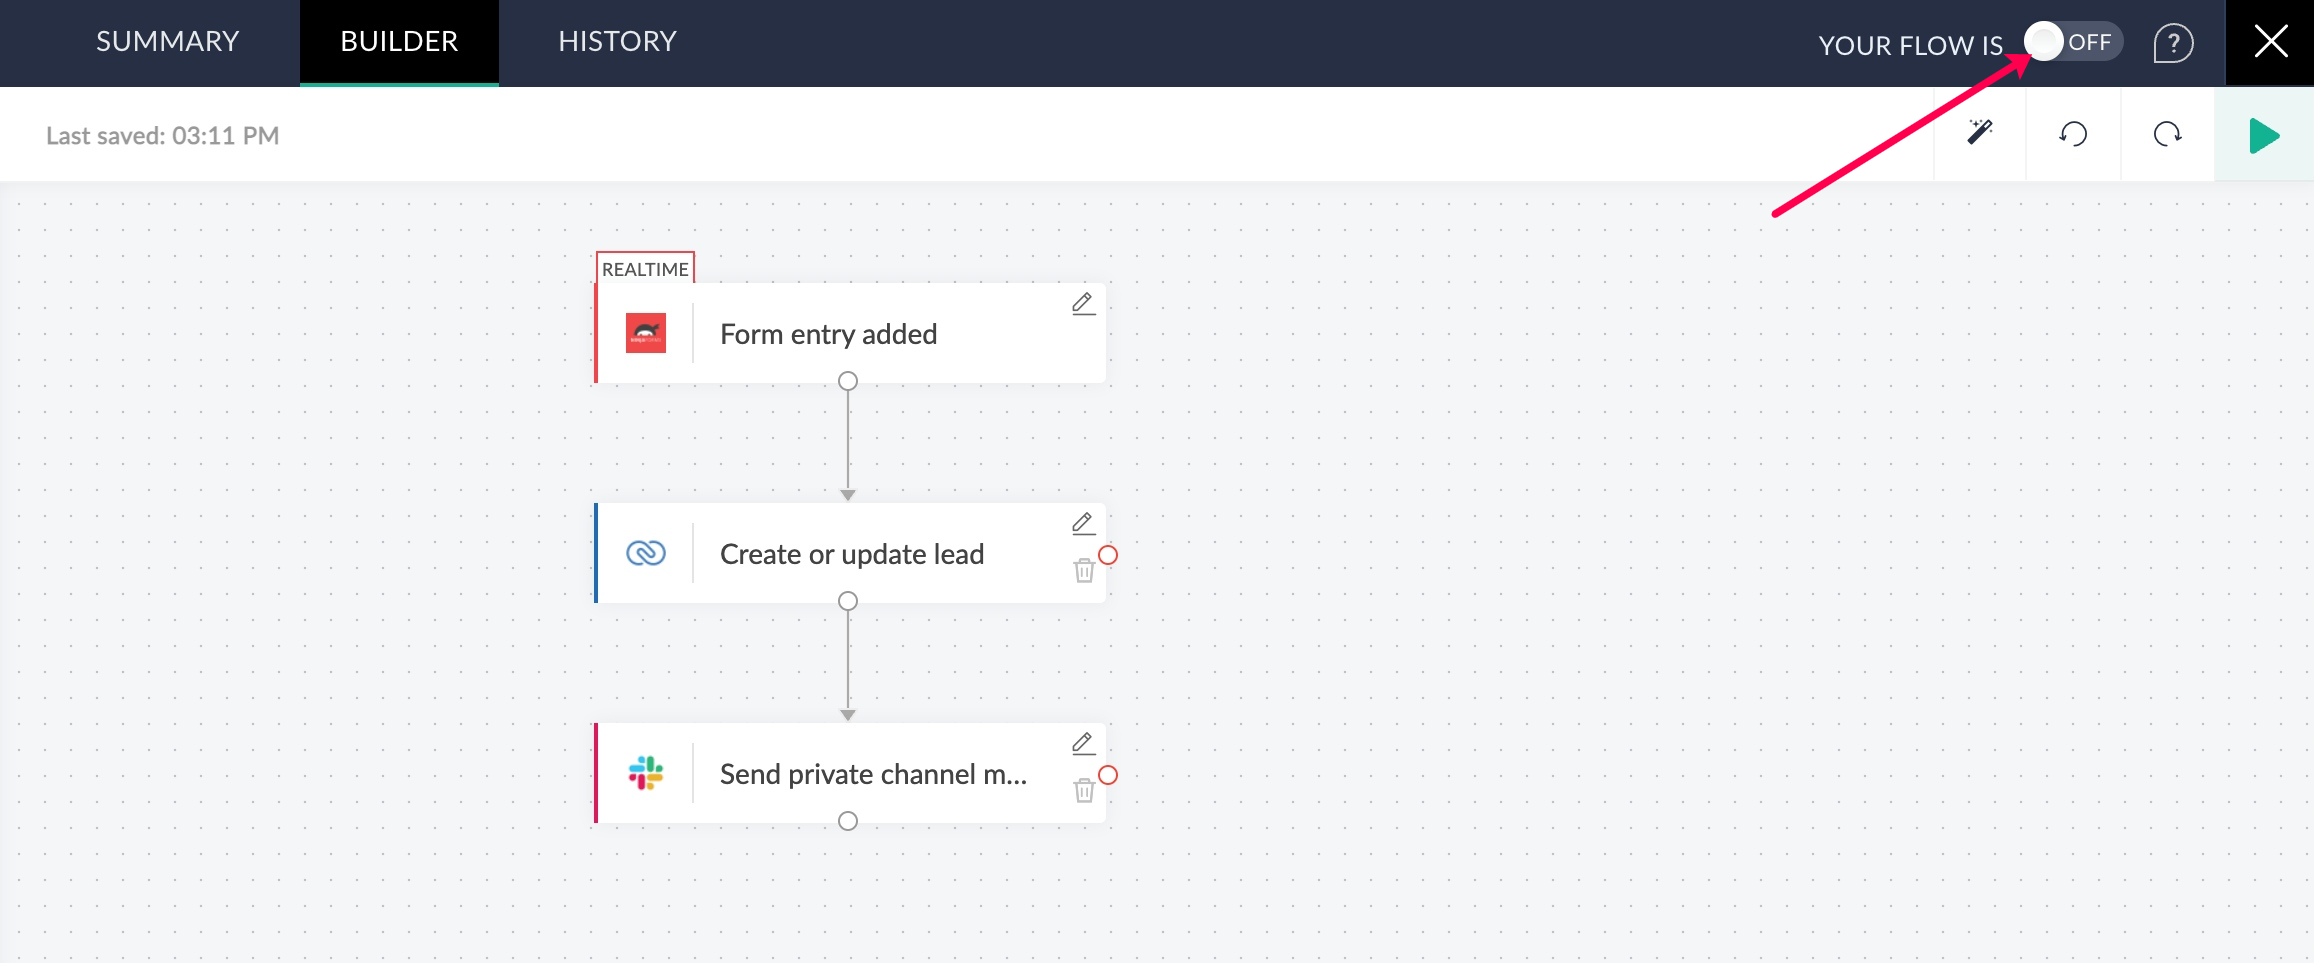
The steps of the workflow should be set up in the same way a human would carry out the task. First, you need to receive the information collected in the form. Then you need to check if the lead already exists in your CRM. If it exists, then you just need to update the information. Otherwise you need to create a new record. Then, you need to send a channel message to your sales team with the lead's contact information for them to follow up.
Let's go ahead and configure these steps as a workflow in Zoho Flow:
Step 1: Set up the Zoho Flow plugin in your WordPress account
You need to install and activate the Zoho Flow plugin in your WordPress account to create connections for WordPress plugins such as Ninja Forms, Gravity Forms, and so on. If you already have the Zoho Flow plugin activated, proceed to step 2.
- Log in to your WordPress account.
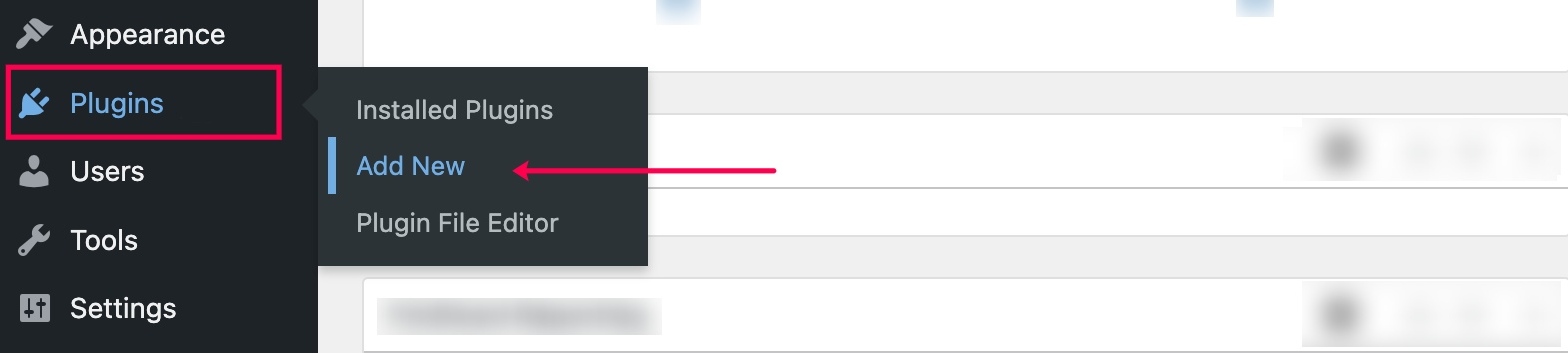
- In the left panel, navigate to Plugins.
- Click Add new.
- Then, search for Zoho Flow and click Install now.
- Alternatively, you can also download the Zoho Flow plugin and use the WordPress built-in plugin installer, or extract the contents into the wp-content/plugins/ directory of your WordPress installation.
- Once the installation is complete, activate the plugin from the Plugins menu in your WordPress admin dashboard.
Step 2: Create a new flow with the Ninja Forms trigger
- Log in to your Zoho Flow account.
- Navigate to the My Flows section on the left, then click CreateFlow at the top-right corner.
- Enter a name and description for the flow.
- Click Configure adjacent to App trigger to choose an app (NinjaForms) as your flow's trigger.

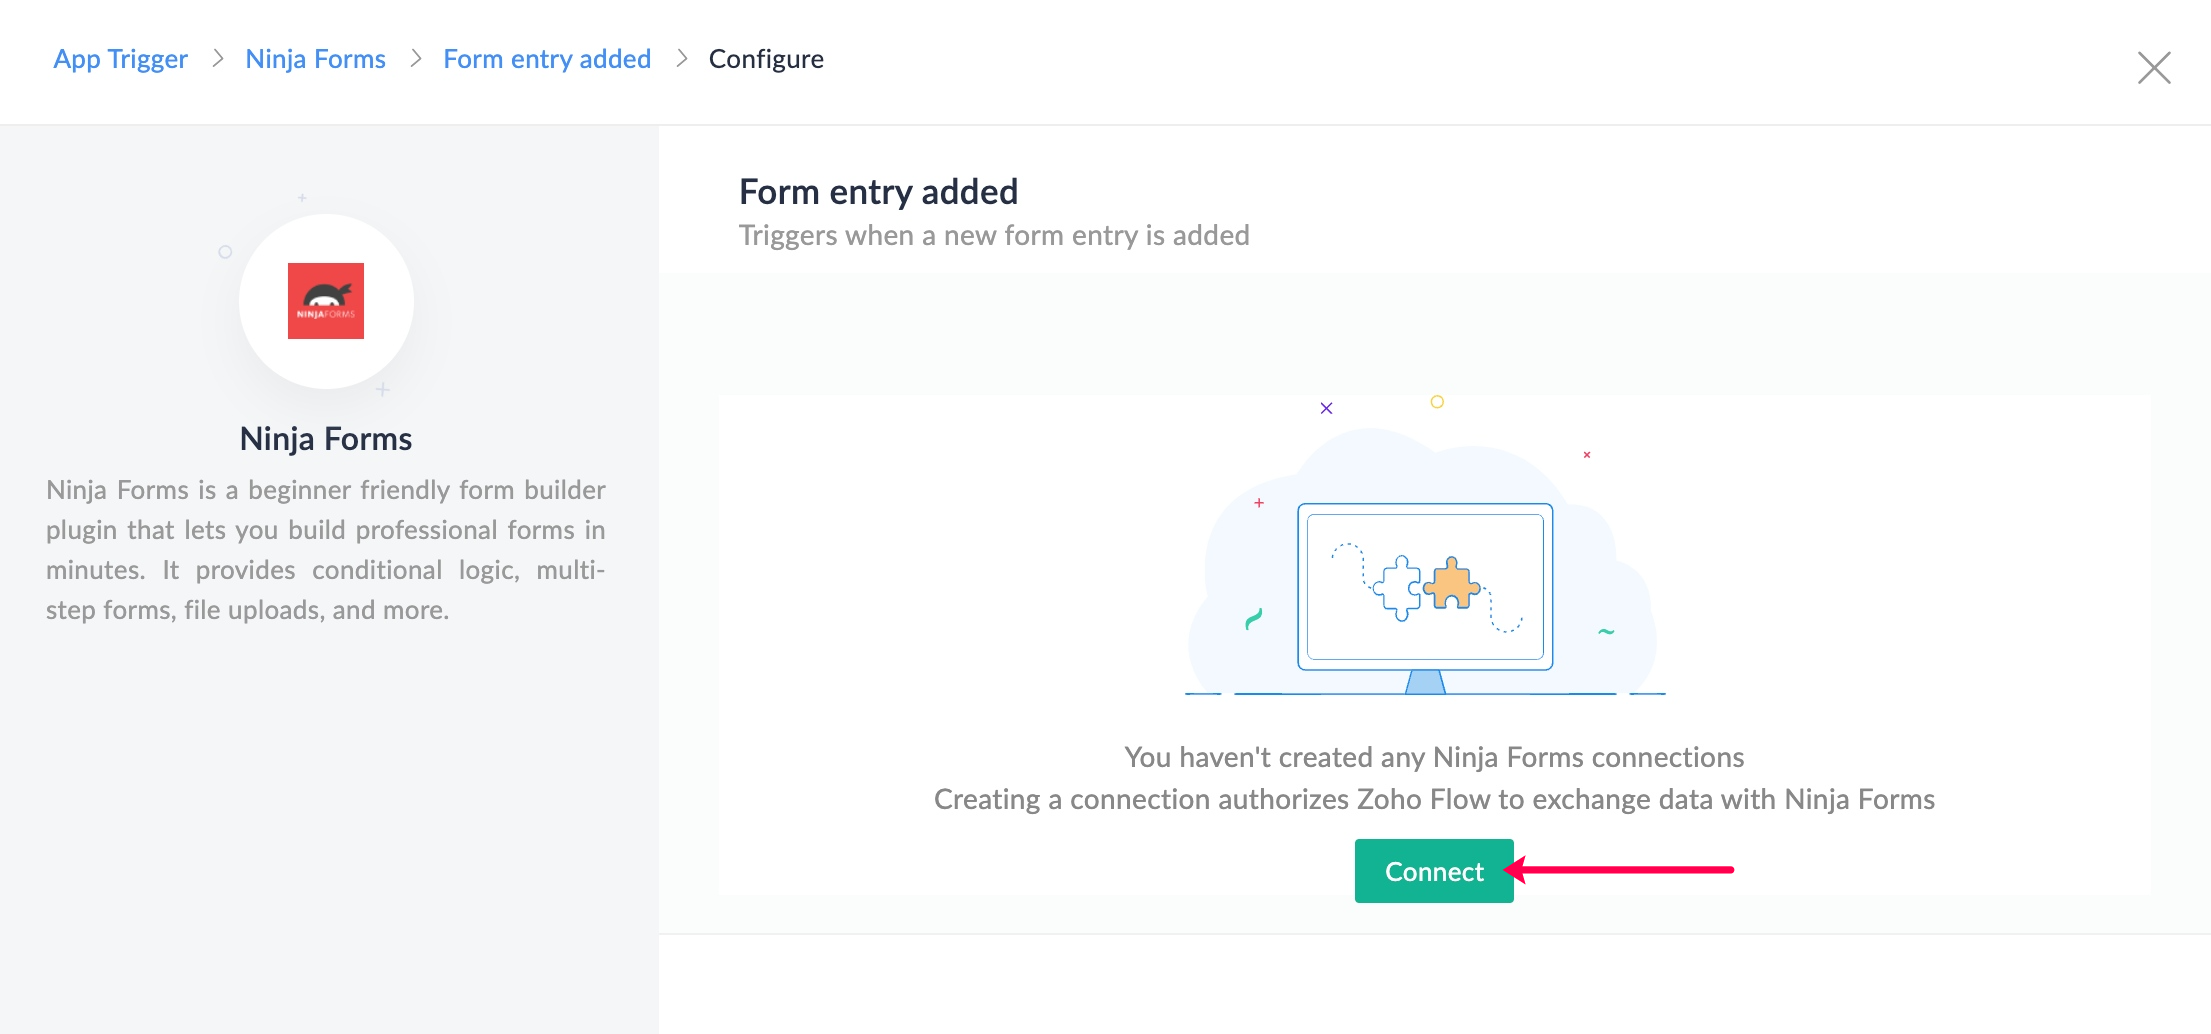
- Select Ninja Forms, then click Next.
- Click Connect to create a new connection. If you already have a Ninja Forms connection, choose it from the dropdown.
- You need an API key and the BaseURL of your WordPress website to authorize Zoho Flow to connect to your Ninja Forms account. Learn how here. Then, click Authorize.
- You need to choose your form, then click Done.
Now that you've set up the trigger, you need to add actions to it.
Step 3: Add action to create new leads
Once the form submission is made in Ninja Forms, you need the data to be moved to your CRM as a lead. If a record with the same email address (an ID that is unique to a person) already exists, then it doesn't need to create a duplicate entry. It just needs to update the details of the existing lead.
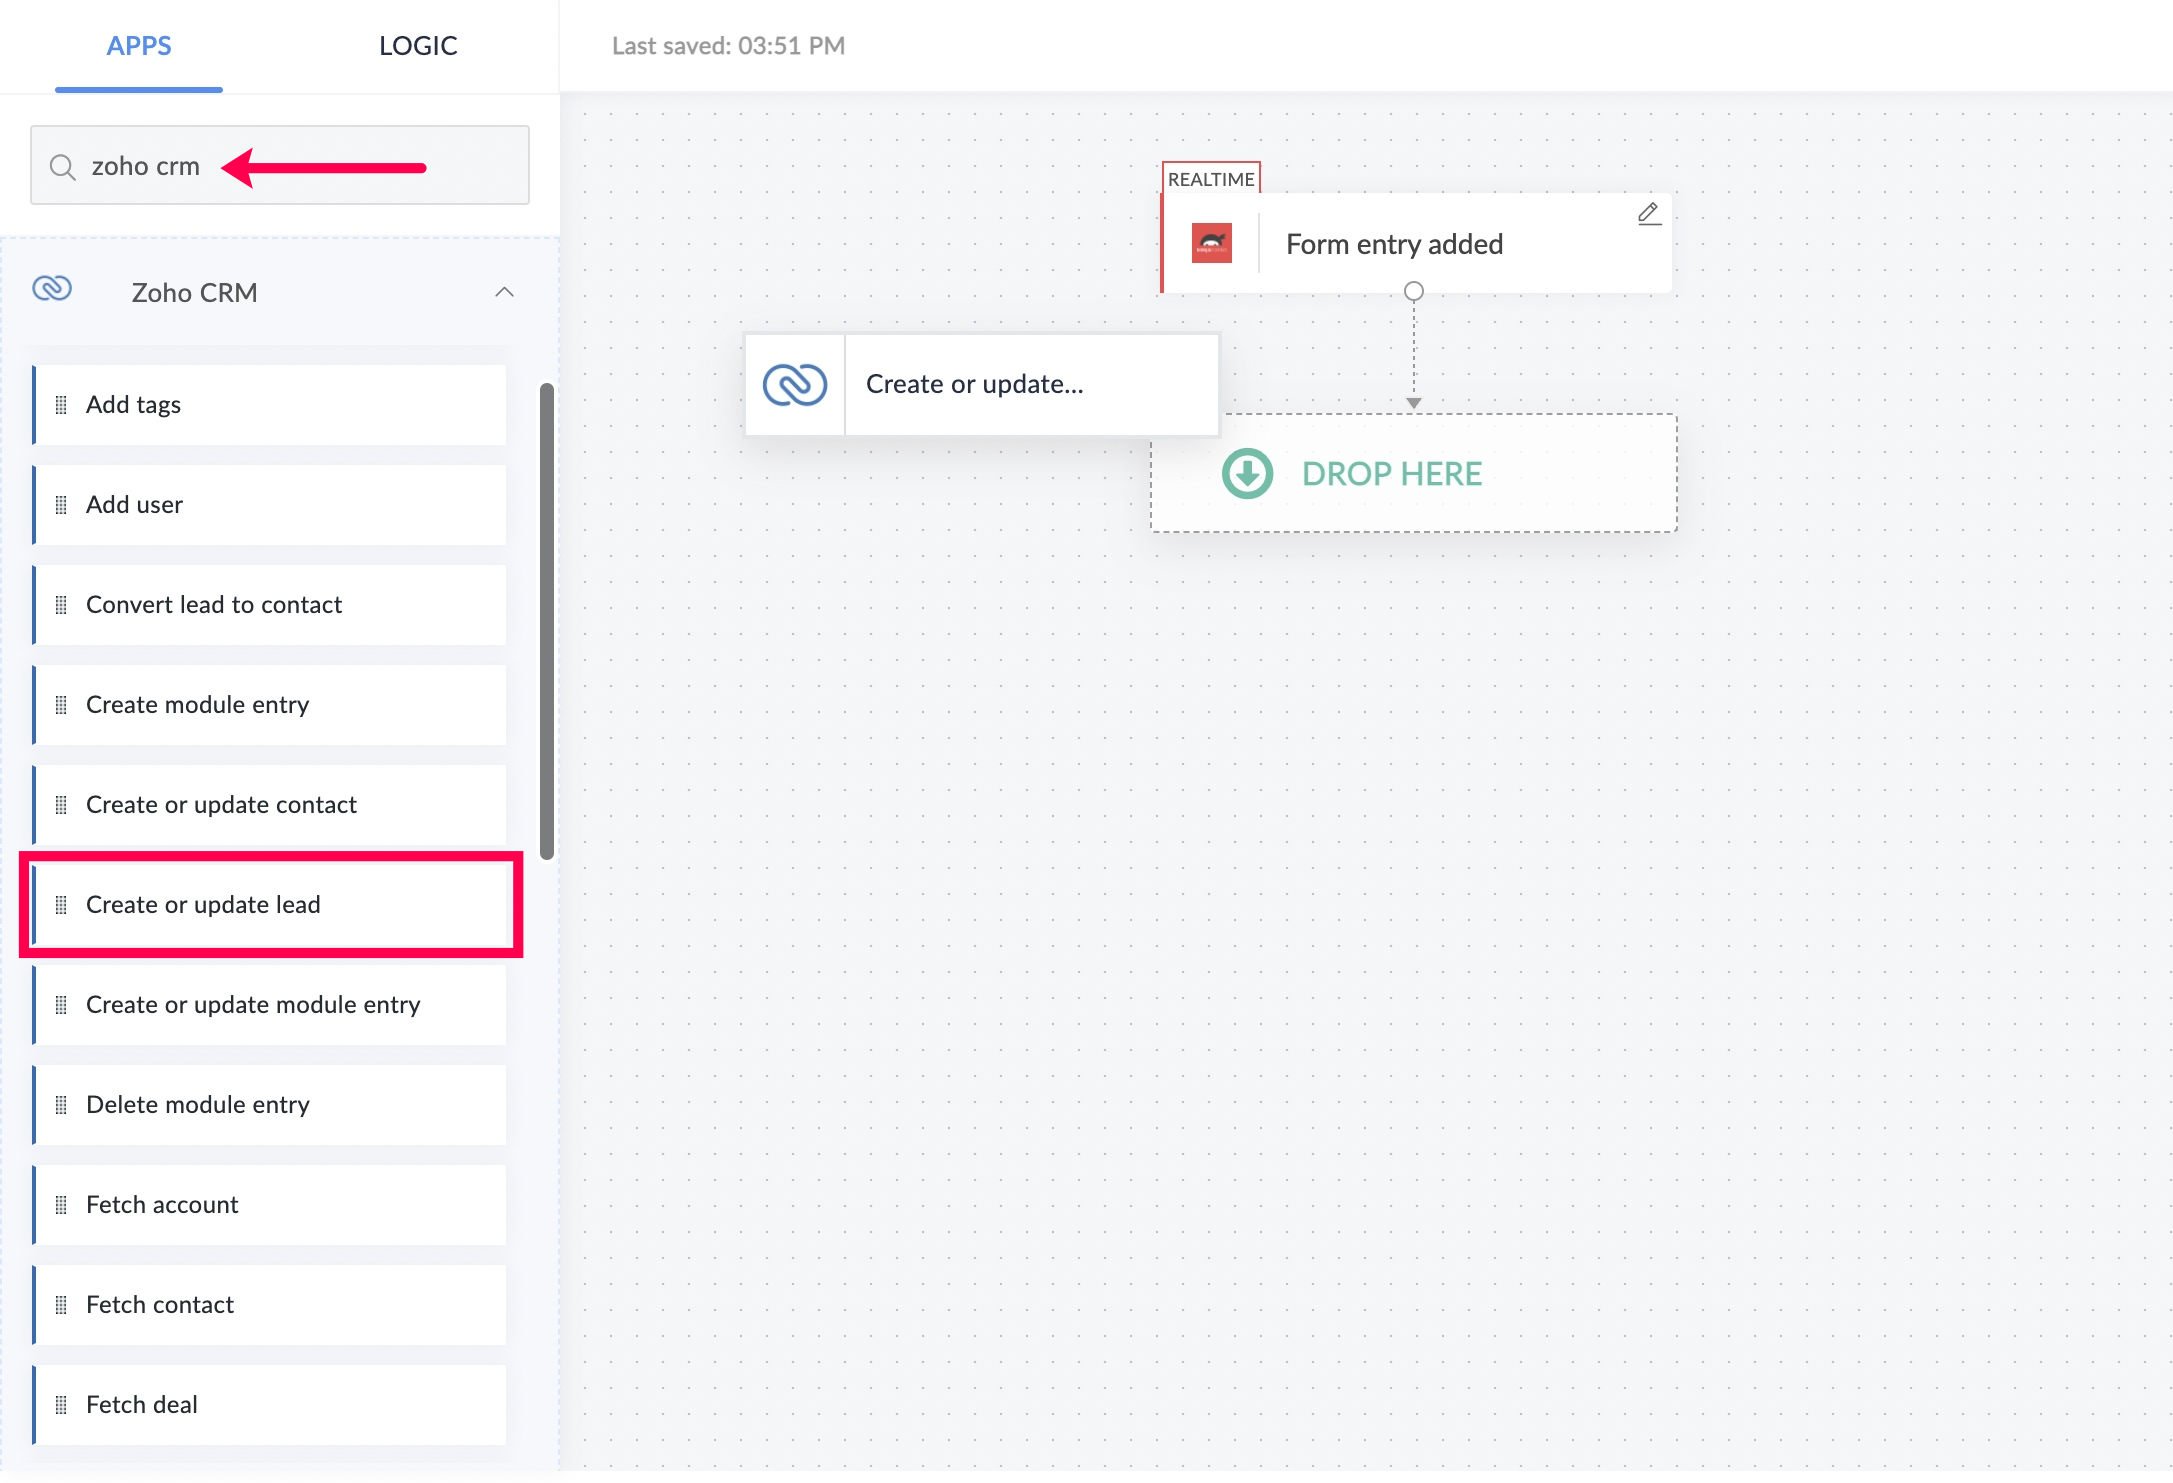
- On the left section of the builder, under Apps, search for ZohoCRM.
- Drag and drop the Createor update lead action into the builder.
- If you already have a Zoho CRM connection, choose it from the dropdown. Otherwise, create a new connection by clicking New.
- Configure the action with the lead details you've collected from the form. Make sure that you've mapped the Email field with the variable Email passed by the trigger to check for an existing record.
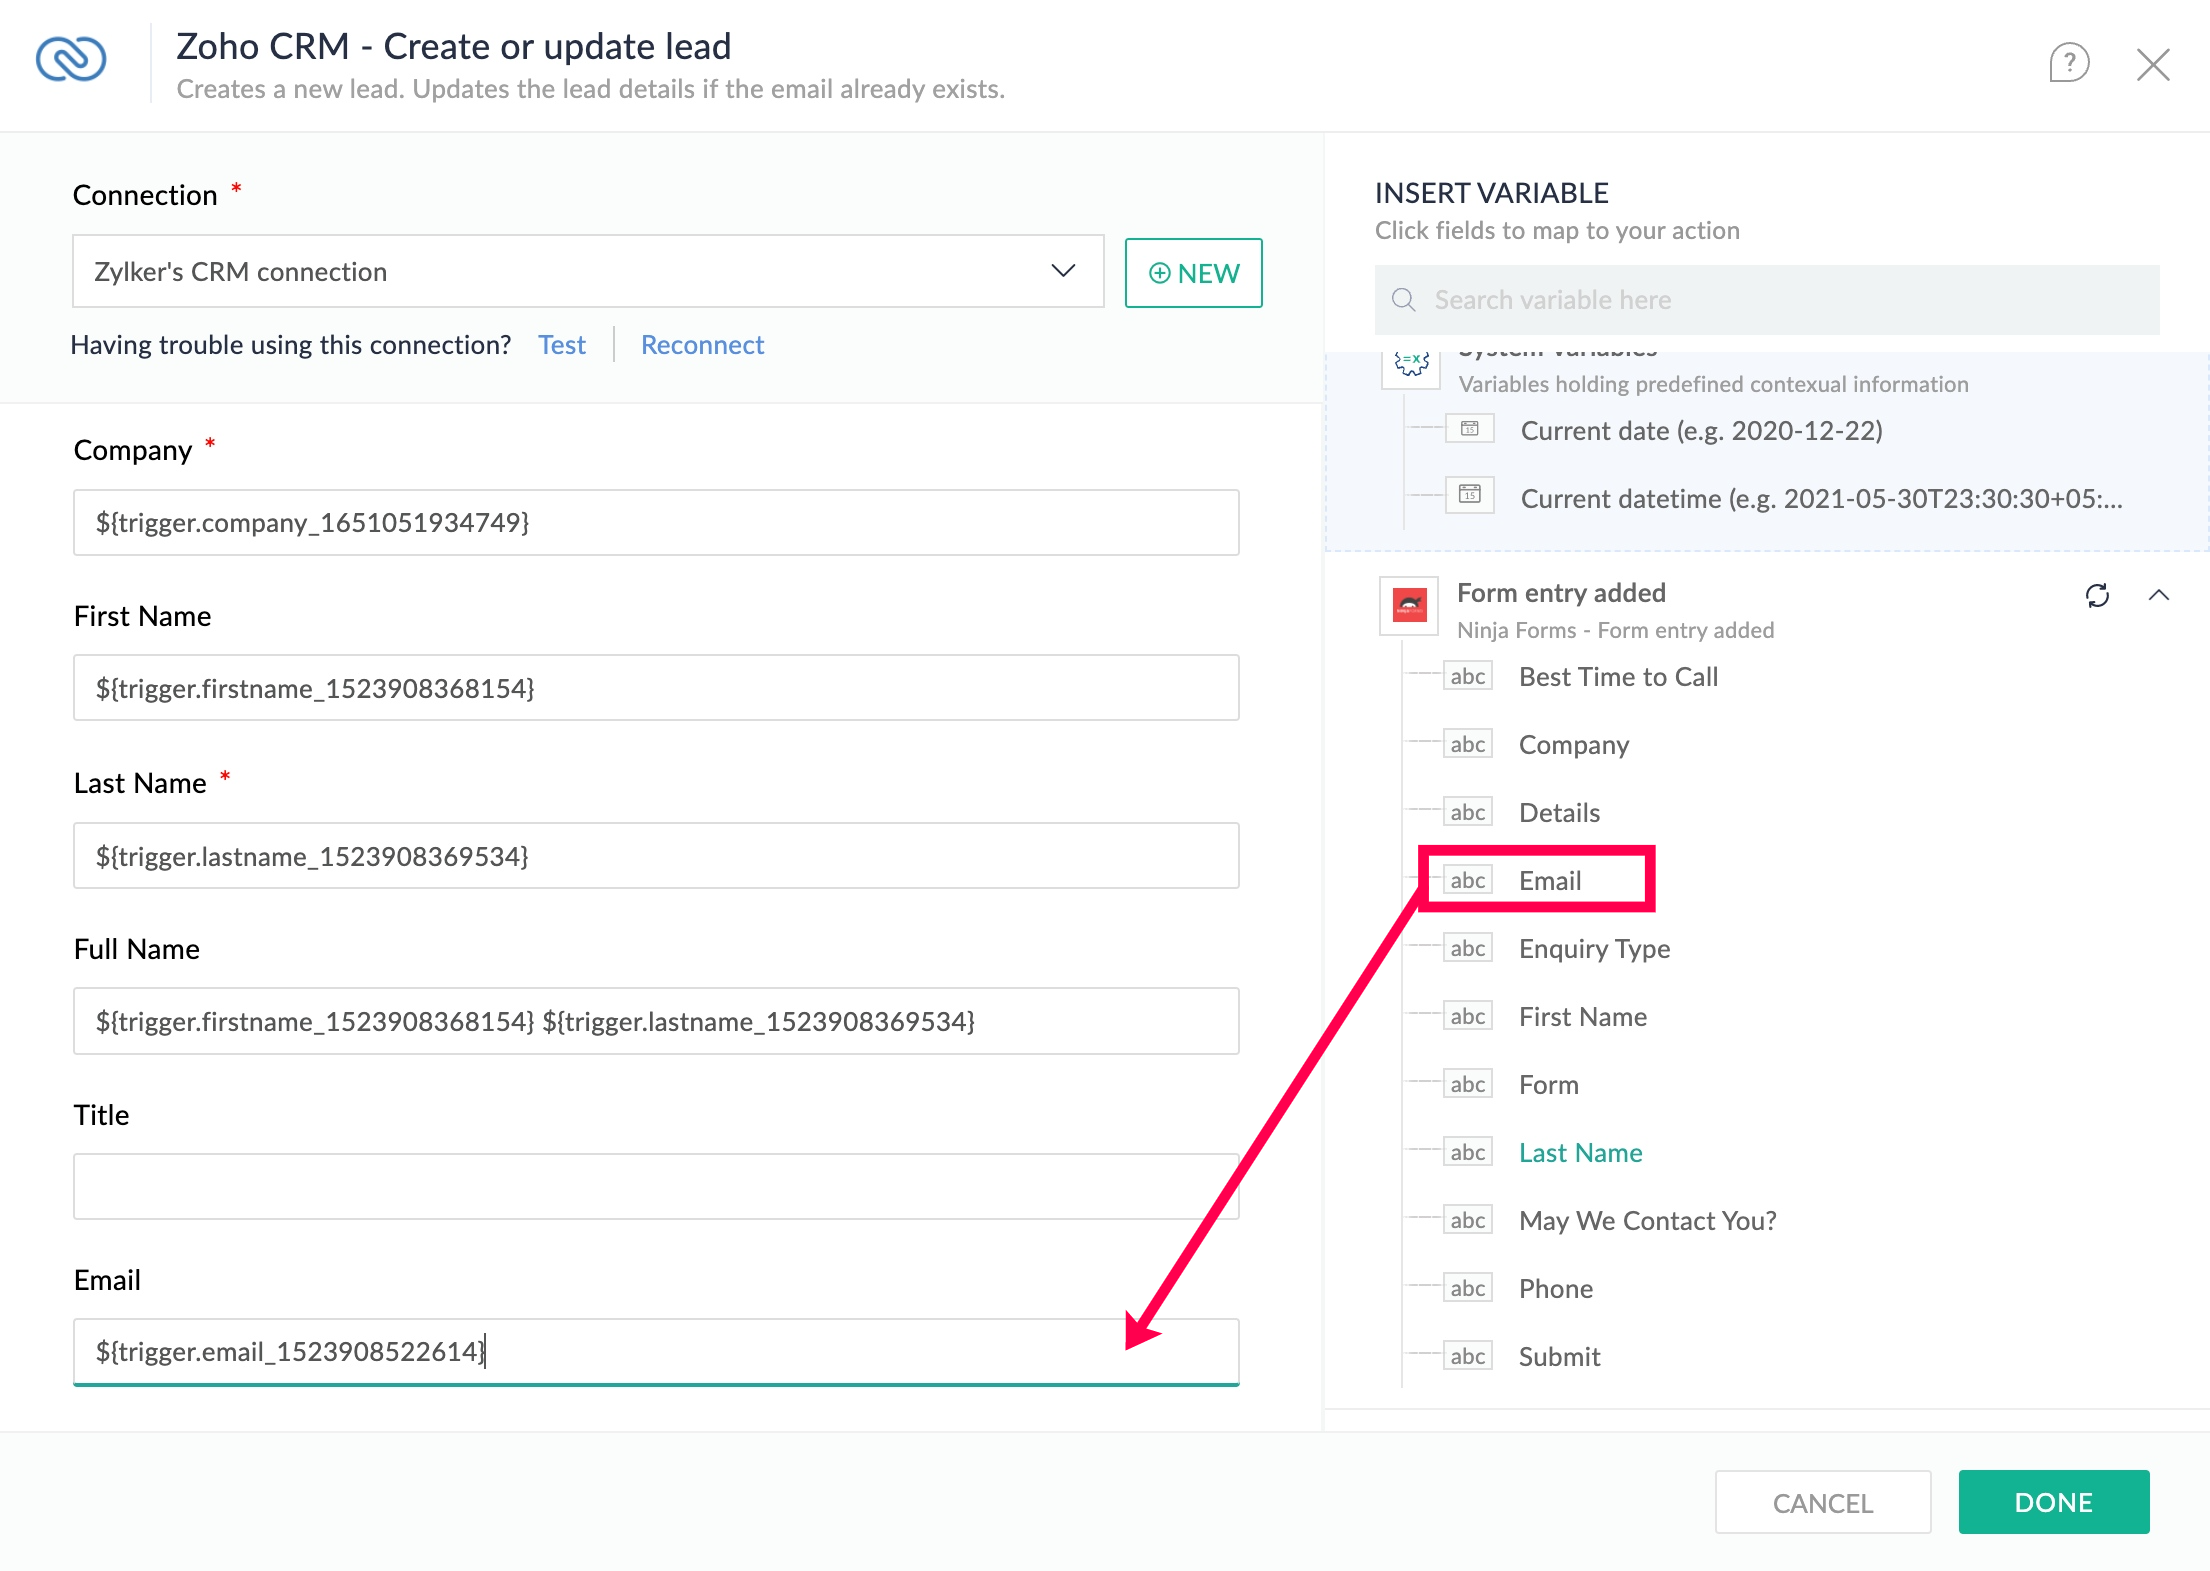
- Click Done.
Step 4: Add action to notify your sales team
Once the lead is created, you need the flow to automatically notify your sales team about the lead's interest in your product. If you use Slack, you can do this by sending a message in your sales team's private channel. Let's see how:
- From the Apps section on the left, search for your team communication app—say Slack.
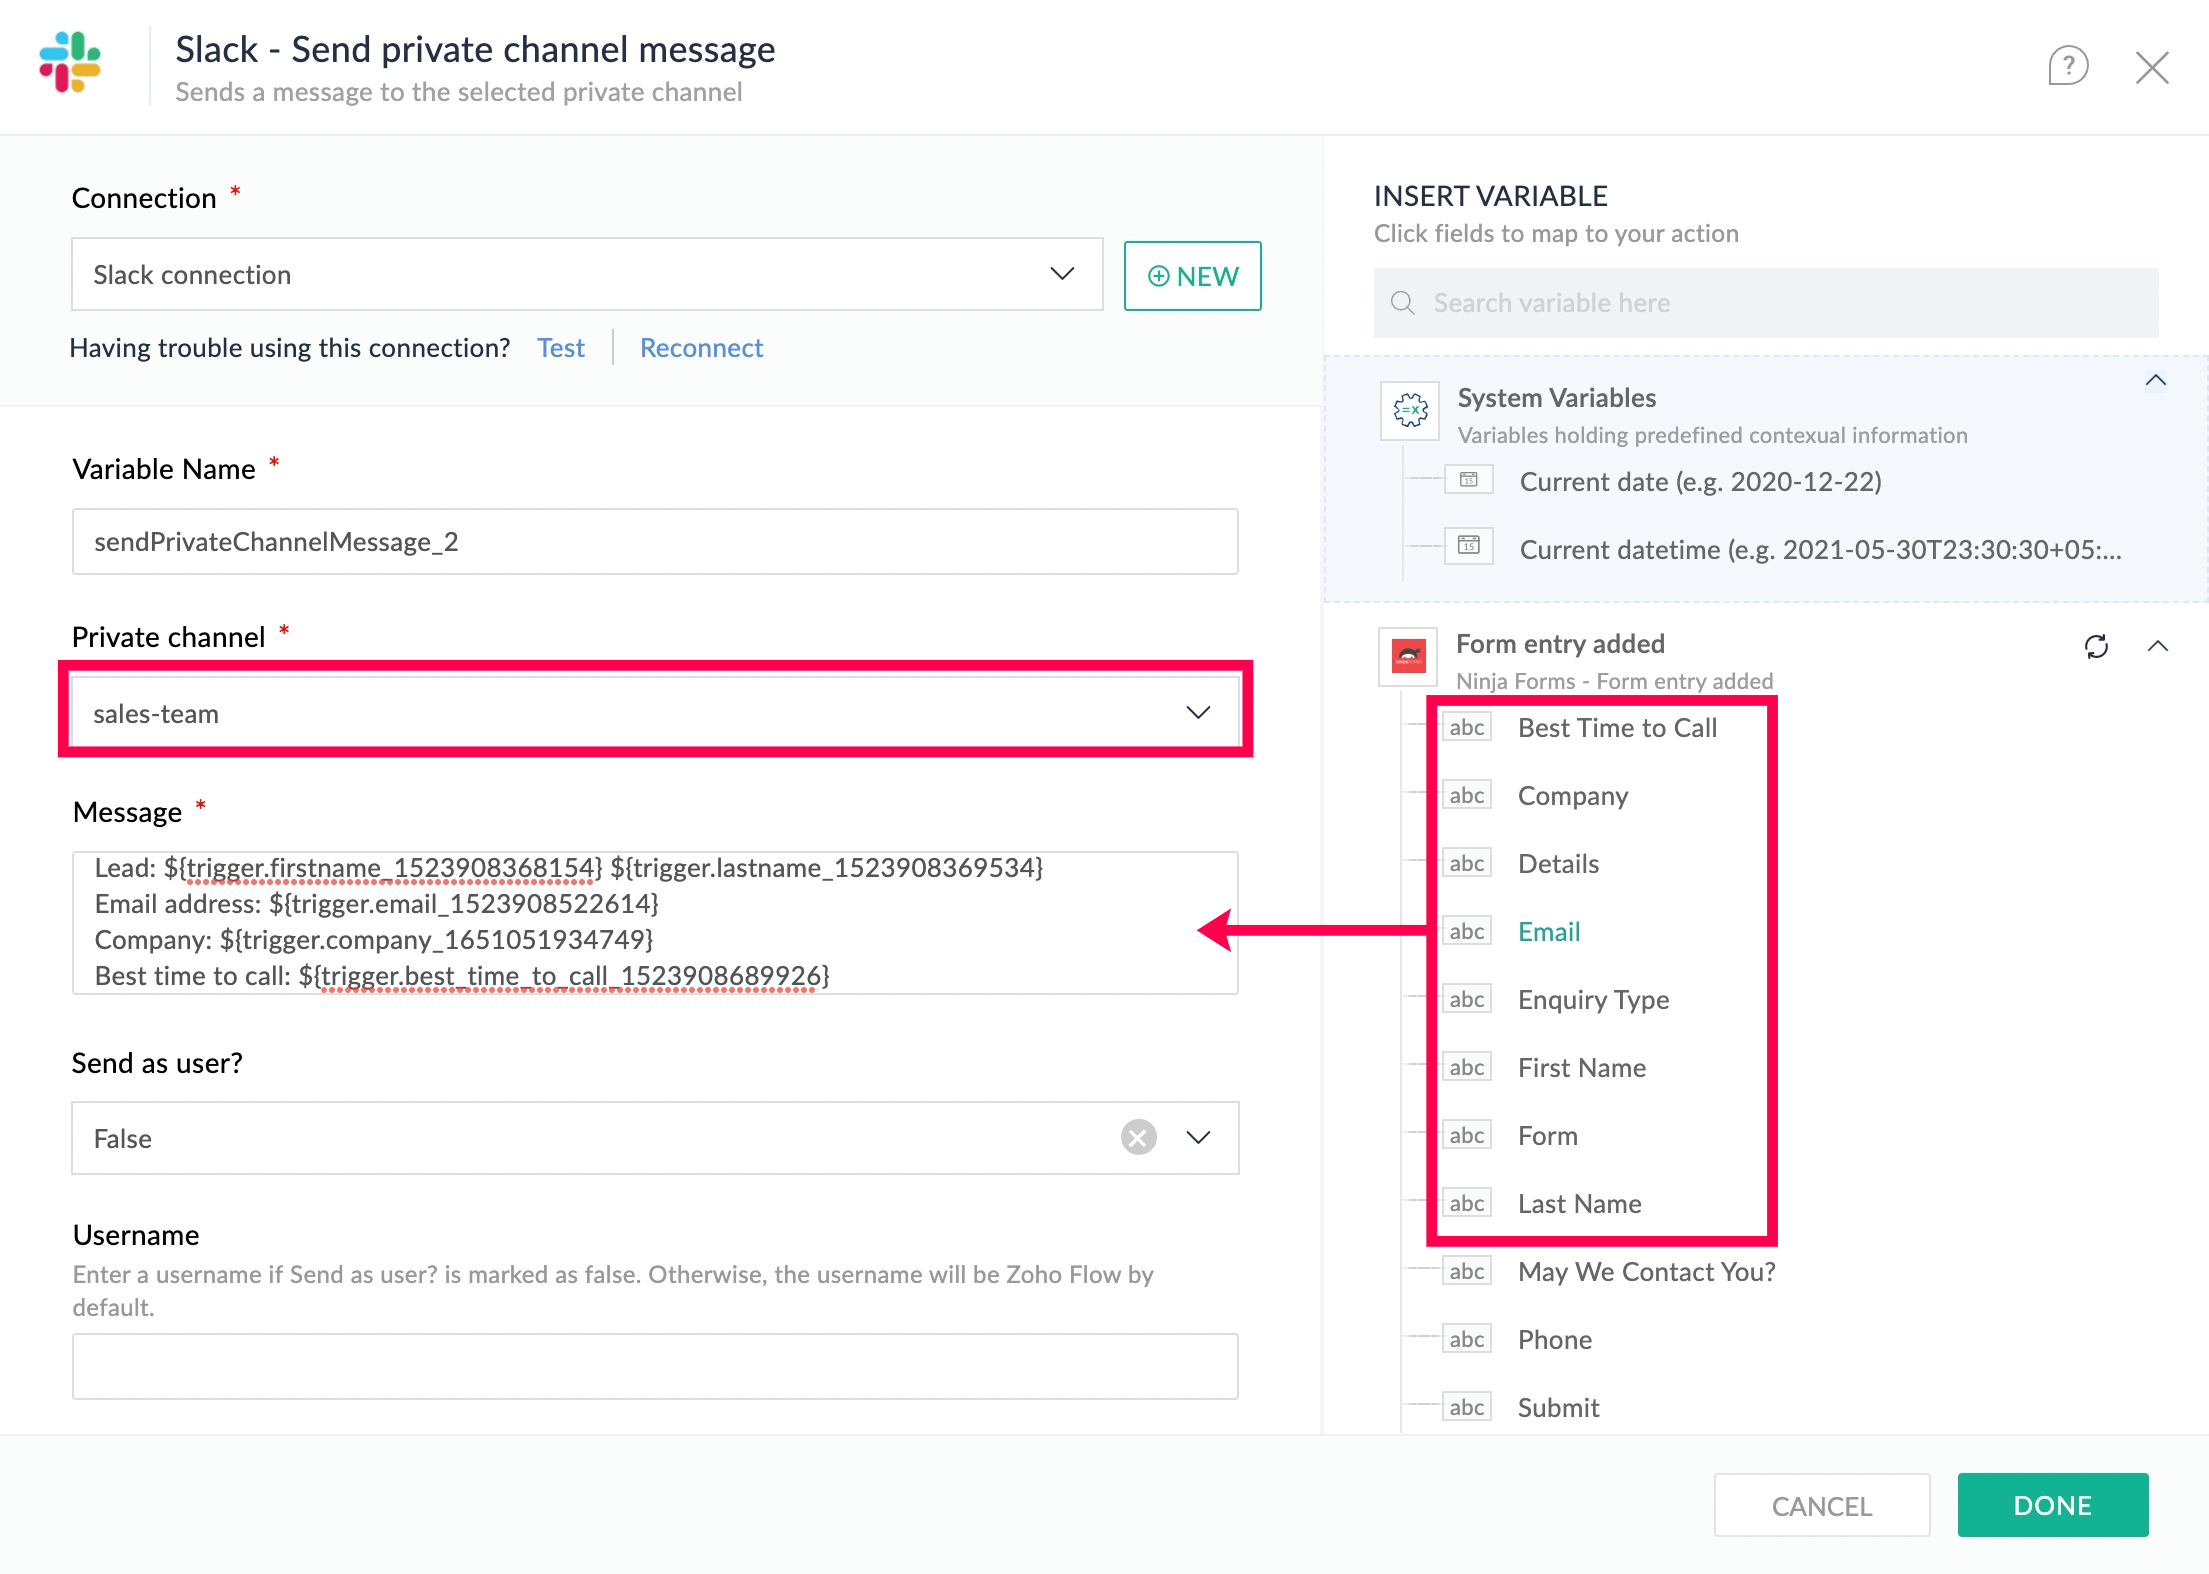
- Drag and drop the Send private channel message action to the builder.
- If you already have a Slack connection, choose it from the dropdown. If not, create a new connection by clicking New.
- Similar to the previous step, configure the action by mapping the required fields to their respective variables from the previous steps. Then click Done.
- Next, click Test and Debug at the top right of the builder. Make a sample submission in your web form to test the flow for possible errors.
- Once you've verified everything, switch the flow on.
The best thing about building your own workflow in Zoho Flow is that you can create it exactly the way you want, with logic elements, custom functions, and more. For example, if you're collecting feedback, you can use a custom function to analyze the sentiments of a text input and automatically escalate it as a ticket to your customer support. Similarly, you can set up more flows to collect contacts, store information in spreadsheets, generate invoices, or add subscribers for newsletters from form submissions.
If you need any help with setting up these workflows for your business, or would like to know more about the possibilities of workflow automations that you can achieve by using Zoho Flow, feel free to write to support@zohoflow.com.
 Arjun
ArjunProduct Marketer at Zoho Flow: Passionately curious, with a love for thinking, writing, and exploring creative ways to connect people with science and technology.