Event Listeners
Table of Contents:
Introduction
Catalyst Event Listeners are an event bus service that listens for the occurrences of pre-determined events and automatically executes associated Event functions. Event listeners are highly useful for automating the execution of a reusable custom action that needs to be linked to a particular frequently occurring event.
Catalyst Event Listeners also allow you to transport a stream of real-time data from various Catalyst components in the application, or from custom sources, to the functions that are invoked as a result. You can associate rules with an event listener and define the exact source to listen to for events, and the actions to be taken upon their occurrence.
There are two types of Catalyst Event Listeners:
- Catalyst Component Event Listener: The Catalyst component event listener can link an event that occurred in one of your Catalyst components to the execution of a target event function. This is created by default.
- Custom Event Listeners: The event listeners that you create are custom event listeners, which function differently from the Catalyst component event listener. When you create a custom event listener in Catalyst, a URL is automatically generated for it. Whenever this URL is invoked by the end user, this event listener triggers the execution of the target event function.
You can access and configure event listeners for your project from the Catalyst console. The console also provides statistics on the performance of each of your event listeners, details of queued events, and drilled-down execution history for every rule of an event listener. You can also see a sample pattern of the data that will be sent to the target function for every rule.
Catalyst also provides you with the flexibility to create application alerts for event listeners directly from the Event Listeners' Rules section in the console, instead of navigating to the Application Alerts component.
To learn about using event listeners in the production and development environments, visit the Environments help page.
Benefits
- Enabling Automation and Data Flow in the Application
Catalyst event listeners reduce manual efforts involved in building complex code by easily facilitating automated data and logic flow between various loosely coupled and distributed components of your application. When you configure an event listener and associate it with the execution of a reusable behavior, the workflow is streamlined and automated based on event occurrences. This enables a faster and more effective application building process. - Delivering Real-Time Data
Catalyst event listeners deliver a stream of real-time data from the various components of your application or from a custom source that you define. It also provides you complete control over this real-time data, by enabling you to route and process it as per your needs. You can enable the components of your application to react to the real-time data and build event-driven architectures in an easy manner. - Rapid Parallel Processing
Catalyst supports the invocation of multiple event listeners and rules in parallel. The target functions of the invoked rules are processed simultaneously without any reduction in data throughput or increase in latency. Catalyst servers auto scale to provide the required resources to maintain the consistency of your application's performance. - Statistics, Queued Events, and Processed Events
The statistics of an event listener displayed in the console enable you to monitor and analyze its performance easily. You can also view Queued Events that show events that are captured in real-time by the event listeners and are currently being processed. Additionally, you can also pause, delete, bulk-delete and resume the queue of events. After they are processed, you can view the details of the processed events of each rule in every event listener. The processed event details contain insights of event traffic, and provide crucial information about the execution history of each rule in an event listener. - Compatible with Budgetary Constraints
Catalyst innovative form of pricing is calculated based on the number of API calls made. If you detect an error in your application, by pausing the queue you pause the processing of the events and the execution of their associated functions. You can debug while the queue is paused or even delete the entire queue of events to ensure no unnecessary API calls are being made during the debugging stage, thereby enabling you to have more control of your monetary resources.
Use Cases
Catalyst Event Listeners can be used in the following scenarios:
- A job portal application allows users to upload their resumes while signing up for an account. The application then reads the required information from the resume files using Zia OCR and auto-fills fields in the users' profile information, such as their educational qualifications and job experiences. To enable this functionality, it uses the Catalyst component event listener to listen for file upload events in a folder in the File Store. The event listener then associates this event with the execution of a function that invokes Zia OCR and fills the fields in the profile with the results of the OCR processing.
- An event application features upcoming events in a locality. When a user is interested in an event, they click on a CTA button for that event and navigate to the event's page to view more details about it. The button click invokes a Catalyst custom event listener's URL in the background and passes certain data about the user's interest. This URL invocation is associated with a target function that processes the data and sends a customized automated promotional email to the user about upcoming events similar to the one the user was interested in.
Terminology
Before you read more about Catalyst Event Listeners, ensure that you understand the following terms in the context of Catalyst:
- Event Listener: An event listener, whether component event listener or custom, can perform only one action: trigger the execution of an event function. It cannot trigger the execution of any other type of function, and an event function cannot be invoked in any other way. You can associate multiple rules with an event listener, and each rule can trigger multiple event functions.
When an event listener is created in Catalyst, a unique Event Listener ID is created for it automatically. This ID and the name of the event listener are passed as part of the event bus details to the target function. Each project can contain a maximum of five event listeners: four custom and one component event listeners. - Rules: A rule defines the specific action that will trigger the component or custom event listener. In a component event listener, a rule is associated with the instances of a particular component, and a set of actions occurring in them. In a custom event listener, each rule acts as an individual instance of the event listener and is identified by a unique rule identifier. You will learn about this in detail in the next section.
A rule matches the incoming event with the execution of the associated event function and routes the data to the function for processing. A unique Rule ID is automatically created when you create a rule for an event listener. - Events: In the case of a component event listener, a specific action occurring in a component is considered to be an event. For example, a table in the Data Store being updated or a user signing up for your application. The complete list of component events is given in the next section.
In the case of a custom event listener, an event is said to have occurred when the event listener's URL is invoked by the end-user of your application. - Queued Events: When an event for which an event listener rule has been configured has occurred, the associated rule will be triggered. The event will then be queued for processing. Each event listener that you create will have its individual queue. Catalyst will invoke the associated target functions for execution during the processing, and pass the event data to them. After the functions complete their execution, or if they fail to execute, the event will be removed from the queue.
For example, if you had configured a rule with a table insert event in the Data Store, the component event listener will be listening for an insert action in that table. When that action occurs, the associated rule will be triggered, and the event will be queued for processing. In the case of a custom event listener, when the URL of the event listener is invoked, the event will be queued until the rule has triggered the associated functions and they complete their execution. You can view detailed information of events when they enter a queue and are being processed from the Queued Events section in the console. - Processed Events: After the associated target functions of a component or a custom event listener rule execute successfully, it will be considered as a processed event. The Processed Events section in the console will contain detailed information about the event traffic and execution history of each rule that was executed.
- Failed Events: If the execution of the associated target functions of a component or a custom event listener rule is a failure, or if the rule fails to invoke the target functions for any reason, it will be considered as a failed event.
The Catalyst Component Event Listener
Every Catalyst project contains one component event listener that is created when the project is created. As mentioned in the previous sections, the behaviors and functionalities of the component and custom event listeners vary.
The Catalyst component event listener is used to link a Catalyst component to a target function, and pass the component data to the function when it is invoked.
The following table describes the list of Catalyst components and the event occurrences in them that can be associated with the component event listener:
| Component | Event | Description |
|---|---|---|
| Data Store | Insert Update Delete | Data is inserted in the associated tables Data is updated in the associated tables Data is deleted from the associated tables |
| Cache | Put | Data is written to the associated Cache segments |
| Authentication | Sign Up Delete | A user signs up for the application A user is deleted from the application |
| File Store | Upload | A file is uploaded in the associated folders |
| GitHub | Success Failure | Github deployment is successful Github deployment is a failure |
| Web Client | Hosted | Web client is hosted in the project |
- You can associate the actions of any one component with a particular rule.
- You can associate multiple events in a component with a single rule.
- You can also execute multiple target functions for a rule.
- You will not be able to rename or delete the component event listener. However, you can delete the rules you create in it.
For example, assume that a component event listener's rule is associated with the Upload file event in three folders: Folder1, Folder2, and Folder3 in the File Store. Its target functions are Function1 and Function2. This means that whenever a file is uploaded to one of these three folders, both Function1 and Function2 are executed.
The data from the event, such as the folder ID, file name, and time of event for all three folders is passed to both Function1 and Function2 in a predefined pattern. The data is always passed to the target function from the event listener in the JSON format.
A sample data pattern is shown in the console when you create a rule. This shows a sample structure of the data that will be passed to the function when the event occurs. The data pattern varies based on the component and the actions that the rule is associated with, because different events will contain different data.
For example, if a rule is associated with an Authentication signup event, the event data would of the following pattern:
			{
    "project_details": {
        "id": 57*************,
        "project_name": "Eventbus"
    },
    "event_bus_details": {
        "name": "Default",
        "id": 57*************
    },
    "data": {
        "platform_type": null,
        "user_details": {
            "email_id": "emma@zylker.com",
            "role_details": {
                "role_name": "App User",
                "role_id": 57*************
            },
            "zaaid": 1002347509,
            "created_time": "Sep 10, 2019 11:47 PM",
            "invited_time": "Sep 10, 2019 11:47 PM",
            "modified_time": "Sep 10, 2019 11:47 PM",
            "user_id": 57*************,
            "is_confirmed": true,
            "last_name": "",
            "first_name": "Amelia Burrows",
            "zuid": 1002342431,
            "status": "ACTIVE"
        },
        "org_id": 1002347509,
        "zaid": 1002345135,
        "redirect_url": null
    },
    "current_project": {
        "id": 57*************,
        "project_name": "Eventbus"
    },
    "action": "SignUp",
    "source": "UserManagement",
    "event_time": 1568139437092
}
The rule passes the user and sign up data, along with the project details, and other meta data about the event. You can code your target function to process the event data however you require.
Let us now work with event listeners in the Catalyst console.
Create a Rule in the Component Event Listener
You can access the Event Listeners component from the Amplify section in your Catalyst project in the console. The Catalyst component event listener will already be present there by default.
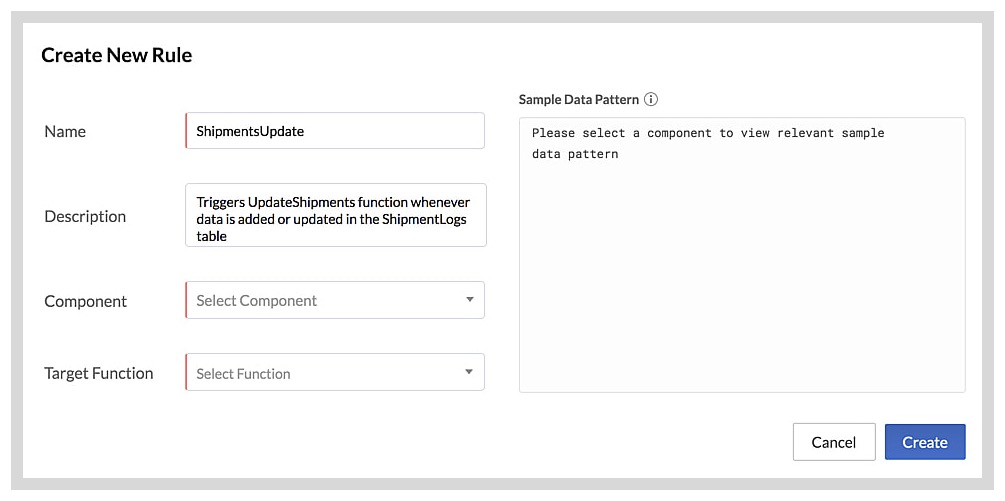
To create a rule in the component event listener:
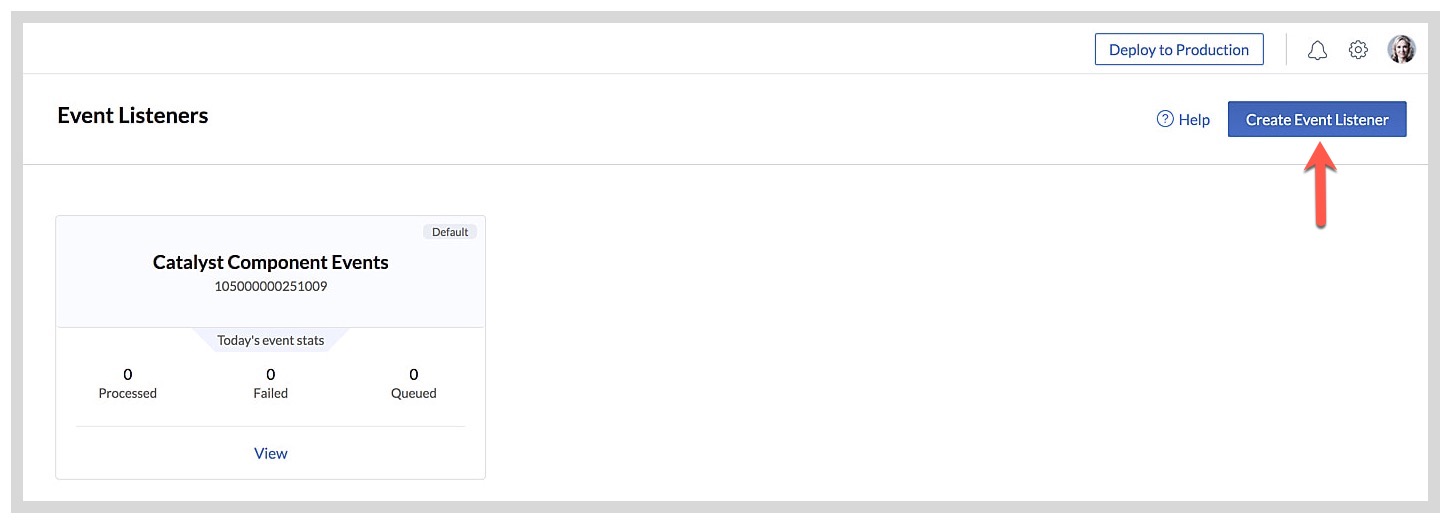
- Navigate to Event Listeners under Amplify in the console.
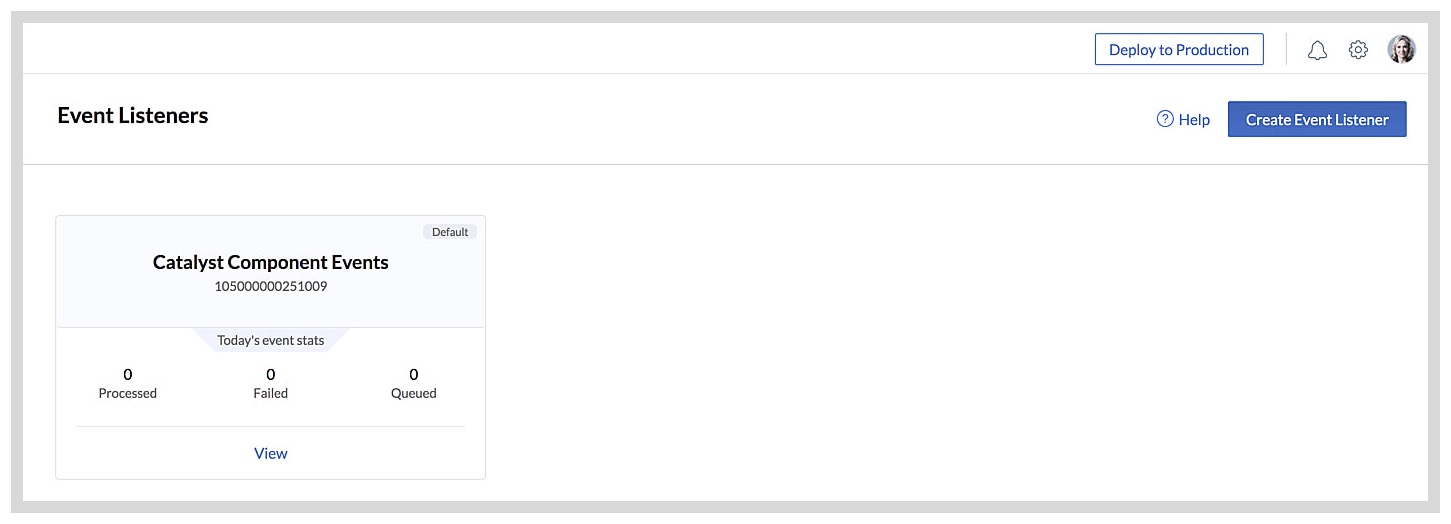
The Event Listeners page will display the Catalyst Component Events tile with the day's statistics of processed, failed, and queued events. - Click View on the event listener's tile to open it.
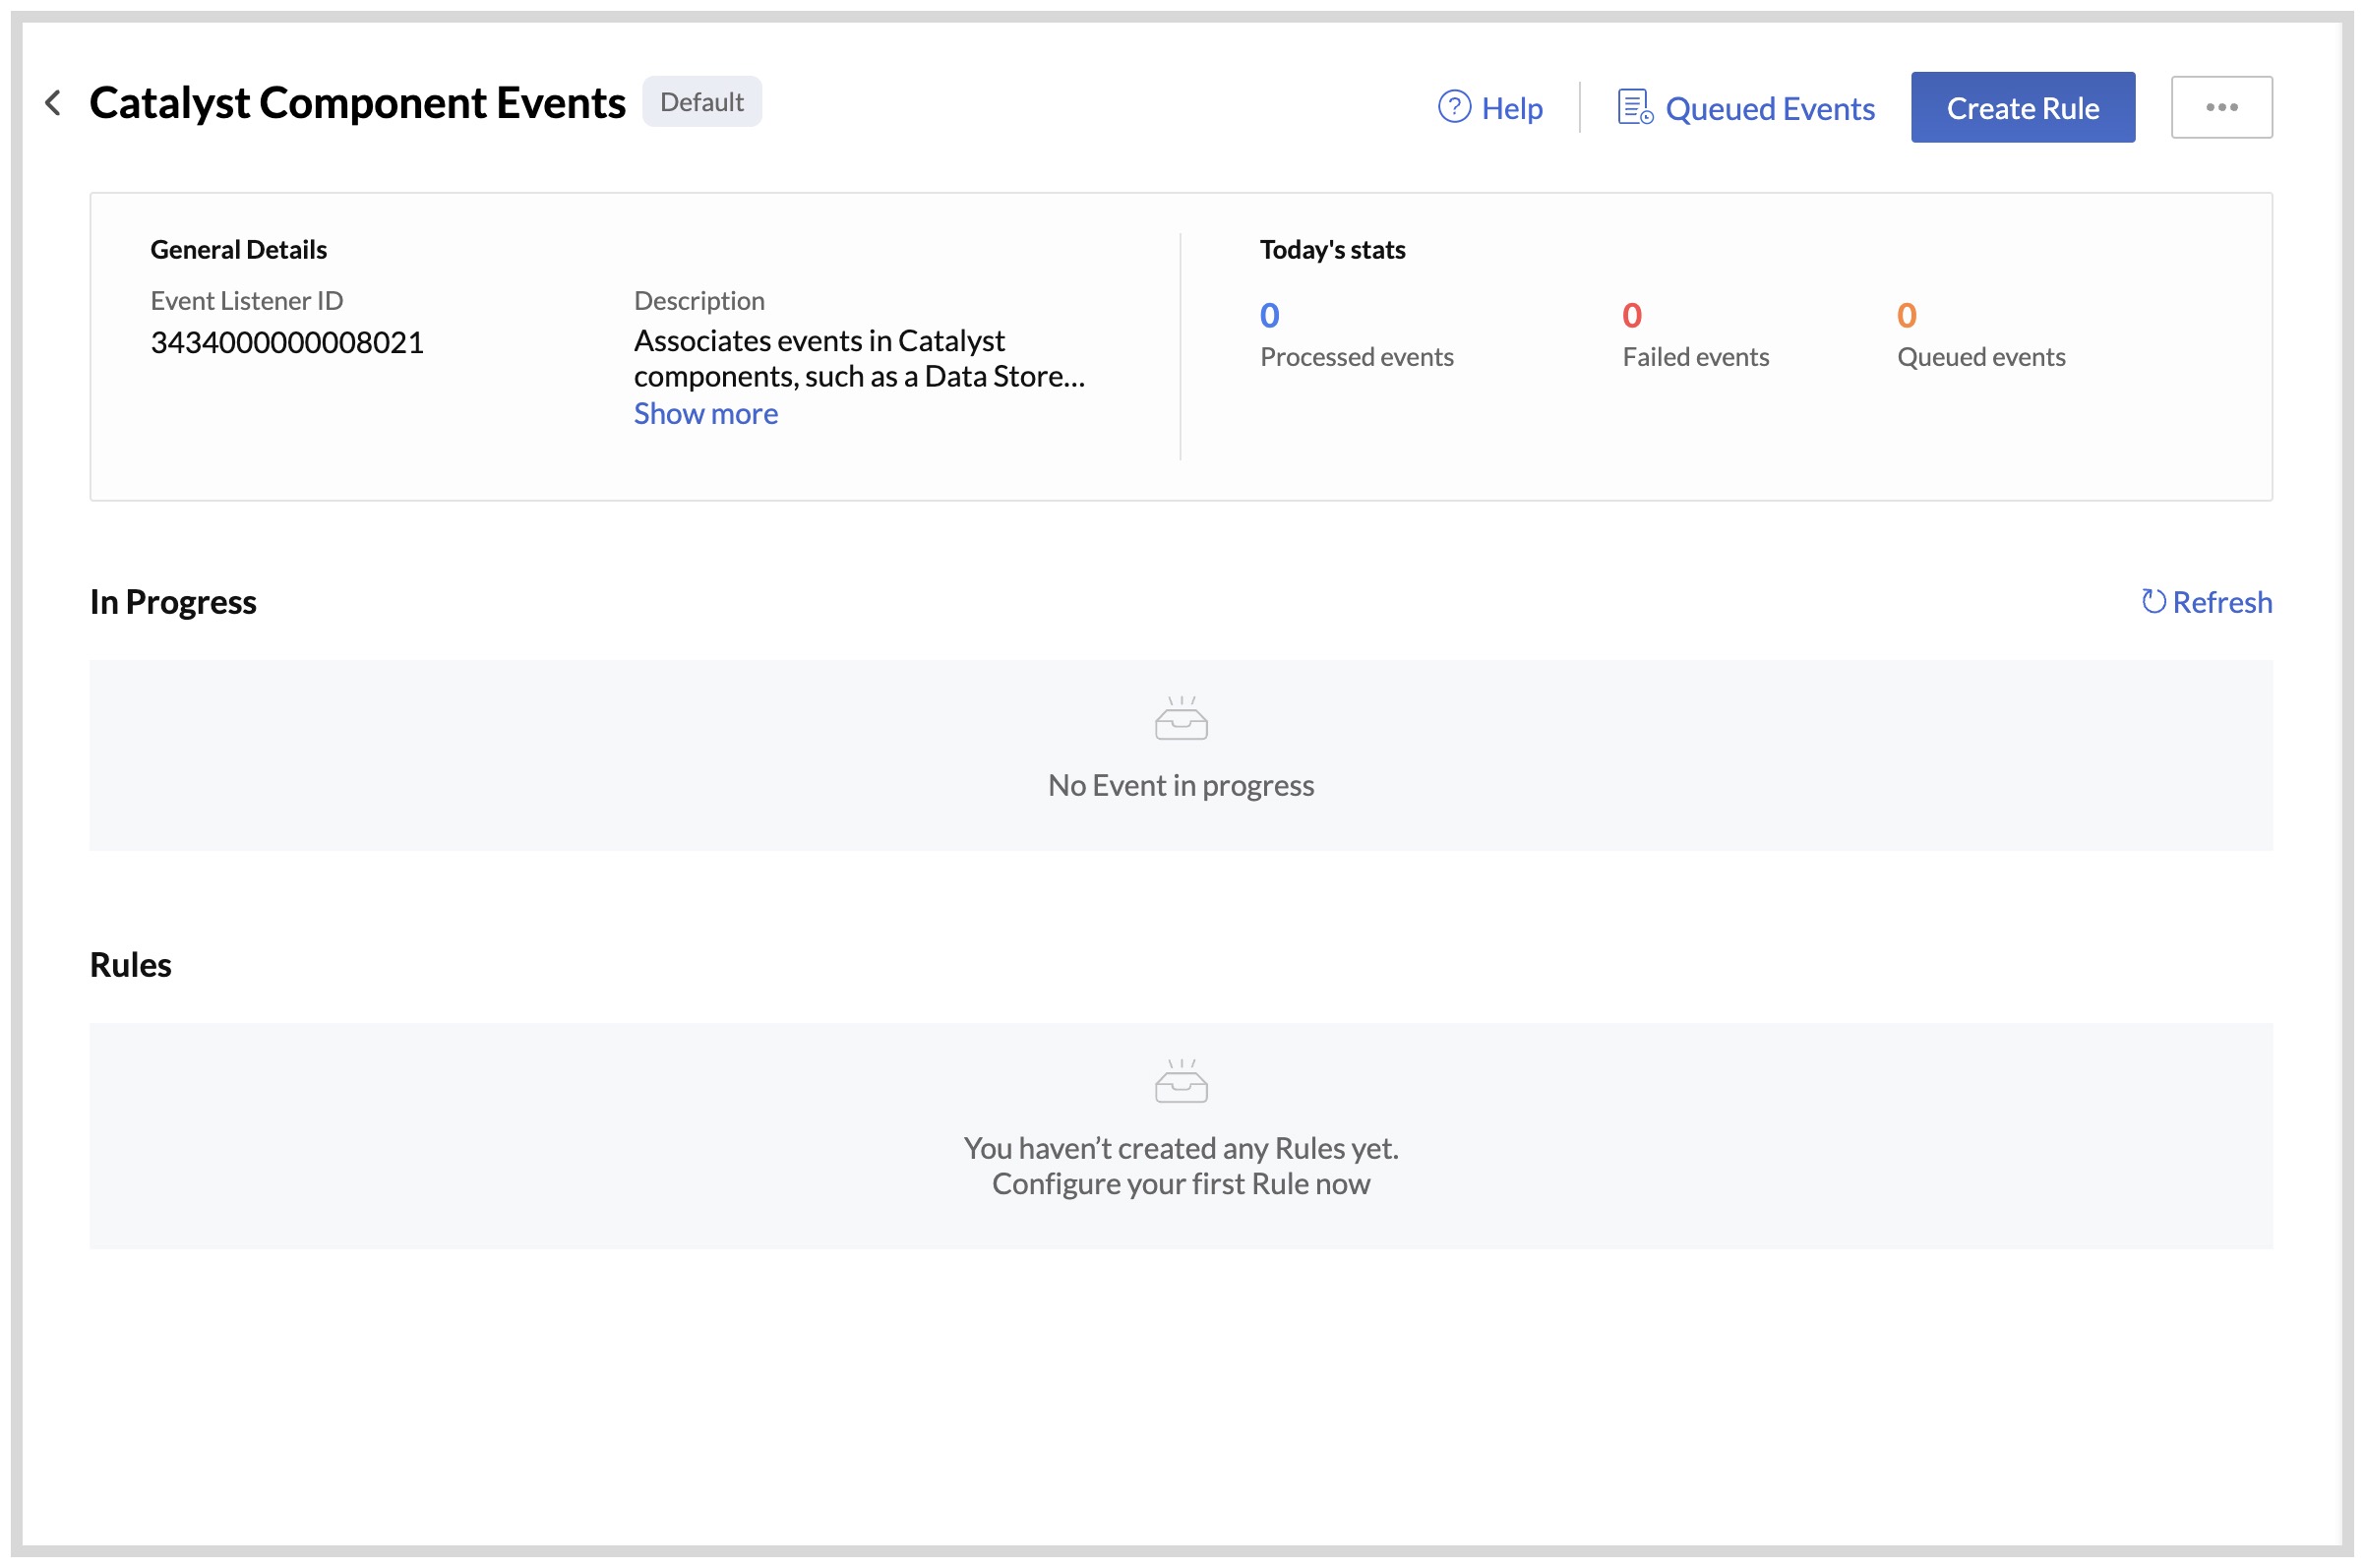
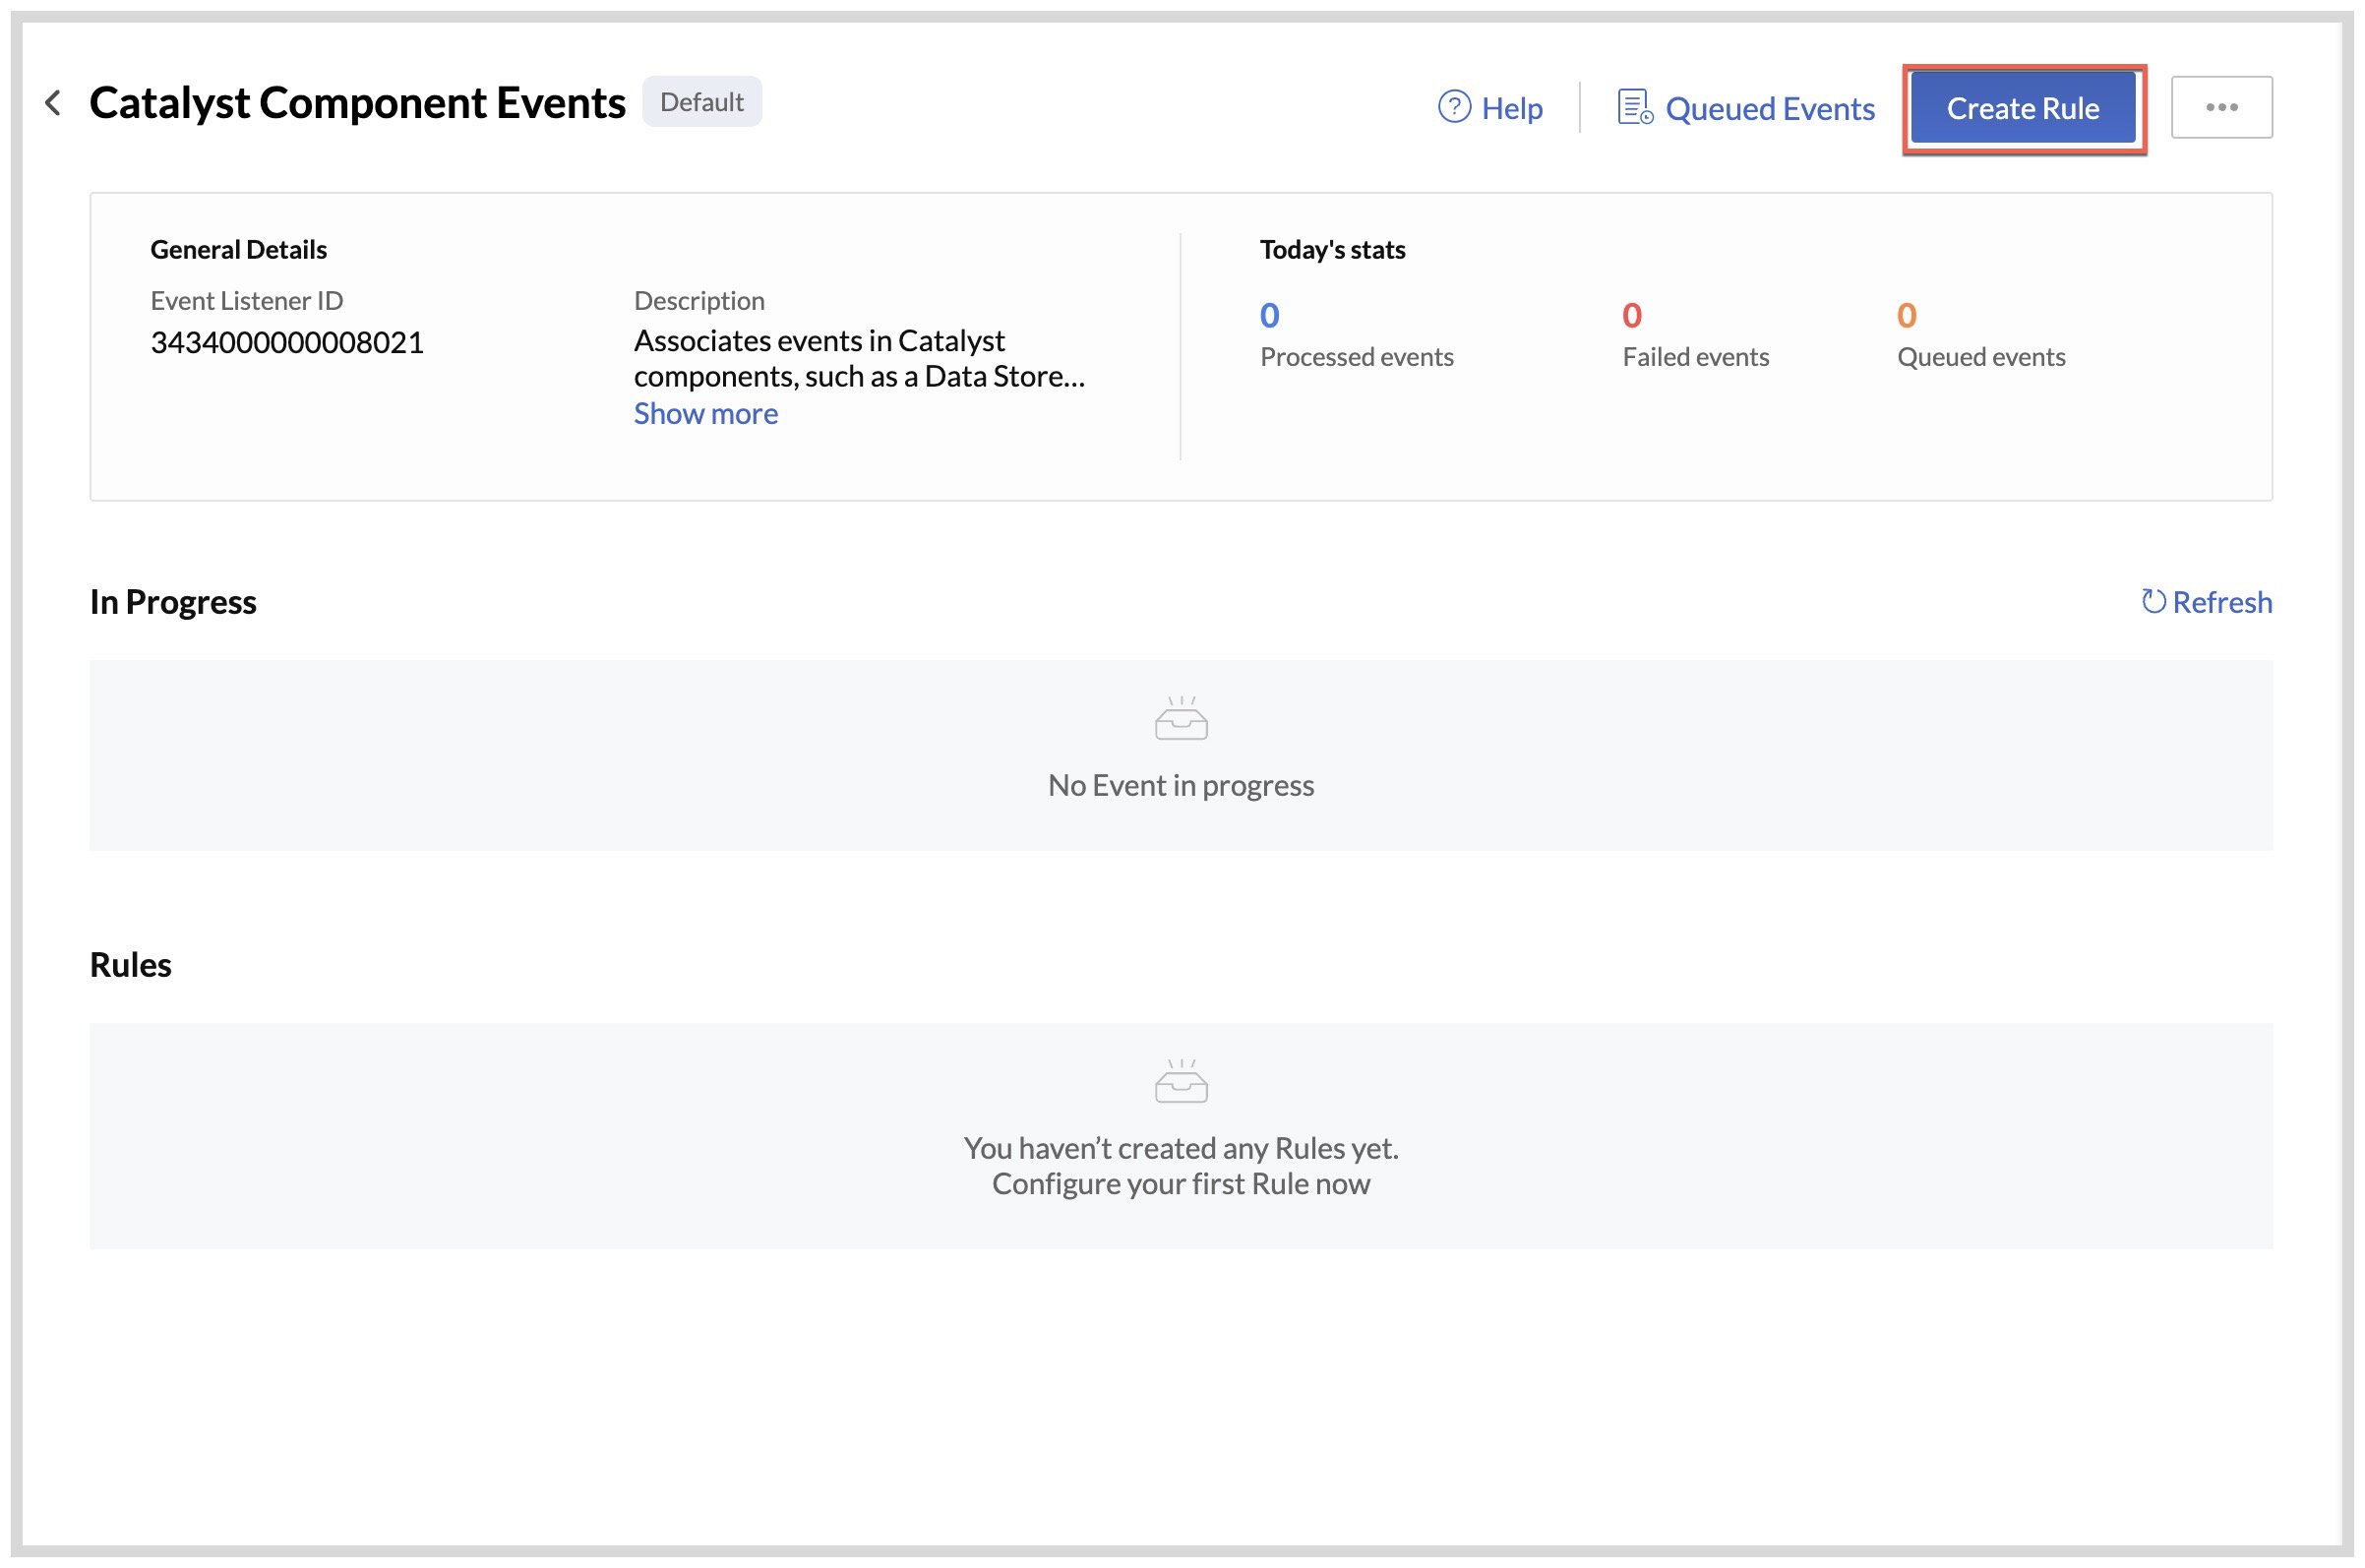
- ClickCreate Rule.
- Enter a name and a description for the rule.
- Select a component from the dropdown list to associate the rule with. When you select a component, the pop-up will display a sample structure of the data that will be passed to the target function. This data pattern varies for each component that you select, as mentioned earlier.

Based on the component that you selected, you might need to provide additional information. For example, if you choose "Data Store", you can select one or more tables to associate the rule with. - Select the actions occurring in the component to associate the rule with. These actions also vary based on the component, as discussed earlier.
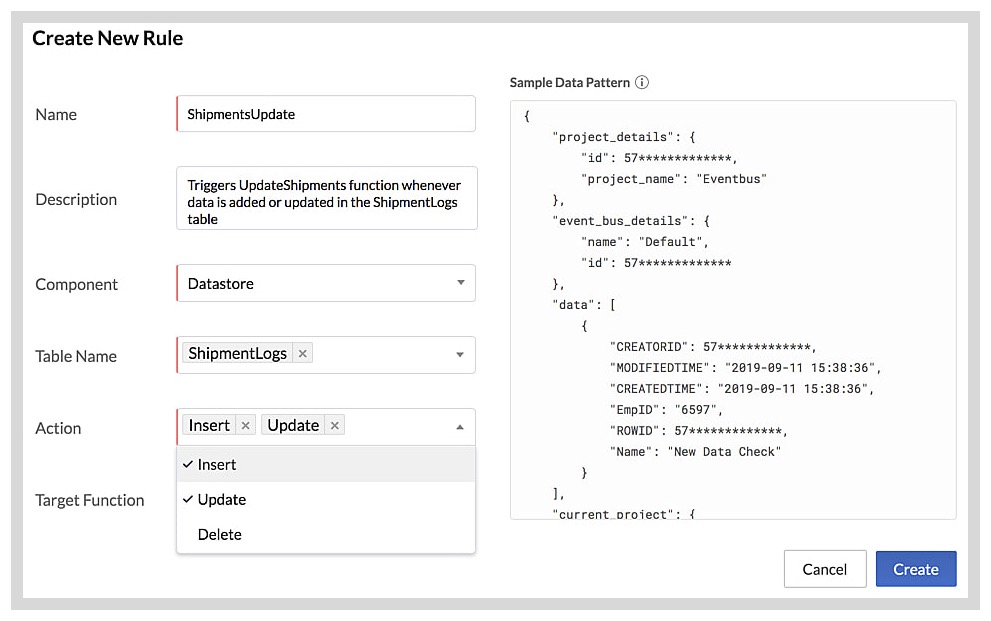 Note: If you select "Web Client" as the component, the Action field will not appear. Selecting Web Client indicates that the rule will be triggered when a web client is hosted in the project.
 - Select the target functions to invoke when the event occurs. You can select one or more functions.
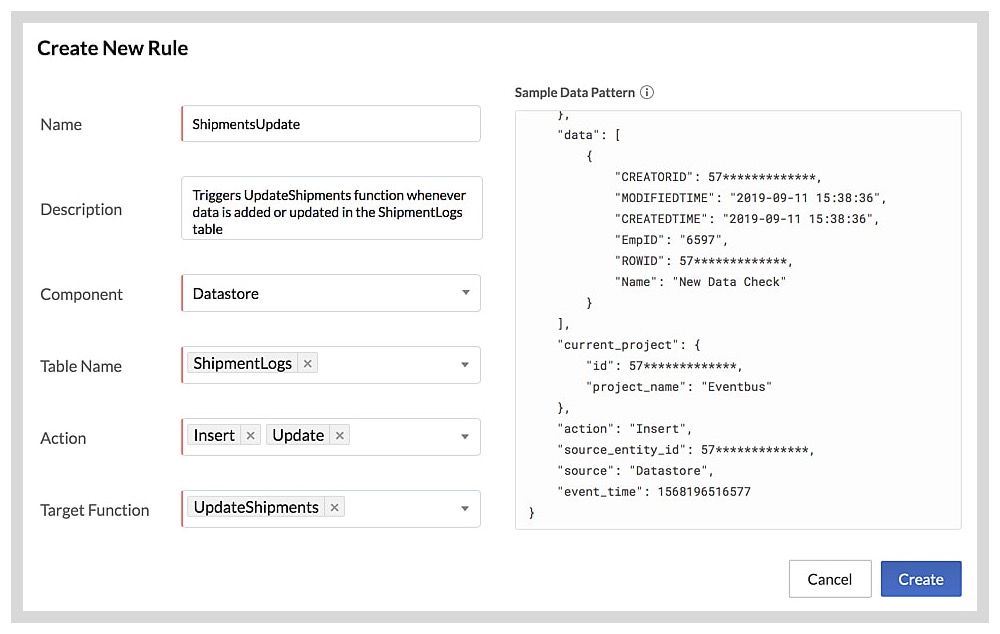 Note: Only event functions are displayed in the dropdown list.
 - Click Create.


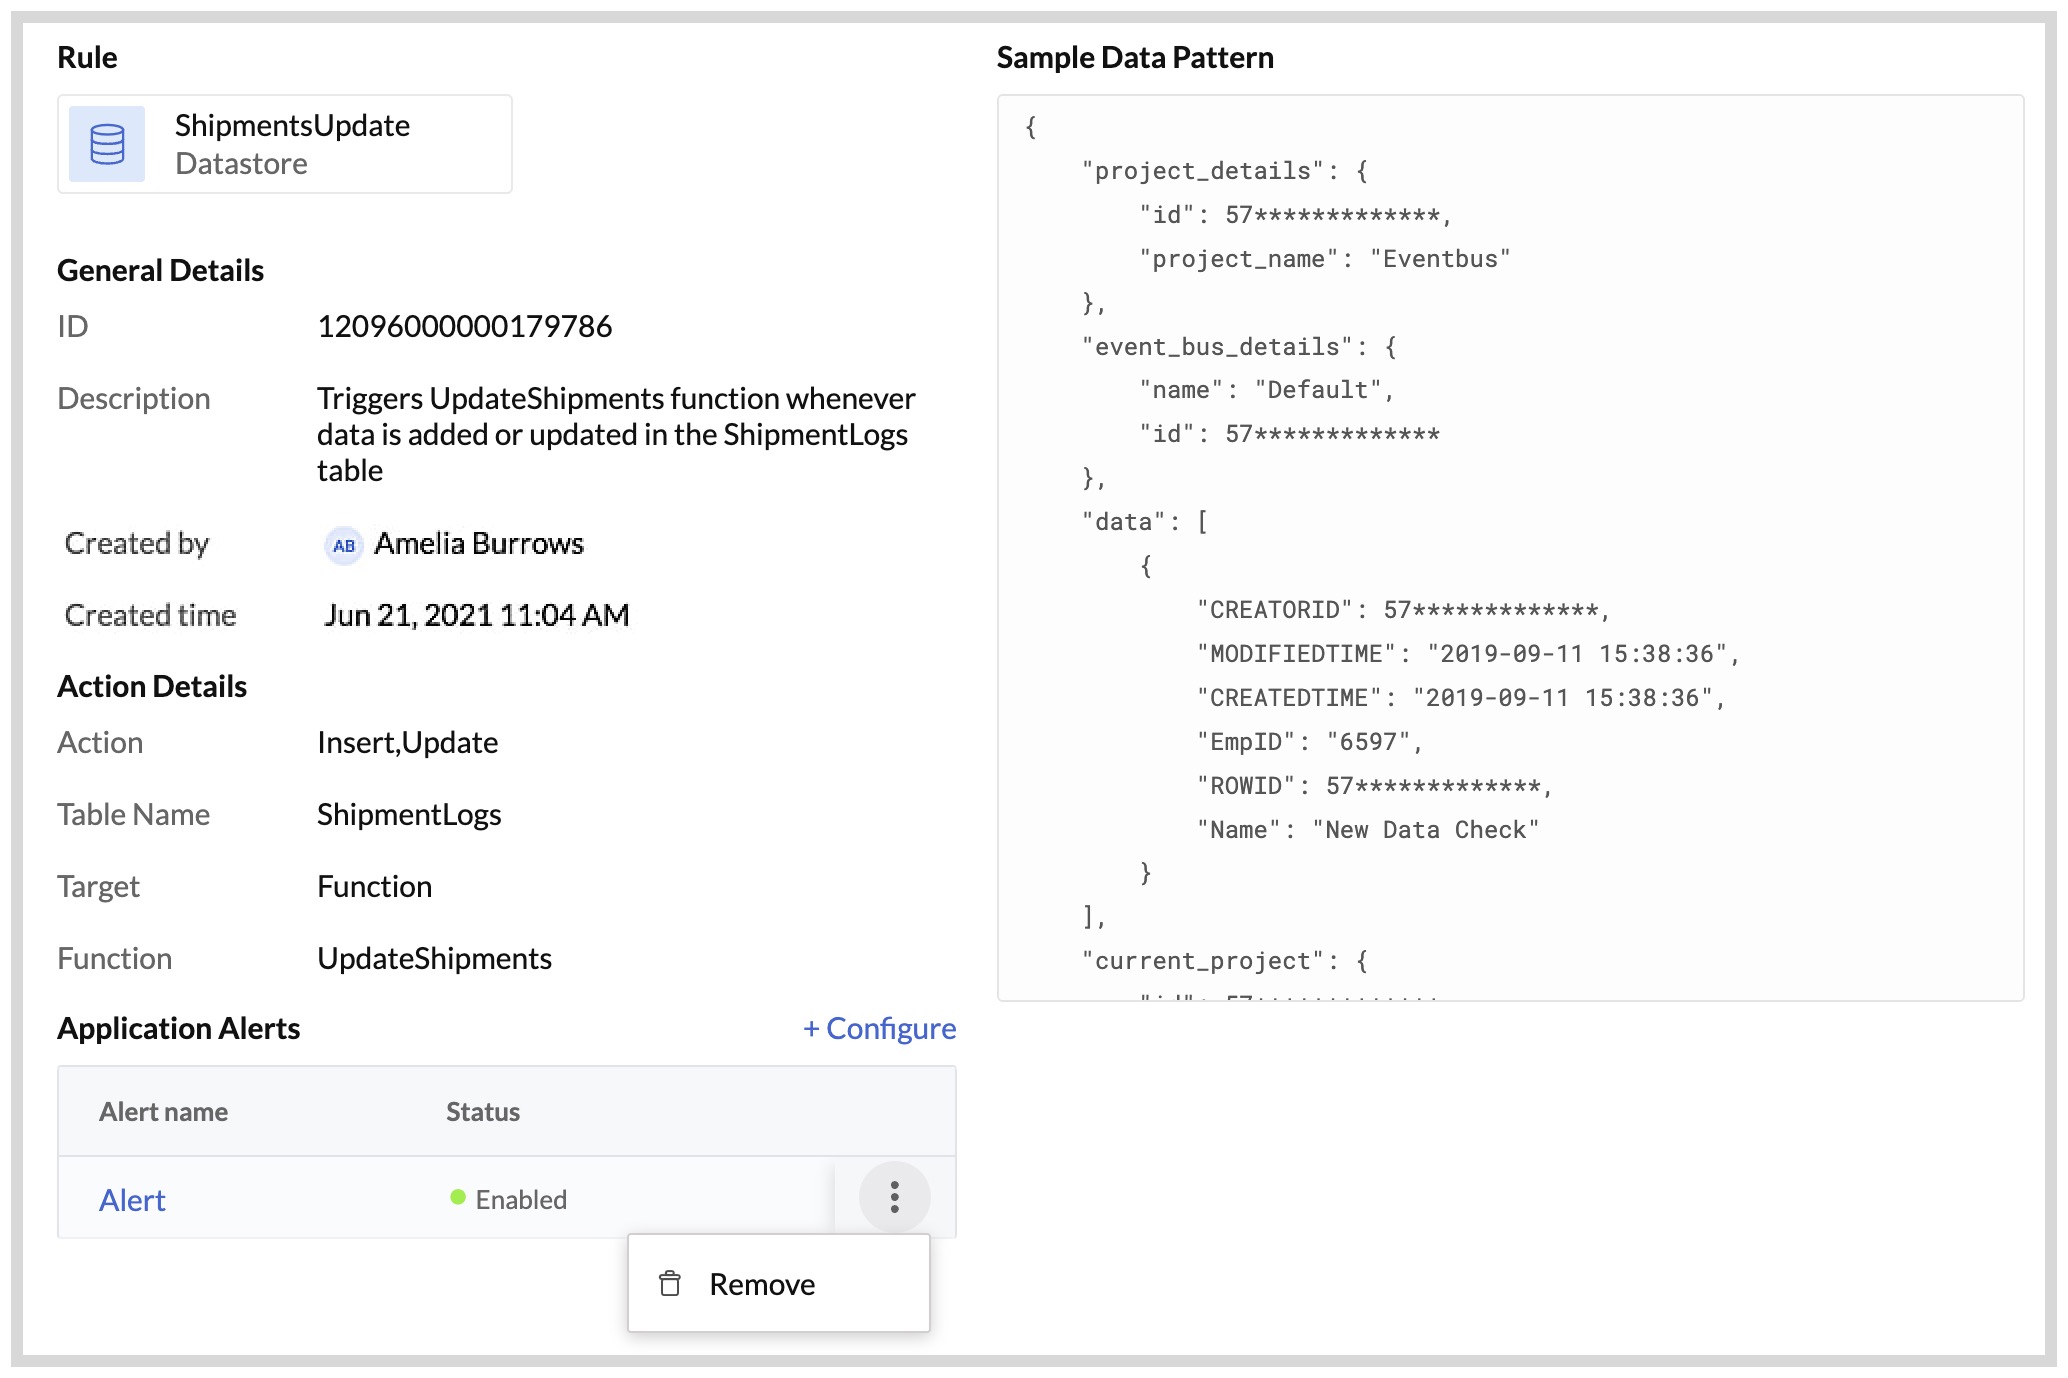
The rule is now created. You can view a list of all the rules and their details of the component event listeners from its section.

When you click on a rule's name from the list, you will view the details of the rule and its sample data pattern.

Before we discuss about the Processed Events section displayed here, and the Queued Events section displayed in the Event Listeners page, let's discuss the custom event listeners.
Configure Alerts for Catalyst Component Listeners
As mentioned earlier, you can configure automatic email alerts to be sent to you if the event listener encounters a failure, code exception or a process timeout. You can configure these alerts in the Event Listeners section directly without having to navigate to the Application Alerts component.
Click the + Configure button in the event listener's details section to configure an alert.

Click Confirm after configuring the alert to enable it.

You can also delete the alert by clicking the ellipsis icon beside the alert status and clicking Remove.


Custom Event Listeners
A custom event listener is used to pass data to a target function whenever its URL is invoked by the end user. You cannot associate an event occurrence in a component with a custom event listener. Any event listener that you create in Catalyst will be a custom event listener, as the component event listener is present by default.
Let's understand the behavior of a customer event listener in a logical sequence:
- When you create a custom event listener, a URL will be generated for it. The same URL will be used for all the event's rules. You can include this URL in your application's code or use it however you need.
- You can associate each rule of a custom event listener with a different target function. You can also send different data in the request body of the event listener's URL for every rule. That is, an event listener's URL invocation can be configured to trigger different functions and send different data for each rule every time.
- You can also associate multiple rules to the same target function, and send different data to the same function every time. This enables you to use the same function for different needs.
- To identify which rule needs to be triggered when a custom event listener's URL is invoked, the rules contain a variable called the rule identifier. When a rule is created in a custom event listener, you will need to provide a unique value as its identifier. This rule identifier is associated with only that rule, which in turn associates the target functions with the rule.
- Since a custom event listener has the same URL for all its rules, you can indicate which rule must be invoked, by passing the rule identifier value in the request body of the URL. The request body is in the JSON (application/JSON) format, and therefore must contain this information as a key-value pair with the key as rule_identifier. You can also pass more information in the request body based on your needs.
- The URL can only be invoked using the HTTP POST method, as other methods do not support the inclusion of form data within the message body of the request.
- When the event listener's URL is invoked, Catalyst matches the rule identifier specified in the body of the request with a rule of that event listener configured in the console. When the match is a success, Catalyst triggers that rule and passes the event data to the functions associated with that rule. If there is no successful match, it will be a failed event.
Let's understand the functioning of a custom event listener better with an example:
Assume you create a custom event listener in our Catalyst project. The URL of the event listener will be automatically generated. Now you create a rule (rule_1) in it and provide the value for the rule identifier as ID1. This rule executes the target function Func when triggered. Now you create a second rule (rule_2) whose rule identifier is ID2 and it executes the same function Func when triggered. That is, both rule_1 and rule_2 have the same invocation URL and they execute the same function. Now, you use this URL in the application's logic in two different places.
Usage 1: The user submits data through a form (Form 1) in the client's homepage and the URL is invoked. You specify the rule identifier as ID1 in the form data of the URL's body.
Usage 2: The user submits data in a different form (Form 2), and the same URL is invoked. You specify the rule identifier as ID2 in the form data of the URL's body.
Catalyst event listener will be listening for the invocation of this URL. When a user submits data through Form 1, the URL is invoked. The body of the HTTP request would contain the form data which includes the rule identifier as shown below:
	"data": "Sample data from Form 1",
	"rule_identifier": "ID1"
When Catalyst captures this event, it will match the rule identifier ID1 to rule_1 configured in the project. When the match is a success, it triggers the function Func. It will then pass the event data to the function in the following sample data pattern:
	{
    "project_details": {
        "id": 57*************,
        "project_name": "Eventbus"
    },
    "event_bus_details": {
        "name": "ThirdPartyBus",
        "id": 13*************
    },
    "data": "Sample data 1",
    "current_project": {
        "id": 57*************,
        "project_name": "Eventbus"
    },
    "action": "Produce",
    "source_entity_id": 570000000003015,
    "rule_identifier": "com.abc",
    "source": "Custom",
    "event_time": 1568192053790
}
If a user submits data through Form 2, the same URL will be invoked with the value of the rule_identifier in the request body as ID2. When Catalyst captures this event and associates ID2 with rule_2, relevant data is passed to Func. The data pattern is the same for the rules of all custom event listeners.
Let's now create a custom event listener and configure it.
Create a Custom Event Listener
To create a custom event listener:
- Click Create Event Listener from the Event Listeners section in Amplify, in the Catalyst console.
- Enter a name and a description for the custom event listener.
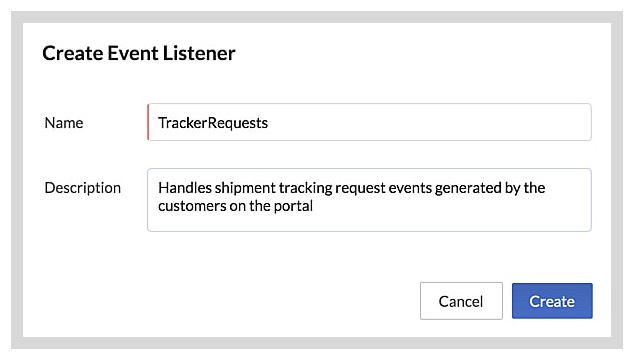
- Click Create.


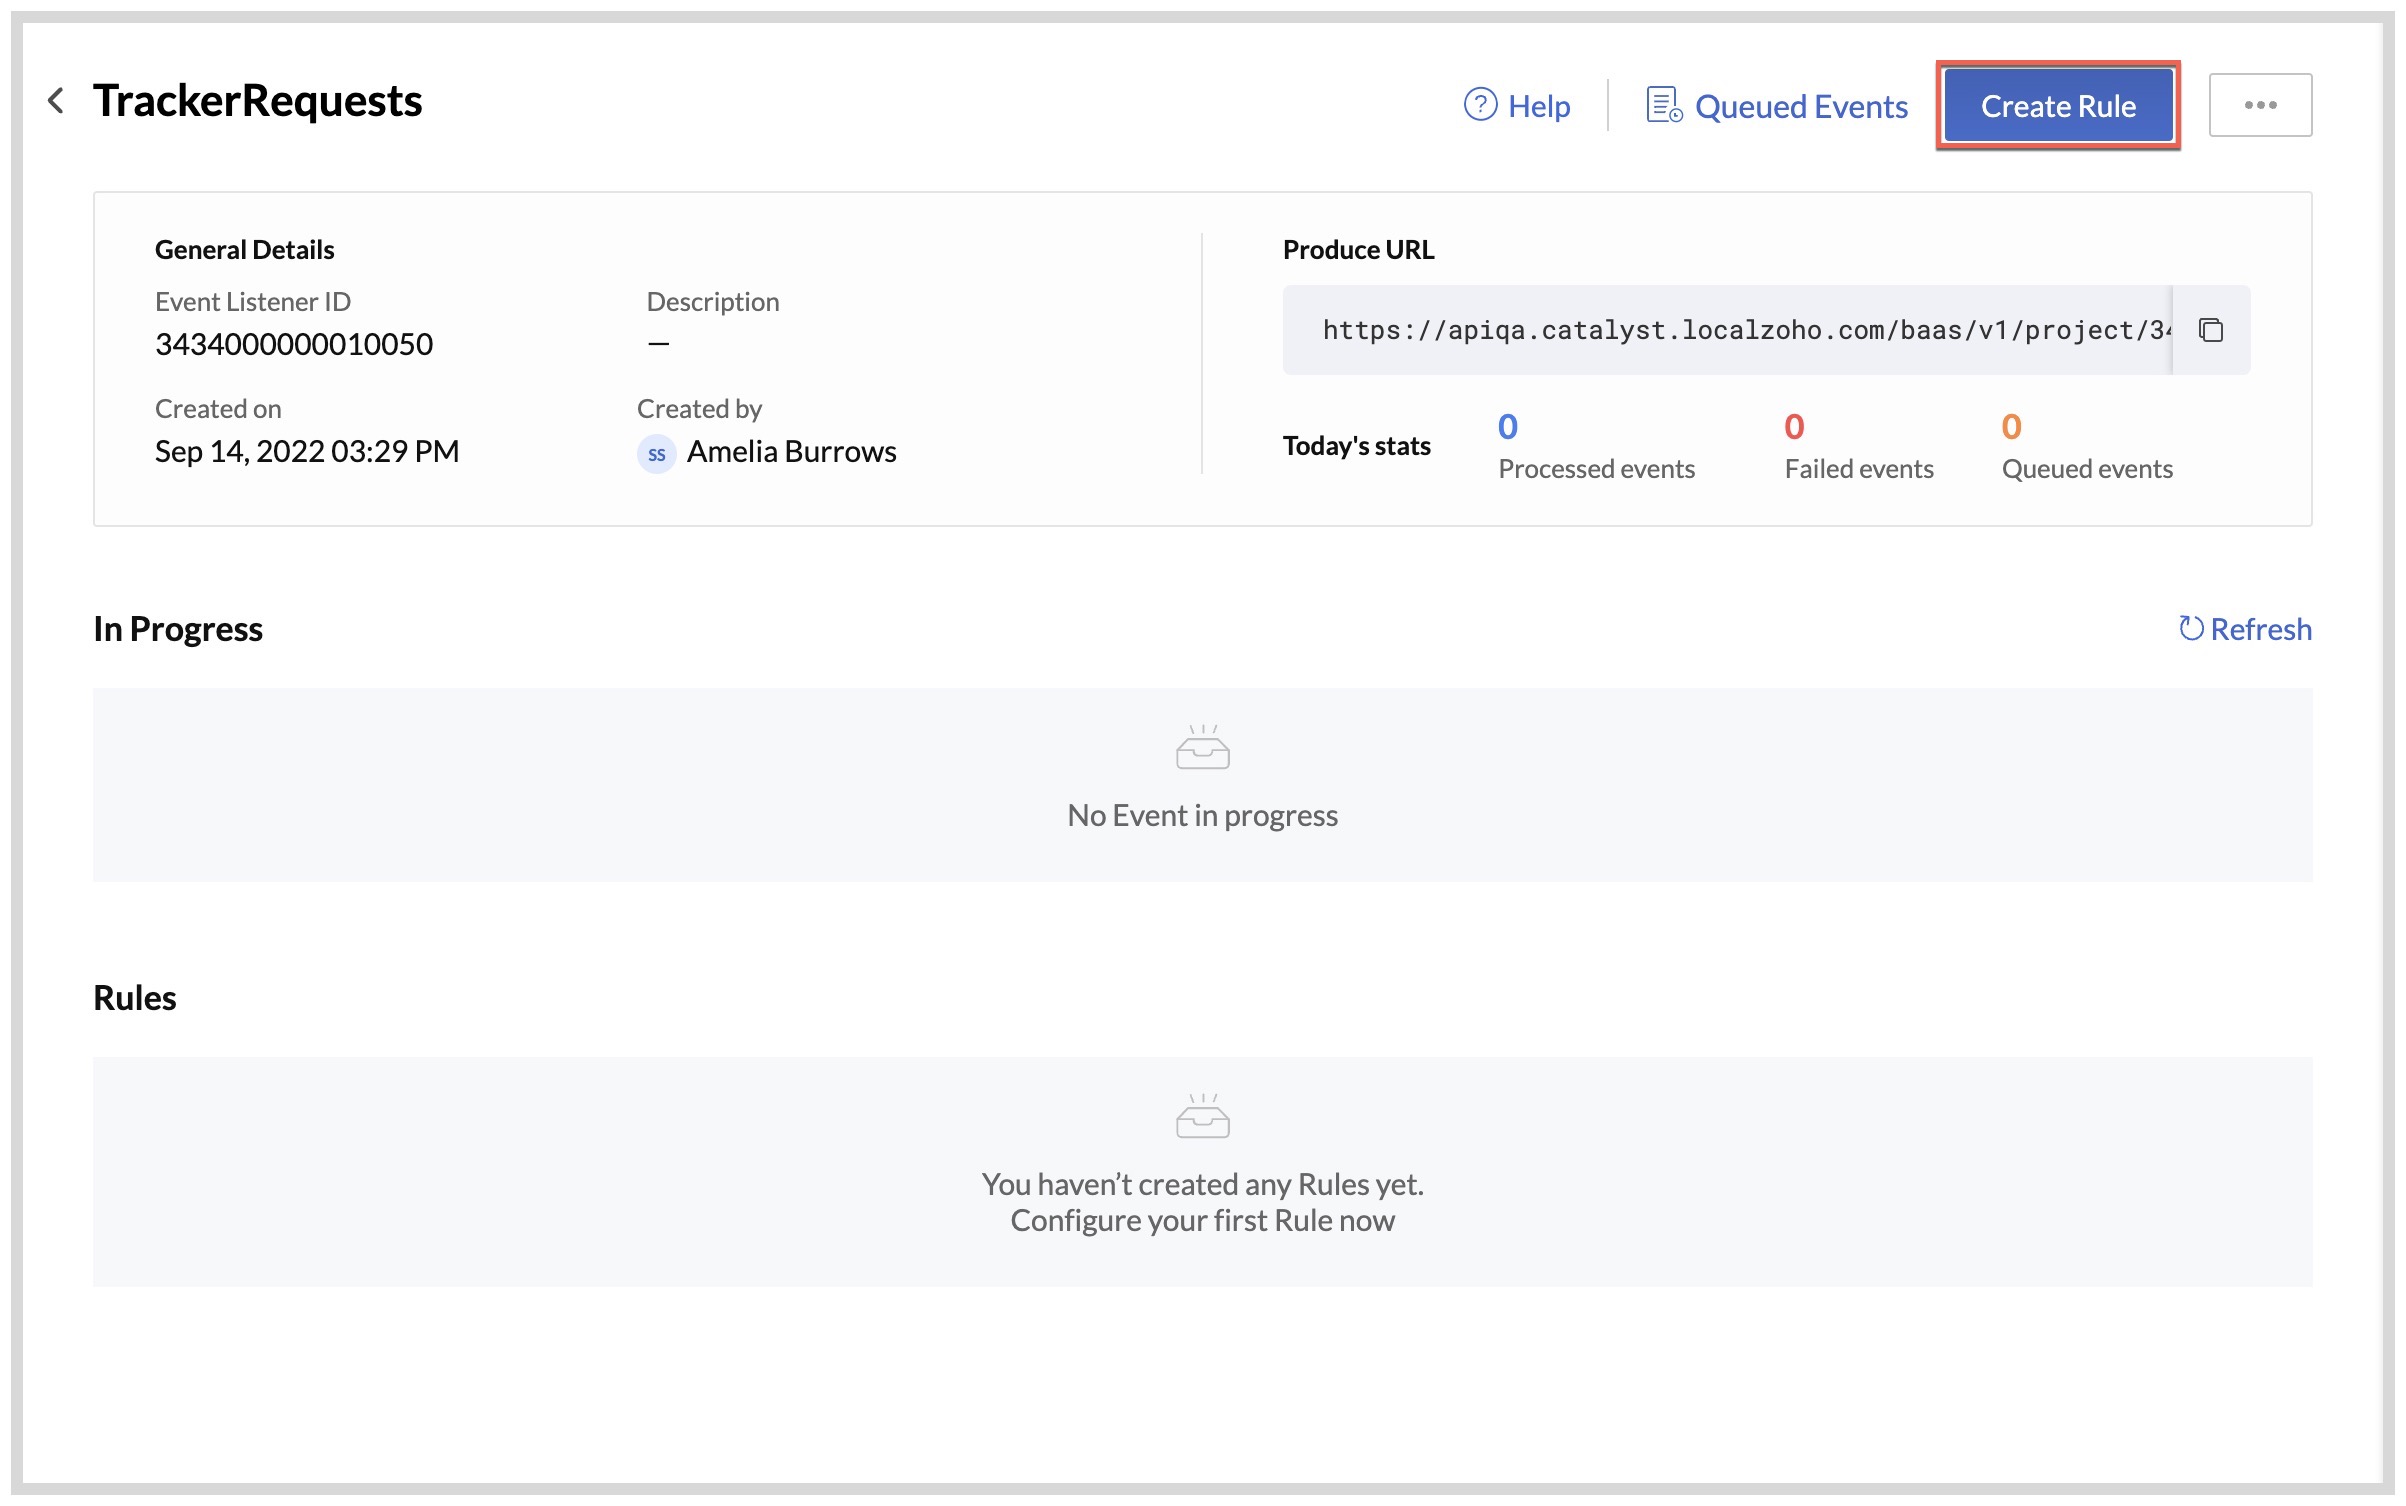
The custom event listener will be created and displayed in the Event Listeners page with its ID and the same performance statistics as the component event listener.

You can view the details of an event listener by clicking on View on its tile. You can also access the URL of the event listener from this page.

The URL of a custom event listener is of the following format: https://api.catalyst.zoho.com/baas/v1/project/project_id/event-bus/event_listener_id/produce?ZCFKEY=zcf_key
with the values of Project ID, Event Listener ID, and a unique ZCF Key filled in.
Create a Rule in the Custom Event Listener
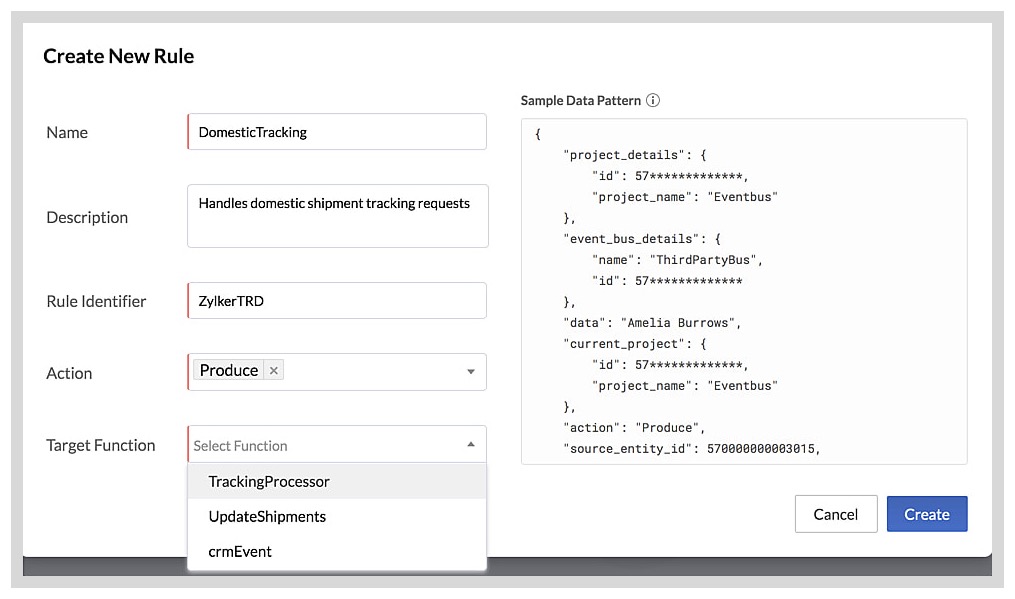
You can now create a rule in the custom event listener in the following way:
- Click on the custom event listener from the Event Listeners page to open it.
- Click Create Rule.
- Enter a name, description, and a rule identifier for the rule.
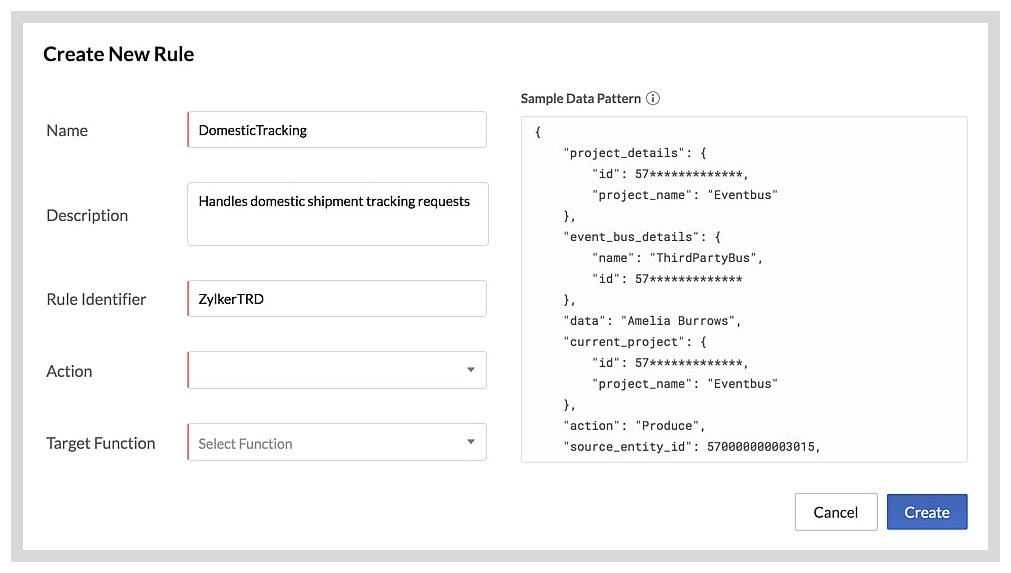
The page displays the sample structure of data that will be passed to the target function. - Select the action and the target function from the dropdown list. You can currently only select Produce to enable passing data to the target function. You can select multiple target functions.
 Note: Only event functions are displayed in the dropdown list.
 - Click Create.


The rule will be created in the custom event listener. It will be listed in the event listener's page with its details. The source of a custom event listener is always "custom".

Click on a rule's name in the list to view the details of the rule and its data pattern.

Before we discuss managing the rules of your event listeners or processed events, let's quickly go over editing and deleting a custom event listener.
Edit a Custom Event Listener
You can rename a custom event listener or edit its description in the following way:
- Open the custom event listener from the Event Listeners page.
- Click the ellipsis menu on the top of the page, then click Edit.
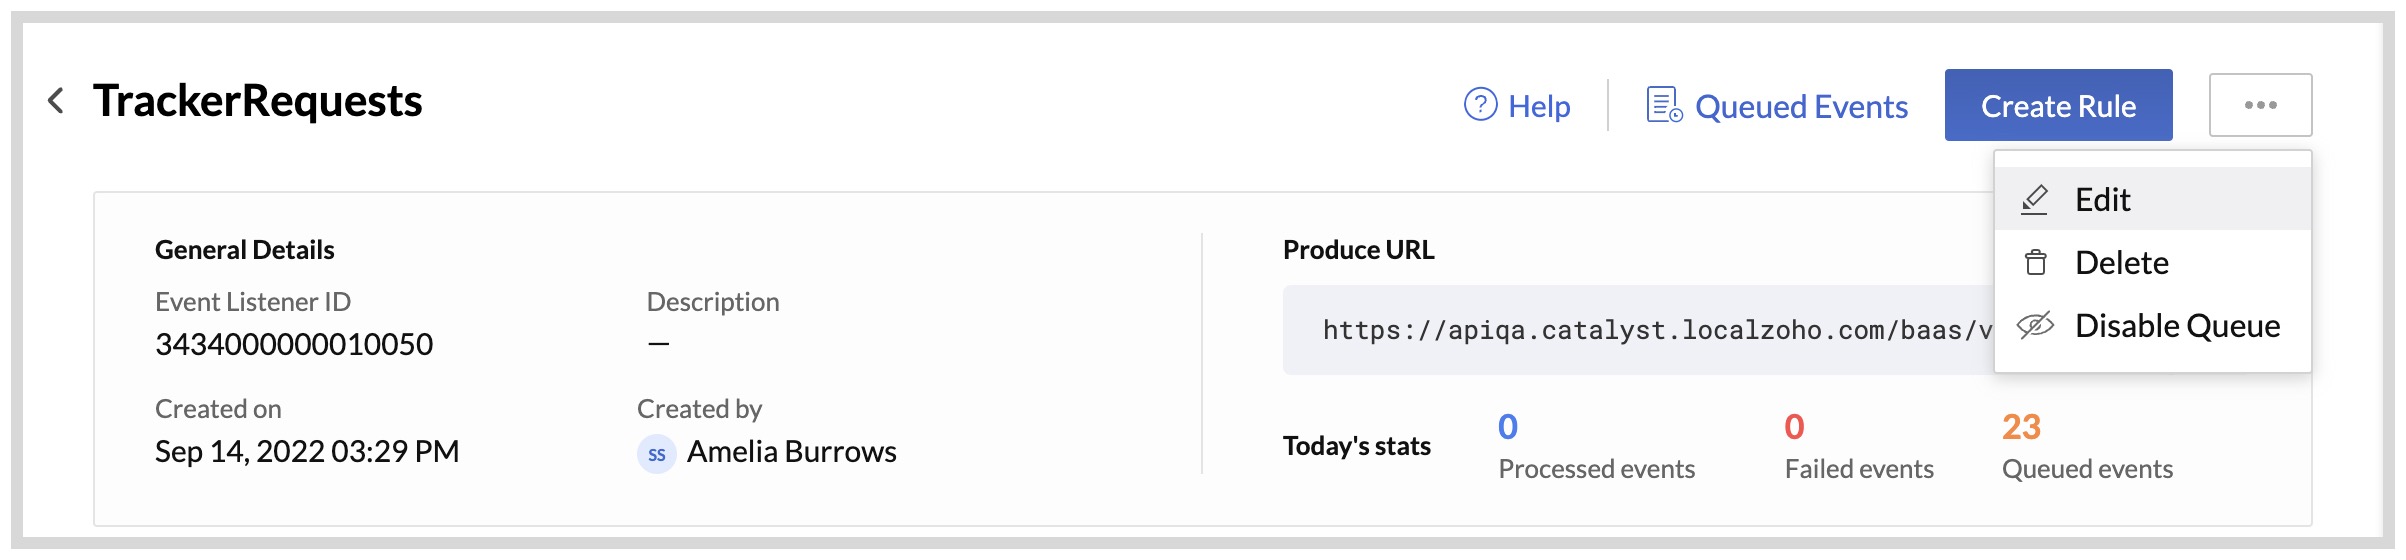
- Update the details of the event listener, then click Save.


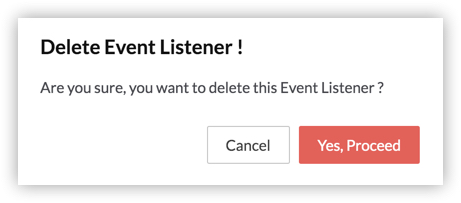
Delete a Custom Event Listener
To delete a custom event listener:
- Open the custom event listener from the Event Listeners page.
- Click the ellipsis menu on the top of the page, then click Delete.
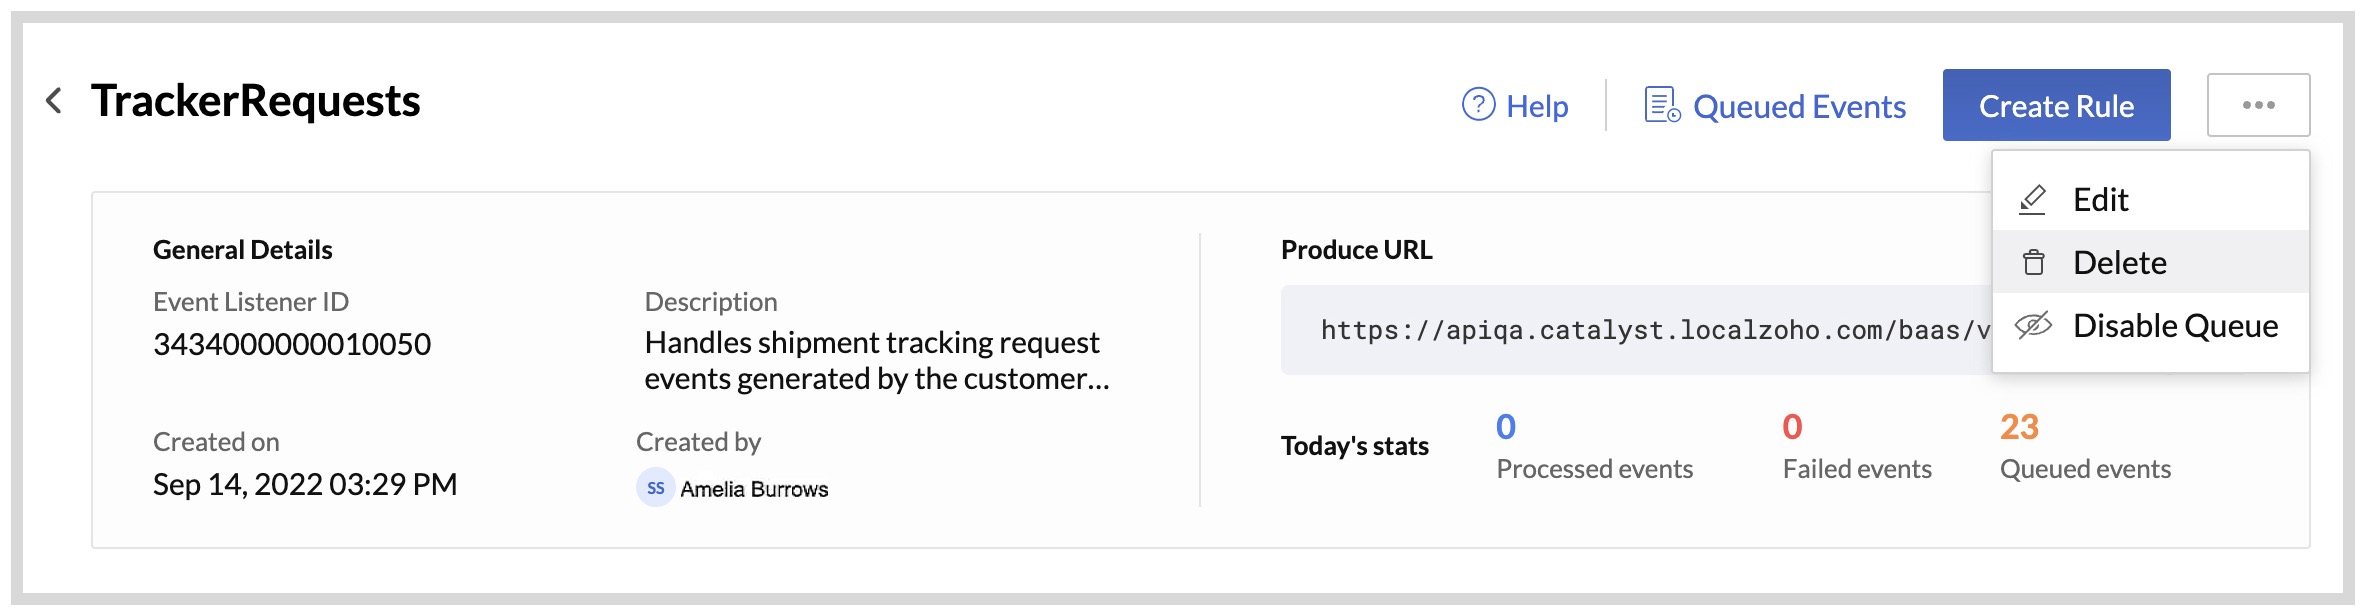
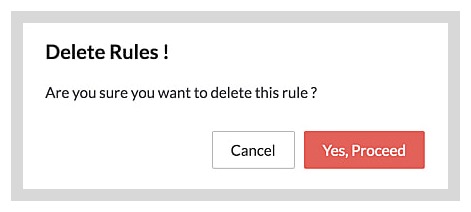
- Click Yes, Proceed in the confirmation pop-up.


Queued Events
As described in the Terminology section, when an event for which an event listener rule has been configured has occurred, the event will be queued for processing. The event will be added to a queue particular to that event listener. This can be an event in a component that an event listener has been configured to listen to, or the invocation of a custom event listener's URL.
The process can be described as follows
- Event listener listens for a component or a custom event
- Event Occurs
- Event is pushed to queued events
- Event listener's rule is triggered
- The rule invokes the associated event functions and passes the event data for execution
- Event function executes
- Function execution is a success or a failure
- Event is removed from the queue, and is categorized as a processed or failed event
Queued Events in Component Event Listeners
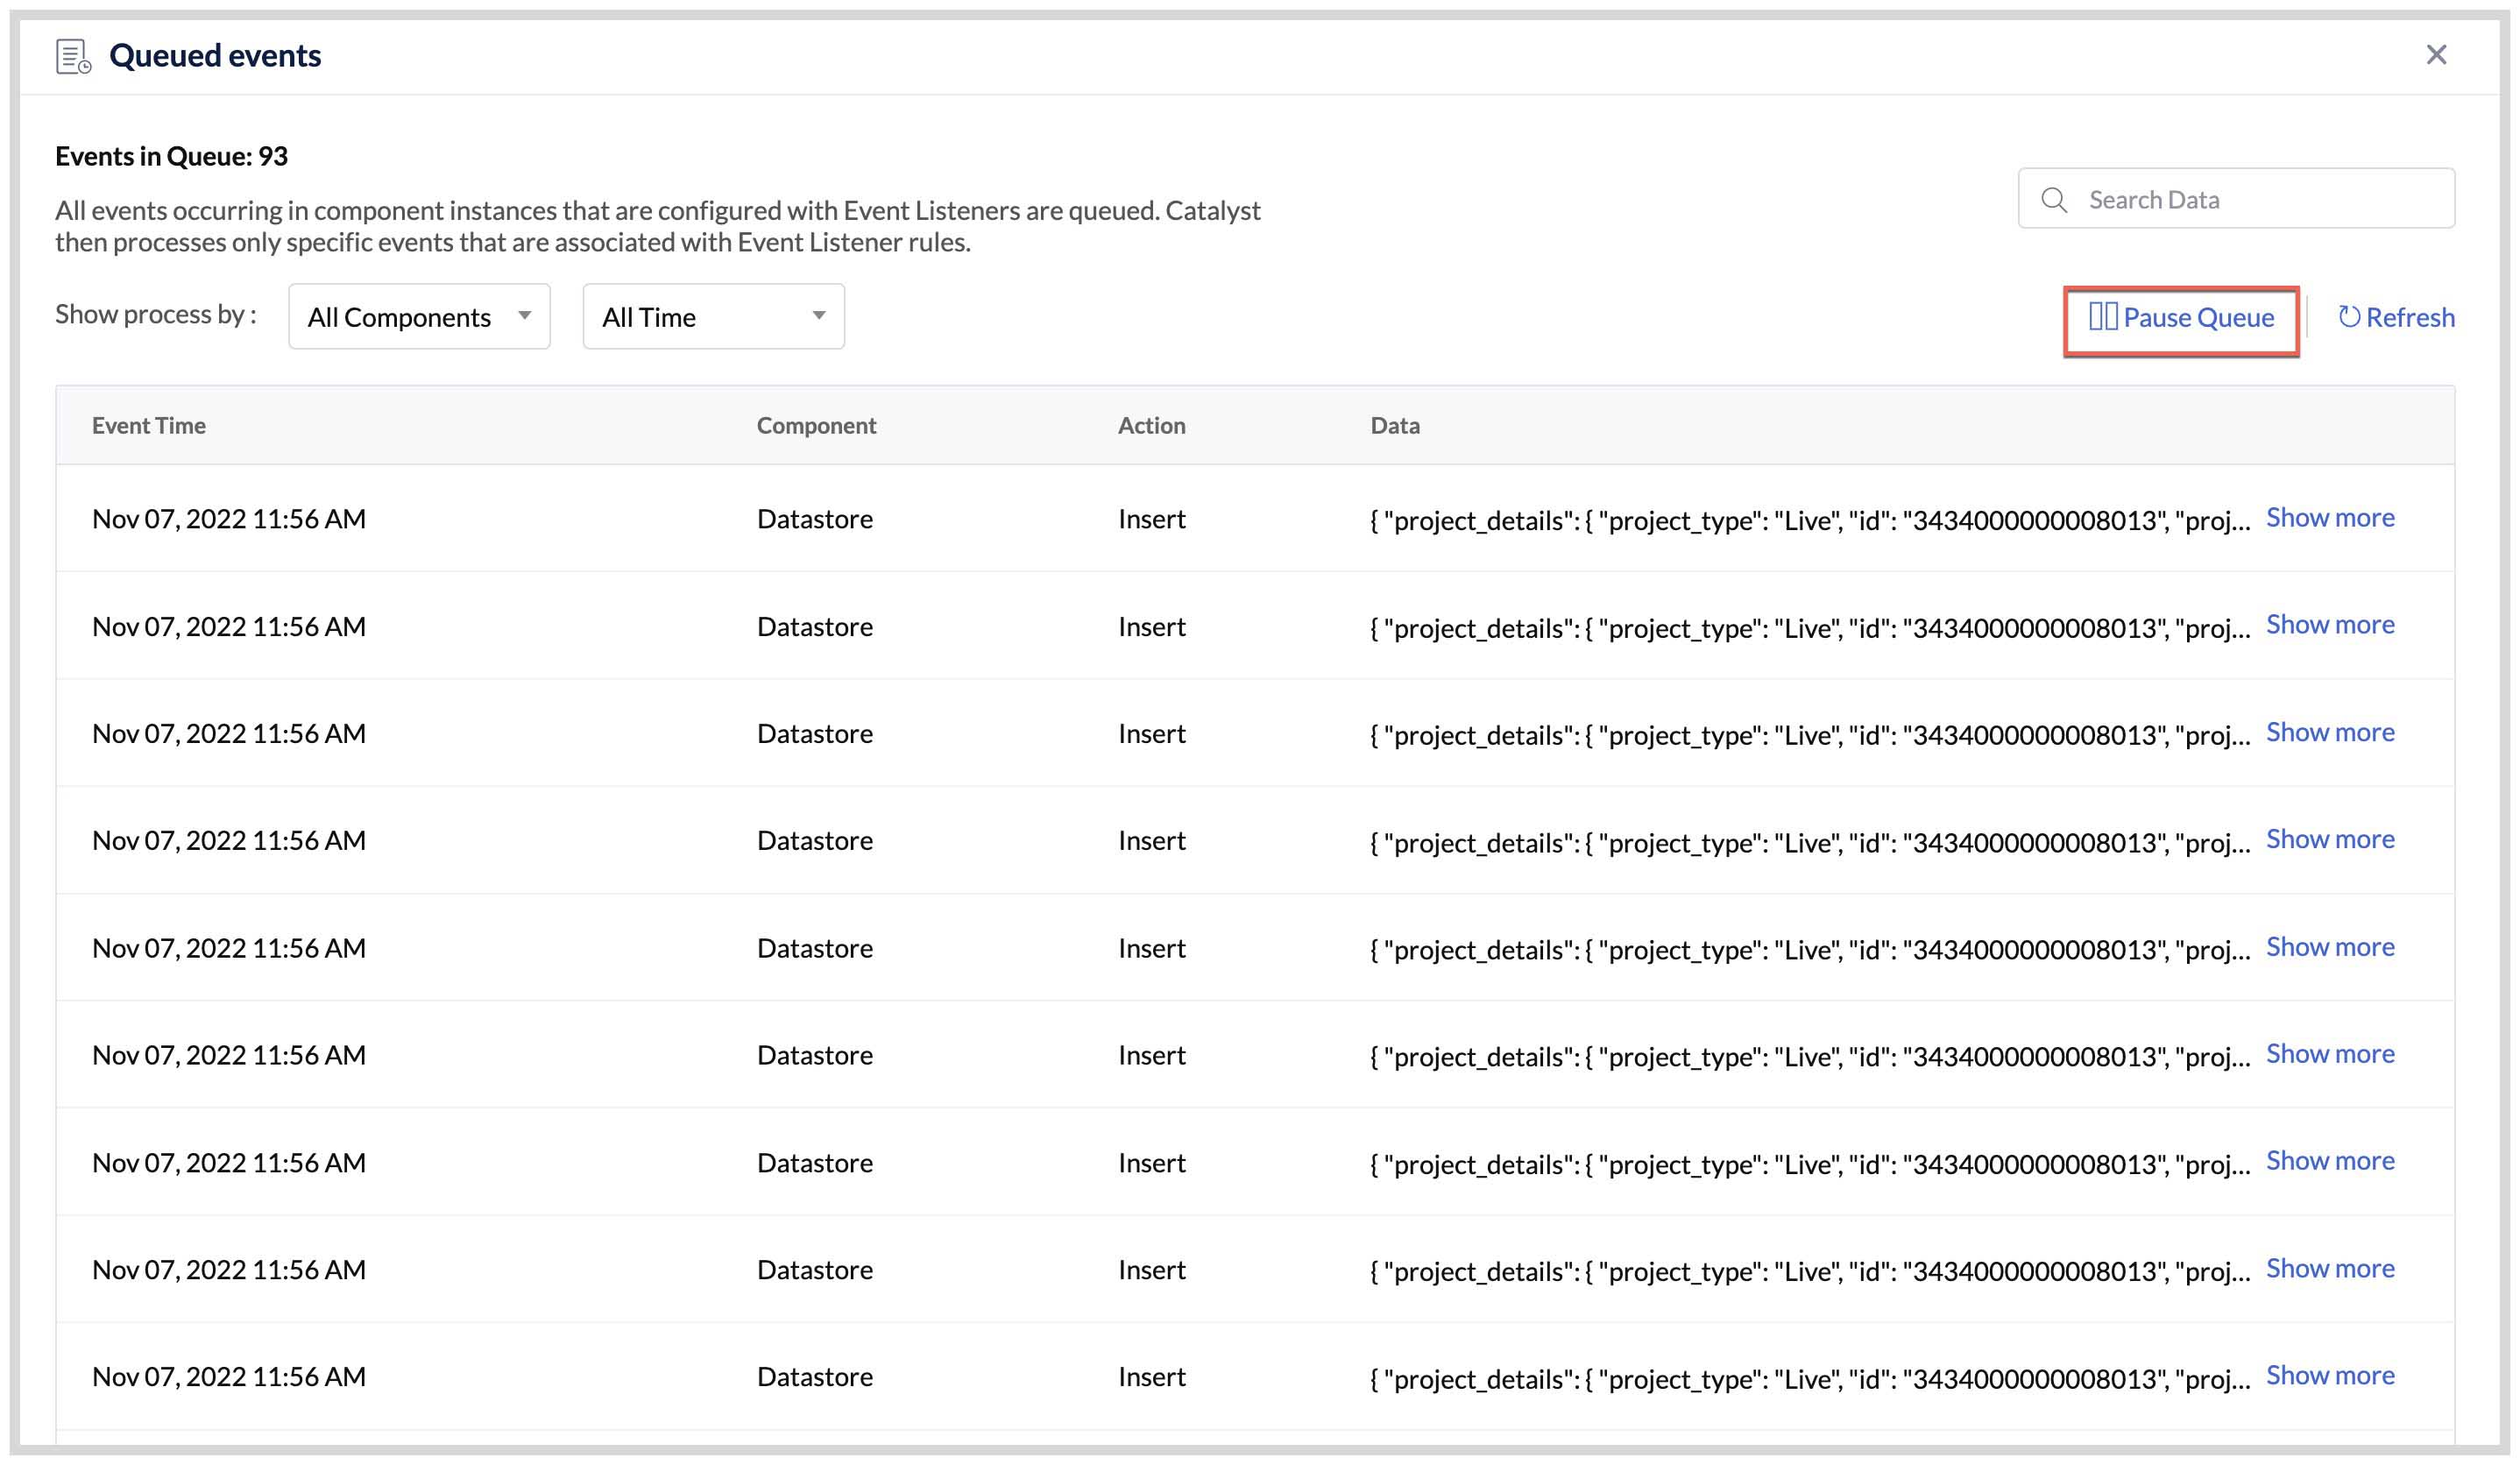
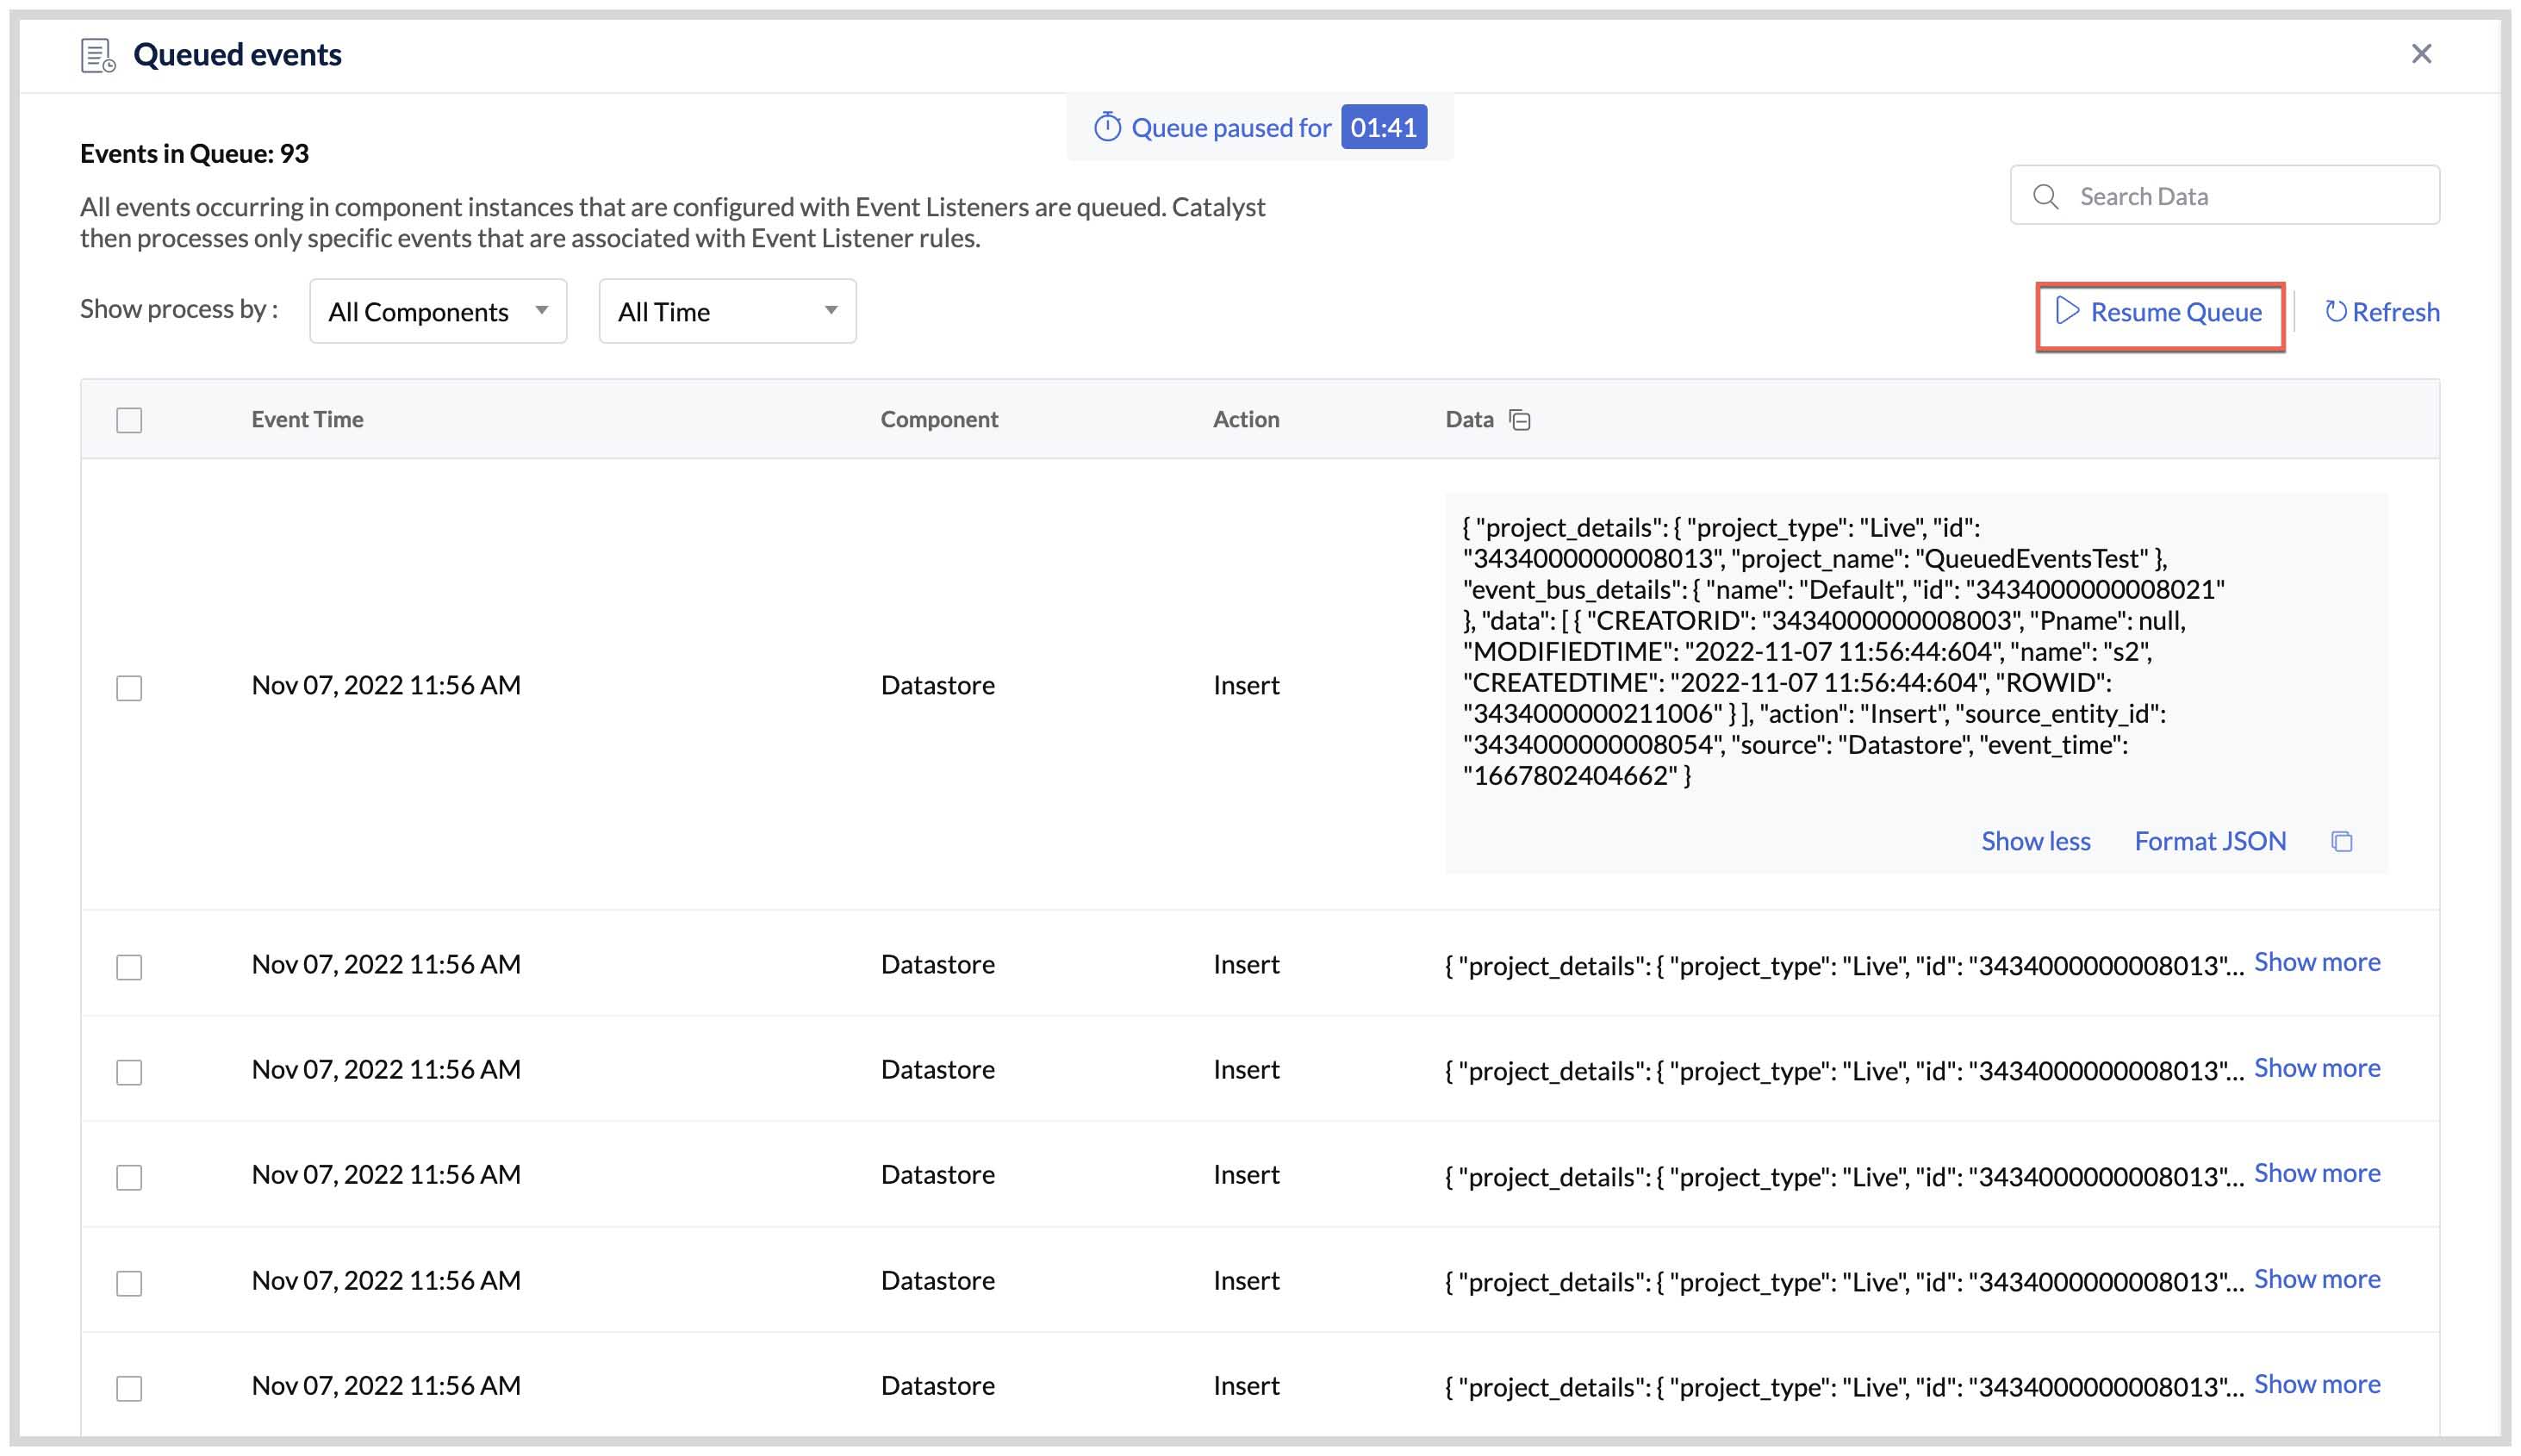
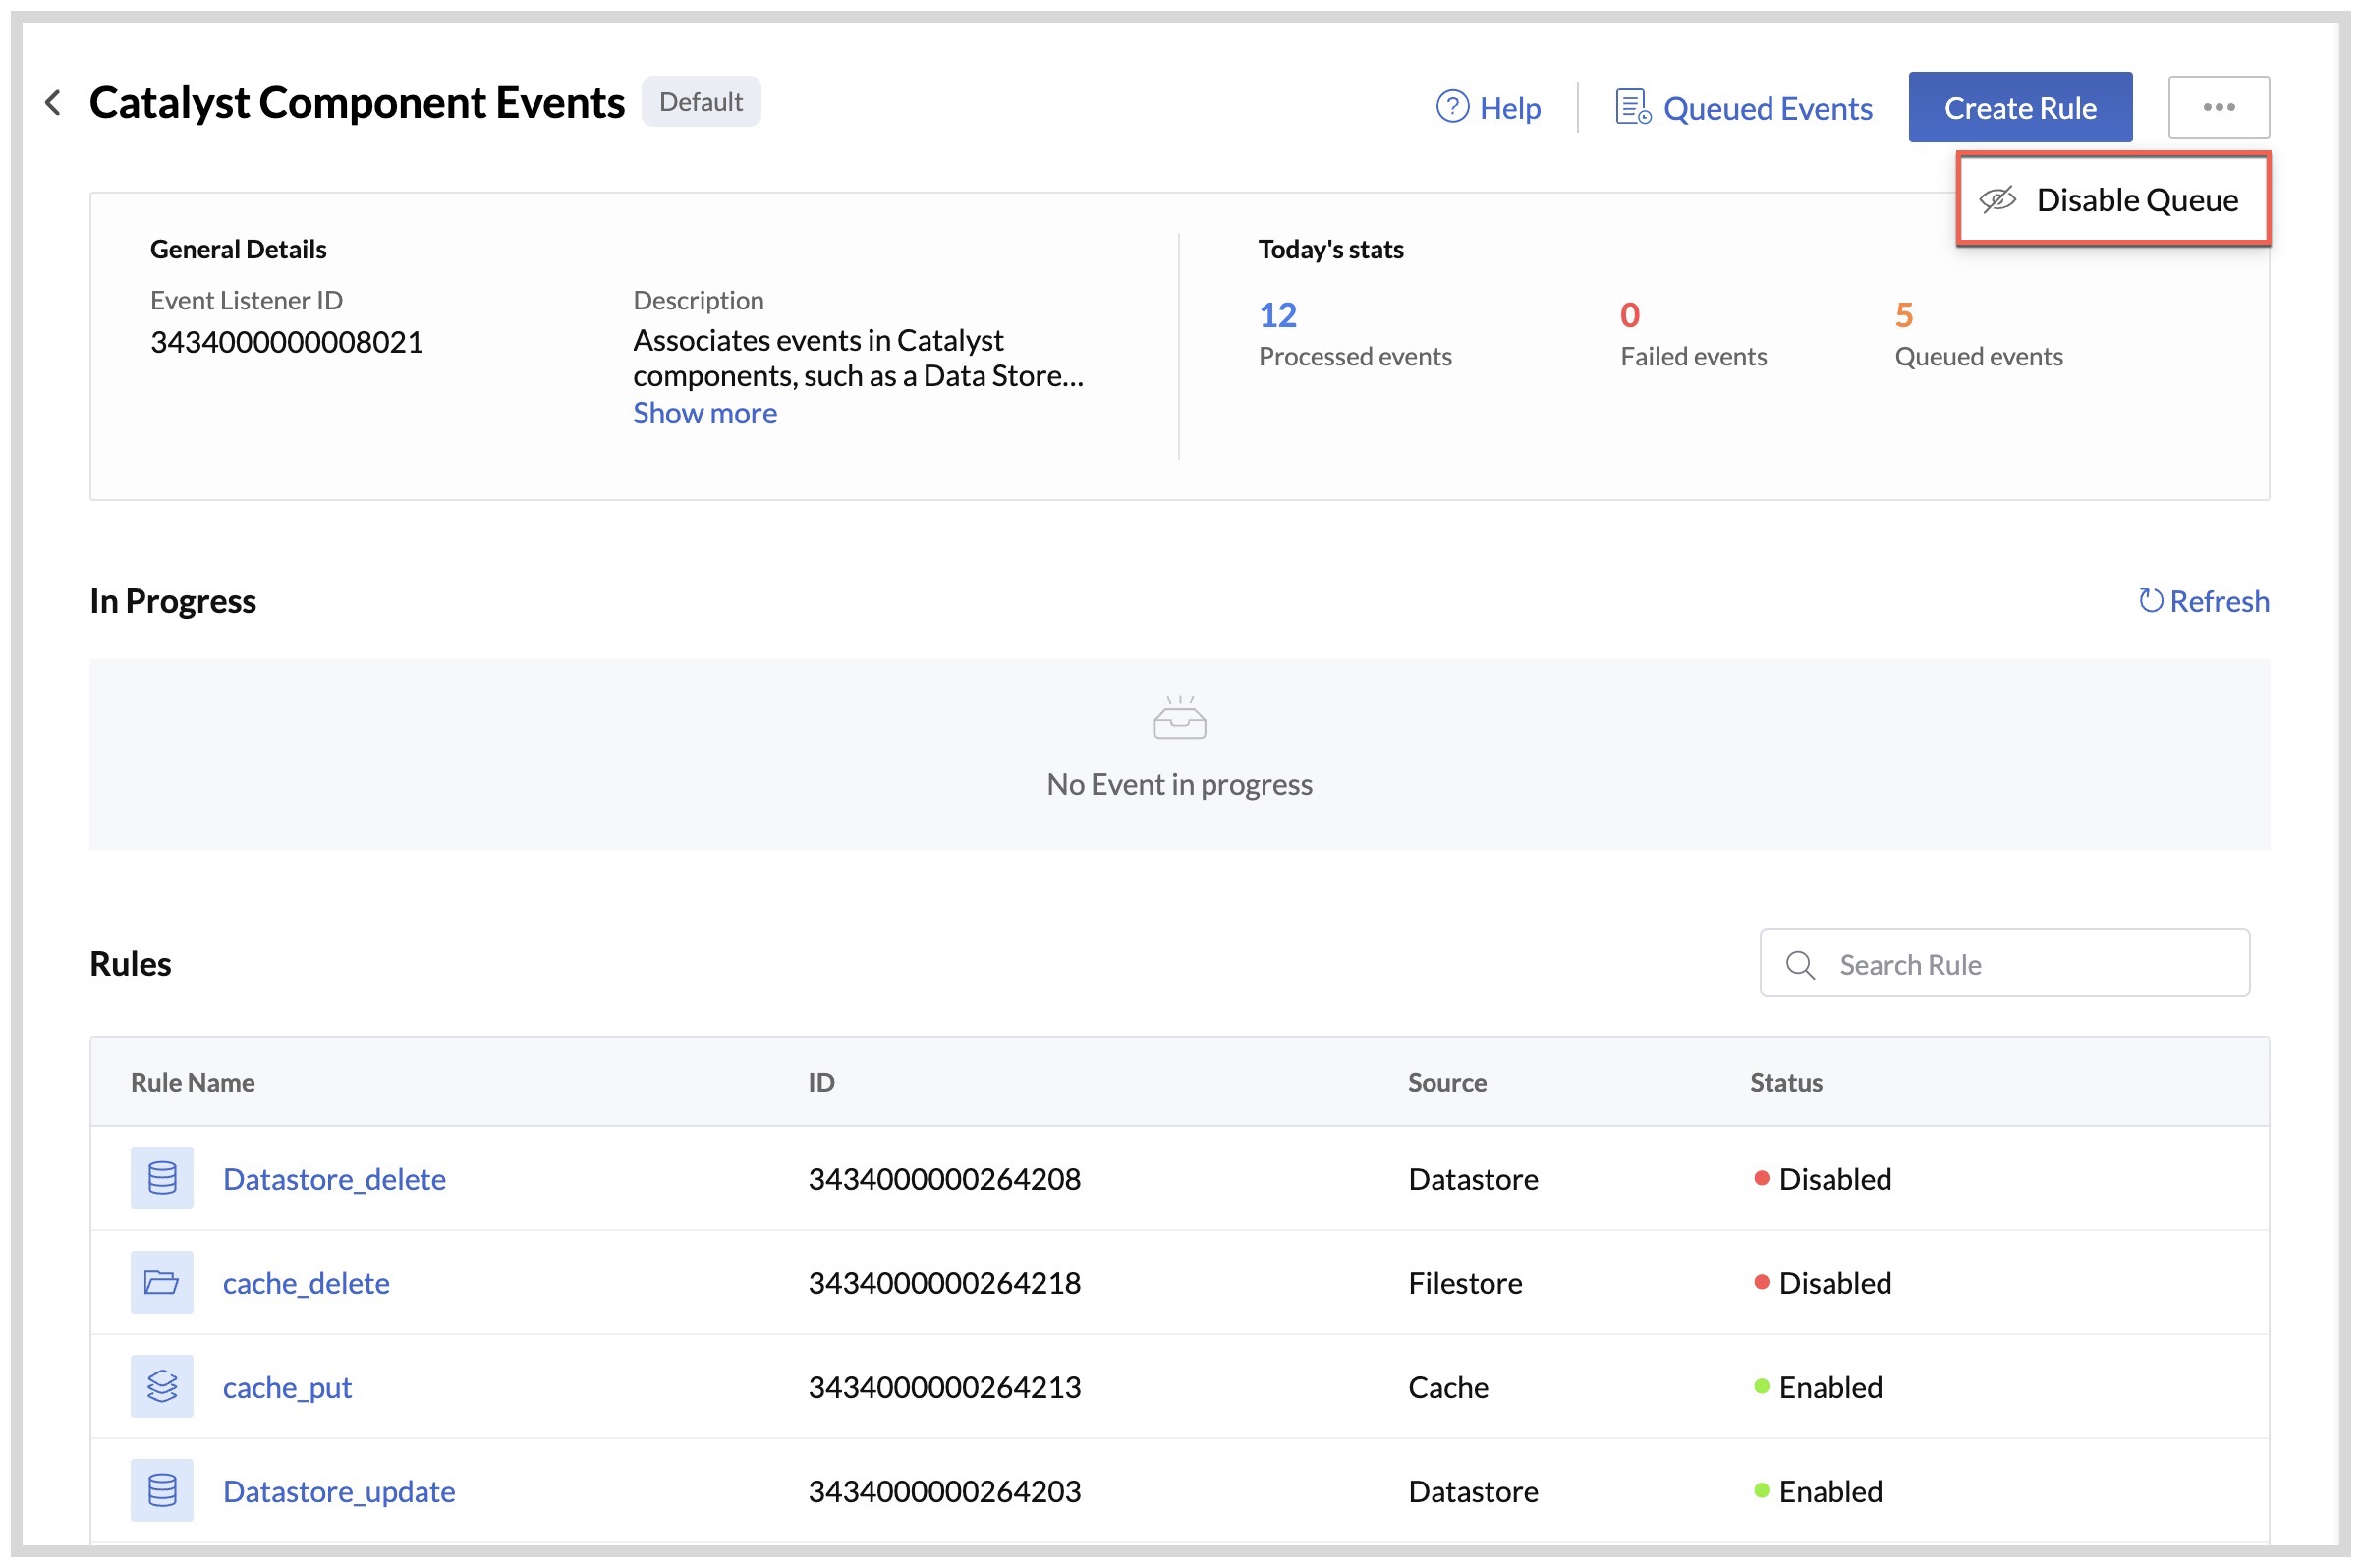
You can view the events that are currently in the queue at any point of time, from the Queued Events section in the Event Listeners page. The event listener's tile will also display the number of events that are in the queue currently, in its statistics.

The queued events section displays various details of the events such as their time of initiation, source, action, and the data in JSON format that will be passed to the associated event functions by the rules respectively. You can view the formatted data by clicking the Format JSON button.

You can filter the queued events displayed on this page based on specific components using the first drop-down list. You can also use the search bar to search for events based on event time, rule name, action or even component name. For more precise search results, you can search using keywords from the event data.

You can further narrow the list of queued events by filtering based on the specific actions pertaining to each component.

You can also filter the events based on their time of initiation, such as from the last 15 minutes or 30 minutes from the time-based drop-down list.

Queued Events in Custom Event Listeners
Similar to the queued events in the component event listener, you can view the events queued for processing in a custom event listener by clicking Queued Events from a custom event listener's page.
The page will display details like the date the custom event listener was created on, the description and by whom it was created. Additionally, you will be able to view and copy the Produce URL of the custom event.

The queued events section also displays other details of the events such as their, source, action, and the event data in the JSON format that will be passed to the associated event functions by the rules respectively. You can view the formatted data by clicking the Format JSON button.

As in Component Event Listeners, you can filter and search the queue for events.
You can click Refresh to view an updated list, if there are any lags in displaying the events.
After these events are processed, they will be removed from the queue.
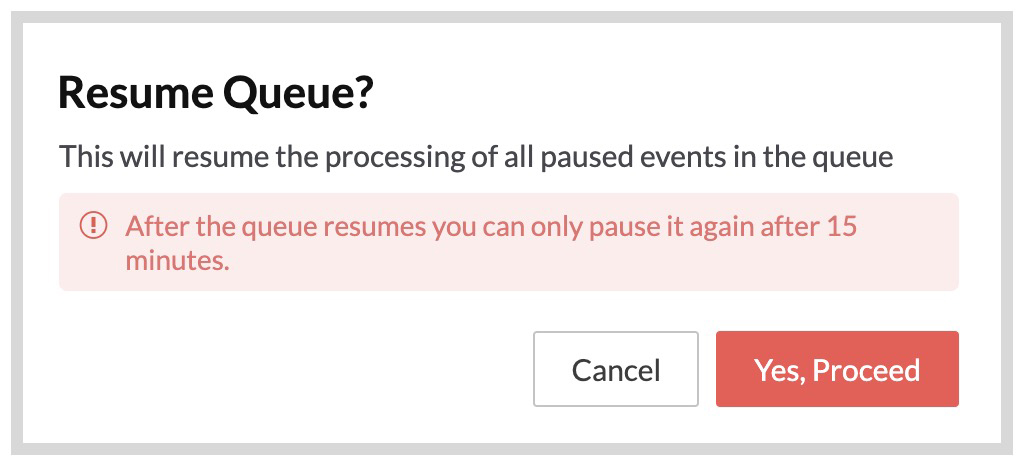
Pause Events in Queue
Catalyst enables you to pause any event in the queue for a maximum period of five minutes in one go. Pausing a queue allows you to stop its processing temporarily and perform code fixes in case any errors occur.
You can then either manually resume a paused queue or wait for the queue to be resumed automatically when the five-minute timer runs out.

You can pause the queue by clicking the Pause Queue button in the right-hand corner.
Click Yes, Proceed
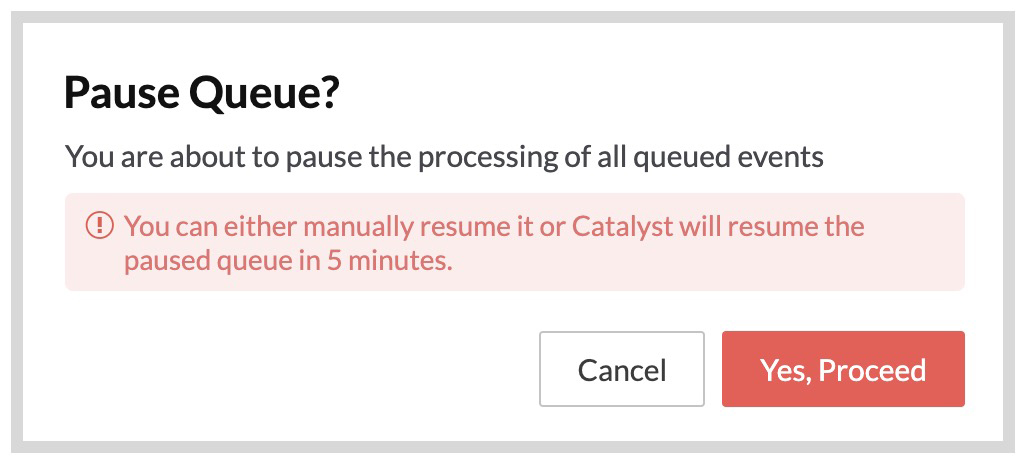


You can search and filter results in the queue even while it is paused. The time remaining for the queue to automatically resume will be displayed on top of the Queued Events page.

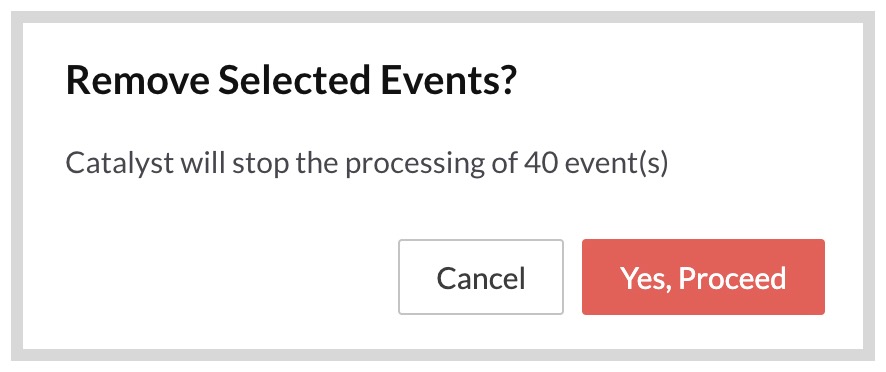
Remove Events from Queue
While the queue is paused, you can delete events from the queue. This will remove them permanently from the queue and terminate their processing. If an associated event function has been triggered, it will also be terminated immediately.
To remove one or more events from the queue:
- Select an event or multiple events when the queue is paused using the check box, then click Remove Event.
You can also select all events and delete them in bulk. Click Remove All.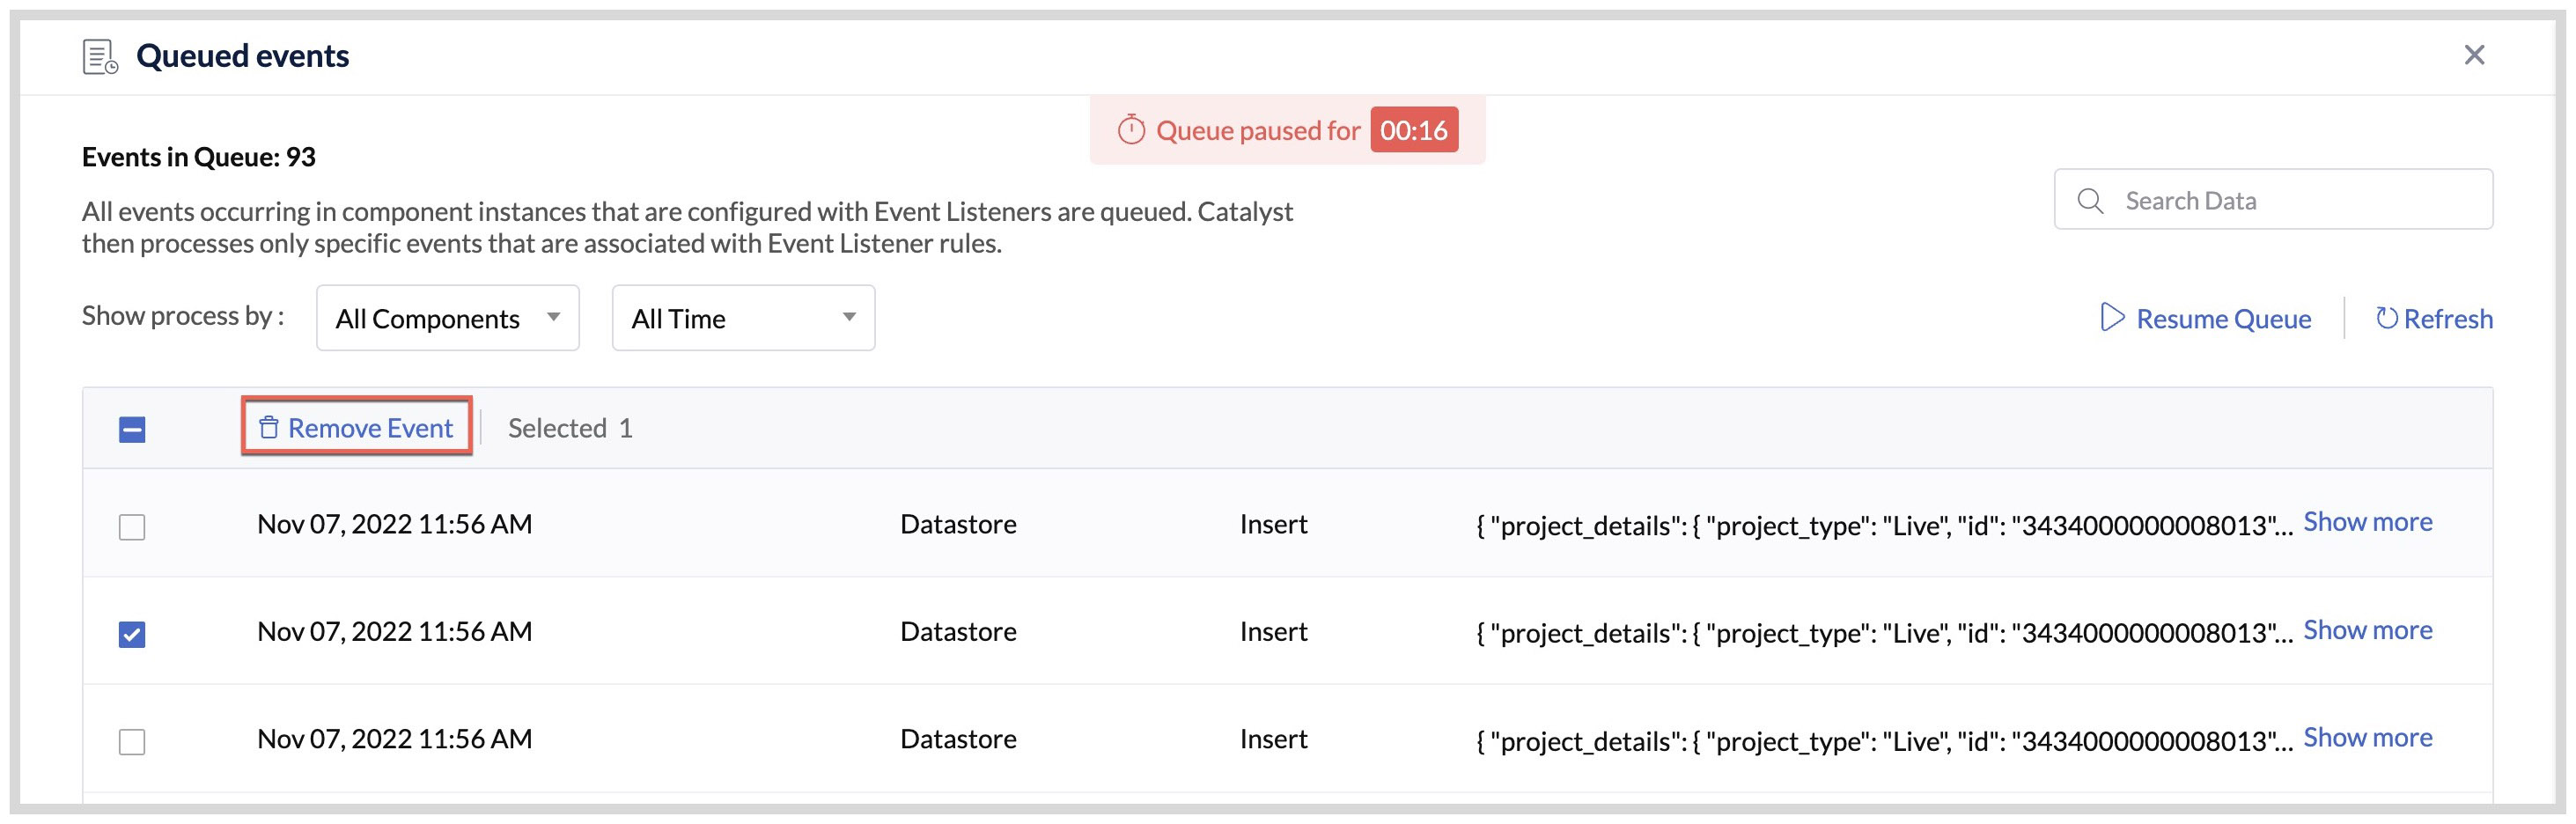
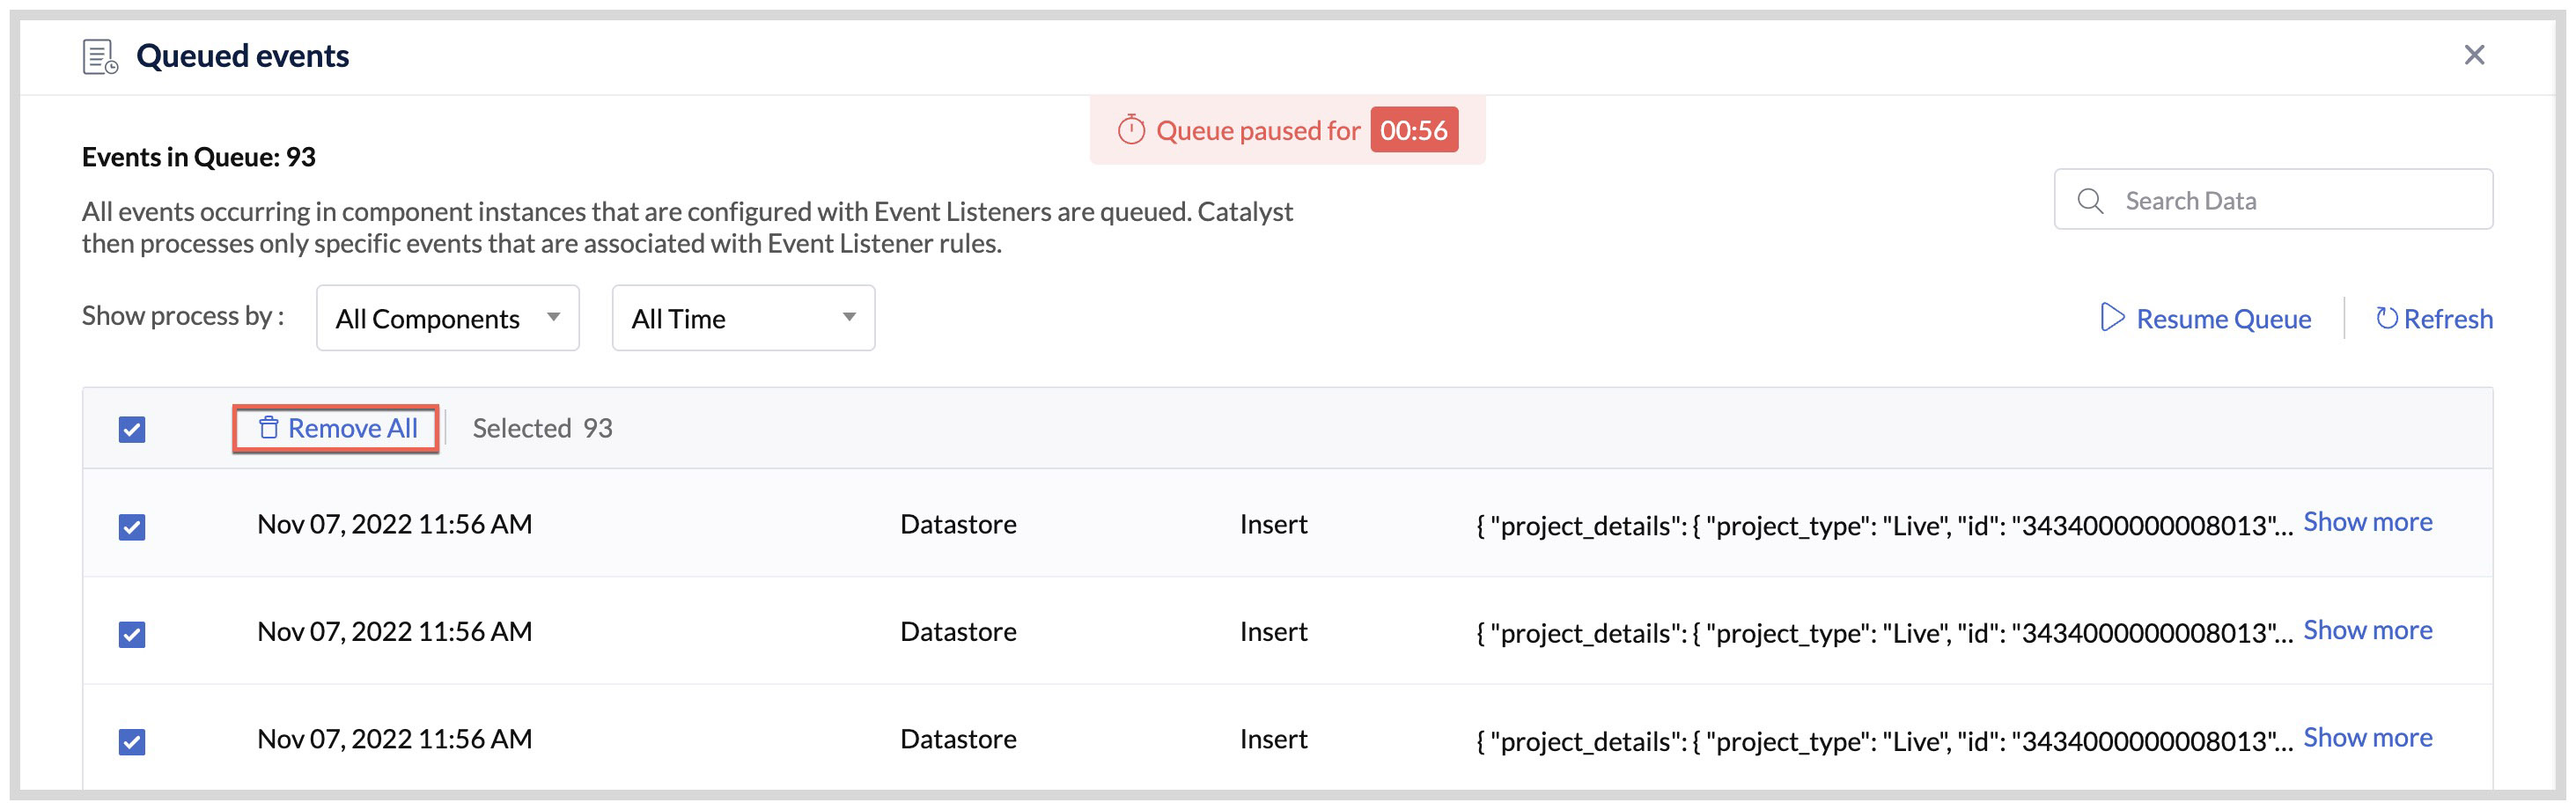
- Click Yes, Proceed to confirm.


Resume Queue
To manually resume a paused queue:
- Click Resume Queue.
- Click Yes, Proceed to confirm.


Kill Events in Queue
A particular event in a queue that is currently being processed will be displayed in the In Progress section of the event listener's index page. This section will display the event's details such as the rule name, Execution ID, date and time of processing, and the event data in the JSON format.
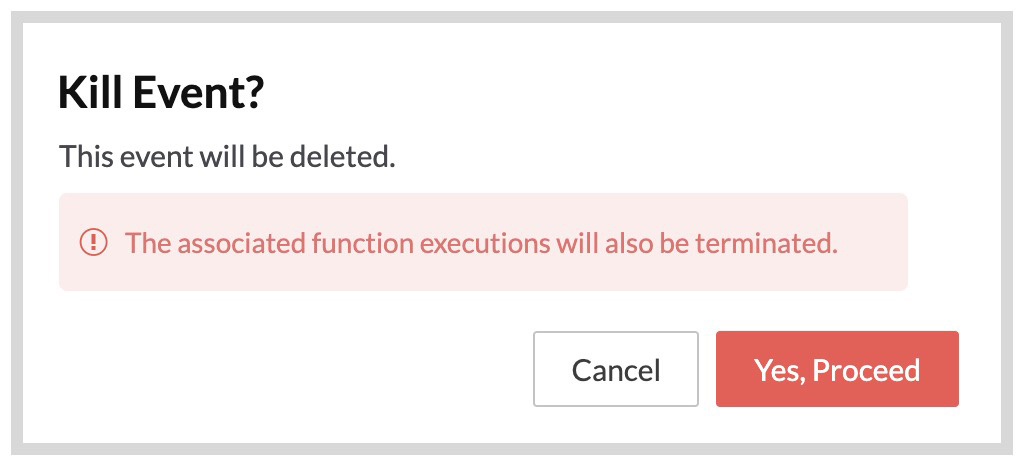
When you kill an event from the In Progress section it will be terminated abruptly and will be removed from the queue. The executions of its associated functions will also be terminated immediately.

To kill an event in progress:
- Click the kill icon from the right-hand corner of the In Progress section.
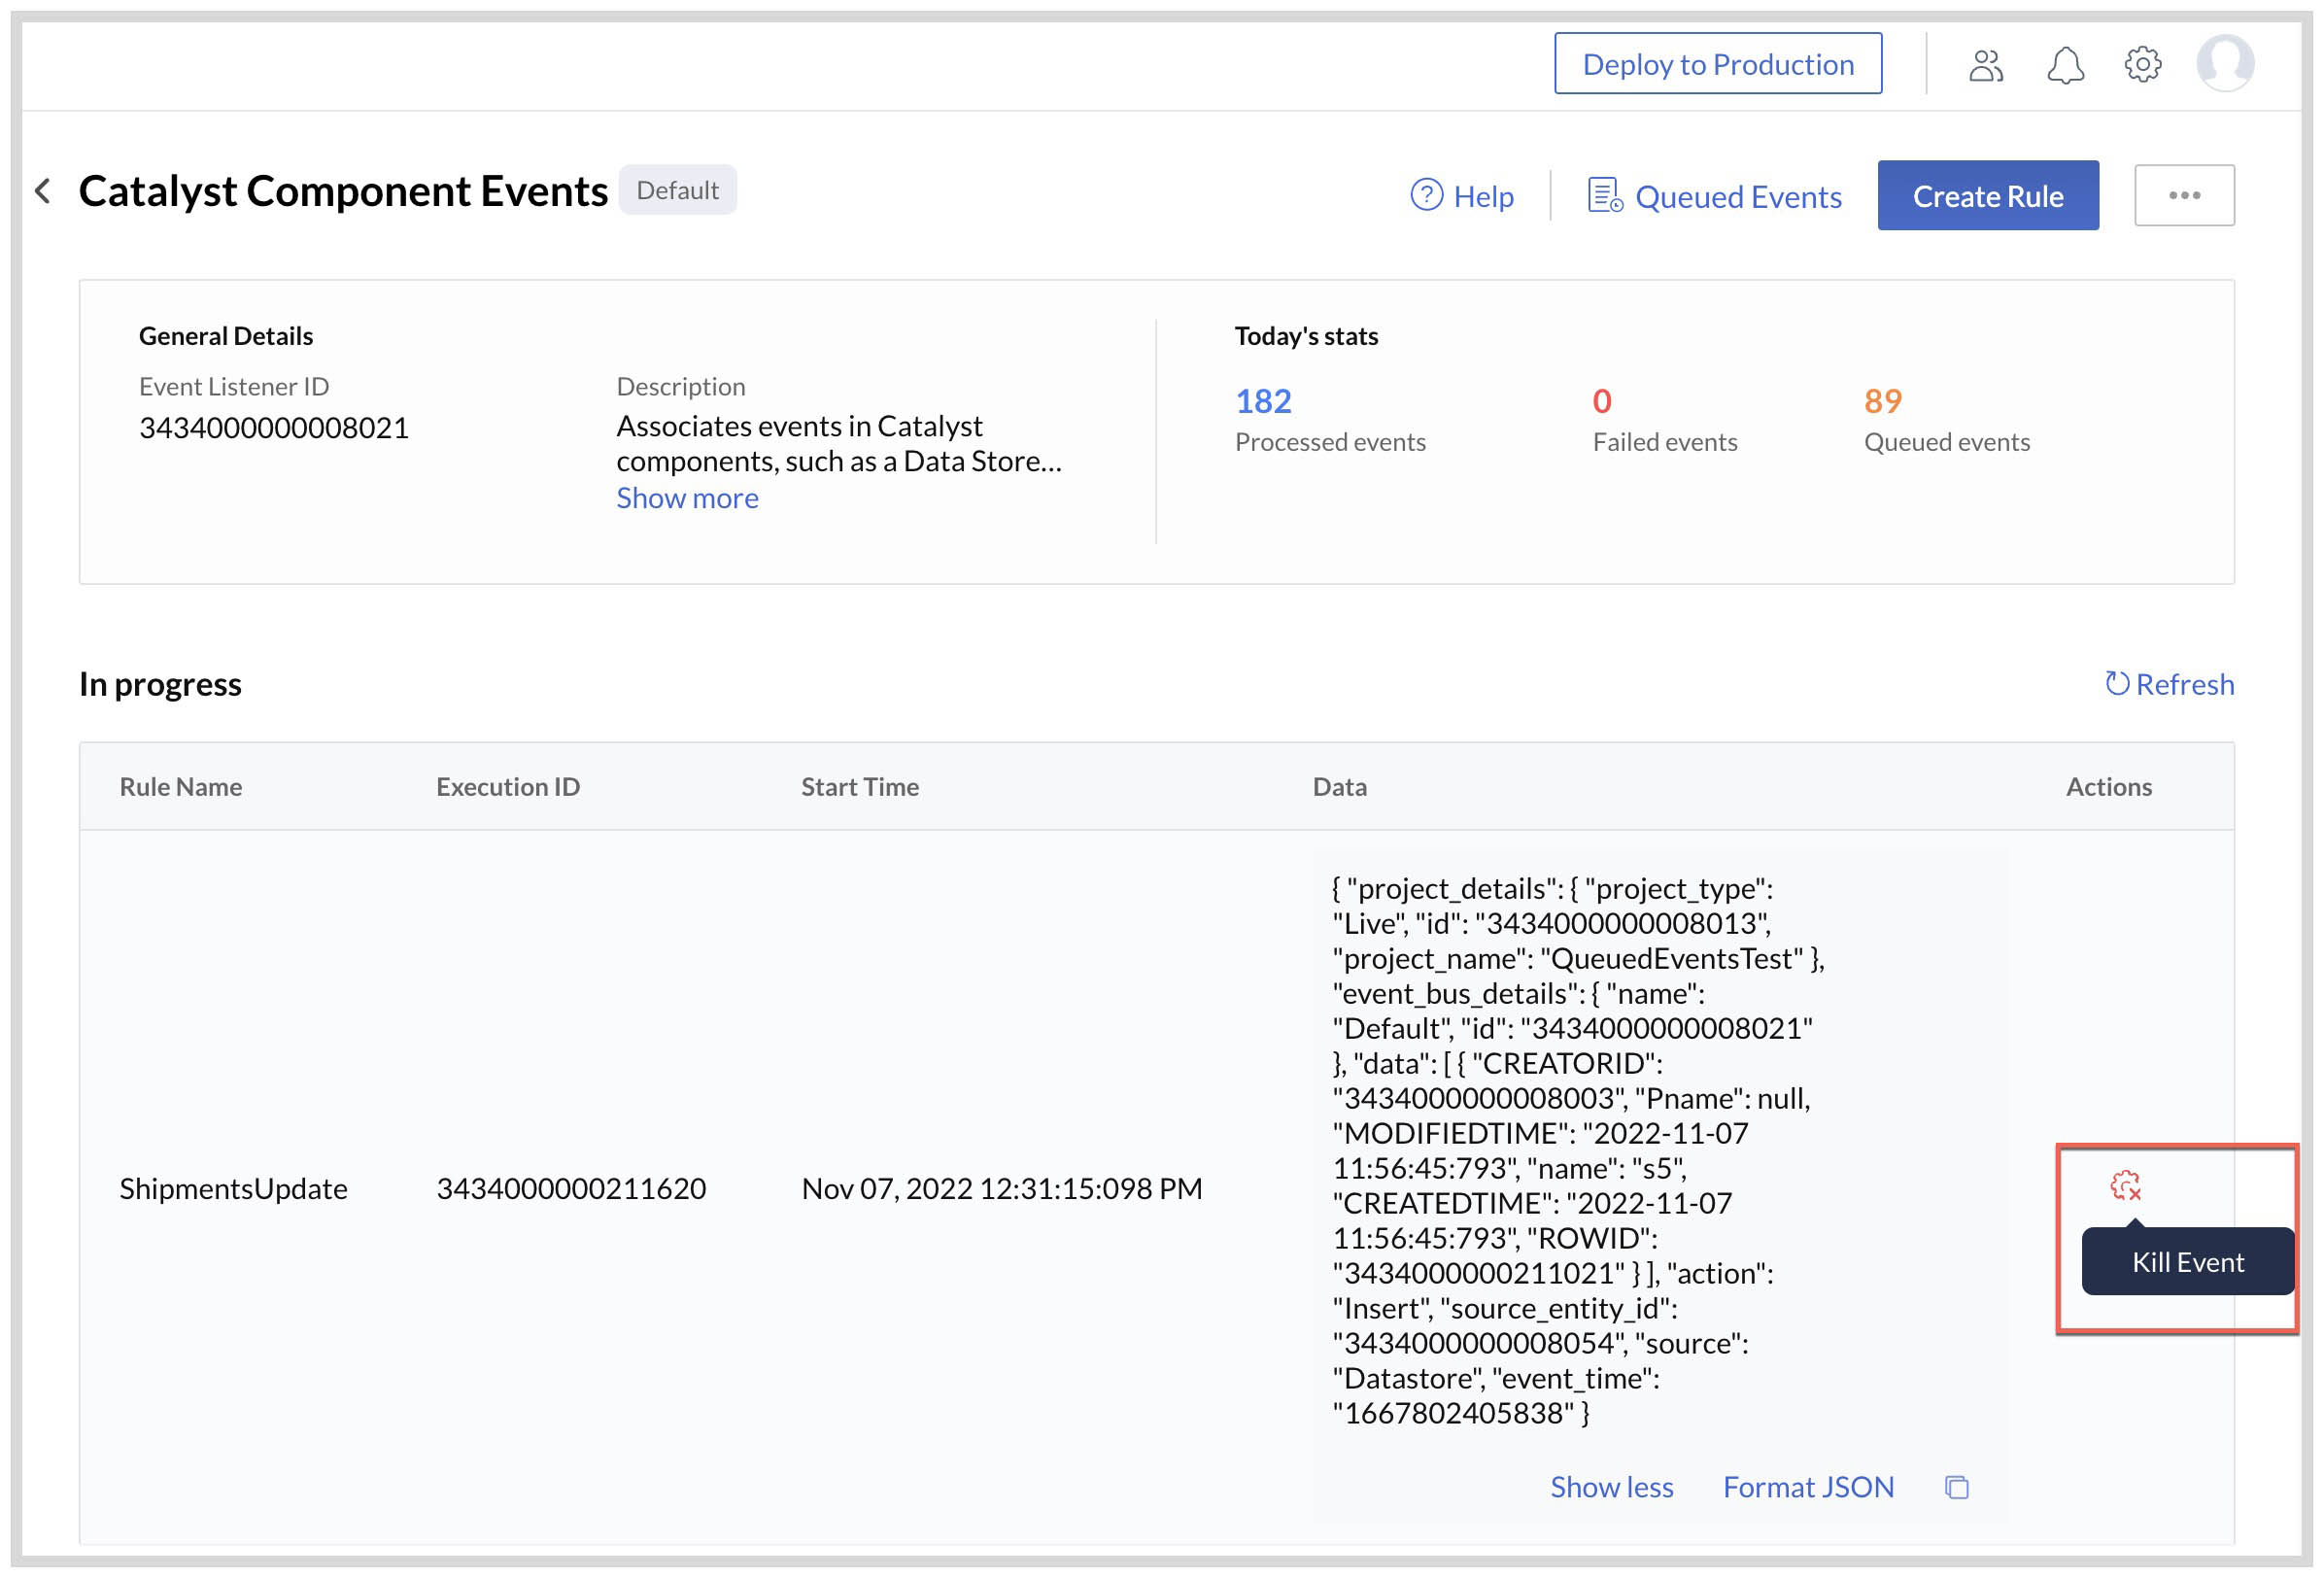
- Click Yes, Proceed to confirm.


Disable the Queue of an Event Listener
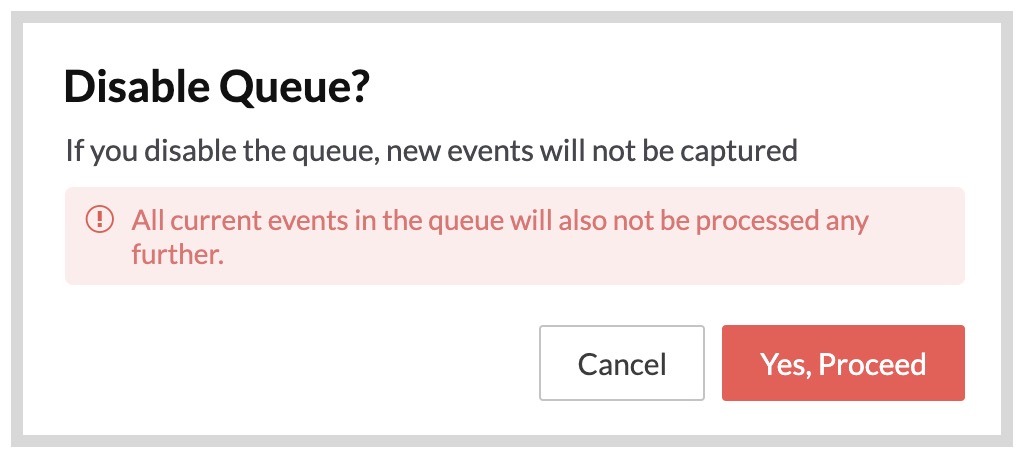
When an Event Listener is created, Catalyst automatically creates and enables a queue for the processing the events associated with that event listener. You can disable this queue when you don't want any events in that queue to be processed. You can always enable the queue again when you require.
- Click the ellipsis icon in the top right-hand corner of the component event listener or a custom event listener's page, and click Disable Queue.
- Click Yes, Proceed to confirm.


The disabled status of the queue will be displayed near the event listener's name. The Queued Events button will also be disabled.

The disabled status of the queue will also be displayed on the Event Listeners page.

You can enable a disabled queue by clicking the same ellipsis icon and clicking Enable.

The enabled queue will now capture and process events.

The enabled queue will now capture and process events.

Processed Events
After an event listener's rule has executed and the event is processed successfully, i.e., the associated target functions have executed successfully, you can view the detailed execution history from the Processed Events section of the rule. The event listener's statistics will also display the processed event count.
You can access the processed events of any component or custom event listener rule in the following way:
- Open the event listener from the Event Listeners page.
- Open the specific rule from the list of rules of the event listener.
- Click the Processed Events tab next to the General Details tab.

This section contains an event traffic graph of the day that displays the number of requests processed successfully in the last 24 hours. You can also select a specific time period from the drop-down filter, to view the graph of that time period alone.

The execution history displays several details of each execution including a unique Execution ID that refers to that execution, the start time, execution time, and the status of the execution.
You can also use the status filter to view executions of a particular status, such as the successful or timed out executions.

The Code Exception status displays events whose associated target functions that faced an exception in their code, and the Unintentional Termination status indicates all cases where the function execution was terminated due to some errors.
You can also use the time filter to view the events executed in a particular time period, such as the last 1 hour or last 12 hours.
Catalyst retains the execution history of event listener rules for 3 months in the Production environment and 1 month in the Development environment. Refer to the Environments help page to learn about them.
This section also contains a link to view the logs and APM of the function executions associated with each rule. Click on the View Logs icon of any rule.

You will be navigated to the Catalyst Logs component that shows detailed information of the event function executions that were processed by that rule.

If you click on View APM, you will be navigated to the Application Performance Monitoring component, that contains detailed statistics about the function calls, error occurrences, component usage, and more.
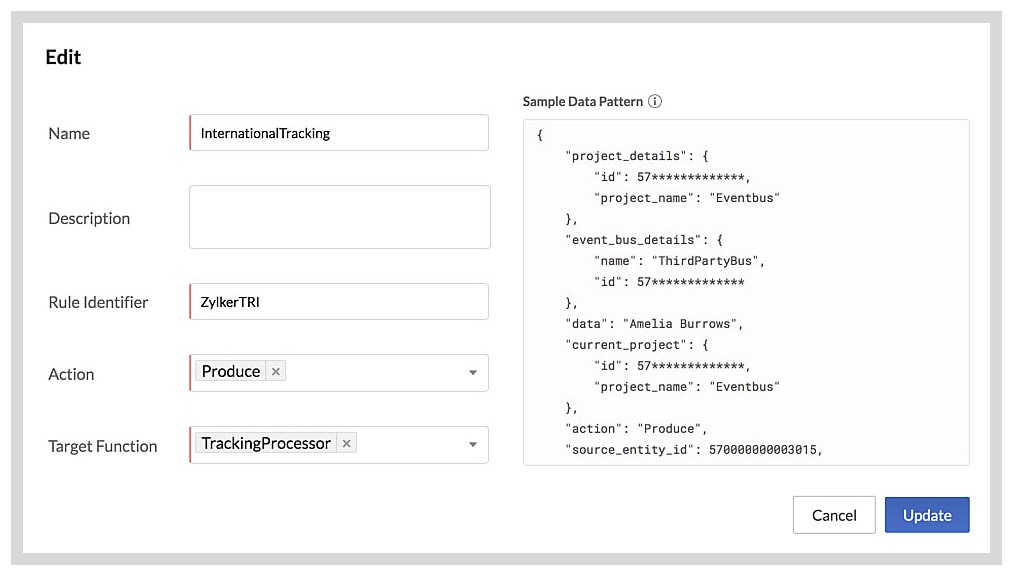
Edit a Rule in the Component or a Custom Event Listener
You can edit a rule in the component or a custom event listener, and modify its details, source, or target functions in the following way:
- Open the component or custom event listener from the Event Listeners page.
- Click the ellipsis icon for the rule, then click Edit.
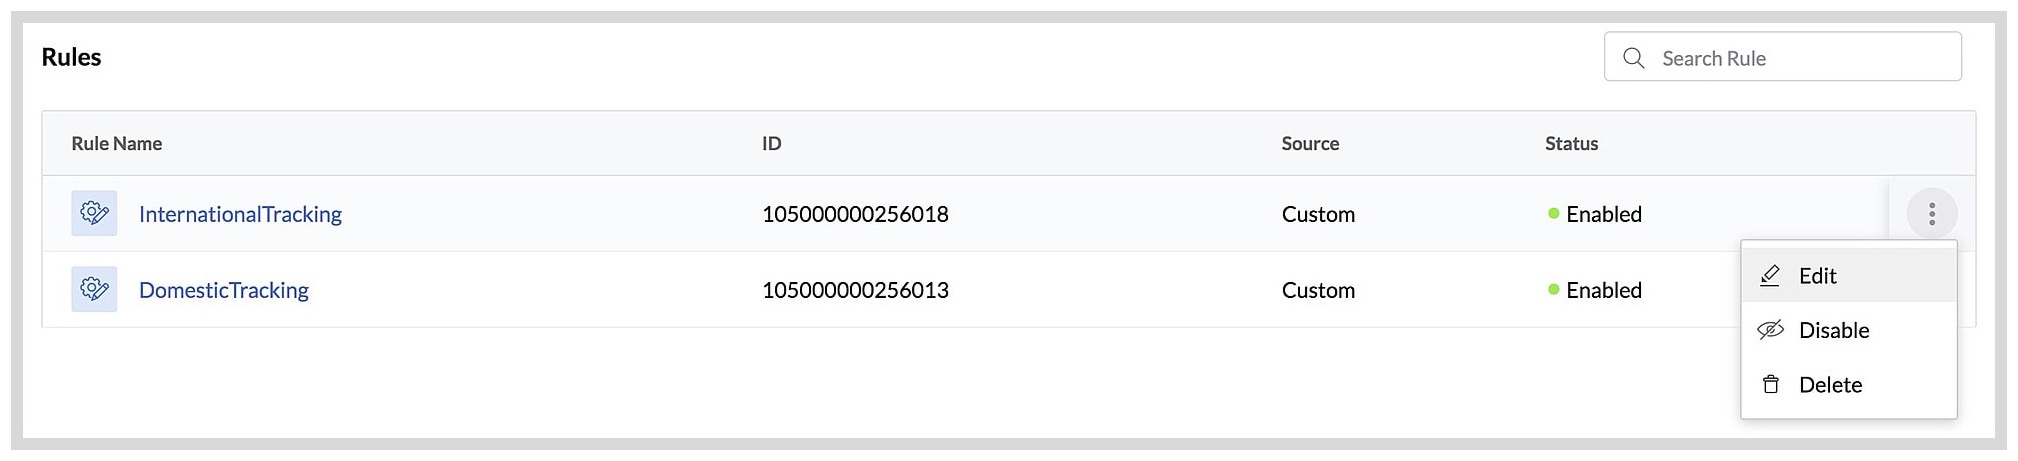
- Make the required changes, then click Update.


Disable a Rule in the Component or a Custom Event Listener
You can disable a rule in a component or a custom event listener if you need to deactivate it temporarily. This will stop the event listener from listening to the event that the rule is associated with, and the associated functions will not be invoked when the event occurs.
To disable a rule in the component or a custom event listener:
- Open the component or custom event listener from the Event Listeners page.
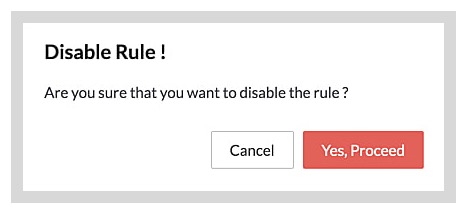
- Click the ellipsis icon for the rule, then click Disable.
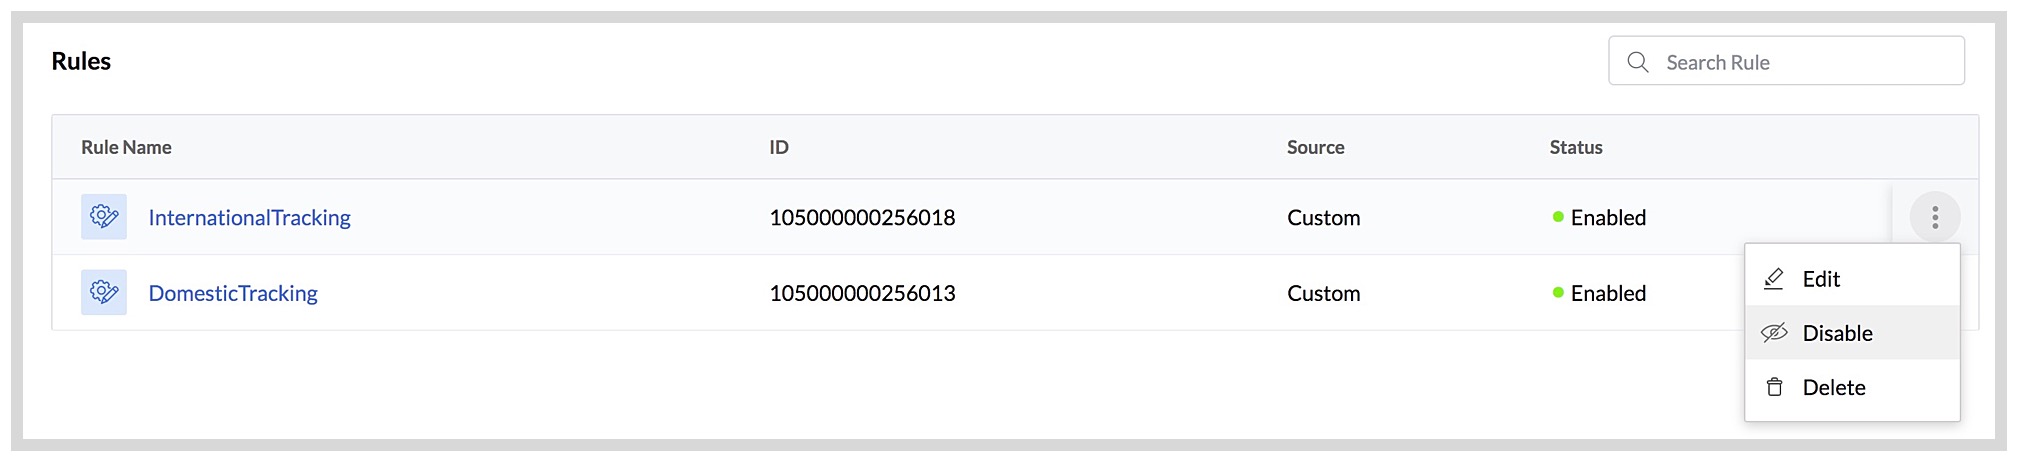
- Click Yes, Proceed in the confirmation pop-up.


The rule will be disabled. You can enable it again by clicking the ellipsis icon and clicking Enable.
Delete a Rule in the Component or a Custom Event Listener
To delete a rule in the component or a custom event listener:
- Open the component or custom event listener from the Event Listeners page.
- Click the ellipsis icon for the rule, then click Delete.

- Click Yes, Proceed in the confirmation pop-up.