Receiving and Managing your Emails
When you receive emails, to sort them in an organized manner, different actions may be needed depending on the emails you receive. You may want to move the email to a folder, apply a label or add a flag, filters emails and so on. Zoho Mail provides multitude of options to achieve a clean, hassle-free inbox.
Actions in the Email Listing pane
Email Status indicator
The email status indicator icon is displayed when you hover over the emails in the email listing. This icon shows the Read/Unread status of the email and whether the email has been replied to or forwarded.
- Read

- Unread

- Replied to

- Forwarded

- Replied to and Forwarded


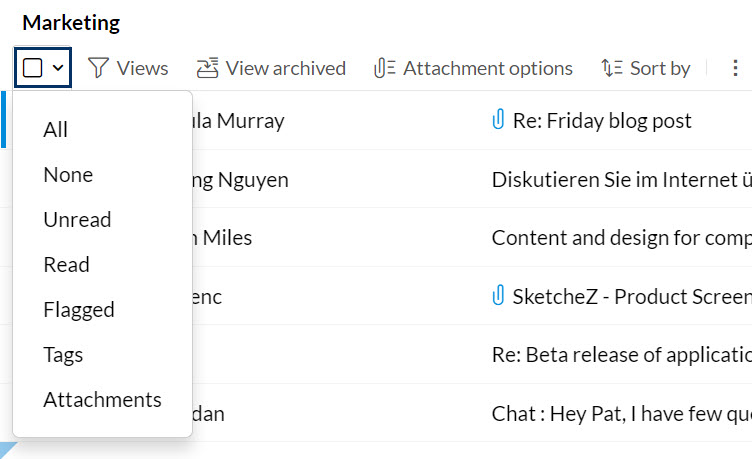
Email Selection
In certain cases, you might want to select a group of emails to perform a bulk action on them. For example, you might select emails with tags or flags associated with them and move them to a different folder. In such cases, you can make use of the group email selection option. To select a particular view, click the dropdown list next to the checkbox icon in the top left corner of each folder. This option lists several views. Select the required view and you'll further be able to perform any operations on these emails.
Note:
More than 300 email conversations cannot be selected at the once to perform bulk actions.
Views
Zoho mail offers several views which make your email listing more organized and provides multiple options to locate the emails that you're searching for easily. You can view all the unread emails, emails that you've added a specific tag/flag to, emails that are archived and those that contain attachments from the Views, View archived and Attachment options icons in the menu pane.
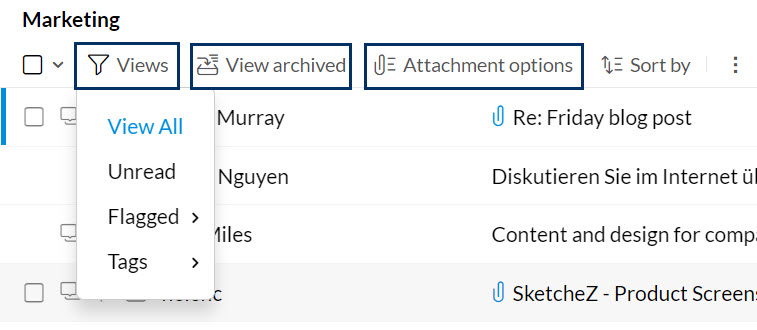
Refer this help page for more details on each of these views.
Zoho Mail also offers attachment based views that let you view the attachments in each folder, and the emails containing attachments. Refer this help page for instructions.
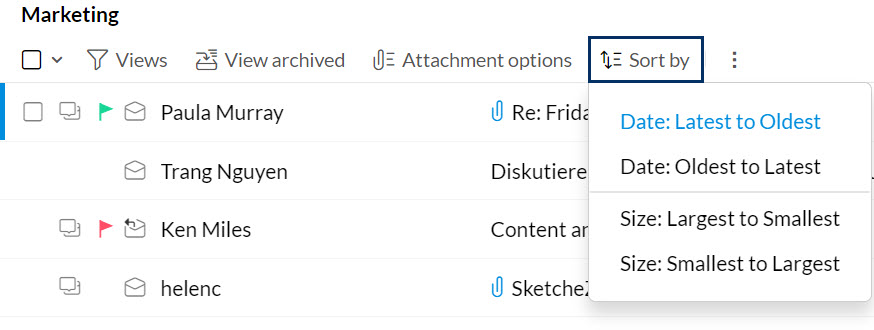
Sorting Emails
Zoho Mail lets you sort your emails according to your preference. You can sort your emails based on either the time they're received or the size of the emails by clicking the Sort by drop down.
- Sort by Date
To view the oldest emails on top, click the Date: Oldest to Latest option. You can later change it back to the latest emails on top by clicking the Date: Latest to Oldest option in the same drop down menu. - Sort by Size
On clicking the Size: Largest to Smallest option, the mails of larger size are listed first. You can change that by clicking on Size: Smallest to Largest option to view the emails of smaller size first.
Note:
You can sort your emails only when the conversation view is switched off.
Move to Folder
You can select single or multiple emails and move them to a folder of your choice directly from the email listing pane. Choose the Move to option in the menu bar, and select the required folder from the options listed. The selected emails will now be moved to the respective folder.

If you want to move all the emails in a specific folder to a different folder, you can make use of the Bulk Actions option. Click the email selection icon, and choose All from the listing. This will select only the emails that are currently displayed in the view. If you choose the Select all messages in this folder option, all messages in the folder will be listed.

You can choose the Move to Folder option to bulk move all these emails. The action will be scheduled and the emails will be moved gradually.
Similarly, bulk selection of emails can also be done for a specific view. For example, when you choose the List Emails with attachments or any such view in a specific folder and select All emails, you'll be shown the Select all messages matching the current view option. This option only selects all the emails with attachments in that folder.
Note:
Bulk Actions for Tag As, Mark as Spam and other such actions can also be performed by the same method as mentioned above.
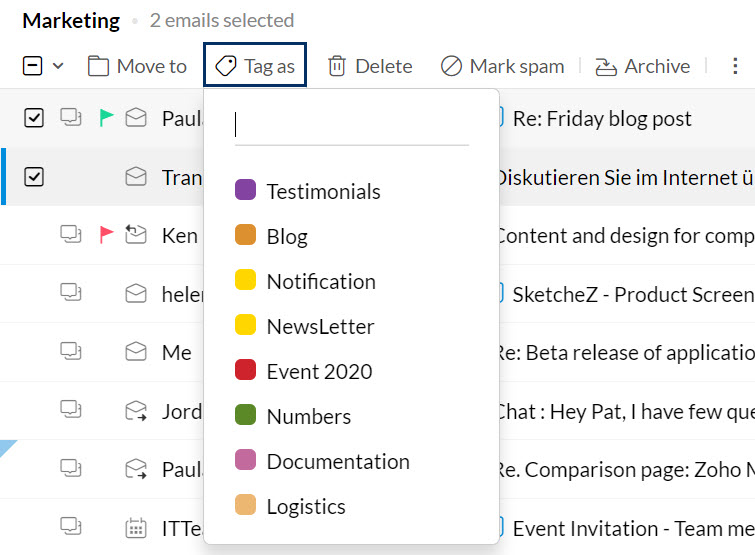
Tag as
While viewing your emails from the email listing pane, you can select a few emails and add a particular tag to them. To add a tag to emails, select the checkbox next to the emails and click the Tag as icon from the top menu pane. Choose the relevant tags from the options listed.
Mark Spam
If you want to mark some of your emails as spam from the email listing pane, you can use the Mark Spam option from the top menu bar. Select the required emails and click the Mark Spam icon from the menu bar. The email addresses will be blacklisted and these emails will be moved to the spam folder. 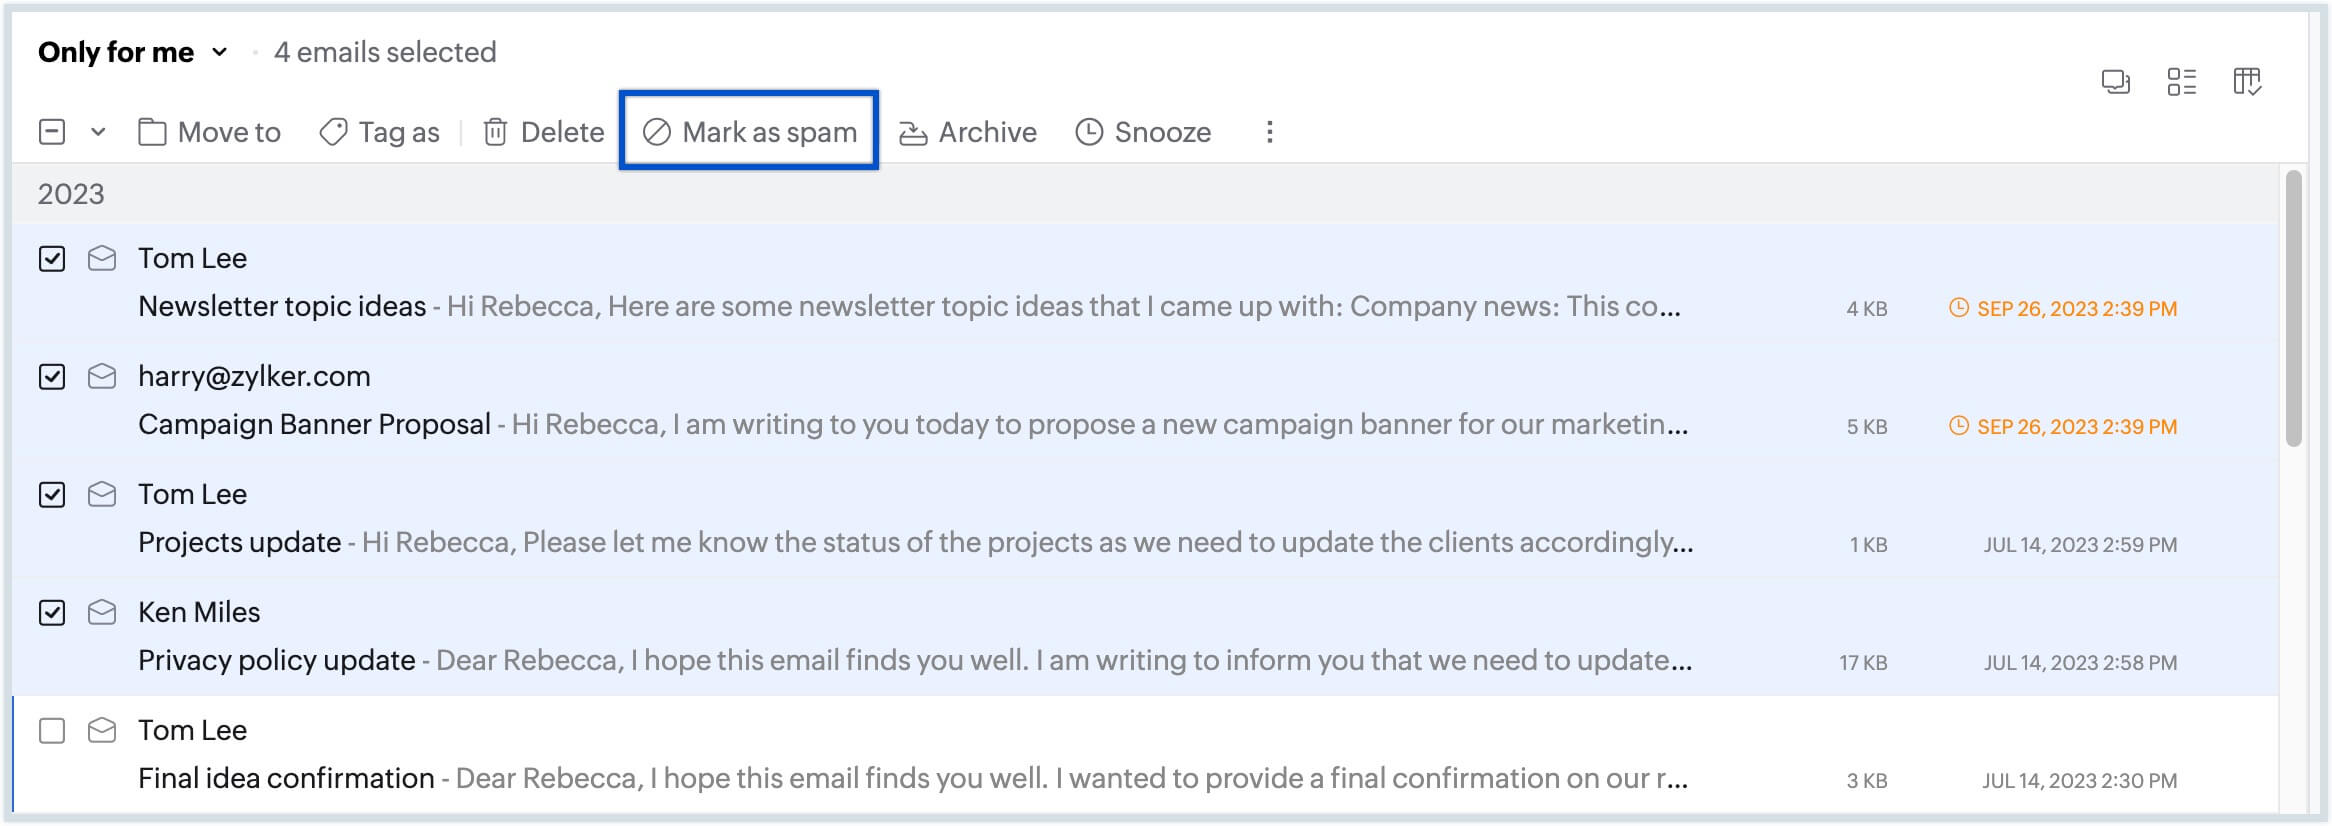
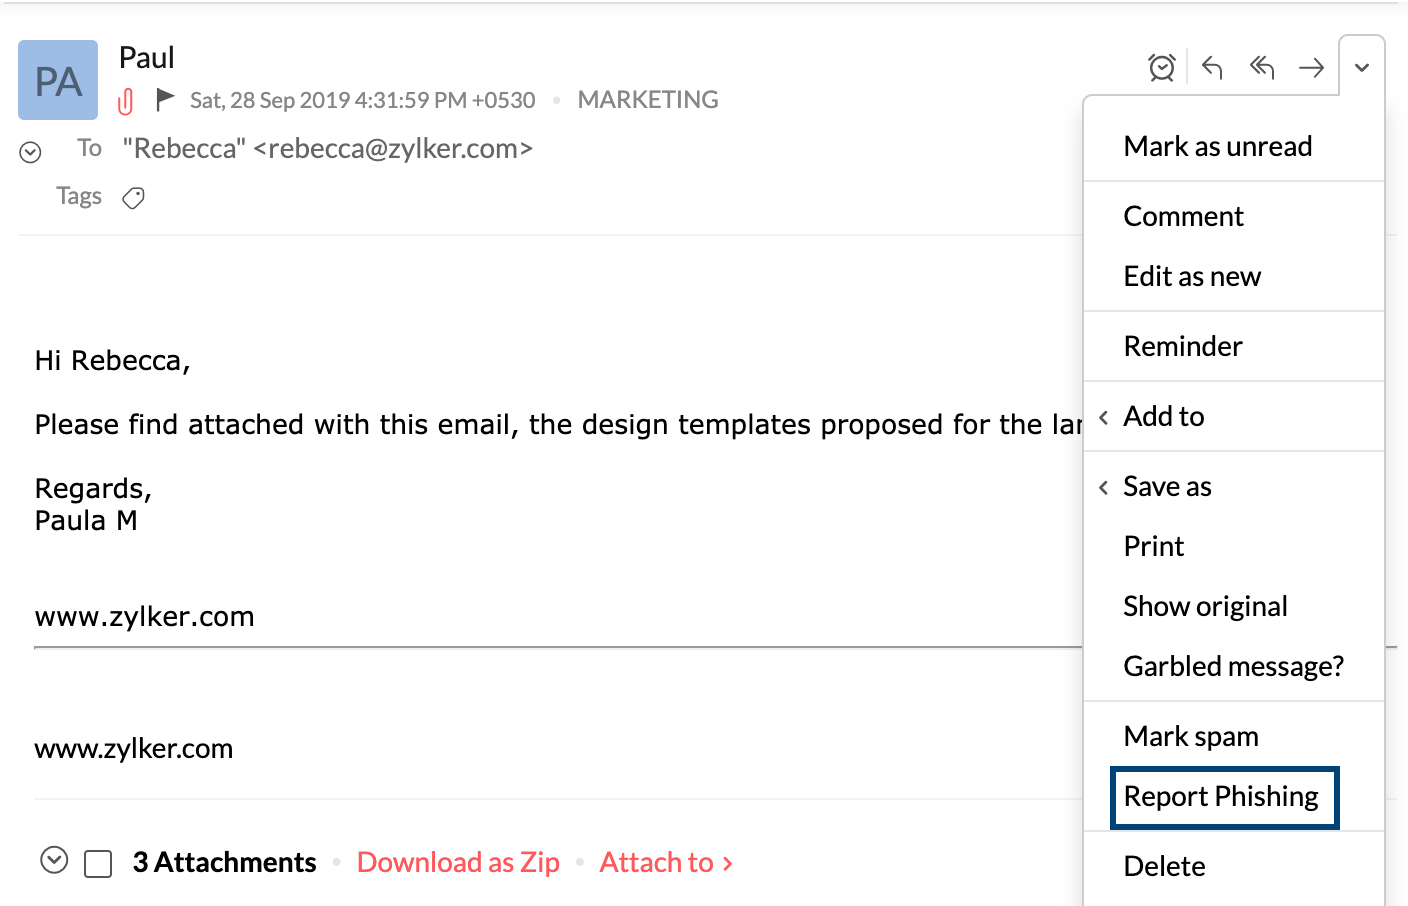
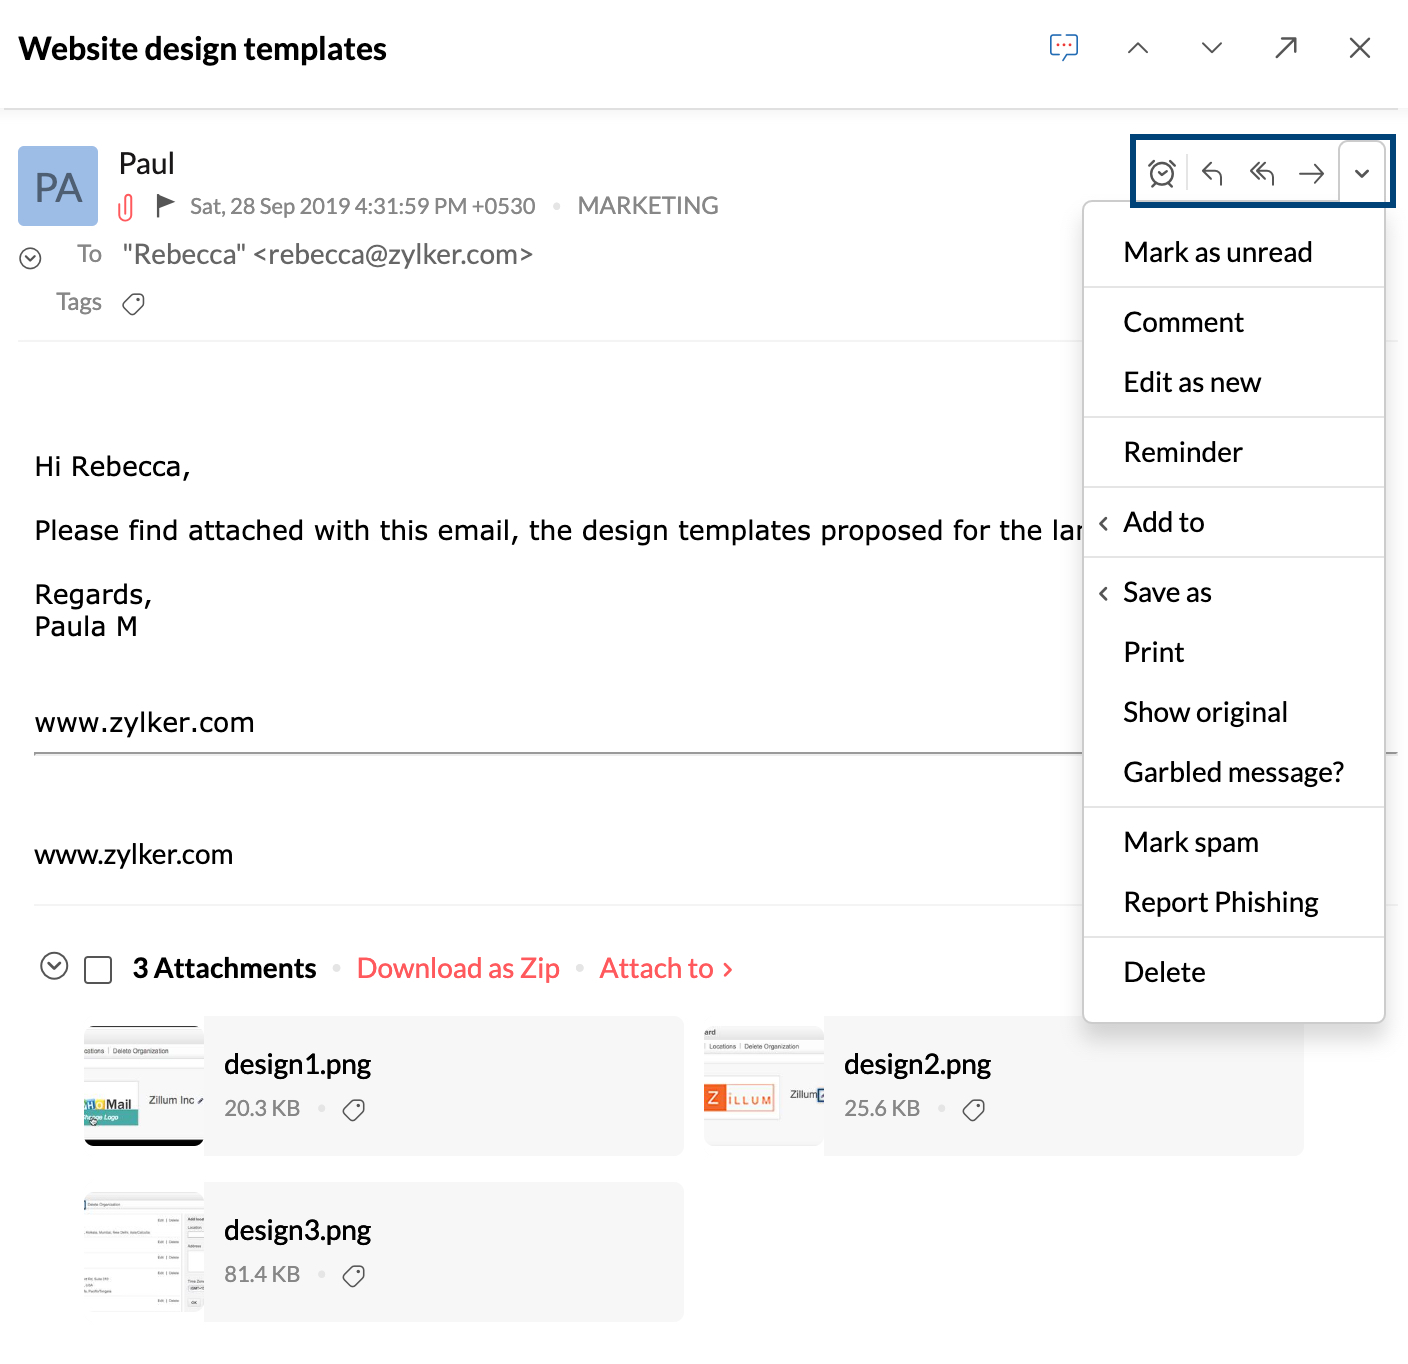
You can also mark an email as spam from the more options drop-down in the email preview.
Note:
There is also the option to block users from who you receive spam emails. Learn more
Report Phishing
Phishing is an attempt at retrieving important personal information through emails by pretending to be from reputed companies. You can mark an email as a phishing attempt by using the Report Phishing option in the More options drop-down in the mail preview.
Other Email Options
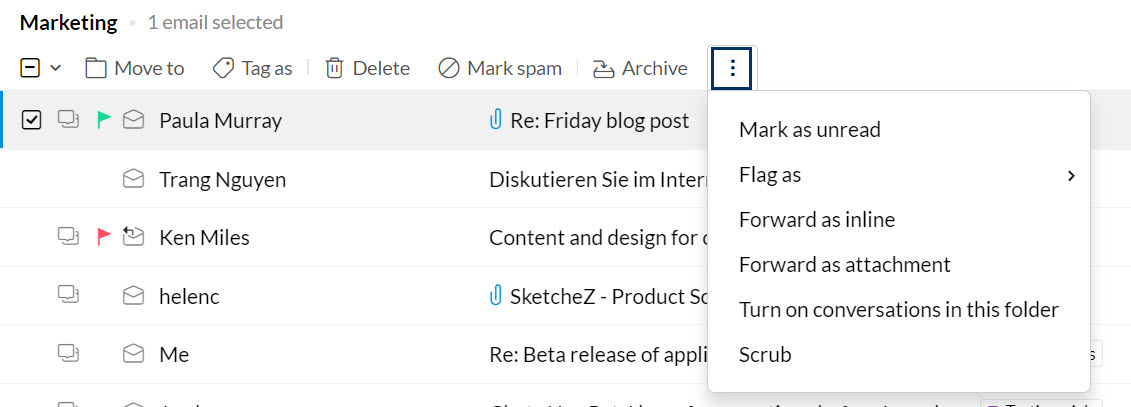
Further, actions such as Mark as unread, Flag as, Forward as inline, Forward as attachment, Turn on/off conversation and Scrub can be performed on the selected emails from the More Actions menu.
Forward Multiple Emails
When you select multiple emails, in the More Options menu, you will be able to see the Forward Multiple Emails option. When you pick this option, the selected emails will get attached to a new email in the compose window. On the receiving end, these emails will be visible as separate forwarded emails.
Since the emails are sent as attachments when this option is used, a maximum attachment size of 40 MB is only permissible.

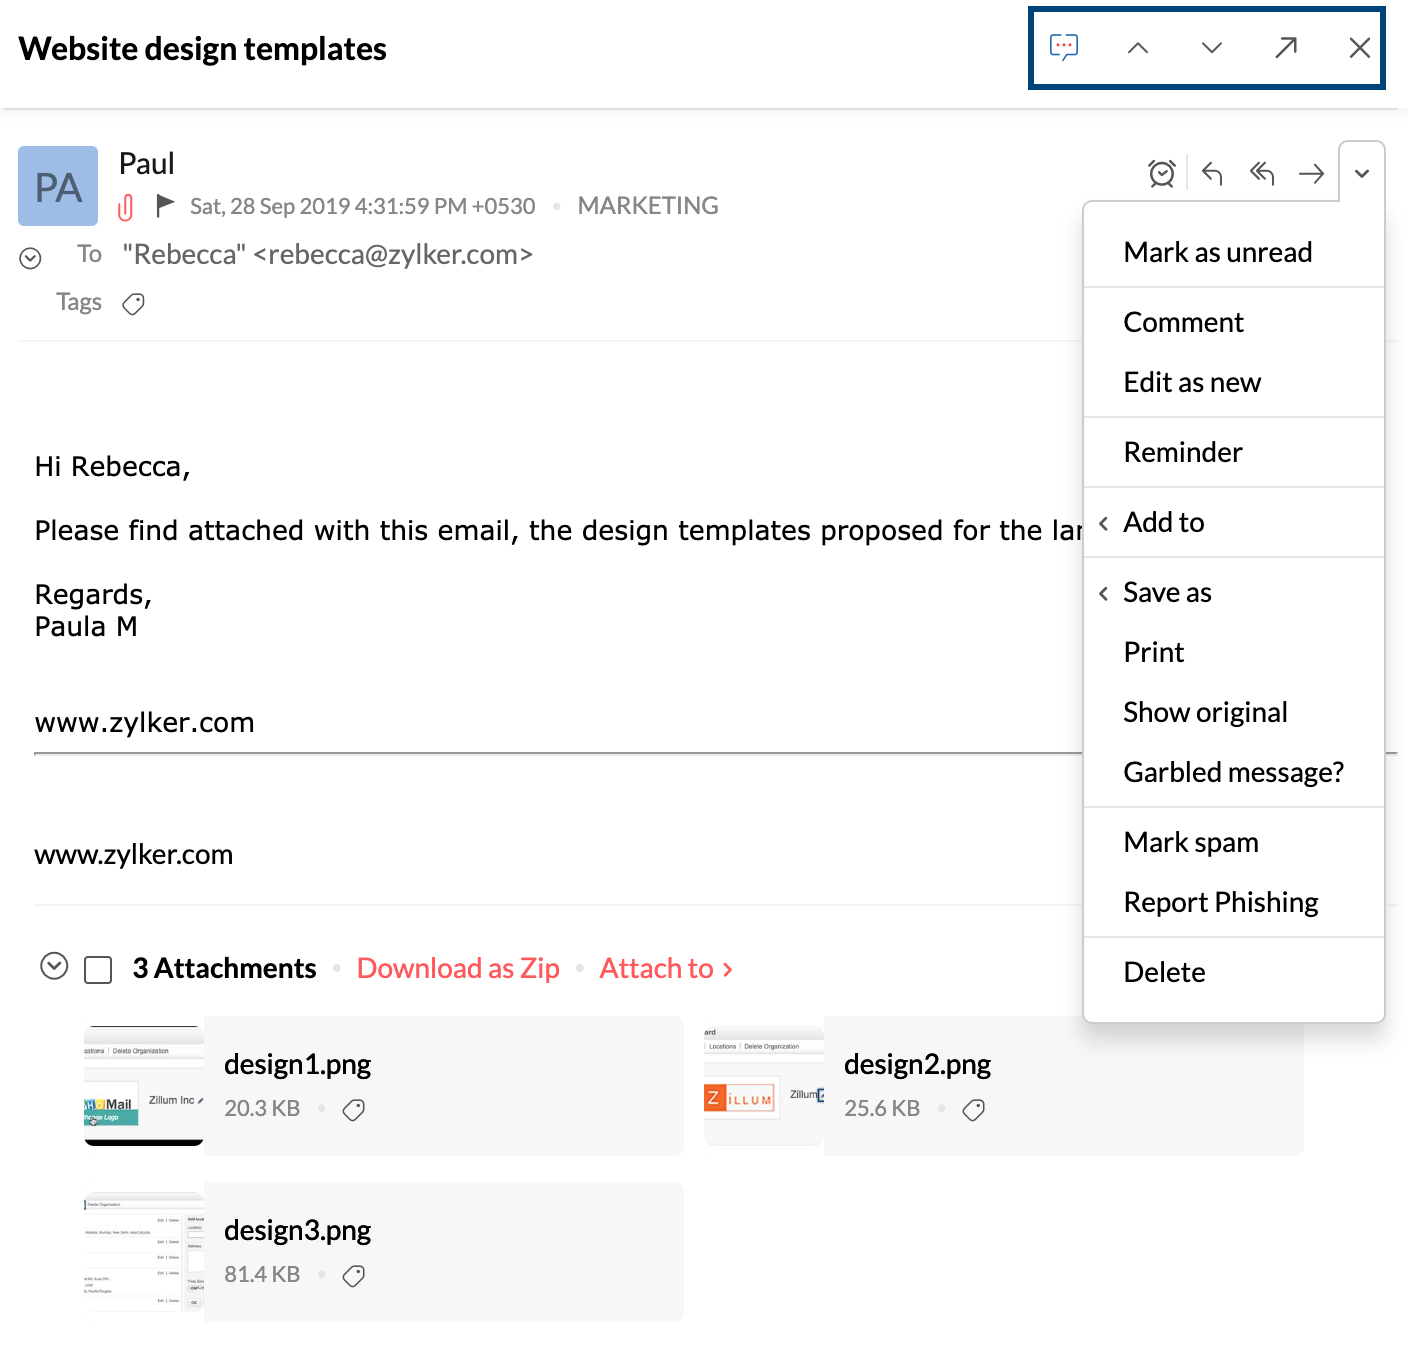
Actions in the Email Preview pane
In the vertical three-pane view, you can quickly navigate between emails and read them at ease. The different icons along with the drop down menu help you to perform the common actions in the email. To Reply, Reply All or Forward, use the icons near the drop-down menu. For specific actions on the particular email, you can use the options in the More Actions drop-down.
Additionally, you can switch to a different reply mode(Reply/Reply All) or Forward in the compose page when you respond to an email.

- When you send, forward or reply to emails that contain EML files with attachments, those attachments will automatically be added to the compose page.
- When you Reply or Reply all to an email, you can include all original attachments by default in your reply email if the Include Attachments setting is enabled in Mail settings.


There are also options to navigate to the previous email or the next email and open the email in a new window using the Popout option.
Note:
This article mainly explains managing the received emails in Zoho Mail. If you have trouble receiving emails in your domain based account in Zoho Mail, refer here.
Undo Actions
You can undo most of the actions, such as marking emails as read, deleting emails, and more, using the Undo action. To undo an email action,
- You can simply click the Undo button from the pop-up banner after performing such action.

- You can use the keyboard shortcut (Ctrl + z by default for both Mac and Windows) to perform Undo. You can also edit the Keyboard shortcut to something else you prefer.

Undo can be performed over these below-mentioned actions.
- Delete Mail
- Move Mail
- Archive Mail
- Spam Mail
- Not Spam Mail
- Archive or Unarchive mail
- Tagging mail—Add Tag or Remove Tag
- Flag or unflag mail
- Mark mail as read
- Mark mail as unread
- Mark this folder as read
Note:
The Undo banner will show up only when the mail disappears from view. But in such cases, you can use the keyboard shortcut to perform Undo.