An introduction to dynamic content in transactional emails
- Published : January 30, 2024
- Last Updated : April 7, 2026
- 1.4K Views
- 4 Min Read
Building an email from scratch to suit the device, client, and purpose can make it hard for developers. The respite comes in the form of templates, which have preset data for commonly used cases. With some minor changes, these templates can be used instantly.
This model works well for content that doesn’t vary from user to user. But, emails, especially transactional emails, contain parameters that often change from customer to customer. Including dynamic content to suit email needs could be seen as a tedious process for the developers designing the code, mainly because of the additional time and effort that goes into them. This too has been solved with the addition of templates featuring dynamic content. This article will focus on just that, starting with the basic dynamic elements.
There are numerous templating languages like Handlebars, Nunjucks, Mustache, and more. ZeptoMail uses Mustache to support dynamic email templates. Let’s look at the basic codes that can be used with your transactional email. Consider the case of an e-commerce store. Here’s how the dynamic template can be used for the different emails sent out from the business.
Variable replacement
Variable replacement is simply used to substitute a value to the variable. An example of this would be including a customer's name in the email. You can simply replace the desired value to the variable using the code below.
<h1>
  <span>{{product name}}</span>
</h1>
  <h2>Order confirmed!</h2>
<p>
    Hello {{name}}! Your order with us has been confirmed and will be delivered by {{date}}.
</p>
In this example, the variable {{name}} will be substituted with the name of the customer. Using variable replacement is a good way to add a personal touch to the email and helps your email avoid being labeled as promotional content by the customer.
Iteration
Iteration displays more than one data point as many times as required. This differs from variable distribution, where the data is substituted only once. An example of iteration is the product list that’s displayed in a purchase order email.
<tbody>
    {{#products}}
       <tr>
           <td>
               {{this.product_name}} </td>
           <td>   {{this.quantity}} </td>
           <td>   {{this.total}} </td>
       </tr>
    {{/products}}
</tbody>
This example illustrates the purchase order email one would receive. The number of items in the list isn’t limited to one; it can accommodate as many data as possible. Here are the sample inputs for the above example. The variables will be substituted with different values in each iteration.
{
  "products": [
      {
         "total": "1000",
         "quantity": "2",
         "product_name": "Blue jeans"
       },
       {
          "total": "500",
          "quantity": "1",
          "product_name": "White shirt"
        }
     ]
}
Conditional statement
Conditional statements display the data if they satisfy a certain condition. This can be emails sent out on a customer's birthday, a subscription reminder, or simply based on the information available in their cart.
 {{#user.premium_member}}
      <p>Use this code to avail 20% discount</p>
 {{/user.premium_member}}
 {{^user.premium_member}}
      <p>Use this code to avail 10% discount</p>
 {{/user.premium_member}}
The above code checks to see if a customer is a premium customer and offers them a discount based on that. A premium customer would get an extra discount, while everyone else would get the usual one.
Display the HTML value
By default, the templating language will apply the HTML tags to the emails you design. However, if you want to display the tags in the emails you send, you can do so by including them within something called the escape parenthesis. Any tag placed within the escape parenthesis will be displayed as such.
Adding dynamic templates in your account
You can incorporate the above code snippets within the existing templates in your ZeptoMail account. Follow these steps below:
- In your ZeptoMail account, navigate to the desired Mail Agent.
- In the templates section, select Add template.

- You can either select a blank template and add the details from scratch, or edit the custom template.
- Once you select your desired option, select HTML from the upper-left drop-down.
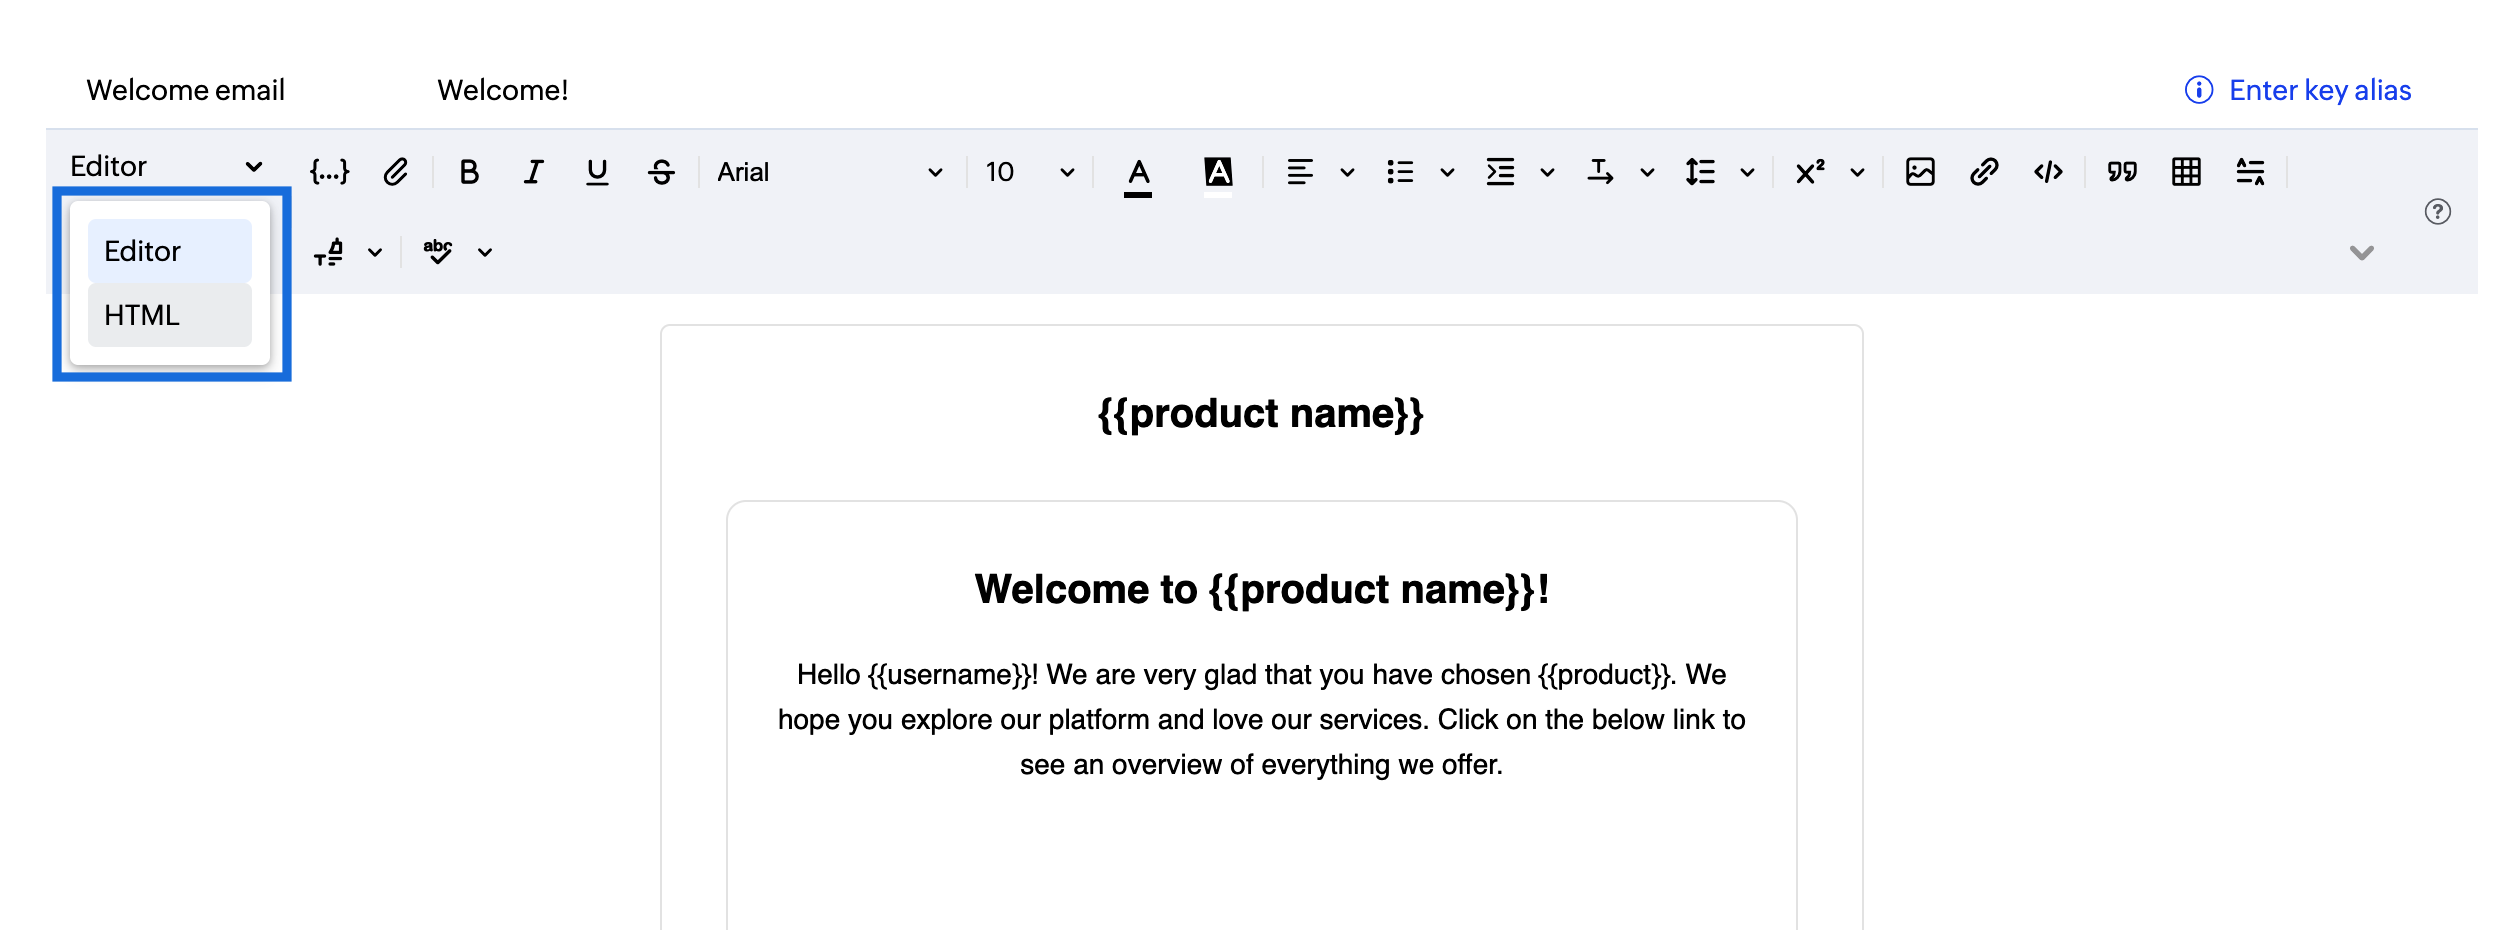
- You can copy and paste the desired code given here. Our help guide has sample codes you can use.
- Once you make the changes, enter a suitable template name, subject, and alias.
- You can directly use the Alias key in the place of the template key while using the template in your API.
Once you add the template, you will be able to test the tags or the placeholders available in the template. This can be done in the Merge info section of the template.
- Click on the template you wish to test. Navigate to the Merge info tab.
- Substitute the desired values against the placeholders and select Change values.
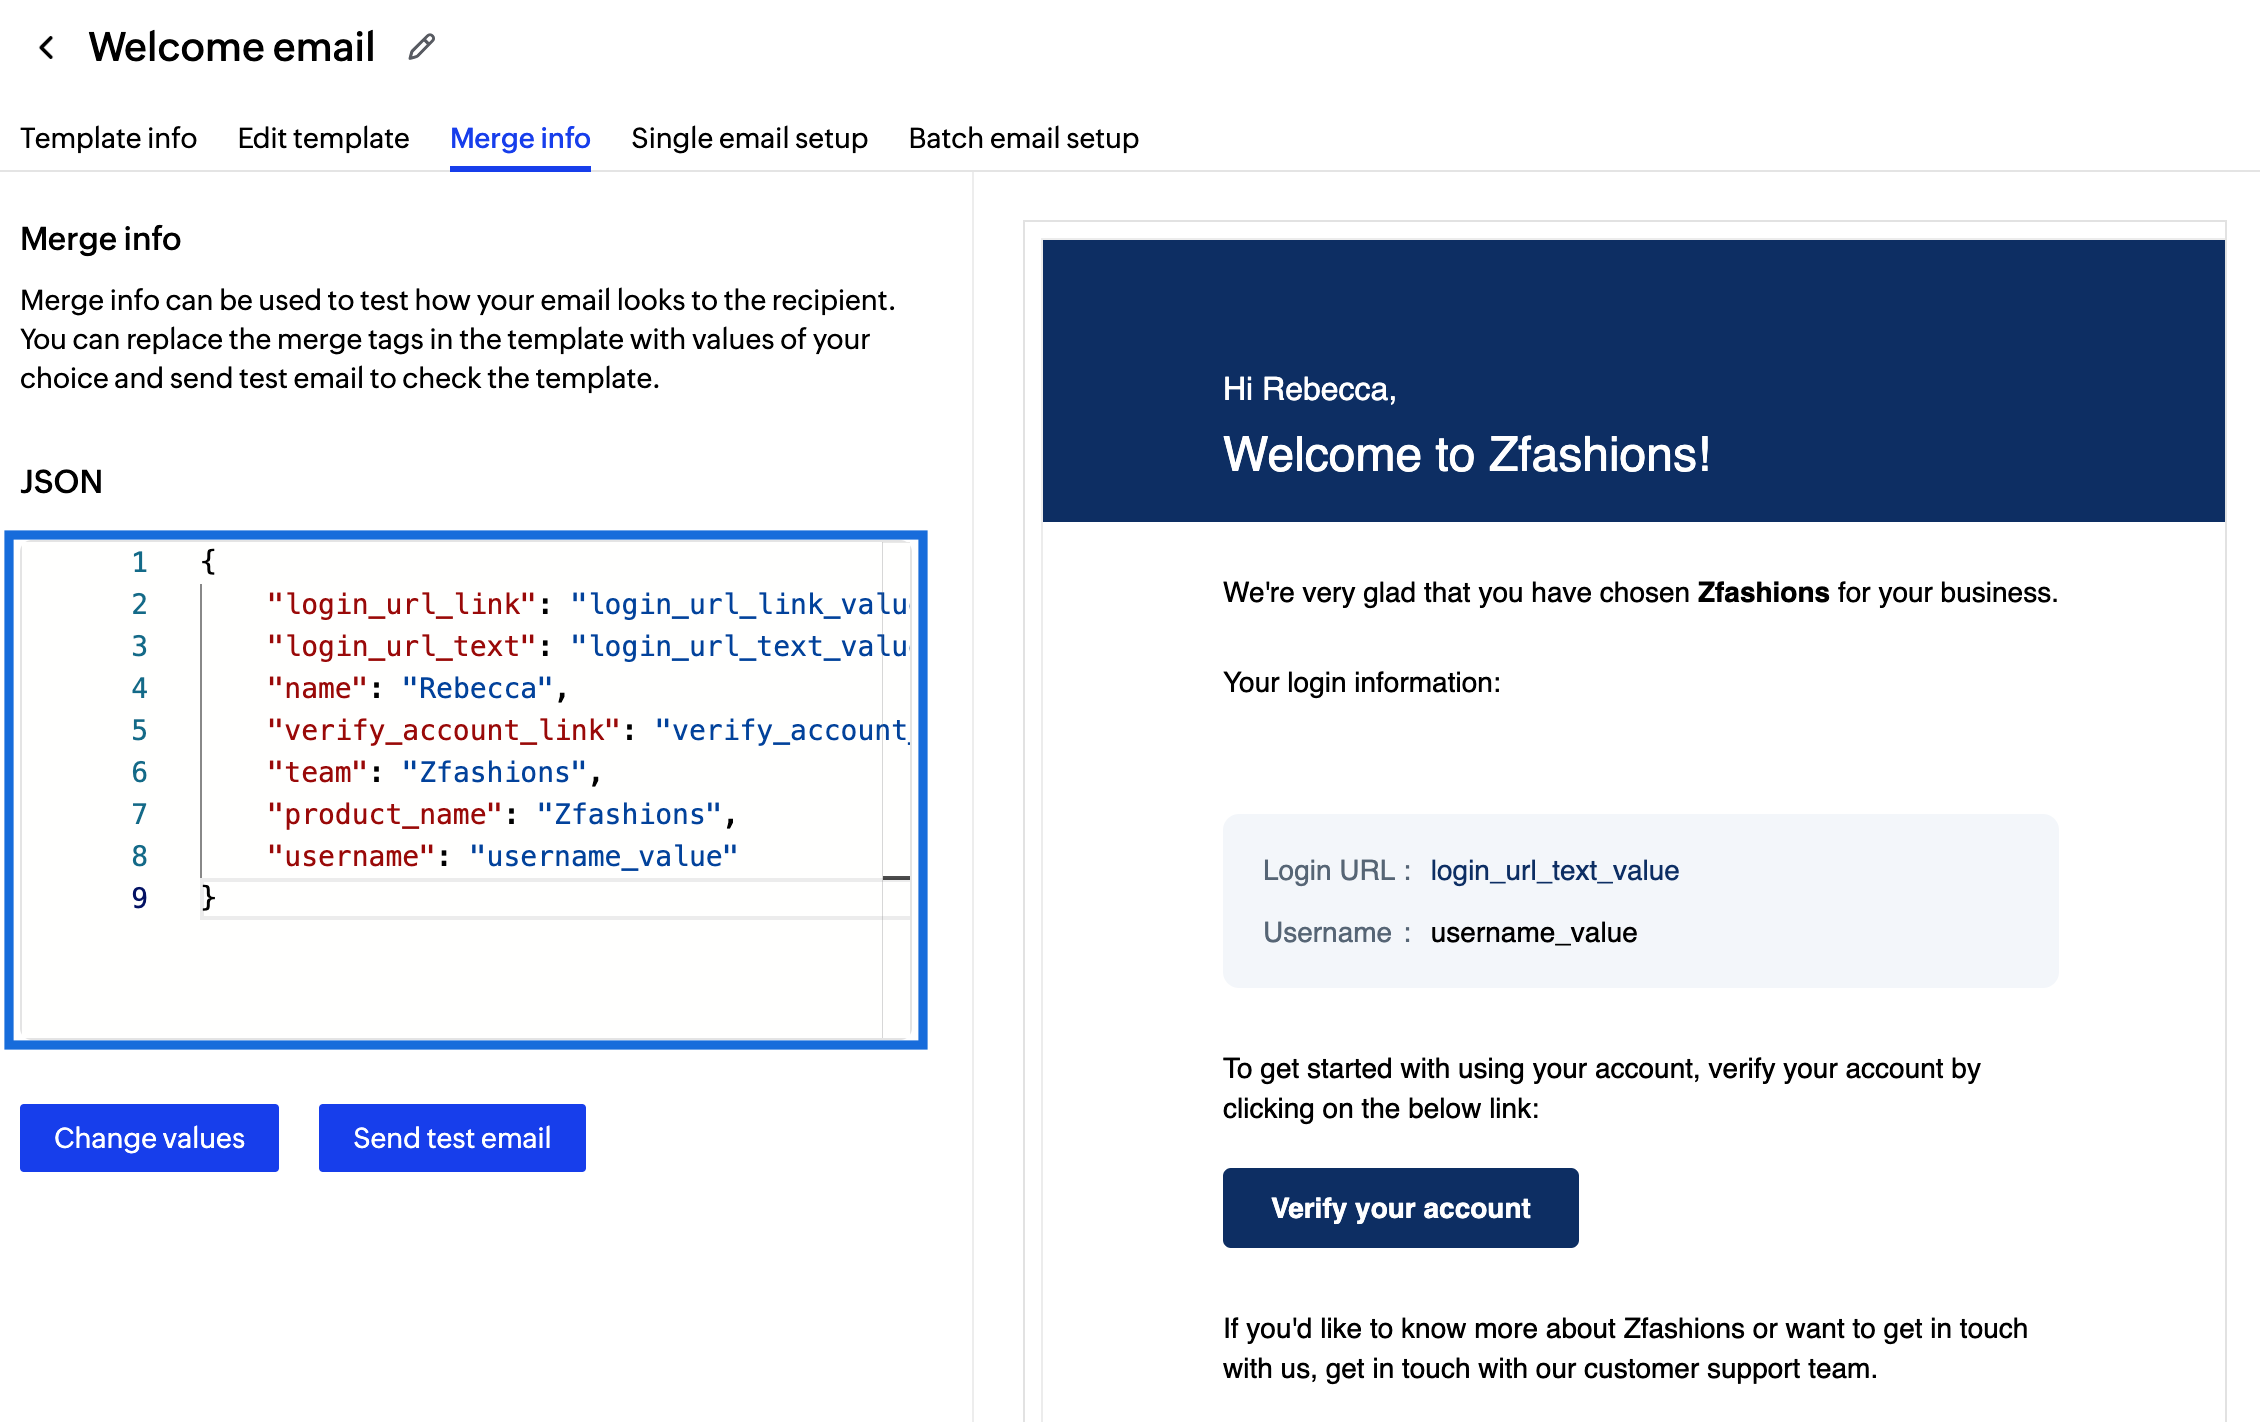
- The changes will be reflected in the template.
- This way, you will be able to view how the email appears to your customers and make changes if necessary.