ZDialer Mobile App for Android
This help document provides step-by-step guidance on installing and using the ZDialer mobile app for Android. It covers everything from setup and navigation to exploring its key features, ensuring you can make and manage calls effortlessly on the go.
Installing ZDialer
Open the Play Store, search for and install the ZDialer by Zoho Voice.
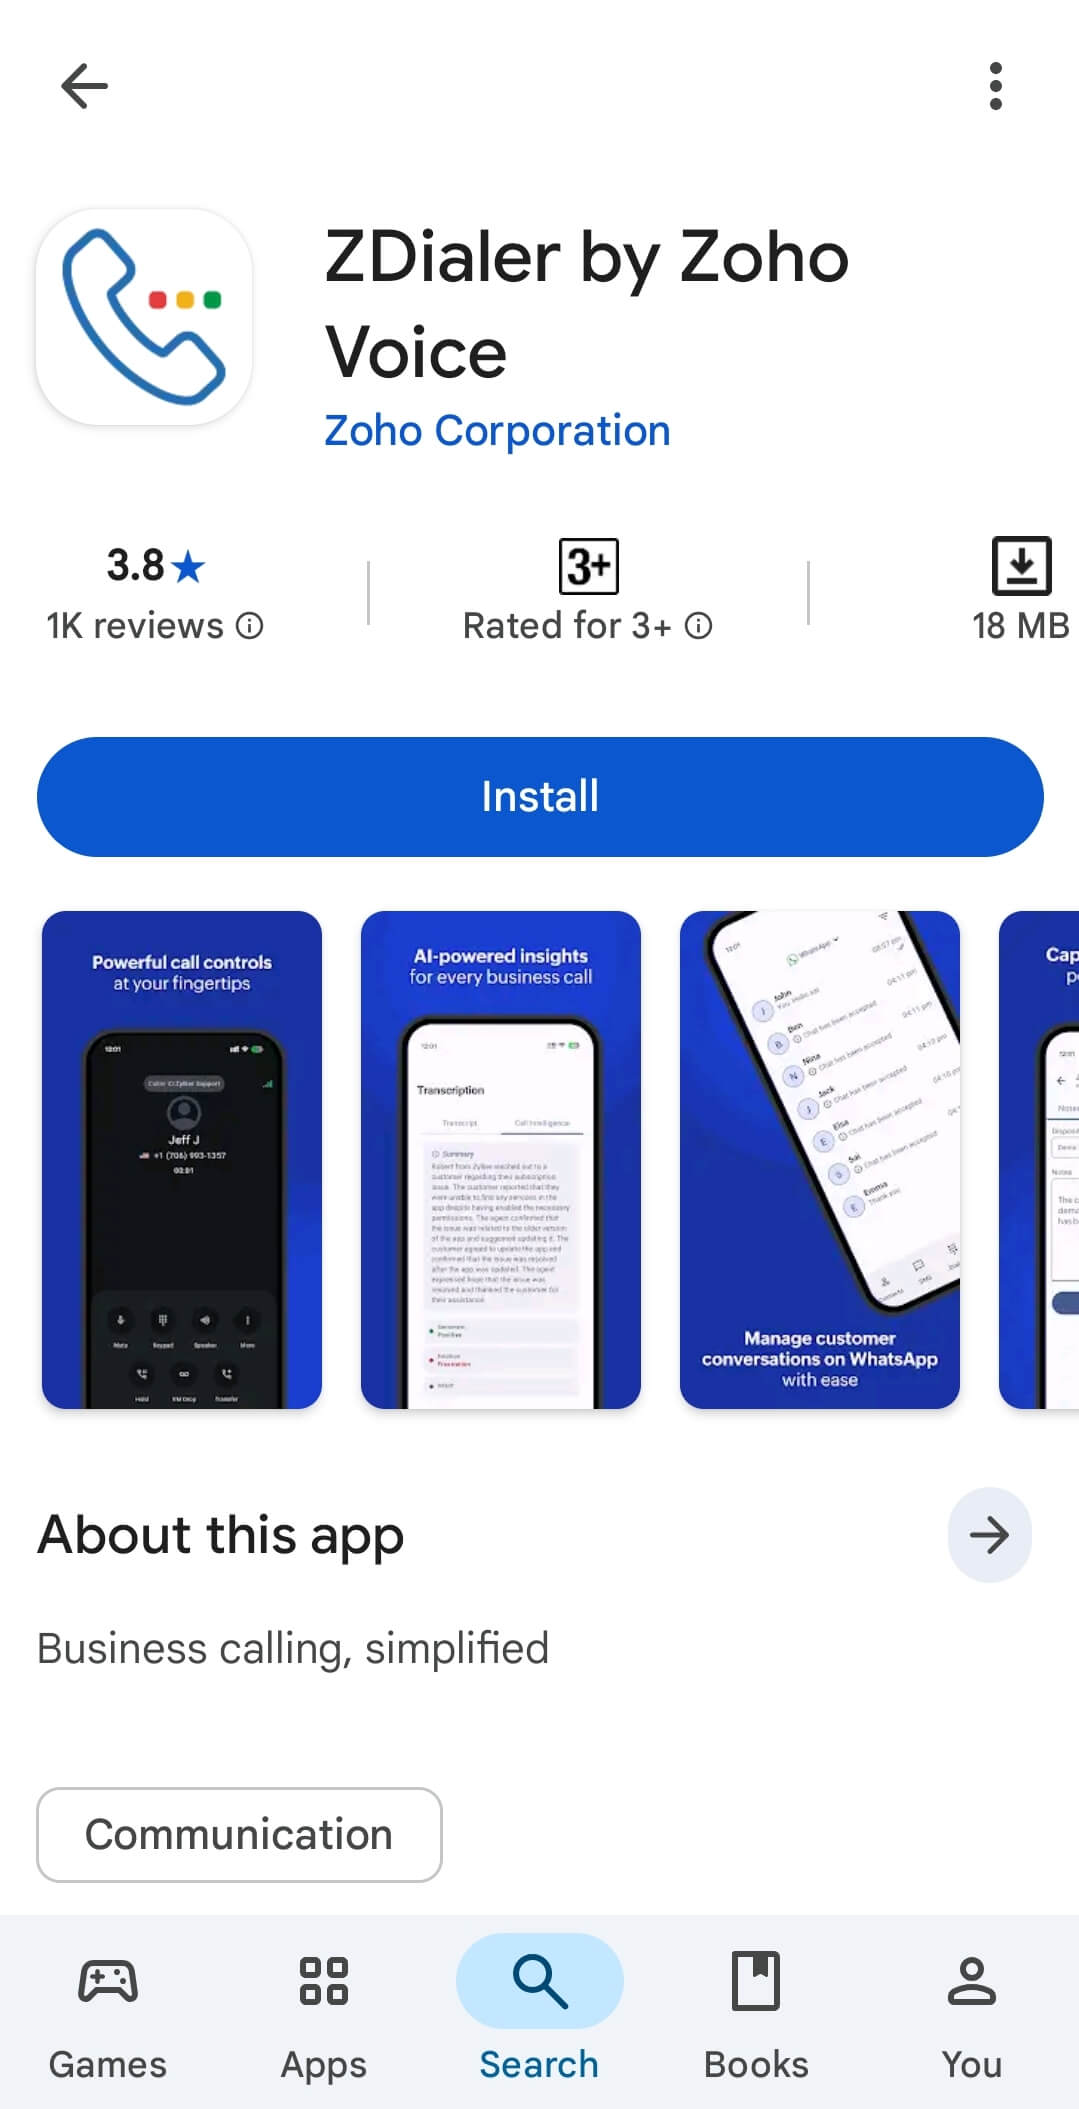
- Log in with your Zoho Voice credentials.
- Grant the required permissions:
- Microphone: To capture and transmit call audio.
- Bluetooth:To connect with nearby Bluetooth devices and improve call quality.
- Notifications: To receive call-related alerts (e.g., incoming and missed calls).
- Phone: To identify and manage phone calls.
Dialpad in ZDialer
Tap your current status in the top-left corner of the screen to update your availability.
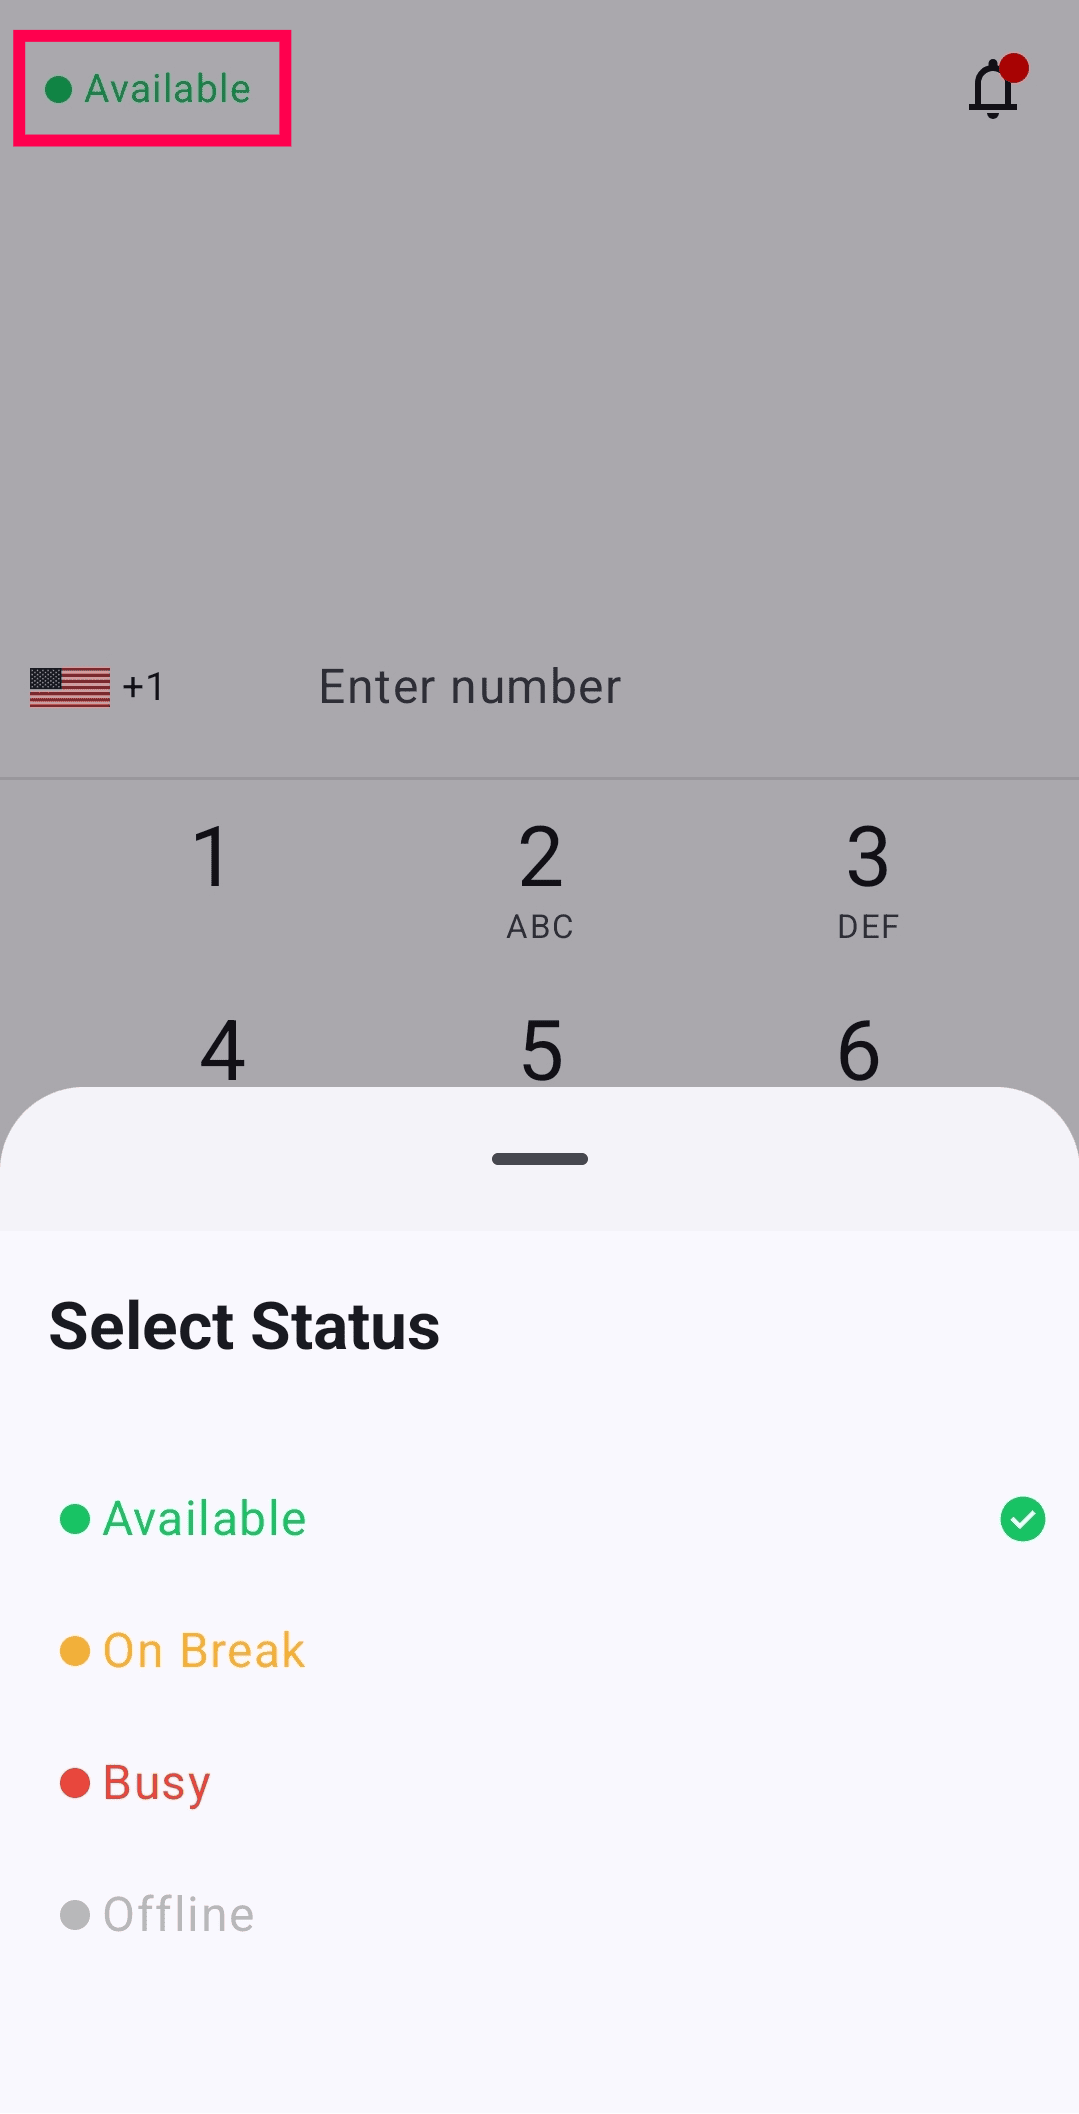
- Change the default country code by tapping the currently selected country code on the dial-pad and selecting the required option.
- Tap the Caller ID dropdown to:
- Select an outgoing number from your available list, or
- Choose Auto-select phone number to automatically pick an number for making outgoing calls based on the destination country.
- Tap the star icon next to any outgoing number to mark it as a favorite.
Note
When using Auto-select phone number, Zoho Voice prioritizes your destination country, area code, and any favorite numbers when selecting a number for outgoing calls.
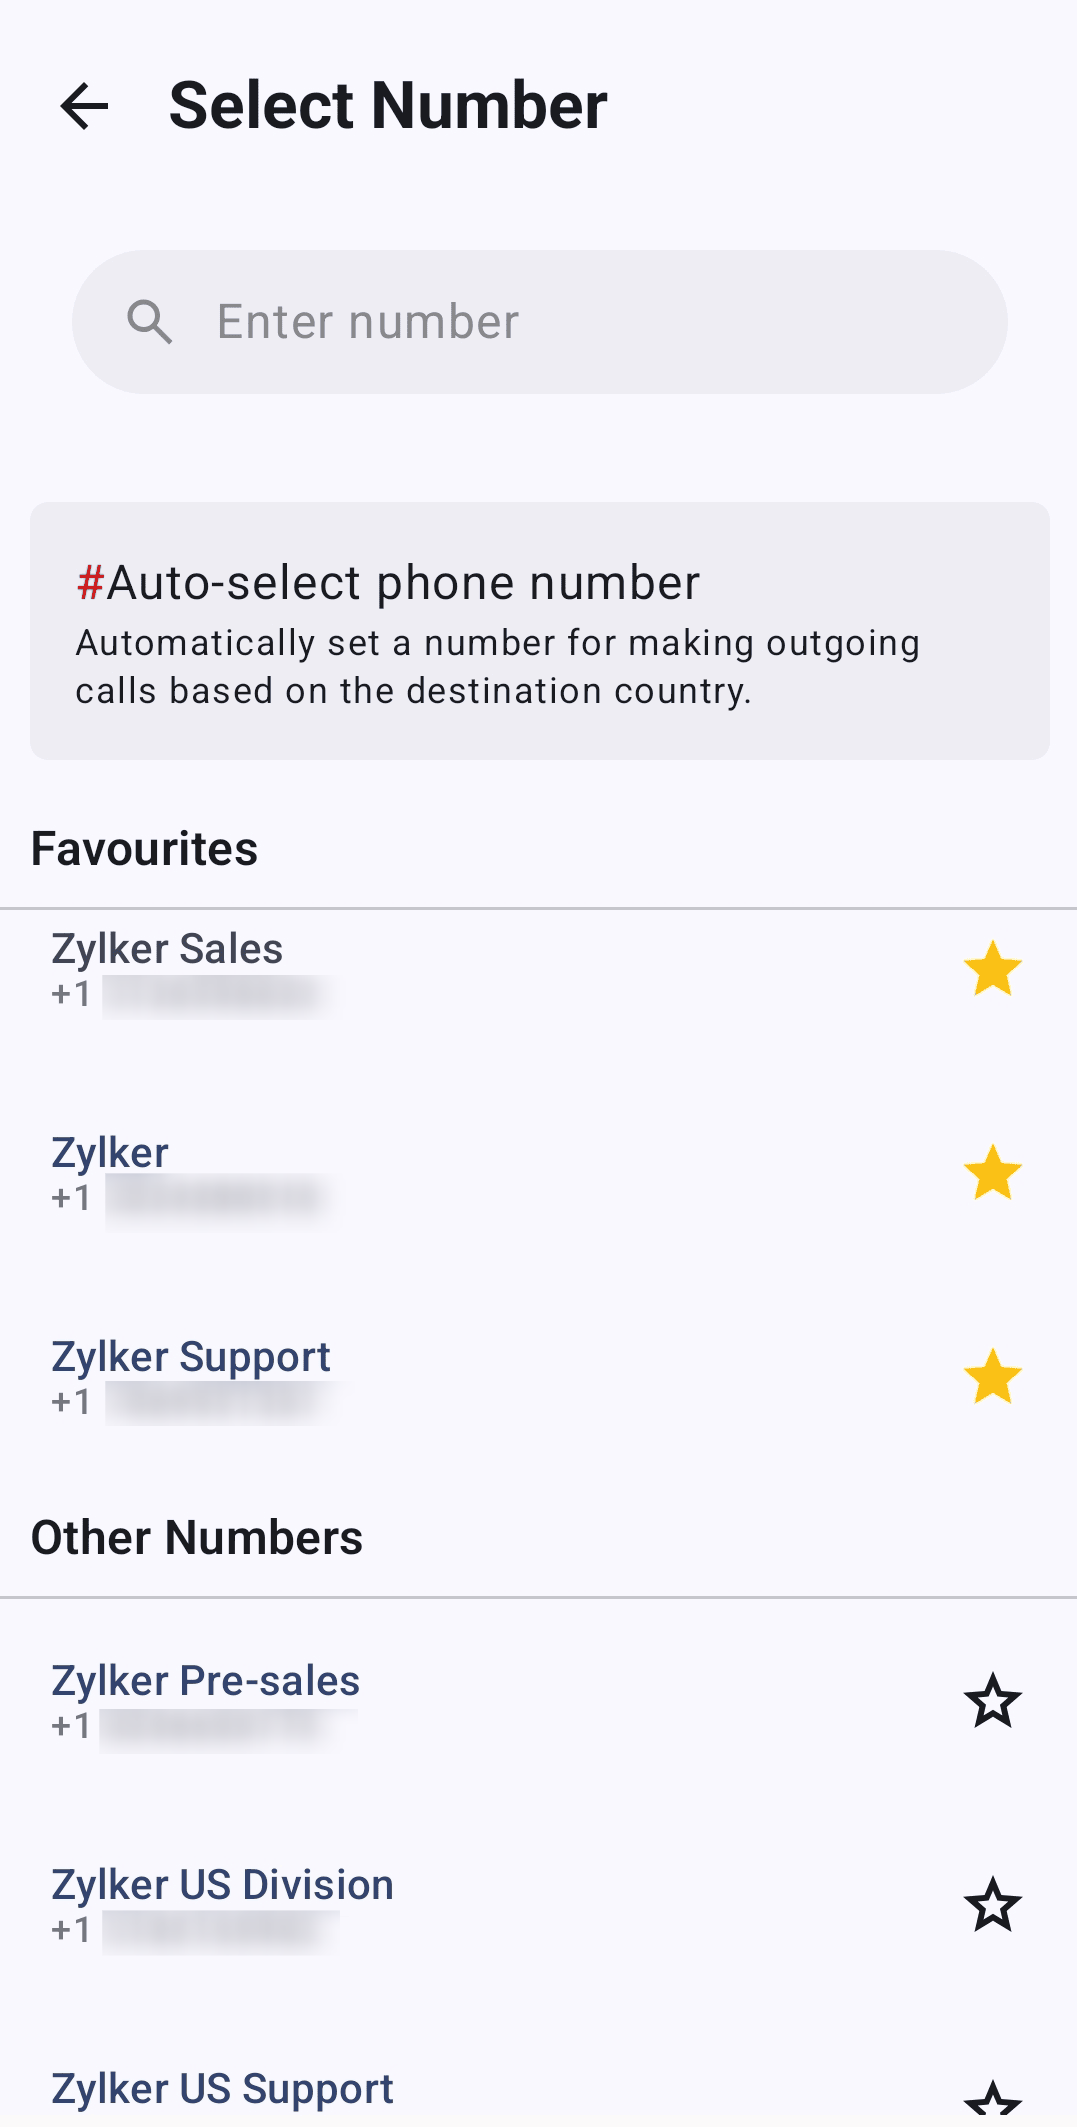
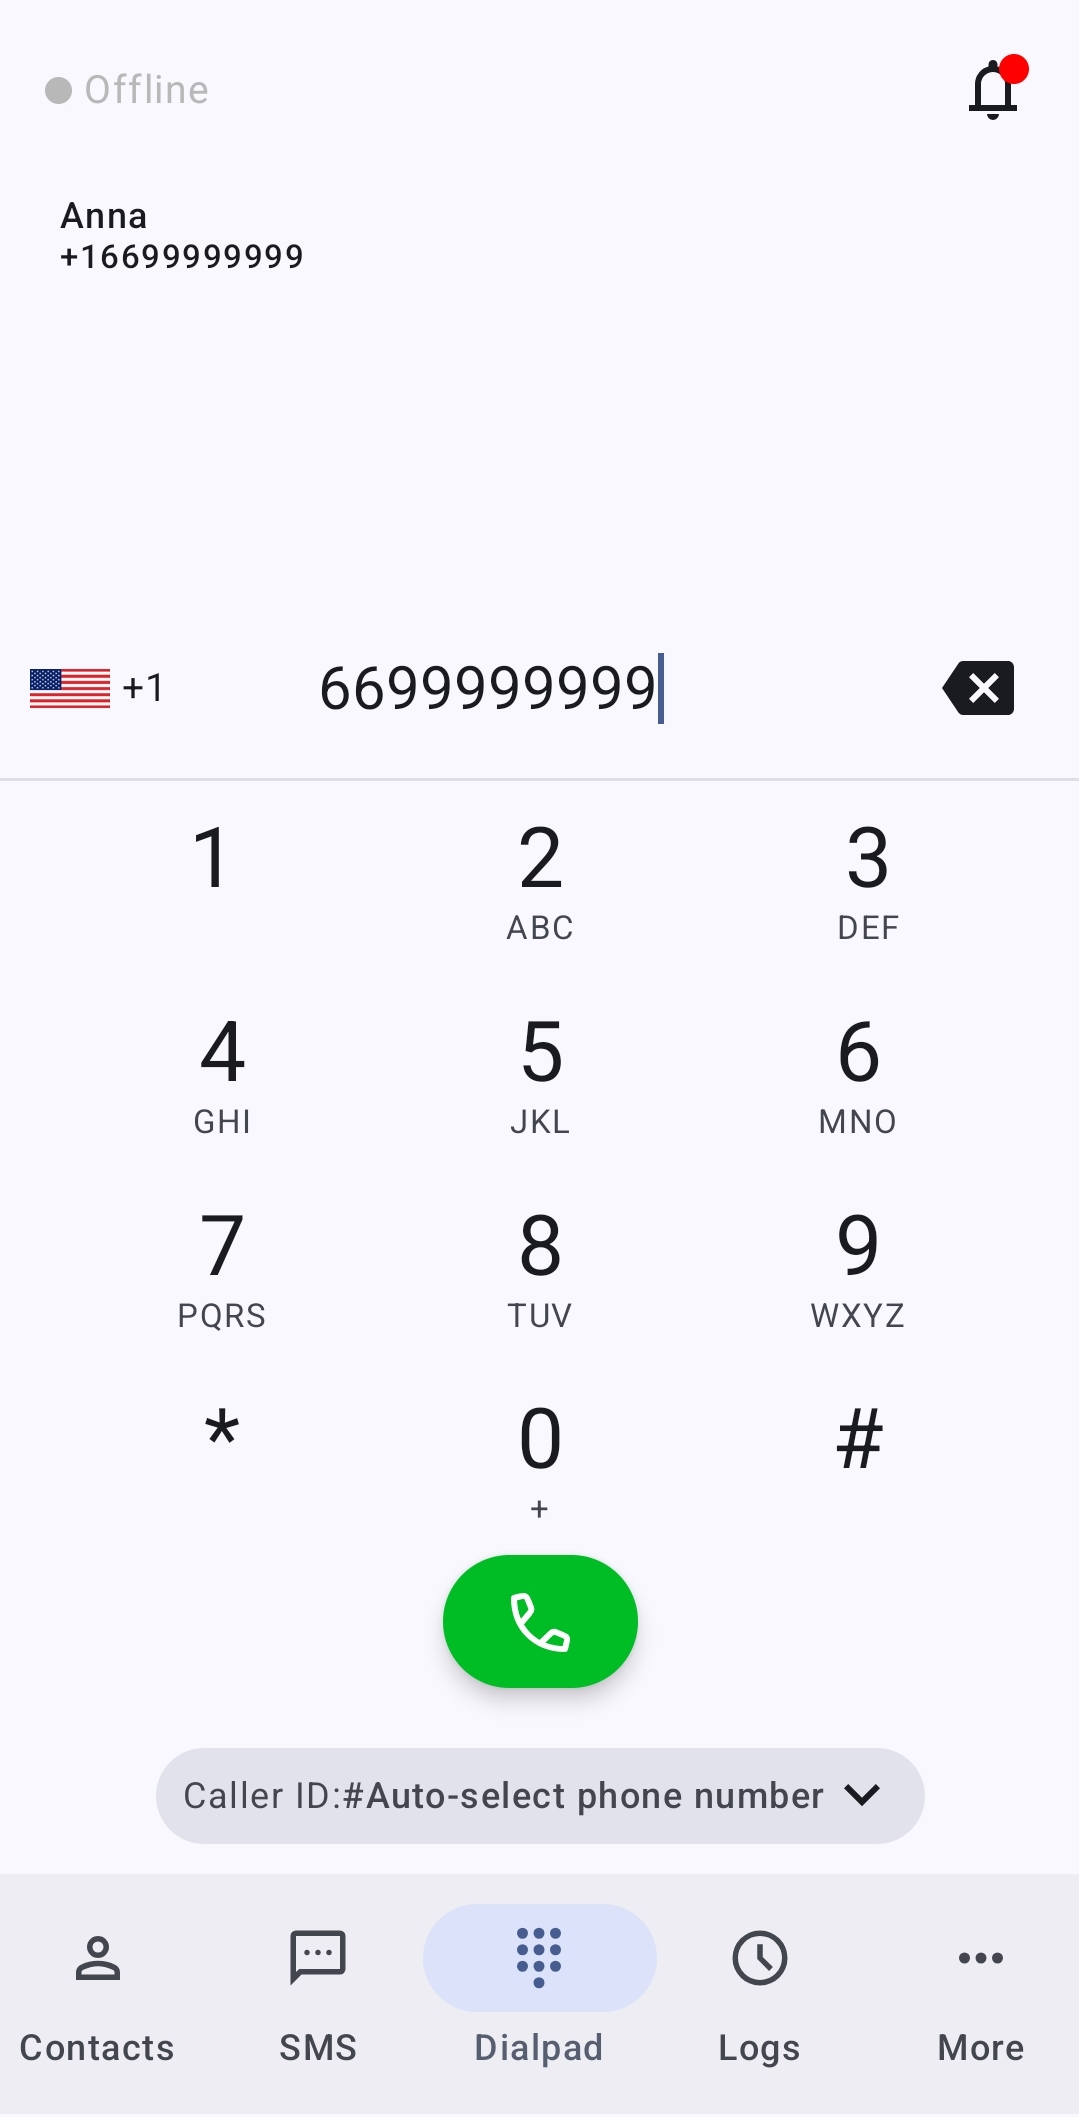
Once the Caller ID is set, you can start making calls. Saved contacts will appear automatically as you enter a number in the dialpad.
Contacts in ZDialer
Tap the Contacts menu in the lower-left corner of the dialer.
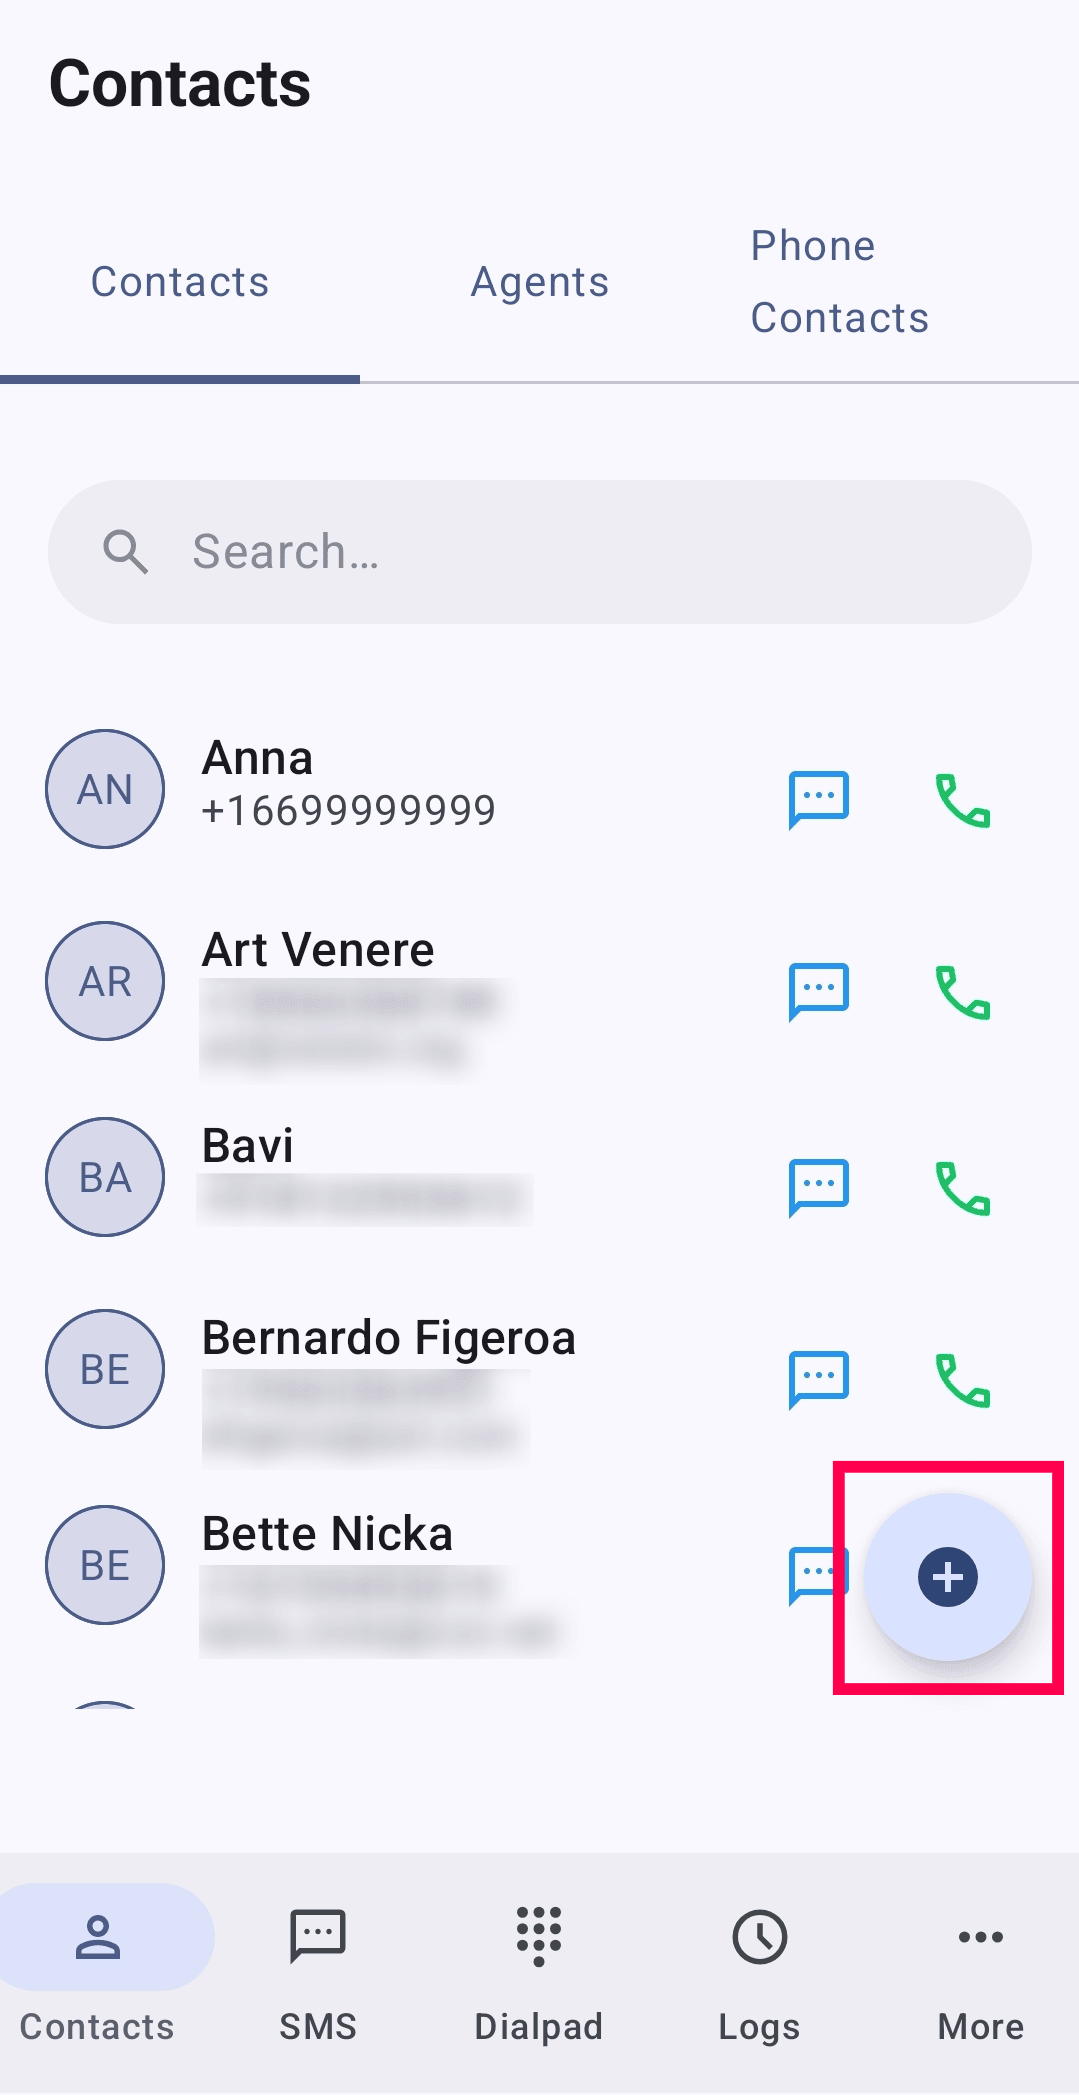
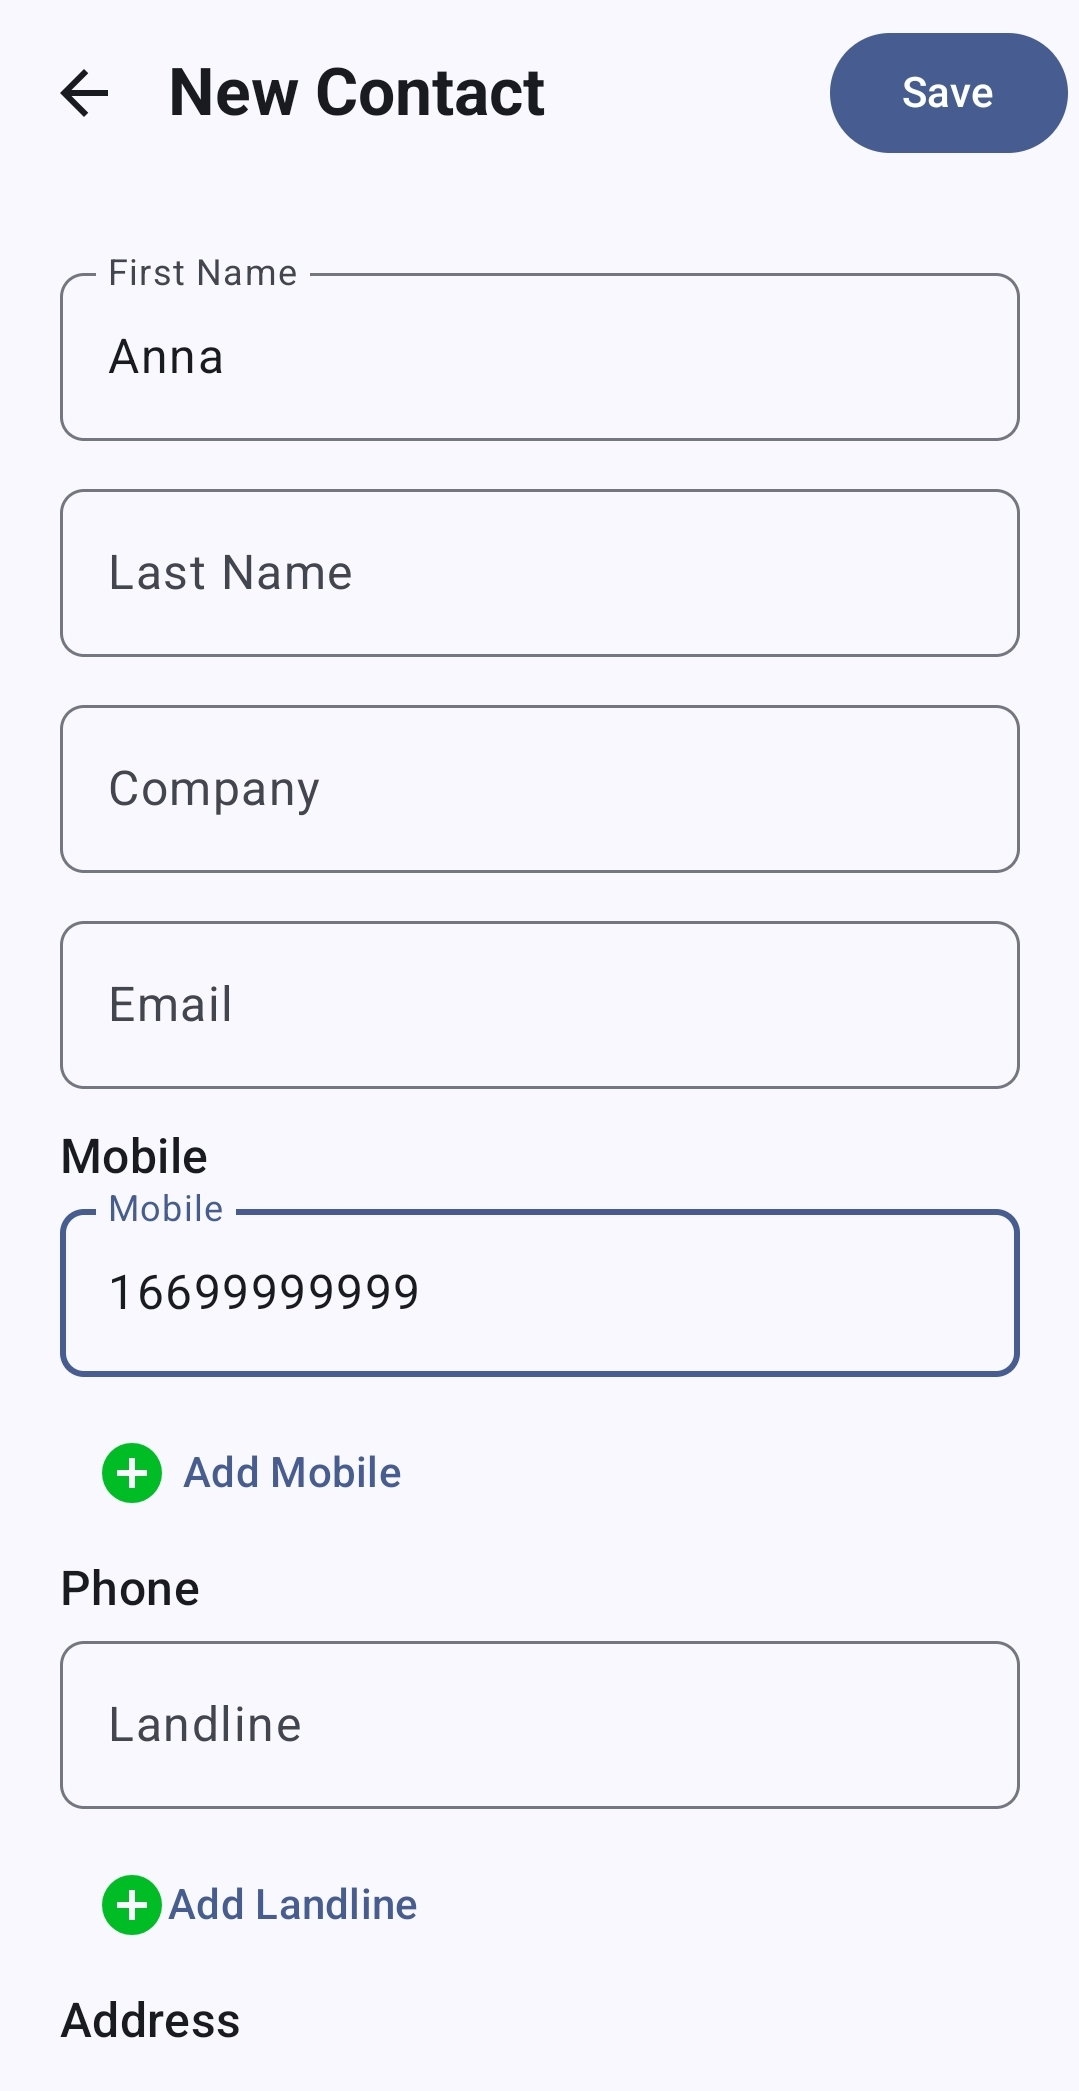
To add a new contact, tap the Add icon in the bottom-right corner. Specify all the required details and tap Save.
- Search for contacts by name or phone number using the search bar.
- To place a call, select a contact and tap the Call icon.
You can also edit, mark as favorite, or report as spam using the corresponding icons after selecting the contact entry.
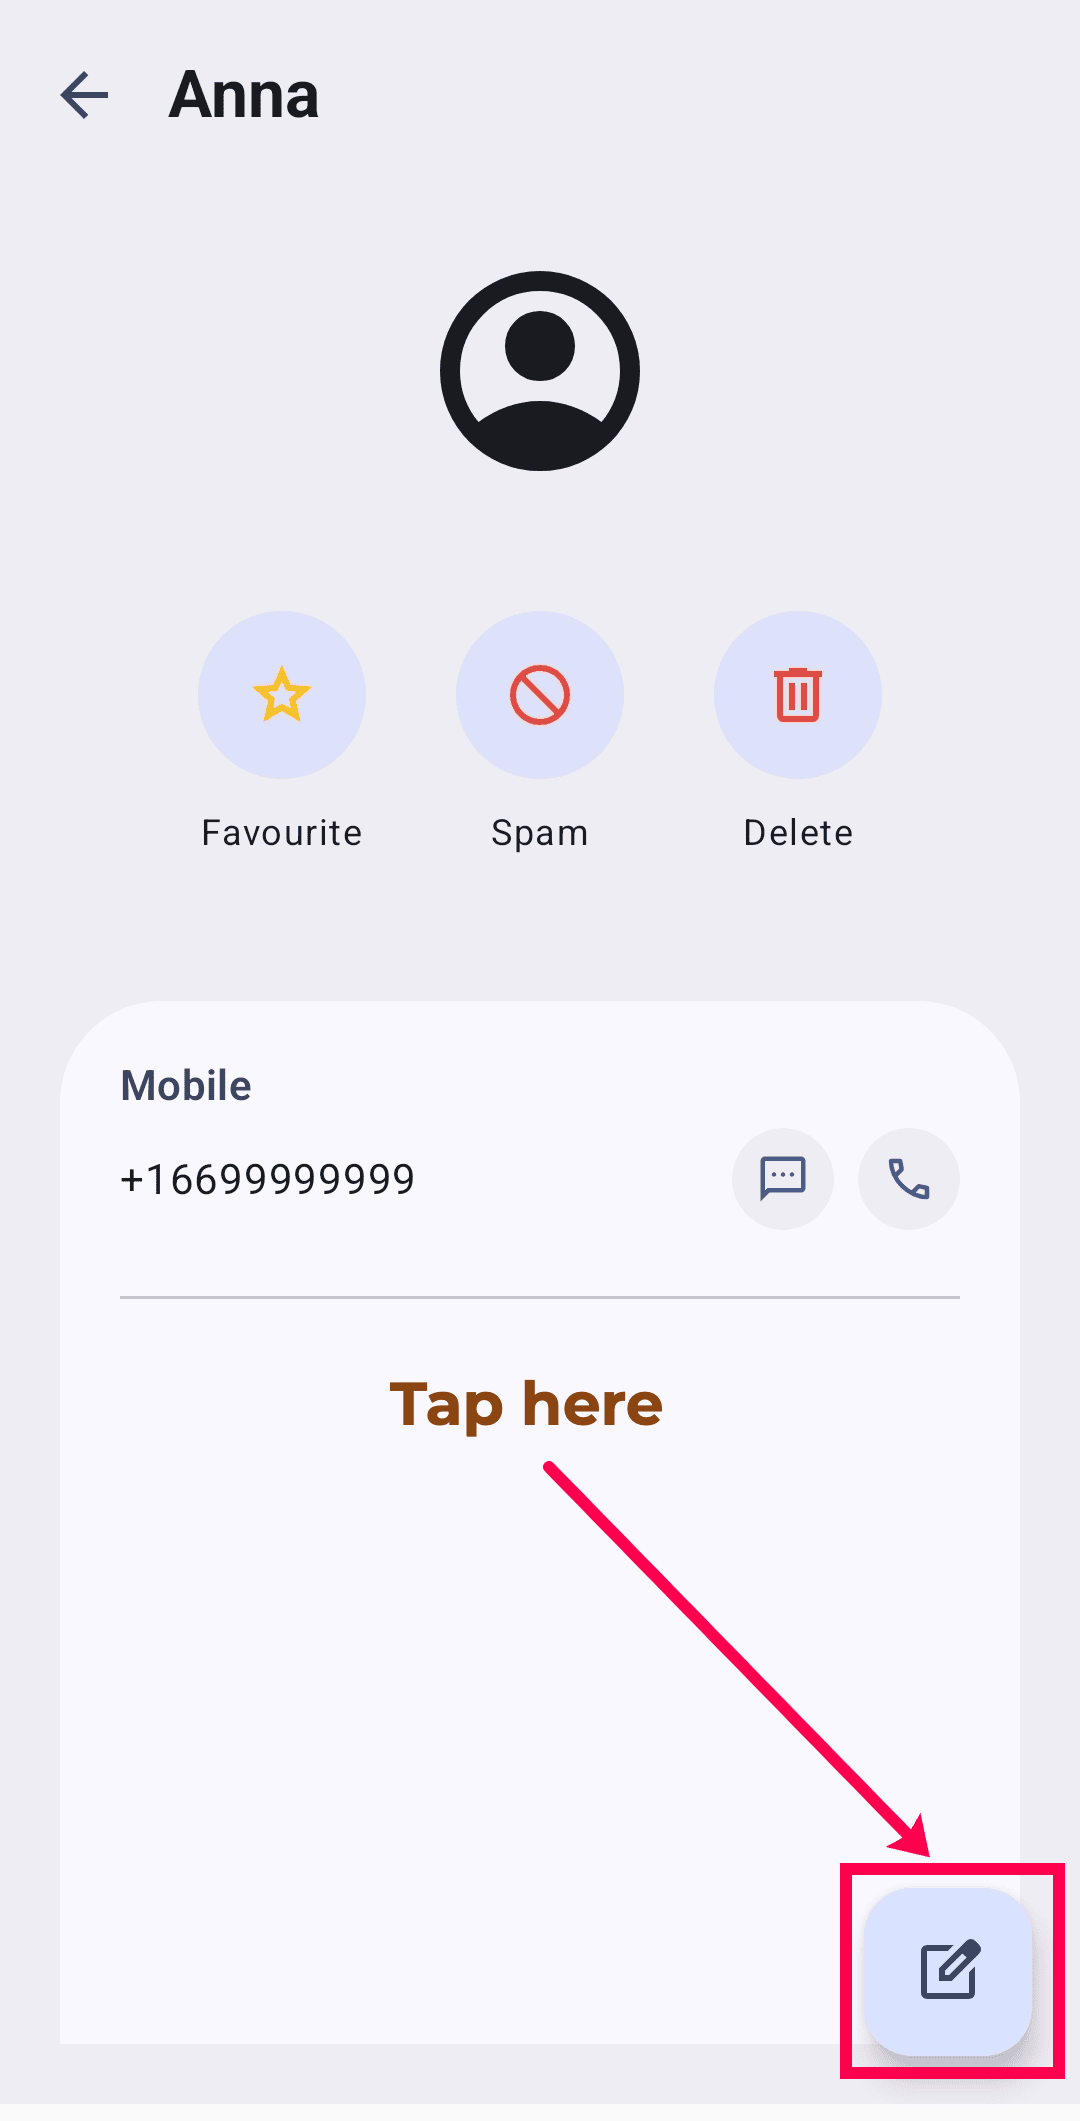
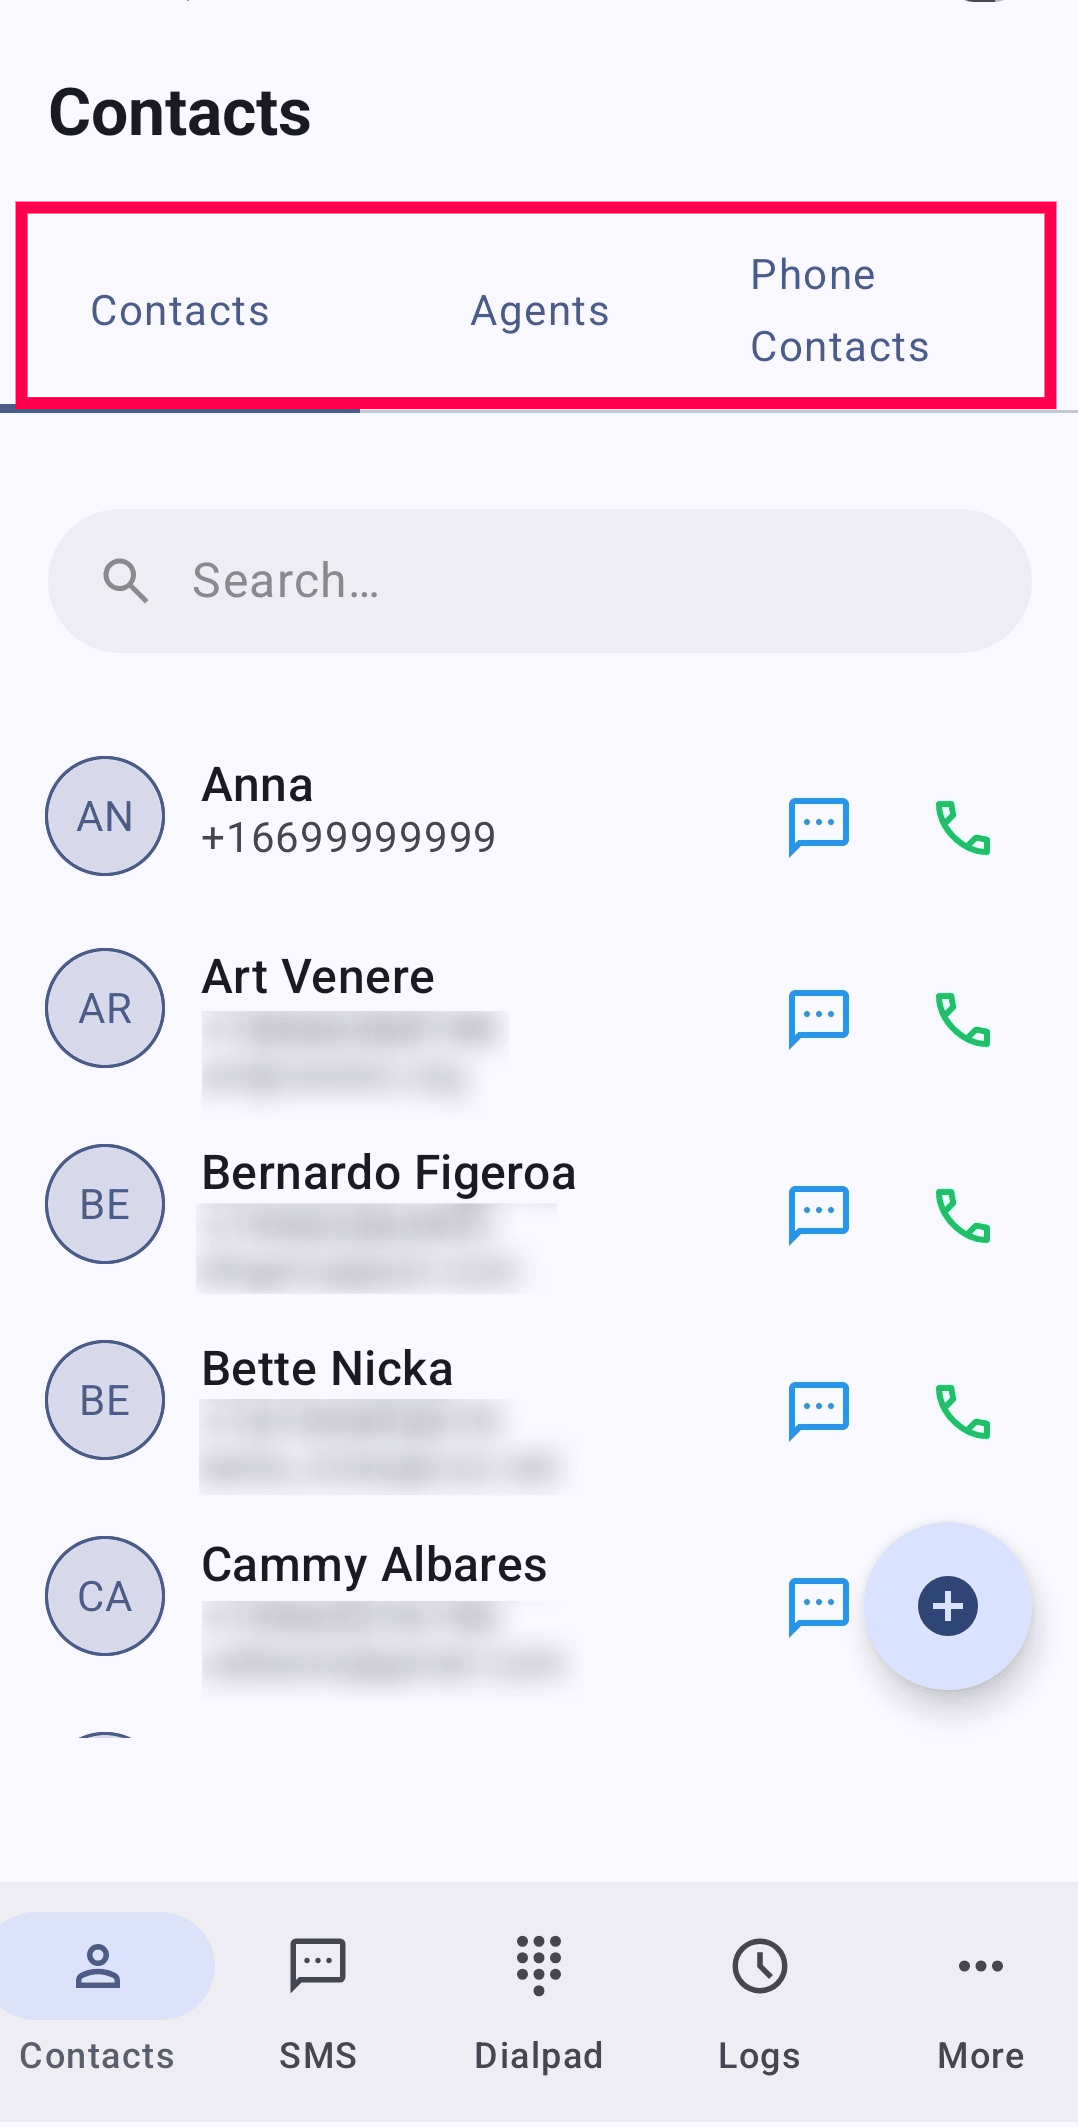
Options in contacts to access:
- Agents tab: Search and call other agents by name or extension.
- Phone Contacts tab: Access and call contacts saved on your device. Tap Allow when prompted to grant access to your phone's contacts.
Compose and Schedule message in ZDialer
Tap the SMS menu at the bottom-left corner of the dialer. Messaging functions are similar to the Zoho Voice web console.
Compose a new SMS
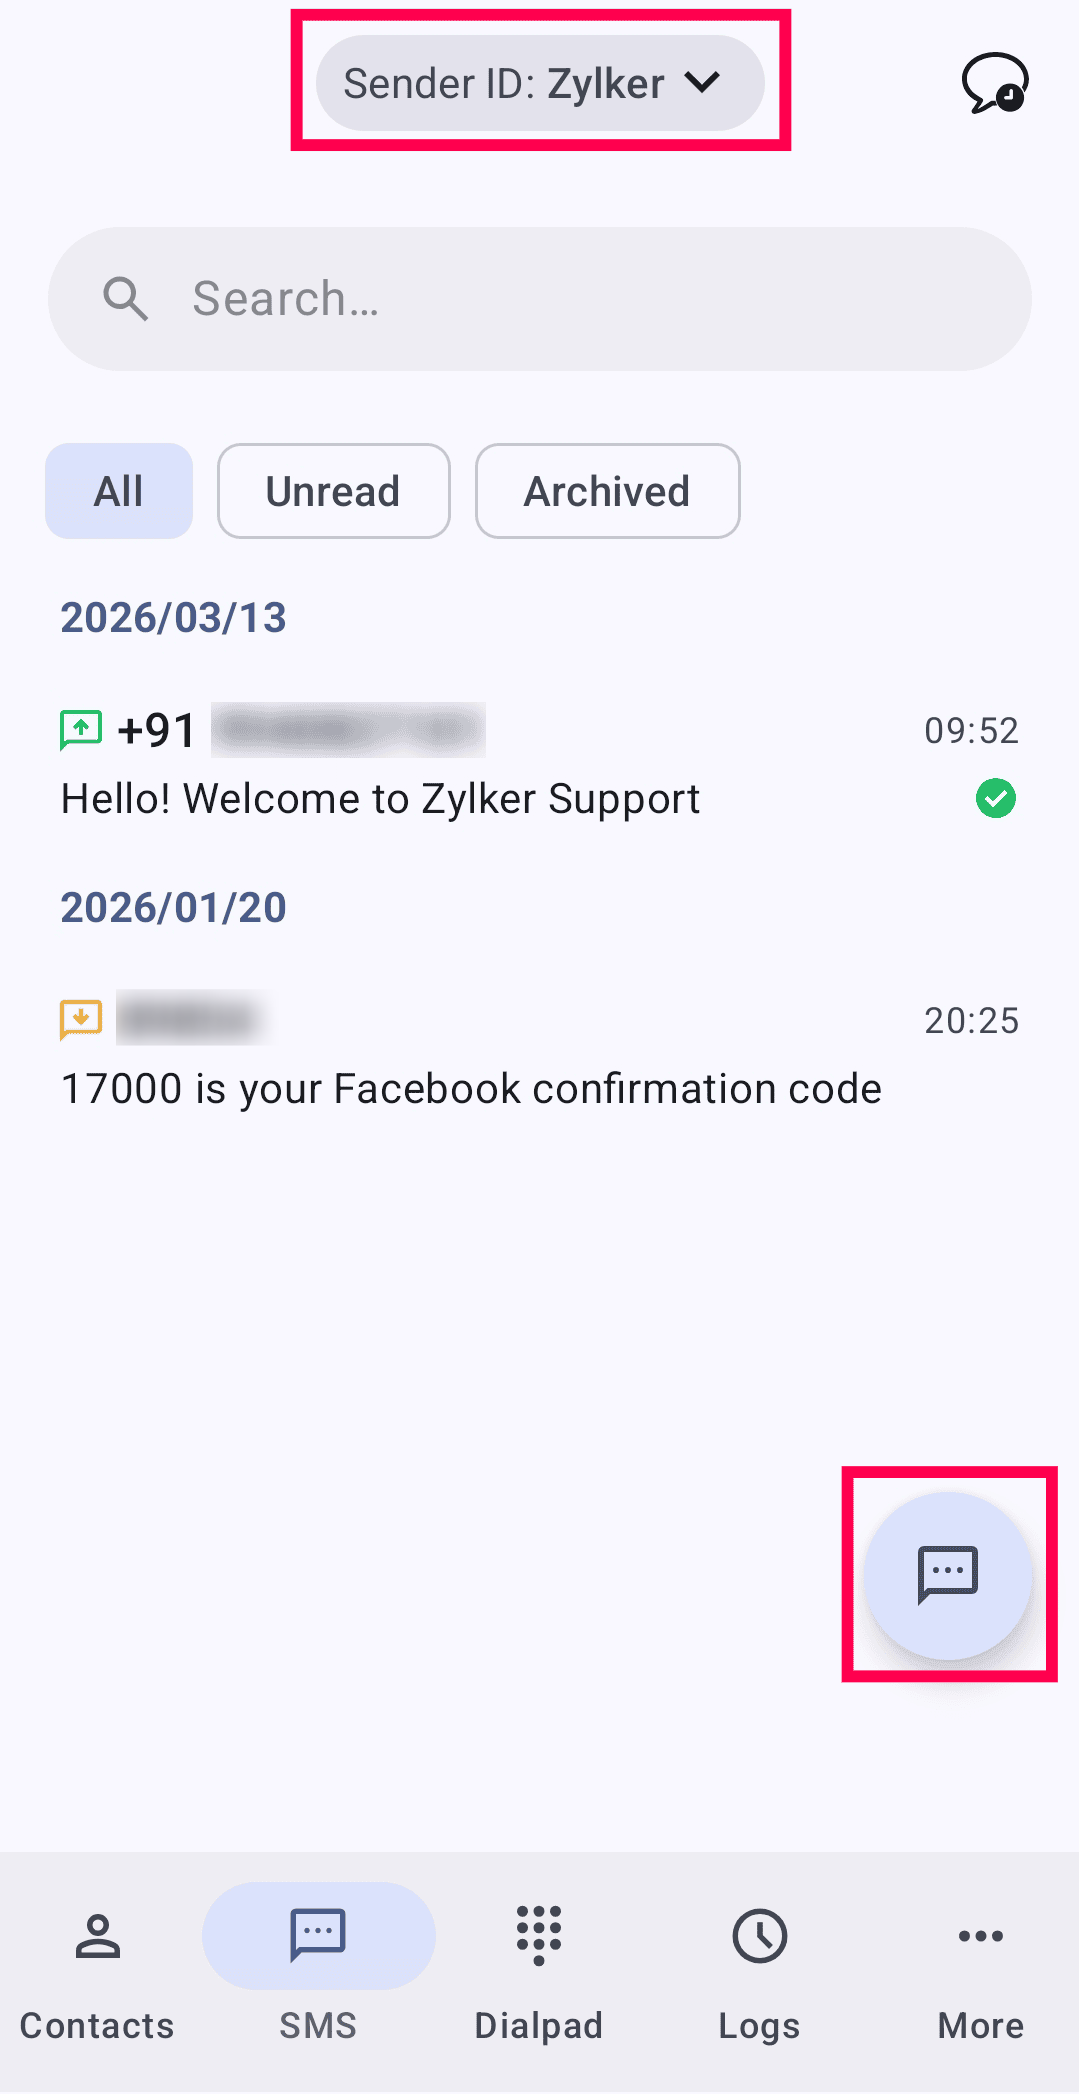
- Tap the currently selected Sender ID in the top-center of the dialer and choose the required Sender ID. You can also mark a Sender ID as favorite using the star icon.
Tap the Message icon available at the bottom-right corner of the screen.
- Enter the recipient’s number.
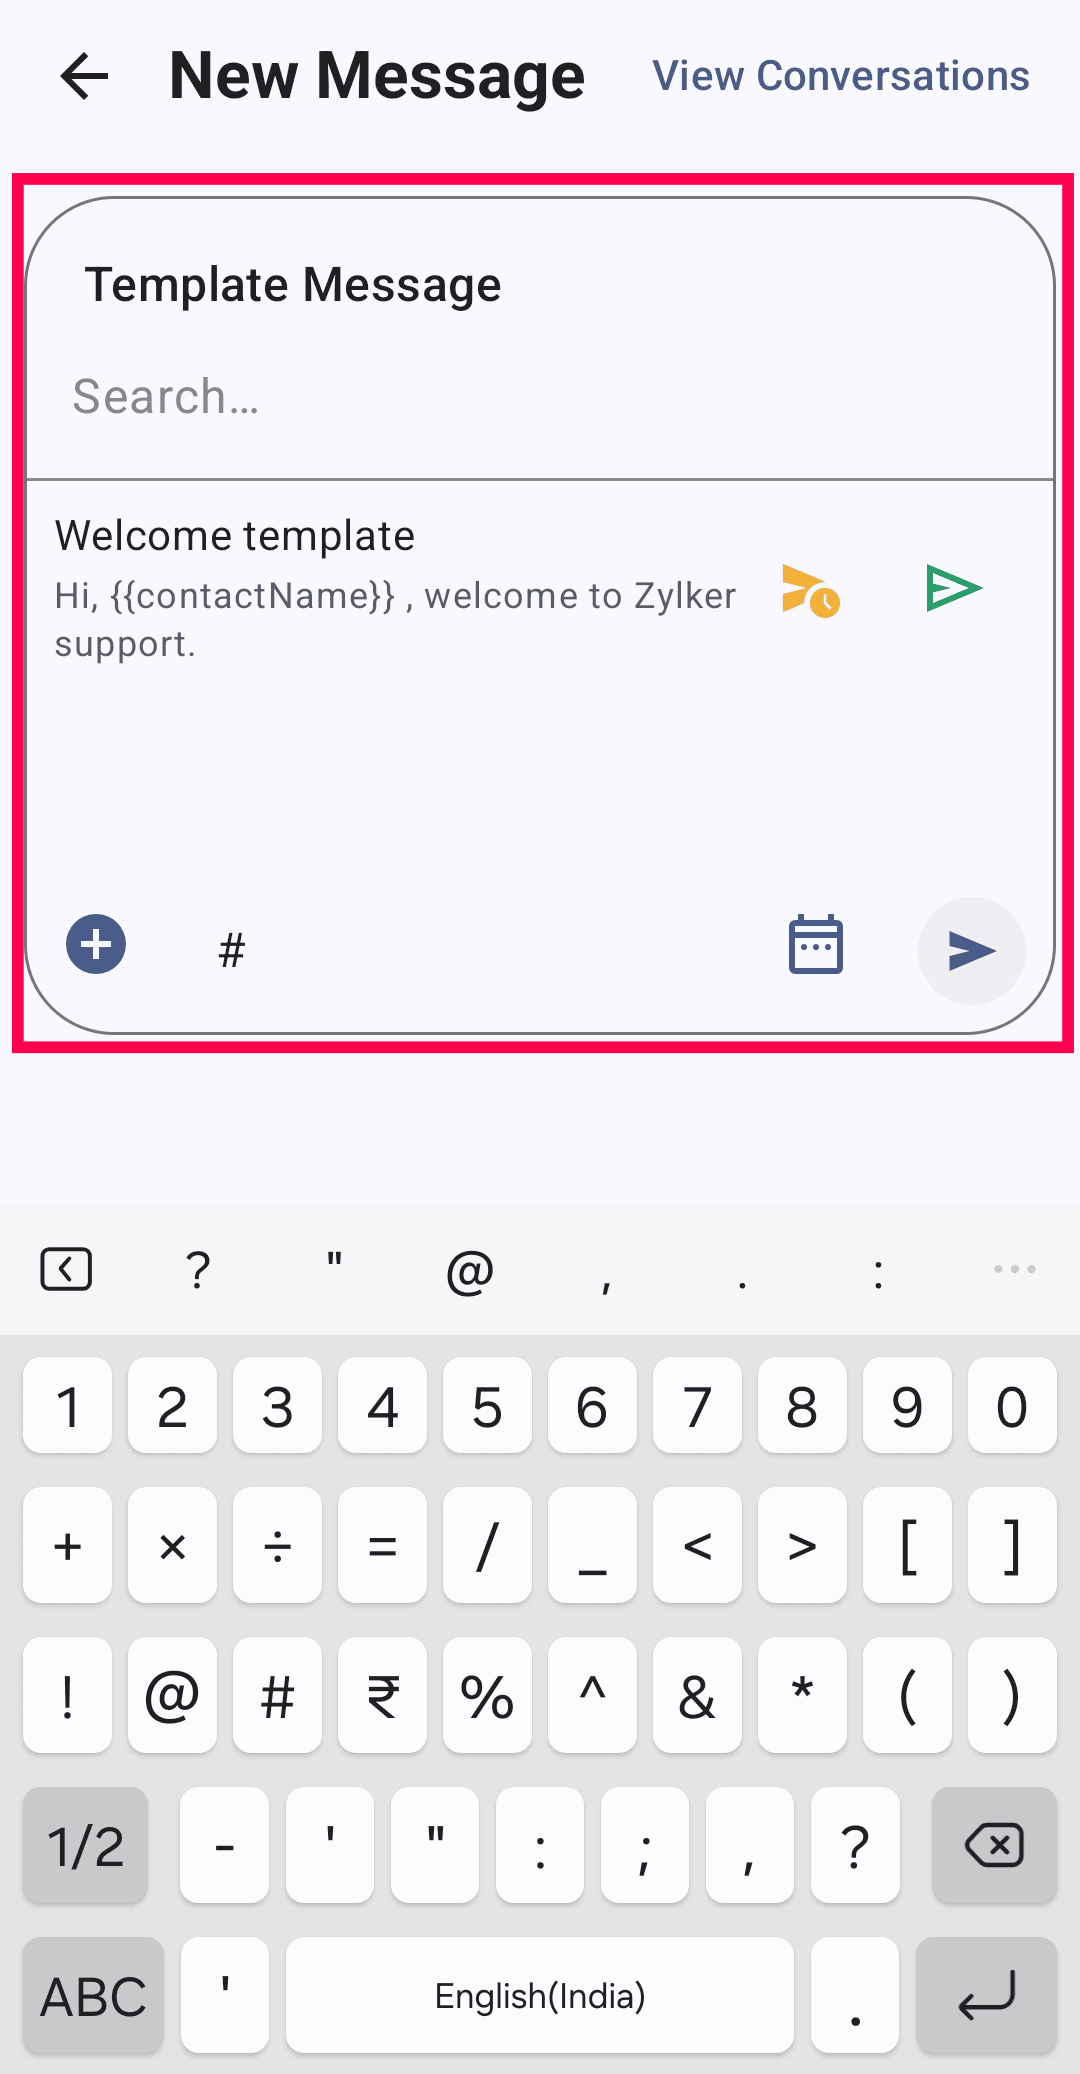
Type your message. You can use # to insert templates or shortcuts (e.g., type :st to insert a template). Learn more about template creation.
Note
Templates must be created and be accessible to you in the Zoho Voice web console.
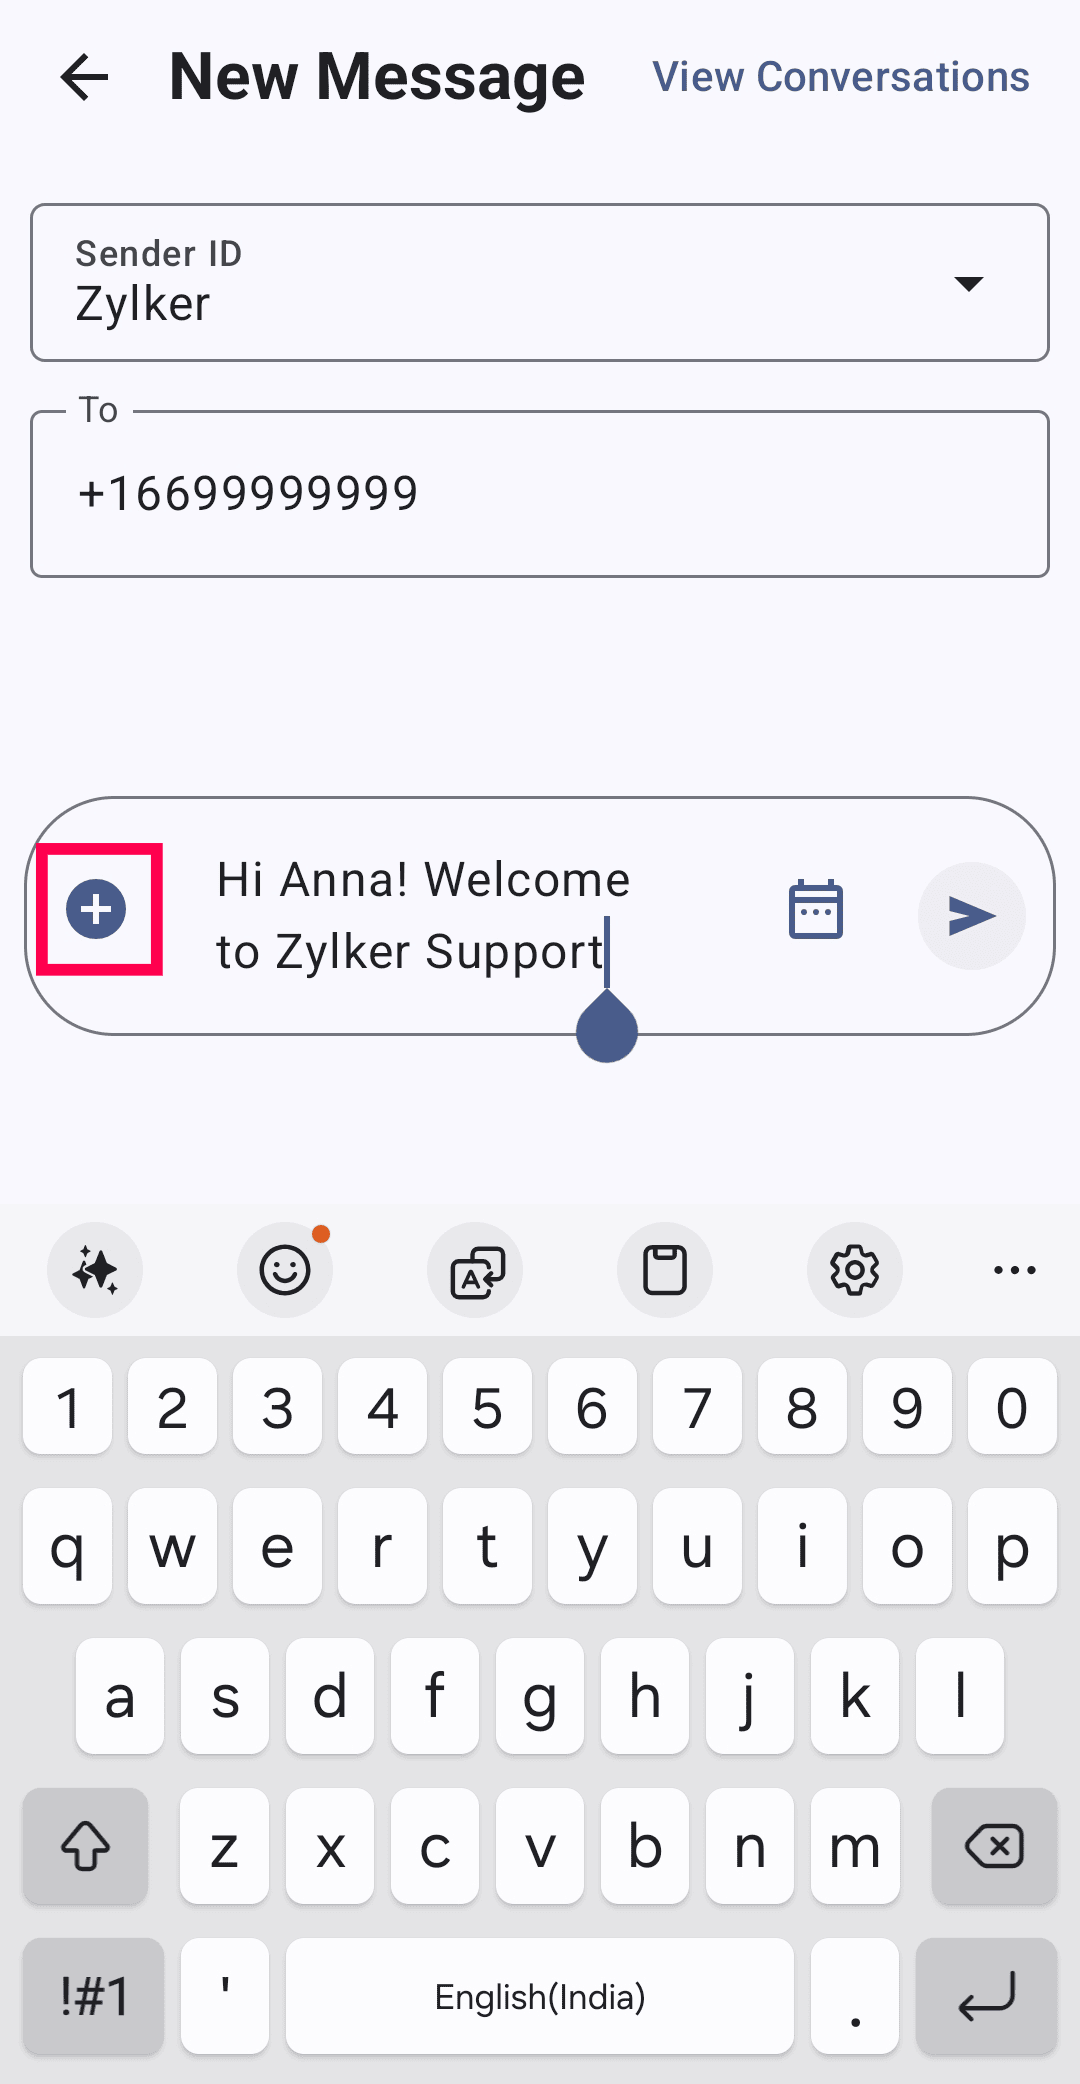
To attach a file:
To attach a file, tap the plus (+) icon next to the message field. You can upload files up to a total size of 1000 KB.
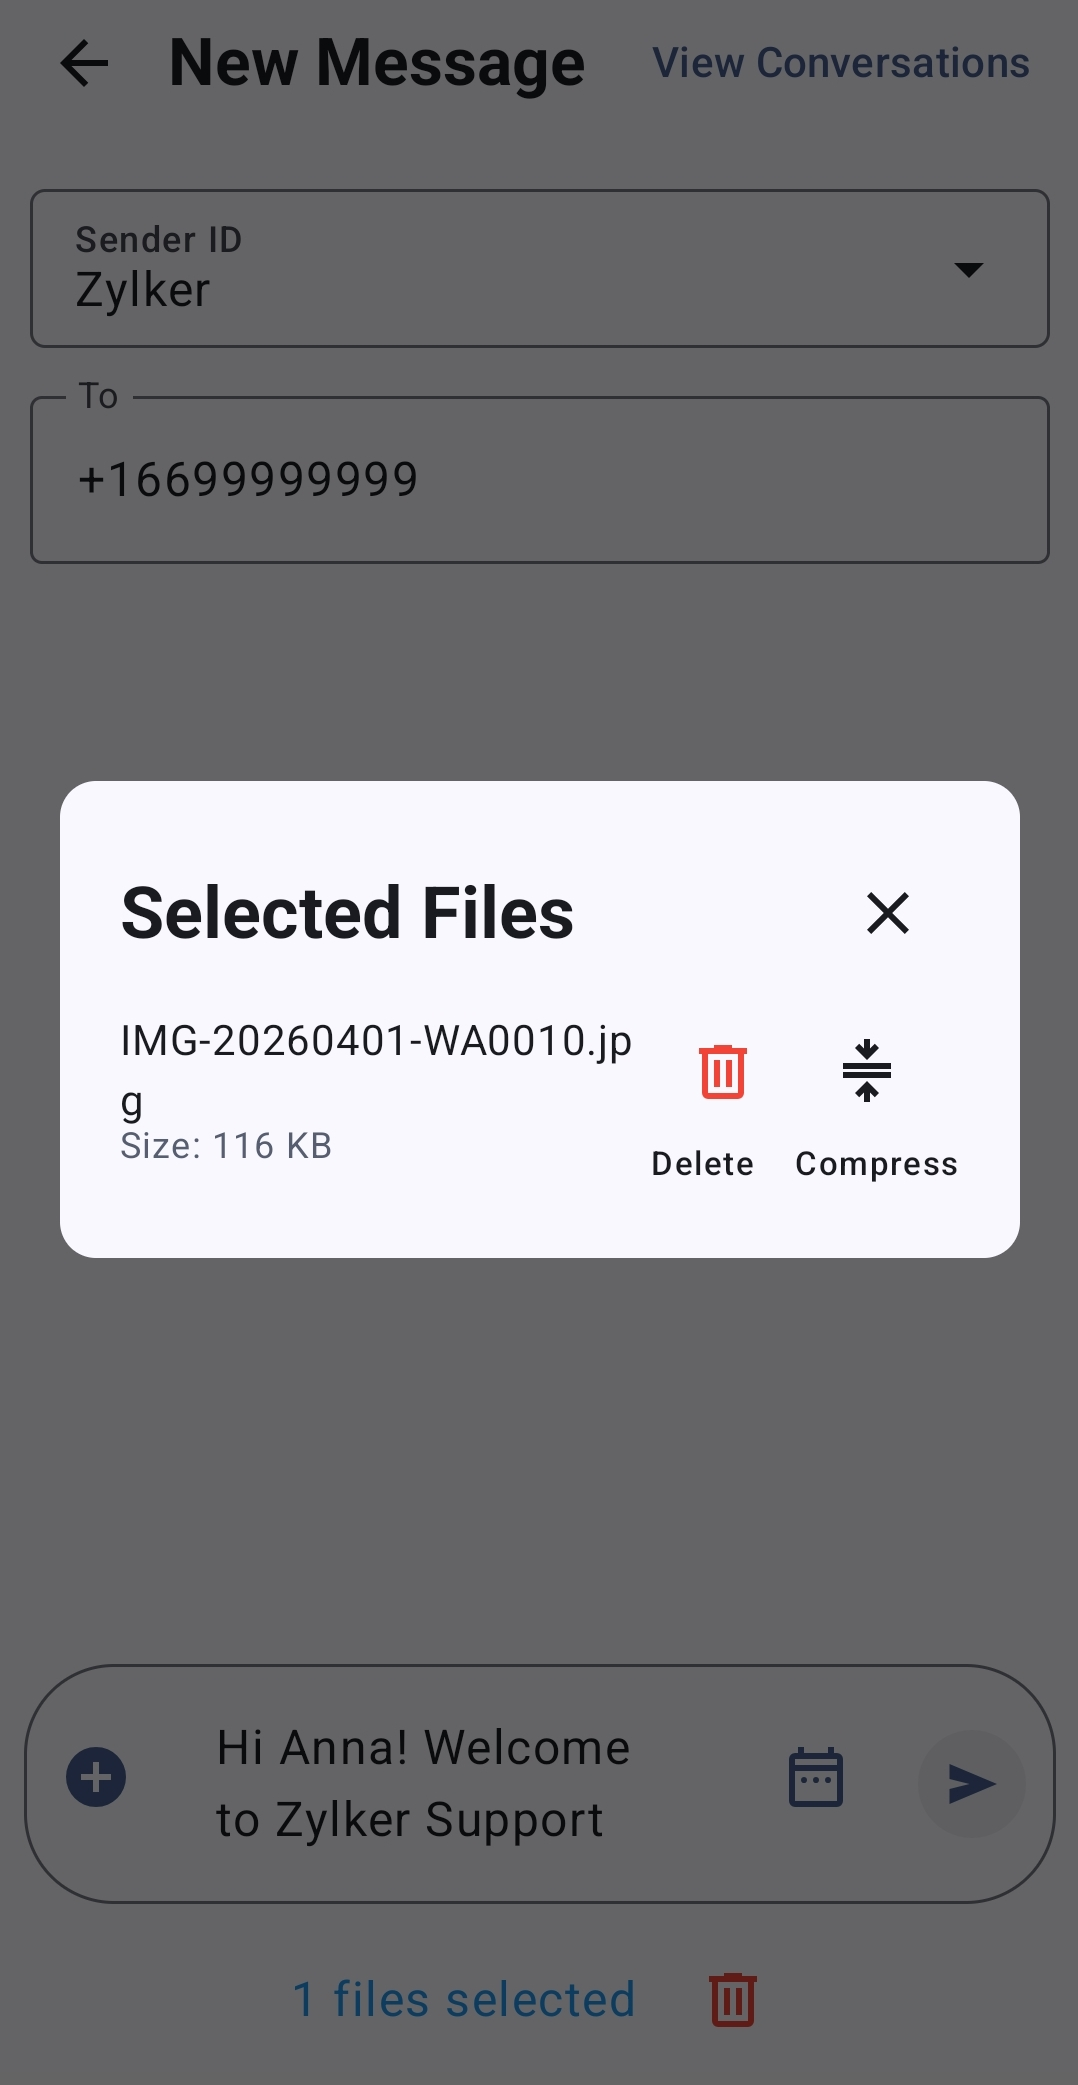
You can compress the image by selecting the uploaded file and tapping Compress. Adjust the quality as needed, then tap Save.
Note
The supported image resolution for compression is up to 4096 × 4096.
Send or Schedule message
To send the message instantly, simply tap the Send icon.
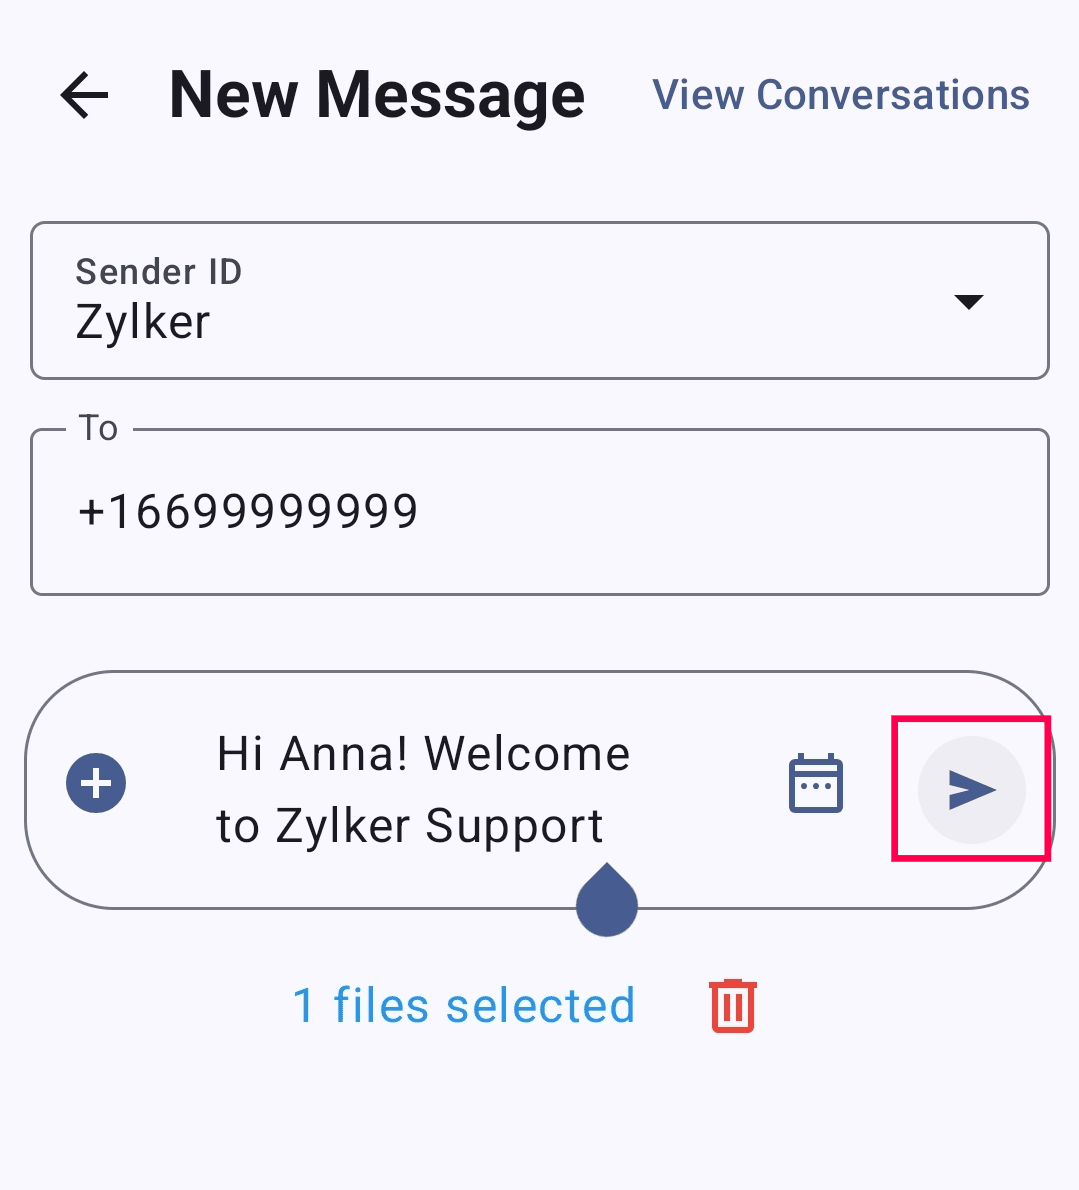
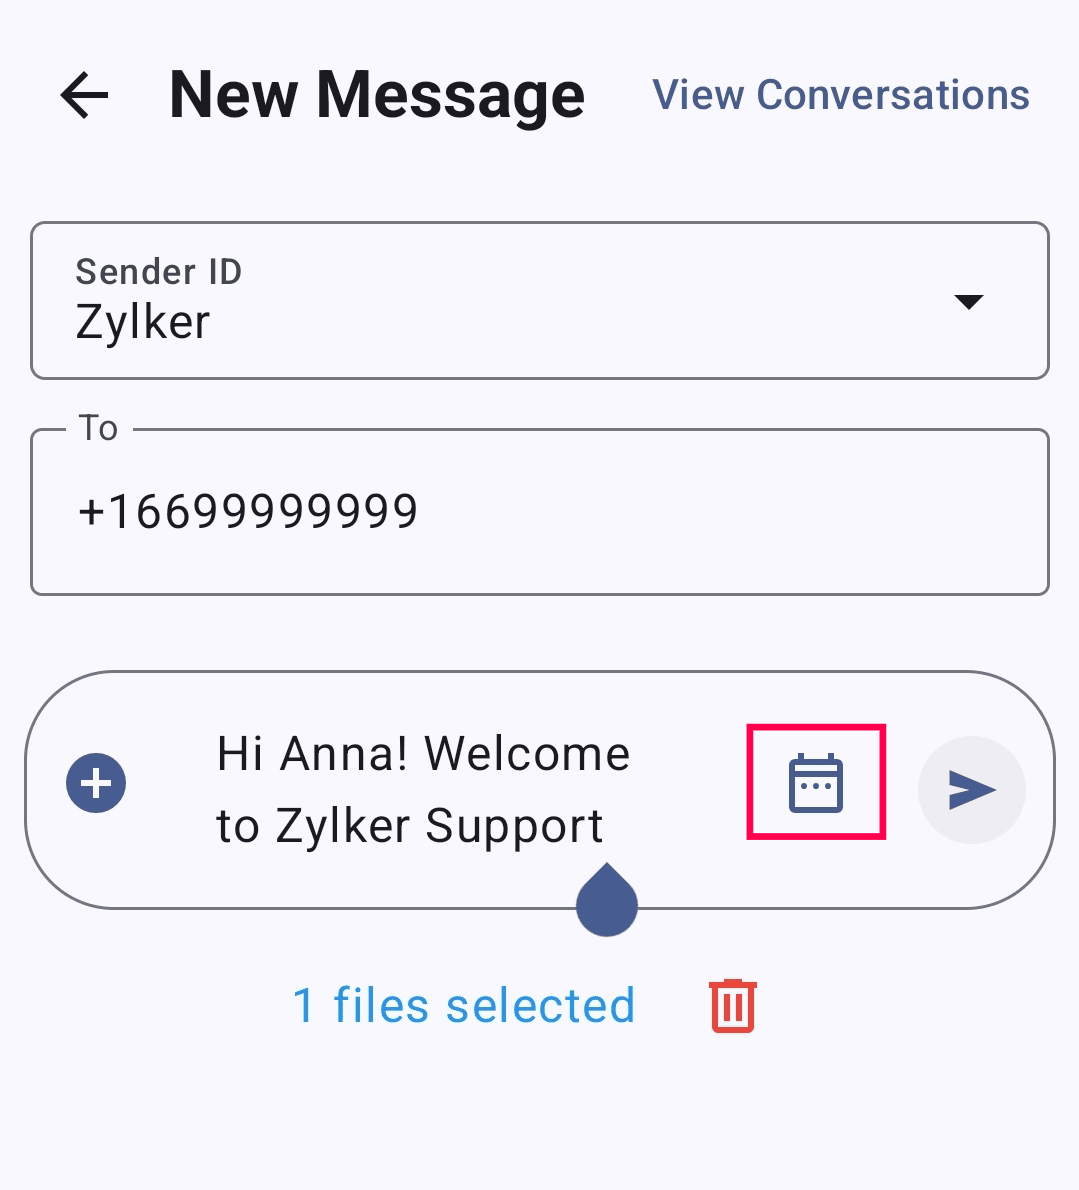
To schedule a message:
Tap the calendar icon.
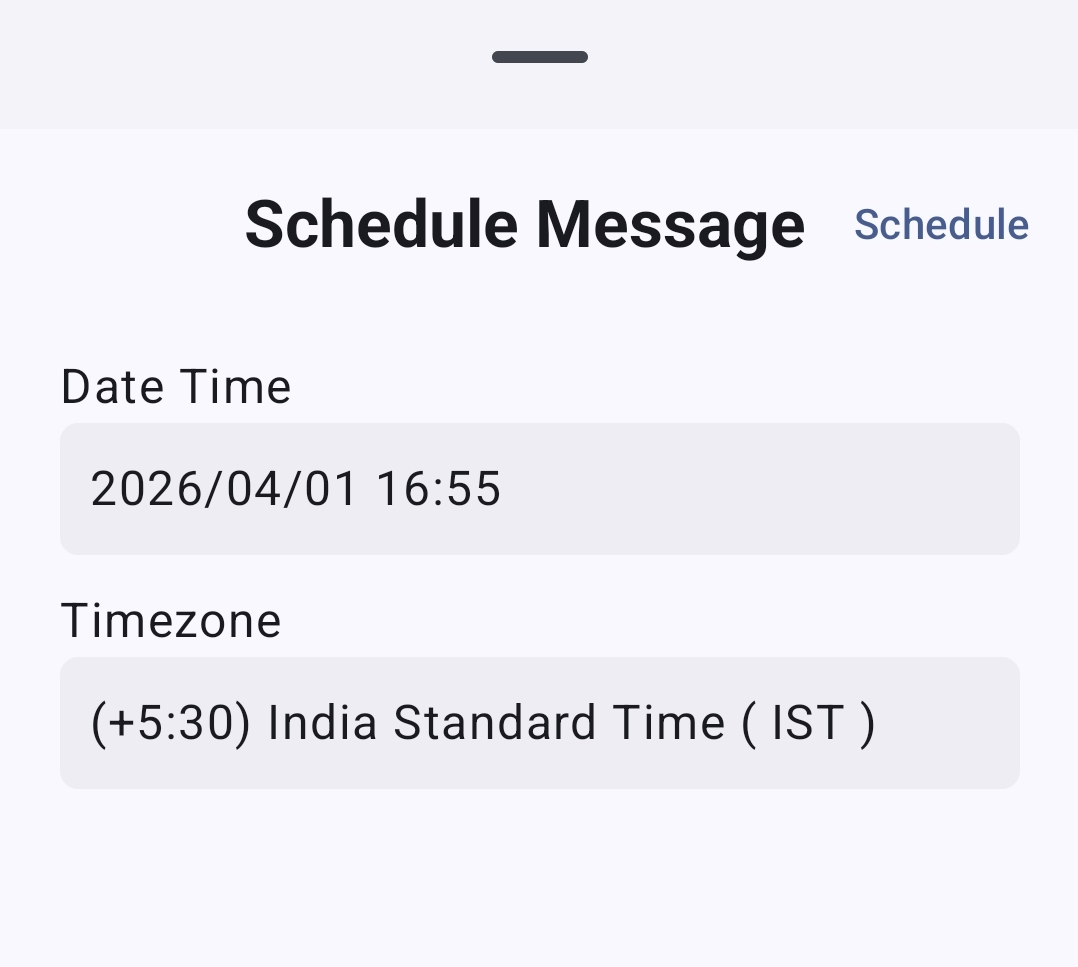
Select the date, time, and time zone, then tap Schedule.
Manage chats
- Use the search bar to find specific SMS conversations.
- Filter messages by selecting the required Sender ID.
- Switch between tabs to view Unread and Archived messages.
Inbox
- Once you send an SMS or MMS, it will appear in the SMS Inbox.
- Tap on any chat to open the conversation thread. Incoming SMS and MMS messages will also appear within the same thread, allowing you to view your entire message history in one place.
The inbox includes three tabs:
- All: Displays all SMS and MMS conversations.
- Unread: Displays all messages that haven’t been read yet.
- Archived: Displays conversations that have been archived for future reference.
Manage conversations
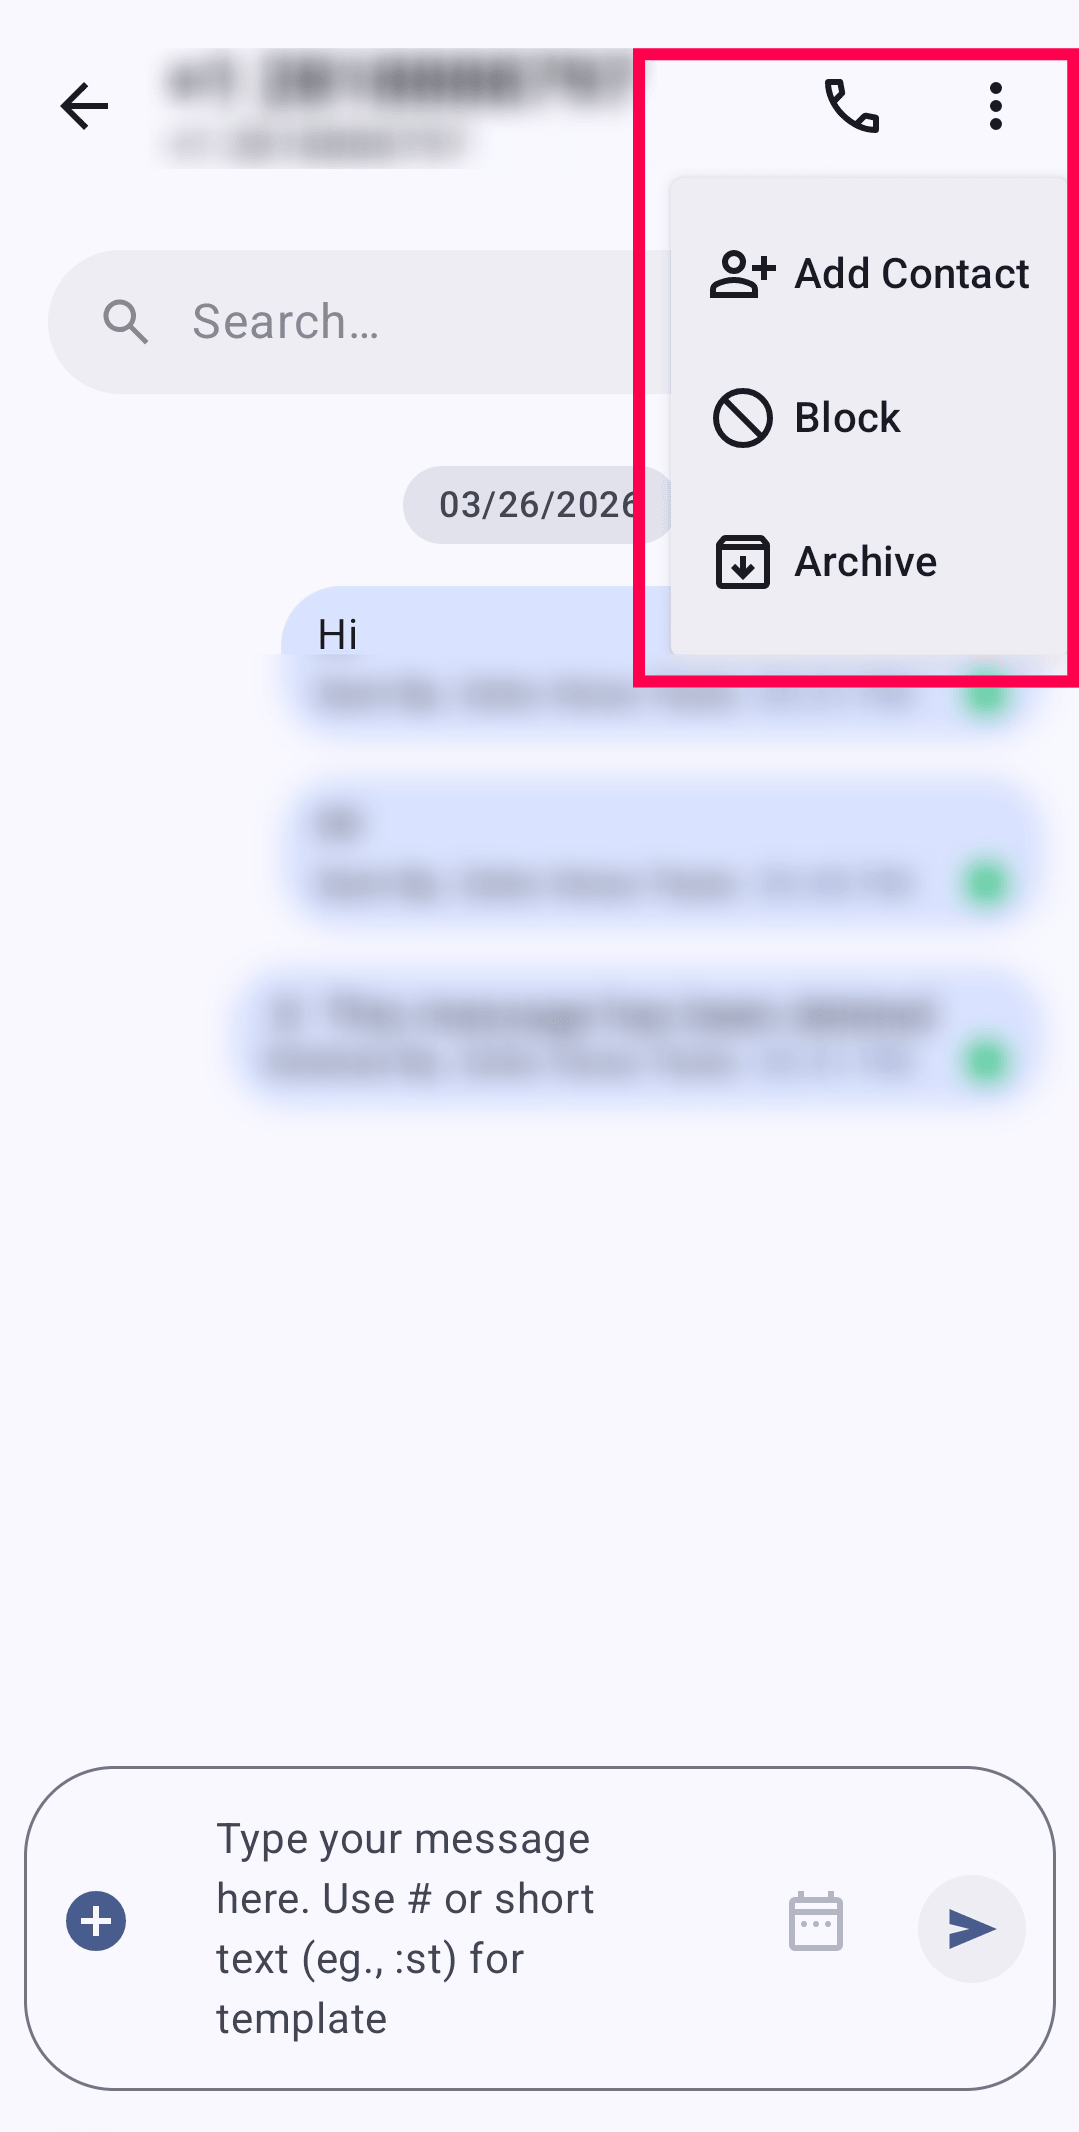
Within a chat, you can manage conversations using the ellipsis(⋮) icon at the top right corner of the chat screen:
- Add Contact: Add an unknown number to your contacts.
- Archive: Move the entire conversation to the Archived tab.
- Block: Prevent further incoming messages from that number. This number will be added to the blocklist (in your Zoho Voice console → Settings → Blocked Numbers).
Managing individual messages
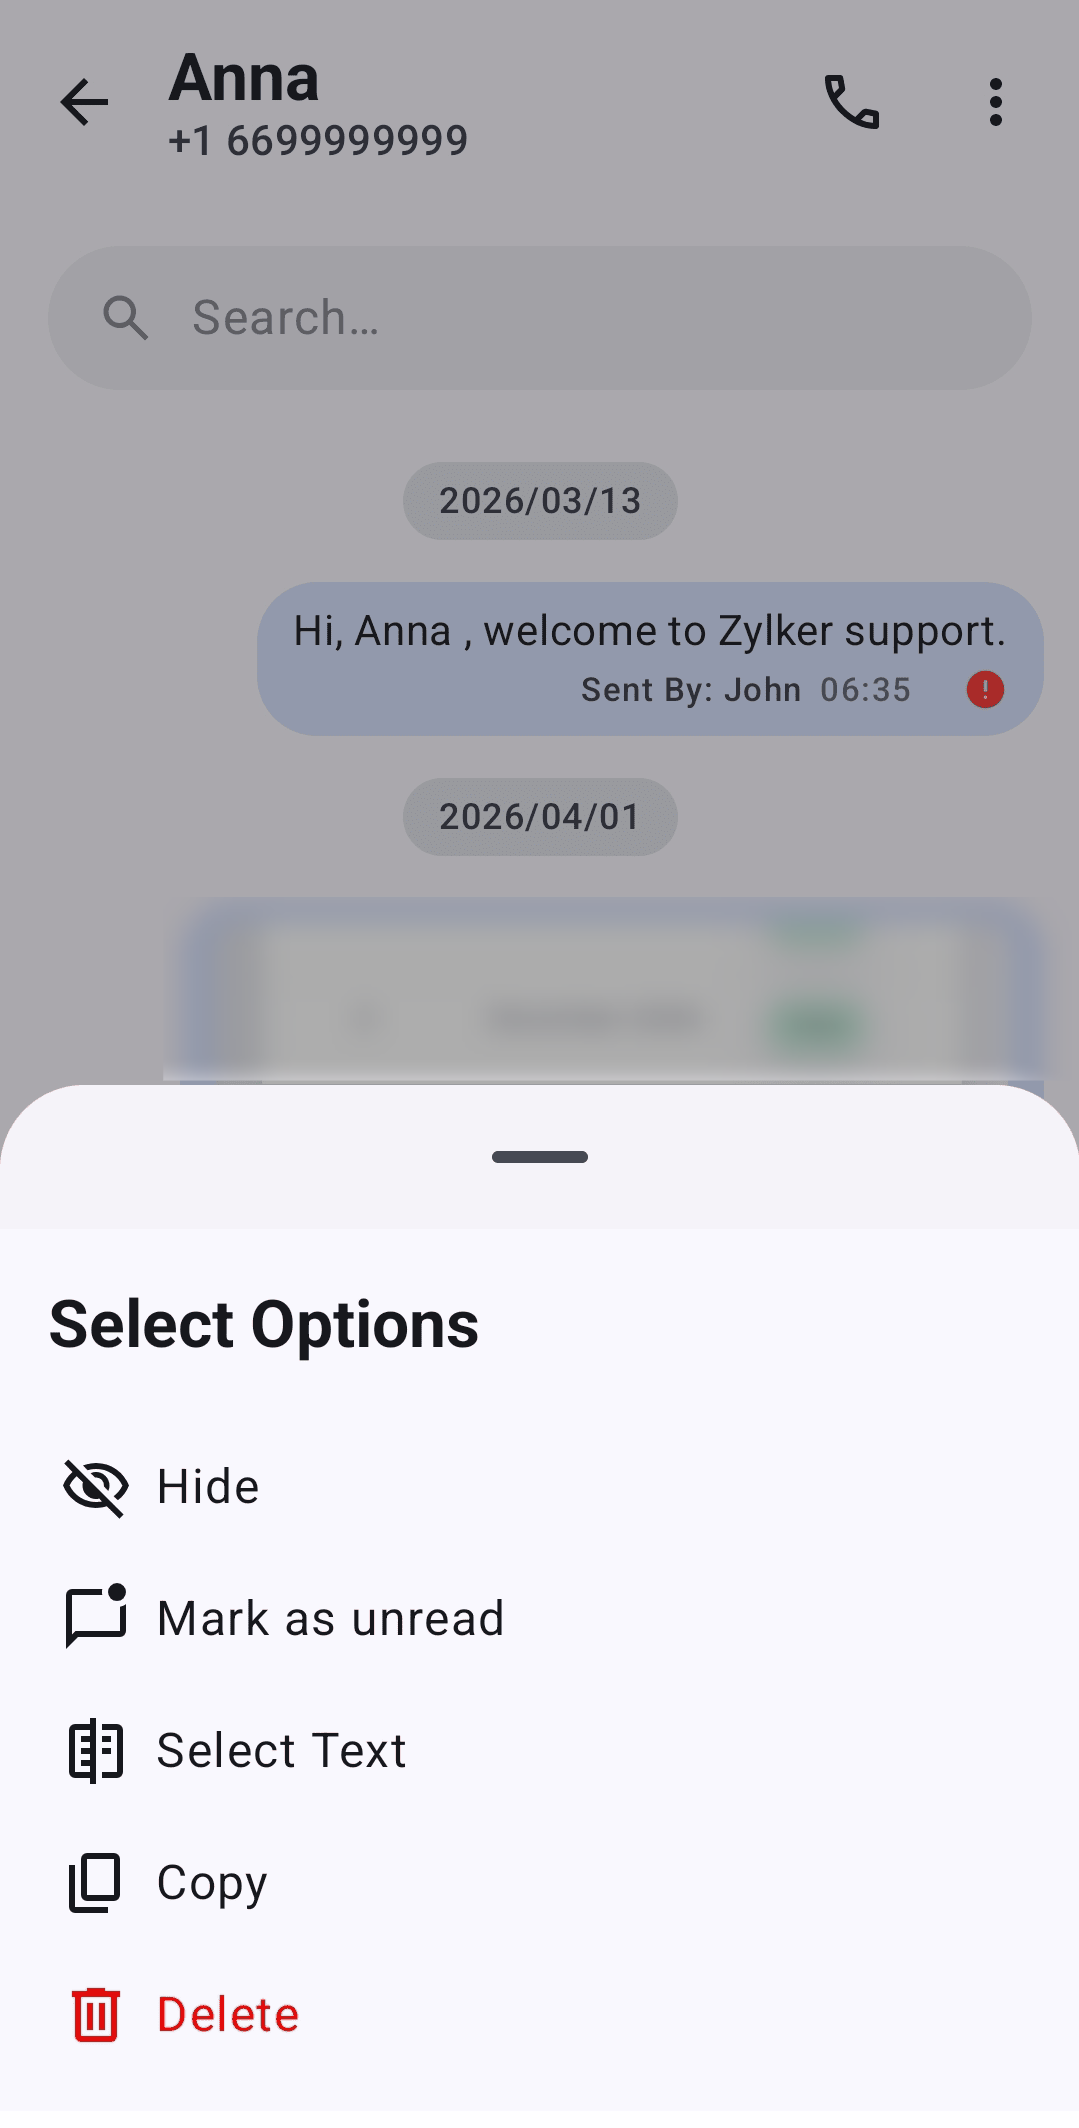
You can also manage individual messages by long pressing a specific message to:
- Copy: Copy the specific message.
- Hide Message: Temporarily hide the selected message. Hidden messages can be retrieved by selecting Unhide.
- Mark as Unread: Mark the selected message as unread. When a message is marked unread, all subsequent messages in the thread will also appear as unread.
- Delete Message: Permanently delete the selected message. The deleted messages cannot be retrieved.
Manage scheduled messages
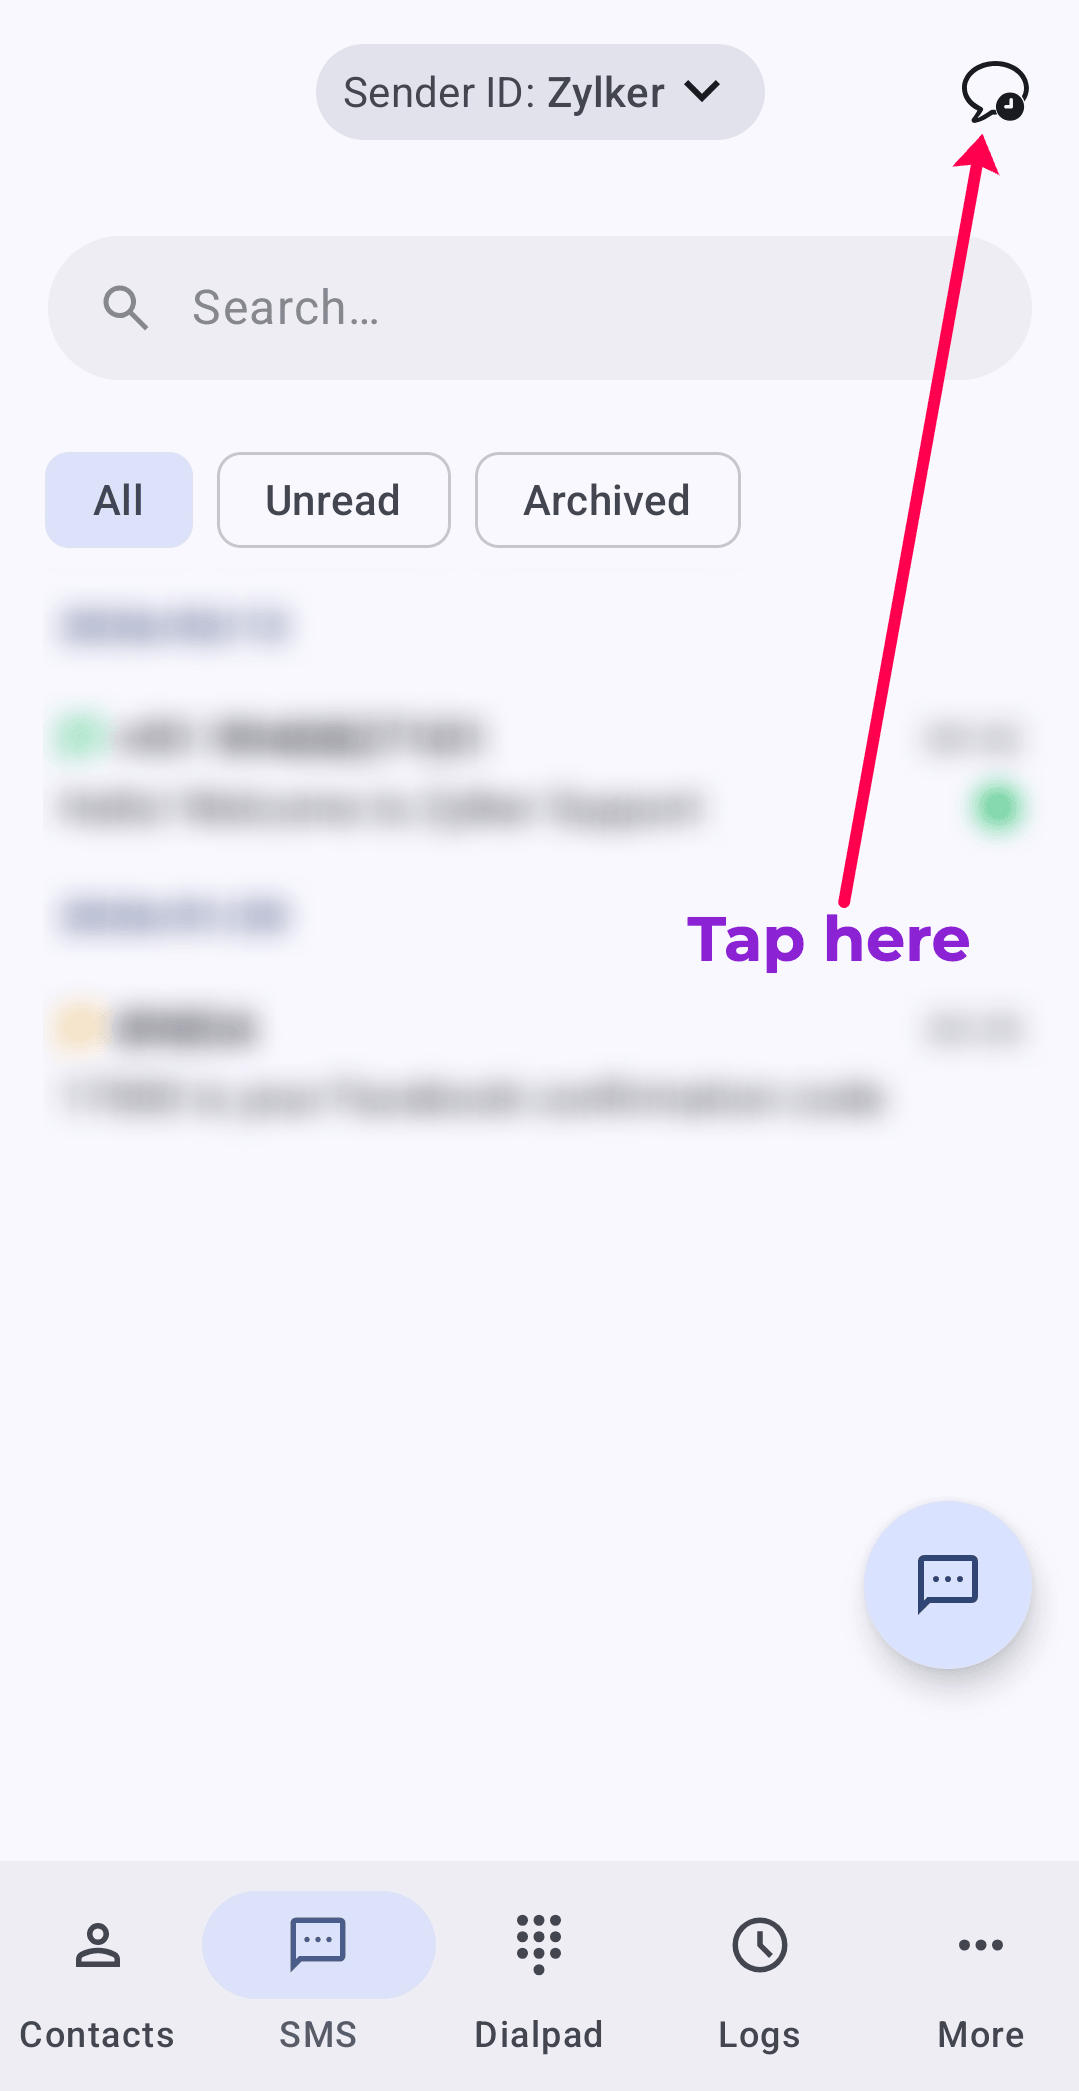
In the SMS inbox, tap the chat icon in the top-right corner to view scheduled messages
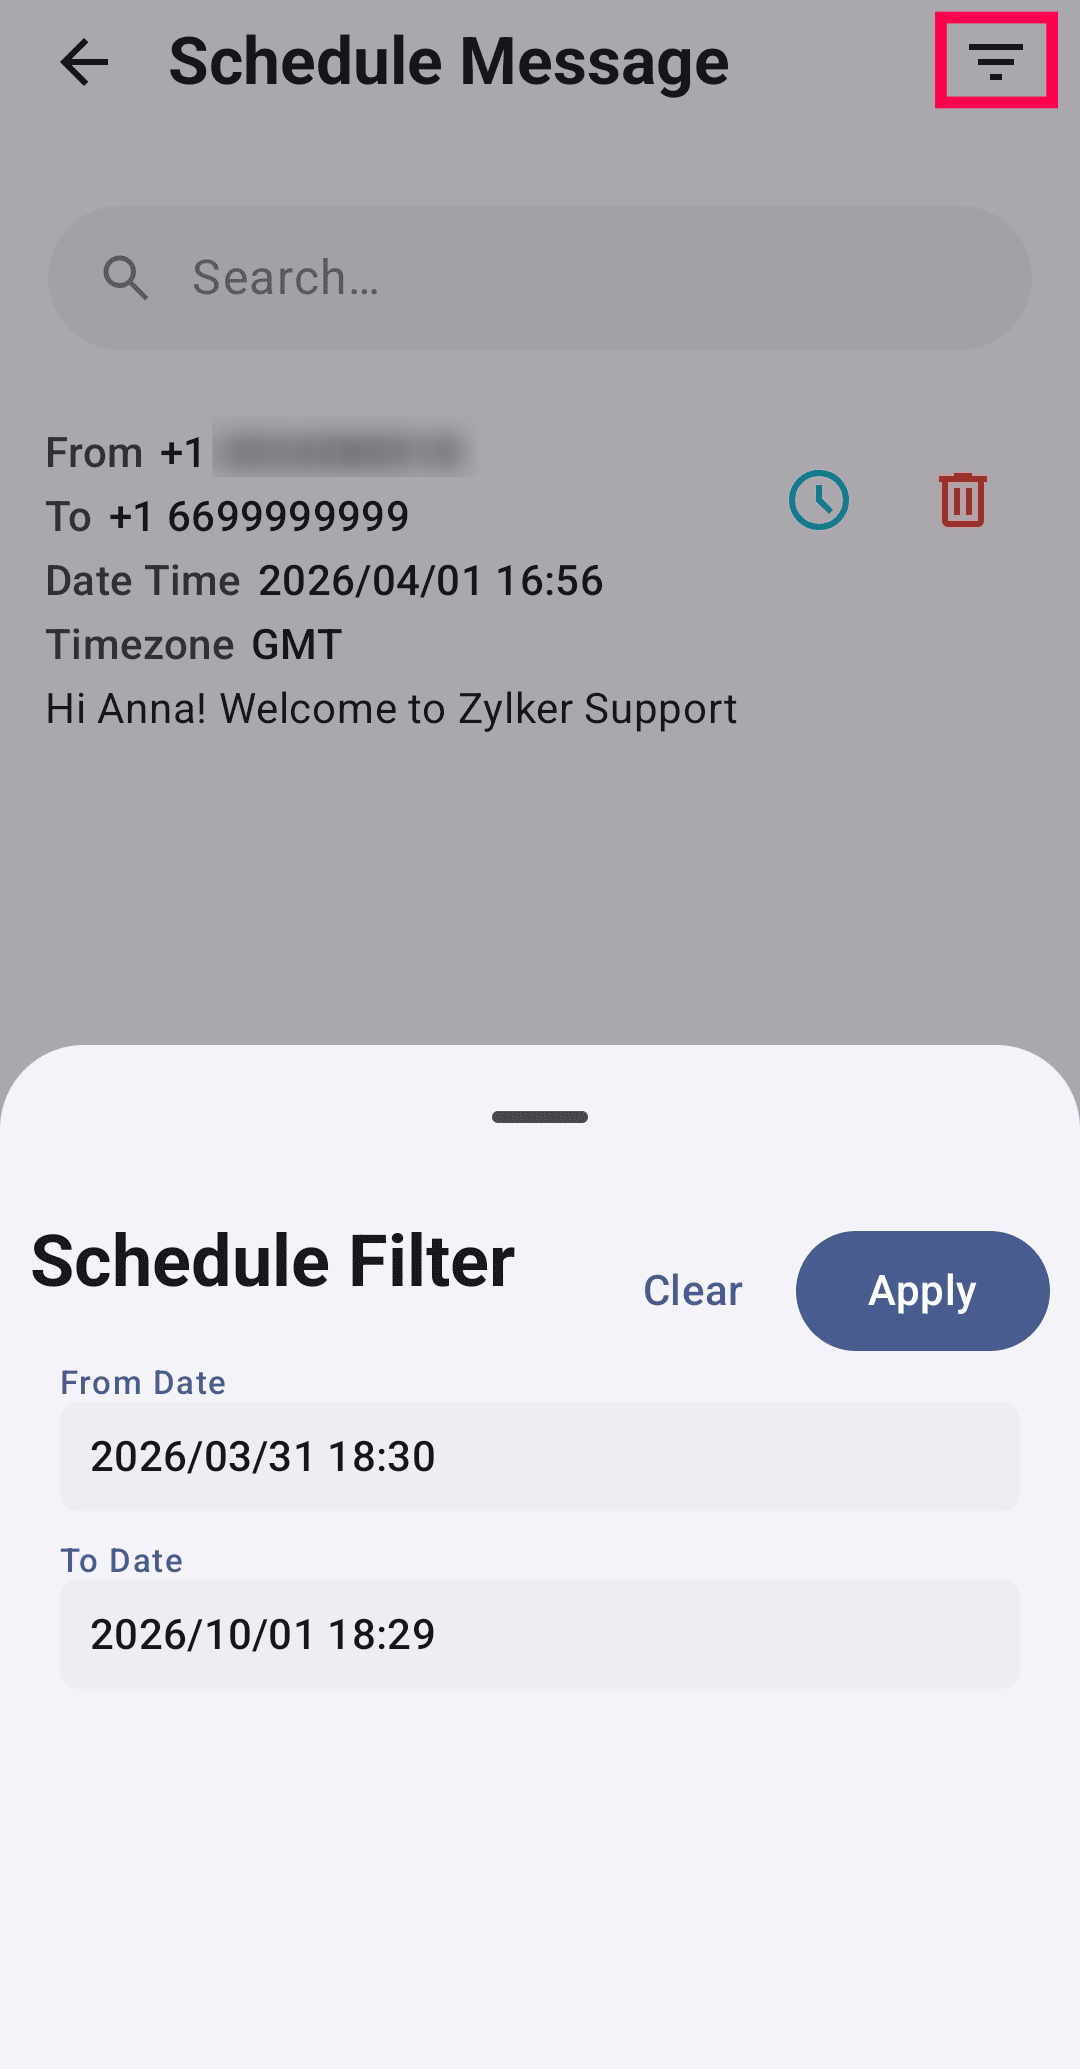
Use the filter menu (three-line icon) to search and filter scheduled messages
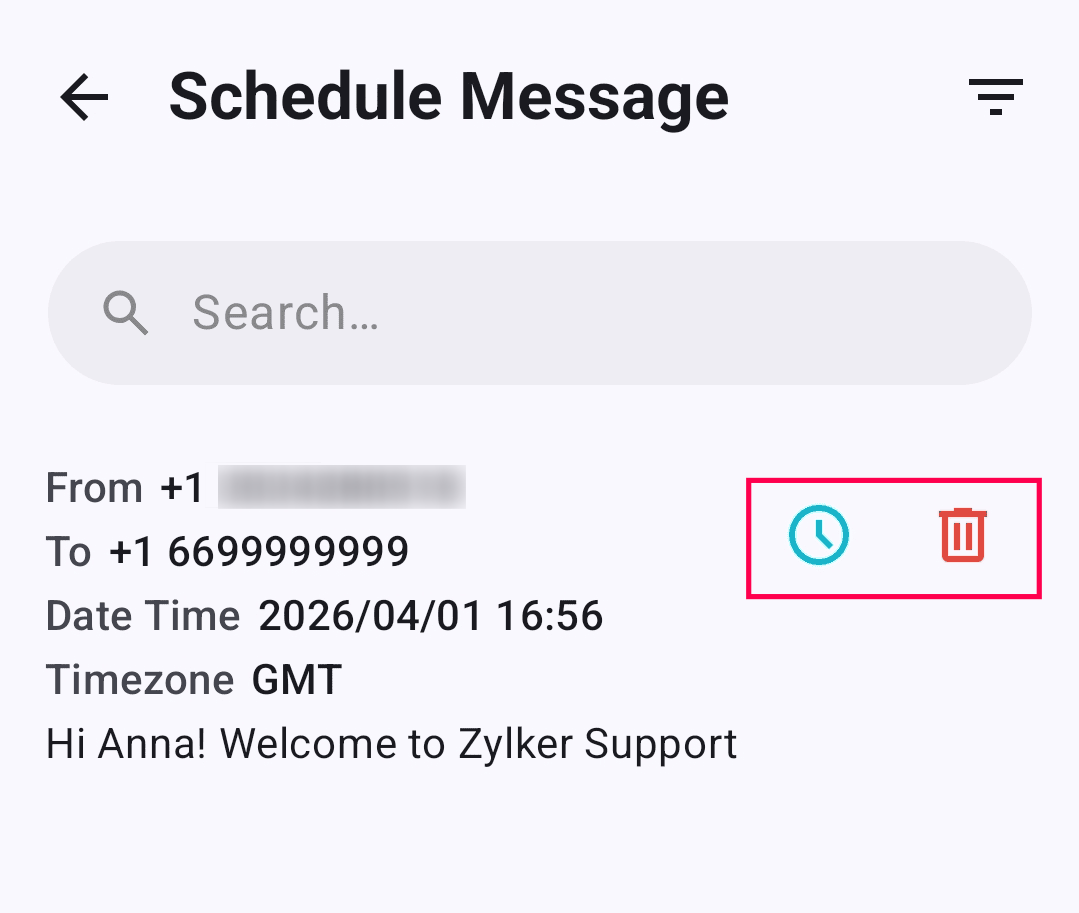
You can reschedule or delete the scheduled message by taping the respective icon.
Instant Messaging(IM) in ZDialer
To access Instant Messaging in ZDialer:
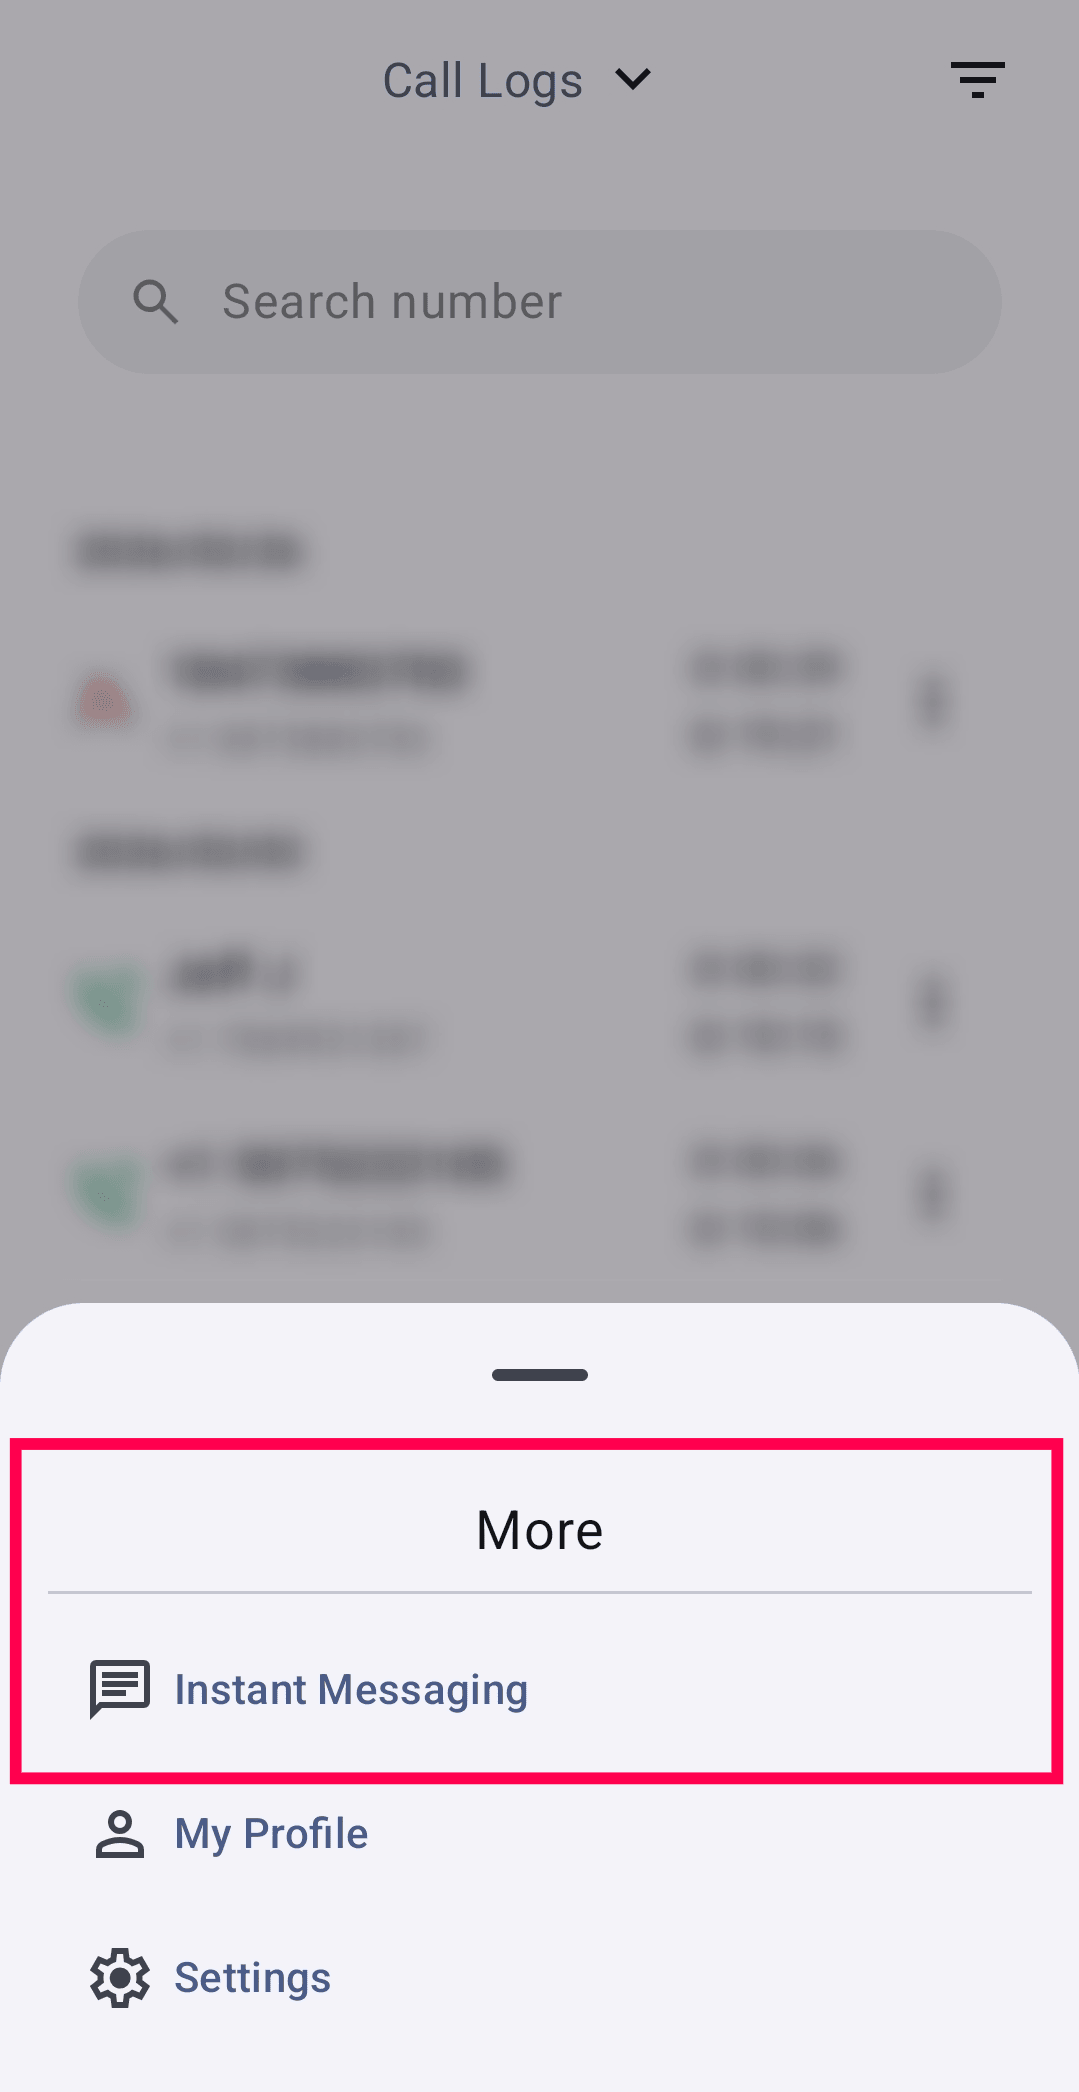
Tap the More menu and select Instant Messaging.
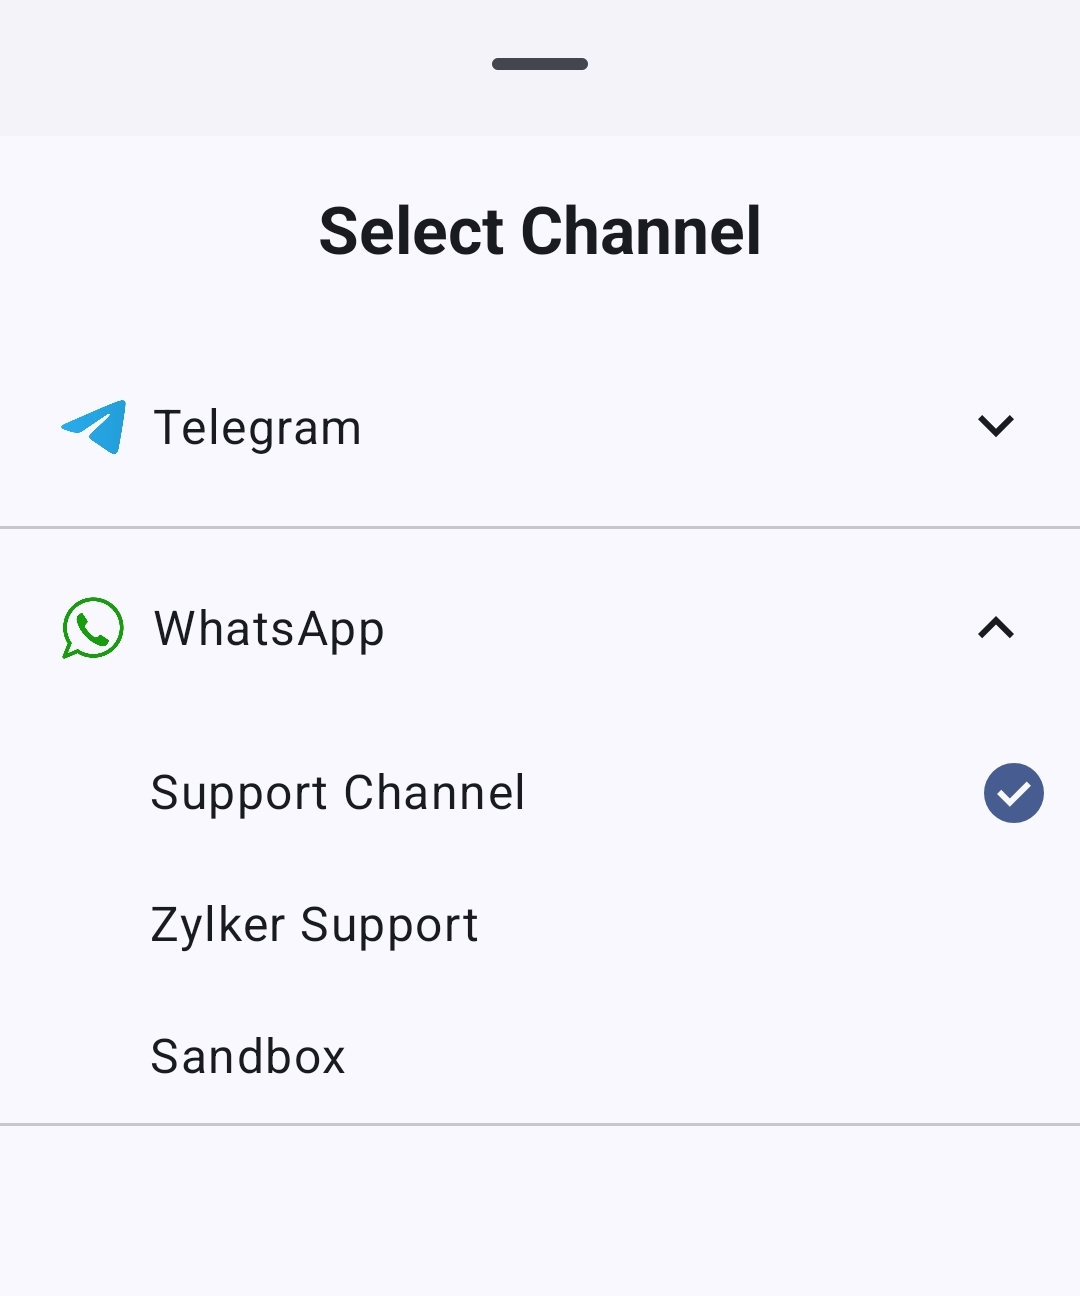
Select the App (WhatsApp or Telegram) at the top of the screen and choose Channel.
Note
Channels are created by the super admin or admin. Only the existing channels will be displayed.
Start a new conversation
- Tap the Message icon in the bottom-right corner of the screen.
- Enter the recipient's number.
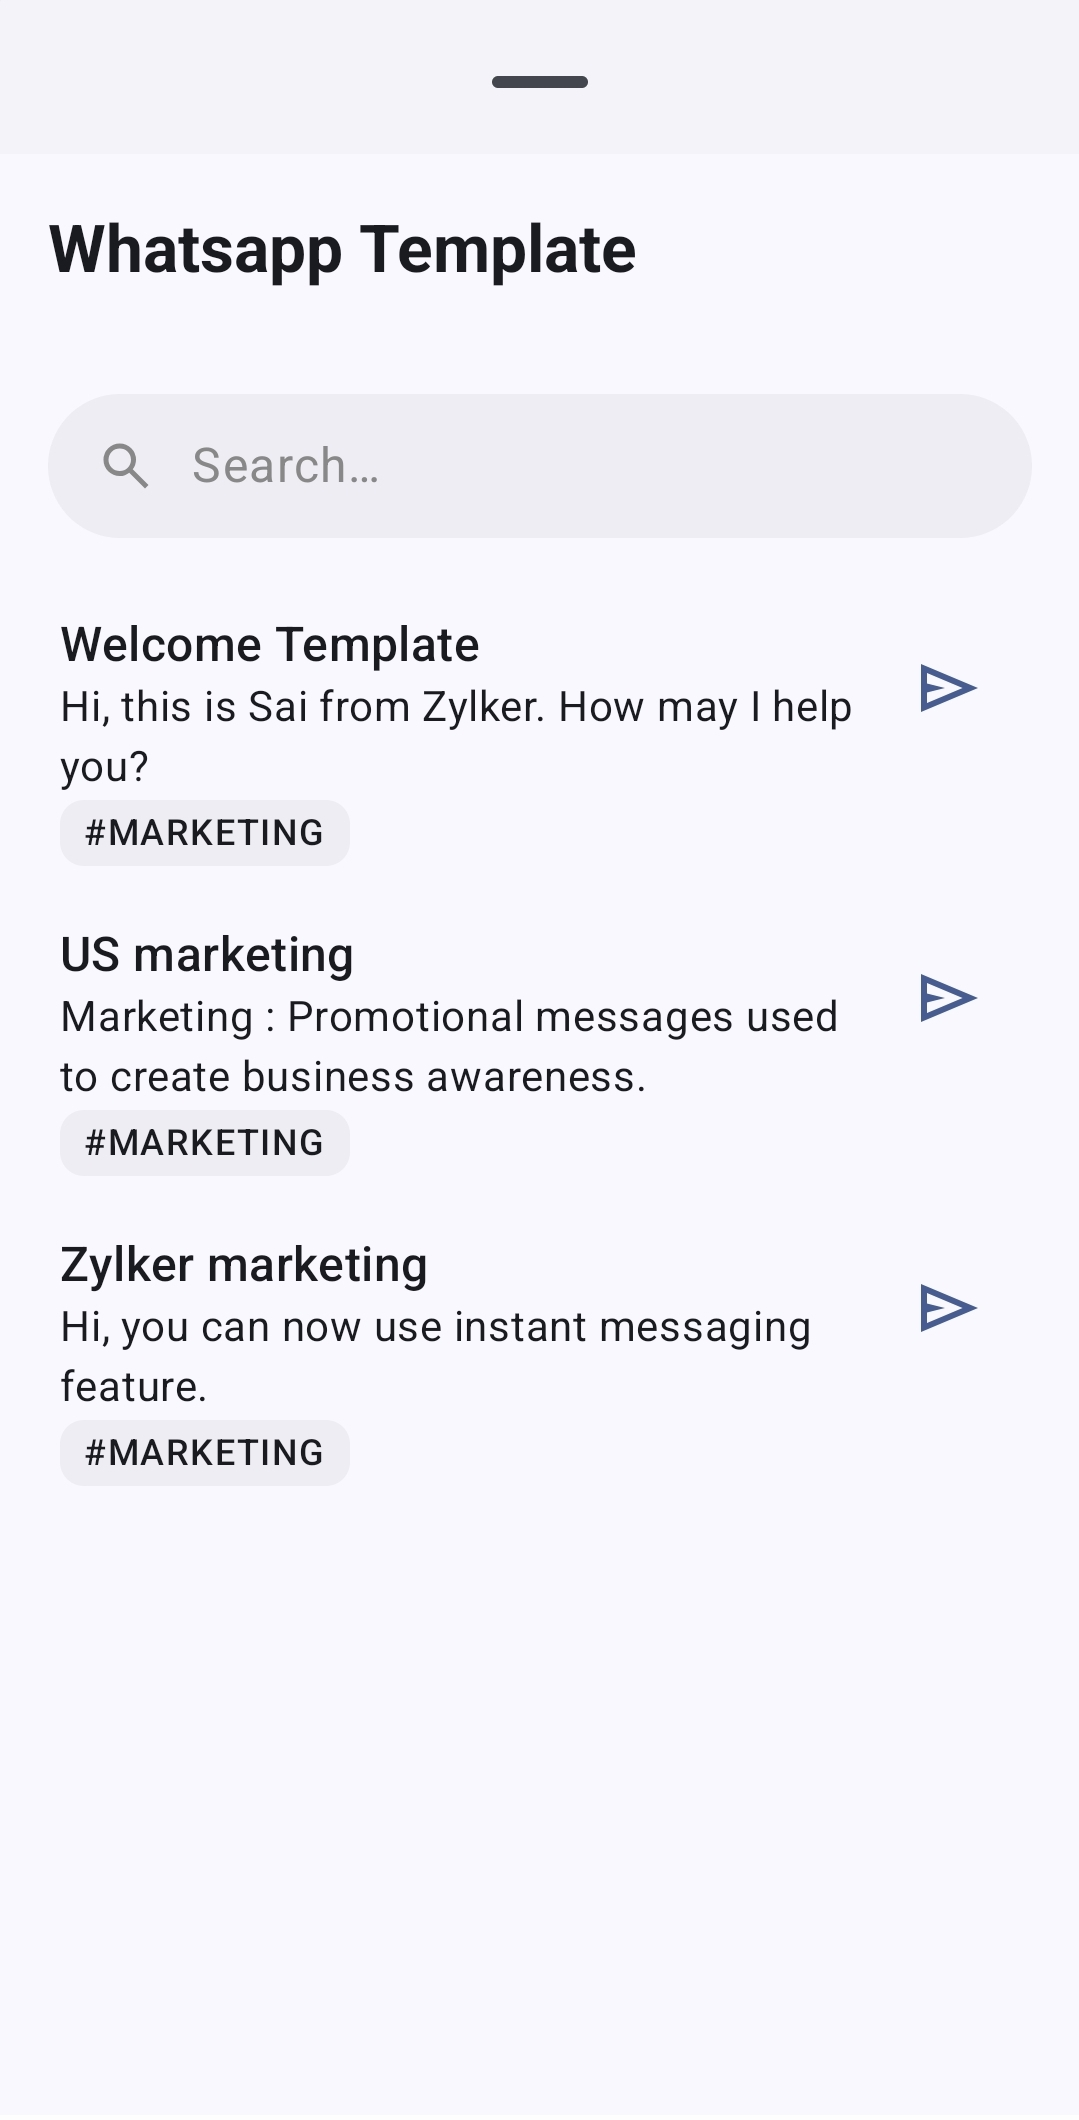
Select a message template.
Note
For WhatsApp and Telegram, you can only start a conversation using a verified message template. These templates are created in the Zoho Voice console under Messages → Templates (IM category).
- Tap Send.
Learn more about instant messaging
Manage conversation
- In the Instant Messaging screen, you can filter conversations using the filter menu(three-line icon) available at the top-right corner.
- Within a chat, you will be able to pick up the chat and start conversation with the customer.
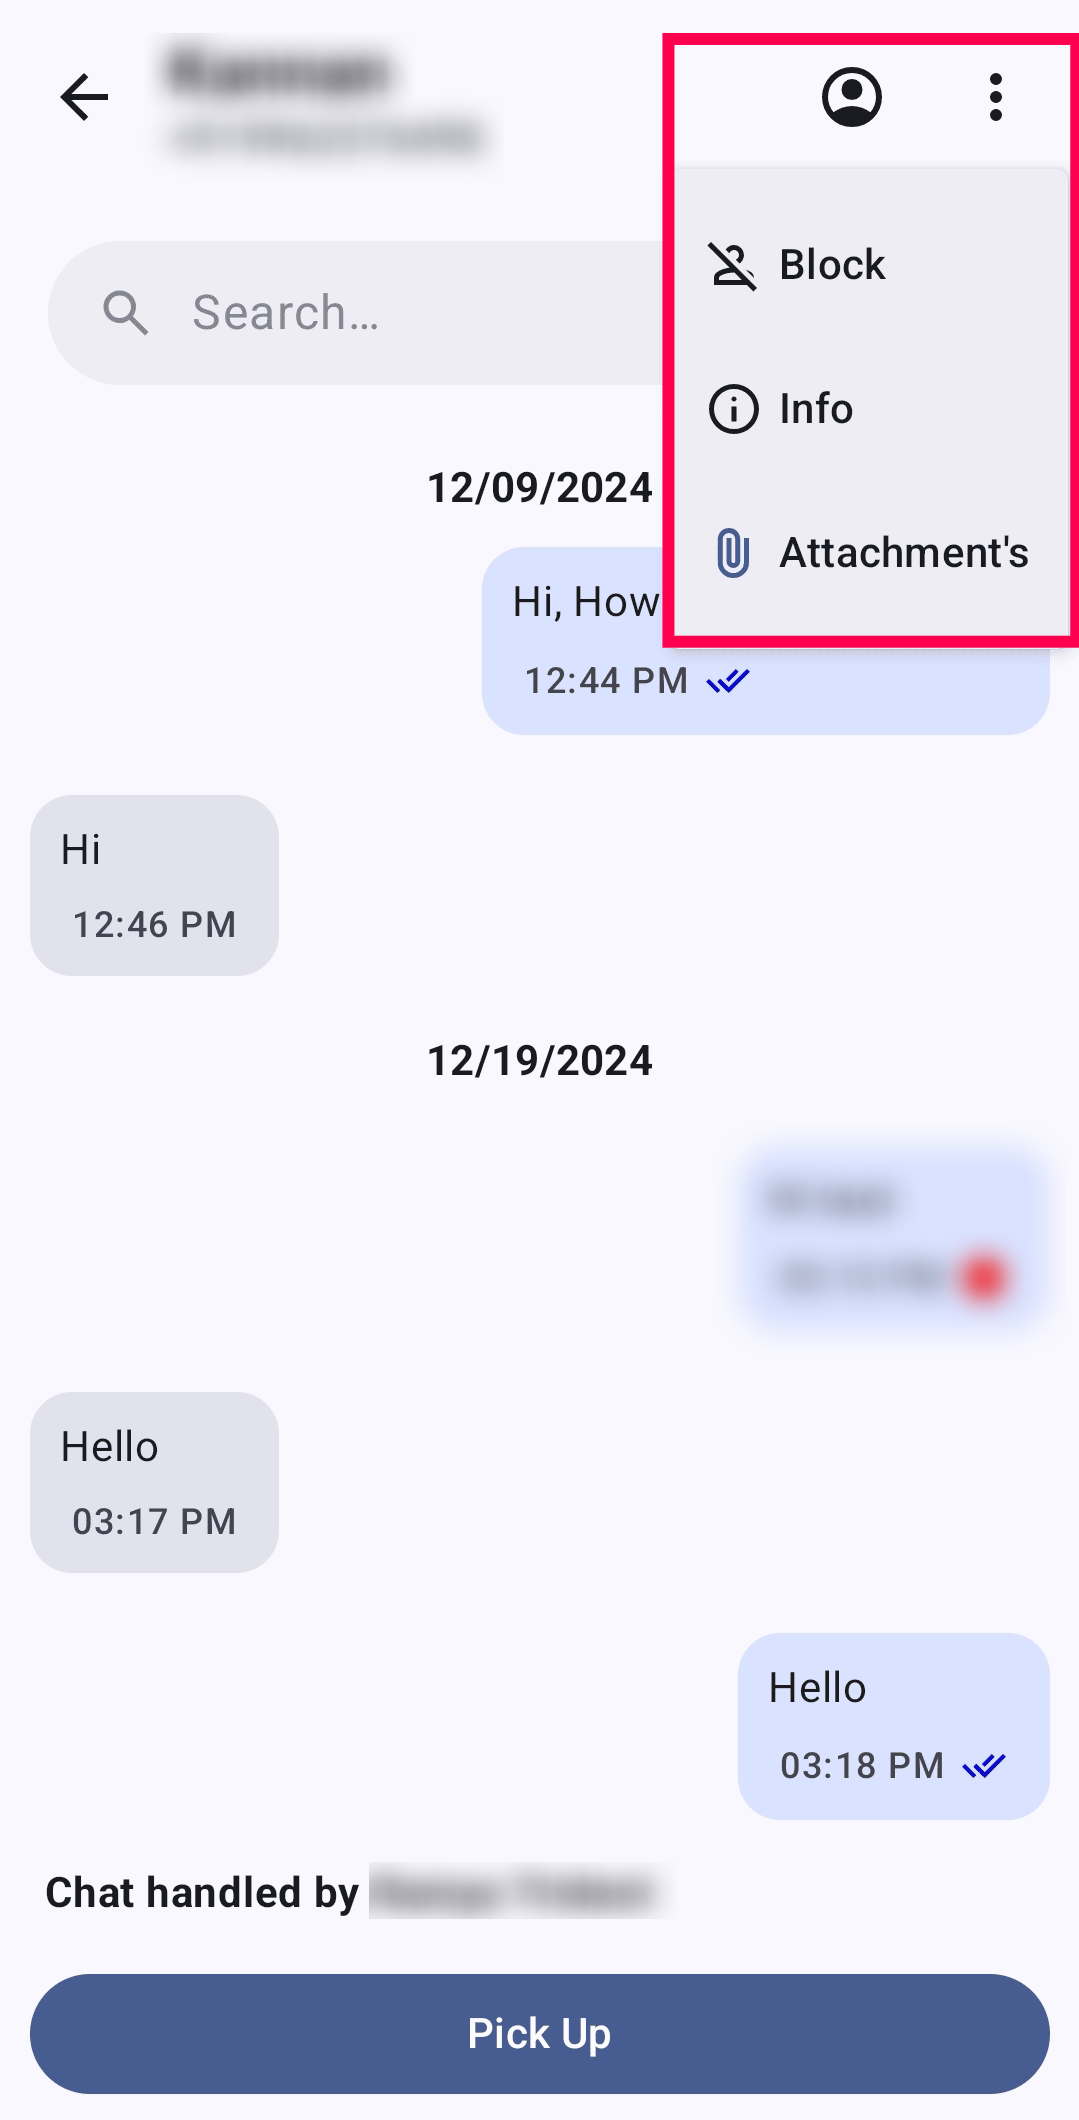
Tap the ellipsis (⋮) icon in the top-right corner, to perform actions such as blocking the user, viewing detailed information, or accessing all attachments.
Logs in ZDialer
Access Logs
- Tap the Logs menu located at the bottom-right corner of the ZDialer.
Tap the Call Logs dropdown at the top-centre of the screen. From here, you can access:
- Call Logs
- Voicemails
- Recordings
- Internal Logs (Agent to agent calls)
- Phone Logs
- Select the required option to view the respective logs.
Filter and search logs
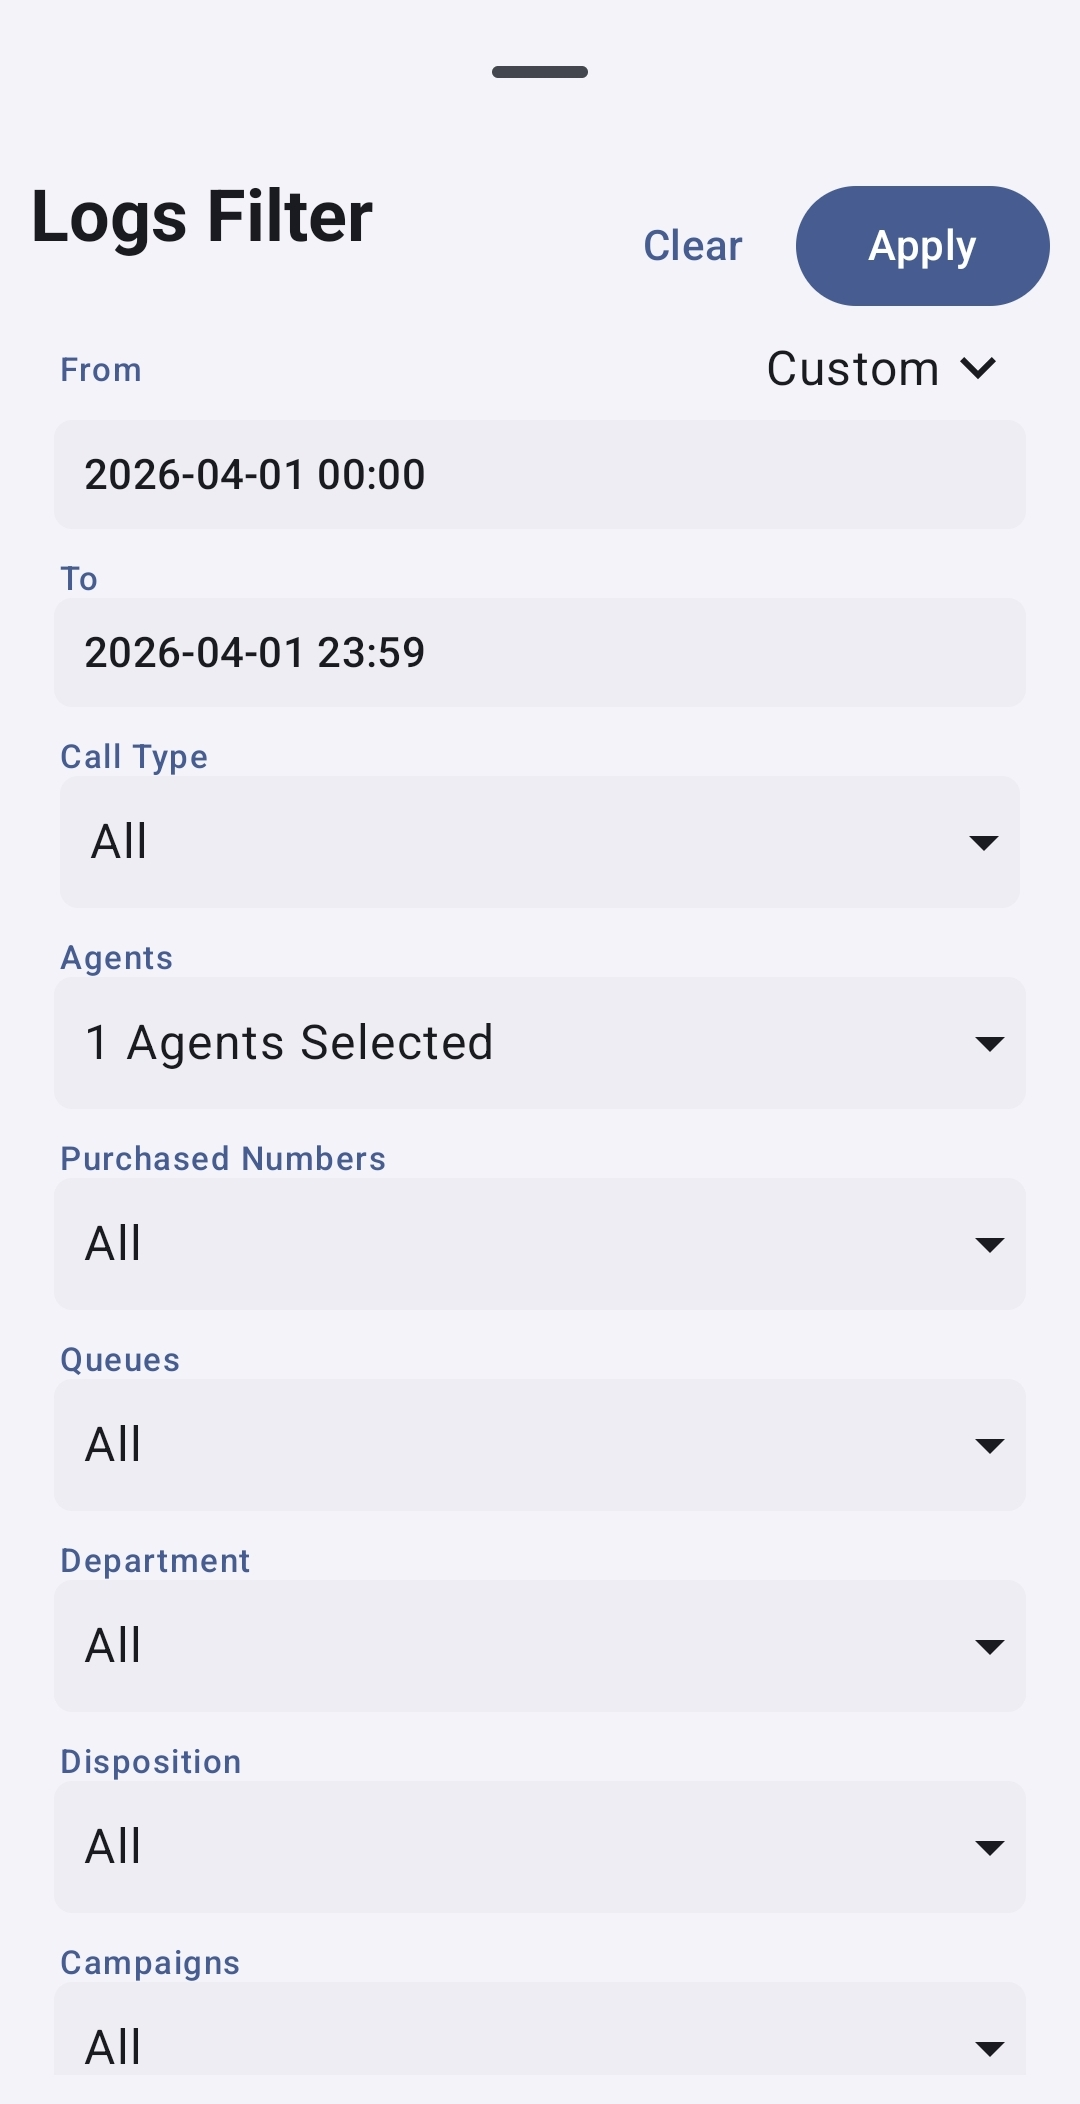
- Tap the filter menu (three lines icon)at the top-right corner.
Use the search and filter options to find specific logs by date range, purchased number, call type, agents, queues, departments, feedback, disposition, campaigns.
Note
Similar filter options are available for Voicemail and Recordings logs. However, Internal Logs have limited filter options (Date Range, Call Type, and Agents).
Call Logs
- By default, you will land on the Call Logs screen. If not select the Call Logs from the dropdown.
- You can search for call logs by name or by number.
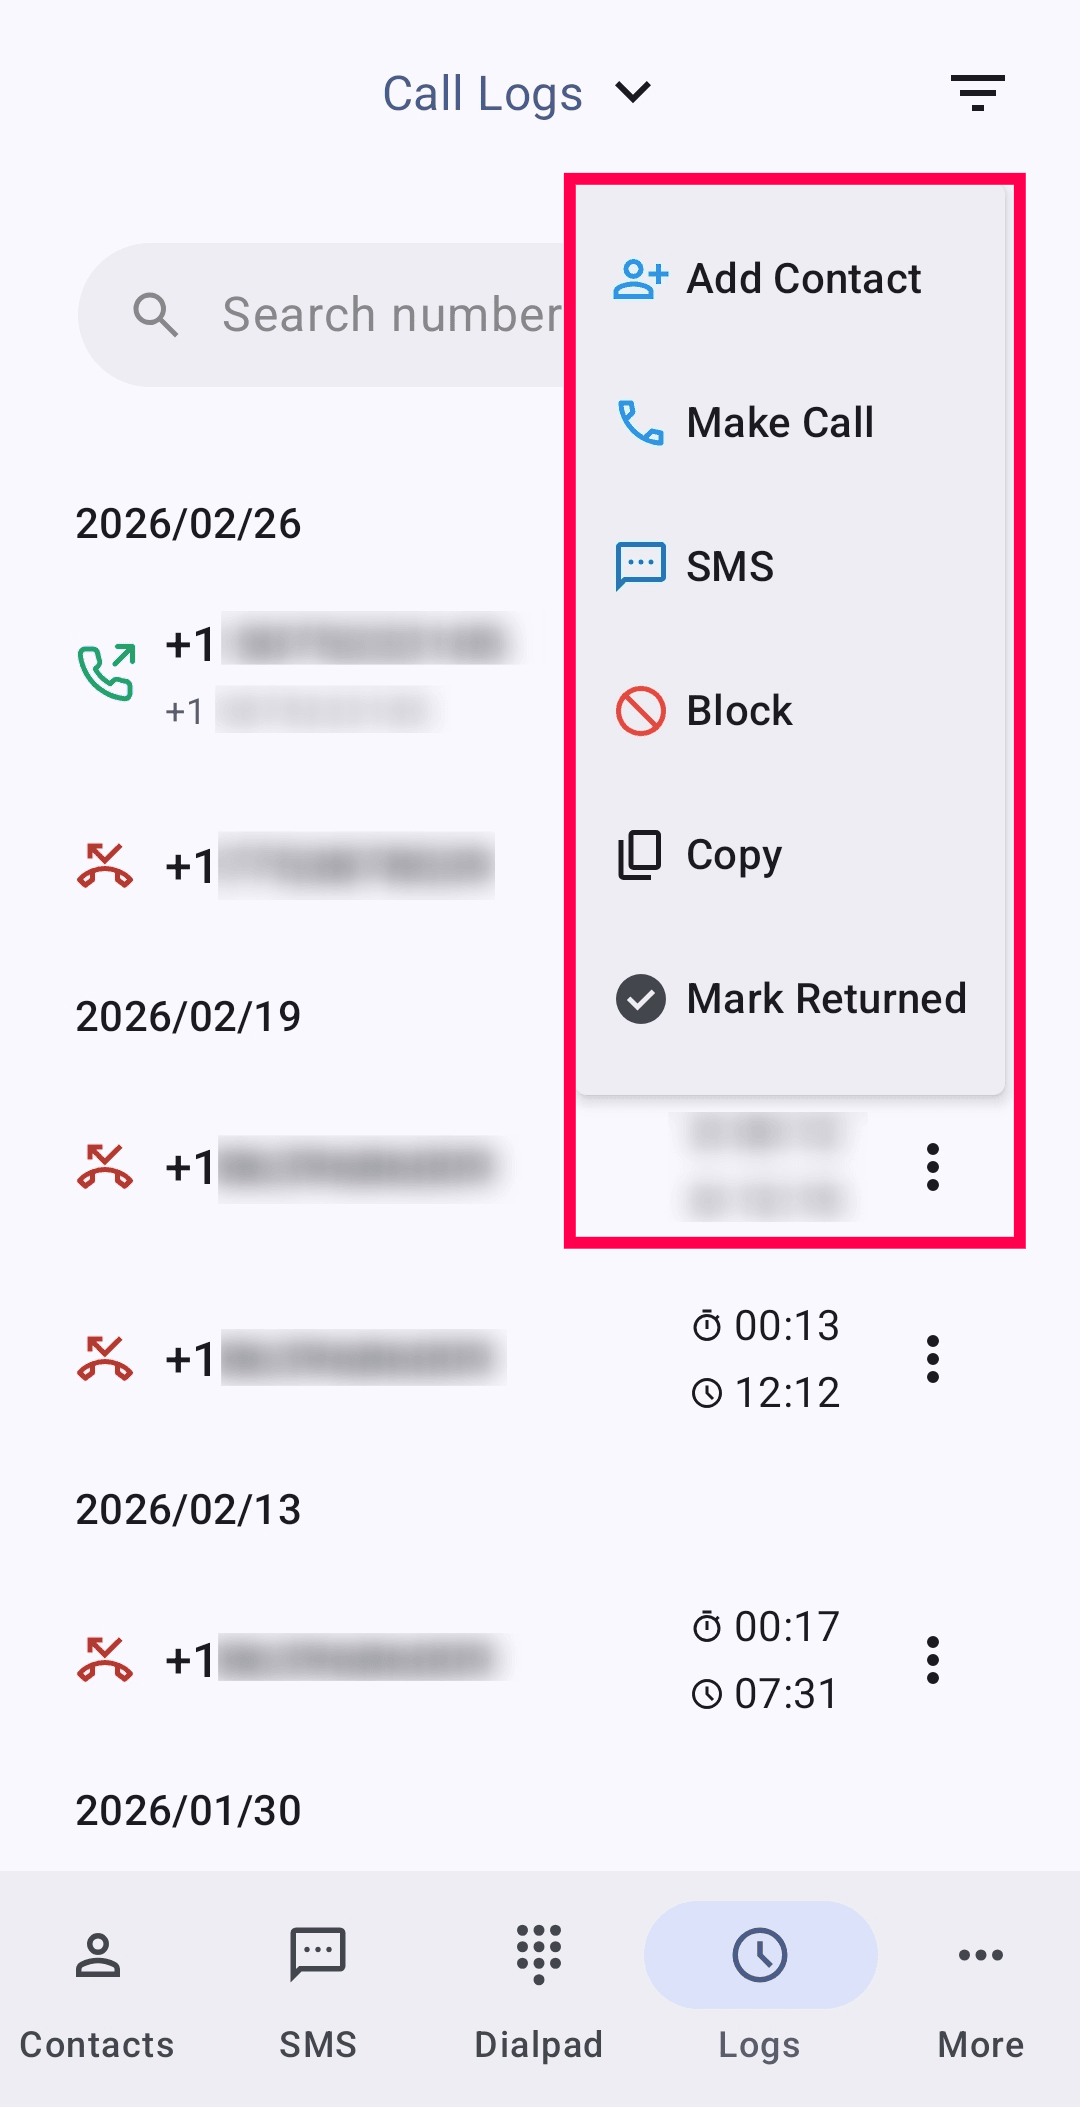
Tap the ellipsis(⋮) icon next to the call log to:
- Send an SMS, listen to recordings (if available), generate transcription (if available), copy or block the number by selecting the respective option.
- For unknown numbers, you can add them to contacts by taping the add contact option.
- For missed calls, you can mark them as Mark Returned (call returned) to indicate that a follow-up call has been made. This helps prevent multiple agents from calling the same number.
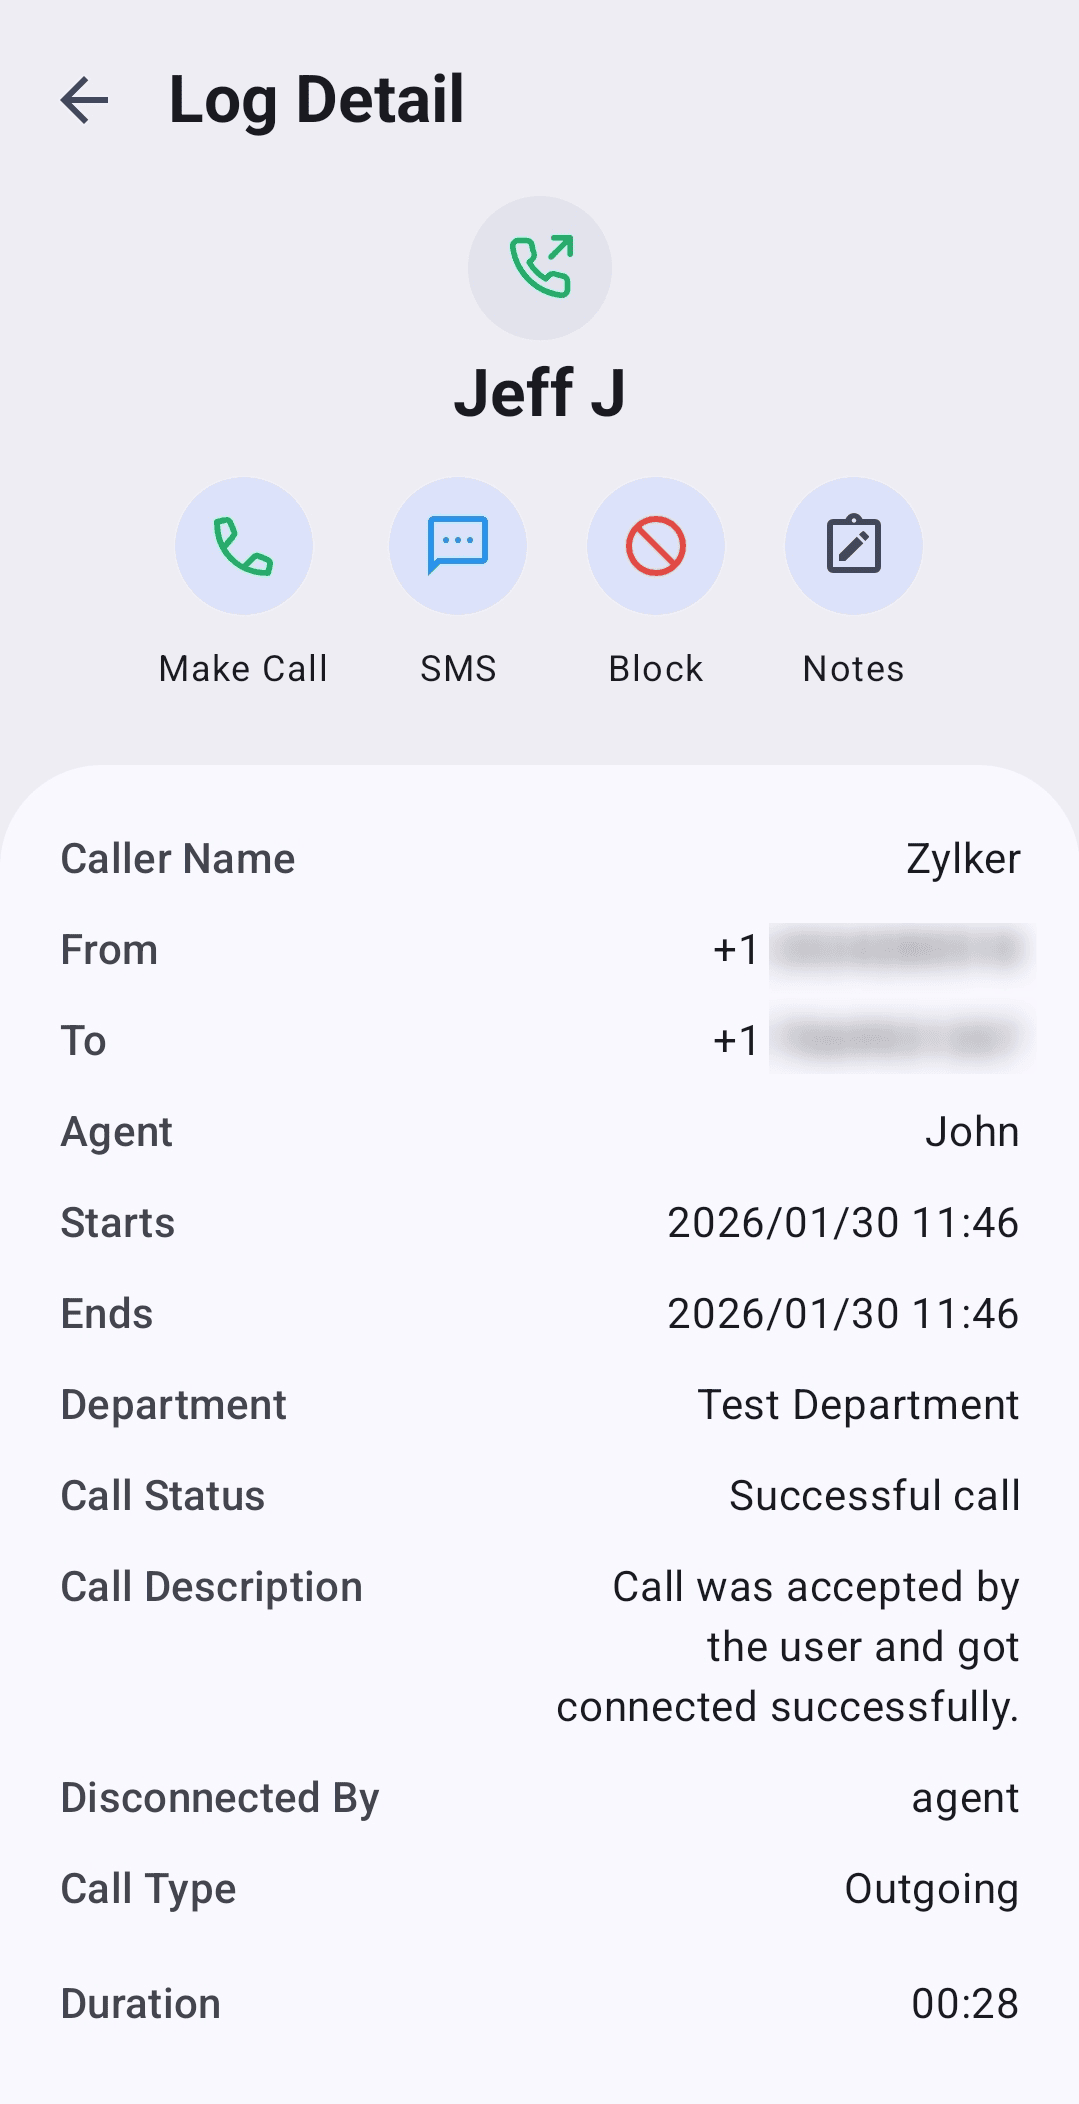
- Tap the log entry to view detailed call log information, including call status and call description.
You can also:
- Block number using the Block icon.
- Add notes by taping the Notes icon, entering your comments, and taping Save.
Internal Logs
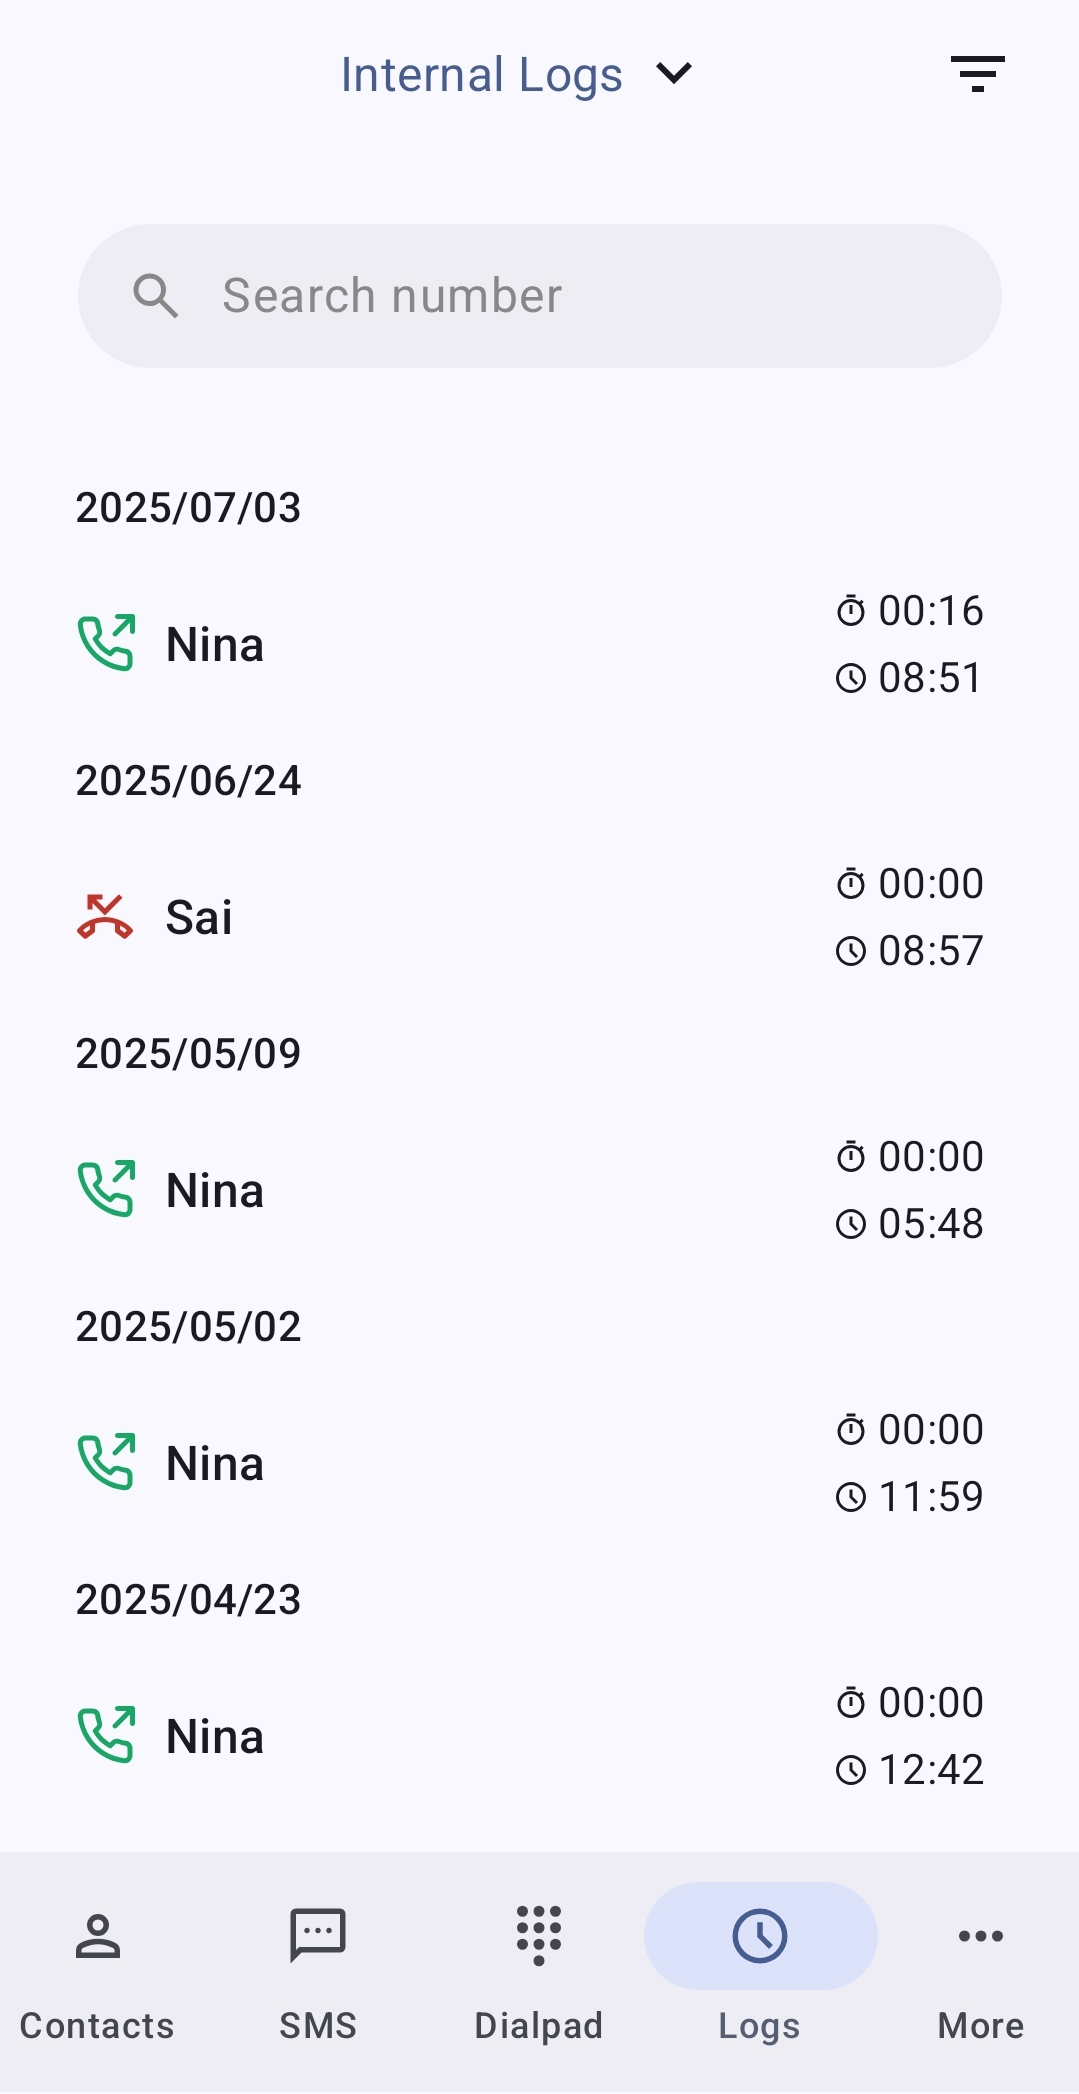
To access, select Internal Logs from the dropdown at the top-center. From here, you can view agent-to-agent call logs and place calls to fellow agents directly.
Voicemails
- To access your logs with voicemail, select Voicemails from the dropdown at the top of the Logs module.
To listen to a voicemail, tap the ellipsis (⋮) icon next to the log entry and select Voicemail. From there, you can also download the voicemail if needed.
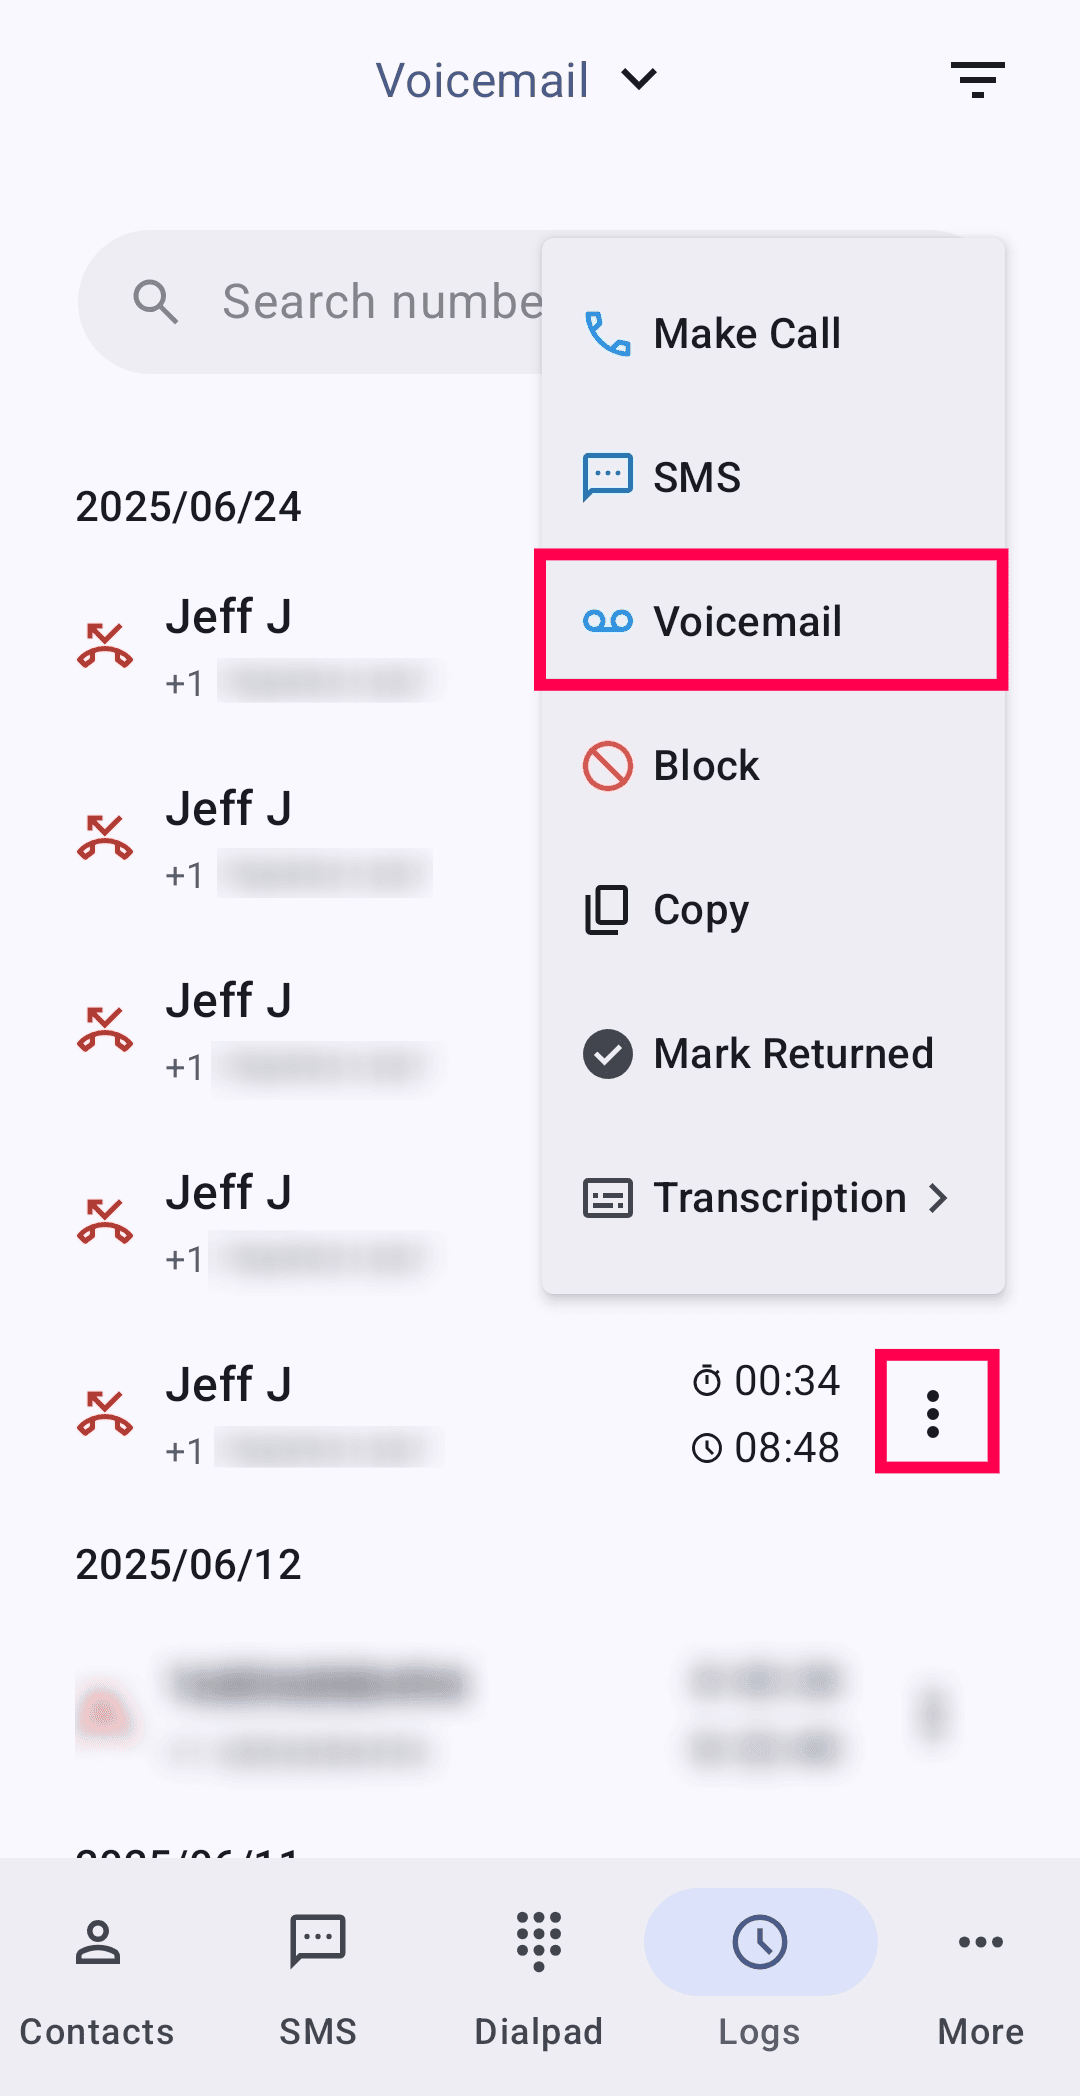
If on-demand voicemail transcription is configured for the number in the Zoho Voice console, you can generate transcript by tapping the ellipsis (⋮) icon next to the log entry and selecting Transcription → Generate.
Learn more about voicemail transcription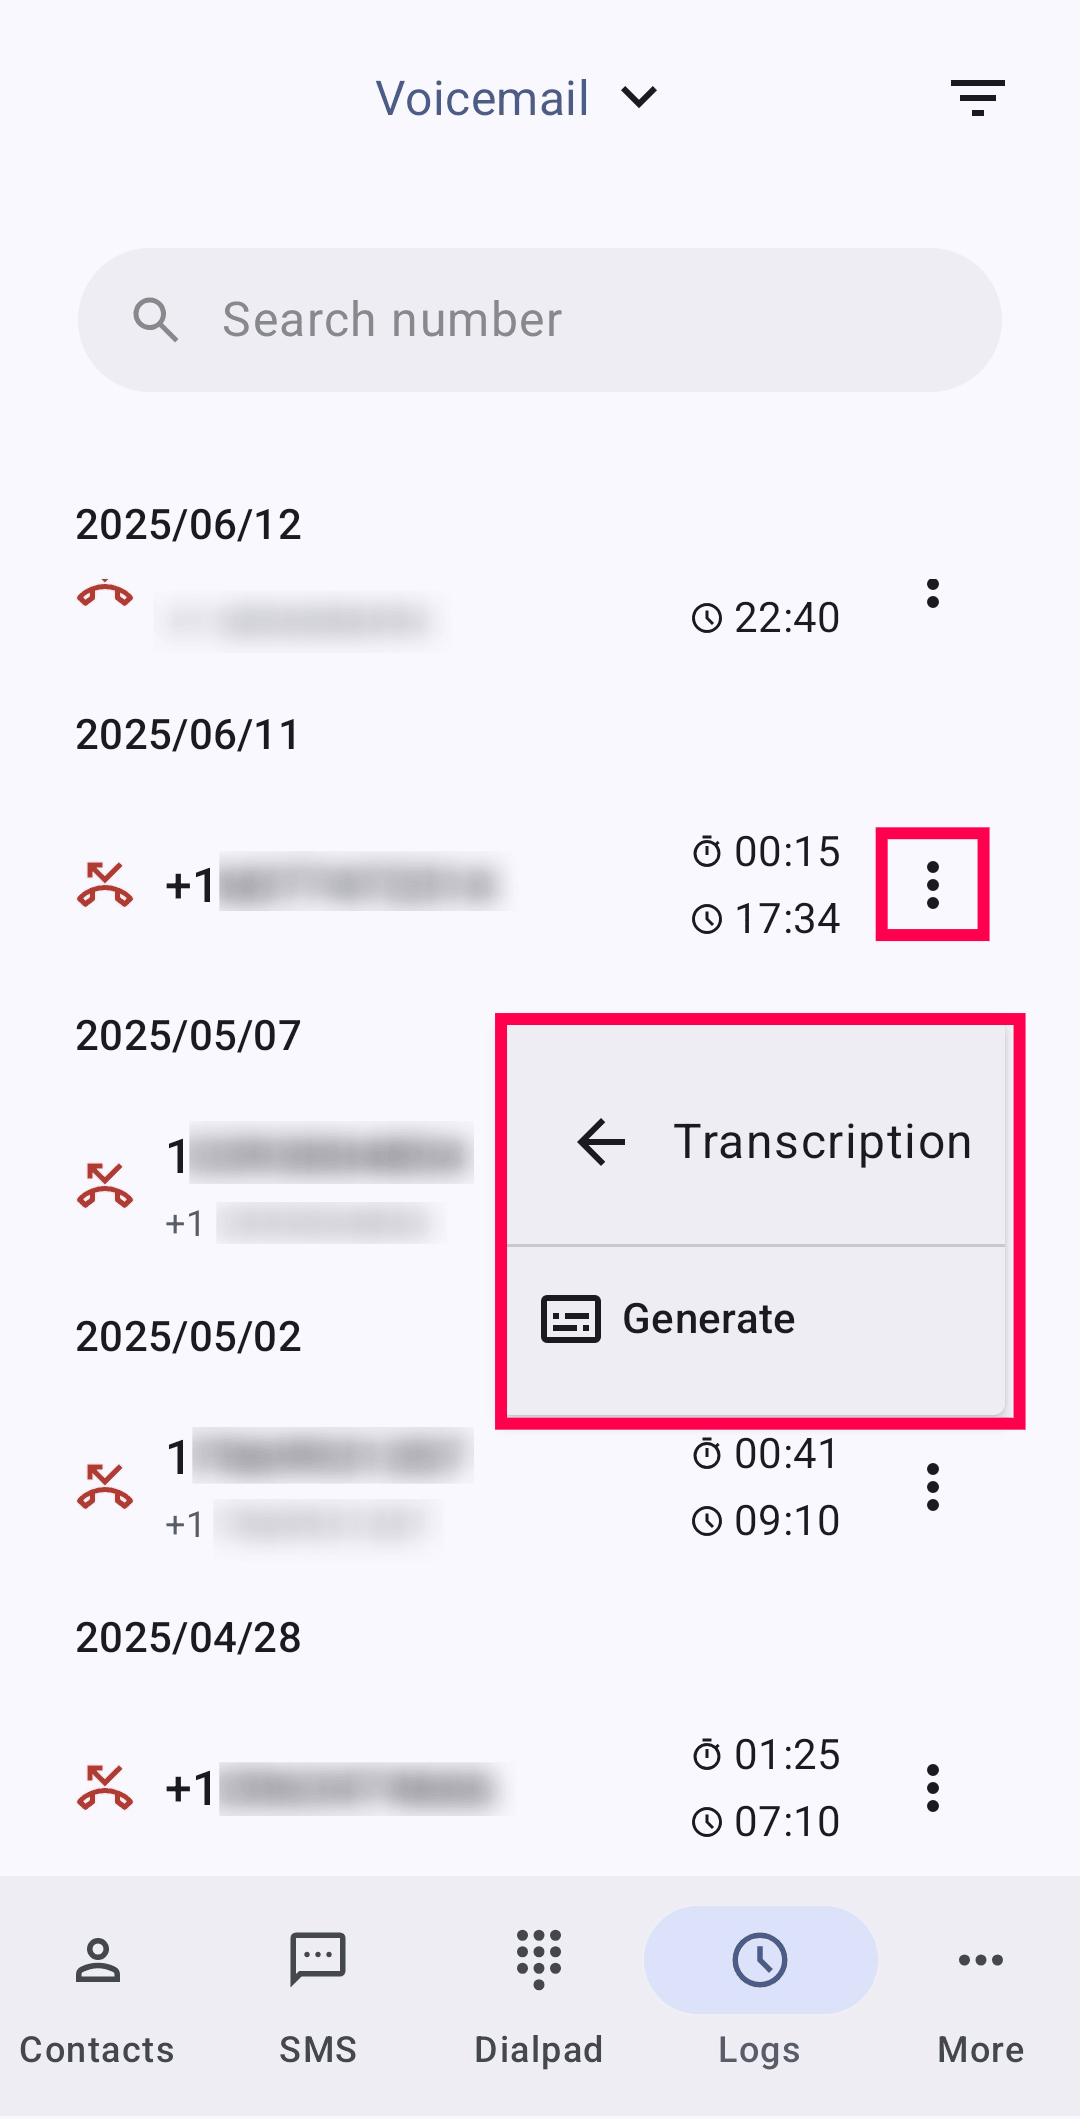
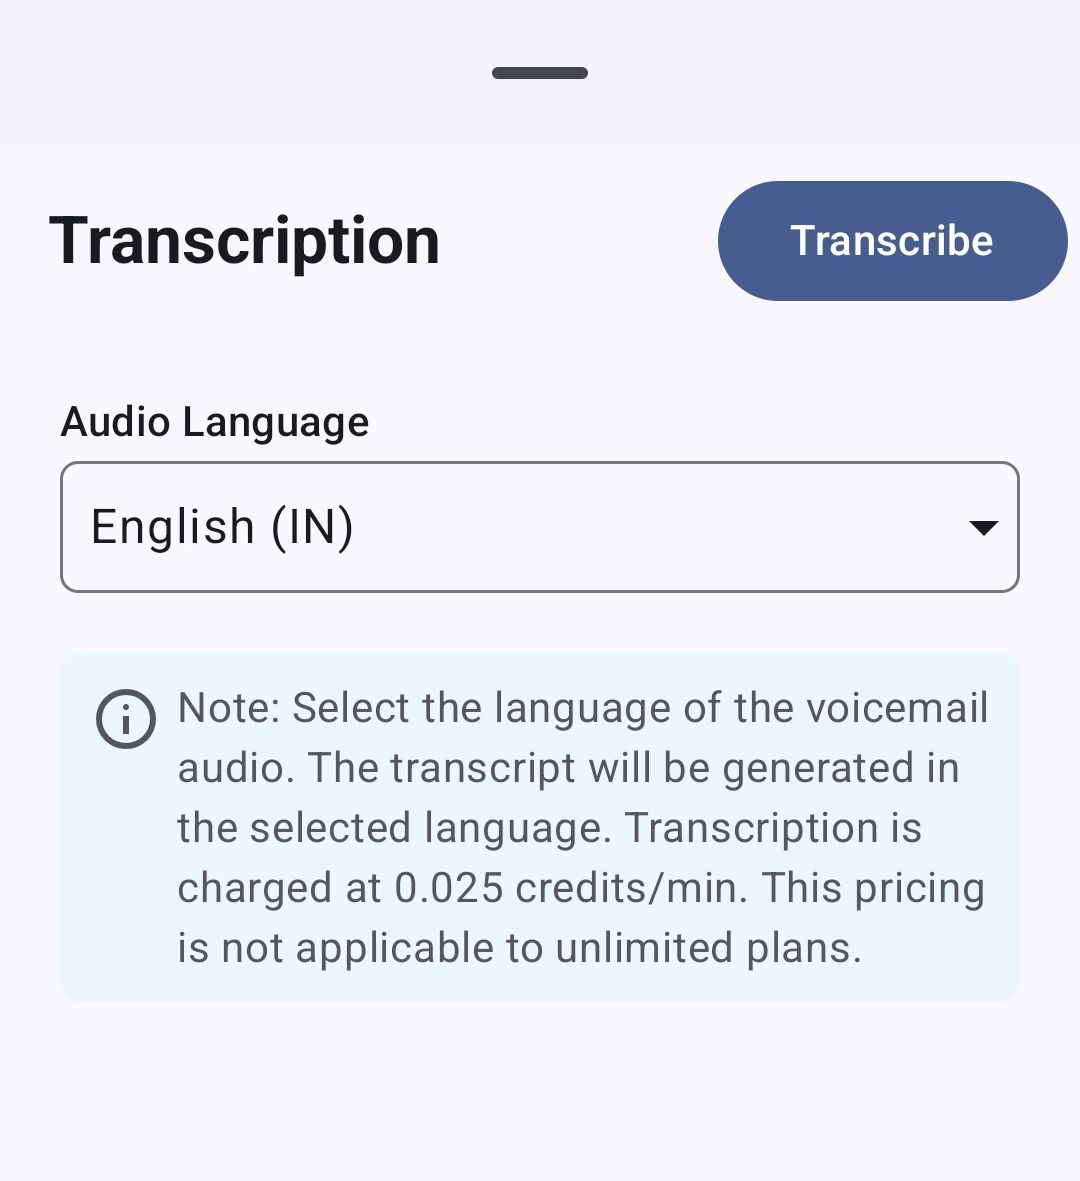
- Select the language of the voicemail audio. The transcription will be generated in the selected language.
Transcription is charged at 0.025 credits/min. This pricing is not applicable to unlimited plans.
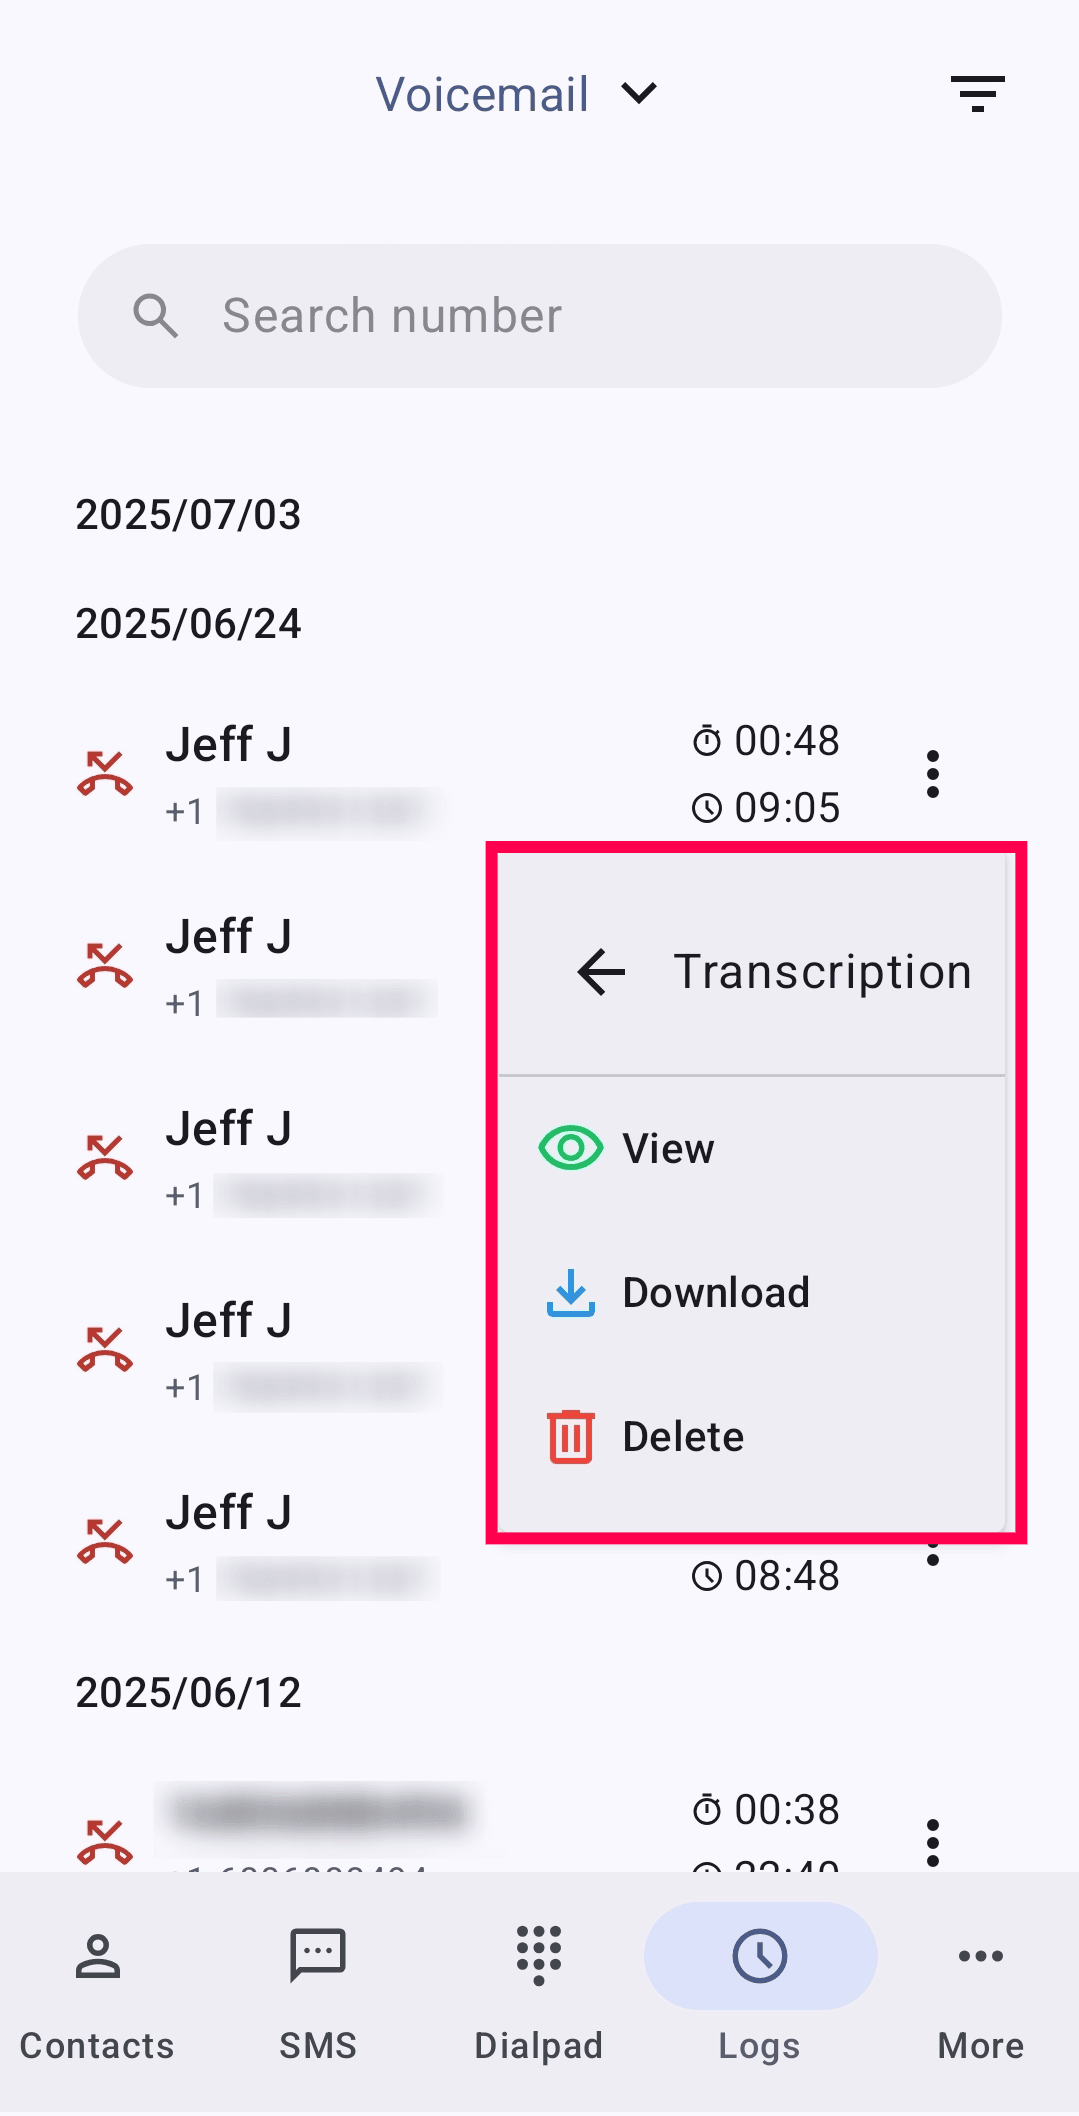
After the transcription is generated, you can view, download, or delete it. If a transcript is deleted, you can regenerate it by selecting Transcription → Regenerate.
Recordings
- To access your call logs with recordings, select Recordings from the dropdown of the Logs module.
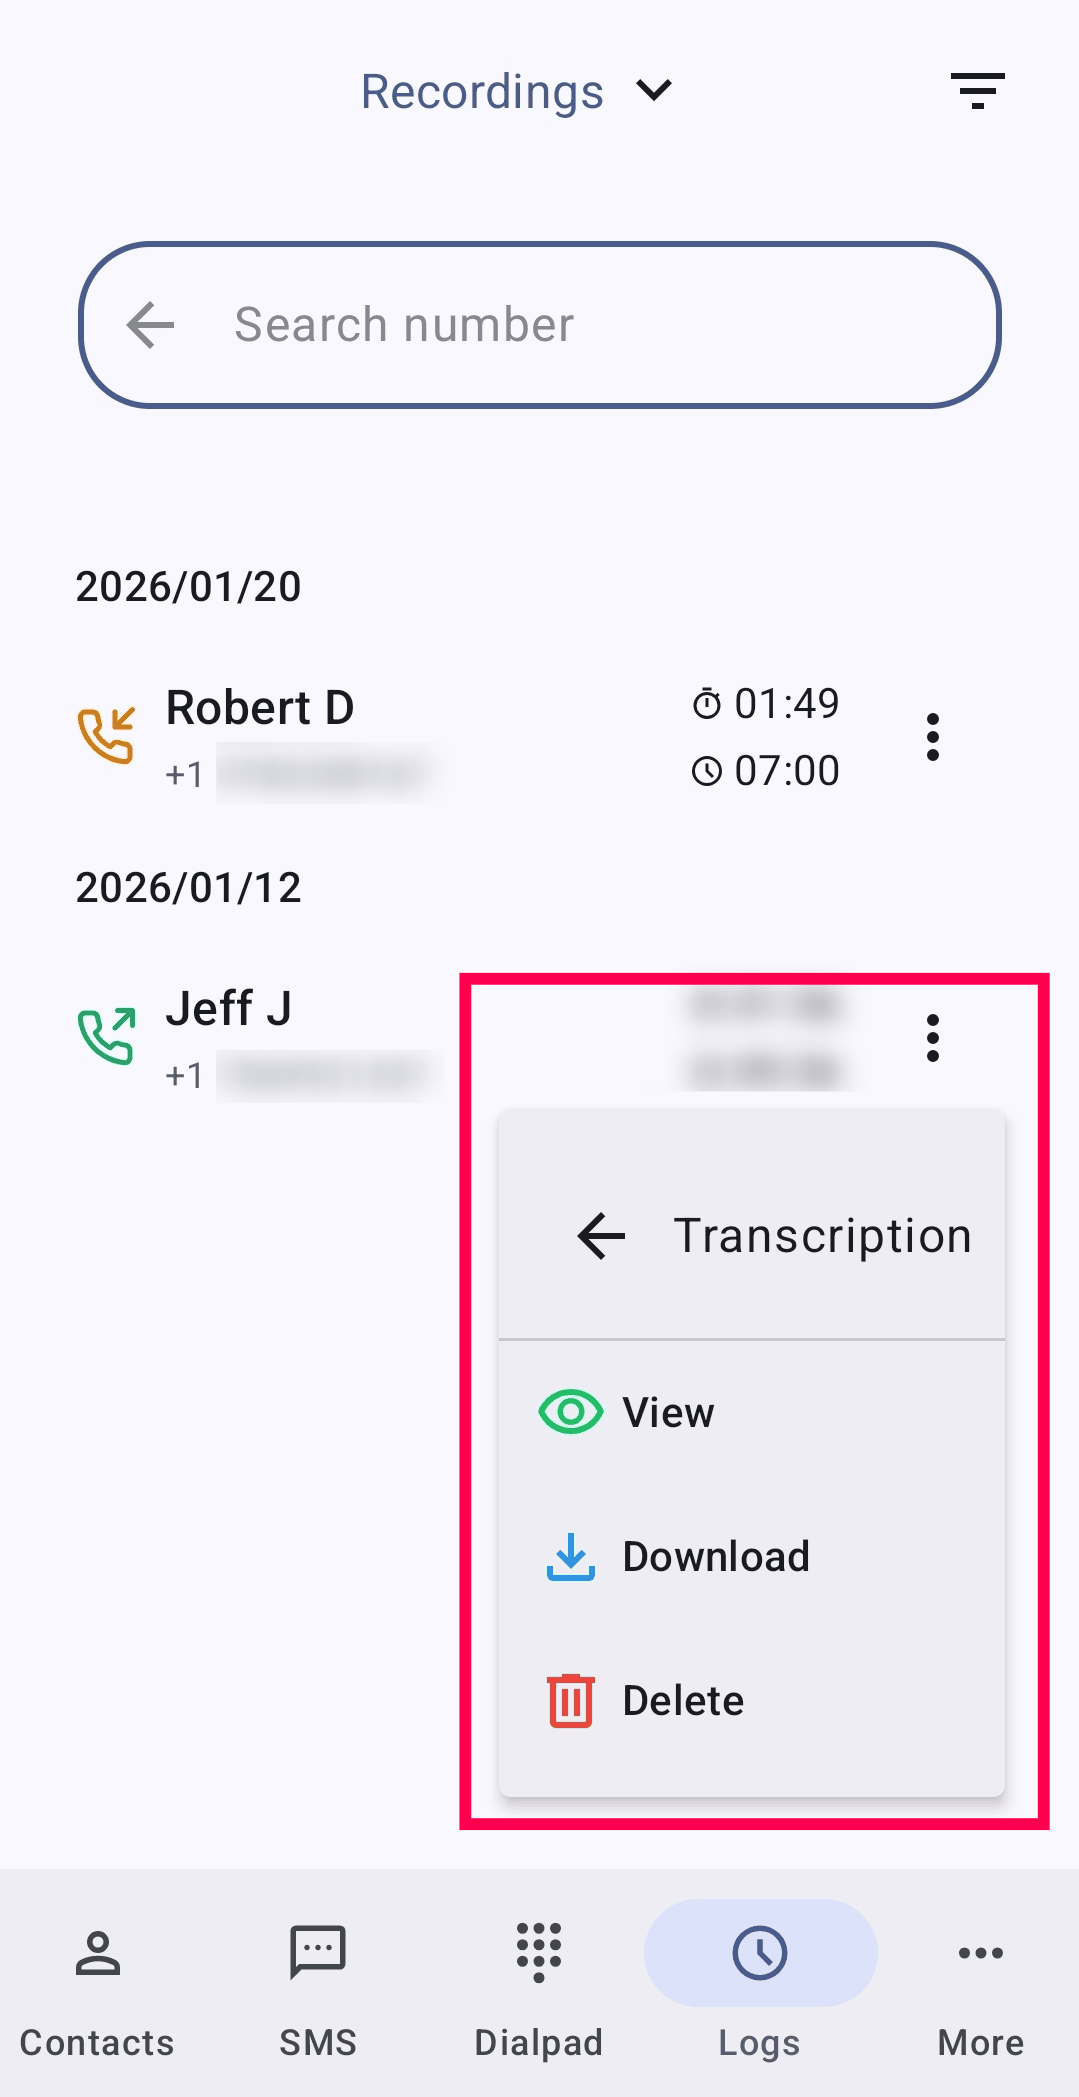
To listen, tap the ellipsis(⋮) icon next to the log entry and select Recording.
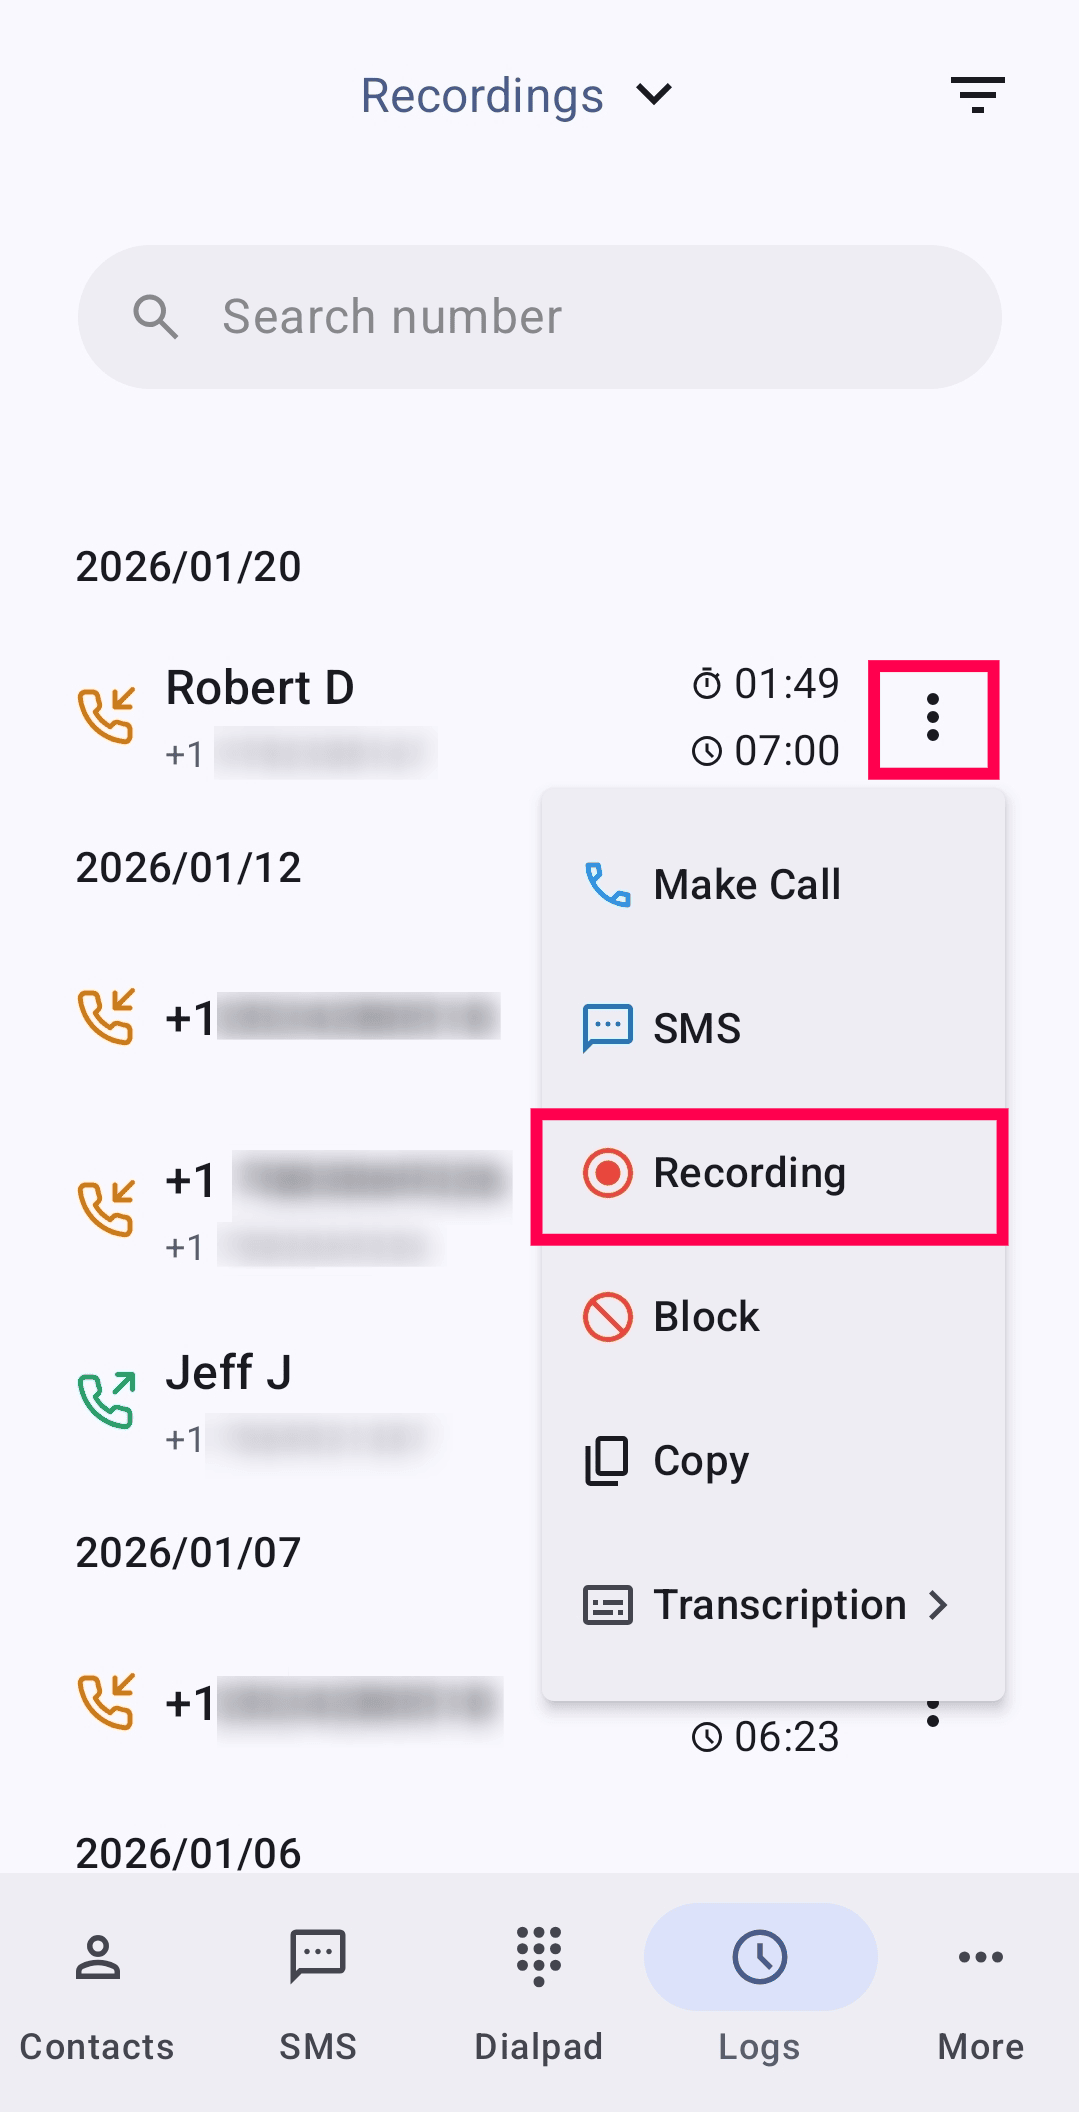
If on-demand call recording transcription is configured for the number in the Zoho Voice console, you can generate a transcript by tapping the ellipsis(⋮) icon and selecting Transcription → Generate.
Learn more about call recording transcription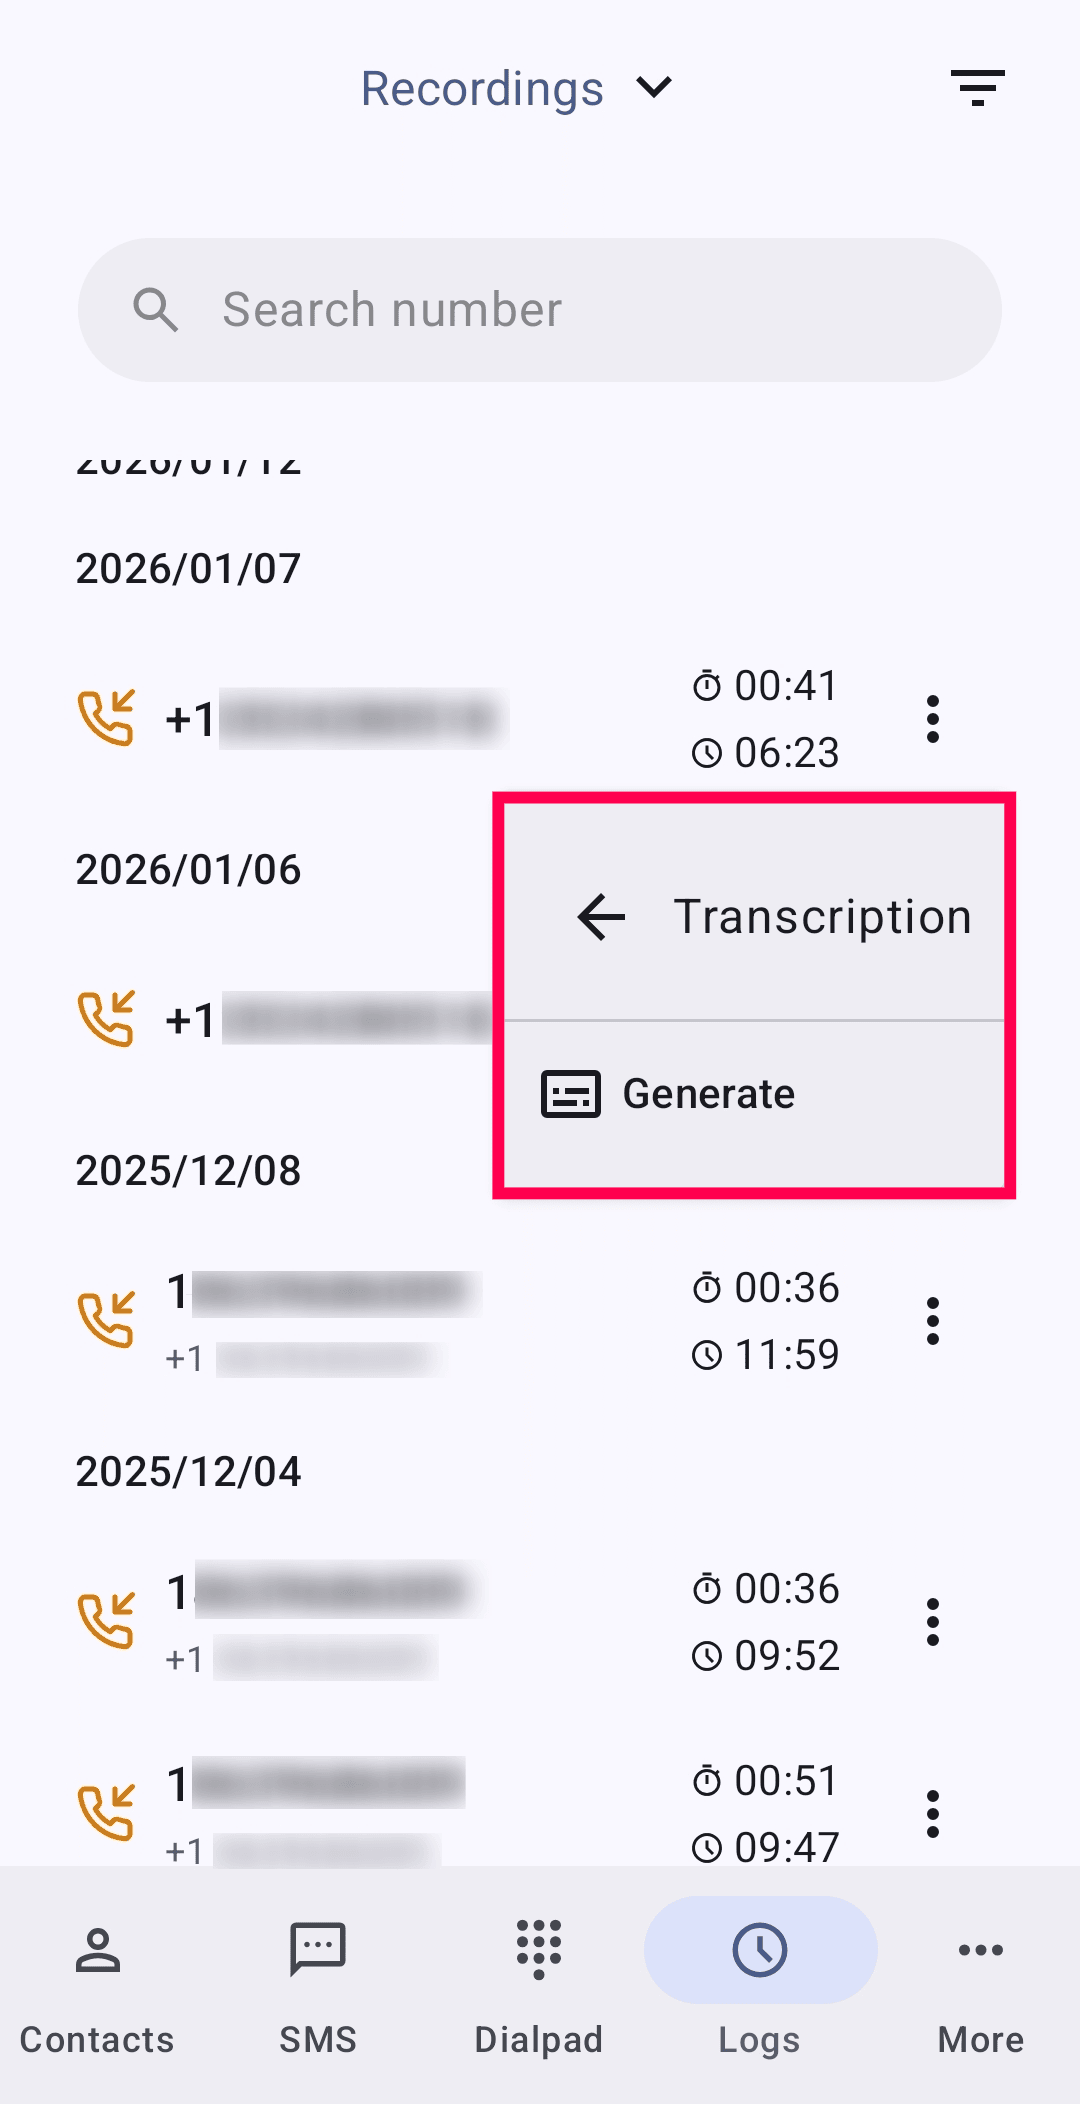
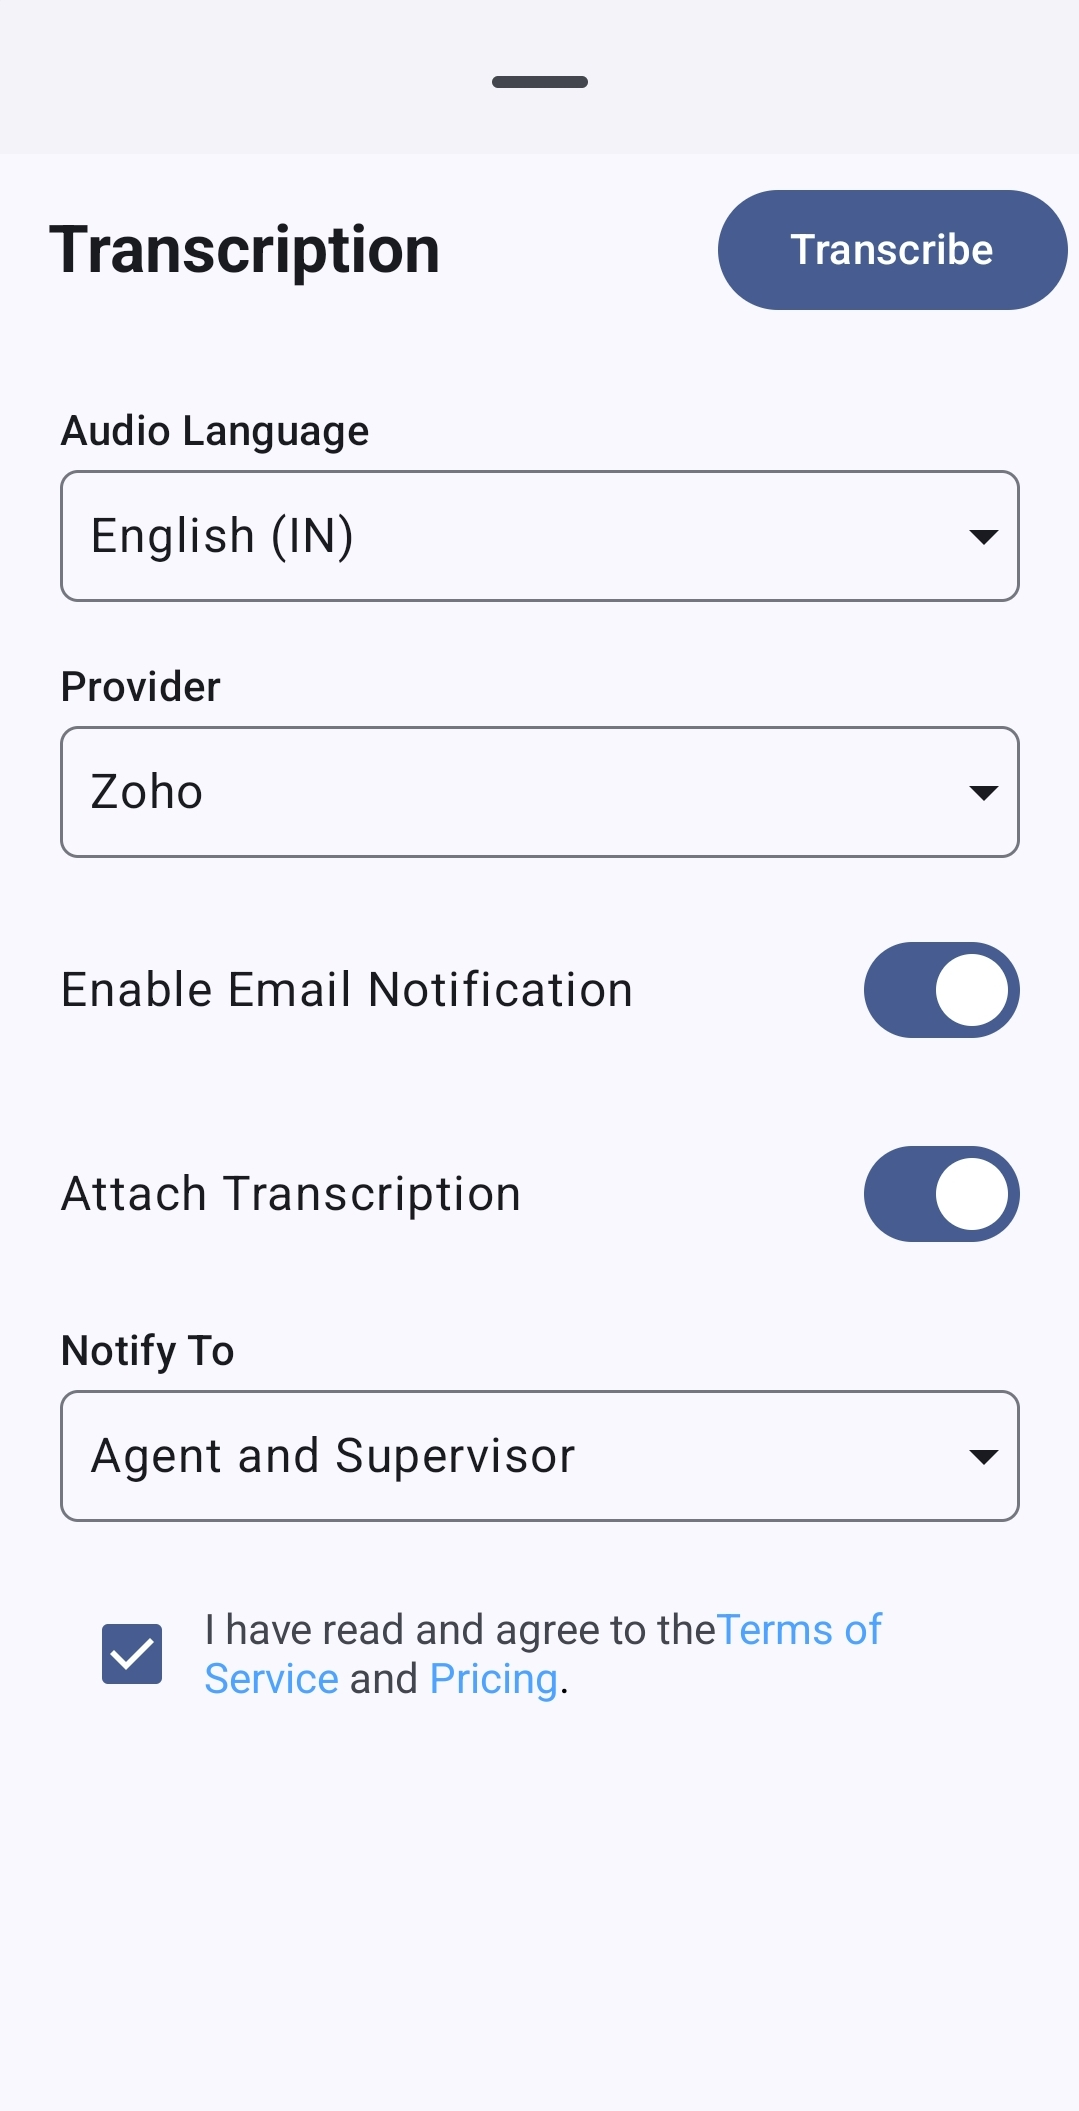
- On the Transcription screen:
- Choose the recording audio language and select a provider (Zoho or Google).
- Enable Email Notification to receive updates about the transcription.
- Enable Attach Transcription to include the transcript in the email.
- Select who should be notified (Agents or Agents and Supervisor).
Agree to the Terms of Service and pricing, then tap Transcribe.
Once the transcription is generated, tap the ellipsis(⋮) icon → Transcript → View.
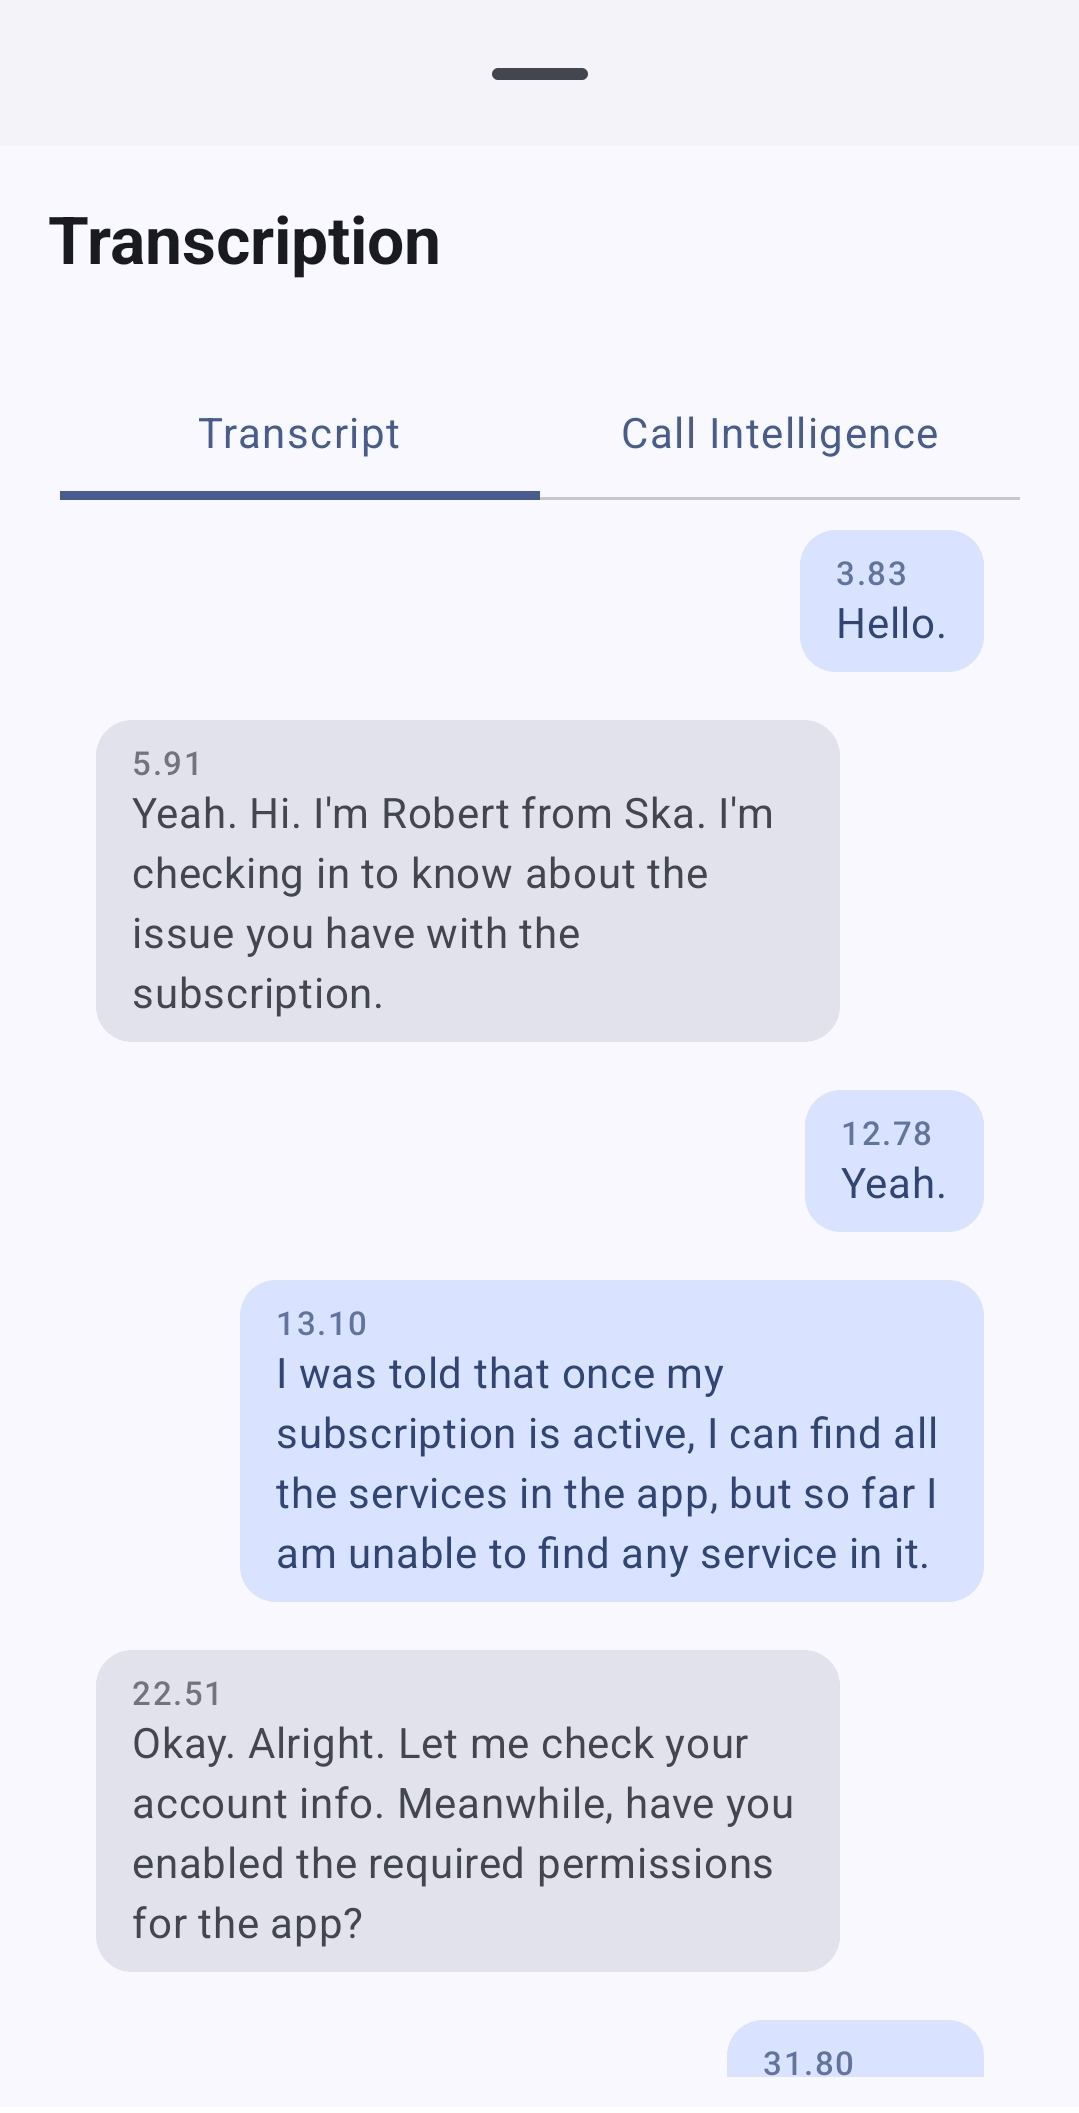
- The transcript screen includes two tabs:
- Transcribe: Displays the transcribed call recording.
Call Intelligence: Provides insights such as call summary, sentiment, customer intent, and emotions.
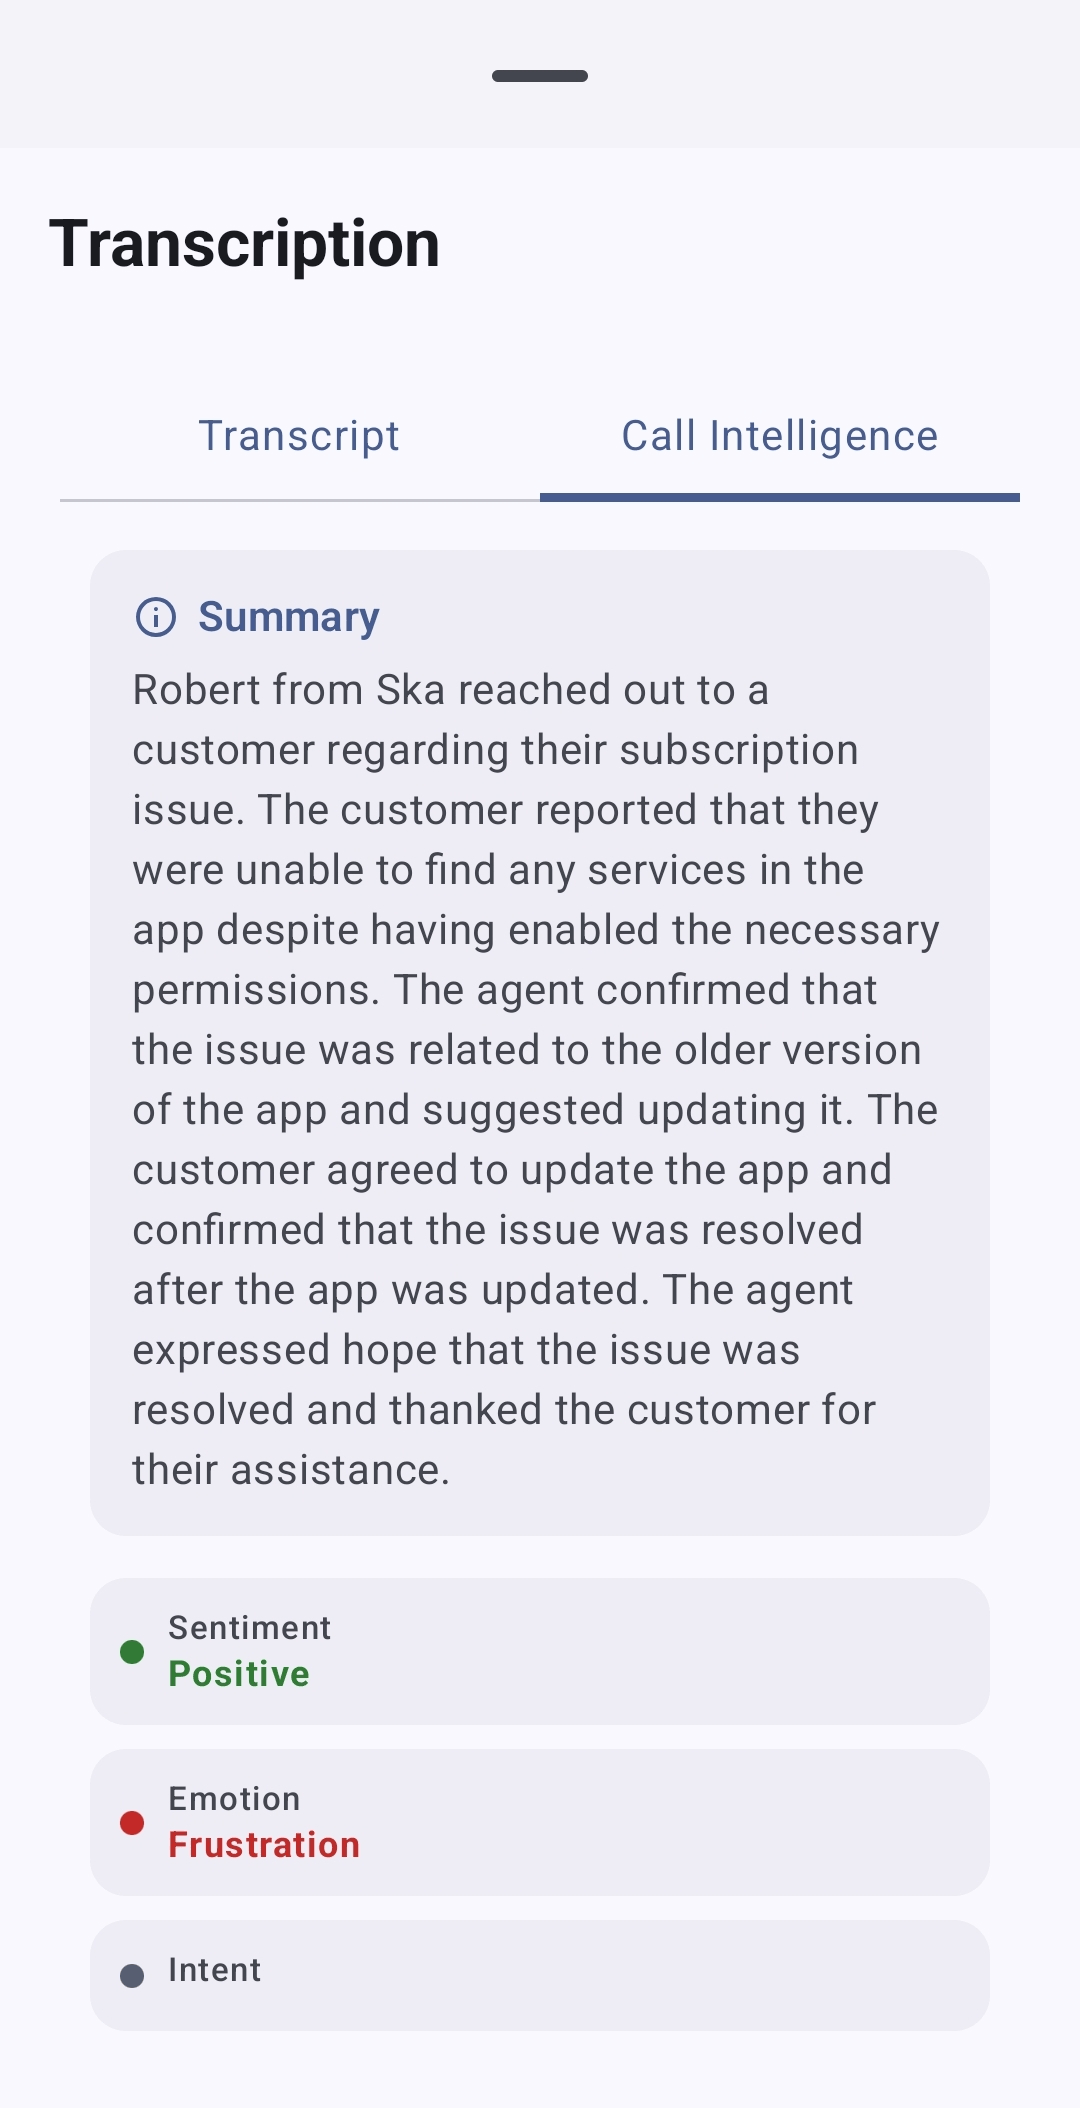
You can tap the ellipsis(⋮) icon to Download or Delete the transcription. If a transcript is deleted, it can be generated again using Transcription → Regenerate.
Phone Logs
- To access, select Phone Logs from the dropdown of the Logs module. All your phone logs will be listed here.
When prompted for access, tap Grant Permission.
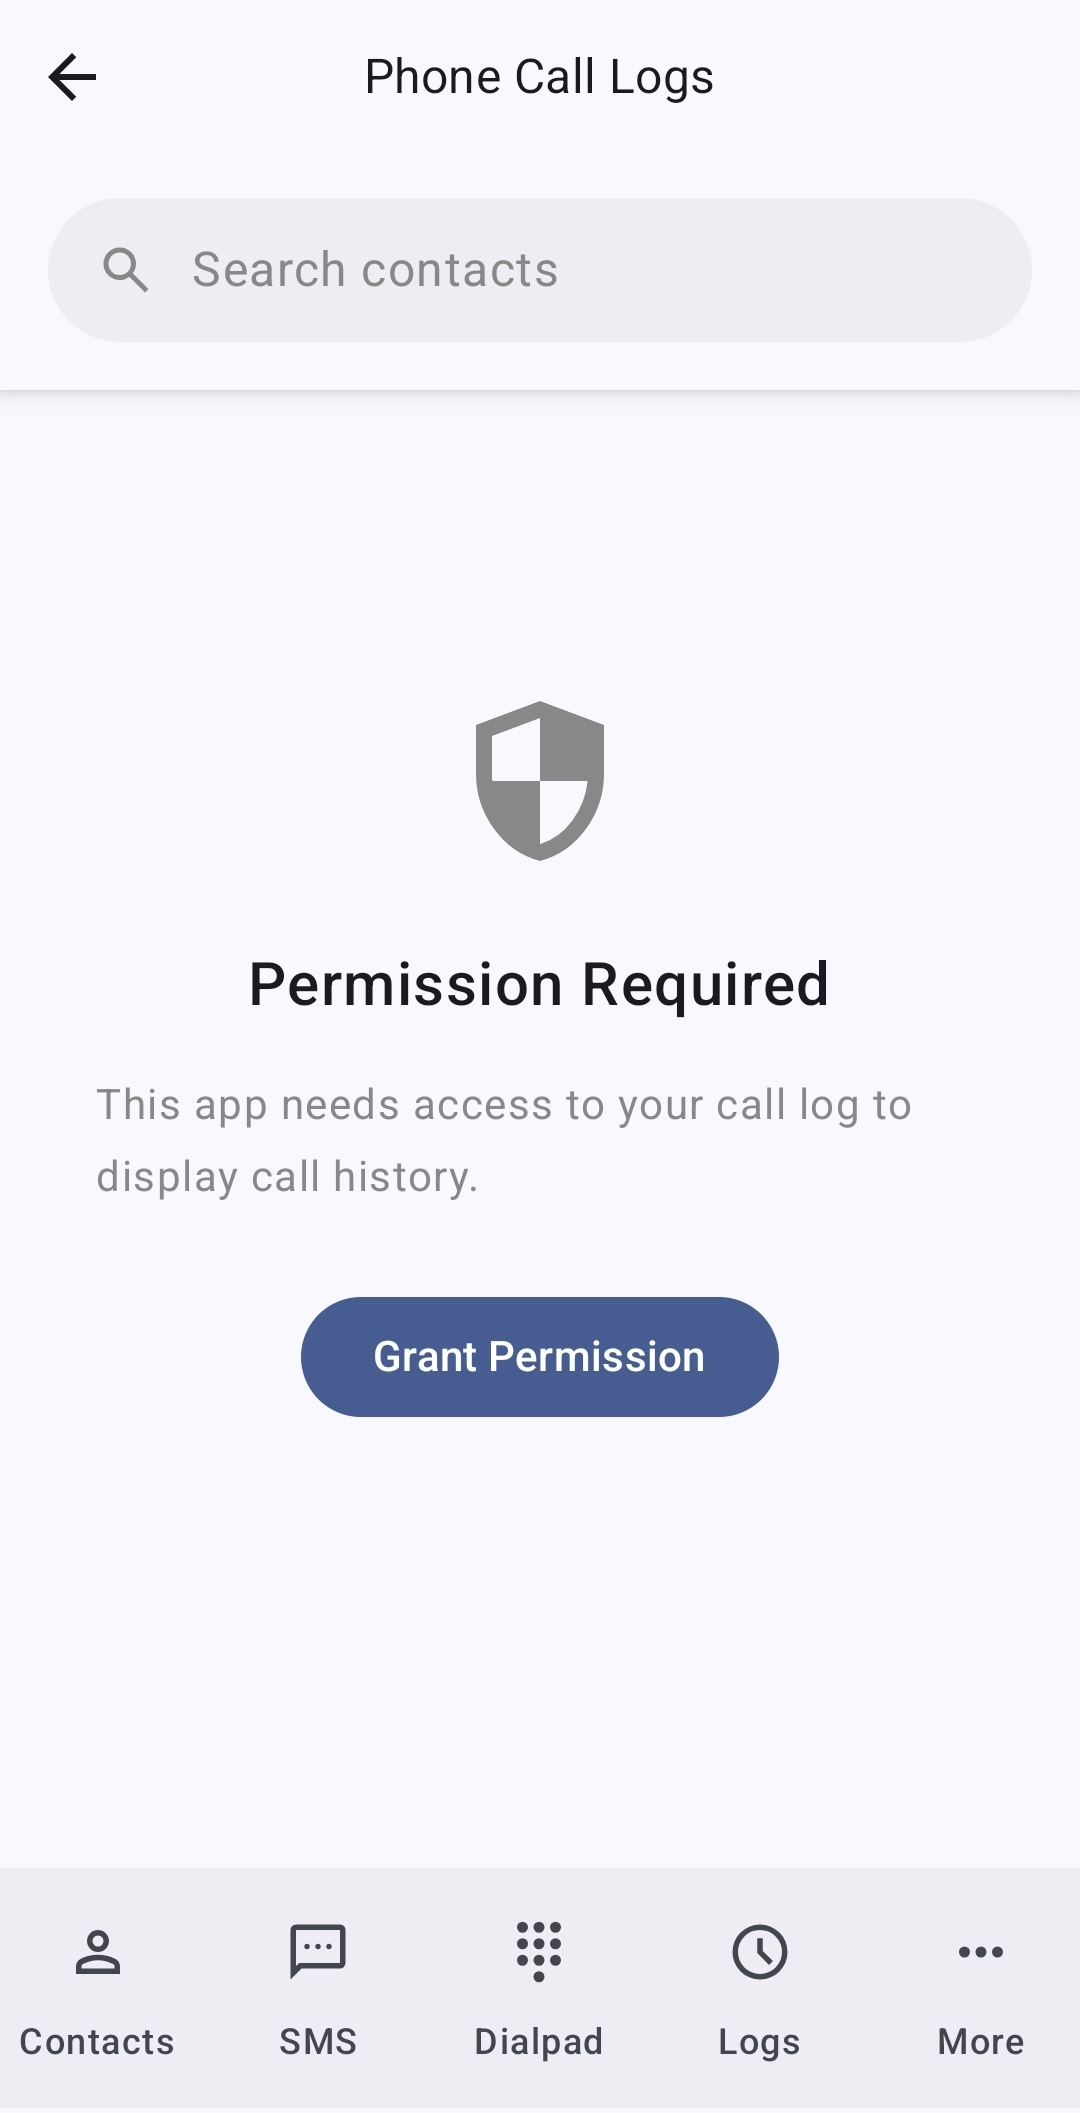
- Tap Allow to let ZDialer access your phone call logs.
From this screen, you can view your phone call logs and make calls from ZDialer.
My Profile in ZDialer
To access your profile in ZDialer:
Tap the More → My Profile from the menu.
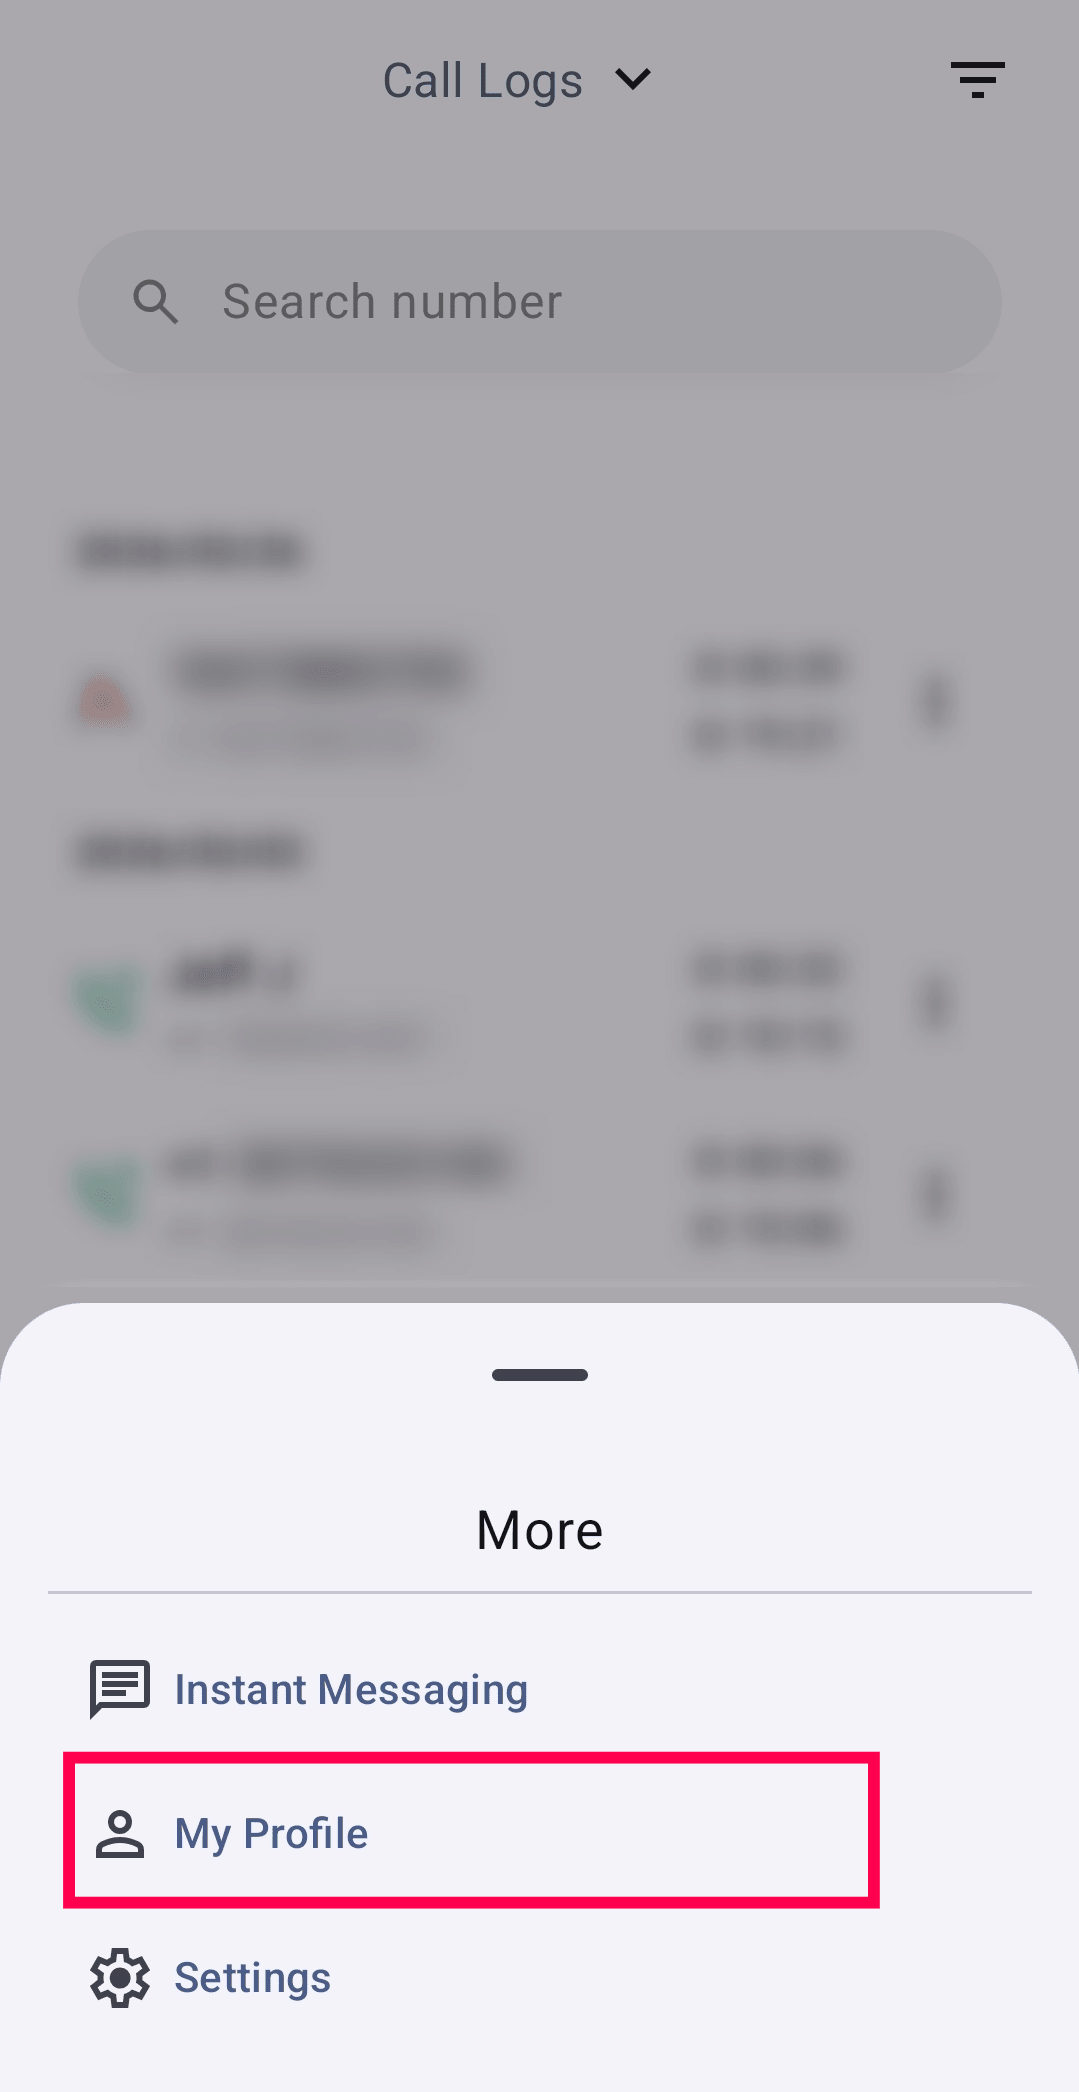
- Based on your role, you’ll be able to view or update certain profile settings.
This section mirrors the My Profile settings available in the Zoho Voice console.
Learn more about the My Profile settings
Notifications in ZDialer
To access your notification in ZDialer:
Go to the Dialpad andtap the bell icon on the top right corner of the screen, to access the notification.
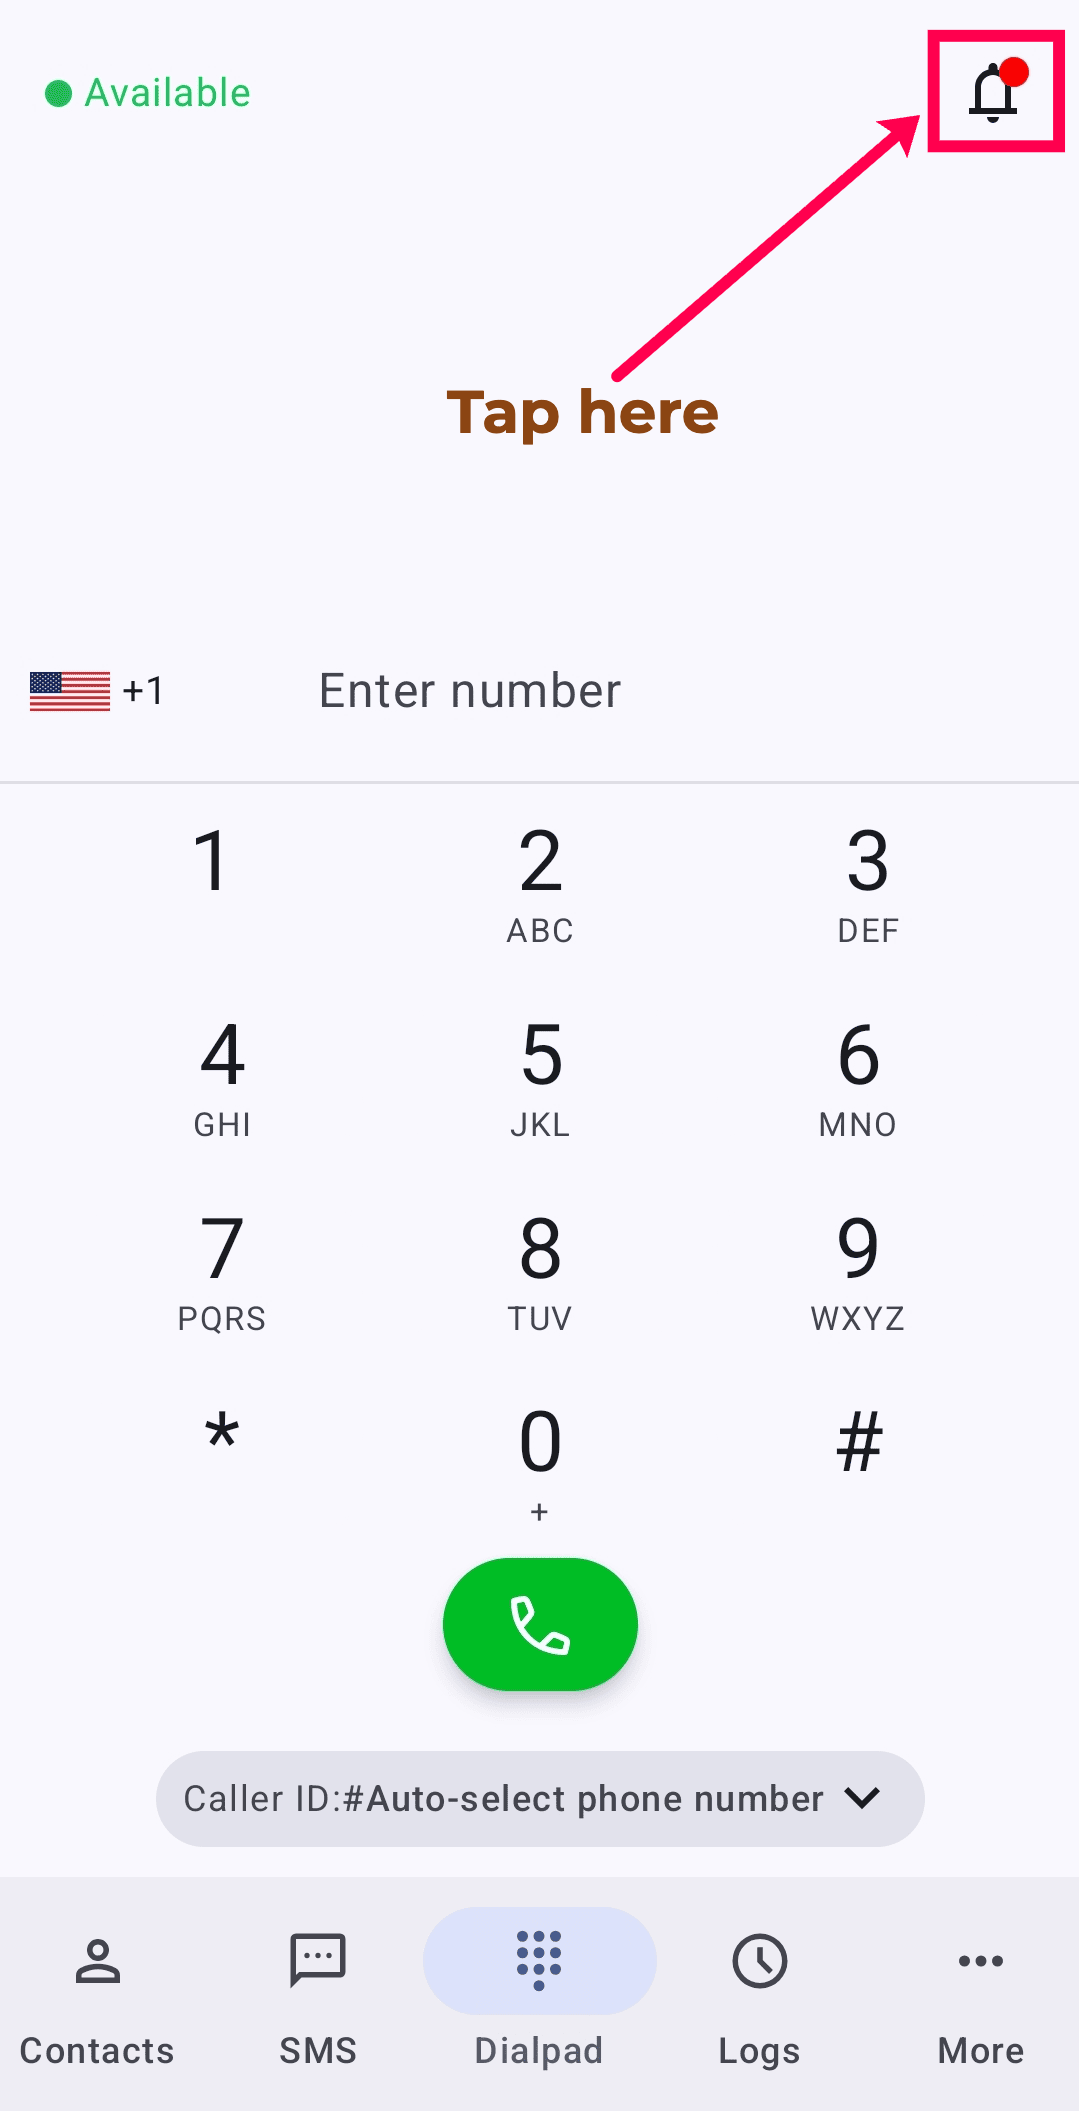
- This section mirrors the Notification module available in the web Zoho Voice console.
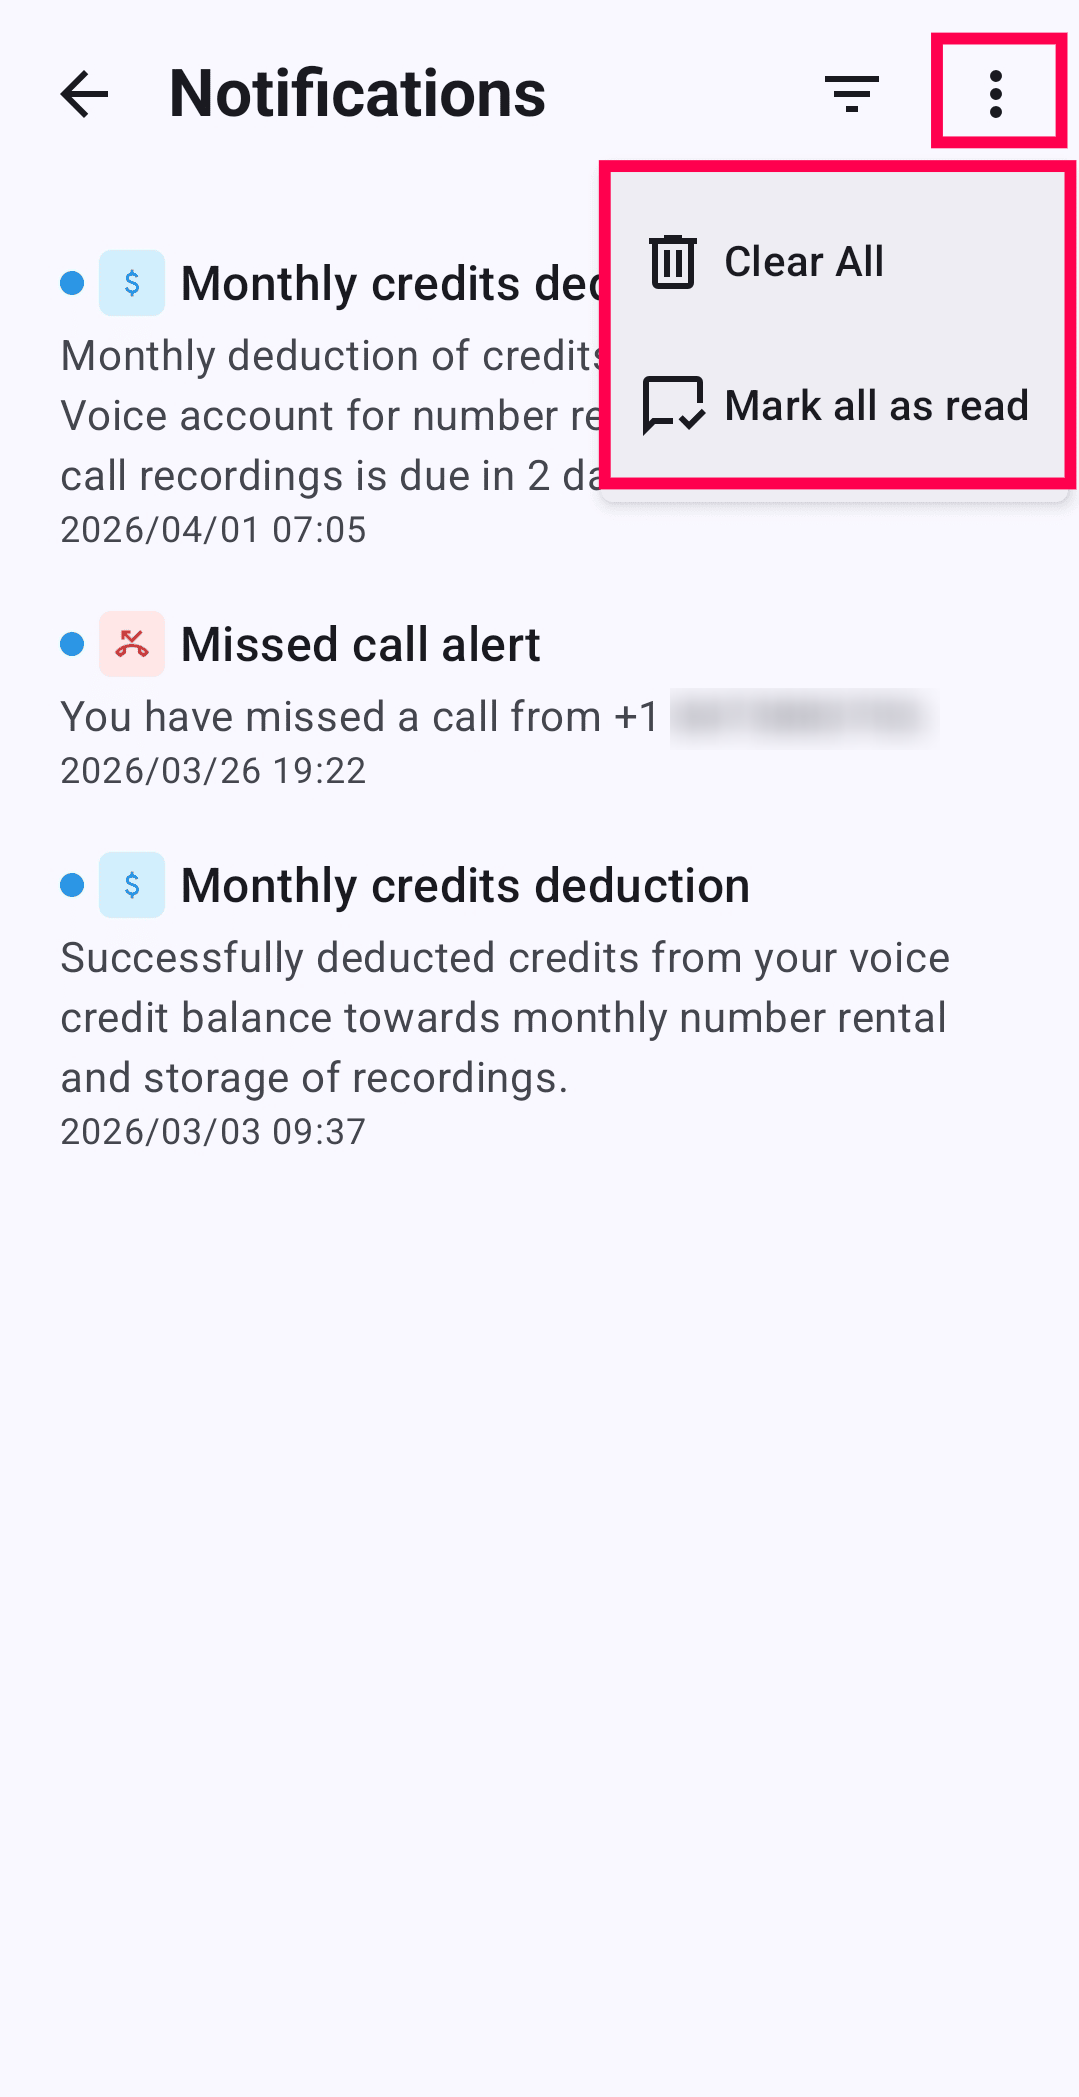
- You can filter notifications by taping on the filter (three-horizontal lines) menu.
- To clear all notifications, tap the ellipsis (⋮) icon and select Clear All.
To mark all notifications as read or unread, choose Mark as Read/Mark as Unread from the same menu.
General Settings
Tap on the More →Settings in the bottom-right corner of the ZDialer.
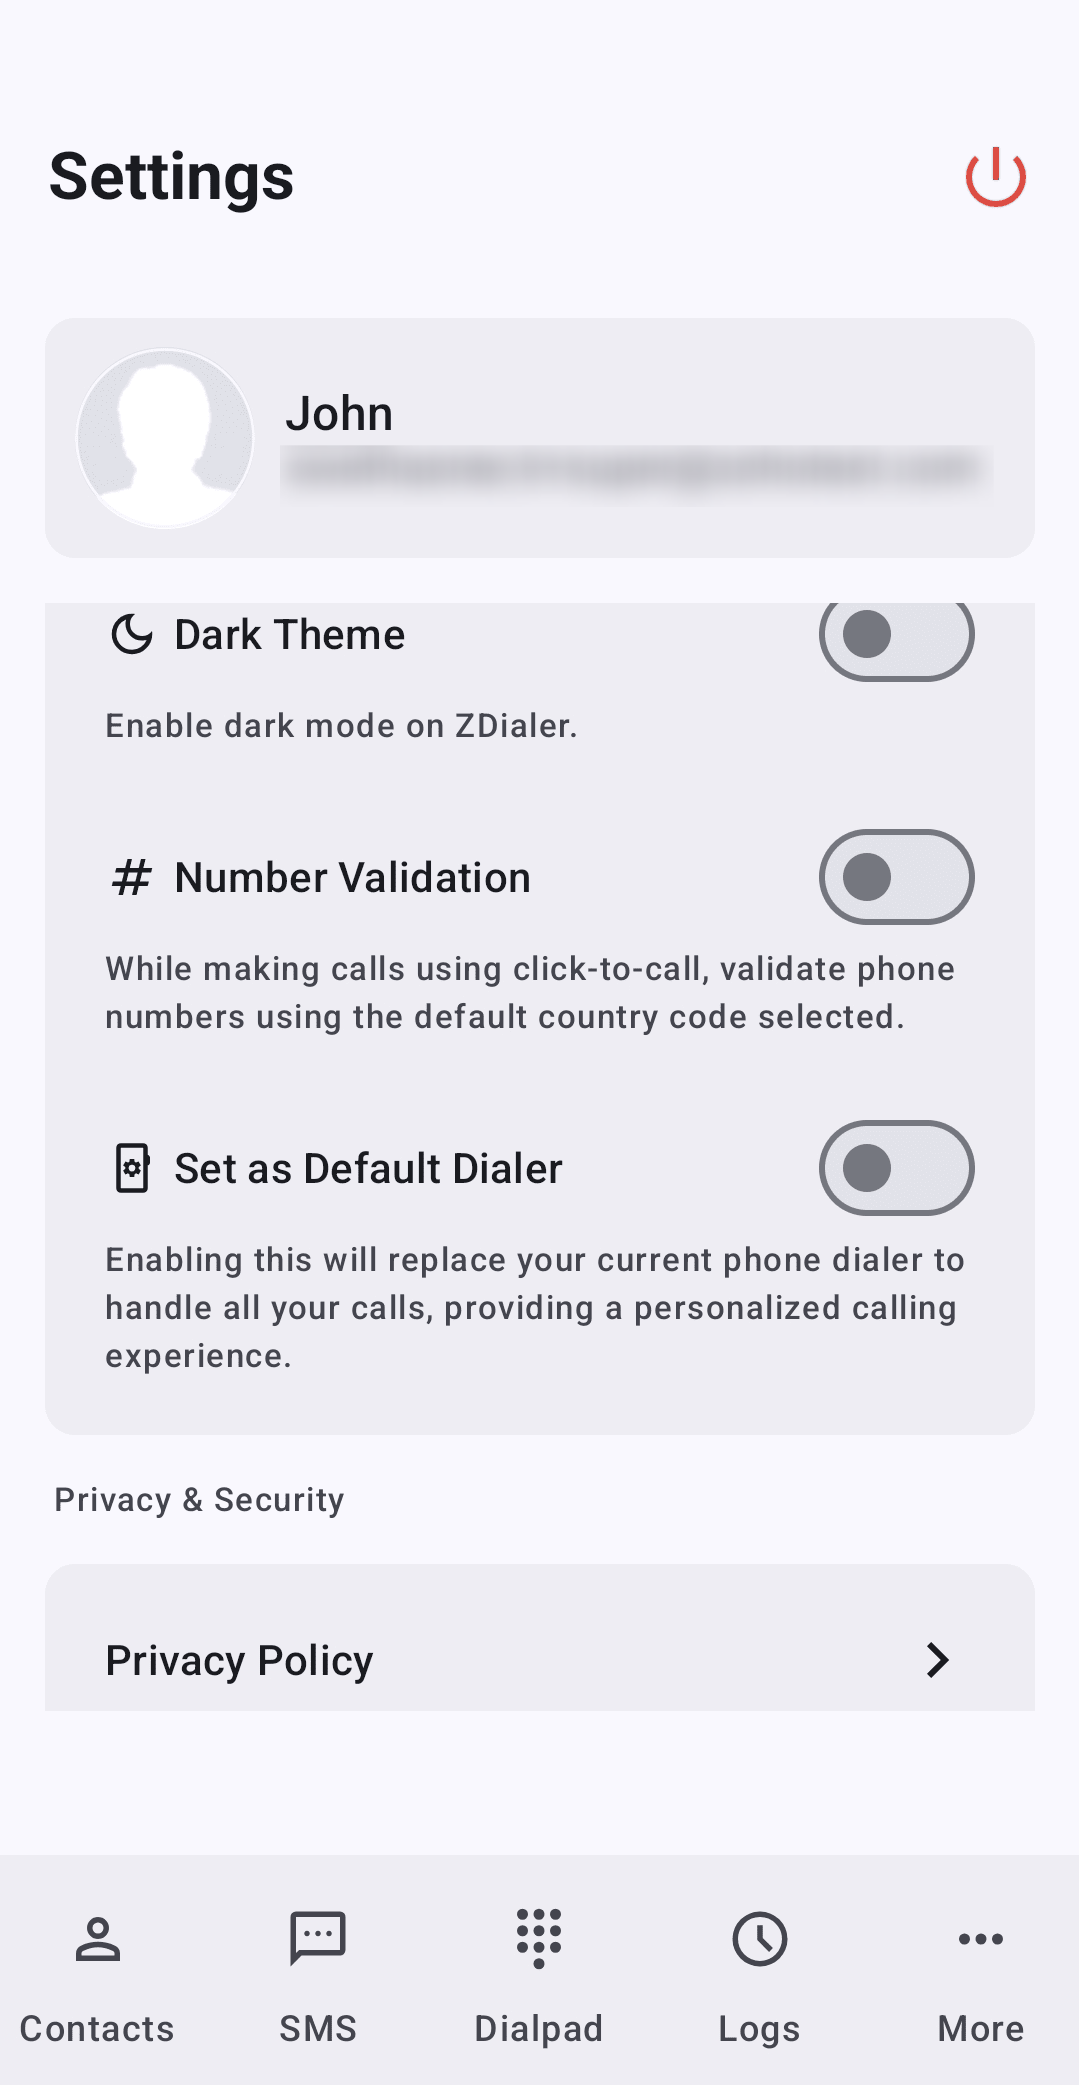
You can configure the following:
- Dark Mode: Enable to set dark mode on your ZDialer app.
- Number Validation:When enabled, if you place a call using tap-to-call or dial a number without a country code, the system will automatically prepend the default country code from My Profile module before placing the call.
- Set as Default Dialer: When enabled, ZDialer will replace your device’s default phone dialer and handle all outgoing and incoming calls through the app.
- Privacy Policy: Read Zoho's privacy policy
- Terms of Service: Read Zoho's terms of service.
- Send diagnostics and usage statistics: By enabling this, you let to capture app crash data automatically and send it to Zoho Voice team to help improve performance and user experience.
- Crash Reports: Enable this to generate crash reports. These reports allow you to review and troubleshoot app crashes.
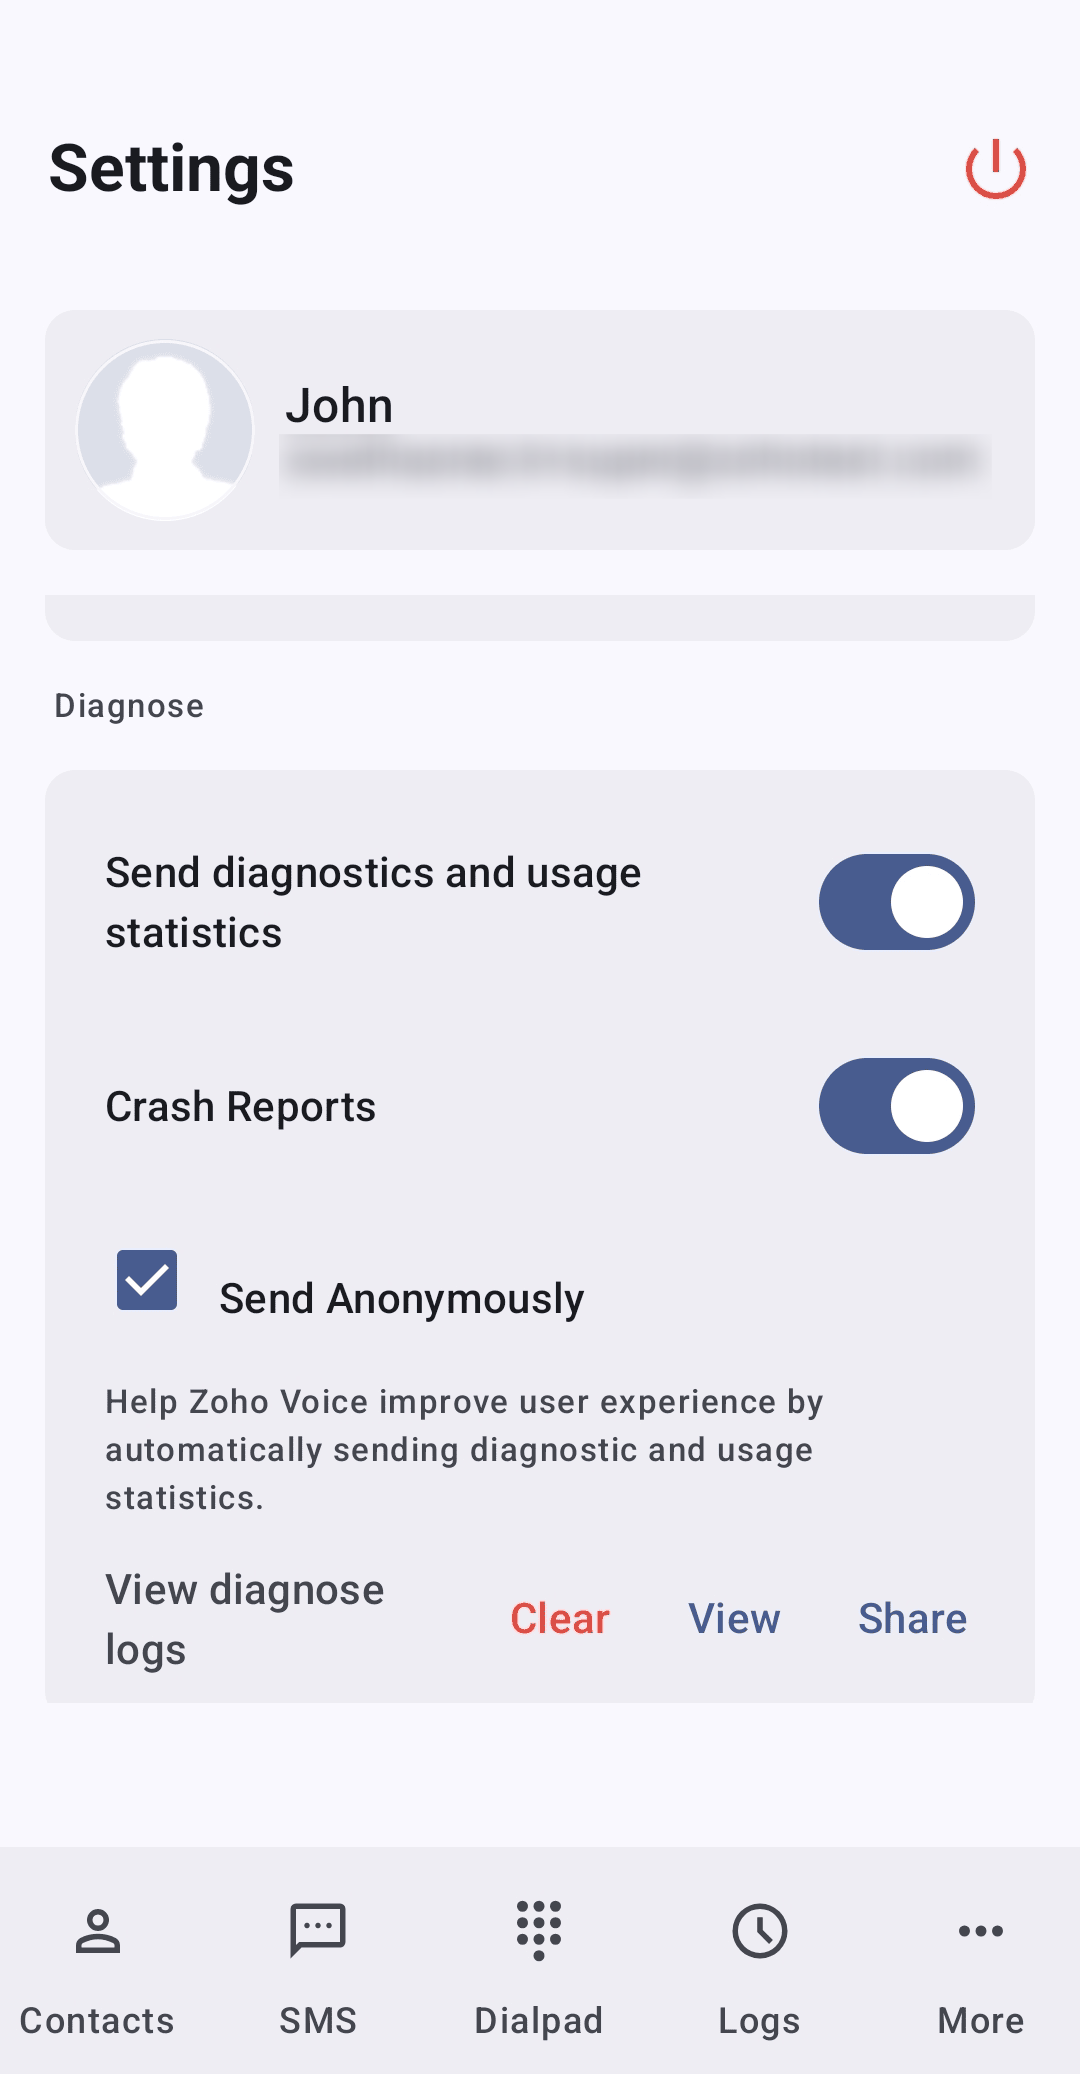
- Send Anonymously: When the checkbox is selected, you can choose how crash/diagnostic information is shared with Zoho Voice: send anonymously, send with your email address, or opt out entirely. If opted out, no reports will be sent automatically.
- View diagnose logs: Used primarily for troubleshooting ZDialer. Tap View to inspect diagnostic logs, Clear to delete them, and Share to send them to the Zoho Voice support team for analysis.