Create a Queue
With Zoho Voice, you can add and organize agents into call queues, ensuring calls are routed efficiently to the right teams or departments.
Note
Only Super Admin, Admins, and Supervisor Plus roles have permission to create and edit queue profiles. Deletion of queue profiles can only be performed by Super Admin and Admins.
Steps to create a Queue
Go to the Queue module from the left sidebar menu.
Click the Add Profile in the top-right corner.
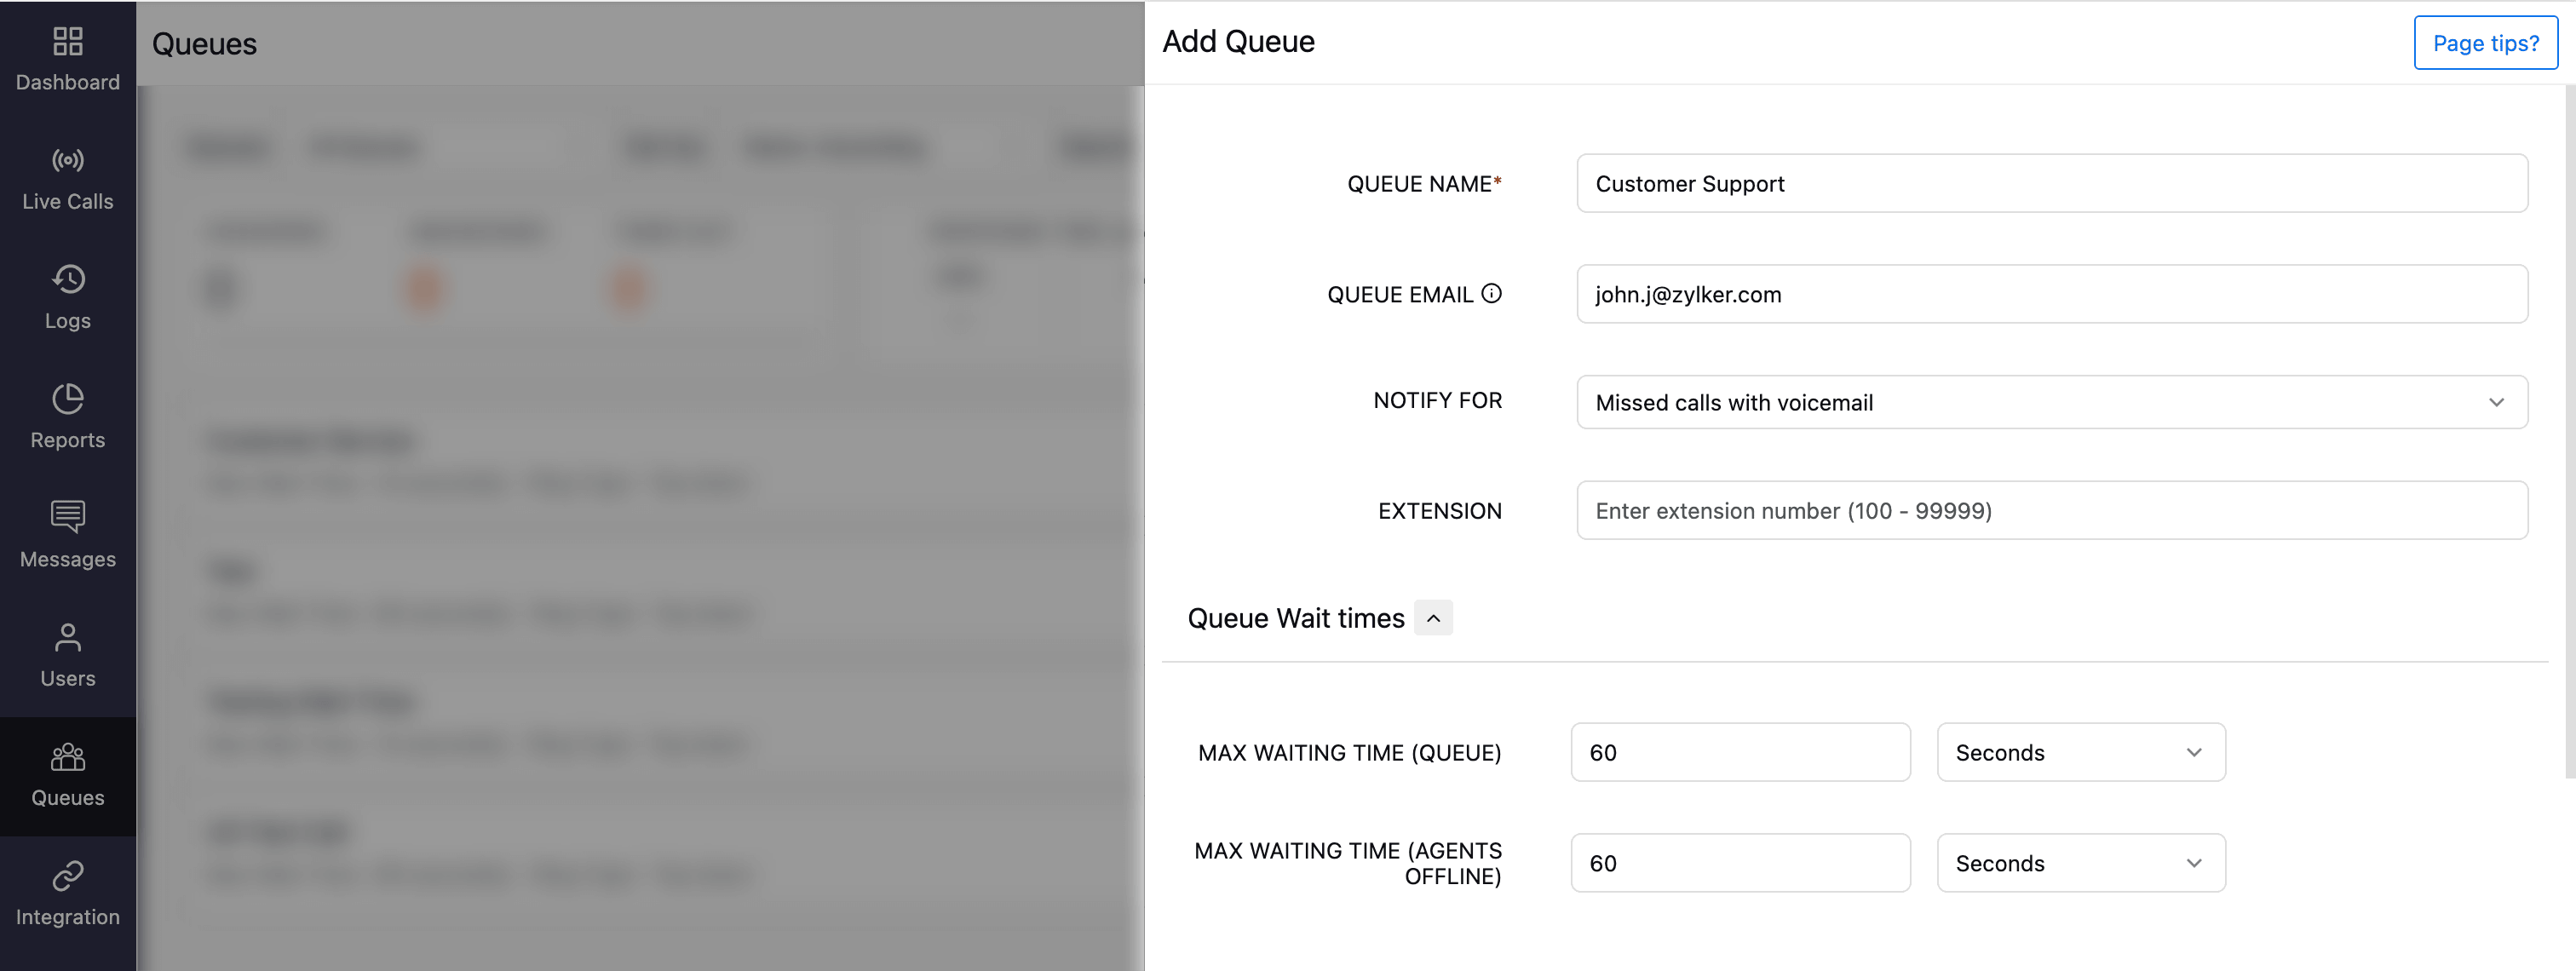
On the Add Queue page, fill in the details as mentioned below:
Queue details
Provide the following general details for the queue:
Queue Name: Enter a name for the profile. This is mandatory.
Queue Email: This should be a group email address with all the members of the queue included in it.
Notify for: Choose when to send email notifications to the queue email address:
All missed calls
Only missed calls with voicemails
No notifications
Extension: Assign an extension number for the queue.
Queue Wait Time: Specify the maximum wait time when a caller is in the queue and the maximum wait time when all the agents are offline.
Note
The max waiting time (queue) cannot be less than 10 seconds.

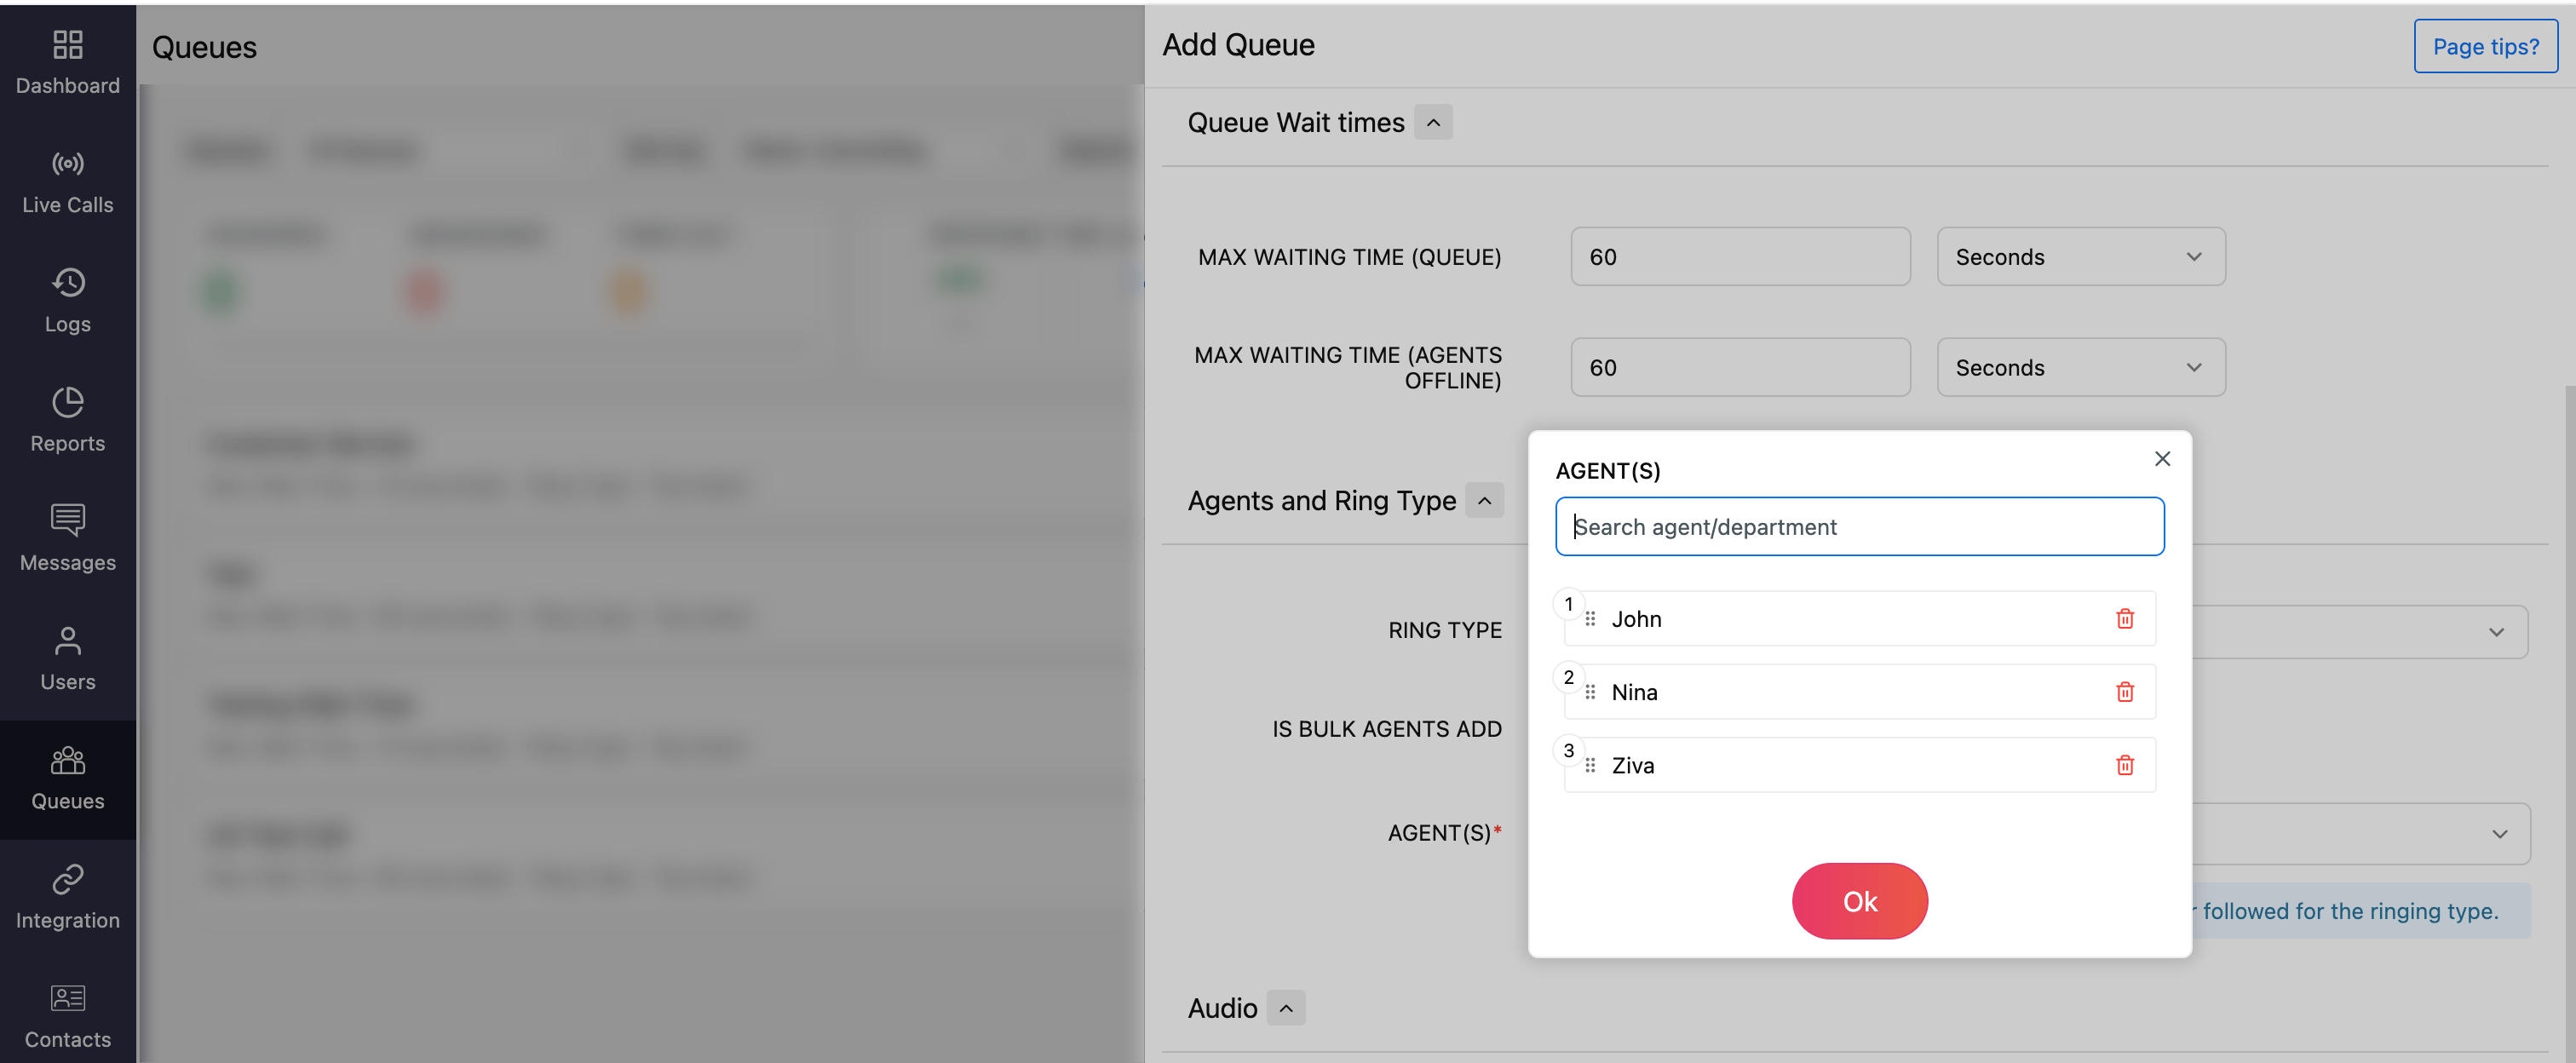
Agents & Ring Type
You can select the ringing order and the agents that are to be assigned for the queue.
Ring Type
The ring type you choose determines the order in which agents are notified when a call enters the queue. Zoho Voice provides four flexible ringing methods:
Top down: The call is always routed to the agent in position 1. If the agent rejects or does not answer, the call is then routed to the agent in the next position, and so on.
Ring progressively: The call rings first for the agent in position 1. After 10 seconds, it starts ringing for the next agent while continuing to ring the first agent.
Each agent receives a 30-second ring, followed by a 20-second pause, then another 30-second ring.
If an agent rejects the call, ringing stops immediately for that agent and resumes after a 20-second gap.
Note
For every agent, the call rings for 30 seconds, followed by a 20-second break, after which it rings again for 30 seconds. This cycle repeats until someone picks up the call. If an agent rejects the call, the ringing stops immediately; there is then a 20-second break, after which it rings again for that agent.
Round Robin: Calls are distributed evenly across agents in a rotation. For example, the first call goes to Agent 1, the second to Agent 2, and so on.
Simultaneous: All agents receive the call at the same time. The ringing continues until one of them answers.
Agent with fewest calls: The call is first routed to the agent who has answered the fewest calls. If unanswered, it moves to the agent with the next fewest answered call count. This continues until one of the agents answers the call.
Note
When there are multiple agents with the same number of answered calls, the last offered time is considered to determine priority.
Agent with longest wait time: The call is first routed to the agent whose last call ended the earliest. This ensures that agents who have been idle the longest receive the next incoming call first. This method helps ensure fair call distribution and reduces agent idle time, especially when agents are shared across multiple queues.
Agents
Once you select your ringing type, you can assign agents to this queue in two ways:
Add agents individually: Search by name or department to add agents one at a time. Drag and drop to rearrange their order (important for Top Down and Ring Progressively modes).
Bulk add agents: You can enable IsBulk Agents Add, which allows you to paste a list of agent email addresses instead of selecting them one by one.
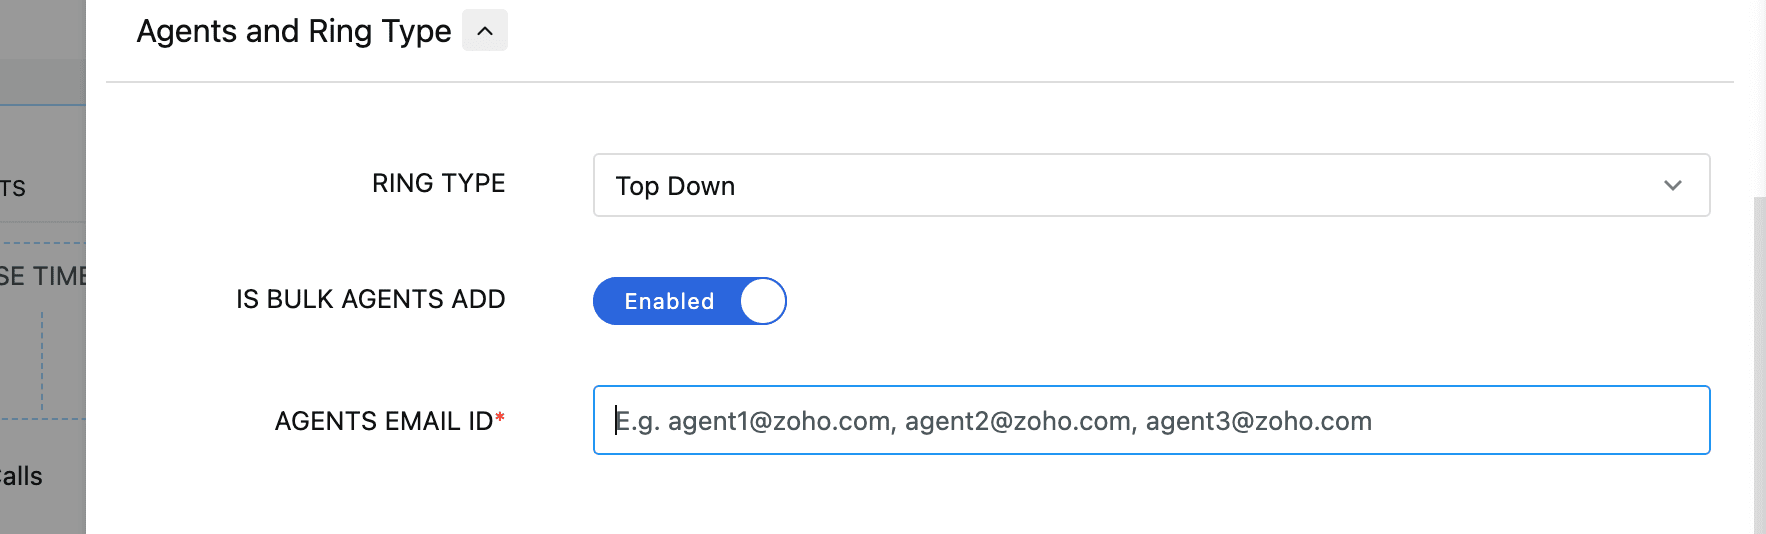
Note
The order in which you list agents affects how calls are distributed for the Top Down and Ring Progressively types.


Audio Settings
Set the audio for the queue as mentioned below:
Queue music on hold: Choose the music callers hear while waiting in the queue. You can upload new audio or select from previously uploaded files (fetched from Settings → AudioFiles → IVRAudio).
Regular waiting announcement: When enabled, a periodic announcement will be played to callers on hold.
Queue Audio Profile Config: Choose an existing audio profile from the dropdown or create a new one by clicking Add Queue Audio. For detailed steps, refer to the Audio Profile Setup Guide. All previously created profiles will be listed in the dropdown for selection.
Note
Queue Audio Profile cannot be used if Regular Waiting Announcement is enabled.
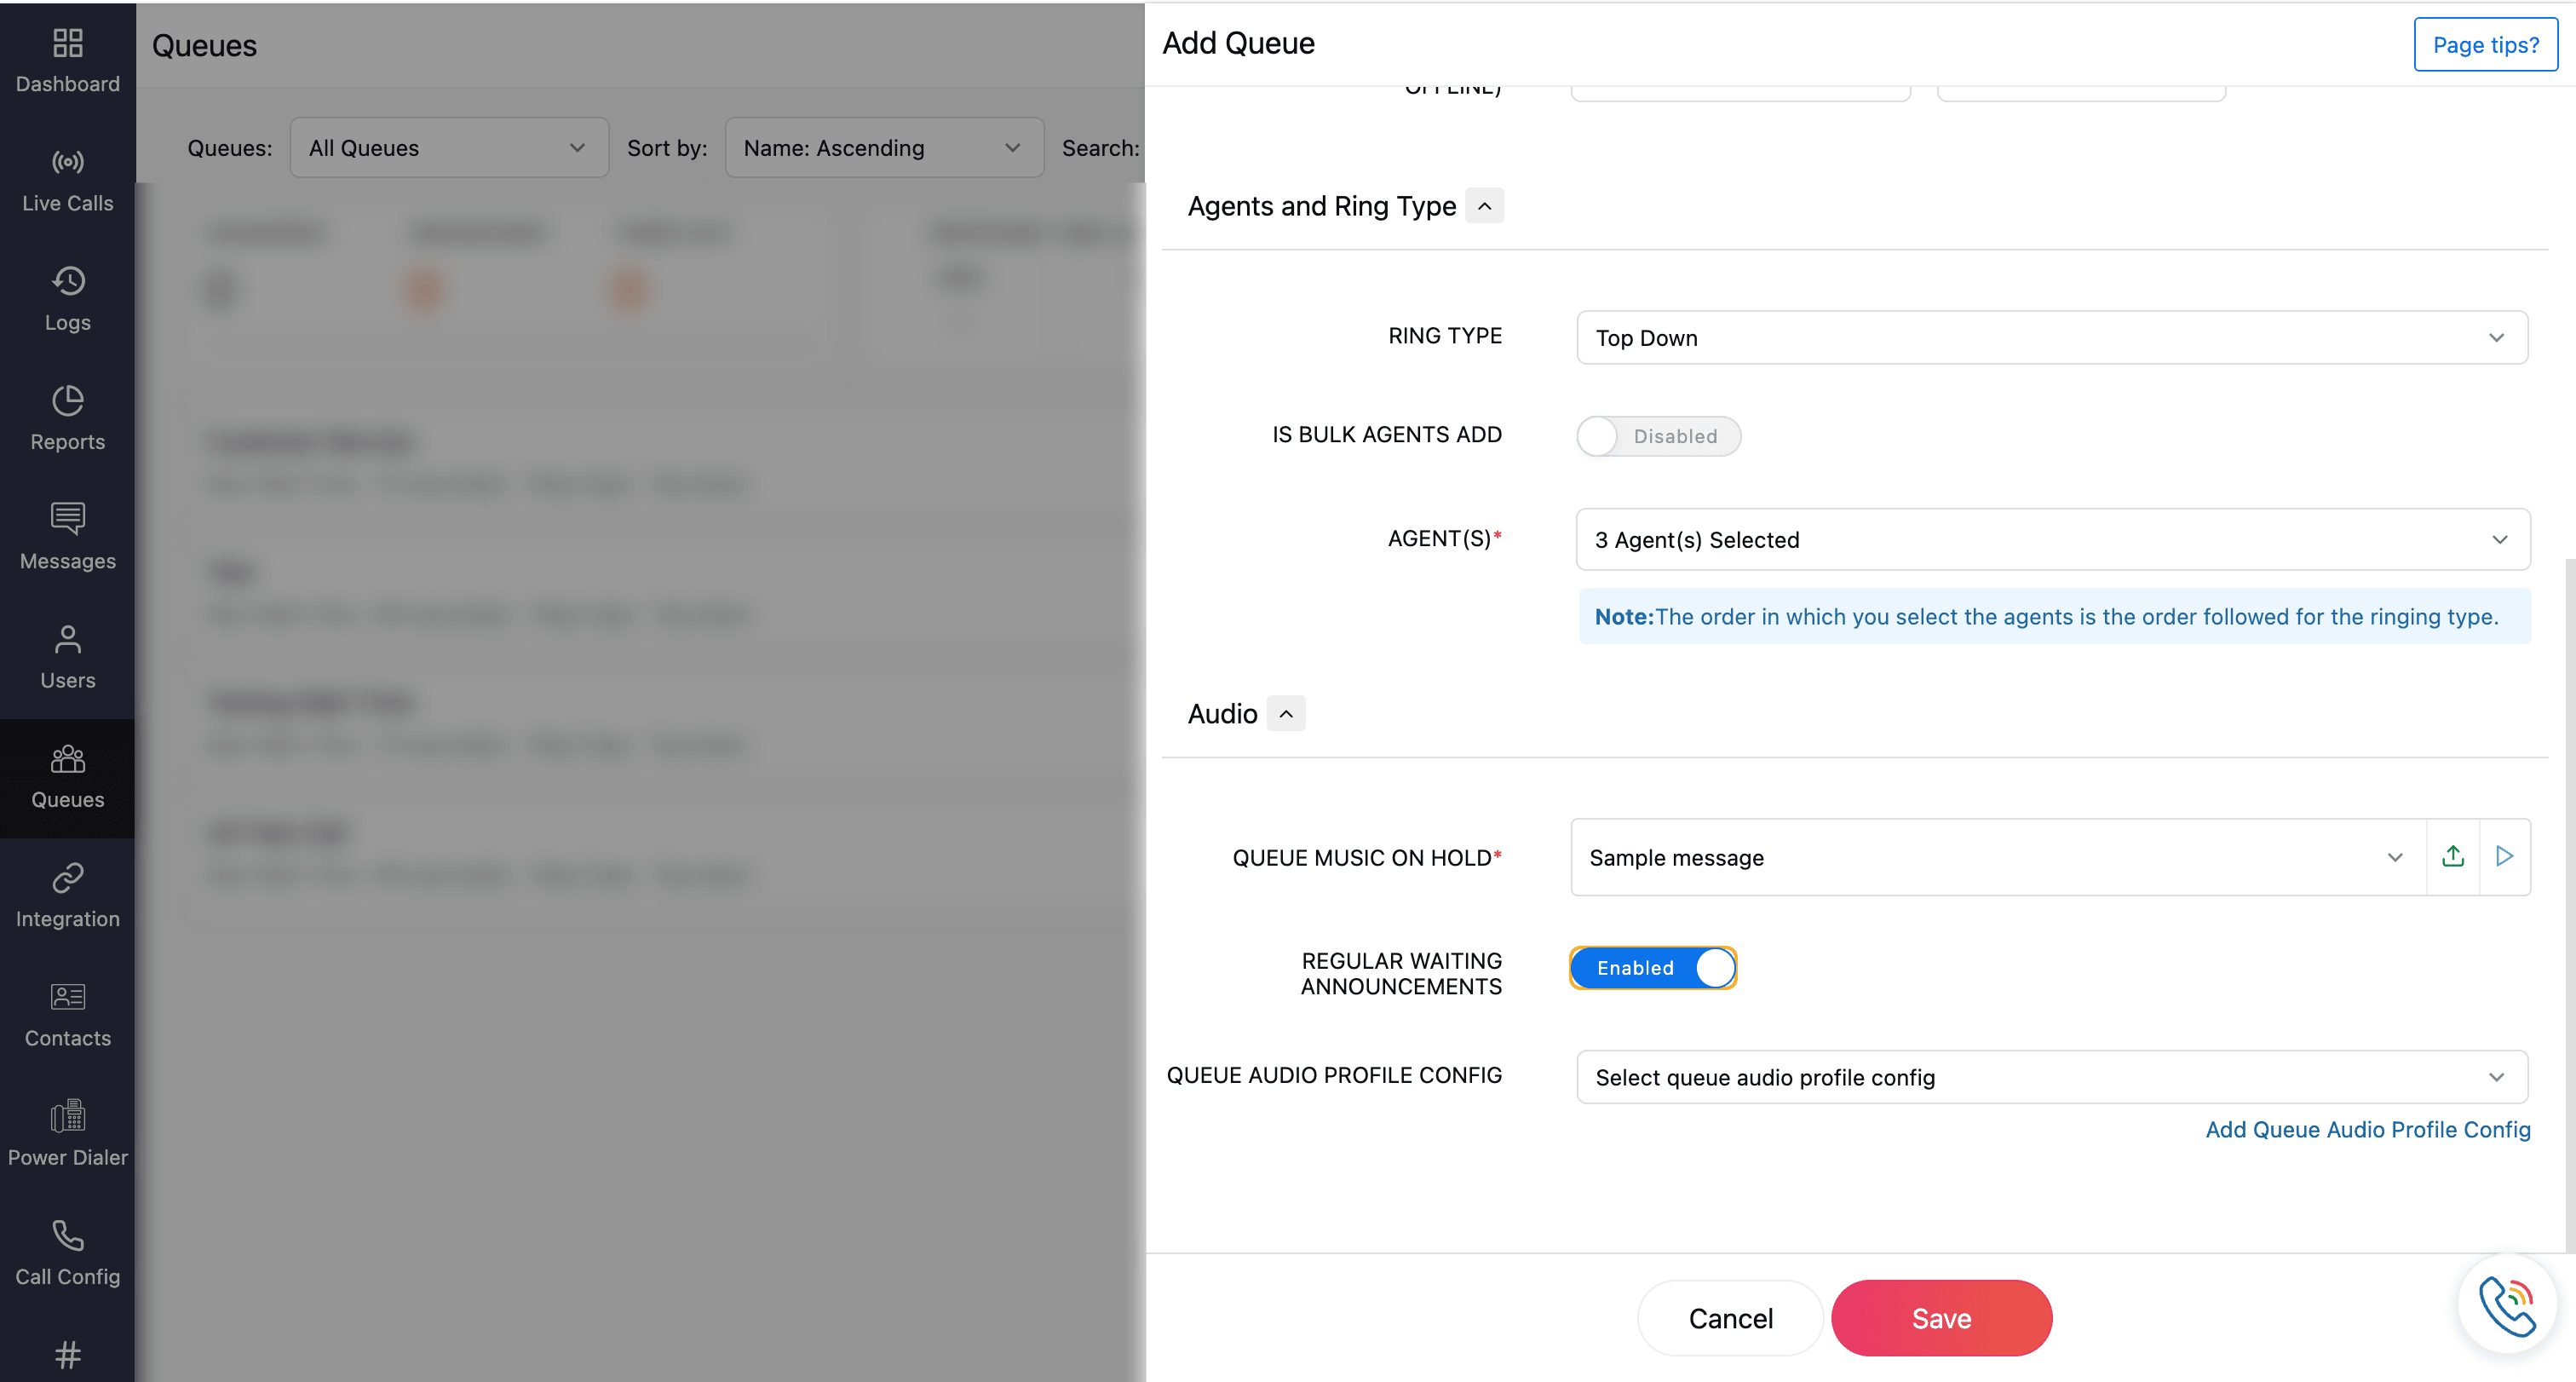

Click Save once the required fields are specified.
The saved profile will be listed on the Queue homepage. You can edit and delete the profile by using the respective icons.