Clients:
- Adding a Client
- Importing Clients
- Exporting Clients
- Adding CRM clients into People
- Deleting Clients
- Viewing Client Information
Adding a Client
If an organization wants to track time for work done for their clients, Timesheet is the best option. In Timesheet, Jobs are done for Projects which are associated with Clients. So, getting Clients added into the system is very important. Follow the steps given below to add a Client to your system.
- From your home page, go to Timesheet > Projects/Jobs > Clients
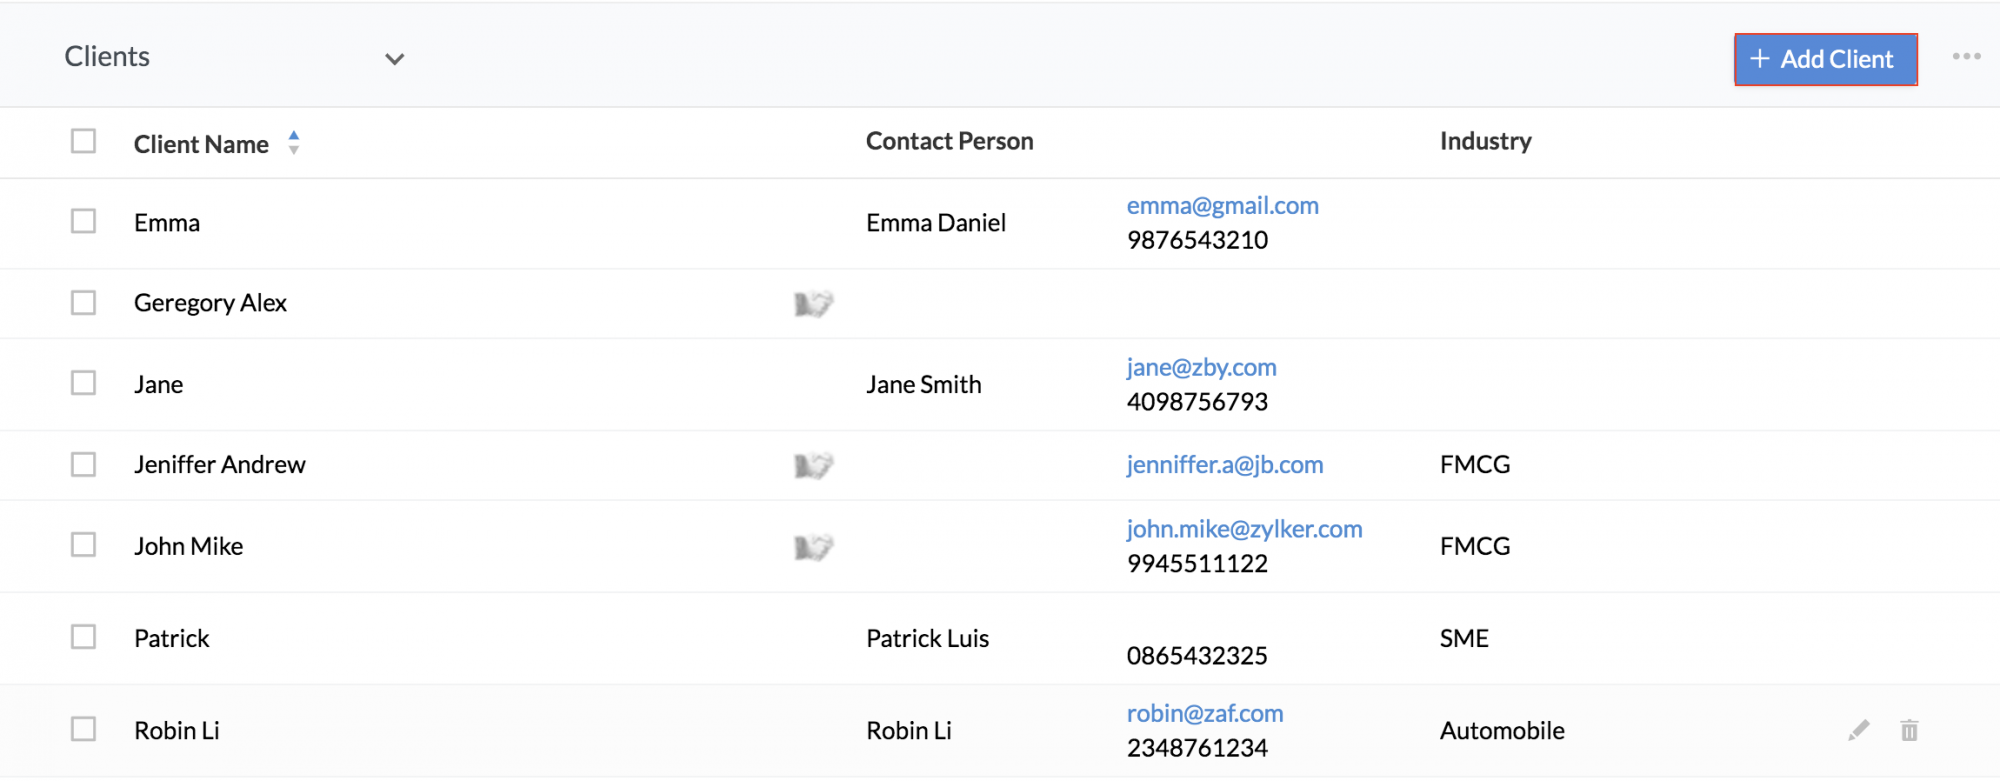
- Click Add Client
- Enter values for the mandatory fields like Client Name, Currency etc
Note: If there are bills to be generated for a particular client, the currency that is defined here will be used. Click here to know how to generate bills.
- Under Billing Method, select Hourly Job Rate, Hourly User Rate, Hourly User Rate - Jobs or Hourly User Rate - Projects.
Note:
- If you select Hourly Job Rate, then the bill will be generated based on the Rate per hour that you define in Job(Timesheet > Project/Jobs > Add /Edit Job > Rate Per Hour).
- If you select Hourly User Rate - Jobs, then the bill will be generated based on the Rate per hour you define for each Assignee in Job (Timesheet>Projects/Jobs > Add /Edit Job> Assignees > RPH).
- If you select Hourly User Rate - Projects, then the bill will be generated based on the Rate per hour that you define for each Project User in Project. ( Timesheet > Projects/Jobs > Add Project > Project Users > RPH)
- If you select Hourly User Rate, then the bill will be generated based on the Rate you define for the user under Payroll settings (Time Tracker > Settings > Payroll Settings > Add Employee Rate)

- Click Submit
The client is now created on your system and Projects can be associated with this client.
Importing clients
The Import option helps you add many clients into your Zoho People account at one go. Follow the steps given below to add multiple clients.
- From your home page, go to Timesheet > Projects/Jobs > Clients
- Click the ellipsis icon at the right corner and select Import
- Click Upload File and select the file to be uploaded
- Map the fields and click Next
Your client list will get imported into your Zoho People account.
Note: If the currency given in the file that is to be imported does not match with any of the currencies listed while the Client was added, then the default currency that has been given in the Billing Settings will only be considered.
The file imported should be in .xls or .xlsx or .csv format
Importing from Zoho CRM
If you have a Zoho CRM account, you can also import CRM clients into Zoho People. Follow the steps given below.
- From your home page, go to Timesheet > Projects/Jobs
- Click on the ellipsis icon at the right corner of the page and click Import from Zoho CRM
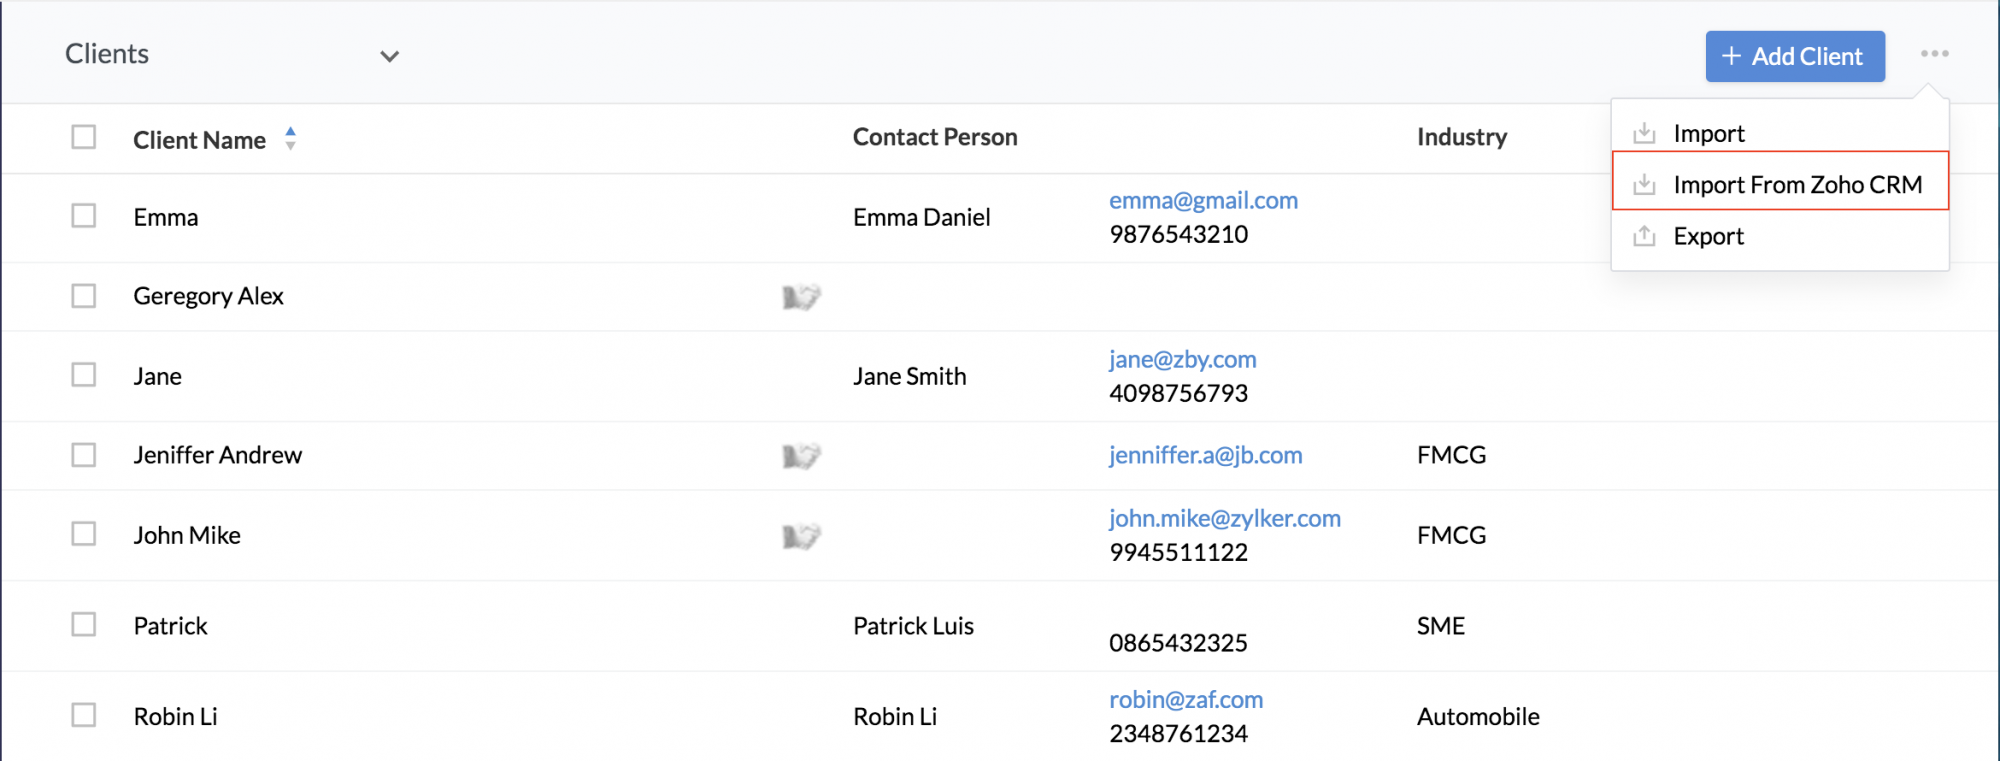
- In the drop-down, make a selection from the options, Lead, Account, Contact, and Deal.
- Select the customer names and click Submit
Your CRM clients are now imported into your Zoho People account.
Click here to learn more about Integrating with Zoho CRM.
Note:
The option to import data from Zoho CRM will be available only for the following employees:
- The administrator of the account
- All the location administrators of the account(if any) (configured under User Access Control > Roles)
- All the location administrators for Timesheet module (if any) (Configured under User Access Control > Permissions > Admin Operations).
- The administrator of specific locations, if their roles have import permission enabled.
Exporting Clients
The Timesheet features options to export Clients to an external source.
Follow the steps given below to export Clients.
- From your home page, go to Timesheet > Projects/Jobs > Clients
- Click on the Export icon
- Check Include Tabular Section Data if required and click Export
Note: Export can be done only in .xls/.csv/.tsv formats
Adding CRM clients into People
There are two ways in which you can add your CRM clients into Zoho People.
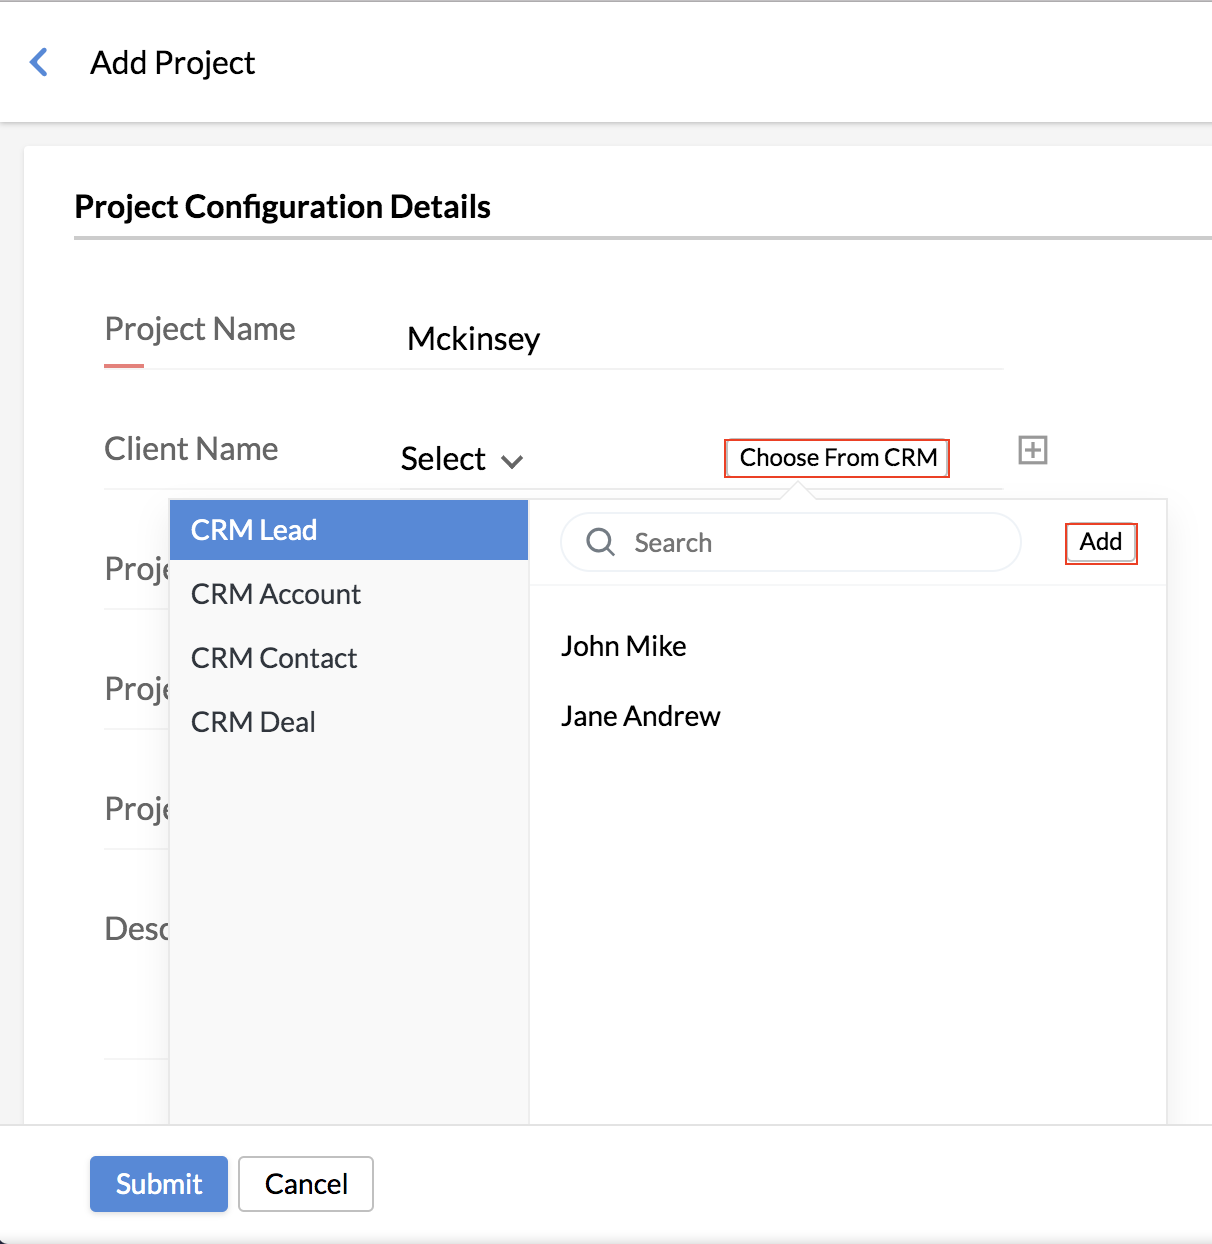
1. While adding a Project, there are two options in which you will be mapping the Project to a Client.
- You can choose an existing Client from the drop-down or from CRM by clicking on 'Choose From CRM'
- You can also add a CRM Client directly here, using the Add option. Enter the Client's details and click Submit to get the Client added into your Zoho People account.
2. The second method of adding a CRM client is using the Import option
- Go to Timesheet > Projects/Jobs > Clients
- Click the ellipsis icon and select Import from Zoho CRM
- Select the Clients from the respective CRM Module, using the drop-down
- Click Submit
Deleting Clients
Follow the steps given below when you want to delete more than one client at one go.
- From your home page, go to Timesheet > Projects/Jobs > Clients
- Select the Clients that need to be deleted
- Click Delete
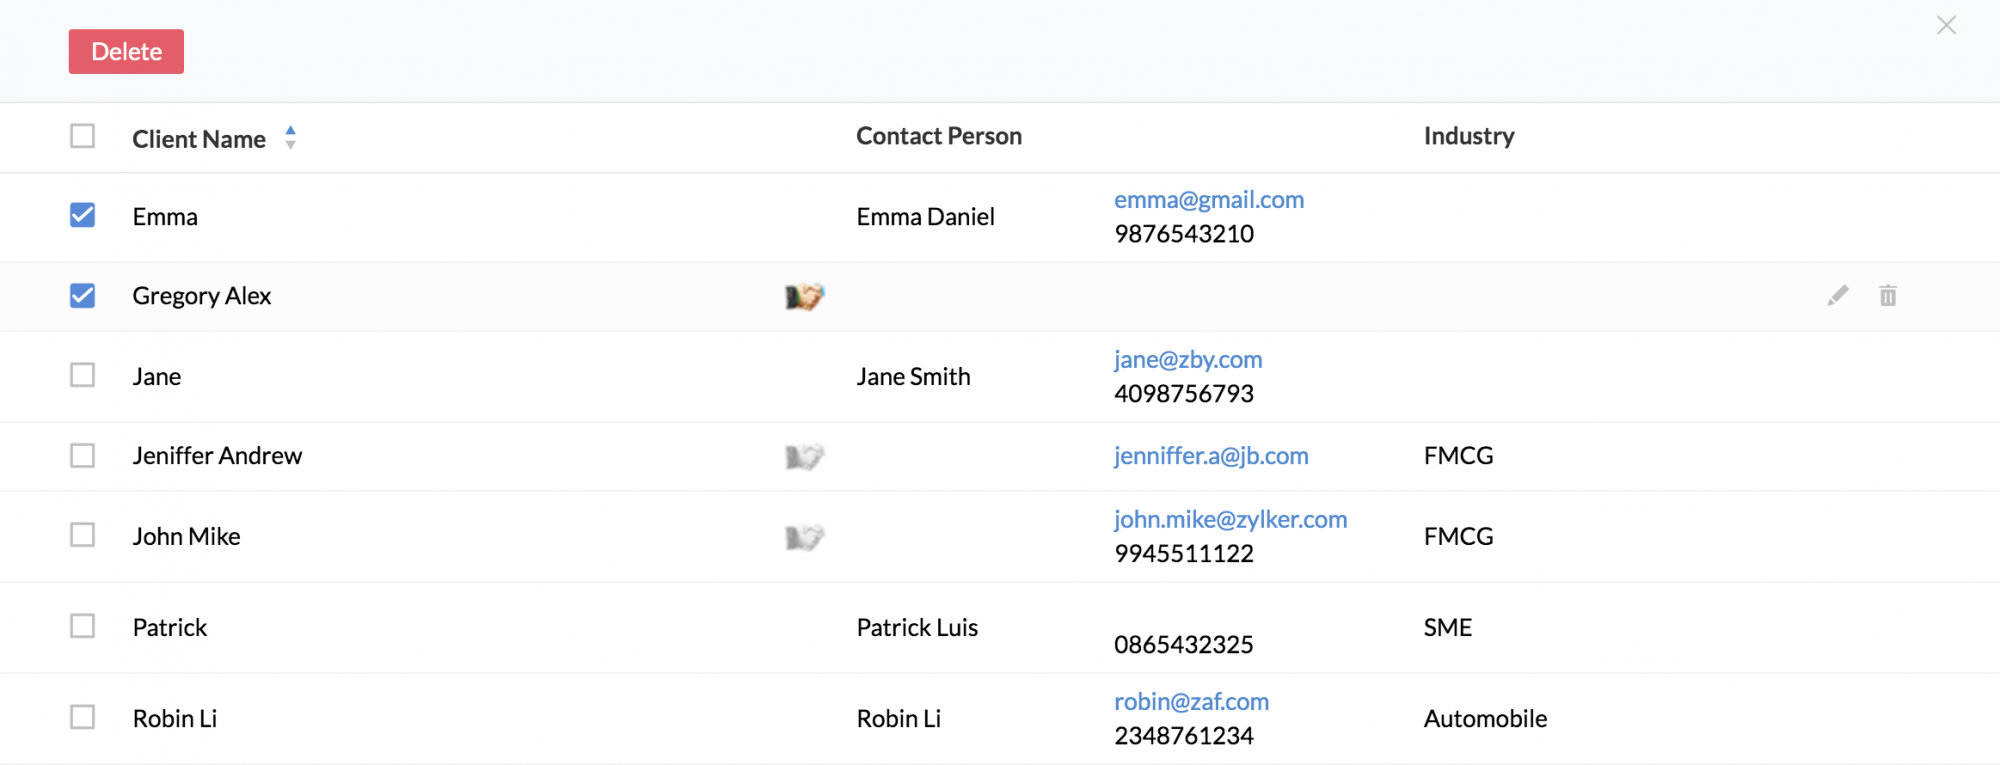
The selected Clients will get deleted.
Viewing Client information
In general, employees will not be able to see the Clients tab. You need to set permissions for an employee to be able to view the Clients tab. Follow the steps given below.
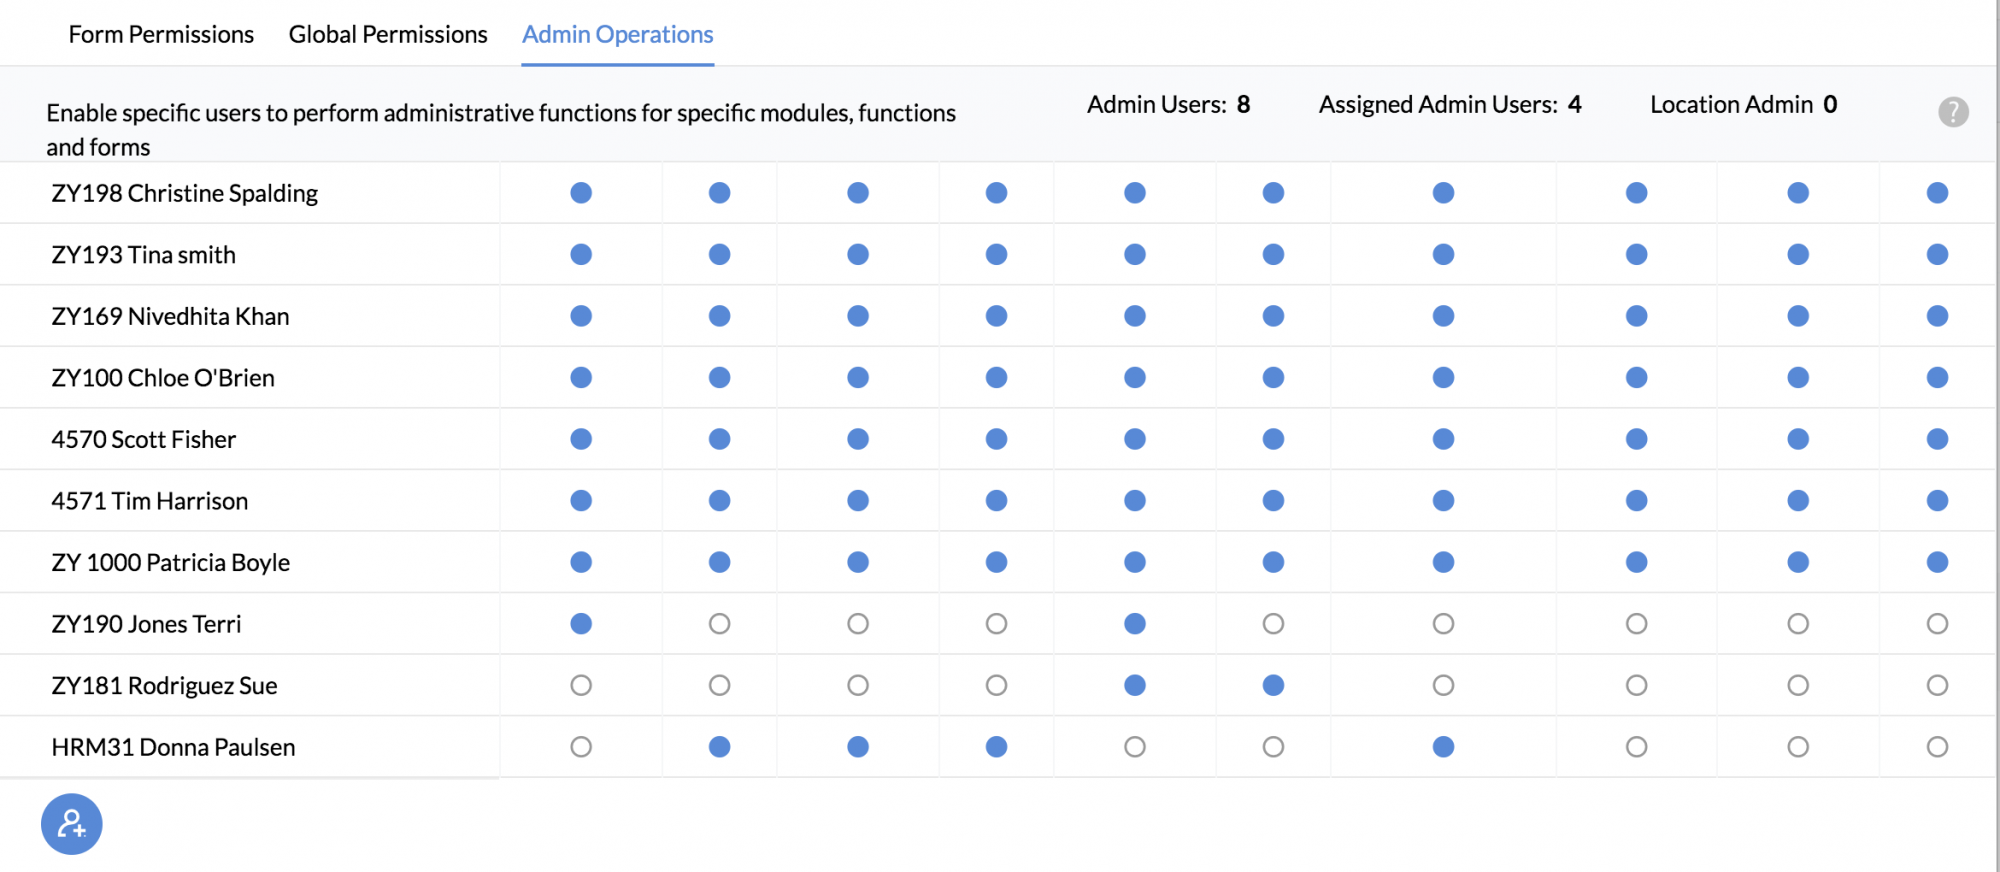
- From your home page, go to Settings (gear icon) > User Access Control > Permissions > Admin Operations
- Click the Add user icon
- Select the User from the drop down
- Under Time Tracker, check the option Data
For employees of certain roles to be able to view Clients tab,
- From your Homepage, go to Settings (gear icon) > User Access Control > Permissions > Form Permissions
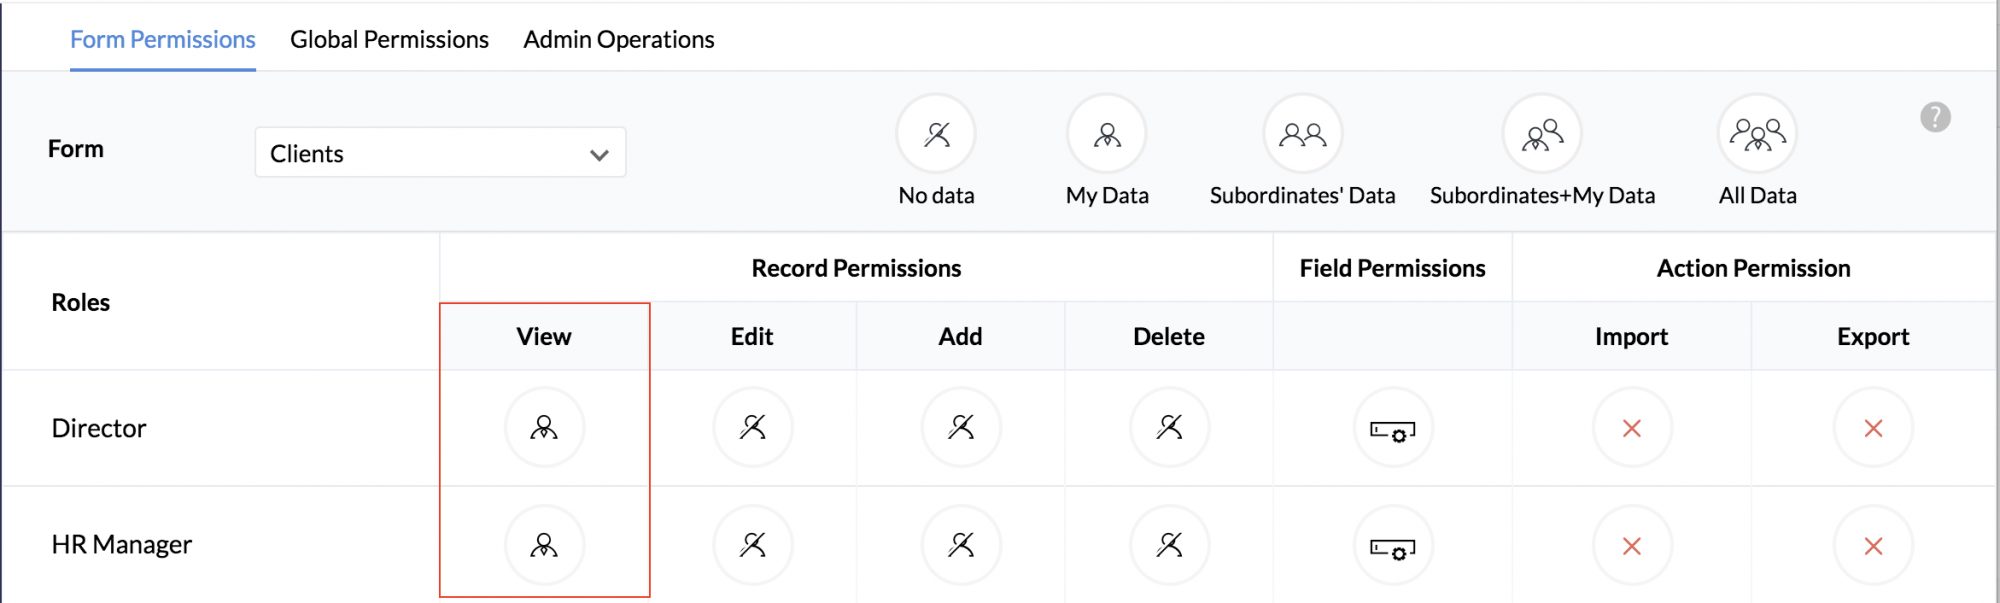
- Select Clients from the Form drop down
- Add the roles to give View permissions for (other than No Data)
The users in the selected roles will now be able to access the Clients tab.