PGP Encryption in Zoho Mail
Pretty Good Privacy (PGP) encryption helps users to send encrypted emails to their recipients ensuring privacy and security of their email content. PGP uses a pair of keys (Public and Private) to encrypt and decrypt emails. In addition to encryption, emails can be digitally signed by hashing ensuring the legitimacy of the sender.
The integration of PGP with Zoho Mail will help the users generate and store Public and Private keys right from within their mailbox. They can use the keys (generated within Zoho Mail or any other platform) to encrypt and digitally sign the emails they send.
- This feature is available only to organizations that have subscribed to one of our paid plans.
- As of now, this feature is available for users in US, EU, IN and AU DCs. It will be enabled for other DCs in a phased manner.
How does PGP work?
PGP works based on numerical encryption using public and private keys. For example, when User A wants to send an encrypted email to User B, the later generates a pair of public and private keys. The private key is kept secret and the public key should be shared with User A.
User A encrypts the email using the public key of User B and digitally signs the email using the former's private key and sends the email. To decrypt the email, User B needs to use the passphrase for the private key associated with the public key used to encrypt the email.
Enable PGP integration in Zoho Mail
Admin Configuration
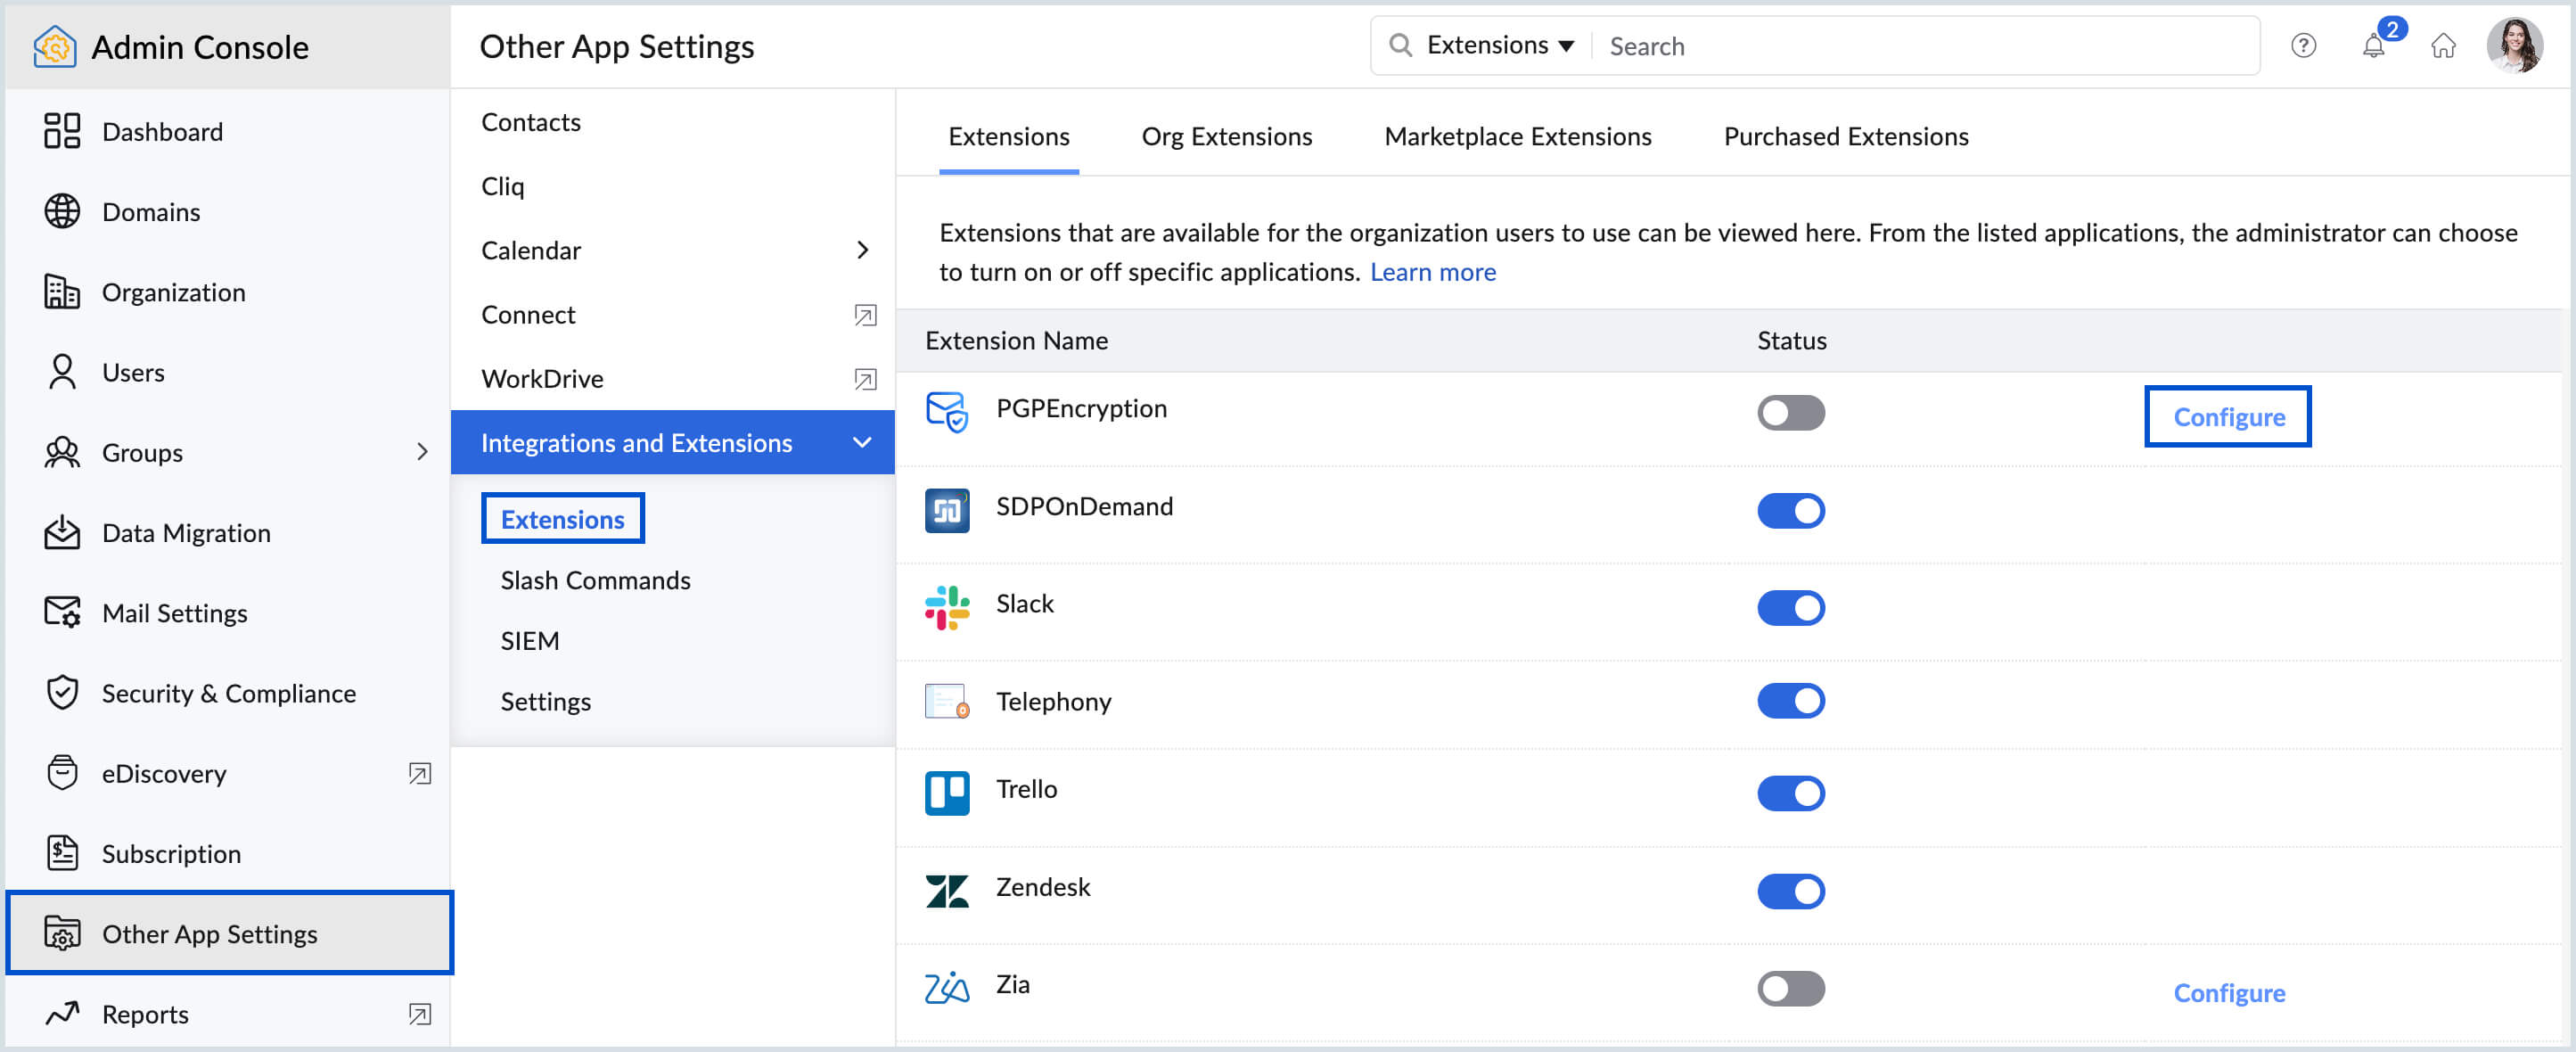
The users in an organization can access PGP integration only when the organization admin enables it from the Zoho Mail Admin Console. To enable access the admin should navigate to Zoho Mail Admin Console > Other App Settings > Integrations and Extensions > Extensions. Scroll down to PGP and click Configure. Learn more about configuring PGP integration for your organization.
Turn ON the Enable PGP Encryption toggle switch. Once enabled the organization users can configure PGP integration from settings, generate and import keys, send and receive PGP encrypted emails from Zoho Mail.
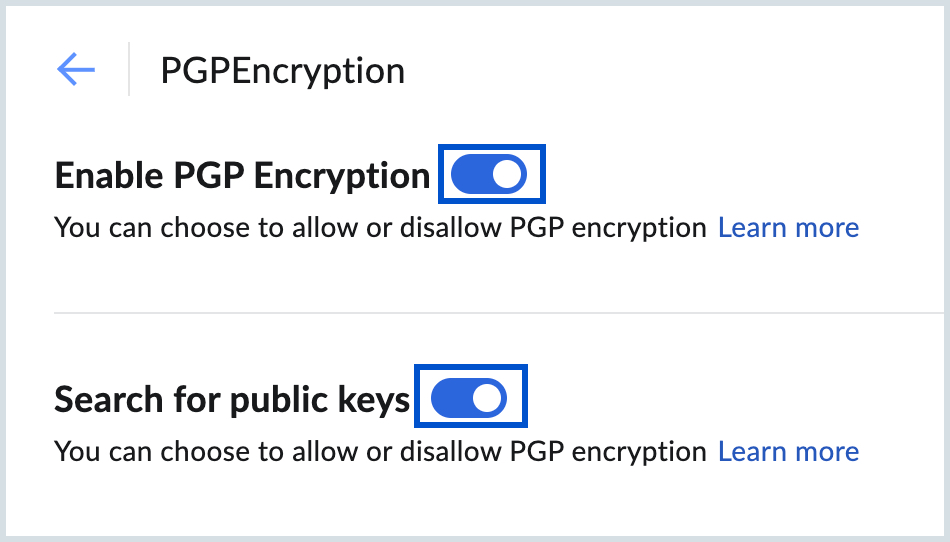
The admin can also choose to allow the organization users to search for the public keys of the recipients from other public key servers. To enable this option, turn ON the Search for public keys toggle switch. Learn more about searching public keys of your recipients.
User configuration
Once Admin enables the integration, to start sending and receiving PGP encrypted emails, you should either generate a pair of public and private keys or import them from local storage have them saved to your account.
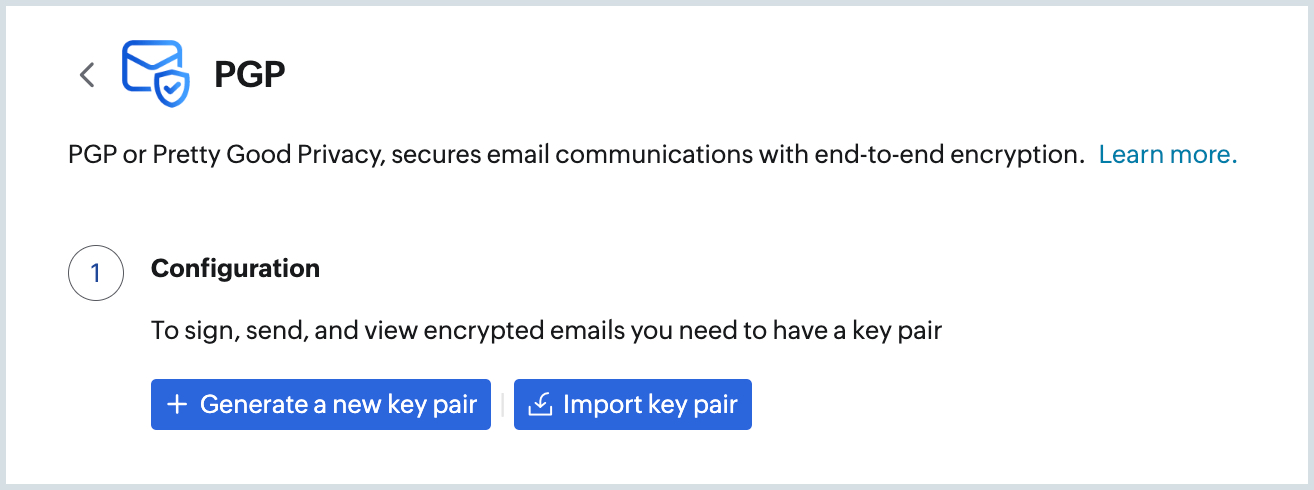
Key pairs for your account
Important components in a key pair
- Name - The name you provide for the key pair for easy identification.
- Email address - The email address with which the key pair is associated.
- Status - Valid/ Revoked. Only the valid key pairs can be used to encrypt and decrypt the emails.
- Key ID - The key ID will help you to identify the public key of yours using which the email has been encrypted.
- Passphrase - The passphrase will be used to sign digitally and decrypt emails using your private key corresponding to the public key used for encryption.
- Algorithm - The type of algorithm (RSA or ECC - Curve25519) used for encryption.
- Length - The key size (2048 or 4096) which is measured in Bits.
The Keys generated in Zoho Mail will be encrypted and stored in Zoho Database using AES algorithms. Only the user who generates or imports a key pair can access the private key. The public key can be fetched by the organization users via the PGP extension in the e-widget.
Generate new key pair
To generate a new key pair:
- Log in to Zoho Mail.
- Navigate to Settings > Integrations > Extensions > PGP.
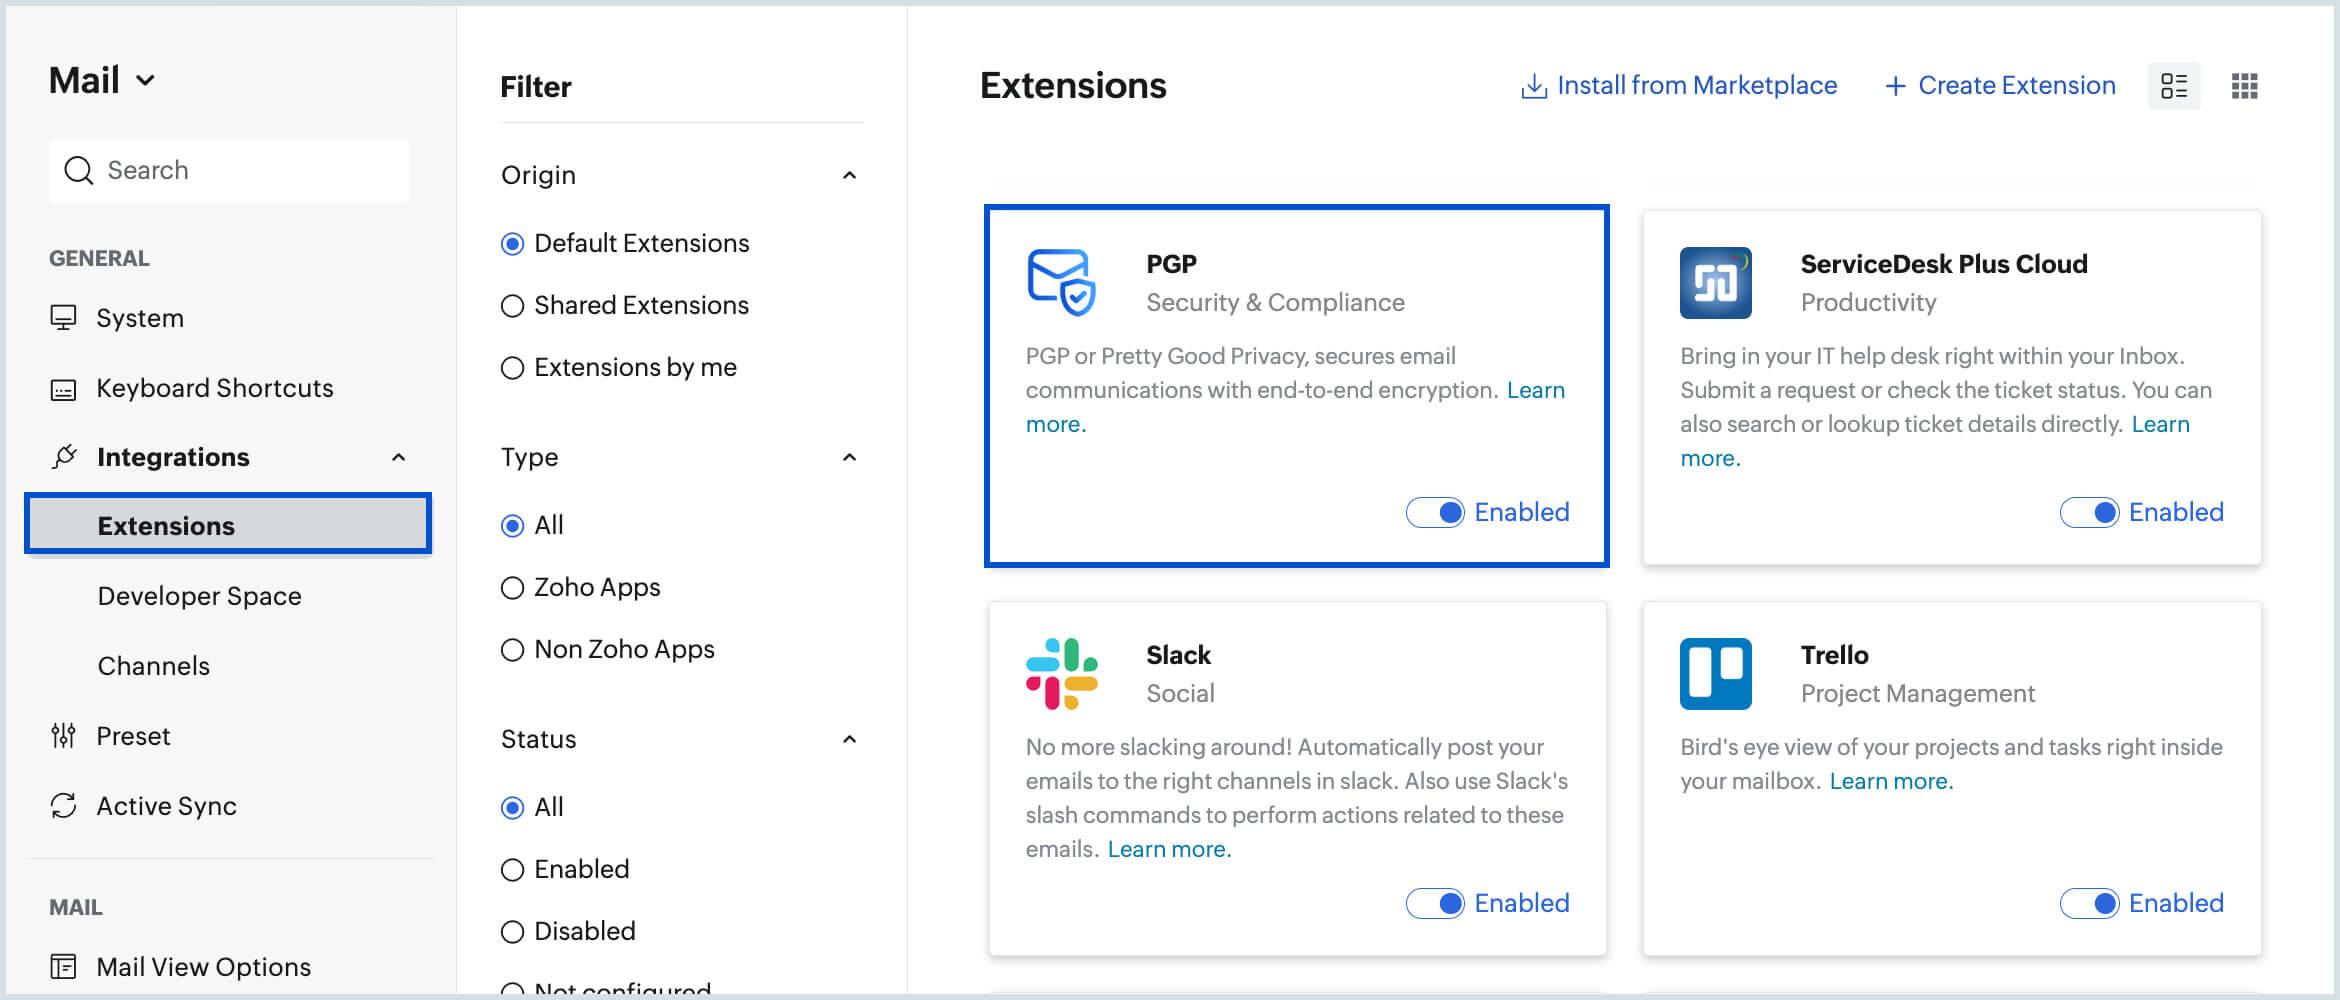
- Click on the PGP integration card.
- Click Generate a new key.
- Choose the Email address or Email alias for which you want to generate the keys.
- Provide a name for the key pairs.
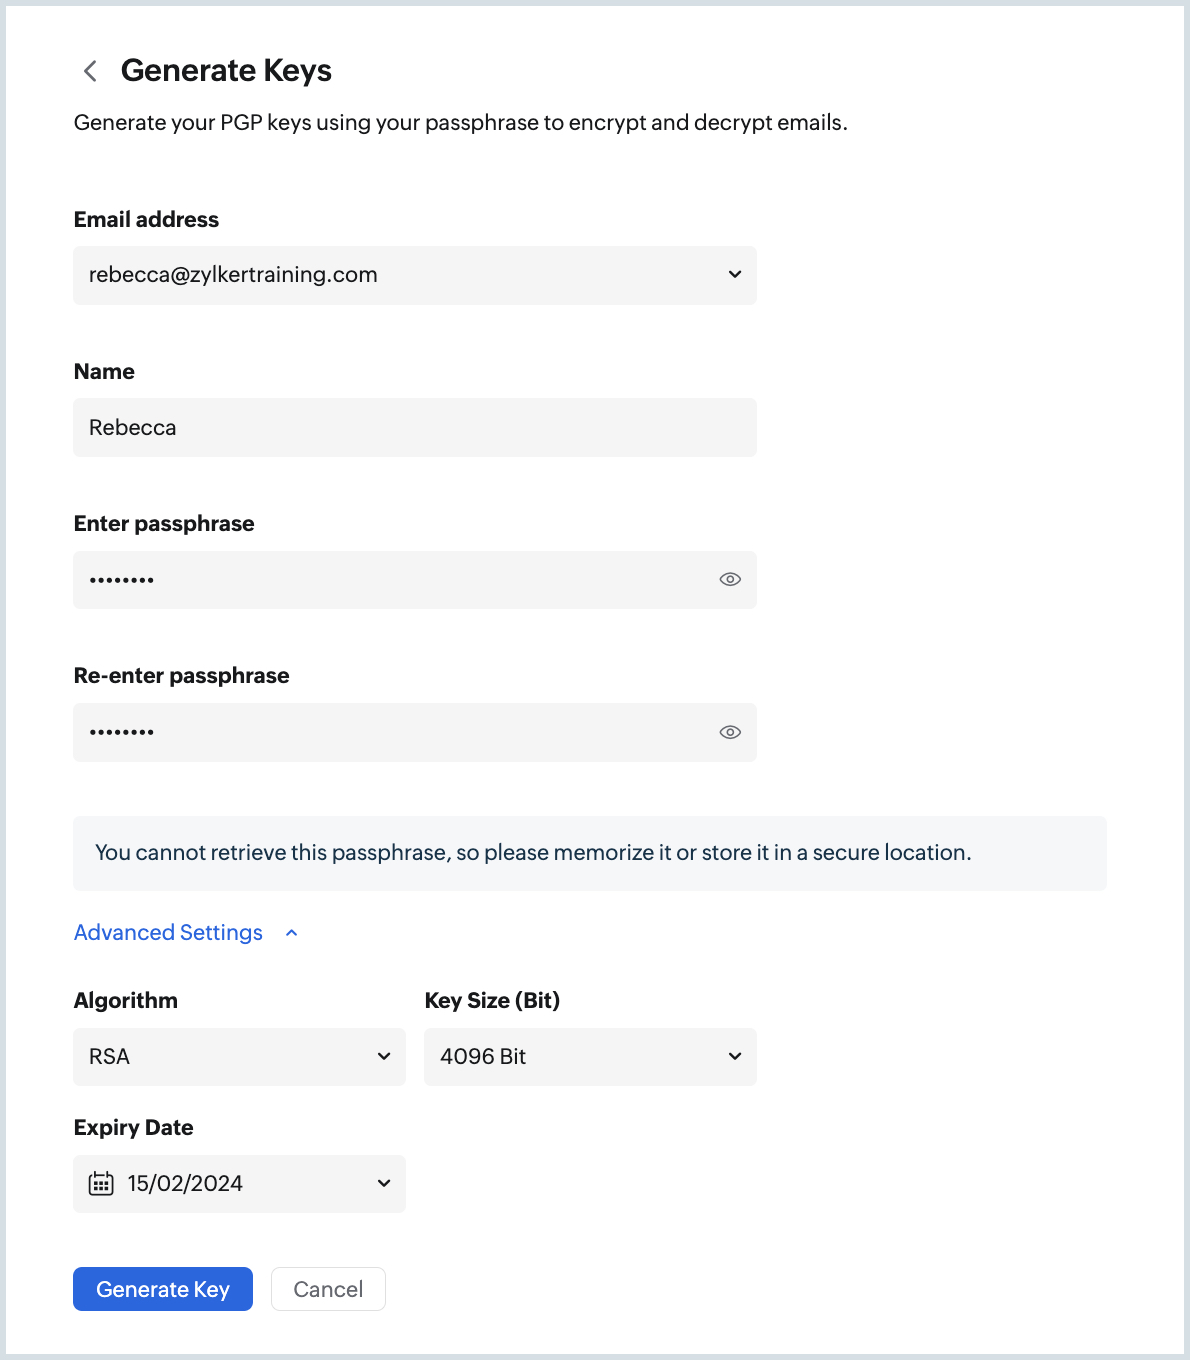
- Provide and confirm a Passphrase for the key pair. This Passphrase will be used to sign the email and decrypt an email.
- Passphrase must include at least one special character, one number, and both uppercase and lowercase letters.
- You should either memorize the passphrase or save it in a password manager. You cannot recover the password if you forget it.
- Click Advanced Settings to choose the Algorithm type (RSA or ECC - Curve25519) and the Key size (2048 or 4096 Bits).
- You can also choose to provide an Expiry date for the key pairs you generate.
- Click Generate Key.
A pair of private and public keys will be generated and will be associated with the primary email address or the email alias chosen.
Note:
You cannot associate any IMAP/ POP email address added to your account while generating the key pairs.
Set an expiry date for the key pair
When you generate a key pair in Zoho Mail, you can have an expiry date set for the key pair generated. Once the key pair expires, it cannot be used to encrypt or sign an email. You have to generate a new key pair to send and receive encrypted emails.
You can also modify the expiry date of the keys within the key details, even after the keys have been generated. However you can still decrypt the emails that have already been sent to you encrypted using the public key that has expired.
Import key pairs for your account
You can import key pairs generated and associated with your primary email address or email aliases from other key service providers. You can also import a key pair that has been generated in Zoho Mail but exported and deleted from your account.
To import a key pair to your account:
- Log in to Zoho Mail.
- Navigate to Settings > Integrations > Extensions > PGP.
- Click Import key pair under the My keys section.
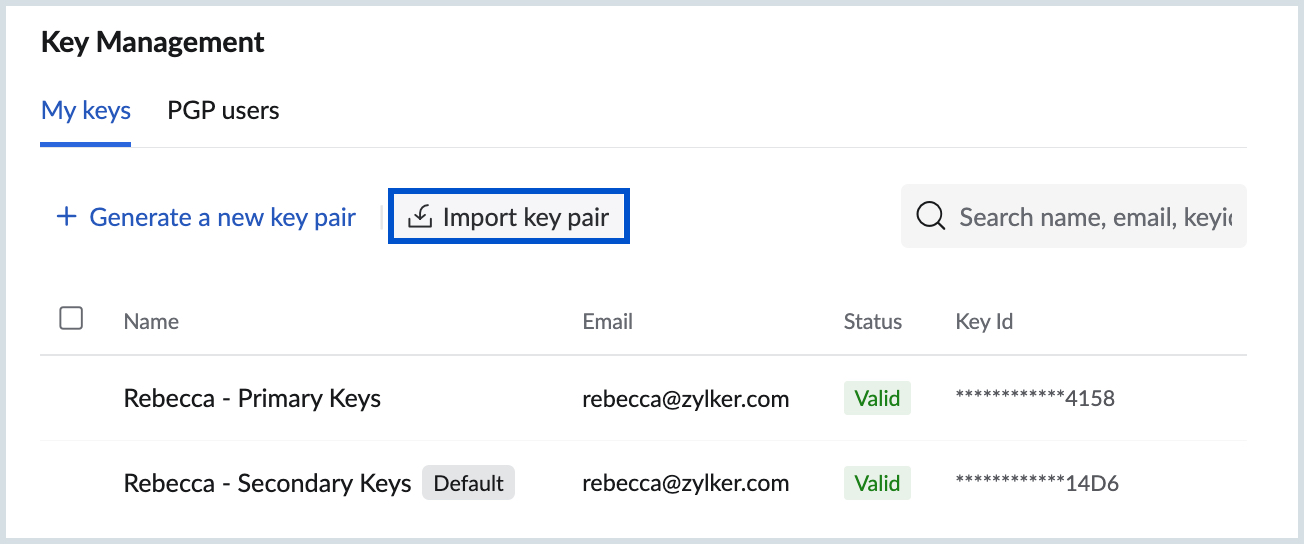
- You can import the key pair from your local storage or paste the key copied from your clipboard.
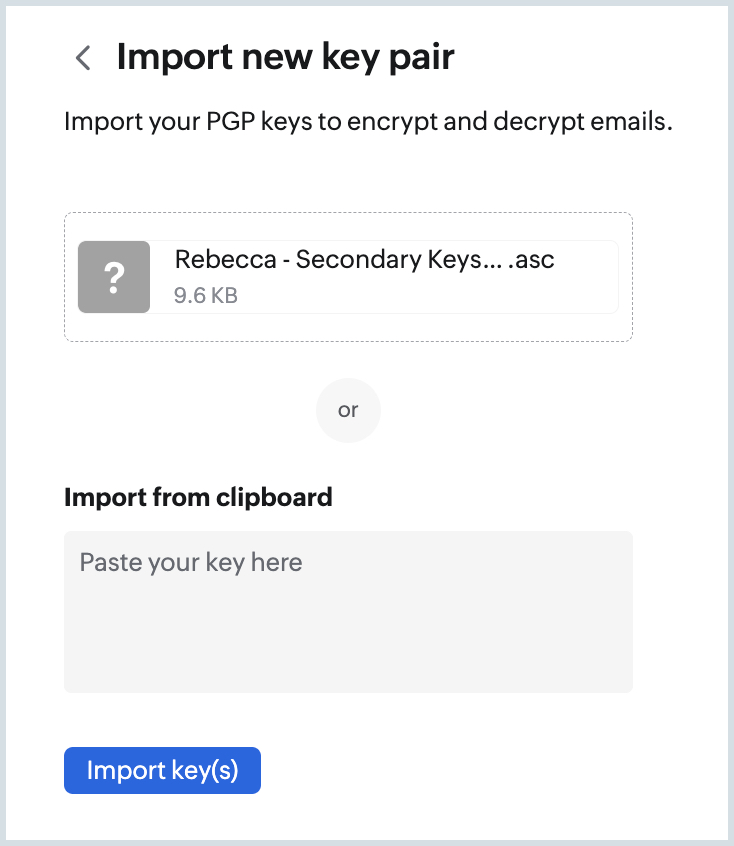
- Click Import keys.
- You can check the Key ID and the Email address with which the key pair has been associated.
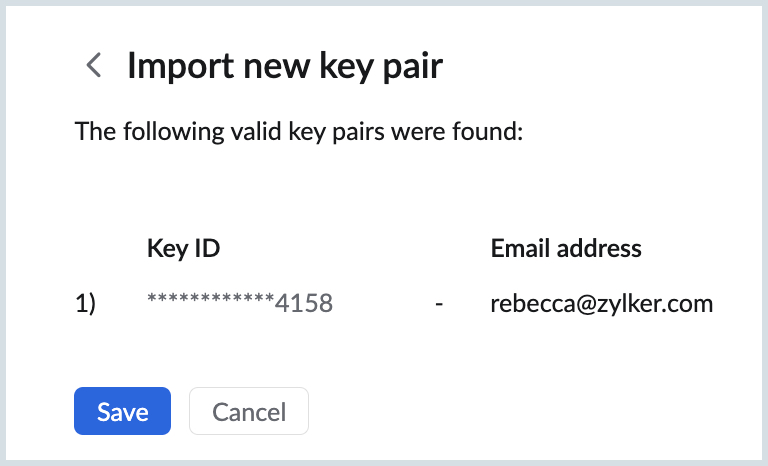
- Click Save.
Once generated the key pairs associated with your primary email address/ email aliases will be listed under the My keys section.
You can click on the key pair to view the details such as Key ID, Associated email address, etc.,
Default key pair
The generated and imported key pairs will be listed under the My Keys section. You can mark a key pair to be Default for the emails sent via a particular email address/ email alias. The default key pair will be used to sign the email whenever you send a PGP-encrypted email using the email address/ email alias.
To mark a key pair default:
- Log in to Zoho Mail.
- Navigate to Settings > Integrations > Extensions > PGP.
- Navigate to the My Keys section.
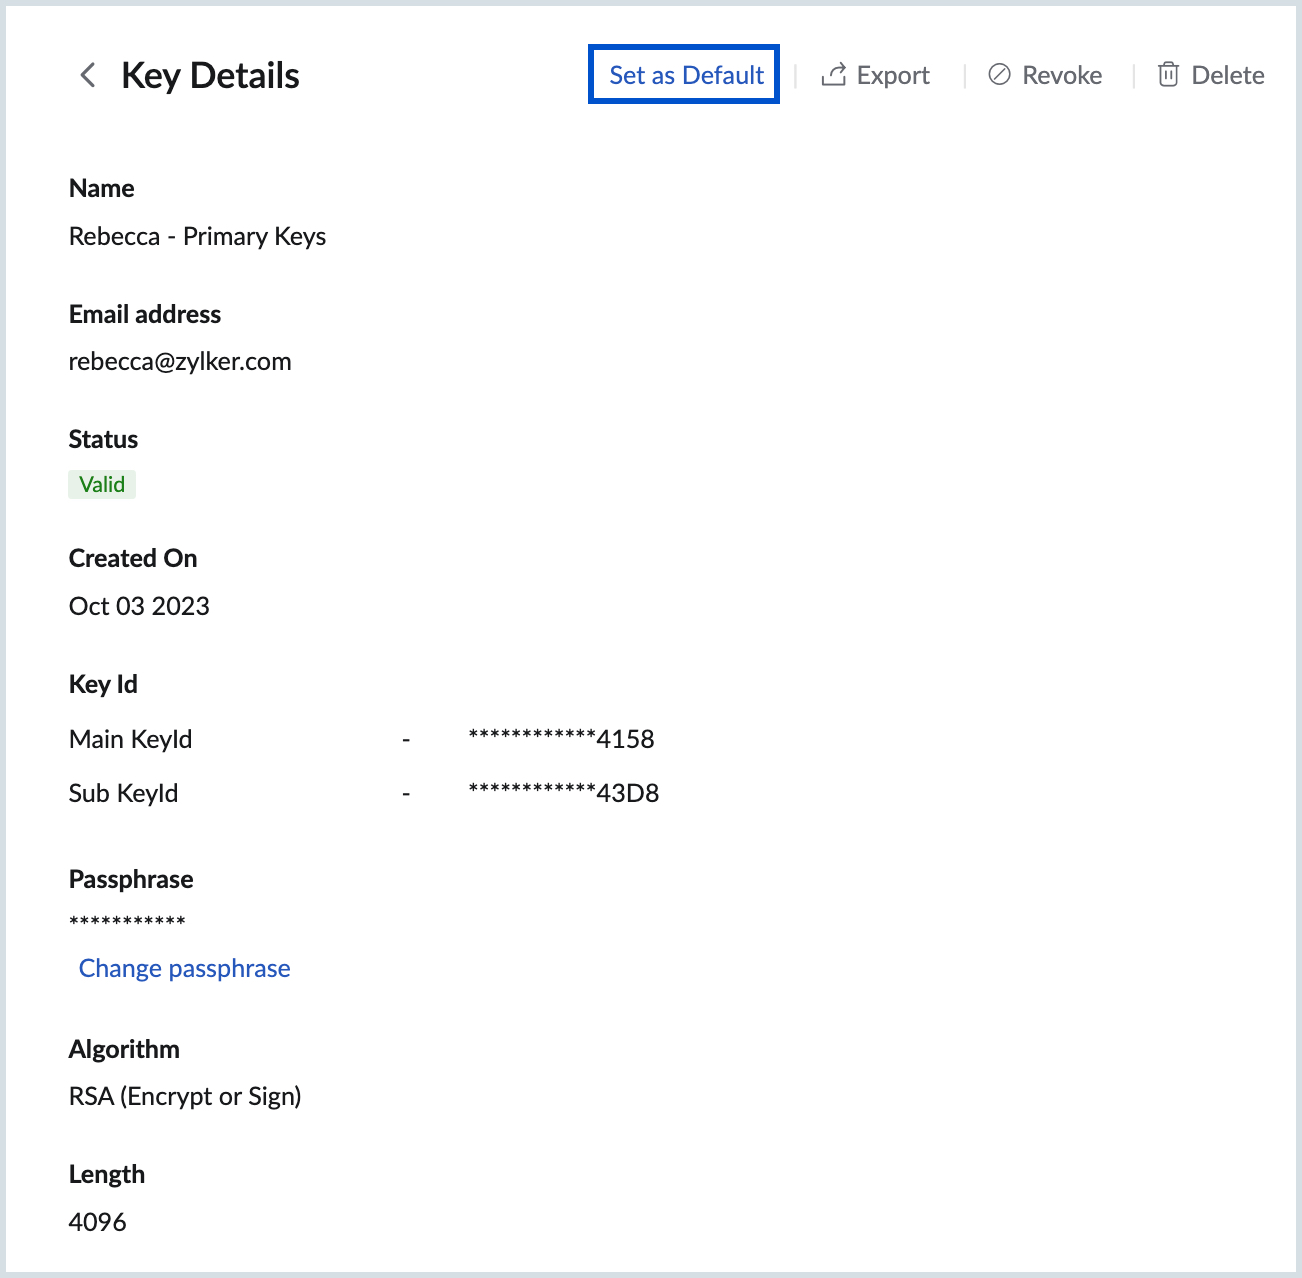
- Click the key pair you want to mark as Default.
- Click the Set as default button on the key pair details page.
The key pair will be set as default to encrypt and sign the emails sent using the particular email address associated with the key pair.
Keys of recipient PGP users
To send and receive emails encrypted using PGP, both the sender and receiver should have access to the public keys of each other. To send emails to your recipients, the public key associated with their email addresses should be saved to your account.
You can import multiple public keys for a particular recipient. When you import multiple keys you can choose a default public key for the user to send them encrypted emails. You can choose to change the default key anytime from the PGP users section.
To import a public key of a PGP user:
- Log in to Zoho Mail.
- Navigate to Settings > Integrations > Extensions > PGP.
- Navigate to the PGP users section.
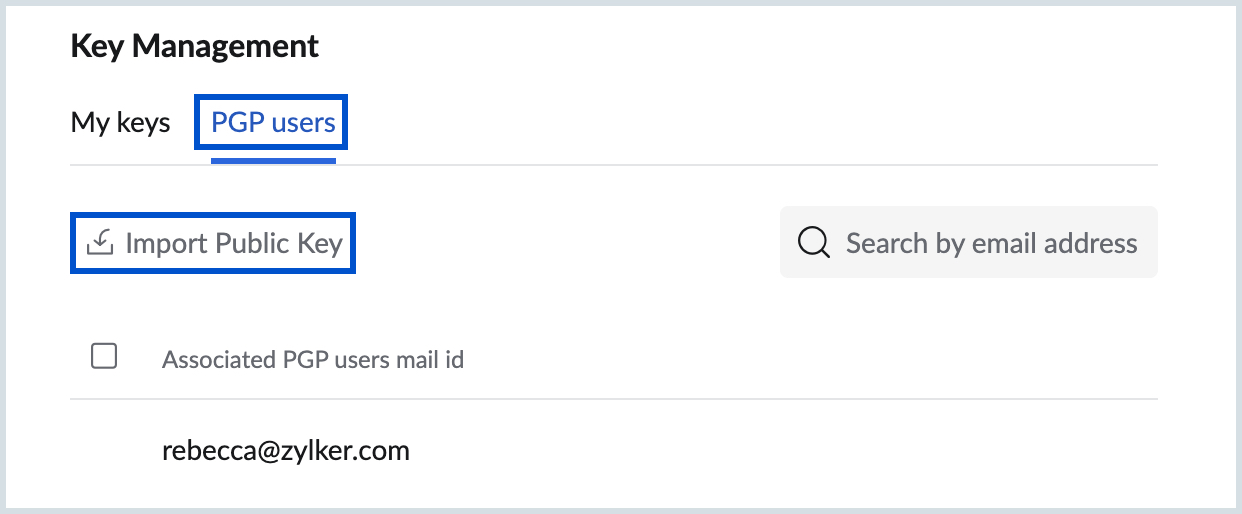
- Click Import public key.
- You can upload a public key file saved to your computer or paste the key copied from your clipboard.
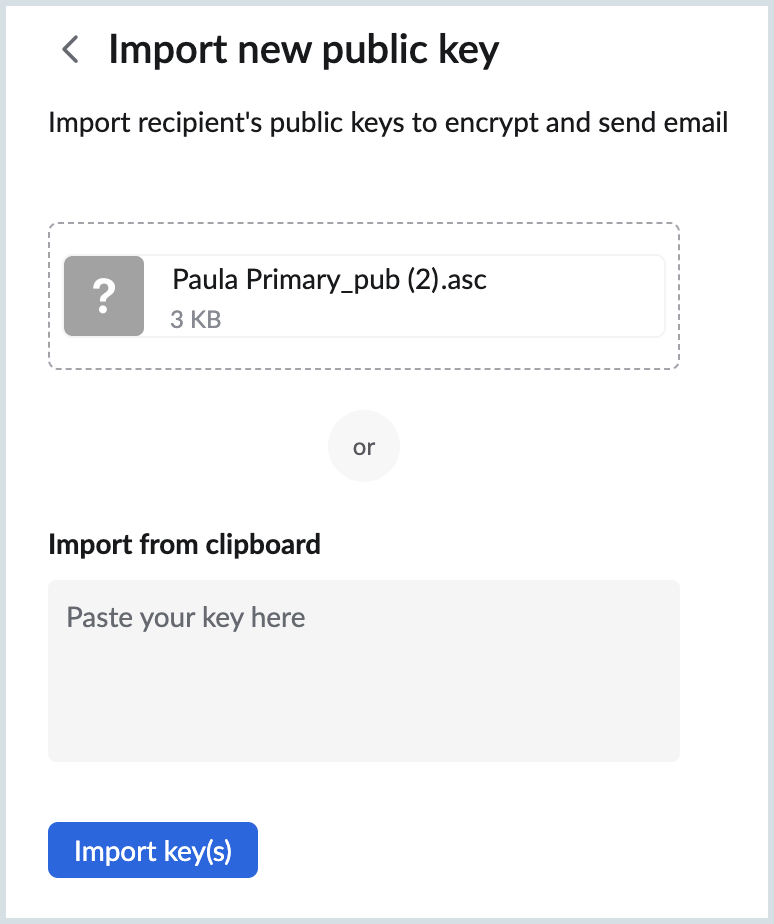
- Click Import key(s).
- Verify the Key ID and the Email address of the PGP user.
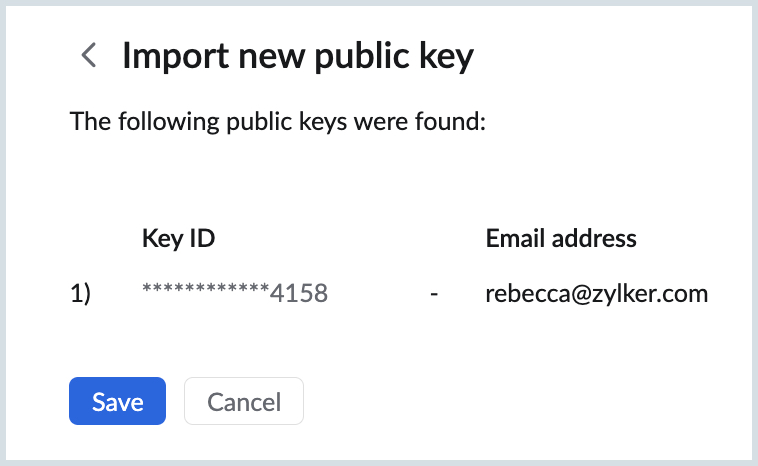
- Click Save
The public key will be imported and can be used to encrypt emails sent to the PGP user.
When you import multiple public keys for a PGP user, you can choose a default key to be associated automatically whenever you send an encrypted email.
You can also import the public keys of your recipients (either from within the organization or outside the organization) using the PGP extension in eWidget. Learn more about the PGP extension in eWidget.
PGP Schemes
The schemes that are available to encrypt your emails using PGP encryption are Inline and MIME schemes. By default, your emails will be encrypted using the PGP/ MIME scheme.
You can choose to change the scheme by following the steps given below:
- Log in to Zoho Mail.
- Navigate to Settings > Integrations > Extensions > PGP.
- Choose the preferred scheme from the Default PGP scheme drop-down.
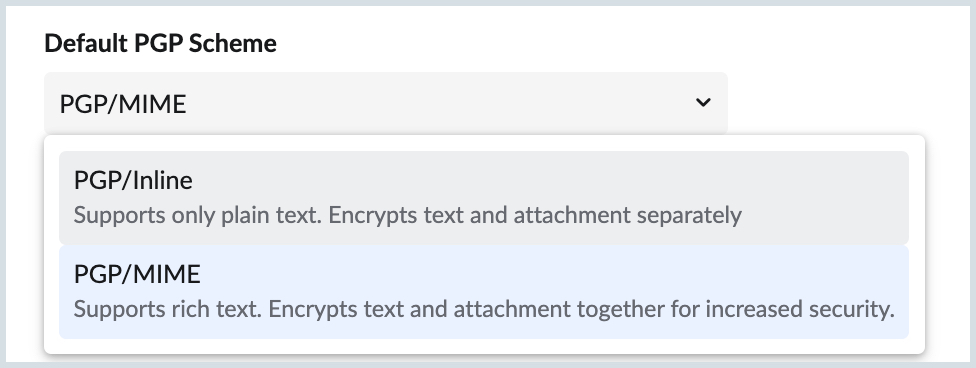
Difference between the two schemes
| PGP/ Inline | PGP/ MIME (Default scheme) |
|---|---|
| Supports only Plain text content as HTML support by this scheme is limited. | Supports Rich text formatting of email content. |
Encrypts the text and attachments separately. Hence, the encrypted text can be copied and decrypted from any other clients that support PGP. | Encrypts the text and attachments in an email together as a single encrypted file increasing the security of the email. |
Sample encrypted emails
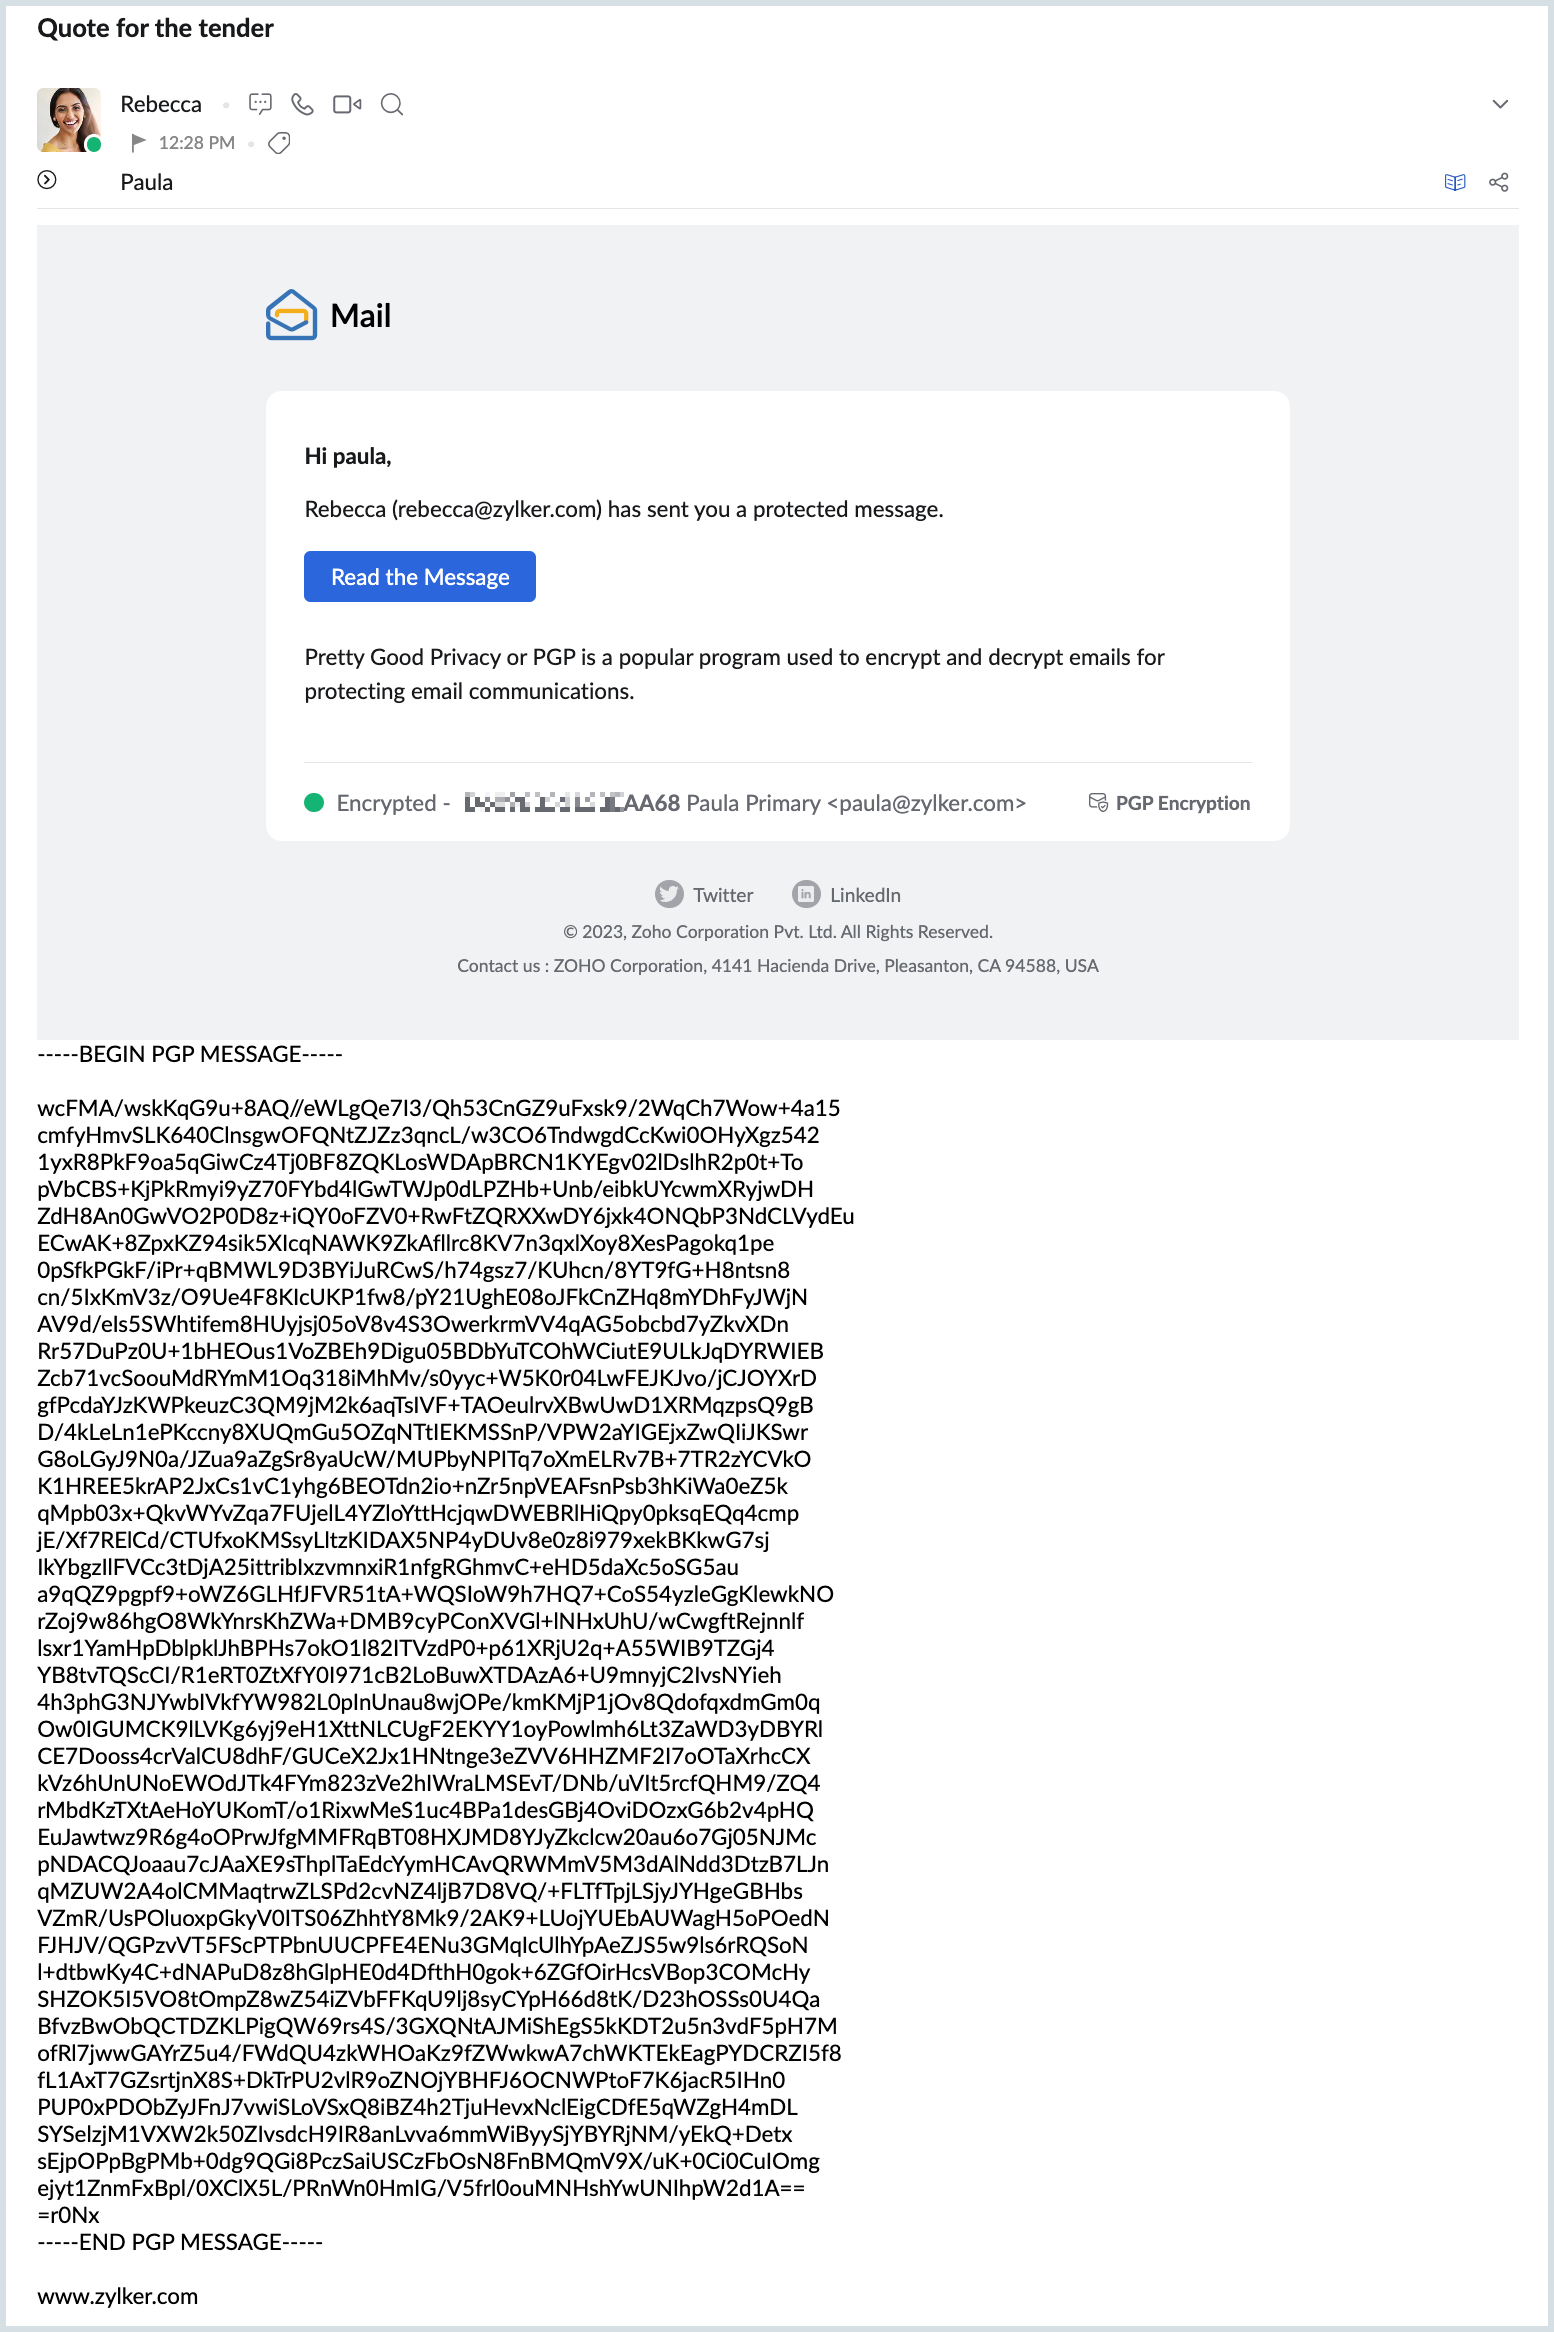
Inline scheme without attachment
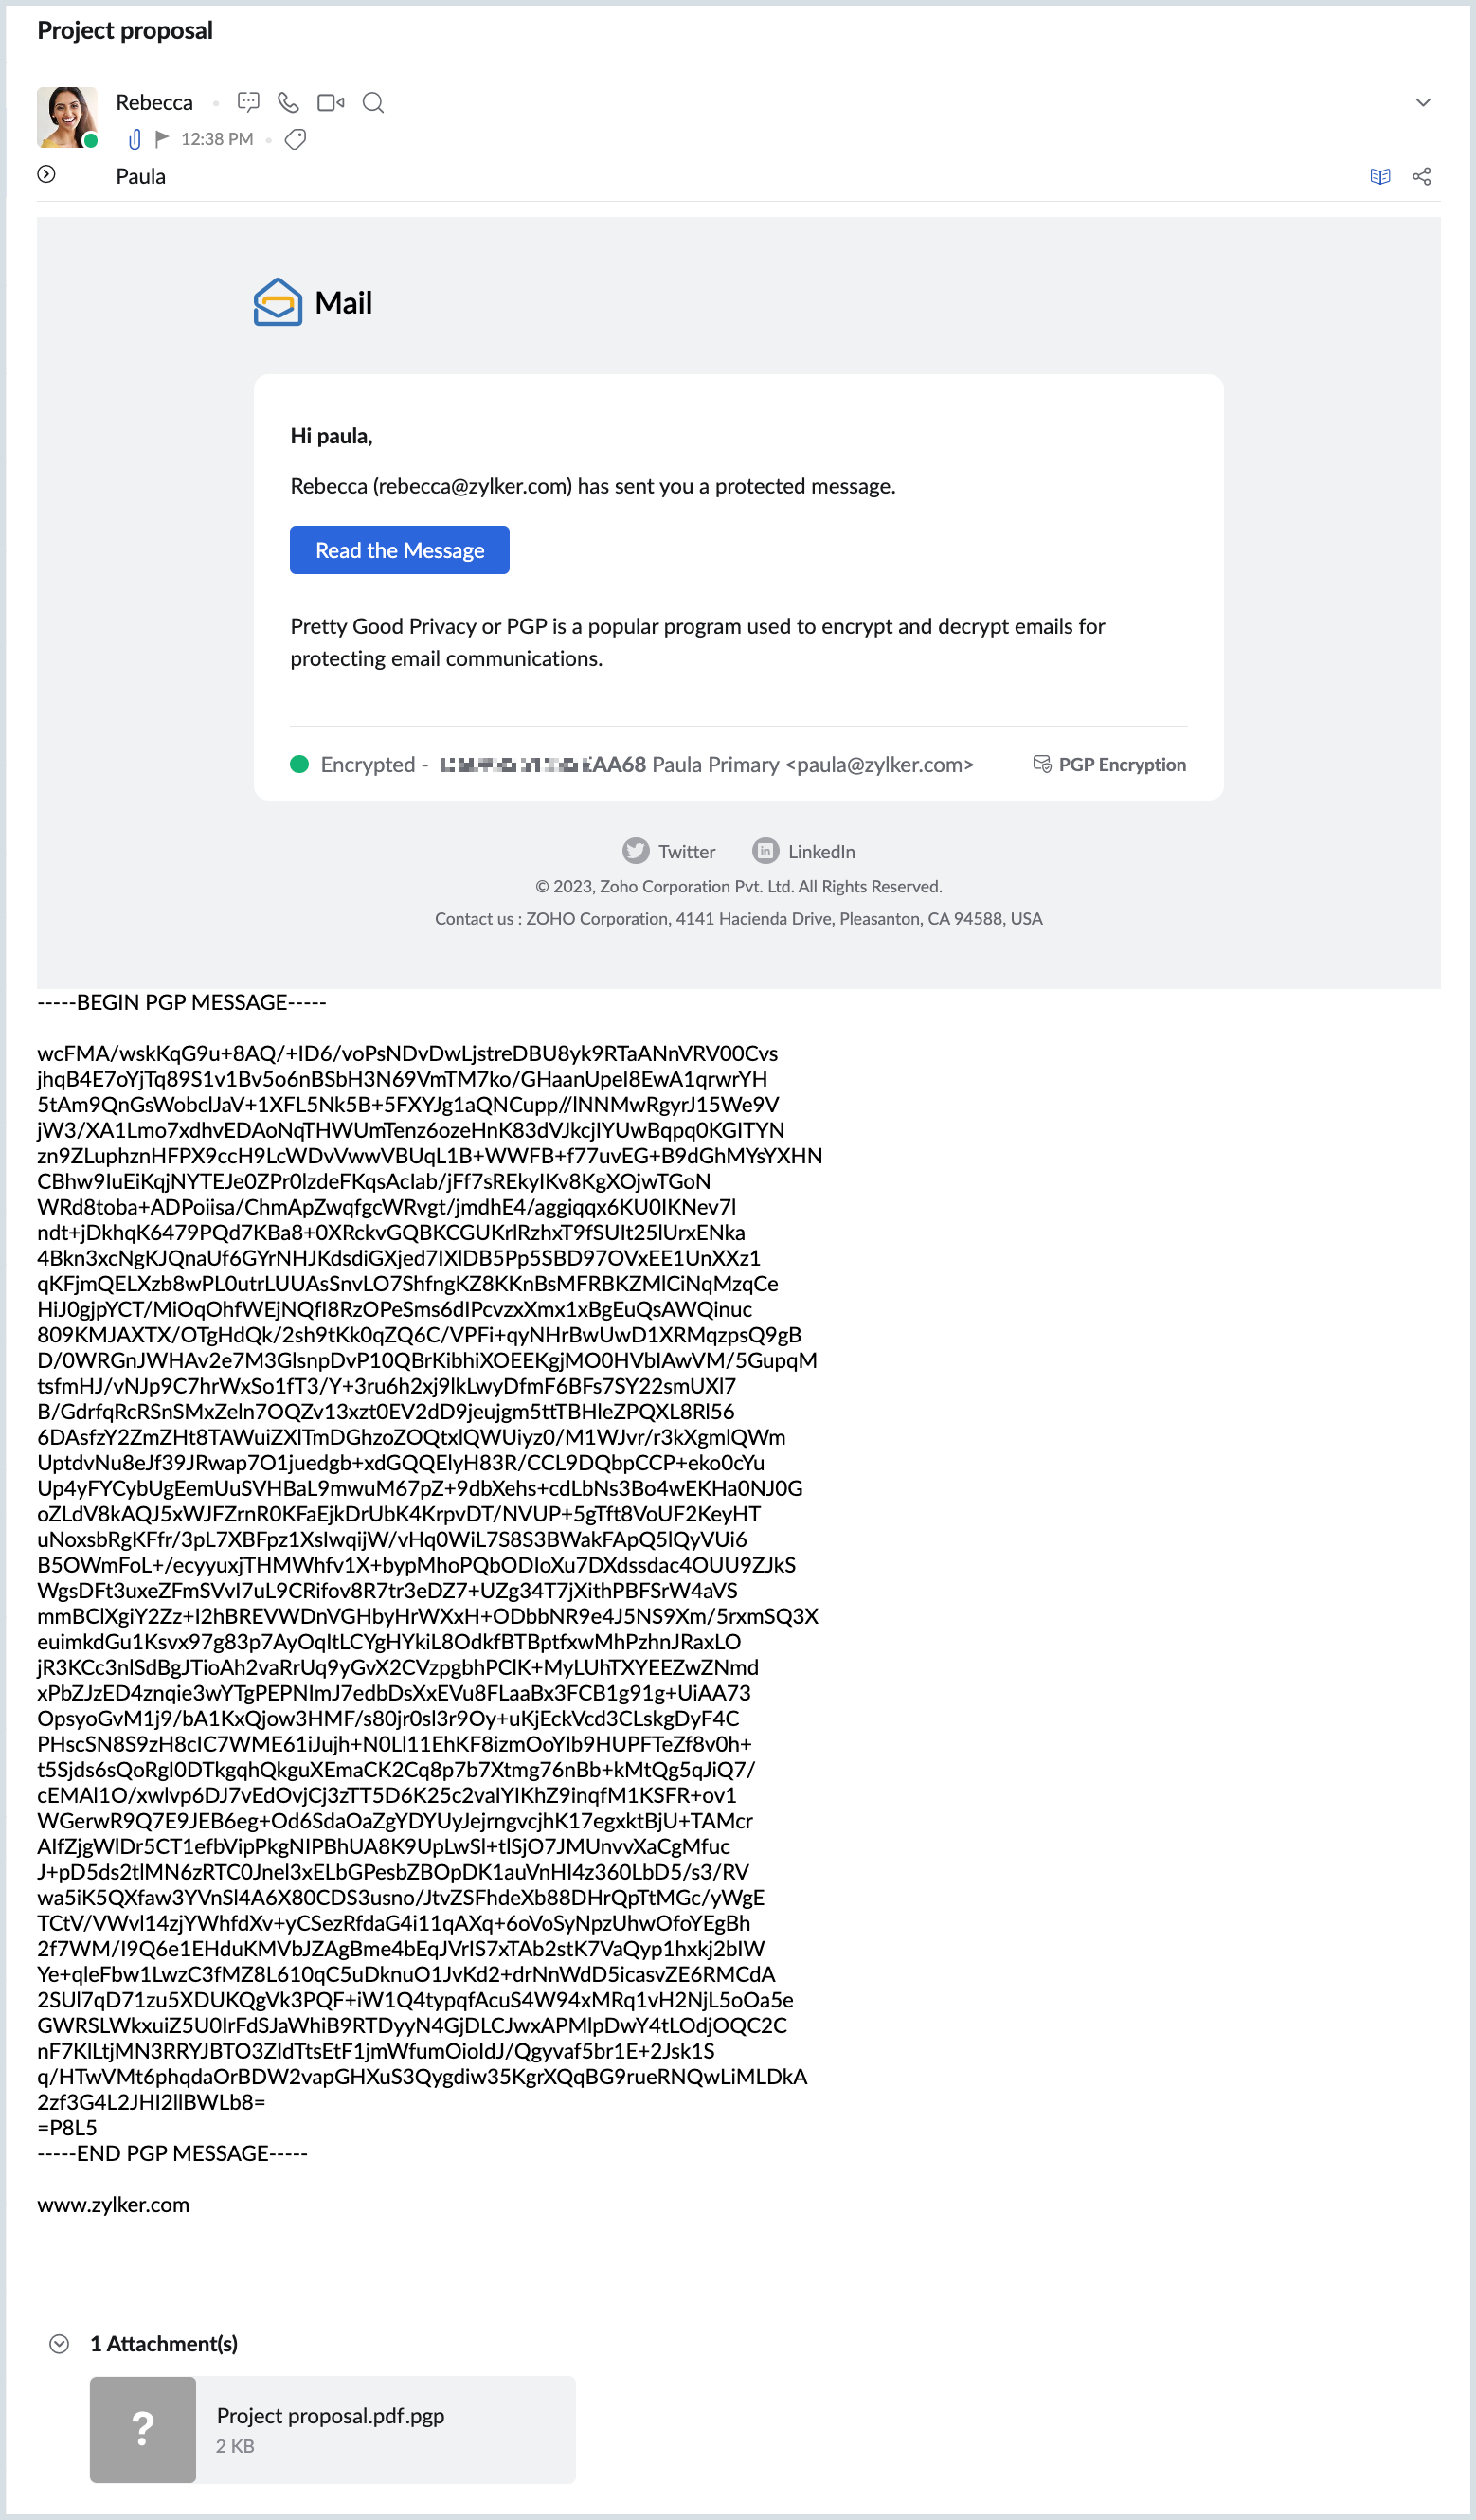
Inline scheme with attachment
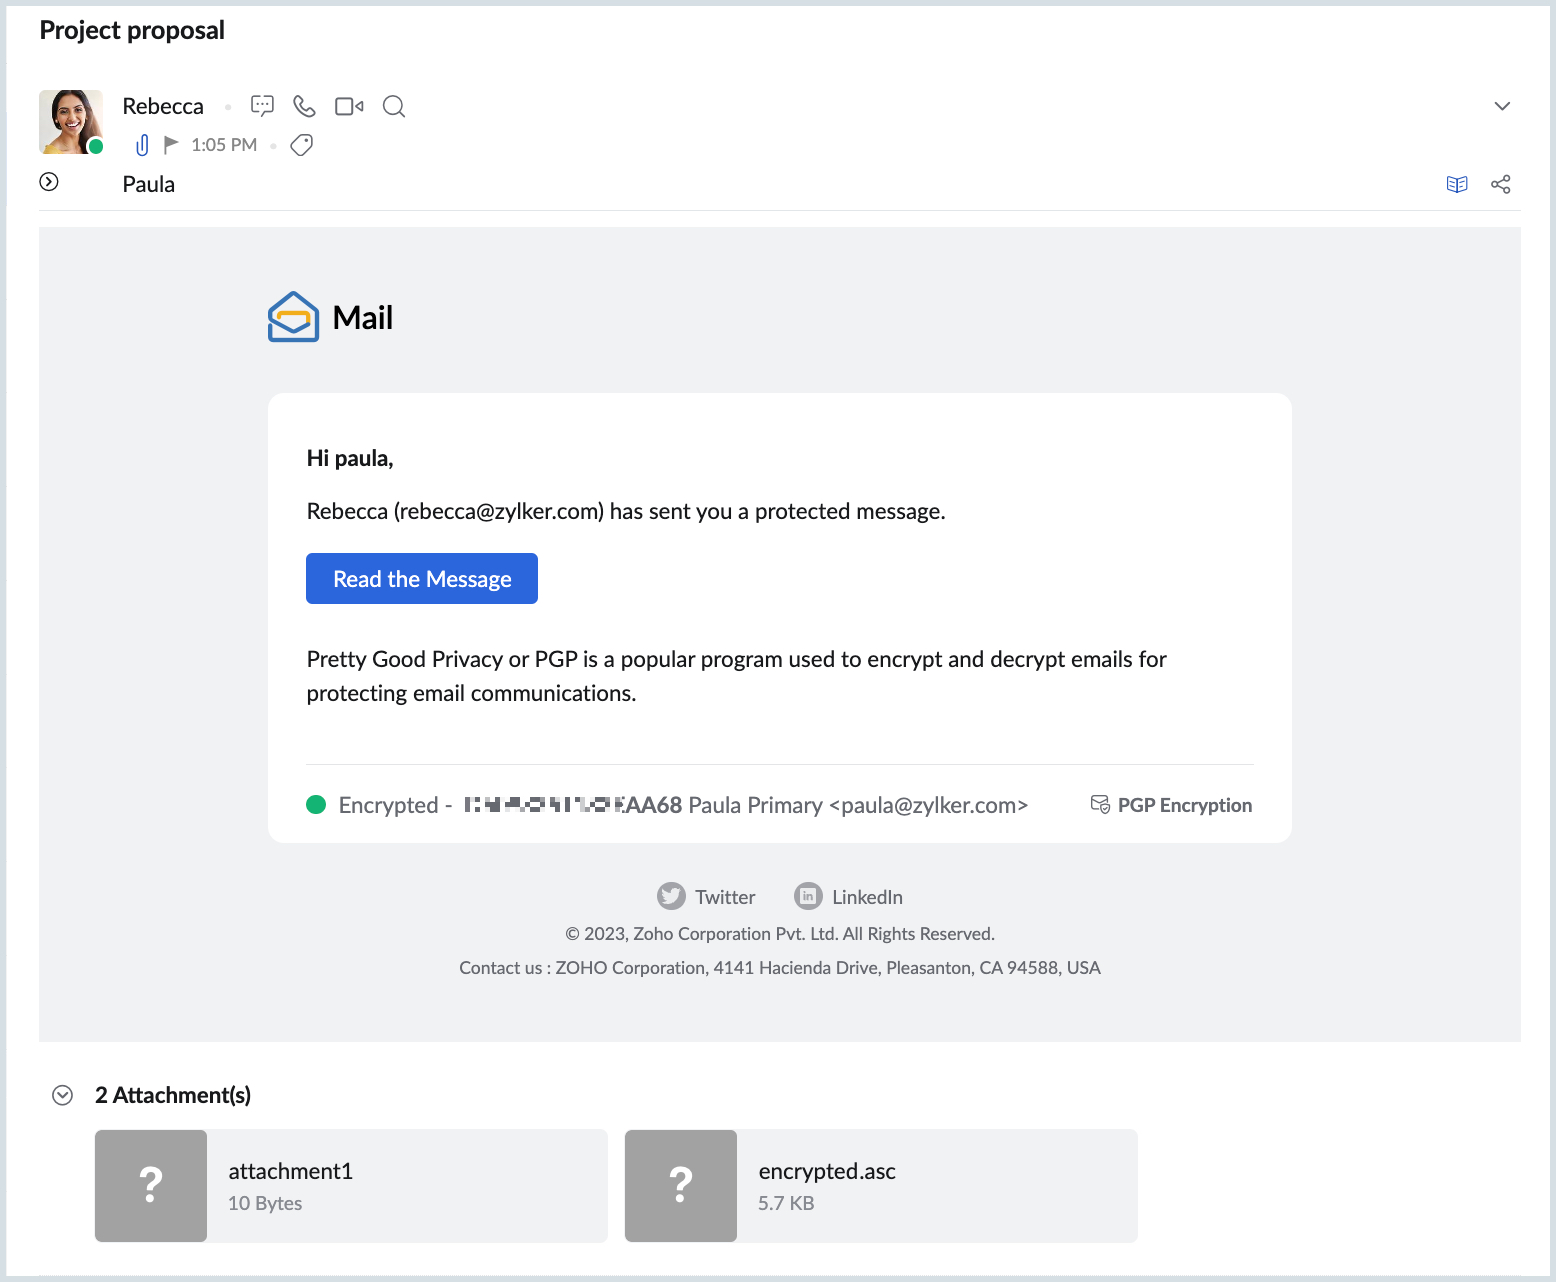
MIME scheme with/ without attachment
As the content and attachment are encrypted together, the encrypted email appears the same with/ without attachments.
The two attachments in the encrypted email (using MIME scheme) are:
- Encrypted email content with/ without attachment
- MIME version file (Based on RFC standards)
Key management
The private and public keys generated for or imported to your account and the public keys of PGP users imported or saved can be managed from the Zoho Mail settings.
Search keys
You can use the Search bar on the My Keys and PGP users section to search for keys using the email address, name, or key ID.
Change passphrase
You can change the passphrase of the key pairs generated for your account.
To change the passphrase:
- Log in to Zoho Mail.
- Navigate to Settings > Integrations > Extensions > PGP.
- Go to the My Keys section.
- Click the key pair for which you want to change the passphrase.
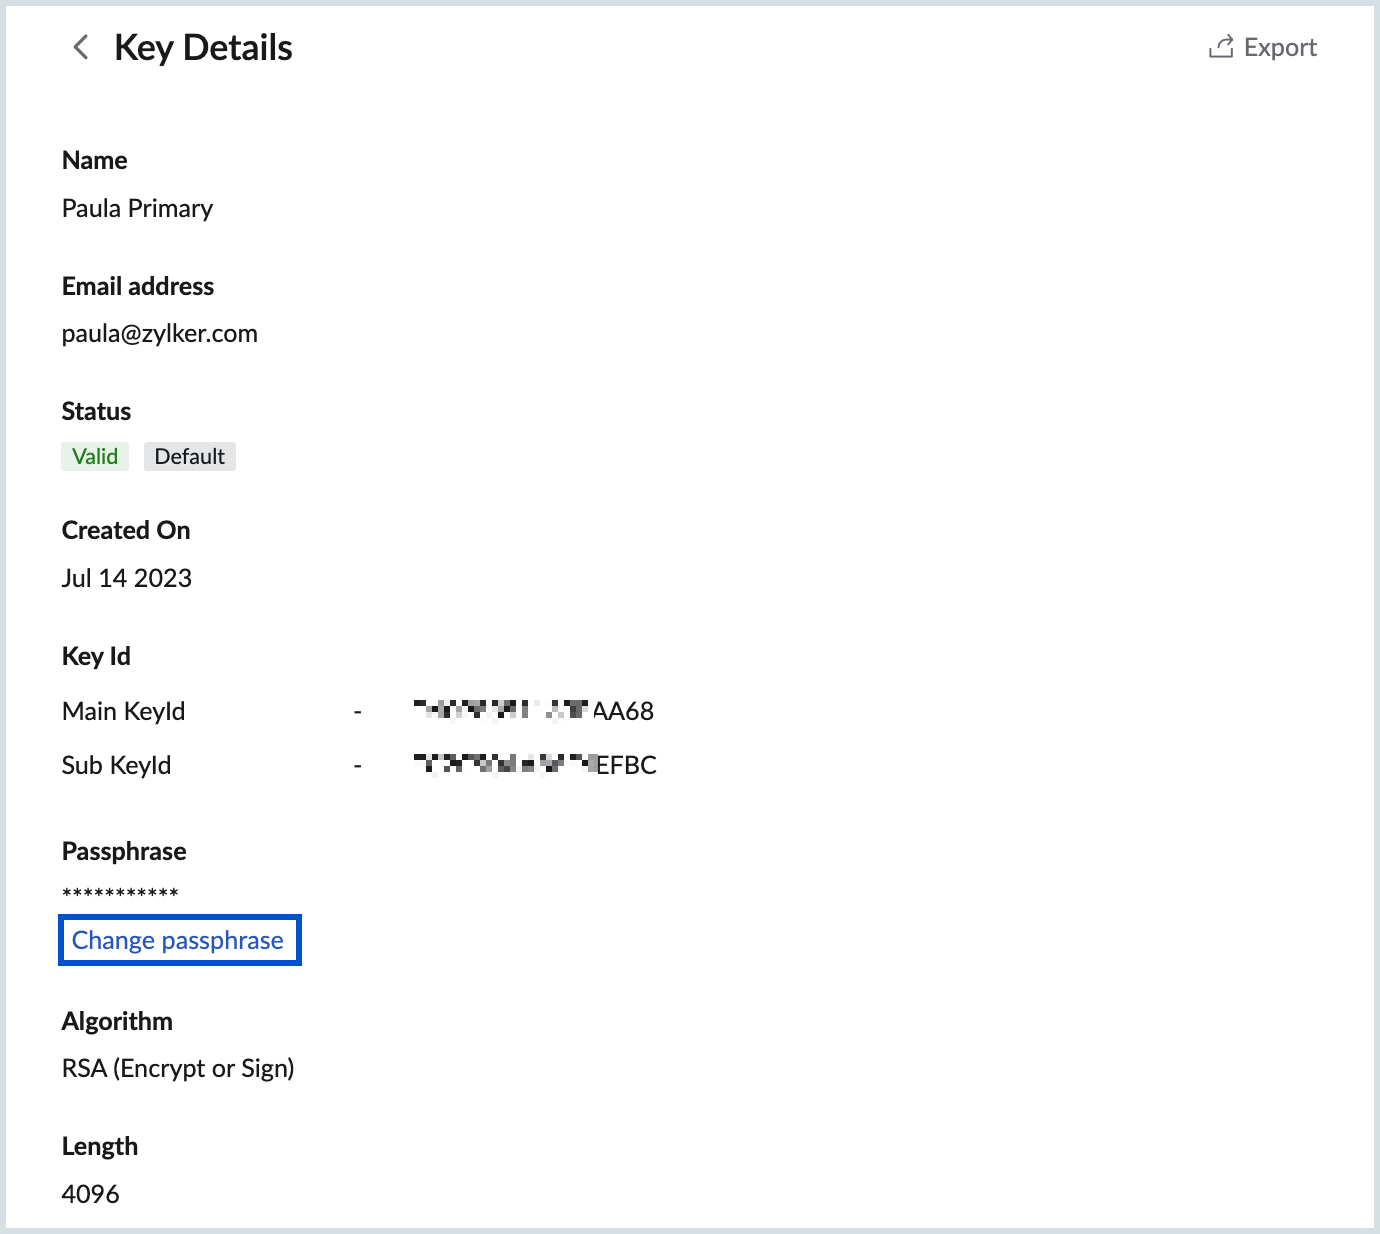
- Click Change passphrase under the Passphrase section on the Key Details page.
- Provide the Old and New passphrases.
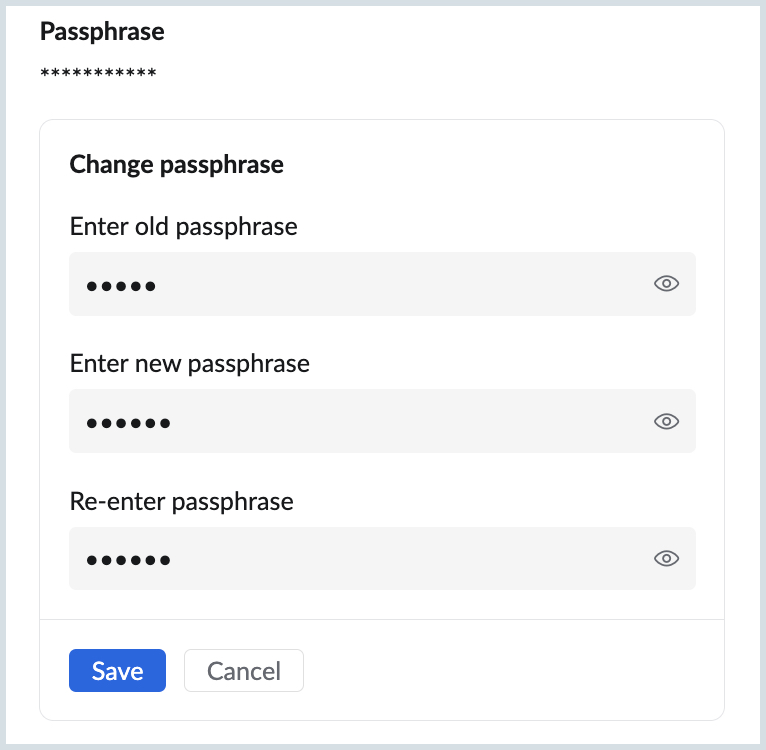
- Verify the New passphrase.
- Click Save.
Export key(s)
You can export the key pair in its entirety or only the private or public keys separately. You can also export the public keys of the PGP users saved to your account.
To export key(s):
- Log in to Zoho Mail.
- Navigate to Settings > Integrations > Extensions > PGP.
- Go to the My Keys or PGP users section from which you want to export the key(s).
- On the My Keys section, click on the key you want to export from the listing.
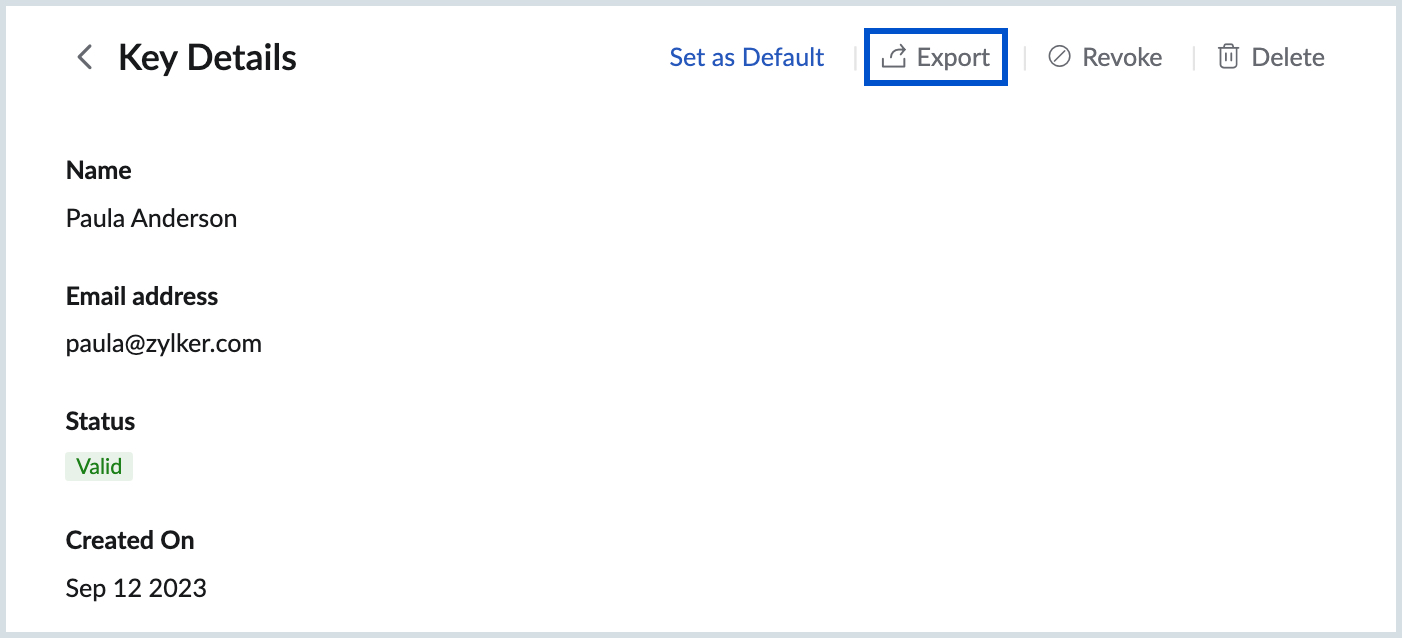
- Click Export at the top of the Key details page.
- You can choose to export Public or Private keys separately or the entire key pair.
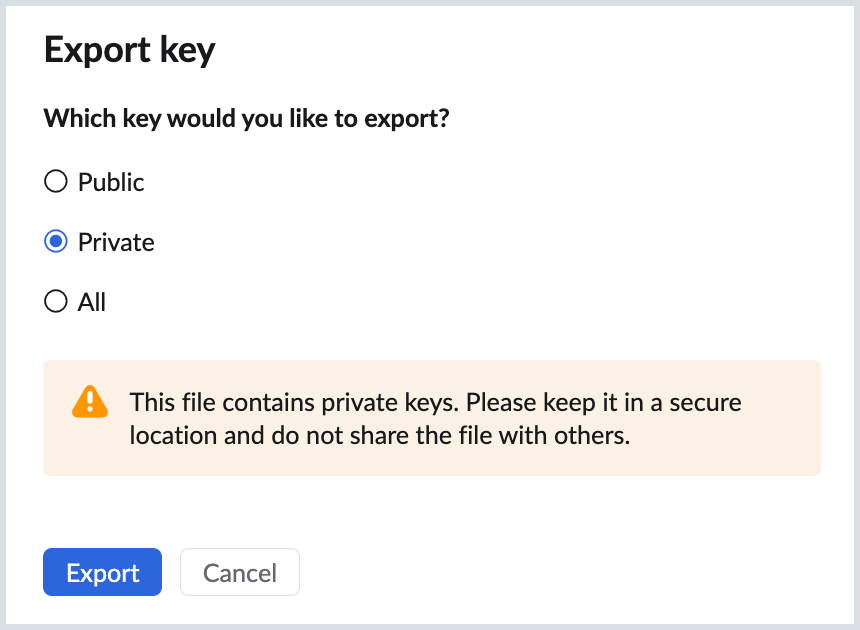
- When you export Private keys, they must stored securely to prevent unauthorized access to your emails.
- On the PGP users section, click the More Options icon next to the public key you wish to export. You can also choose to export all the public keys of a user by hovering over the email address under the PGP users section and clicking Export.
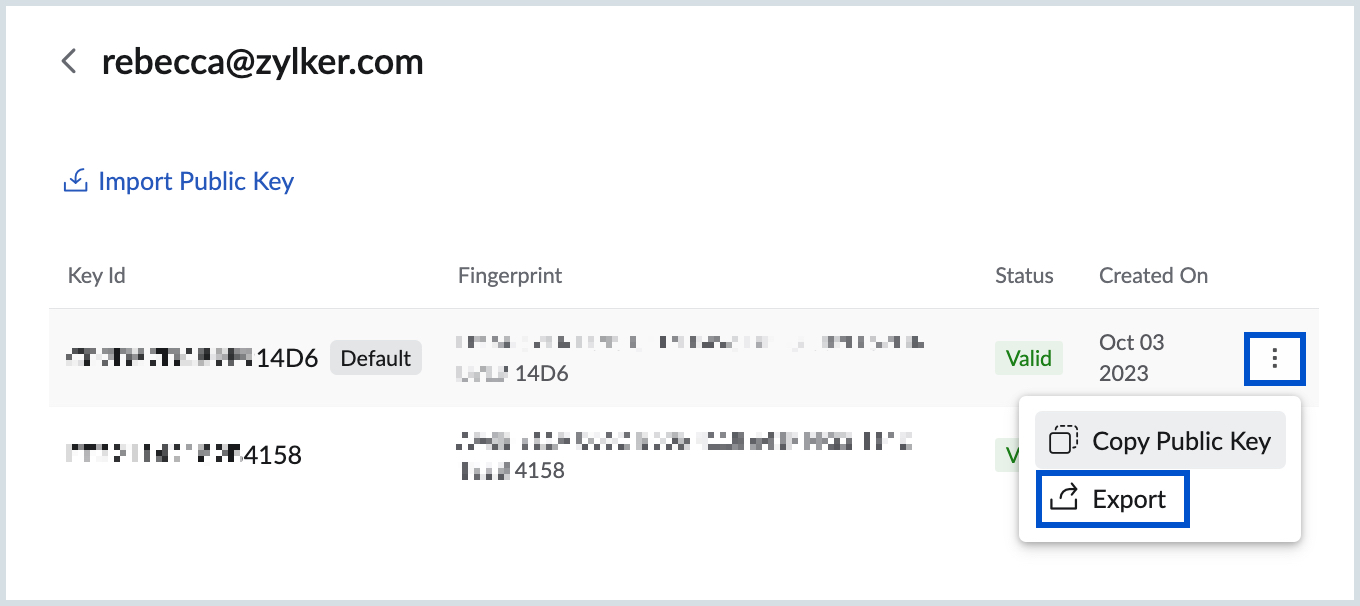
- Click Export.
The exported key pair will be saved to your local storage.
Revoke key validity
When you no longer want your key pairs to be functional or find that the key pair is compromised you can choose to revoke the validity of the key pair. Once revoked, it cannot be used to encrypt or decrypt emails.
To revoke the validity of a key pair:
- Log in to Zoho Mail.
- Navigate to Settings > Integrations > Extensions > PGP.
- Go to the My Keys section.
- Click the key pair for which you want to revoke the validity.
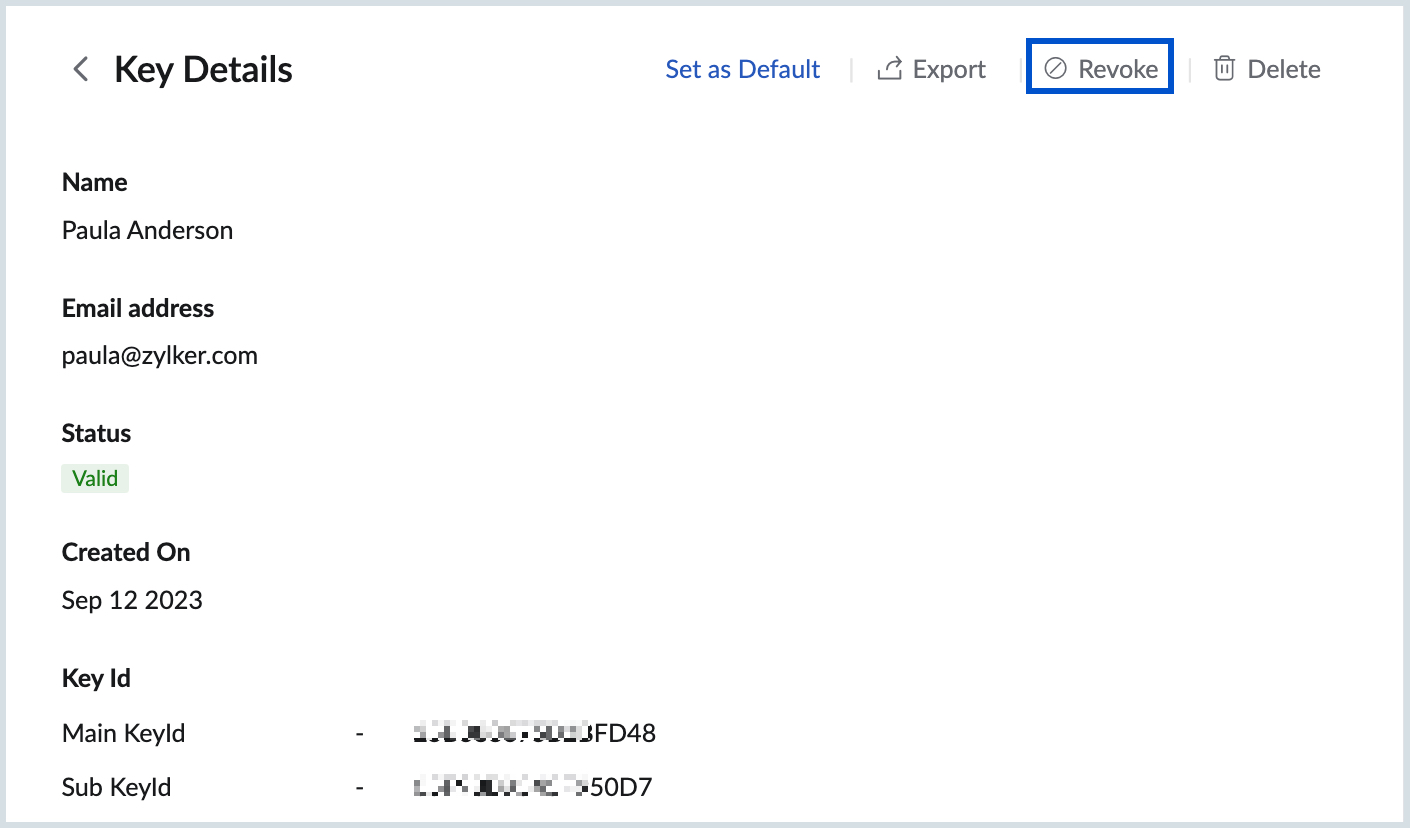
- Click Revoke.
- Click Yes in the confirmation dialogue pop-up.
Once revoked, the public key cannot be used to encrypt emails and the private keys can no longer be used to decrypt or sign emails.
Note:
- The validity of the default key pair cannot be revoked. To revoke the validity, you should make another key pair as default and revoke the validity of the former key pair.
- If the revoked public key has been used to send encrypted emails to you, it can no longer be decrypted. You need to reach out to the sender to resend the email encrypted using a valid key pair.
Delete keys
The key pairs and PGP users' public keys can be deleted from your account.
Note:
- It is recommended to Export the key(s) before deleting them. This is to ensure access to the keys when needed in the future.
- You cannot delete your Default key pair.
- Deletion of keys does not revoke the validity of the keys. They can still be used to encrypt and decrypt emails.
- When you view an email that has been encrypted using a deleted key pair, a prompt will be shown to import the key pair or reach out to the sender to resend the email encrypted using an available key pair
To delete your key pair or a public key of a PGP user:
- Log in to Zoho Mail.
- Navigate to Settings > Integrations > Extensions > PGP.
- Go to the My Keys or PGP users section from which you want to delete the key(s).
- On the My Keys section, click on the key you want to delete.

- Click Delete at the top of the key details page.
- On the PGP users section, click the More Options icon next to the public key and choose Delete Key.
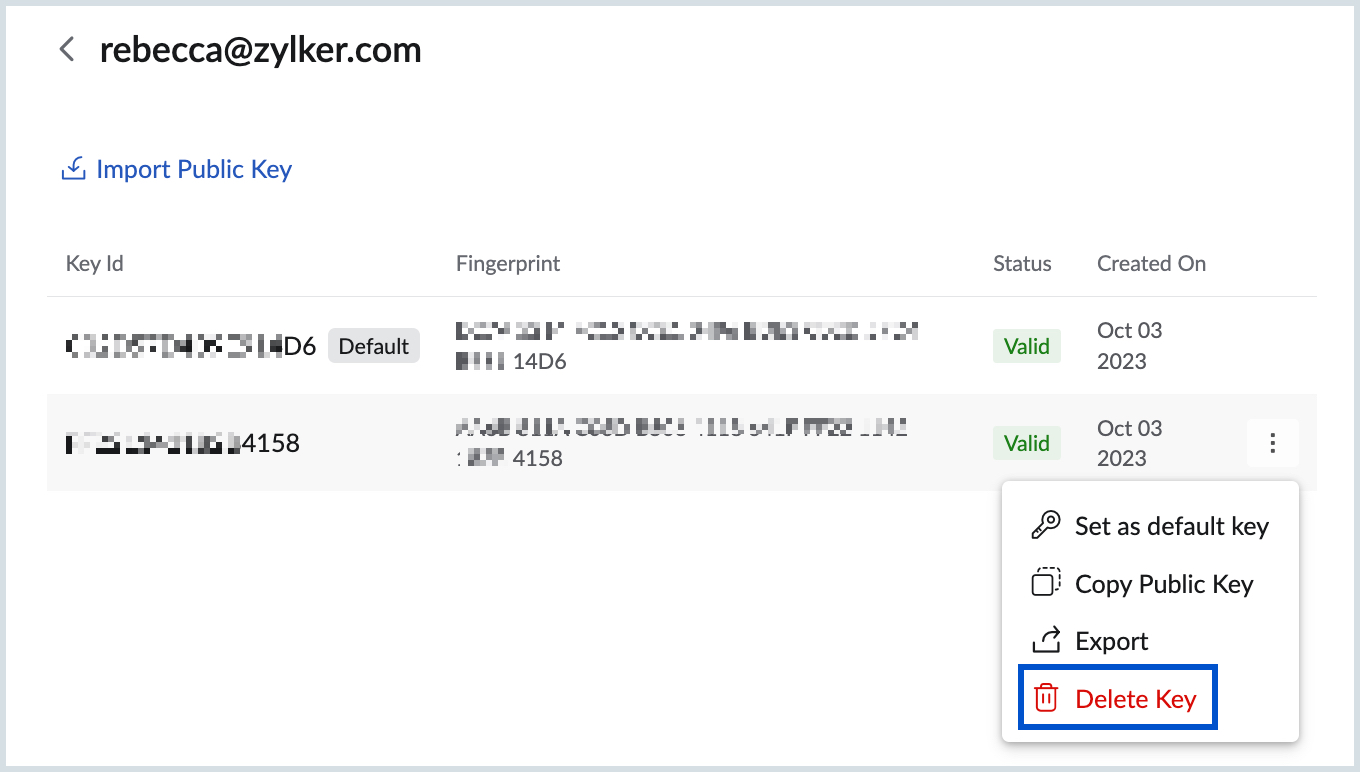
- Click Ok in the confirmation dialogue box.
The key or key pair will be deleted from your account. If exported they can be imported again to your account to use them for encryption and decryption.
Disable the integration
You can disable the integration temporarily. When you disable the integration you will not be able to send PGP encrypted emails and read any of the encrypted emails sent to you. However, the keys that you have generated and imported to your account will exist and can be used again when you enable the extension.
To disable the extension, navigate to Settings > Integrations > Extensions > PGP. Turn off the toggle switch to disable the extension.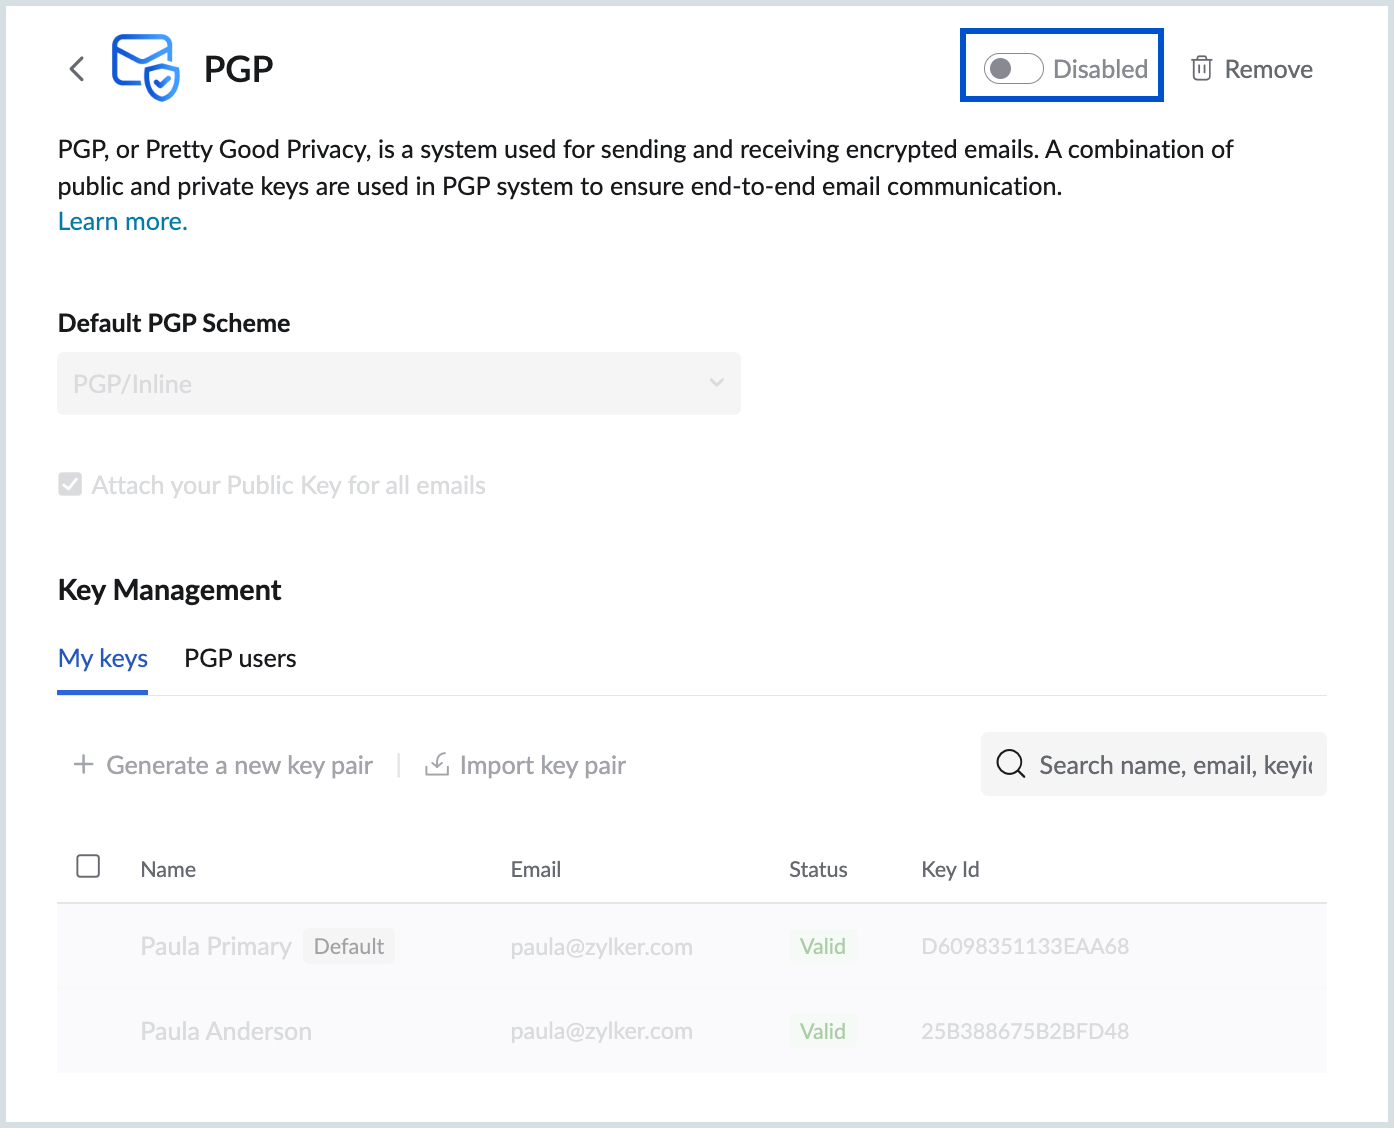
Note:
- The administrator of the organization can also disable the extension from the Zoho Mail Admin Console.
- To disable the extension from Admin Console, navigate to Zoho Mail Admin Console > Other App Settings > Integrations and Extensions > Extensions. Scroll down to find the PGP extension and click Configure. Turn OFF the Enable PGP integration toggle switch.
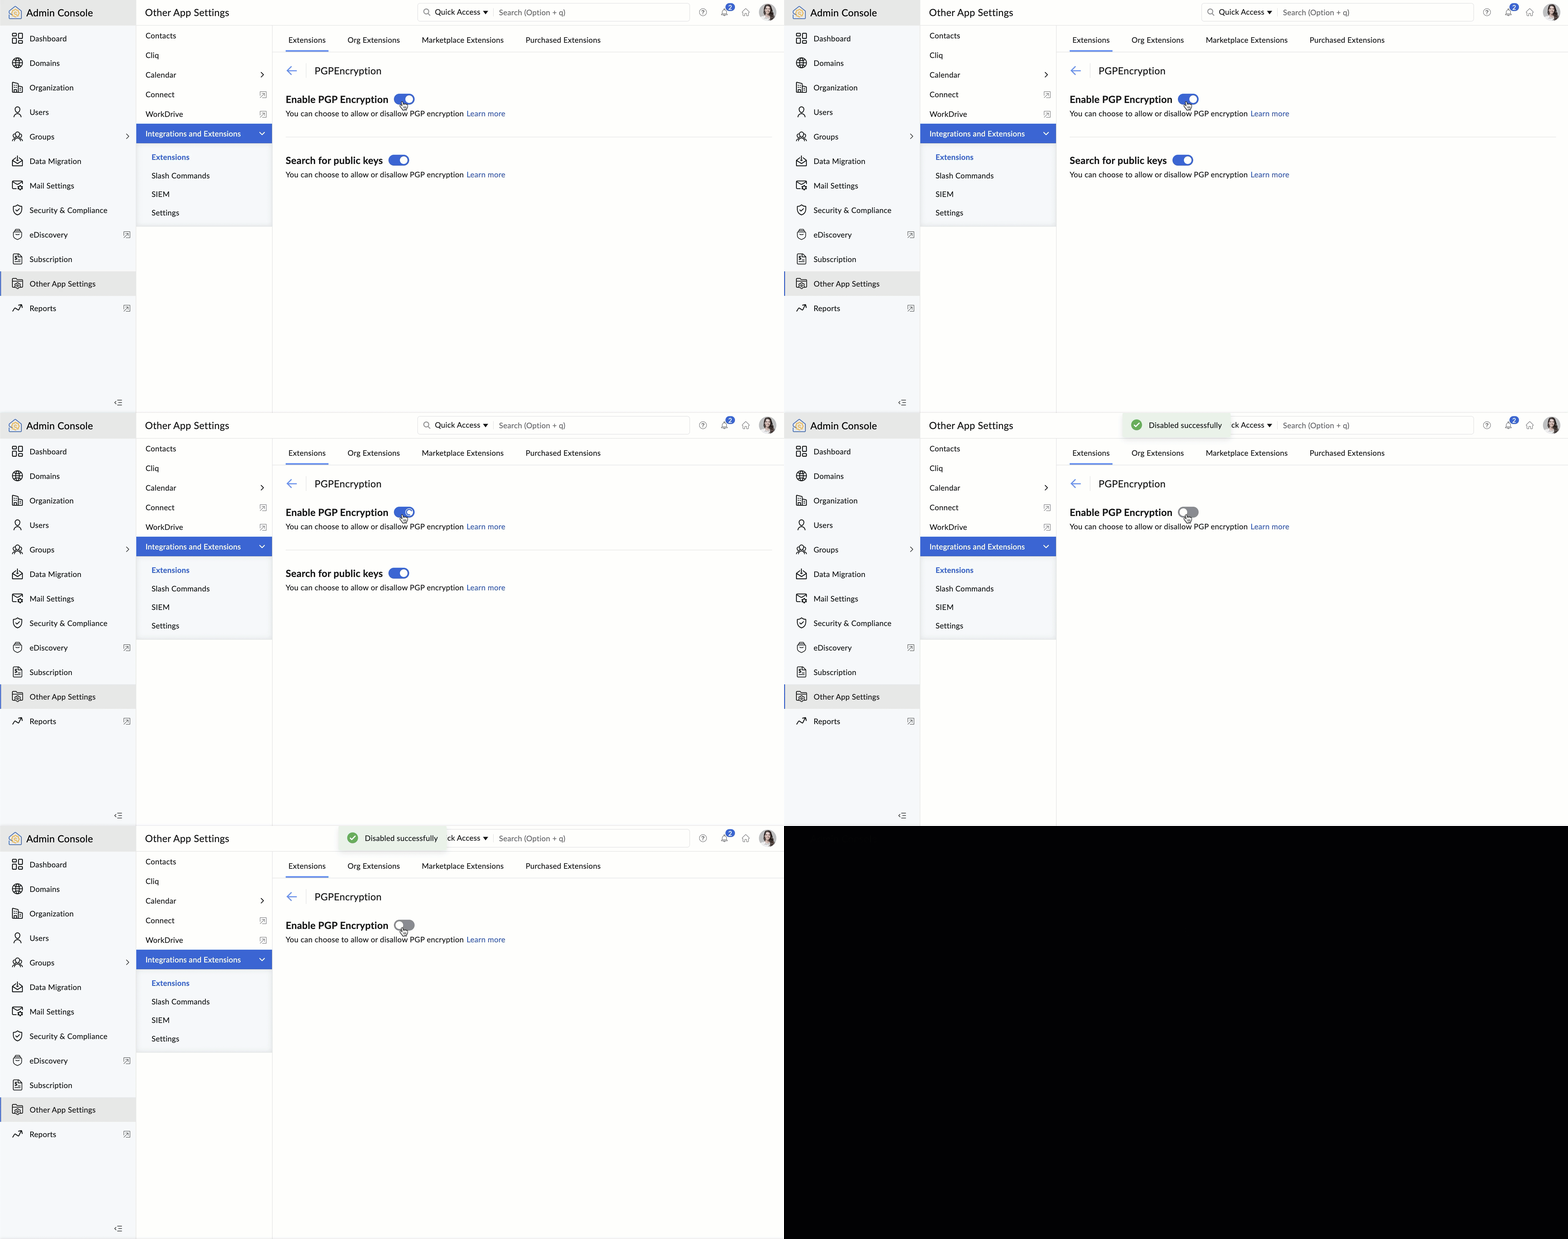
- The extension cannot be accessed by the users and hence they cannot send/ open any PGP-encrypted emails. However, the keys that they have generated/ imported will not be removed from their account. It will be available for them to use when the extension is enabled again by the administrator.
Remove configuration
You can remove the PGP configuration from your account. When you remove the configuration all your keys (generated and imported) will be deleted from your account. You will not be able to send/ read PGP-encrypted emails. You have to generate new key pairs or import keys of PGP users to send. read PGP-encrypted emails.
To remove the configuration, navigate to Settings > Integrations > Extensions > PGP. Click Remove. Click Yes on the confirmation pop-up.


