Zoho Mail Plugin for WHM
The Zoho Mail Plugin for WHM allows authorized Zoho Mail Partners/ Resellers to configure a cPanel domain in Zoho Mail. WHM is the Control Panel for the administrator who manages the server. From WHM, Partners/ Resellers can manage all their domains from a single interface.
Prerequisites for using the Zoho Mail Plugin
Ensure that the following prerequisites are in check before you use the Zoho Mail plugin for cPanel.
- You must be an authorized Zoho Mail Reseller/ Partner.
- You must be a WHM Admin, with account creation permissions. This permission is not necessary if your users are hosting their email by themselves, using cPanel.
Sign Up as a Zoho Partner
Zoho Mail provides opportunities to partner with Zoho. The partners can assist their client organizations to set up and use domain-based email accounts using the Zoho Mail Partner Admin Console. The Partner Admin Console helps the partners to manage multiple client organizations under them.
To become a partner of Zoho Mail, navigate to the Partner Sign up page. Enter the relevant details in the respective fields of the Partner sign up form and click Submit.
Installing the Zoho Mail Plugin for WHM
- Go to the Zoho Mail Plugin for WHM on the cPanel Marketplace.
- Locate the Download URL option in this page, and click on it.
- The plugin will get downloaded onto your system.
- The plugin will be download as a folder named zm_cpanel.tar.gz
- In this directory onto which the plugin is download, open your terminal.
- Enter this command in your terminal, 'perl zohomail_install.pl' with root permission.
Note:
- You can use both WHM and the cPanel integrations using the same plugin that you download. Click here to know more about the Zoho Mail plugin for cPanel.
- The prerequisites that are mentioned are specific to the WHM plugin and are not applicable to the cPanel plugin.
Authorizing WHM to use Zoho Mail
Before you use the Zoho Mail plugin, you need to follow the authorization procedure to let WHM access data from your Zoho Mail account.
- Go to your WHM homepage.
- Select the Plugins option.
- Choose Zoho Mail from the plugins listed.
- Copy the URL in the Authorization Redirect URL field.
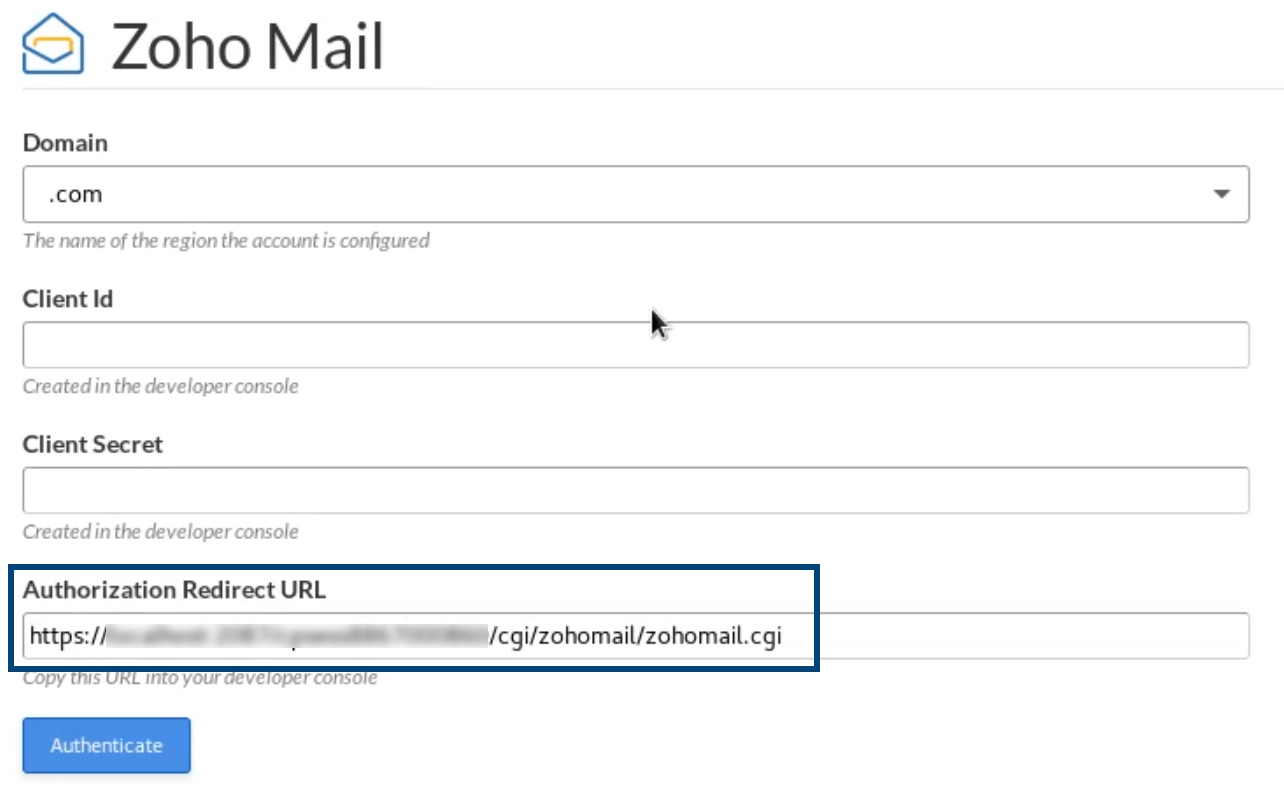
- Login to your Zoho Mail account and navigate to the Zoho Developer Console.
- Enter the Client Name, Client Domain, and paste the Redirect URL that you copied from WHM.
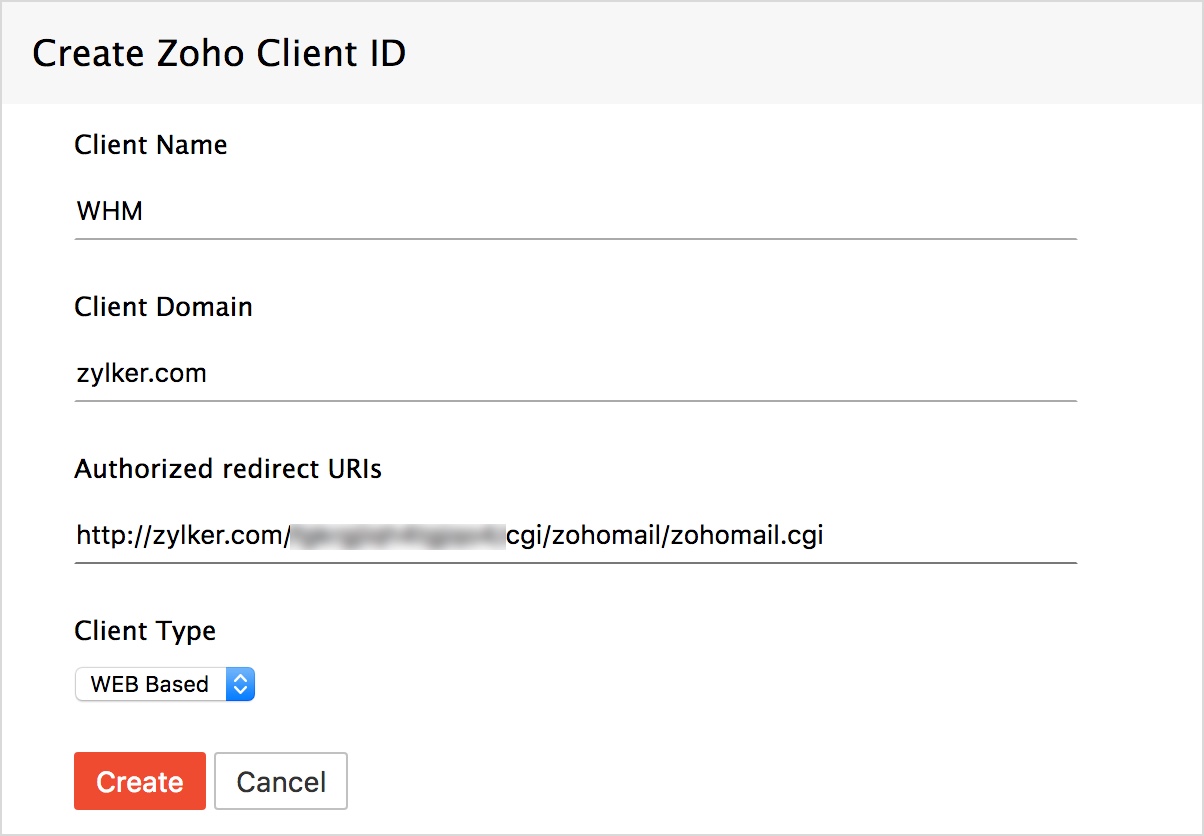
- Click Create to get the Client ID and Client Secret.
- Go to the Zoho Mail WHM page, and enter the Client ID and the Client Secret in the respective fields.
- Select your Domain region from the drop-down.
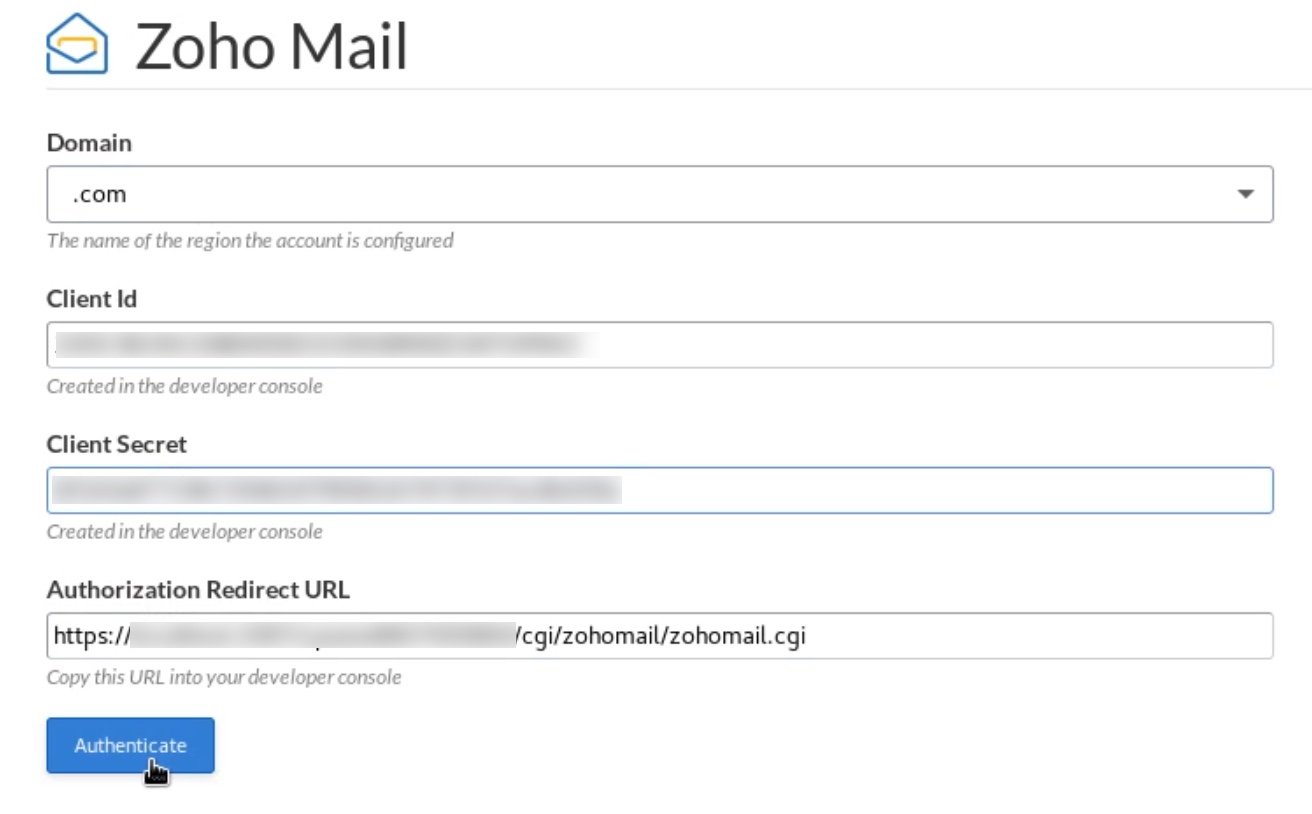
- Now click Authenticate.
- Click Accept in the authorization page.


You have now authorized WHM to access the mentioned data in Zoho Mail.
Account Addition
- Go to your WHM homepage.
- Select the Account Functions option.
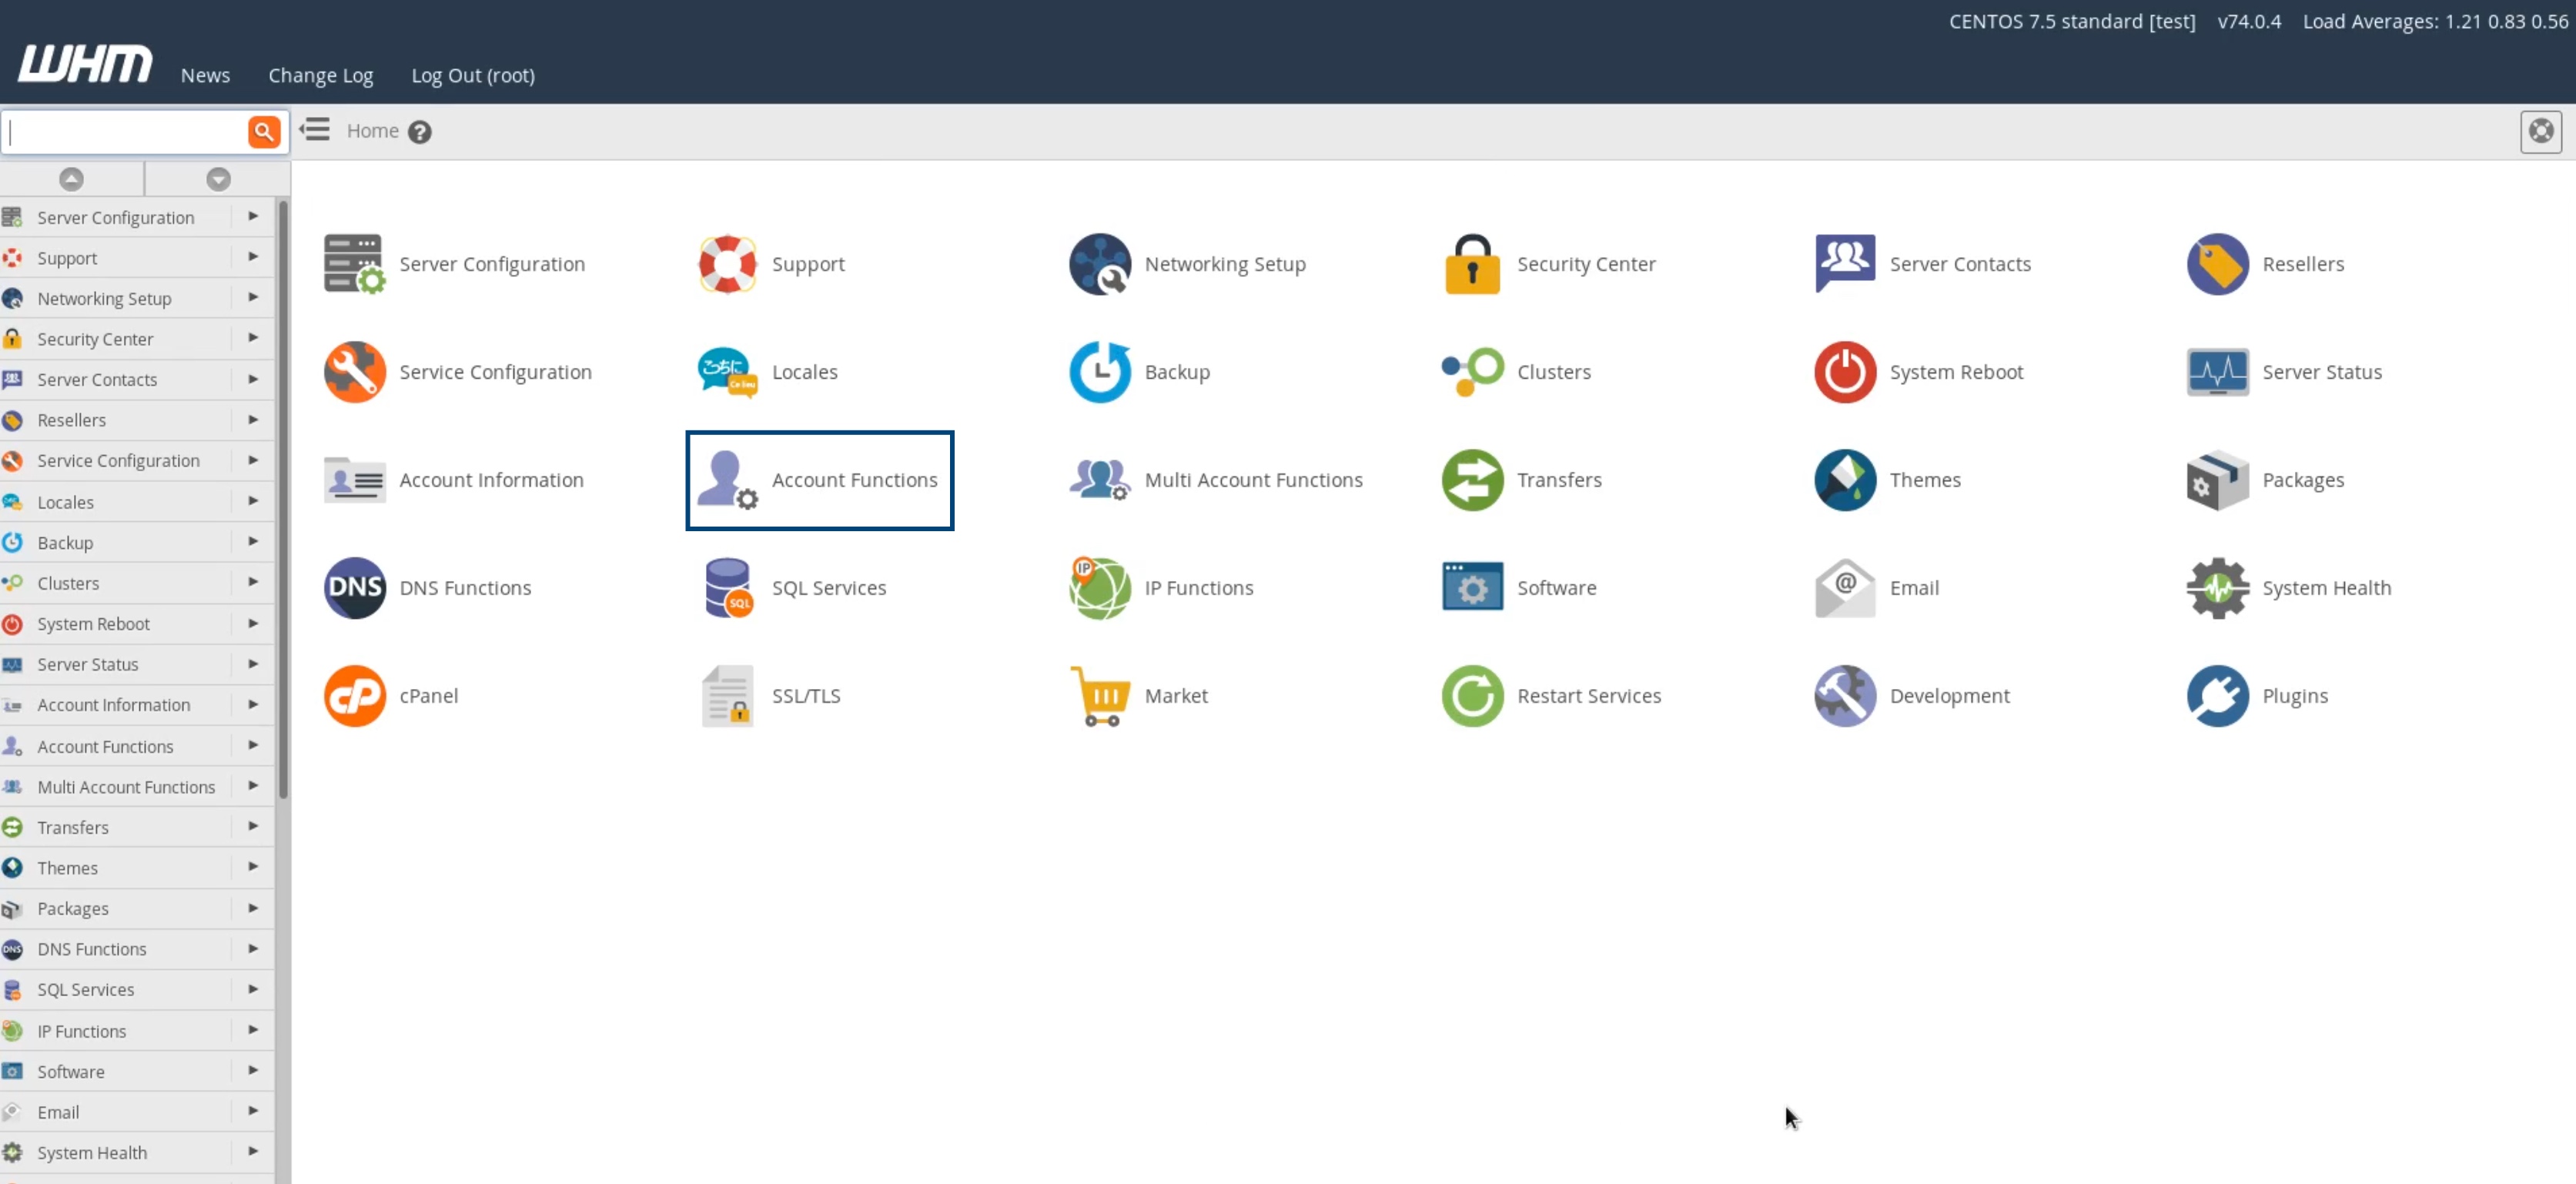
- Click Create a New Account.
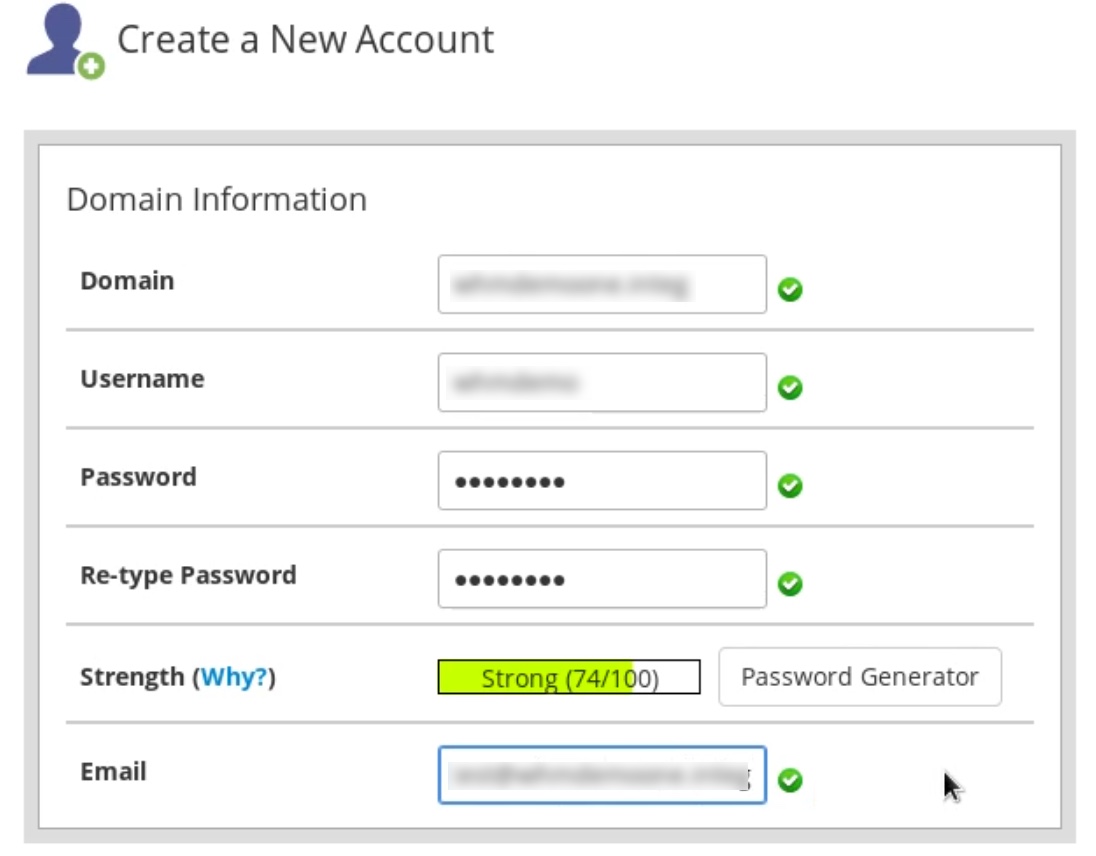
Enter the relevant Domain Name, Username, Password and Email Address.
Note:
- Domain - Enter the name of your client's domain
- Username - The username you enter here will be your client's organization name
- Email Address - The client organization will be created under this email address
- Provide the other details in the Create a New Account page, and click Create.
- If the account creation is successful, you will get the Account Creation Ok message in the next page.


The account that you create here, will be added as a child organization in your Zoho Mail Reseller/ Partner Control Panel.
Note:
You can also create an account without adding it as a child organization to your Partner account.
- Go to your WHM homepage.
- Select the Development option.
- Select Manage Hooks.
- Click the Disable option across the Zoho Mail Hook.
After you disable the Zoho Mail hook, any account you add in WHM will not be a child organization to your account.
You can always enable it at a later time if you want to add an account as a child organization.
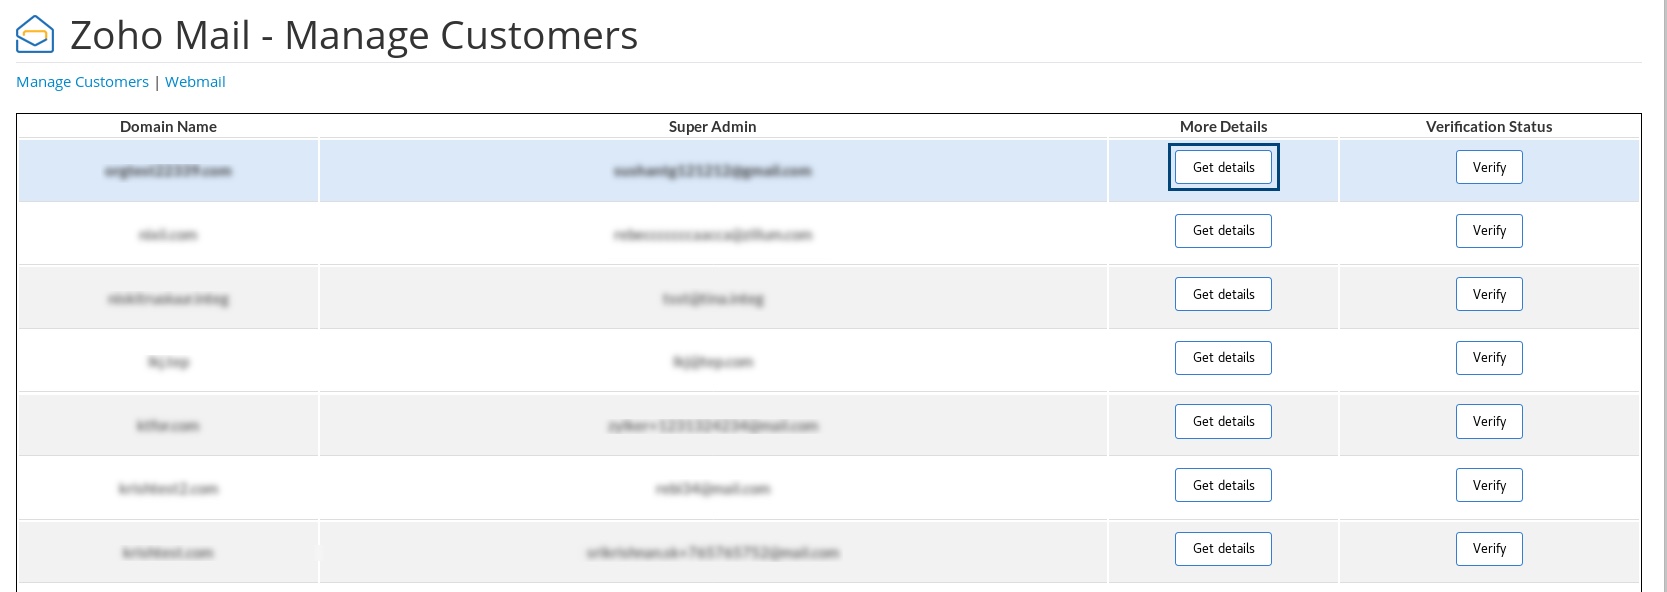
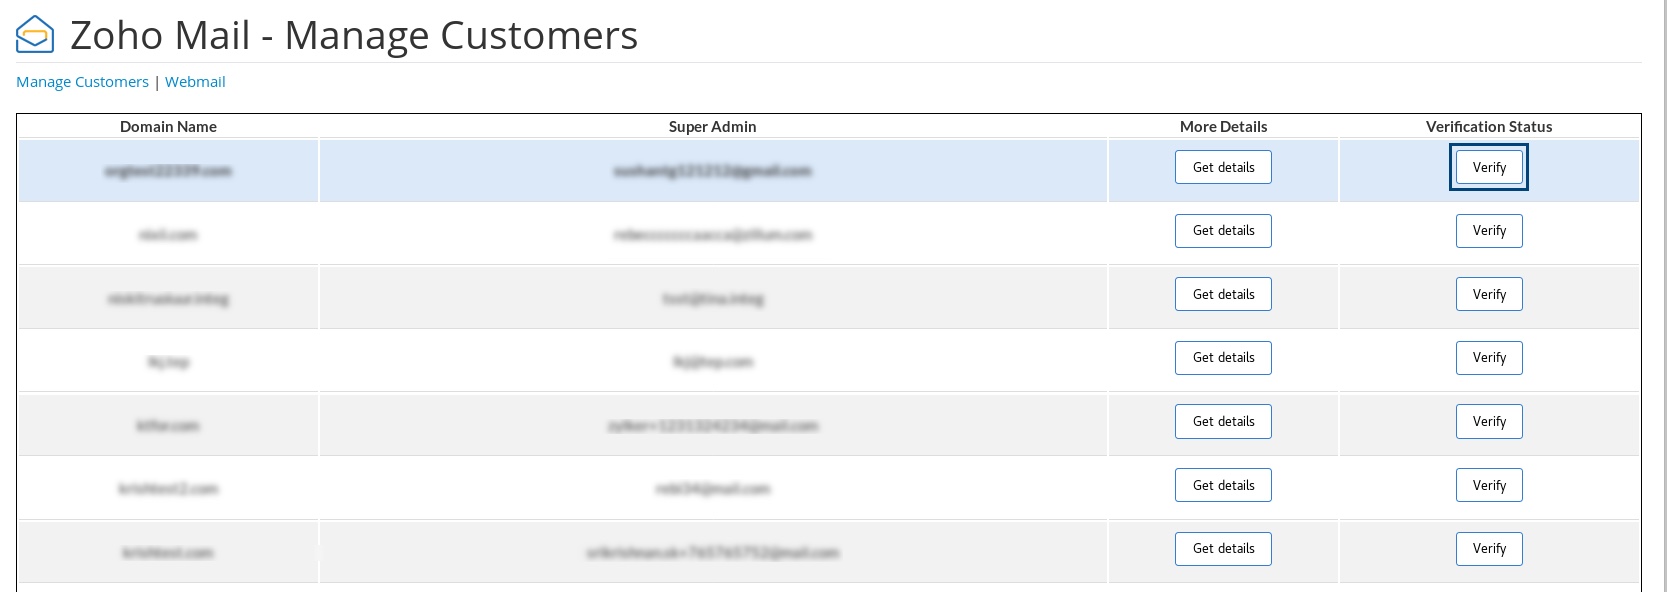
Domain Verification and Managing Customers from WHM
- Go to your WHM homepage.
- Select the Plugins option.
- Choose Zoho Mail from the plugins listed.
- All your client domains will be listed here.
- Locate the domain that you have added now.
- Now click Get Details across the respective domain.
- The Domain Details such as the CNAME (zbcode), the Plan type and the number of licenses will be displayed.
- Go to the domain's cPanel DNS manager.
- Verify your domain using the zbcode that is displayed in WHM. Learn more.
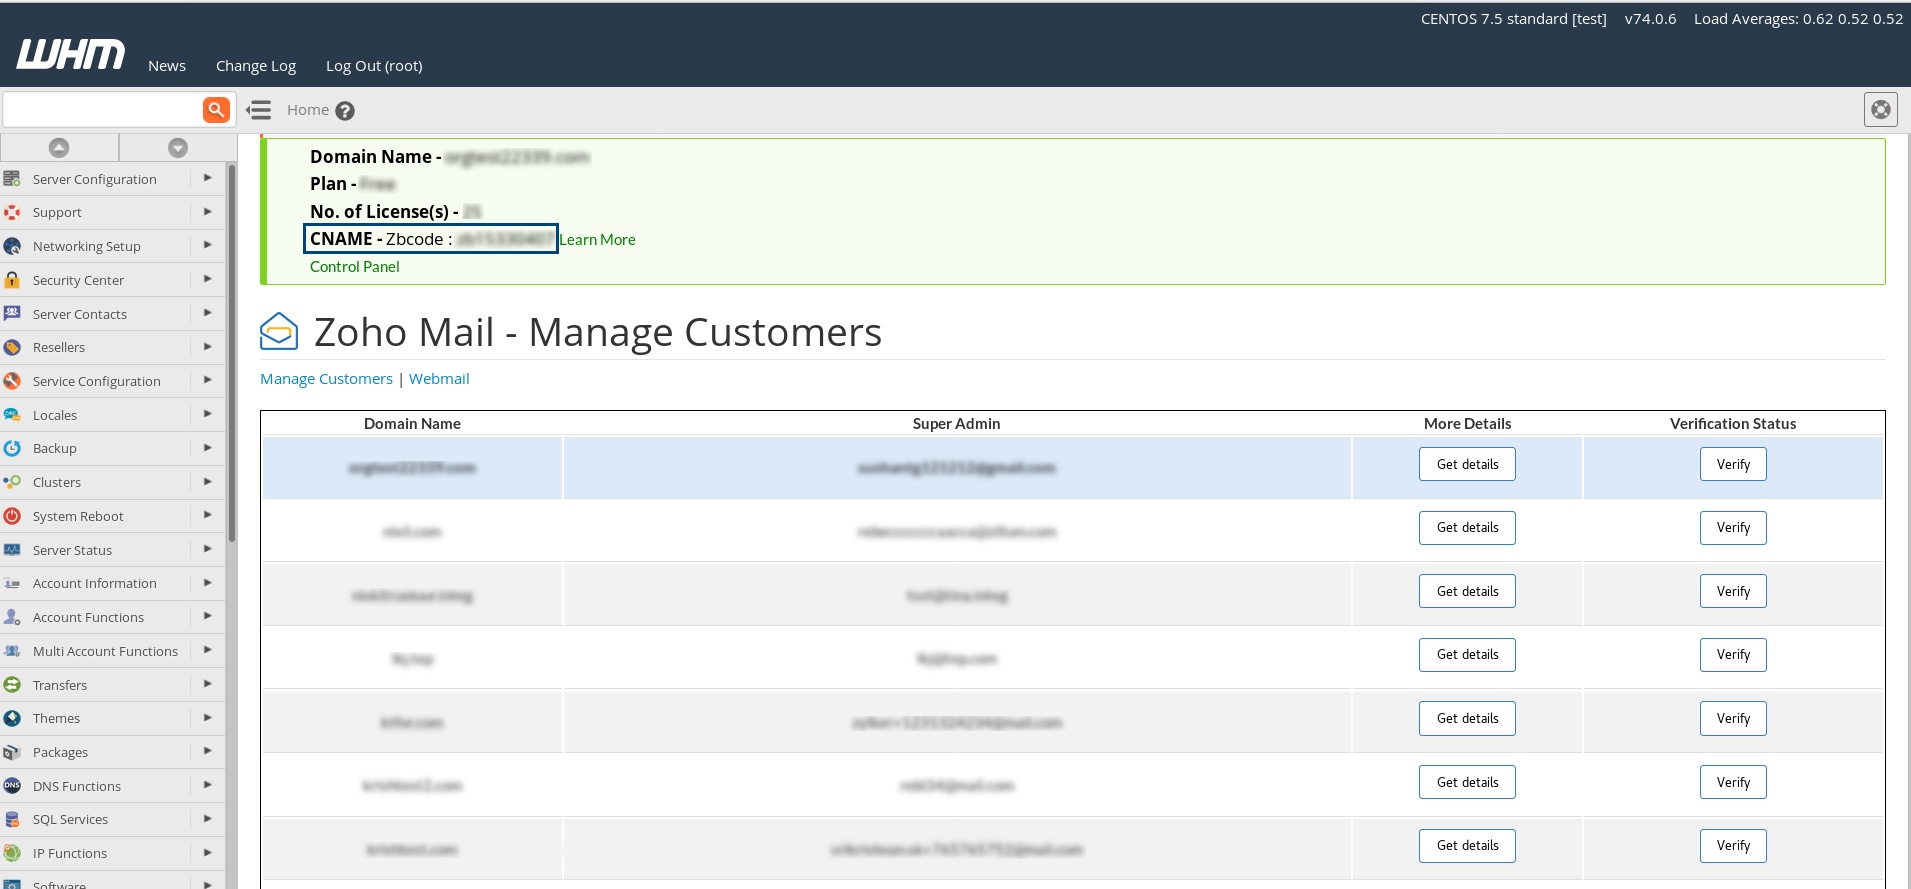
- Configure Email Delivery by adding Zoho Mail's MX Records for this domain. Click here for detailed instructions.
- Once all the details are filled in the cPanel DNS, in the WHM tab, click Verify across the respective domain.


After the domain is verified, click the Control Panel link in the WHM page, where the domain details are displayed. This will take you to the client's Zoho Mail Control Panel. Make sure that Email Hosting for this domain has enabled. You will be able to add user accounts for your client from their Control Panel.