IMAP Migration from Google Workspace to Zoho Mail
If your organization's email was hosted with Google Workspace, you can migrate your email data easily via one-click migration. Alternatively, you can use the IMAP migration method to transfer the data from your Google Workspace accounts to the corresponding accounts in Zoho Mail. You must create the user accounts in Zoho Mail before adding the migration. Refer to our help page for detailed instructions to add users in Zoho Mail.
Add a New IMAP Migration
Below are the steps involved in an IMAP migration:
Add server details for IMAP migration
Follow these steps to add the server details for your migration:
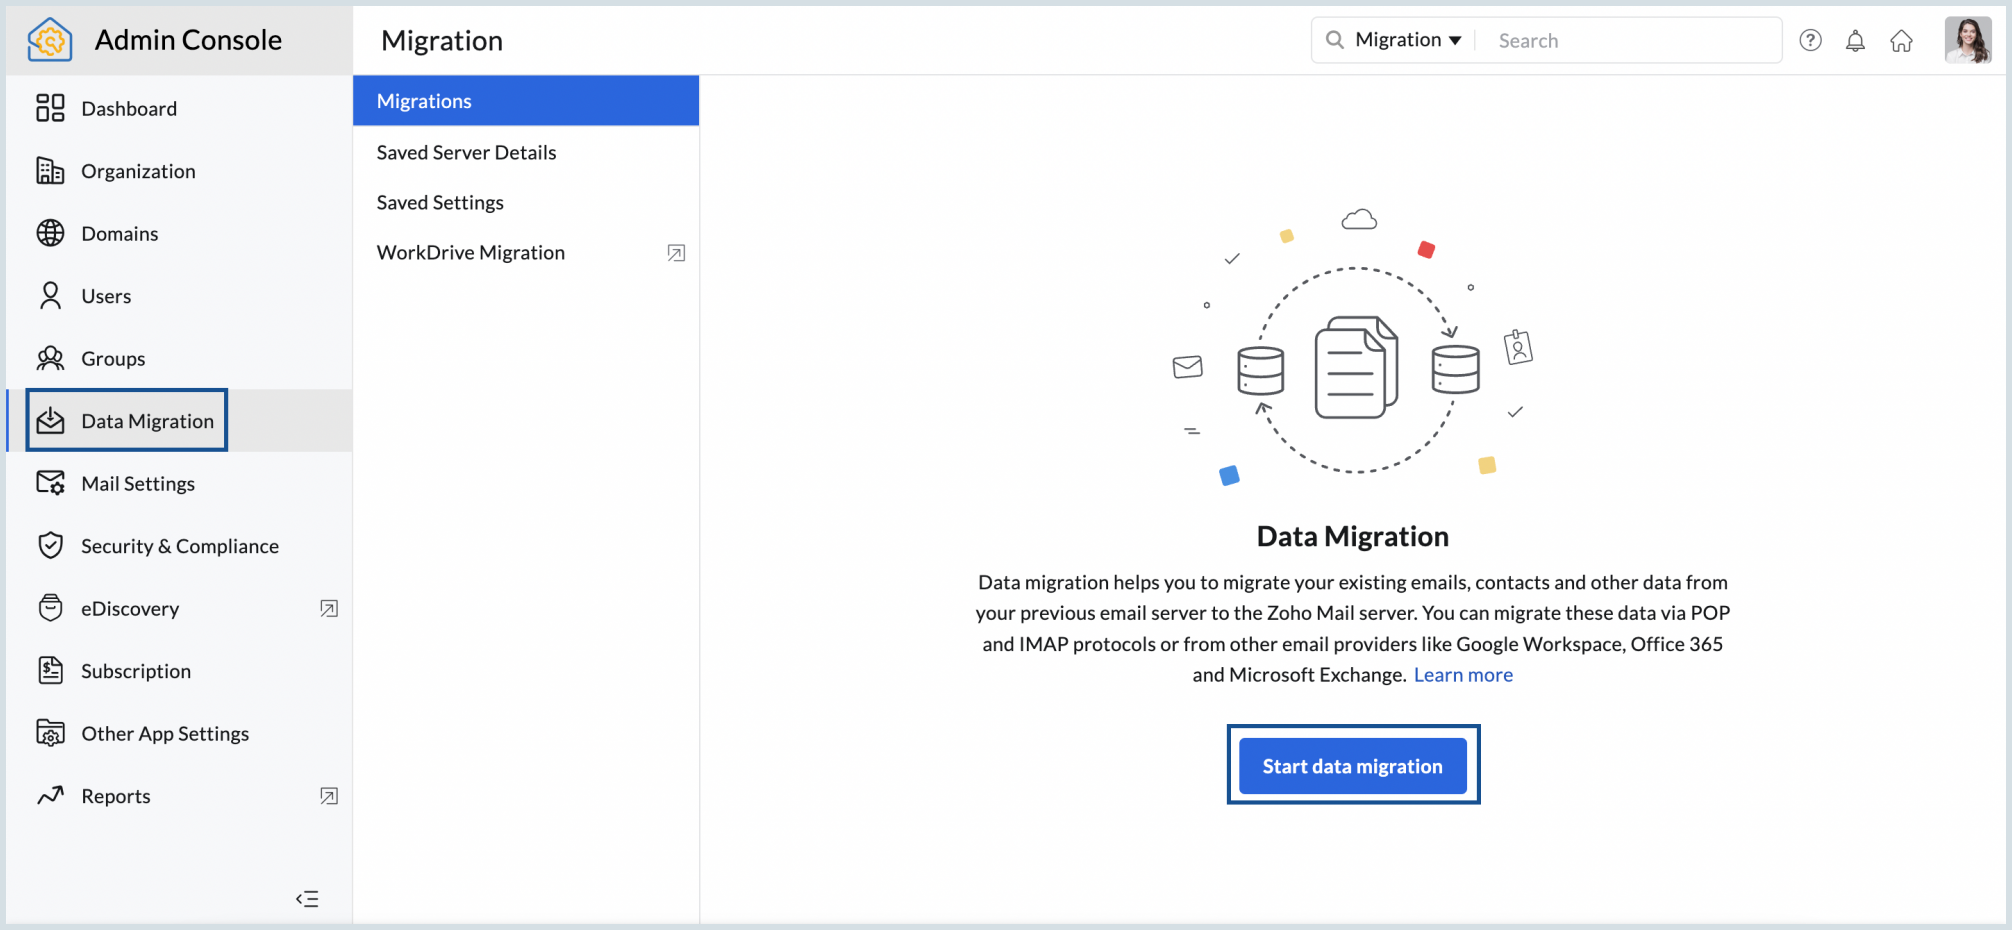
- Log in to Zoho Mail Admin Console and select Data Migration on the left menu.
- Click on Start data migration for the first migration and Click + Create for subsequent migrations.
- Enter a name for the server configuration, for your reference.
- In the Select saved server details drop-down, choose to Add new server details.
- Choose IMAP in the Select Protocol/Application drop-down menu.
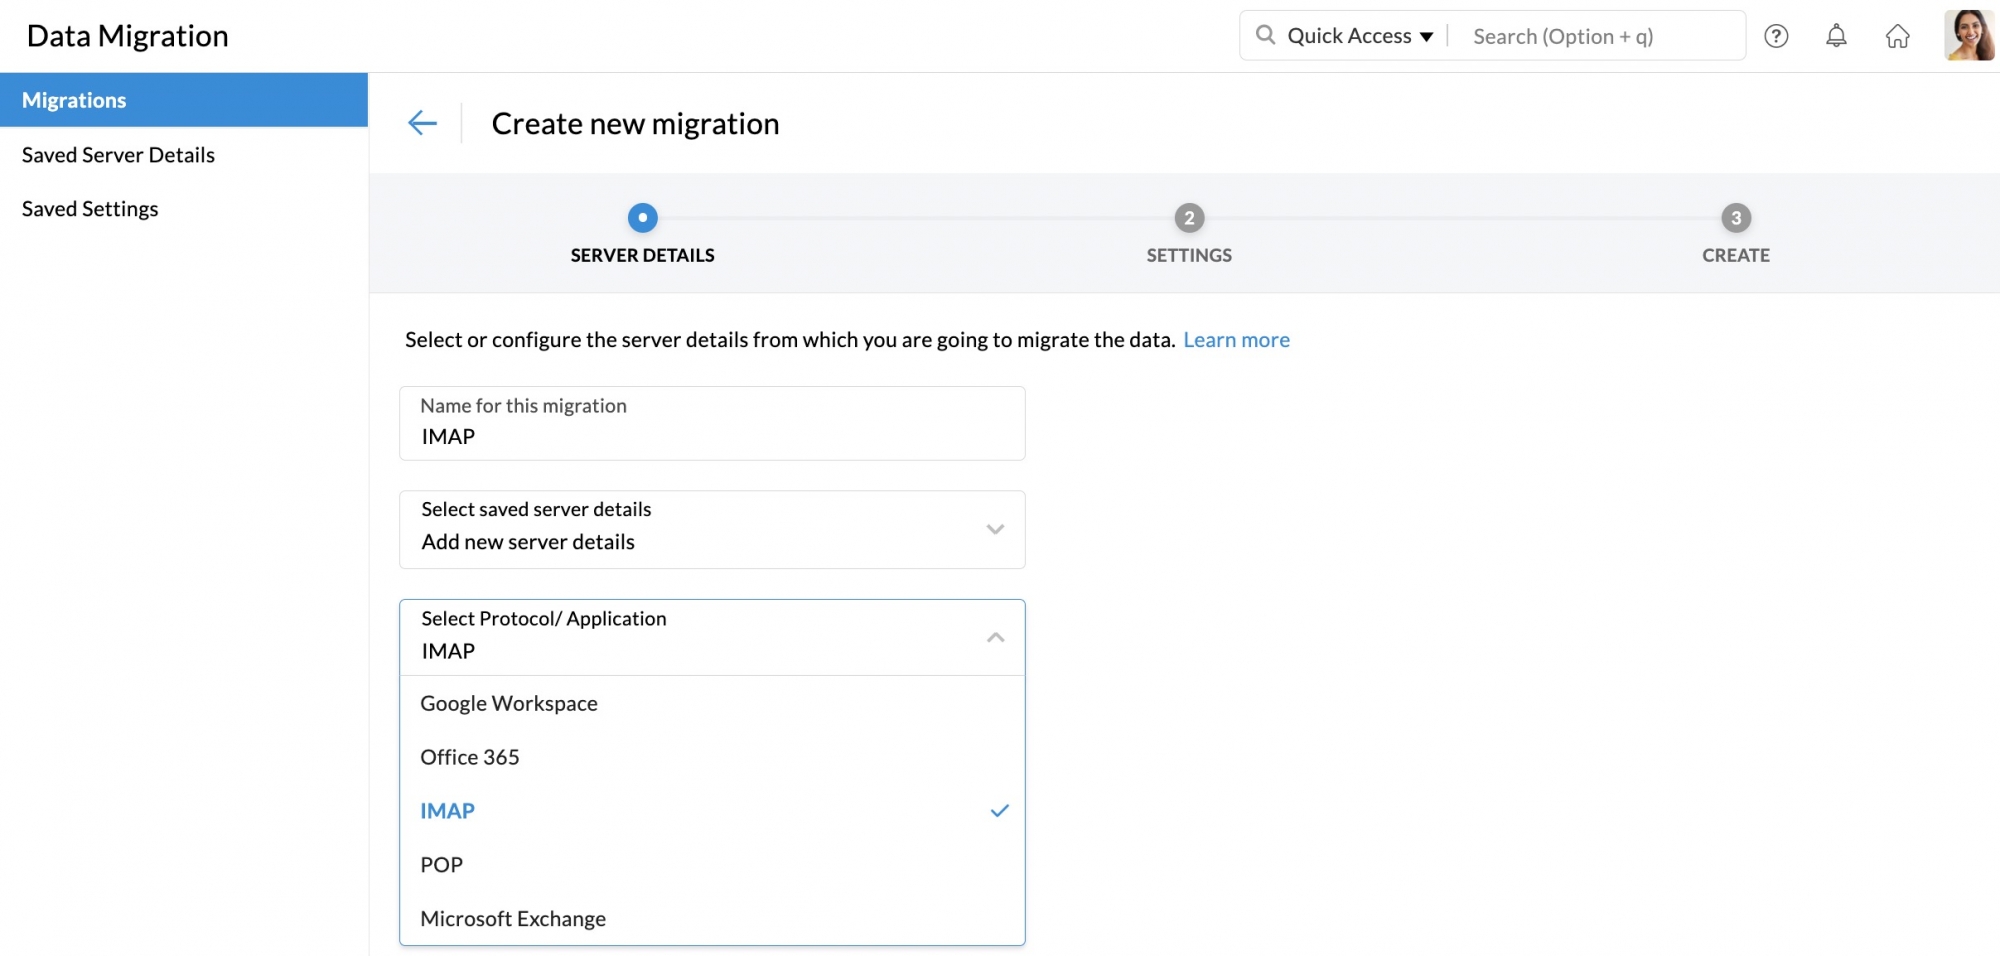
- Enter the Source server address as imap.gmail.com or copy and paste the value by hovering over the tool tip icon.

- If your source server recommends Port Number 993, choose SSL under Security, if it is 143, choose None.
- Click Add.


The server details you added will be saved on the Saved Server Details page, and you can use it for performing other migrations just by picking it from the dropdown.
Note:
- You can add server details from the Saved Server Details section under Data Migration by selecting +Add icon and follow the steps in Add server details.

- The server details added here will be available in the Select saved server details drop-down under the Migration section.

Add server settings for IMAP migration
Follow these instructions to customize the server settings based on your requirements:
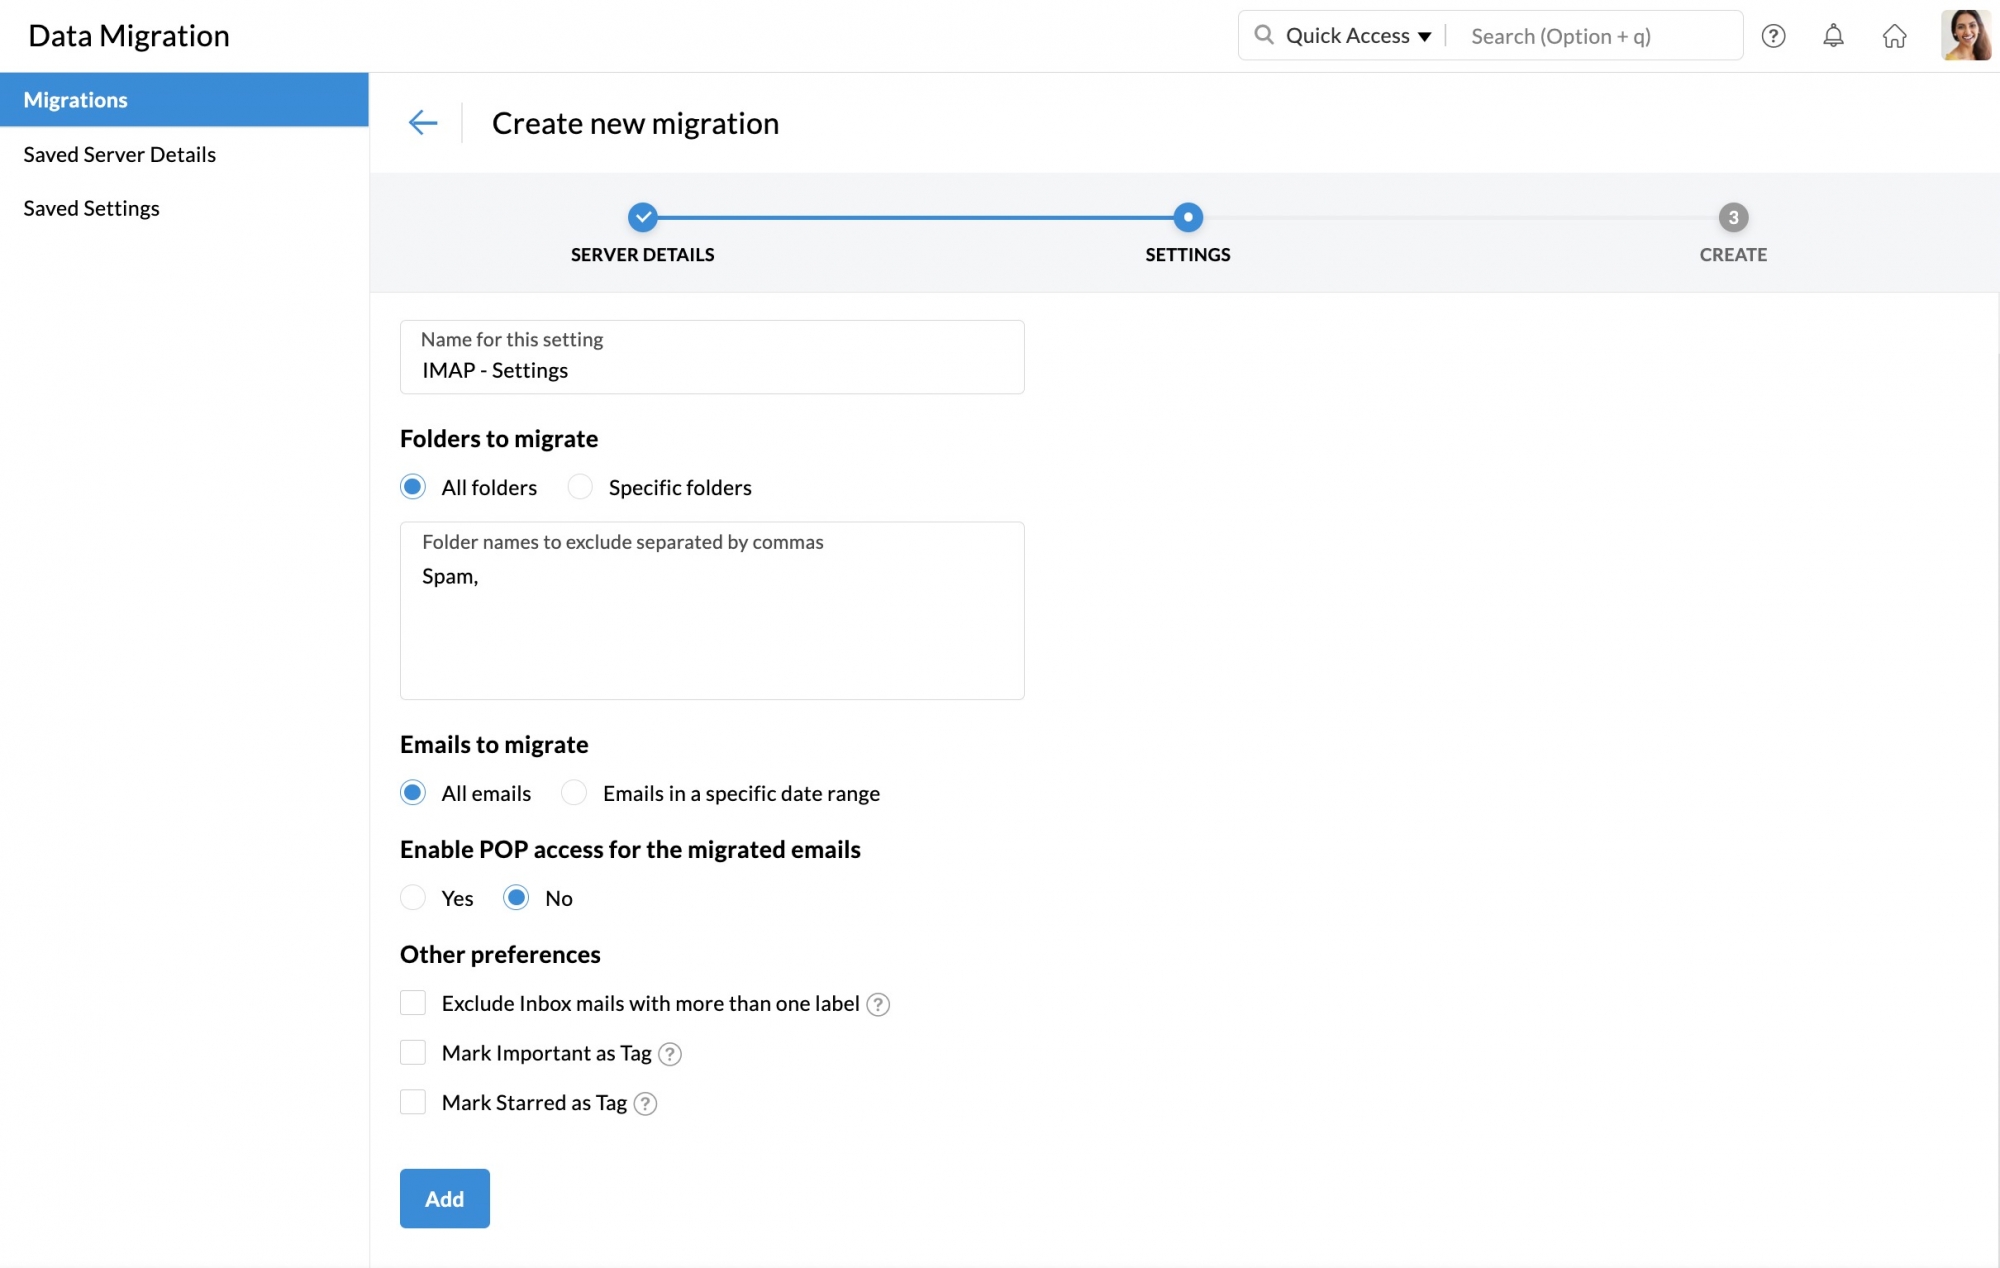
- Enter a name for the server setting.
Under Folders to migrate, choose the All folders option.
Note:
The Specific folder option is not available for Google Workspace IMAP server configuration.
- You can choose to skip any folders during migration using the Exclude Folder List option.
- The skip folders option will be handy when the admin reruns migrations for the same set of users for some new emails or missed emails. Enter the names of the folders within double quotes ("Folder1"), in which case only that folder will be excluded. If you want all subfolders under a parent folder to be migrated enter the folder name followed by /* within double quotes ("Folder1/*"). Refer to folder conventions for more details.
- Under Emails to migrate, select whether you want to migrate all the emails or the emails that you have received after a specific date.
- In Enable POP access for the migrated emails, select Yes if you want your users to view the migrated emails when the account is configured as POP in other email clients. Otherwise, select No.
- There are multiple customizations you can apply to your migration from the Other preferences section:
- Exclude Inbox Mails in case it has more than one label - If an email has multiple labels in the Inbox of your Gmail account, those emails will not be migrated to Zoho Mail.
- Mark Important as Tag - Emails that have been marked as important in Gmail will be added under the ZMImportant tag in Zoho Mail.
- Mark Starred as Tag - Emails that have been marked as important in Gmail will be added under the ZMStarred tag in Zoho Mail.
- Finally, click Add.

The settings you added will be saved on the Saved Settings page, and you can use it for performing other migrations just by picking it from the dropdown.
Convention for mentioning folders
- In case you want to mention a specific parent folder (E.g. Reports), enter it as "Reports".
- In case there are multiple subfolders under Reports and you want to mention all the subfolders, enter it as "Reports/*"
- In case there exists a subfolder under Reports named 2016, and you want to mention this particular subfolder, enter it like this - "Reports/2016".
- If you want all the subfolders under Inbox, only the Marketing folder without the subfolders, and a specific subfolder, 2012, alone under the Sales Reports folder to be mentioned, you will have to type the Folder List like this - "Inbox/*", "Marketing", "Sales Reports/2012".
Create a new migration
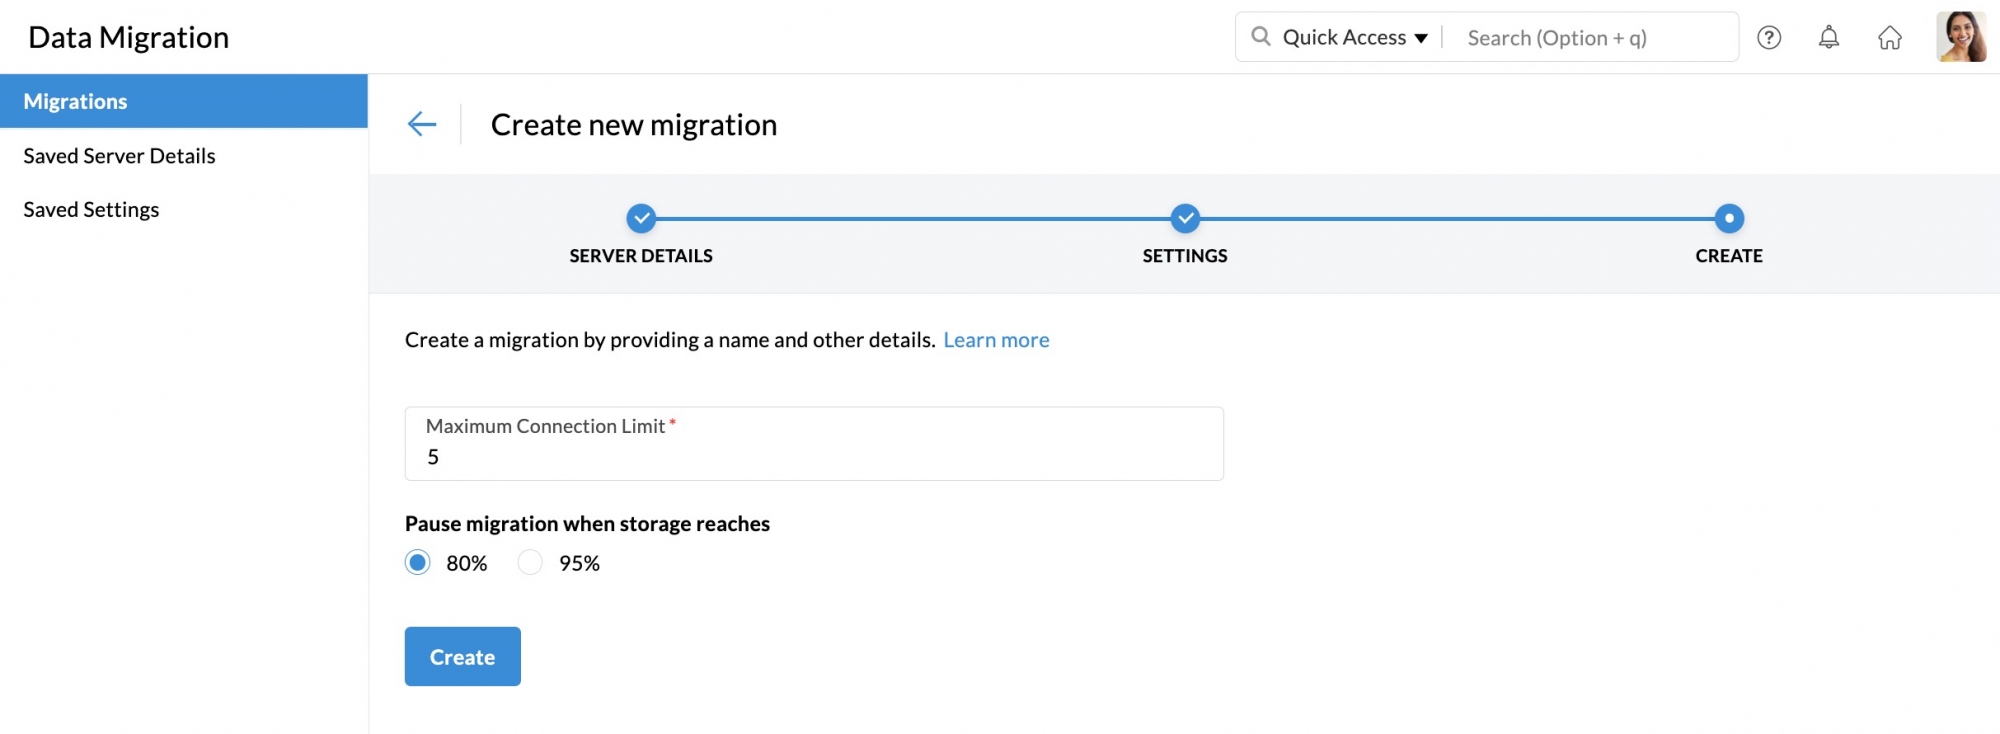
- Enter a Maximum Connection Limit for your migration.
- Select whether you would like to pause the migration when the storage reaches 80% or 95%, and finally click Create.

Add user details for IMAP migration
Zoho Mail provides two options to add user accounts for migration. They include
- Manual user addition
- Migration of multiple users accounts through the CSV option
Manual User Addition
Follow these steps to add users manually:
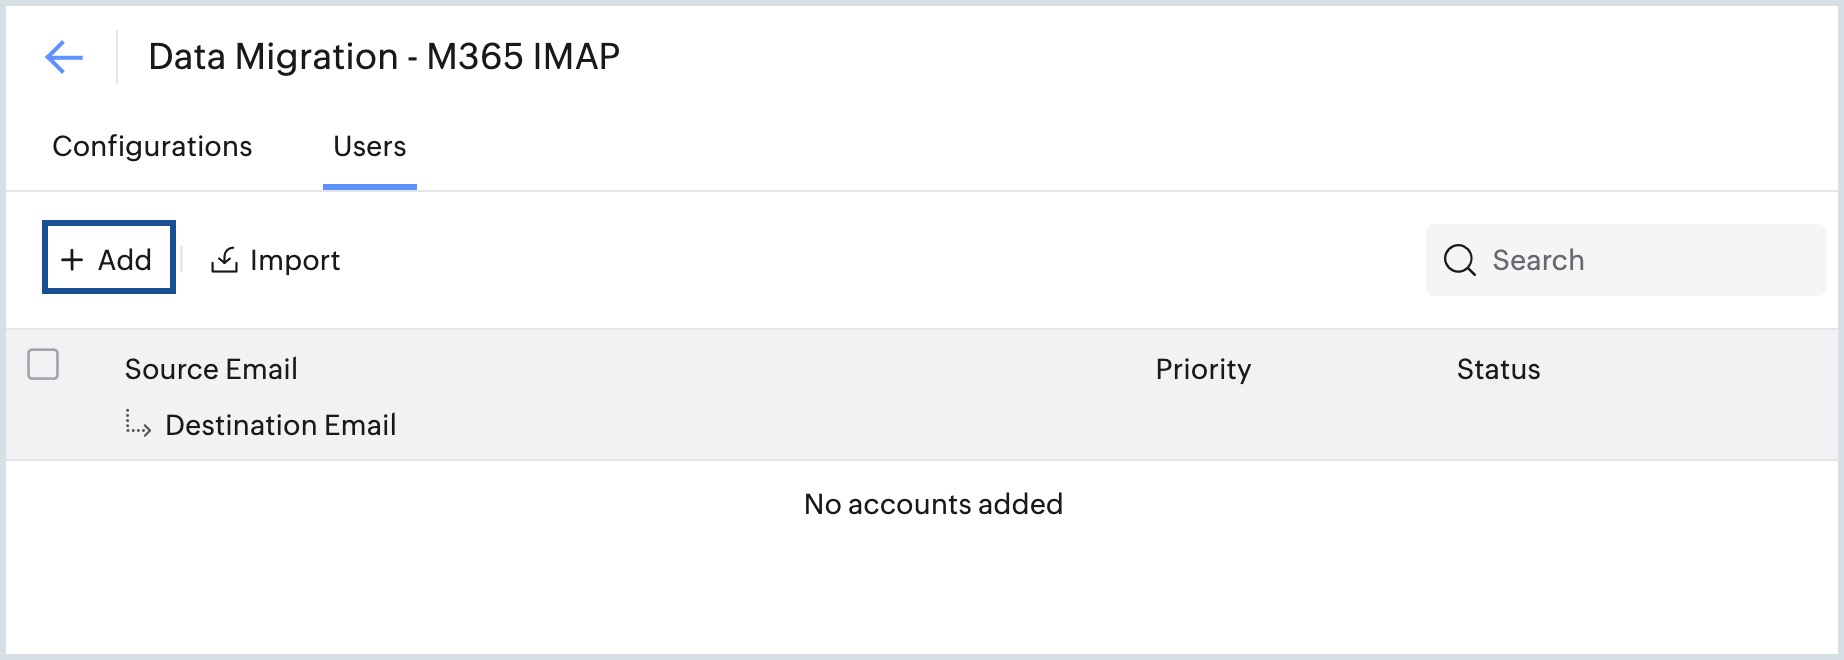
- From the Migration list, select the migration to which you want to add users.
- Navigate to the Users tab and click Add.
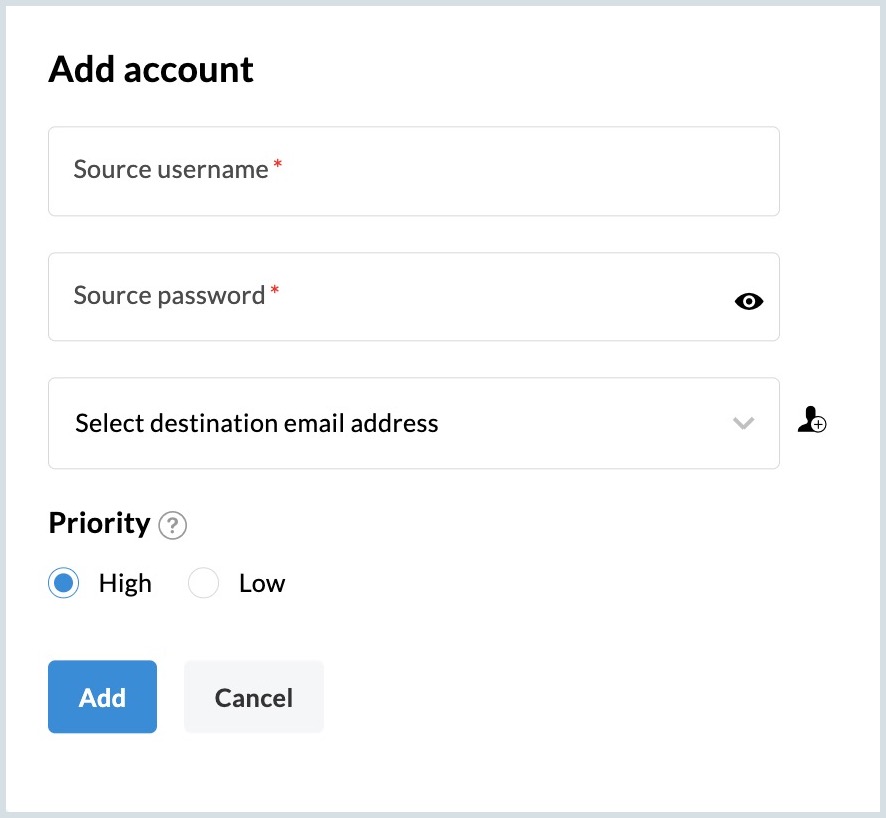
Enter the Source user name, Source password and Select the destination email address.
Note:
Earlier you could configure your Google account in Zoho Mail using your Google account password by enabling a Less secure app or App-specific password. Now, the support for the Less secure apps has been deprecated by Google. In the Source Password field, use the 16-digit App Password generated from Google. To learn more about how to use App Password, click here.
- Choose the priority for the migration and click Add. The user gets added successfully. Proceed to the Start Migration step.


This will add the users for the migration.
Steps to Import users from CSV file
Instead of manually adding the users for migration, you can add the user details to an excel sheet, save it as a CSV file and upload it. The user accounts mentioned in the CSV will be uploaded for migration.
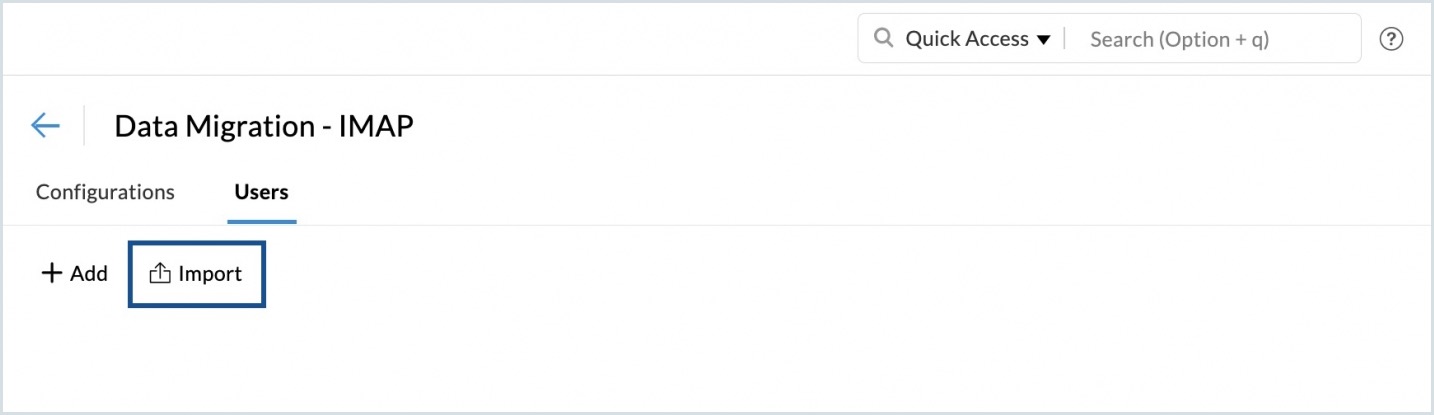
- From the Migration list, select the migration to which you want to add the source and destination user account details.
- Click Import to upload the user accounts using a CSV file.
- The format for entering the User Details in the CSV file can be found in the sample file attached in the pop-up.
- Once you have prepared your CSV file, click Browse Files, and choose the CSV file that you would like to import.
- A preview of all the users in the CSV file, along with details about whether they were imported or not will be shown on screen.

Note:
- The source account and the destination account details should mandatorily be entered in the CSV file.
- Sometimes, there might be an issue with authenticating your source account due to various reasons. For more details, follow this help page.
Start Migration
Once you have added the user accounts for the migration, you can start the migration. Ensure that the source passwords are not changed after adding the users for migration. The password should be the same until the entire migration process is completed.
- Click the Start Migration button after adding the users. If you have navigated out of the page where you added the users, select the migration that you want to start from this page, and click Start Migration.
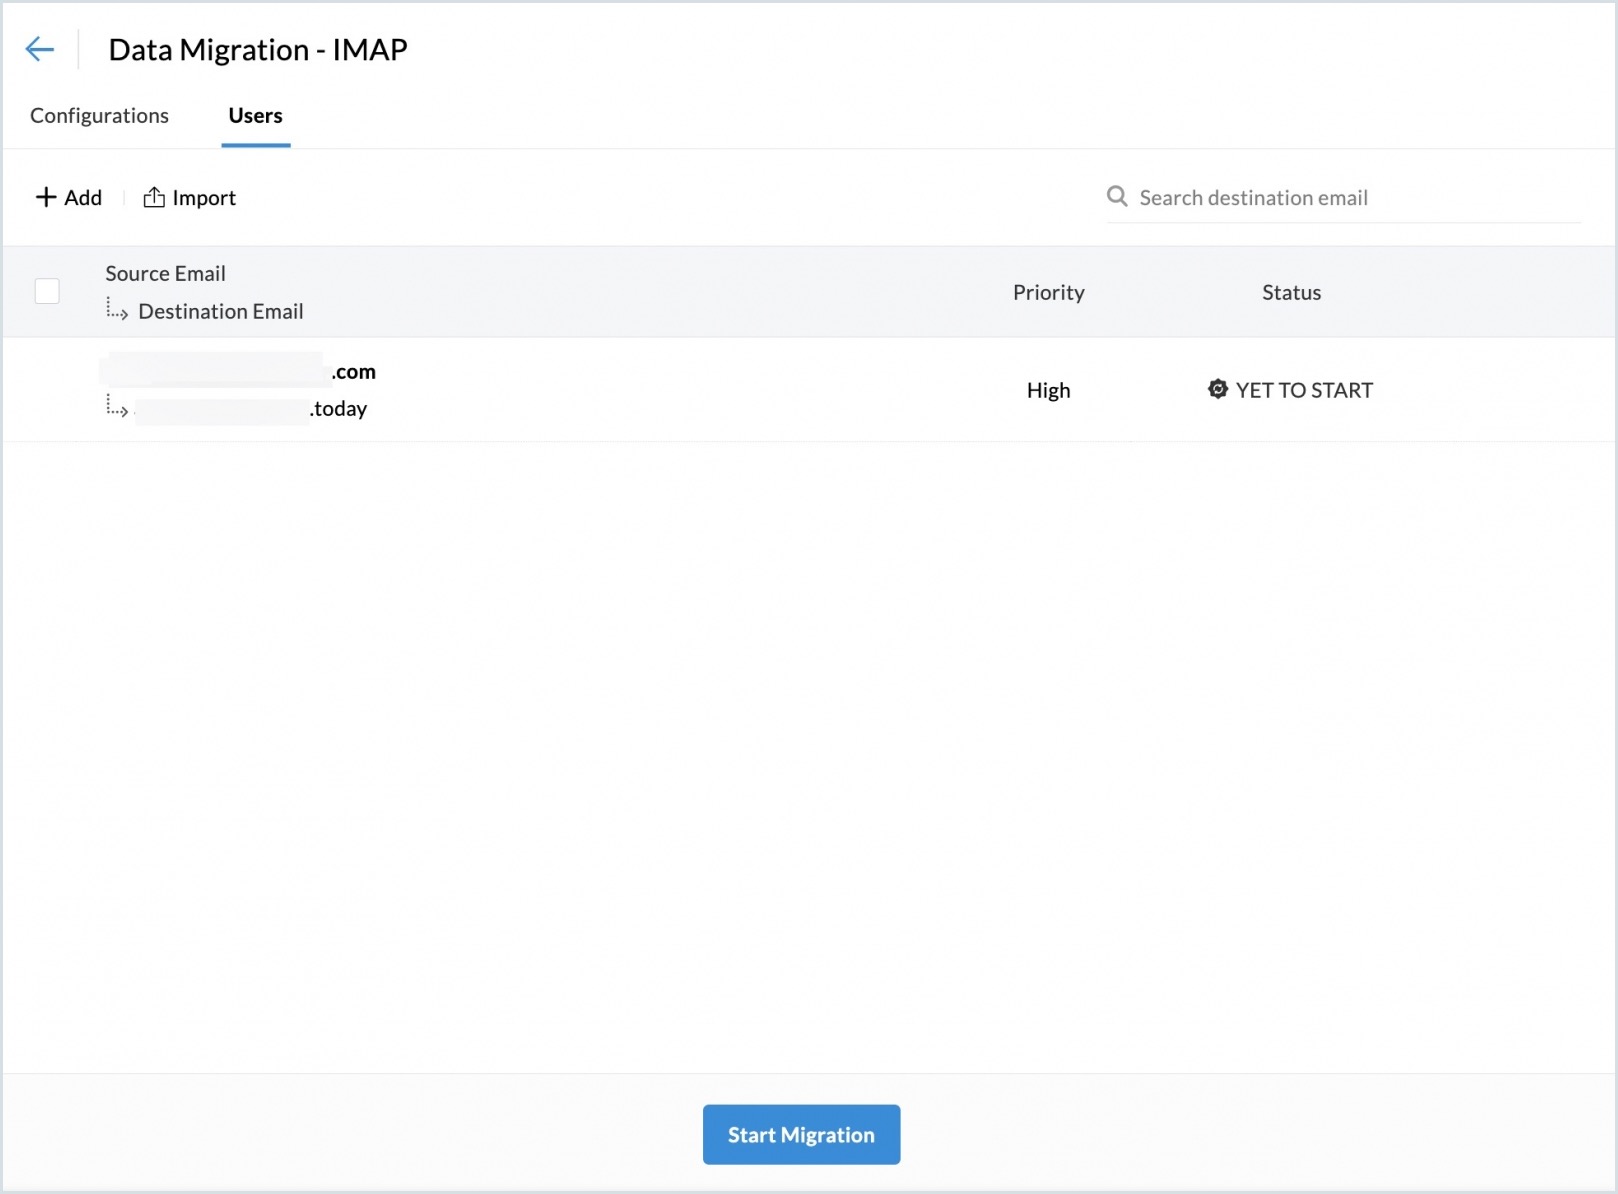
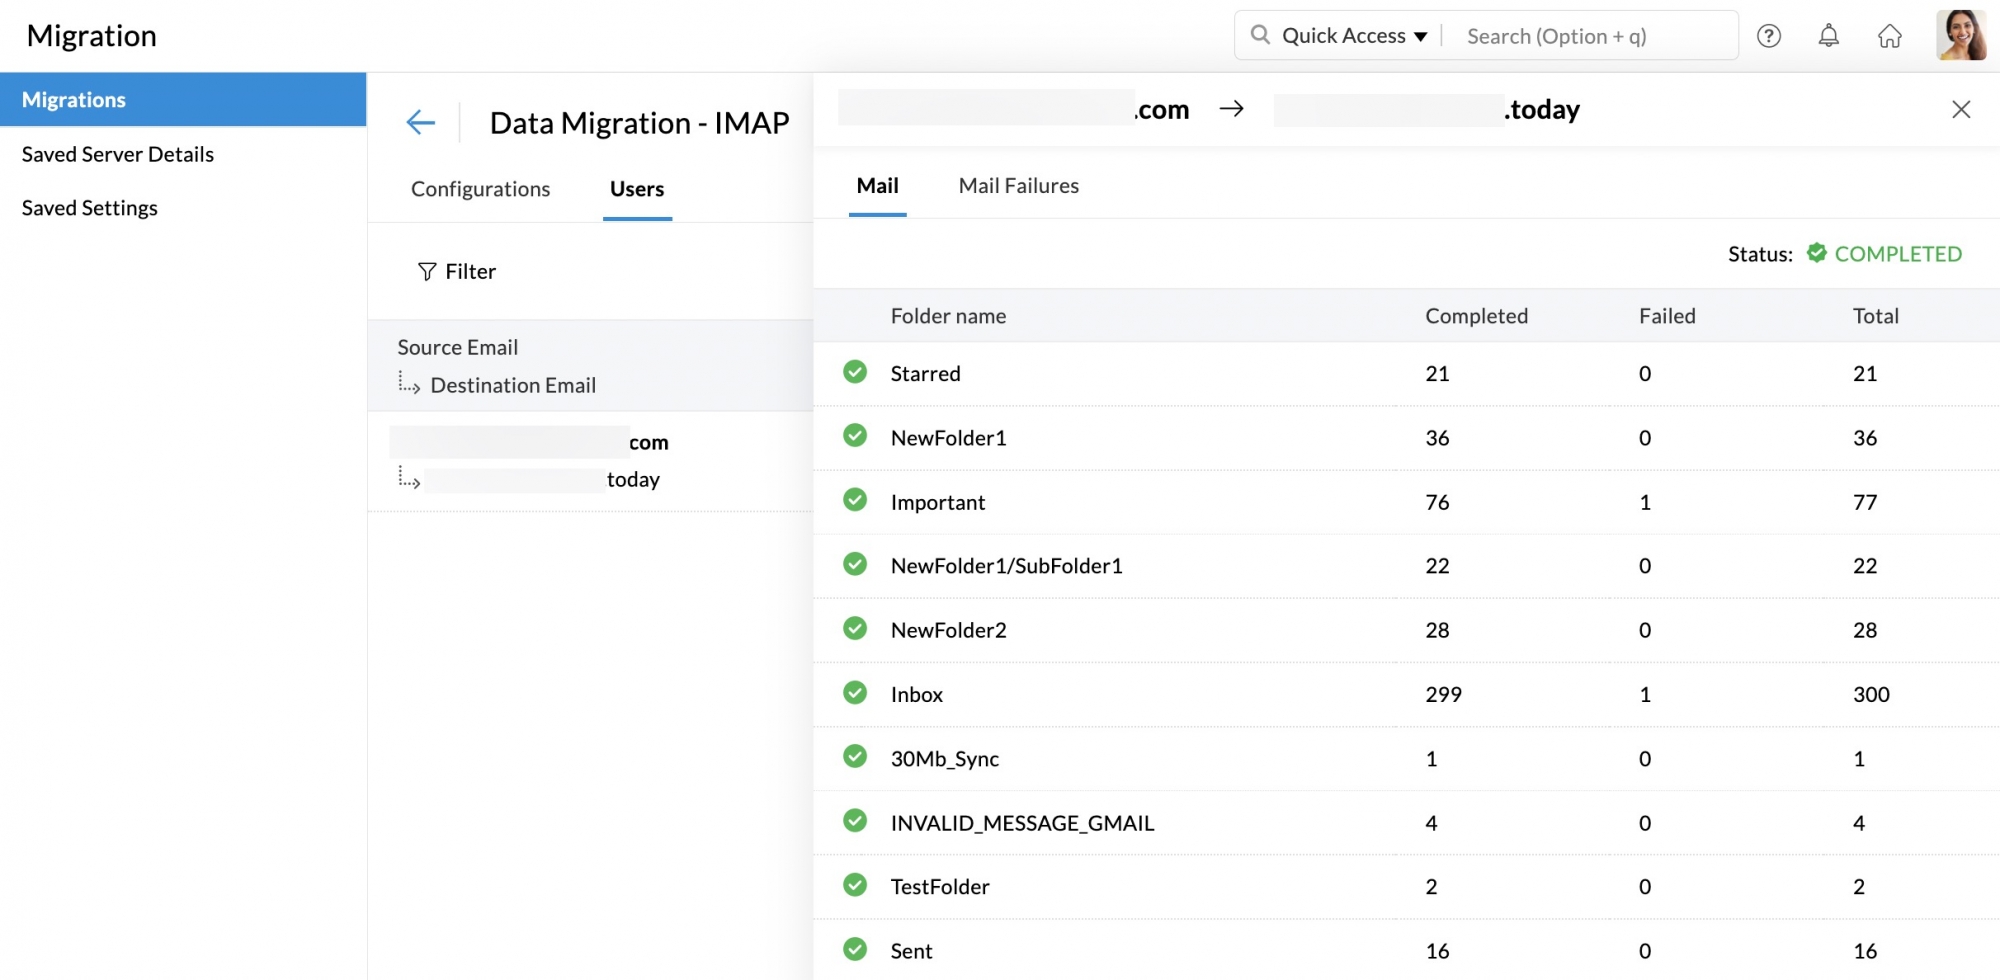
- You can view the progress and statistics regarding the migration on the same page.
- Detailed statistics regarding each user's migration can be viewed by clicking on their email address on the migration progress page.
- For mail migration, detailed reports along with folder information will be available.
- Click Mail Failures to view the detailed information about the folder-wise migration details.


For more information on reasons for migration failure, follow this help page.
Note
Suspension of Migration
During the process of migration, if the size of the emails migrated in the account, exceeds the allowed storage, the incoming emails may get blocked. Hence to avoid this, if the account reaches the allowed storage, as selected by you, the migration gets suspended(paused) temporarily. You can create more space either by deleting some of the old or unwanted emails in your previous account or by purchasing additional storage for your Zoho account.
Once you are confident that the account has enough space, you can resume the migration.