Widget Support
How Can I...
Sometimes, you may want to include features in your Zoho CRM application that are only available through off-the-shelf software. The ability to integrate with these external services helps you in extending the functionality of your application. Zoho Developer's widgets help you build embeddable UI components and seamlessly integrate them with your application data.
Types of Widgets
Currently, Zoho CRM supports five types of widgets in its user interface:
Telephony Widget
- This widget is used to integrate and embed any call center or telephony application inside Zoho CRM application.
- After users install the telephony widget, they can place a call by clicking on the telephone icon [
 ]
]

Embed a Telephony Widget
- Log in to Zoho Developer Console and click Extensions for Zoho CRM.
- Select the extension you'd like to modify and click Edit.
- Create a Connected App.
- Click Telephony in the left pane.
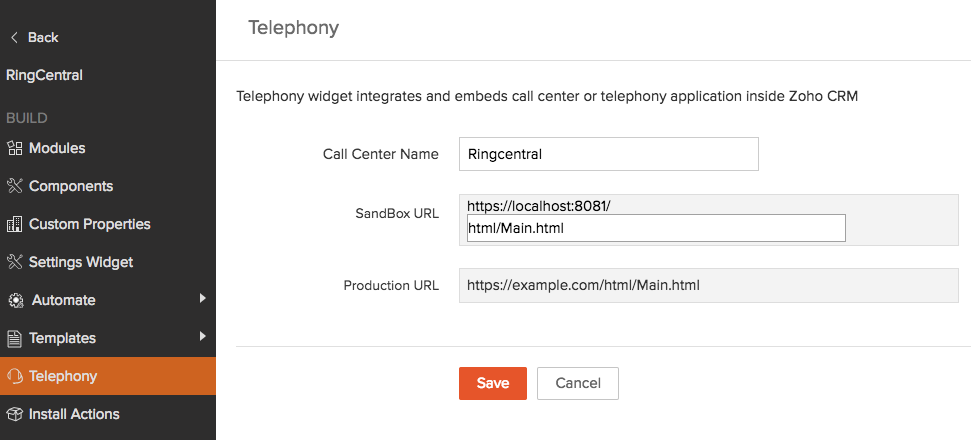
- In the Telephony page, provide the following details:
- Name for the widget in Call Center Name field.
- A resource path in SandBox URL field.
This is the relative path to the main view of your telephony widget.
- Click Save.
To learn how to use a telephony widget, click here.

Web Tabs
- Through web tab widgets, you can embed information from a third-party application inside your Zoho CRM application. Web tab widgets differ from ordinary web tabs in their ability to fetch data through APIs provided by Javascript SDK.
- If you need to create modules with UI elements that cannot be added using prebuilt or custom modules, or if you need to add features in your module that are not supported by prebuilt or custom modules, you can do so using web tabs.
- Web tabs are displayed in your application like any other prebuilt or custom modules.

Create a Web Tab
- Log in to Zoho Developer Console and click Extensions for Zoho CRM.
- Select the extension you'd like to modify and click Edit.
- Create a Connected App.
- Click Modules, located in the left pane, and select the Web Tabs tab.
- Click the Create Web Tab button in the List of Web Tabs page.
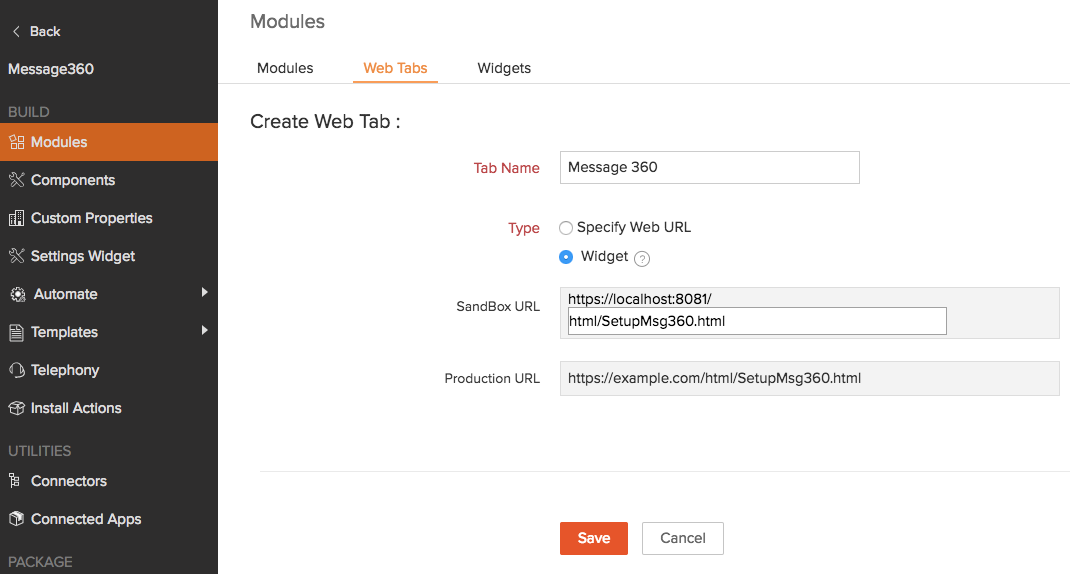
- Enter the following information:
- Name for the widget in Tab Name field.
- Select Type as Widget.
- A resource path in SandBox URL field.
This is the relative path to the main view page of your web tab widget.
- Click Save.
To learn how to put to use a web tab widget, click here.

Related Lists
- This widget helps you display correlated information from other modules or third-party service in the View page and represent it contextually as a related list.
- For example, you can integrate Google Drive with your application and upload documents from your CRM application to your Google Drive account. You can view within a record, a related list of all the associated documents uploaded to your Google Drive account. The related list will be automatically synced to your Google Drive account.

Create a Related List
- Log in to Zoho Developer Console and click Extensions for Zoho CRM.
- Select the extension you'd like to modify and click Edit.
- Create a Connected App.
- Click Components located in the left pane.
- Select Related Details tab and click Add Widgets button.
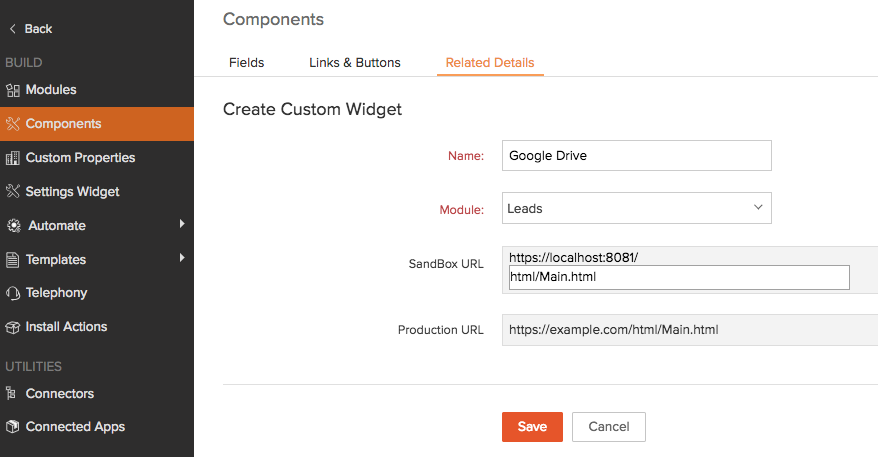
- Enter the following information:
- Name for the related list in Name field.
- Select the name of the Module in which the related list has to be added.
- A resource path in SandBox URL field.
This is the relative path to the main view page of your related list widget.
- Click Save.
To learn how to put to use a related list widget, click here.

Custom Buttons
- Buttons can also be configured as widgets. These widgets are used in List View pages or Record Details pages of a module to perform specific operations on clicking the button.
- For example, if you want to send an SMS to a Contact, then you can embed a Send SMS button to integrate with any messaging service. This button could be placed in the View, List View page or at List View - Button for each record of Contact(s).


Create a Custom Button
- Log in to Zoho Developer Console and click Extensions for Zoho CRM.
- Select the extension you'd like to modify and click Edit.
- Create a Connected App.
- Click Components located in the left pane.
- In the Components page, select the Links & Buttons tab.
- Click the Create New Button button.
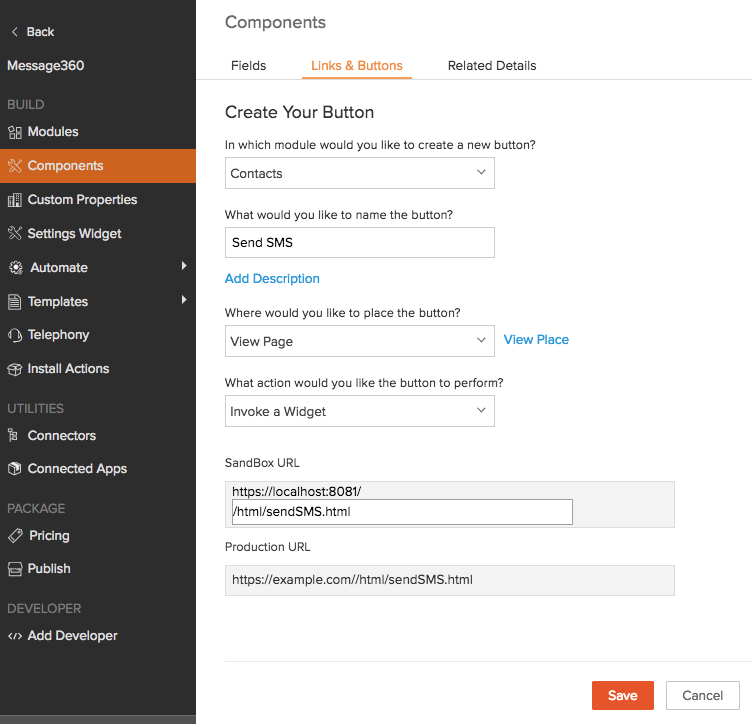
- Enter the following information:
- Select the name of the Module in which the button has to be displayed.
- Name for the button.
- Click the Add Description link and specify the functionality of your custom button.
- Choose the location to place the custom button.
- Select Invoke a Widget as the action to be executed by the custom button.
- A resource path in SandBox URL field.
This is the relative path to the main view page which will be displayed when your custom button widget is clicked.
- Click Save.
To learn how to put to use a custom button widget, click here.

Settings Widget
- While installing an extension, you'll want to put in place some configurations that are necessary for its functioning. Settings Widget helps you create the interface for establishing such configurations.
- These configurations can be a one-time set up of some global parameters that are used to authenticate the extension with an external system. It could also be some data configurations that are needed to correlate data between your application and a third-party product.
- Settings Widget helps you maintain centralized control and access to the set-up data of the extension.
- For example, consider the example where you are going to use data from an external source to create records in your CRM modules. While doing so, you might want to establish how the data from the third party product is mapped to your CRM fields.
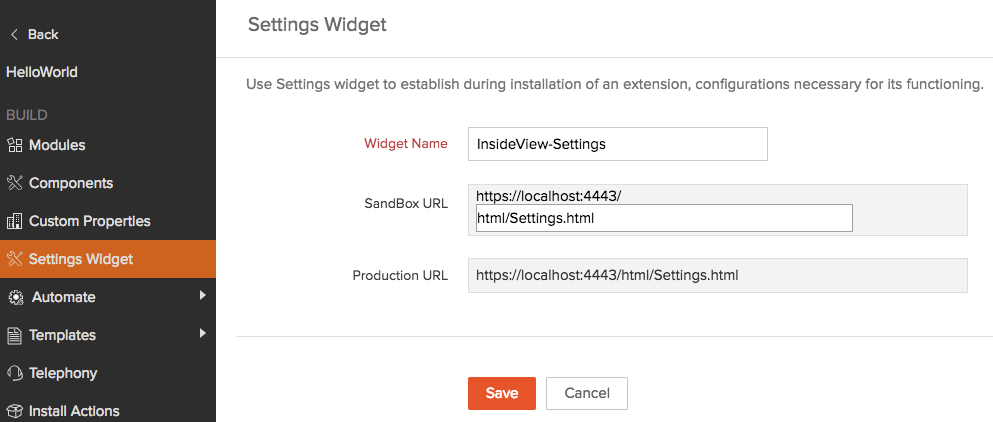
- When creating a new lead, account, or contact using the InsideView extension component, you can determine what values from InsideView should be prefilled for which fields in Zoho CRM. The below screenshot depicts the settings widget used in the InsideView extension.

- In extensions where Settings Widgets are used, the Settings option will appear in the listing for the Installed extensions.


Create a Settings Widget
- Log in to Zoho Developer Console and click Extensions for Zoho CRM.
- Select the extension you'd like to modify and click Edit.
- Create a Connected App.
- Click Settings Widget located in the left pane.
- In the Settings Widget page, provide the following details:
- Name for the widget in Widget Name field.
- A resource path in SandBox URL field.
This is the relative path to the main view page of your settings widget.
- Click Save.

Business Card Widget
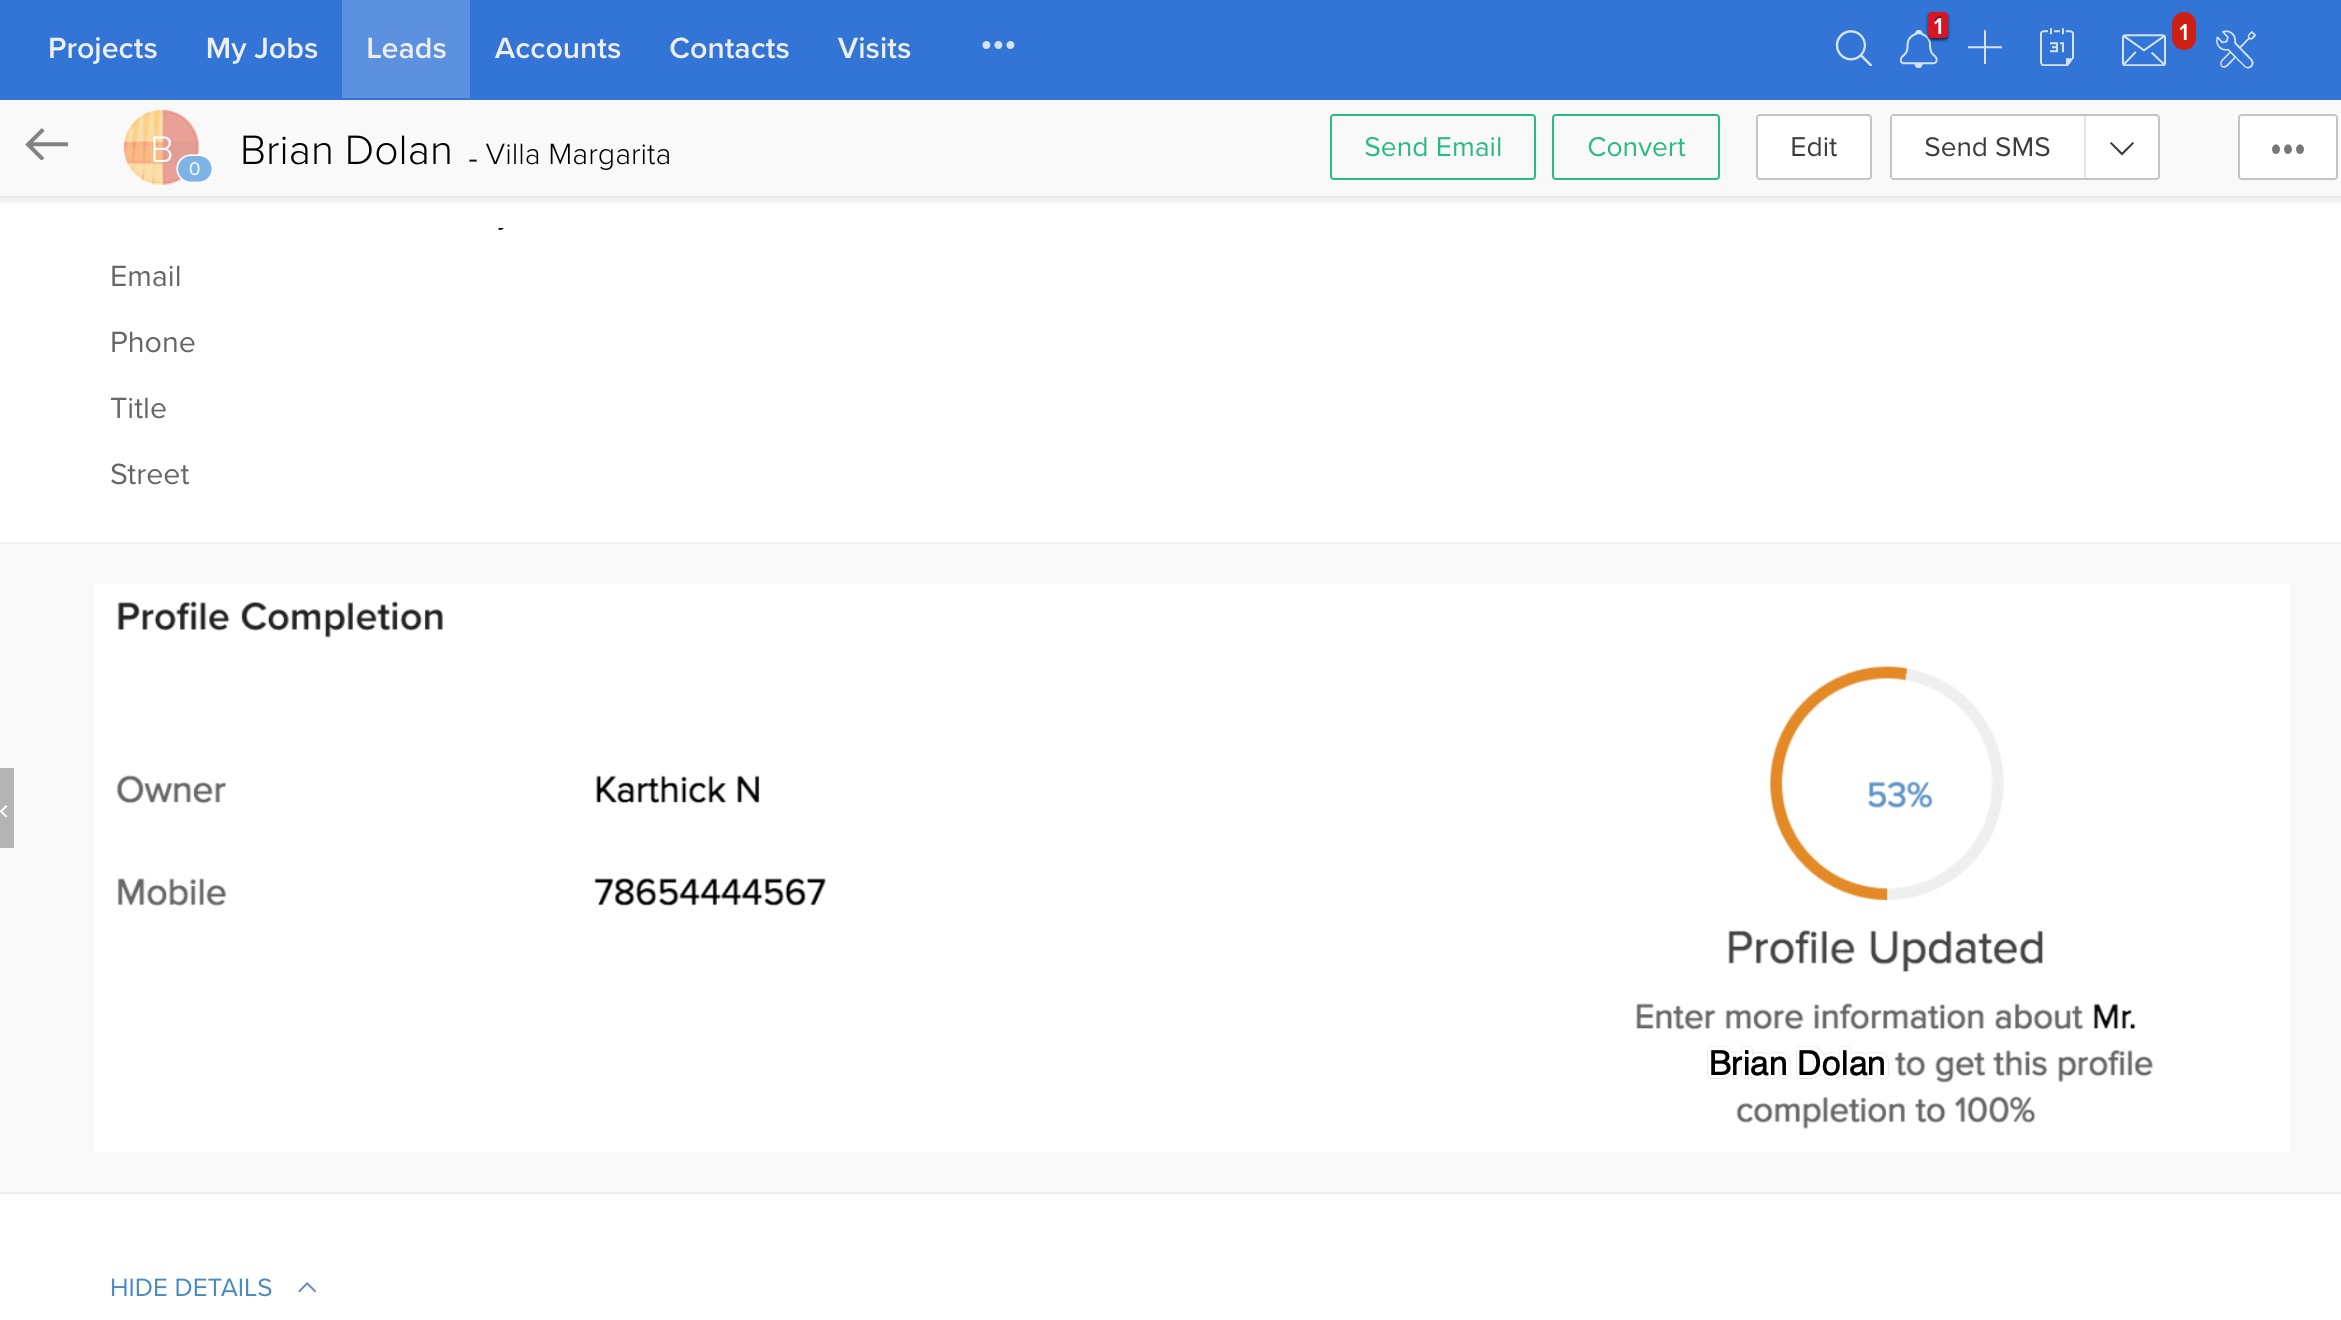
In the View page of a record in your CRM Solution, the data can be presented in a variety of modes. Use a one- or two-column section layout, related lists, and other options to customize the content and layout to ensure data is presented in the most pertinent way. You can also embed other UI components and data representations in your record by using the Business Card widget. Use the Business Card widget to display data in new formats and display derived information which is not supported in the usual framework of the CRM solution record.
Here are a few examples of how to use the Business Card widget in your application:
- Display the degree of completion for details in any module record (refer to the screenshot below)
- Display related product suggestions
- Display infographics or statistical data related to the record
- Indicate progress of a process or steps covered in a process
The Business Card widget can be included in any module record in your Zoho CRM application.
Create a Business Card Widget
- Log in to the Zoho Developer Console and click Extensions for Zoho CRM.
- Select the application to modify and click Edit.
- Create a Connected App.
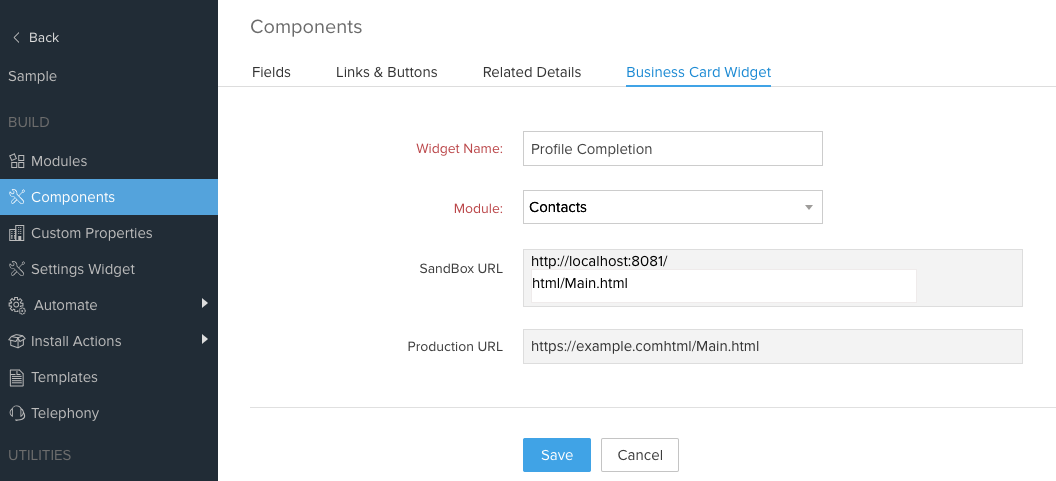
- Click Components in the left pane.
- Select Business Card Widget and click Create Widget.
- Provide the following details:
- Enter a name for the widget in the Widget Name field.
- Select the Module to view the business card widget in.
- Enter a resource path in the SandBox URL field.
This is the relative path to the main view page of your business card widget.
- Click Save.

Ensure that the height parameter in the ZOHO.CRM.UI.Resize() method has a value greater than zero.
ZOHO.CRM.UI.Resize({width:0,height:200});