Building a Ytel Connected App with Custom Button and Web Tab Widgets
A Ytel extension with Zoho CRM allows a CRM user to,
- Send an SMS to a contact or list of contacts using Custom Button.
- Create SMS templates.
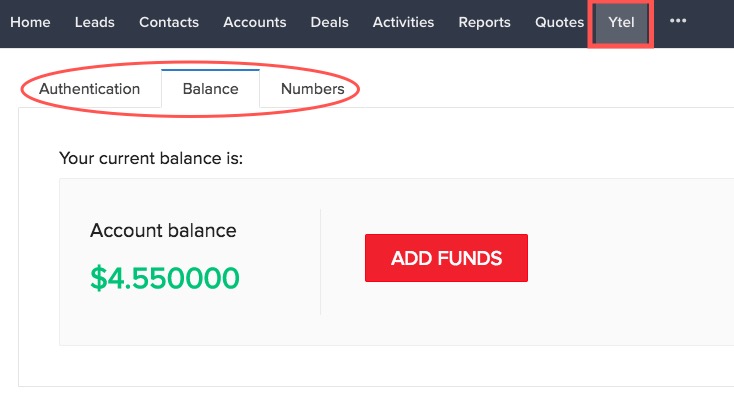
- Retrieve authentication details, add balance amount, edit phone numbers, and purchase new numbers through web tabs.
- Create a message history through an SMS History custom module.
This guide helps a developer create a Connected App with widgets to implement Ytel features with Zoho CRM.
How Can I ...
Import the Zoho JS SDK
To import Zoho JS SDK, please visit this link, download and extract it to your path.
Register the Event Listener
To pass the contextual data to the connected app, you need to register for the appropriate events. Registering an event means defining a function that will be executed when certain event is triggered by your application.The event here is
Page Load - Triggered whenever an entity page(Detail Page) is loaded.
The code for event listener for the "Ytel" application is,
})
The code to initialize SDK is,
The code to invoke an API is
});
Create and Authenticate an Extension
This extension with Zoho CRM is authenticated using custom variables. Click here to find out how to obtain the Account SID and Authtoken.
To create an extension,
- Log in to Zoho Developer Console and create a ytel extension.
- Select Custom Properties on the left pane and setup the custom variables.

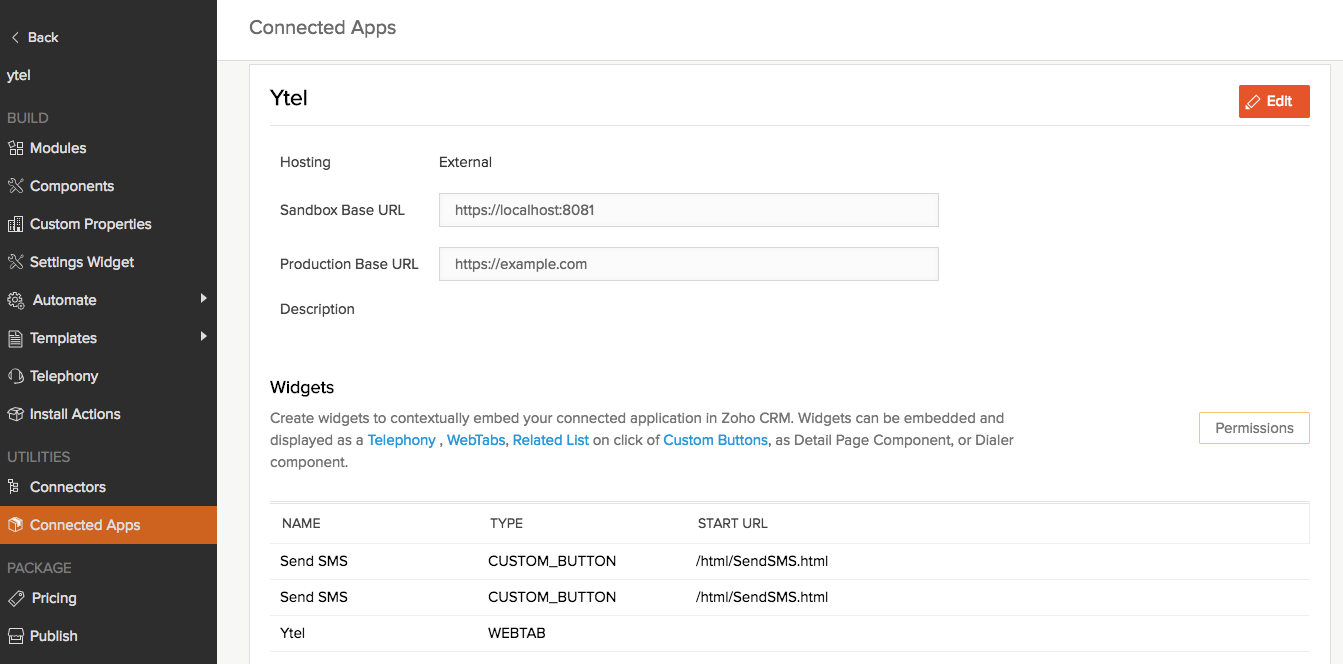
Set up a Connected App
- Click Connected Apps on the left pane of the Extension details page.
- In the Connected Apps page, enter the necessary information.
- Connected App Name : Ytel
- Description : A short description about the connected app.
- Choose Hosting : select External Hosting.
- Specify Base URL : https://localhost:8081 (Sand Box), https://example.com (Production)
- Click Save.

Create Customized Components
To create custom buttons
- Click Components on the left pane of Zoho Developer Console
- Select Links & Buttons.
- Create custom Send SMS buttons in the List View page and View page (Details page) of the Contacts module.
- What action would you like the button to perform : Select Invoke a Widget.
- Enter the SandBox URL : /html/SendSMS.html
- Click Save. Now you can view the custom buttons you've created.

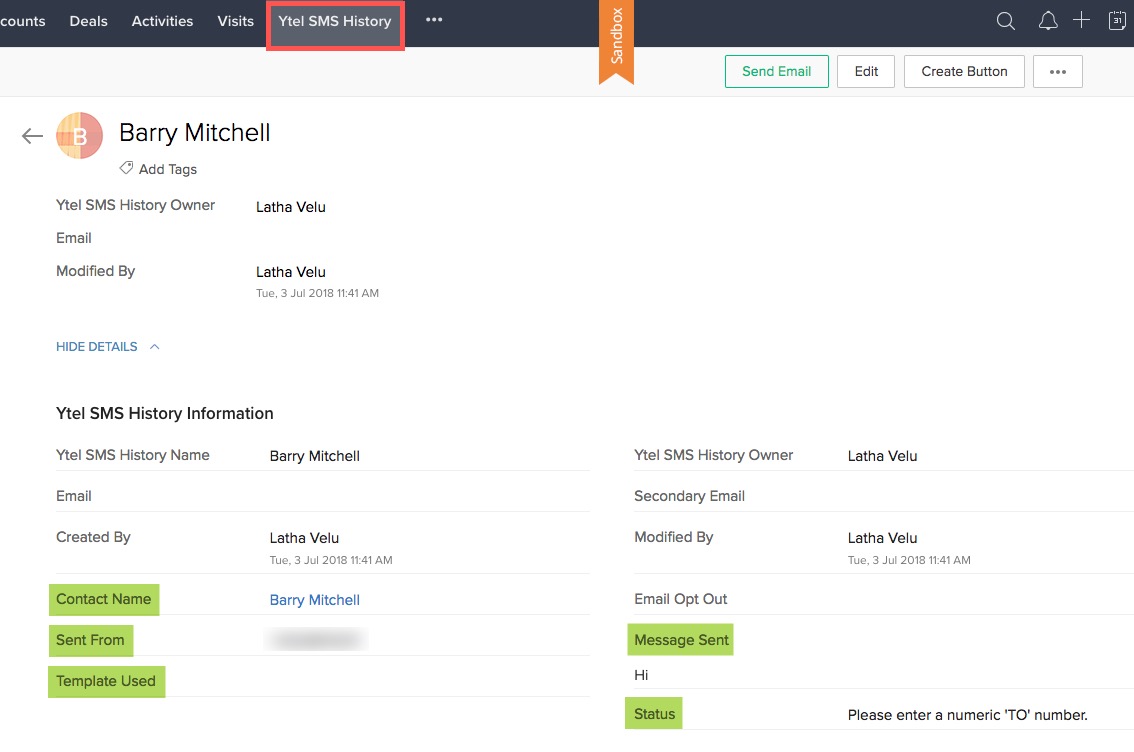
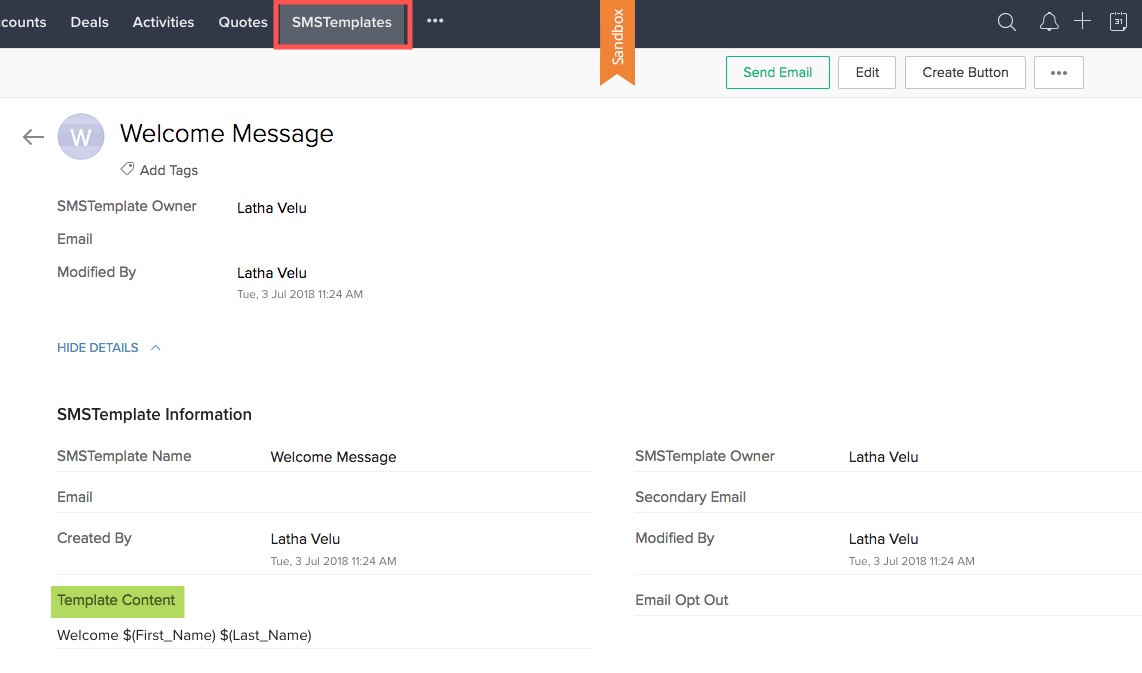
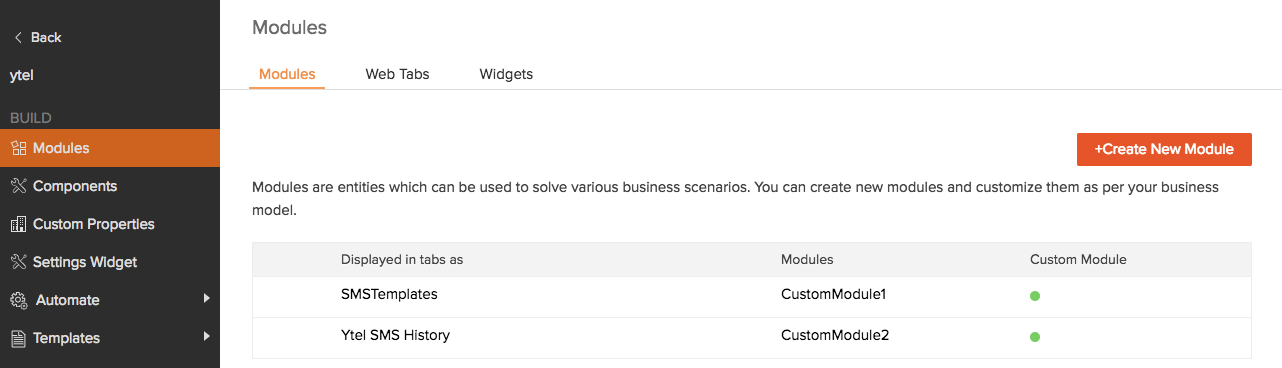
To create custom modules and fields
- Click Modules on the left pane of the Zoho Developer Console, and select Modules tab.
- Create two custom modules SMSTemplates and Ytel SMS History as shown below
- Create the fields structure for the SMSTemplates module along with one custom field named Template Content.

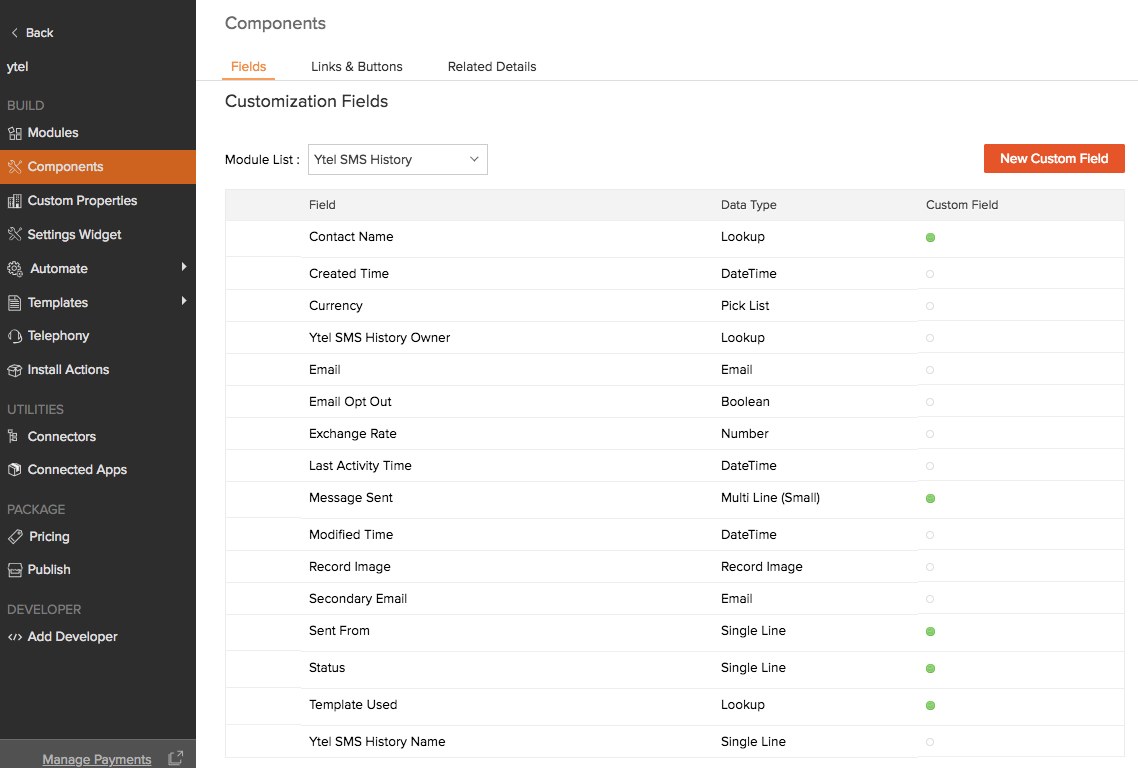
- Create the Fields structure for Ytel SMS History module with 5 custom fields,
- Contact Name : Look up
- Message Sent : Multi Line (Small)
- Sent From : Single Line
- Status : Single Line
- Template Used : Look Up
For details of how to add custom fields, refer to this page.


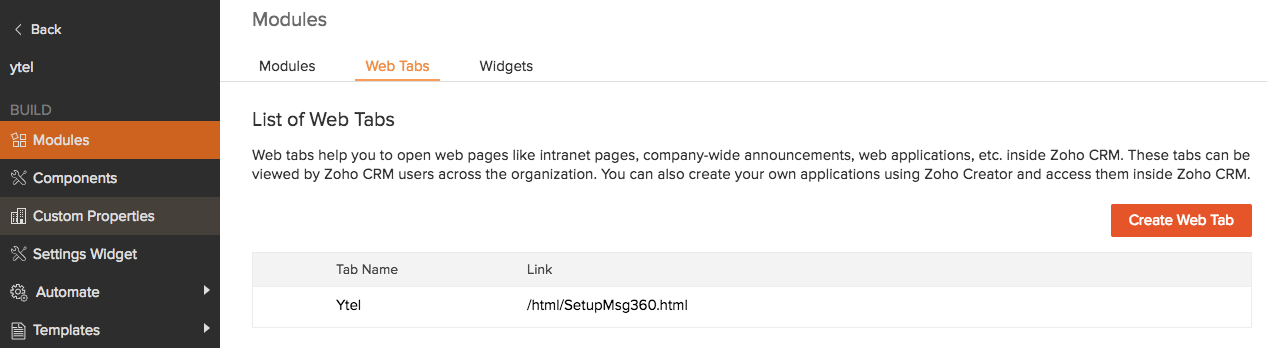
To create a web tab widget
- Click Modules on the left pane of the Zoho Developer Console, and select Web Tabs.
- Click Create Web Tab, and enter the following information,
- Tab Name : Ytel
- Type : Widget
- SandBox URL : /html/SetupMsg360.html
- Click Save.
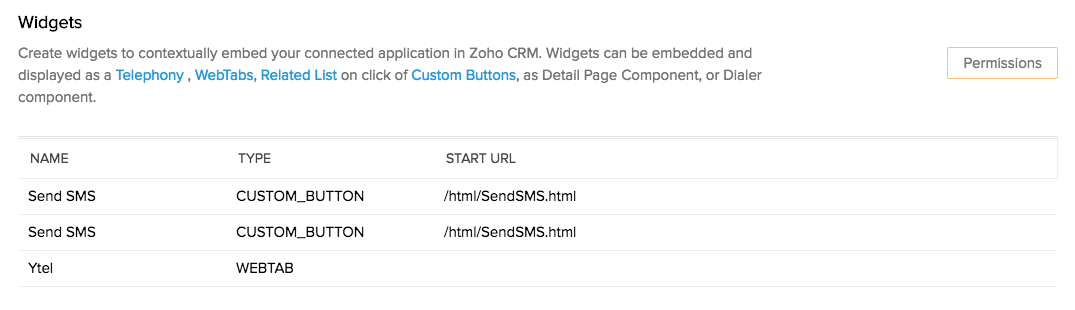
- Click Connected Apps on the left pane of the Console, and view the widgets you've created for this extension.


Test an Application
- Test the Application by clicking the Test your Extension button located in the top right corner of your Zoho Developer Console.
- Ensure that the custom button widgets, web tab and the custom modules work as intended.