Blueprint for Deal Follow-up Process
Objective: To guide Zylker's sales reps at every stage of deal follow-up process, which consists of sending and reviewing a quote.
- Here, the discounts offered to the customer will be validated by CRM, thereby ensuring that the sales teams adhere to Zylker's sales policies.
- Email notifications can promptly be automated to sales managers at the acceptance of a quote, so that it does not escape their attention.
- Basic Details and Process Flow
- Transition Settings and Execution
Enter Basic Info
Pre-requisites
Even before the first step of entering basic info, you must follow the pre-requisites mentioned below. These are essential to create a Blueprint for Zylker's Deal Follow-up scenario.
Under Setup > Customization > Modules > Deals, create the following custom fields.
- Discount - Percentage field
- Order Quantity - Number field
- Order Summary - Multi-line field
- Terms and Conditions- Pick-list field with values as Accepted and Not Accepted.
- 1.Click Setup > Process Management > Blueprint.
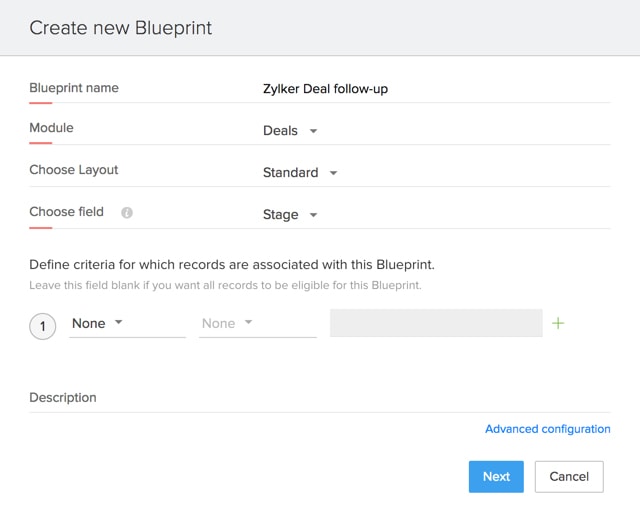
- 2.Click +Create Blueprint. In the ensuing popup window, specify the following details:
- Blueprint name: Zylker Deal Follow-up
- Module: Deals
- Layout: Standard
- Choose field: Stage
- Criteria: None
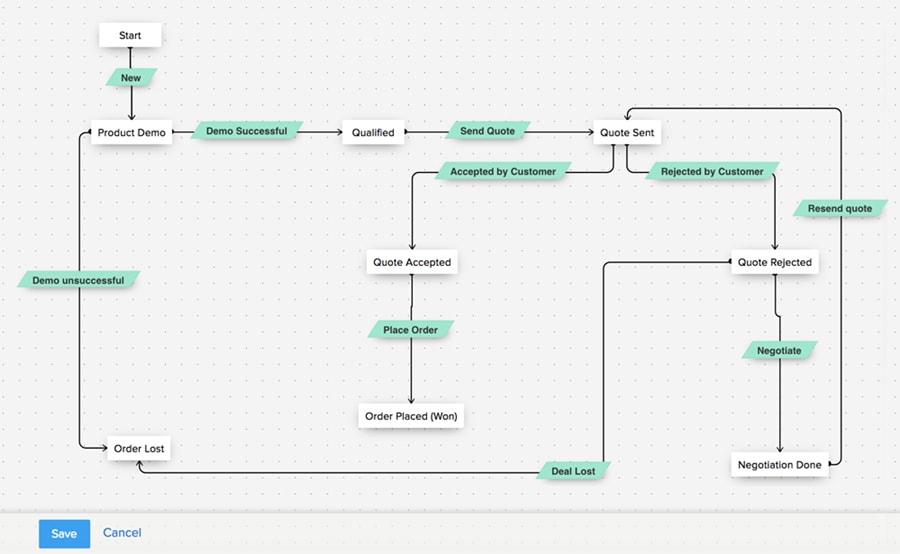
Design Process Flow
- 1.In the Blueprint Editor, drag and drop all the States (stages) that form a part of the process.
- 2.Establish the process flow between the States by connecting the nodes in the State buttons.
- 3.Create Transitions by clicking on the + button between two States. (To delete a transition, simply Right Click on the transition line and click Remove Transition)
Configure Transition Settings
| Before Transition | During Transition | After Transition |
|---|---|---|
Criteria: None | None | None |
Once you have configured the Transition settings, save the Blueprint. Now we are ready to execute this Blueprint.
Execute Blueprint
- 1.Create a new deal.
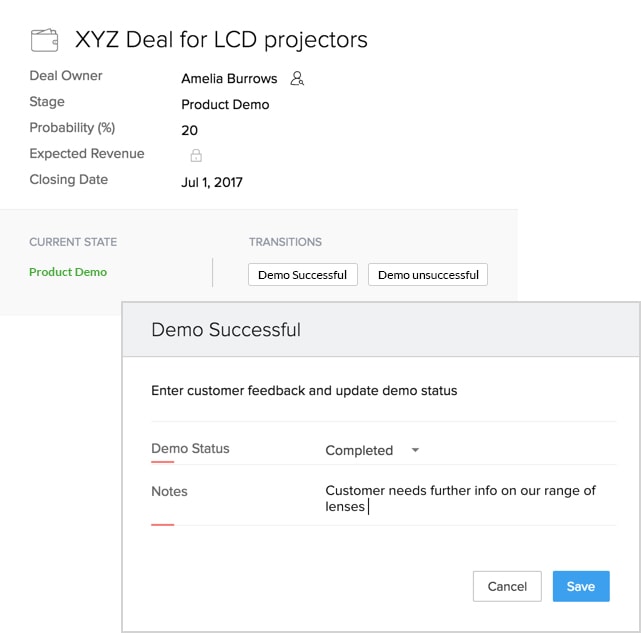
- 2.Go to the new record's detail page.
- 3.A Blueprint strip displays the "Current State" of the record and the Transitions available at that State.
- 4.Click Demo Successful. This opens a popup window which prompts you to enter the demo details such as Demo Status and notes on demo feedback from the customer. When you update the Status as Completed, you can qualify the deal.
- 5.Now click Send Quote.
- 6.Associate the sent quote with the deal.
- 7.Next, the quote has to be reviewed by the customer. If it is accepted, the order is placed. Click Place Order. You are prompted to ensure that the customer has accepted the Terms and Conditions and fill the Order Summary. On execution of this transition, the deal is closed and won.

- 8.If the quote is rejected, it goes through a negotiation and then re-sent to the customer. The product discount offered at the Negotiation stage is also validated by CRM - that is, the deal cannot complete the Negotiation stage if the discount is greater than 25%.

- 9.If the demo has been unsuccessful or for some other reason, the order is lost, click Lost Deal.
This process begins with the result of the product demo. Let's say the demo went well and the customer liked it.


This way, you can systematically follow up with a deal and close it.
You have successfully executed the Deal Follow-up Blueprint.