Blueprint for Lead Qualification
Objective: To guide Zylker's sales reps at every stage of scheduling a product demo. This Blueprint will also act as a call agent script, thereby helping a sales rep with product descriptions while they are on the phone with a prospect. This solves the problem of inconsistency in what sales reps say to leads over a call.
- Basic Details and Process Flow
- Transition Settings and Execution
Enter Basic Details
Pre-requisites
- Create two custom fields called: Demo time (Date-time field), Primary Address (Multi-line field).
- Create a custom pick-list field called "Call Status" with the following values.
Not Contacted Responded Greetings Product Brief Not Responsive Demo scheduled
Contact in future
Lead Lost
Attempting to contact
Nil
- Create a custom pick-list field called "Product interested in" with the following values.
Home theatre systems LCD Projectors Video game consoles 5.1 multimedia speakers USB Condenser microphone To enter basic details
- 1.Go to Setup > Process Management > Blueprint.
- 2.Click Create Blueprint.
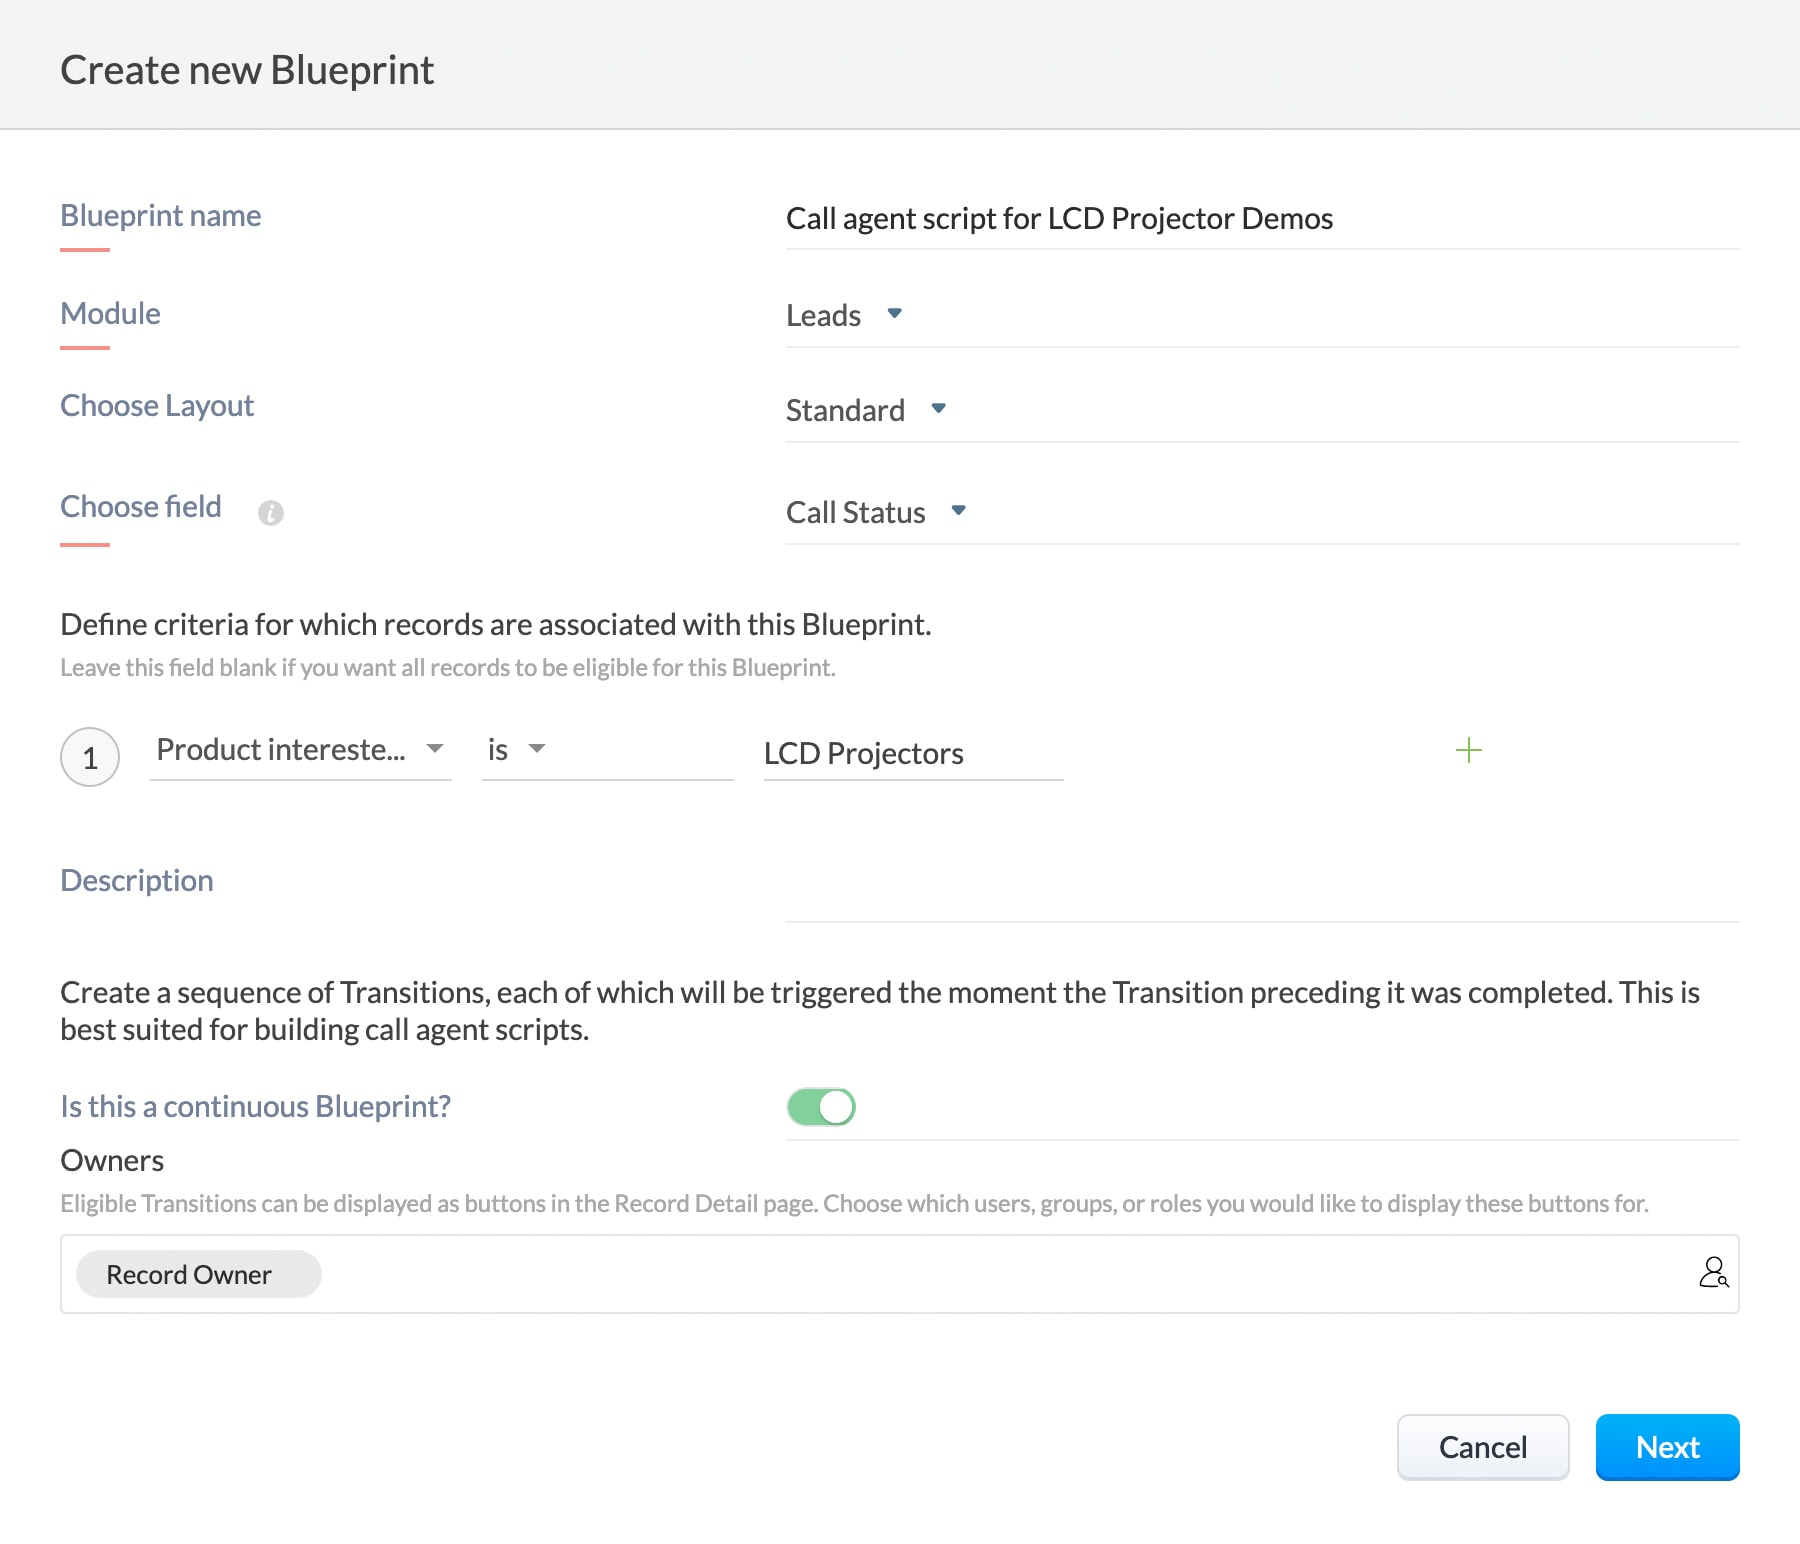
- 3.In the Create Blueprint popup, specify the following details:
- Blueprint name: Call agent script for LCD Projector Demos
- Module: Leads
- Layout: Standard
- Choose field: Call Status
- Criteria: Product interested in is LCD Projectors.
- 4.Click Advanced Configuration and activate Continuous Blueprint.
- 5. Choose Owners of this Blueprint.
- 6.Click Next.
Notes
- Continuous Blueprint is one in which the stages in a process are executed one after the other without a pause. Hence it is ideal for call scripting.
- For the same reason, a Continuous Blueprint cannot have multiple "Transition Owners", as the process is not intermittent. Example, a call script will be executed from start to end by a single person - this owner can be defined in the Create Blueprint page.
Design Process Flow
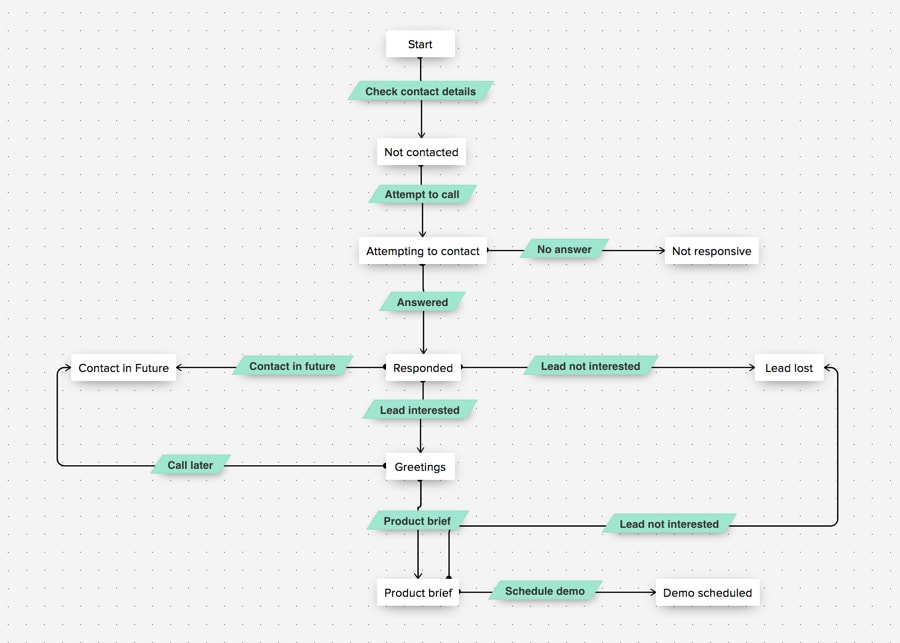
- 1.In Blueprint Editor, drag and drop all the States (stages) that form a part of the process.
- 2.Establish the process flow between the States by connecting the nodes in the State buttons.
- 3.Create Transitions by clicking on the + button between two States. (To delete a transition, simply right click on the transition line and click Remove Transition)
- Create a custom pick-list field called "Product interested in" with the following values.
Under Setup > Customization > Modules > Leads.


Configure Transition Settings
Following are the instructions to configure each Transition included in the Leads Qualification Blueprint for Zylker. Click on each Transition header to reveal the Before, During and After Transition settings.
| Before Transition | During Transition | After Transition |
|---|---|---|
Criteria: None | Add Message: "Enter phone number and email if not already available." Add mandatory fields: Email & Phone | None |
Once you have configured the Transition settings, save the Blueprint. Now we are ready to execute this continuous Blueprint. Click Done to see how this process is executed.
Execute Blueprint
To execute the Lead Qualification Blueprint
- 1.Create a new lead with the following field values.
- Call Status: None
- Product interested in: LCD Projectors
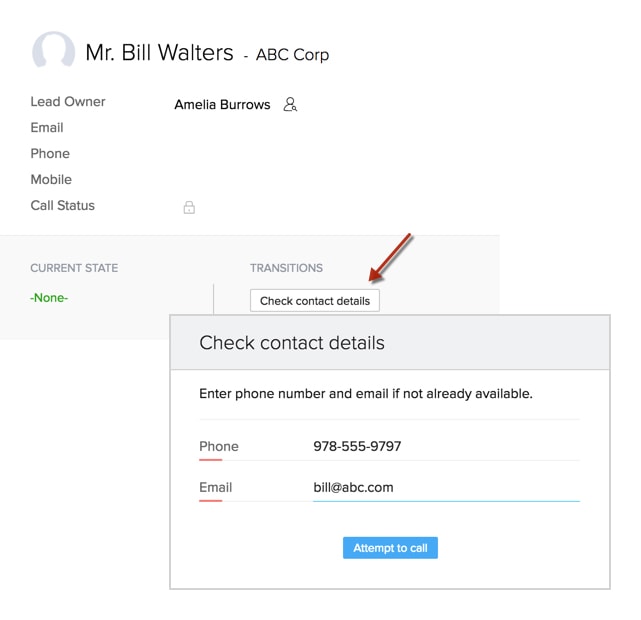
- 2.Go to the new record's detail page. A Blueprint strip displays the "Current State" of the record and the Transitions available at that State.
- 3.Say you are now all set to make a call to a lead in order to schedule a product demo. Click Check contact details. This opens a popup window which prompts you to enter the Phone number and email address of the lead. This way, CRM prompts important information from the users, contextually. Once you have entered the required details, click the next Transition - Attempt to Call.
- 4.Let's say the lead answers your call. Click Answered.
- 5.In the next set of Transitions, you see that the lead may be interested, not interested or may ask you to call later. For this example, click Lead interested.
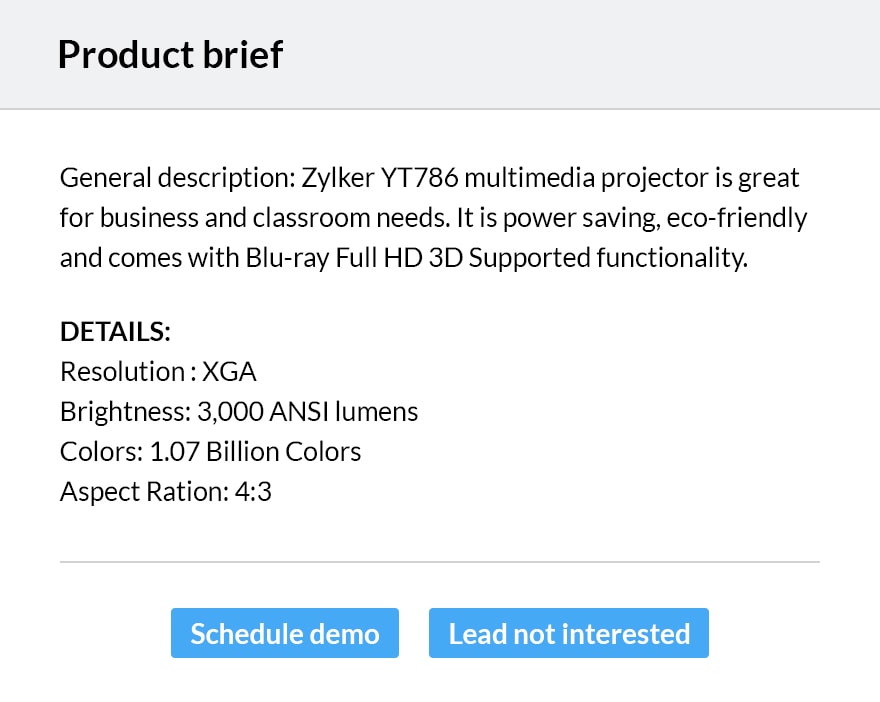
- 6.A popup window displays the script to help the agent begin the conversation with the lead.
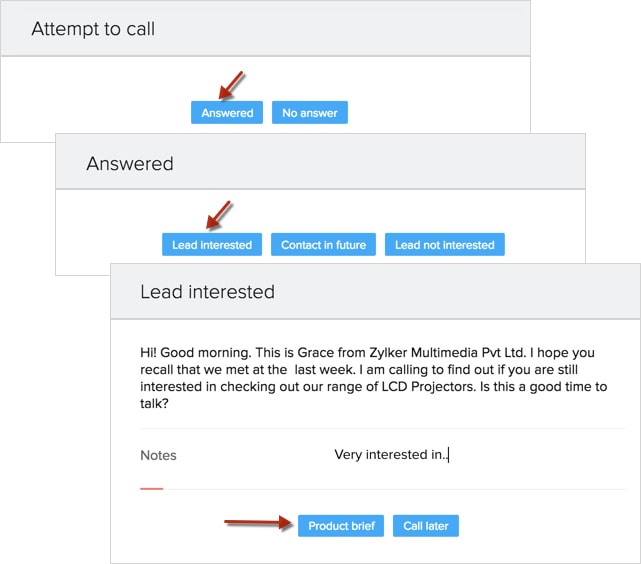
- 7.Next, if the lead is further interested, click Product Brief and read the description off the script.
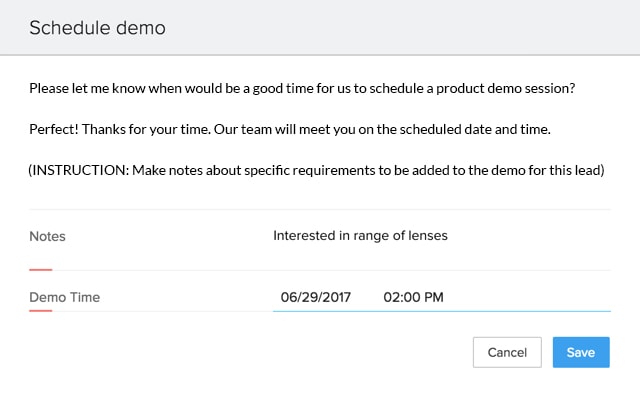
- 8.If the lead agrees on scheduling a demo. click Schedule Demo, and enter the Demo date, time and address.
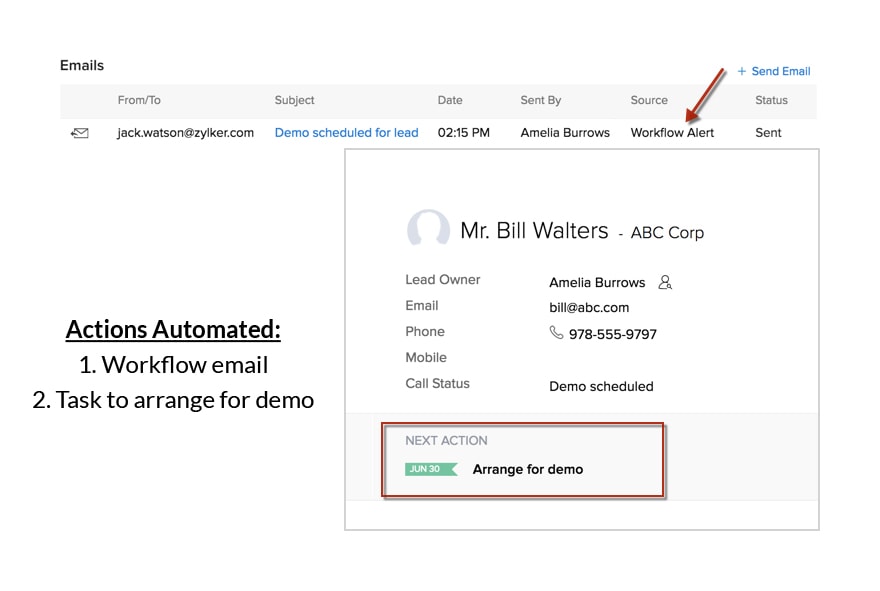
- 9.Once this final Transition is done, you will see that the Call Status of the record has been updated to "Demo Scheduled". At the same time, you will also notice that a task for arranging demo and a demo notification email have automatically been triggered, as per the "After Transition" settings in Blueprint.


You have successfully executed the Lead Qualification Blueprint.