Create and manage groups
Create a group
You can create groups in your Zoho account and the accounts where you have the permission to access the Account Setup. To create a group in your account:
- Go to your Zoho Creator Home.
- Click the Setup icon near the top-right corner of the Home page. You'll be taken to your account's Setup page.
- Click Groups under User Management. You'll be taken to the Groups page:
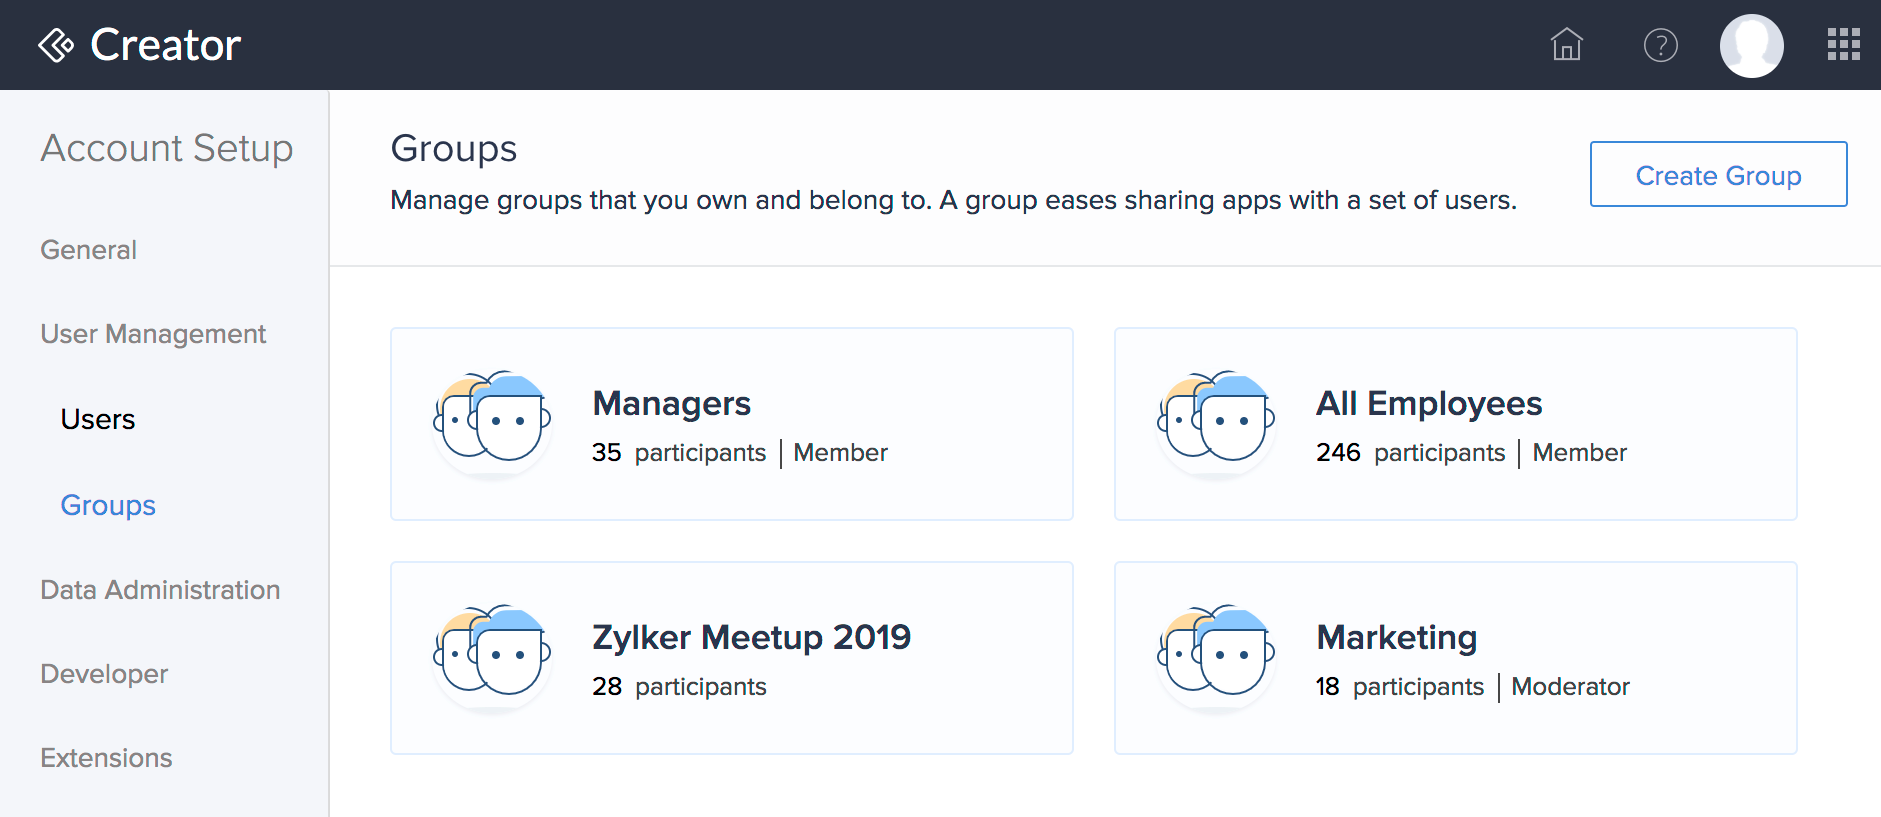
- Click Create Group displayed near the top-right corner of the page. The Create Group pane will slide in from the right.
- Set Group name as required:
- It can contain a maximum of 30 characters
- It can include the following special characters: hyphen (-) underscore (_), asterisk (*), at (@), backslash (\), forward slash (/), exclamation mark (!), colon (:), pipe (|), tilde (~), and ampersand (&)
- Set Group description as required:
- It can contain a maximum of 200 characters
- It can include the following special characters: hyphen (-) underscore (_), asterisk (*), at (@), backslash (\), forward slash (/), exclamation mark (!), colon (:), pipe (|), tilde (~), ampersand (&), parentheses (), period (.) and comma (,)
- Enter the Email address of at least one user whom you want to invite to the group.Note: You can add a maximum of 200 participants while creating a group. You can invite more after creating the group, as given here.
- Set an Additional message. This will be added to the invitation email that your invitees will receive, which by default will include the group's name and description.
- Select the Invitation Language. The invitation email will be sent in this language. The group's name, description, and your message won't be translated; they'll be included as is.
- Click Create. Upon successful creation, the group will appear in your Groups page.

Invitees must accept your invitation to become a participant in your group. Until they accept, their Status will be Pending. You can always Re-Invite such members when required.
Manage groups
You can perform the following actions in groups where you are the Owner or Moderator:
- Edit a group's name and description
- Add and remove participants
- Assign and unassign moderators
- Re-invite an invitee
- Delete a group

Edit a group's name and description
- Navigate to the Groups page.
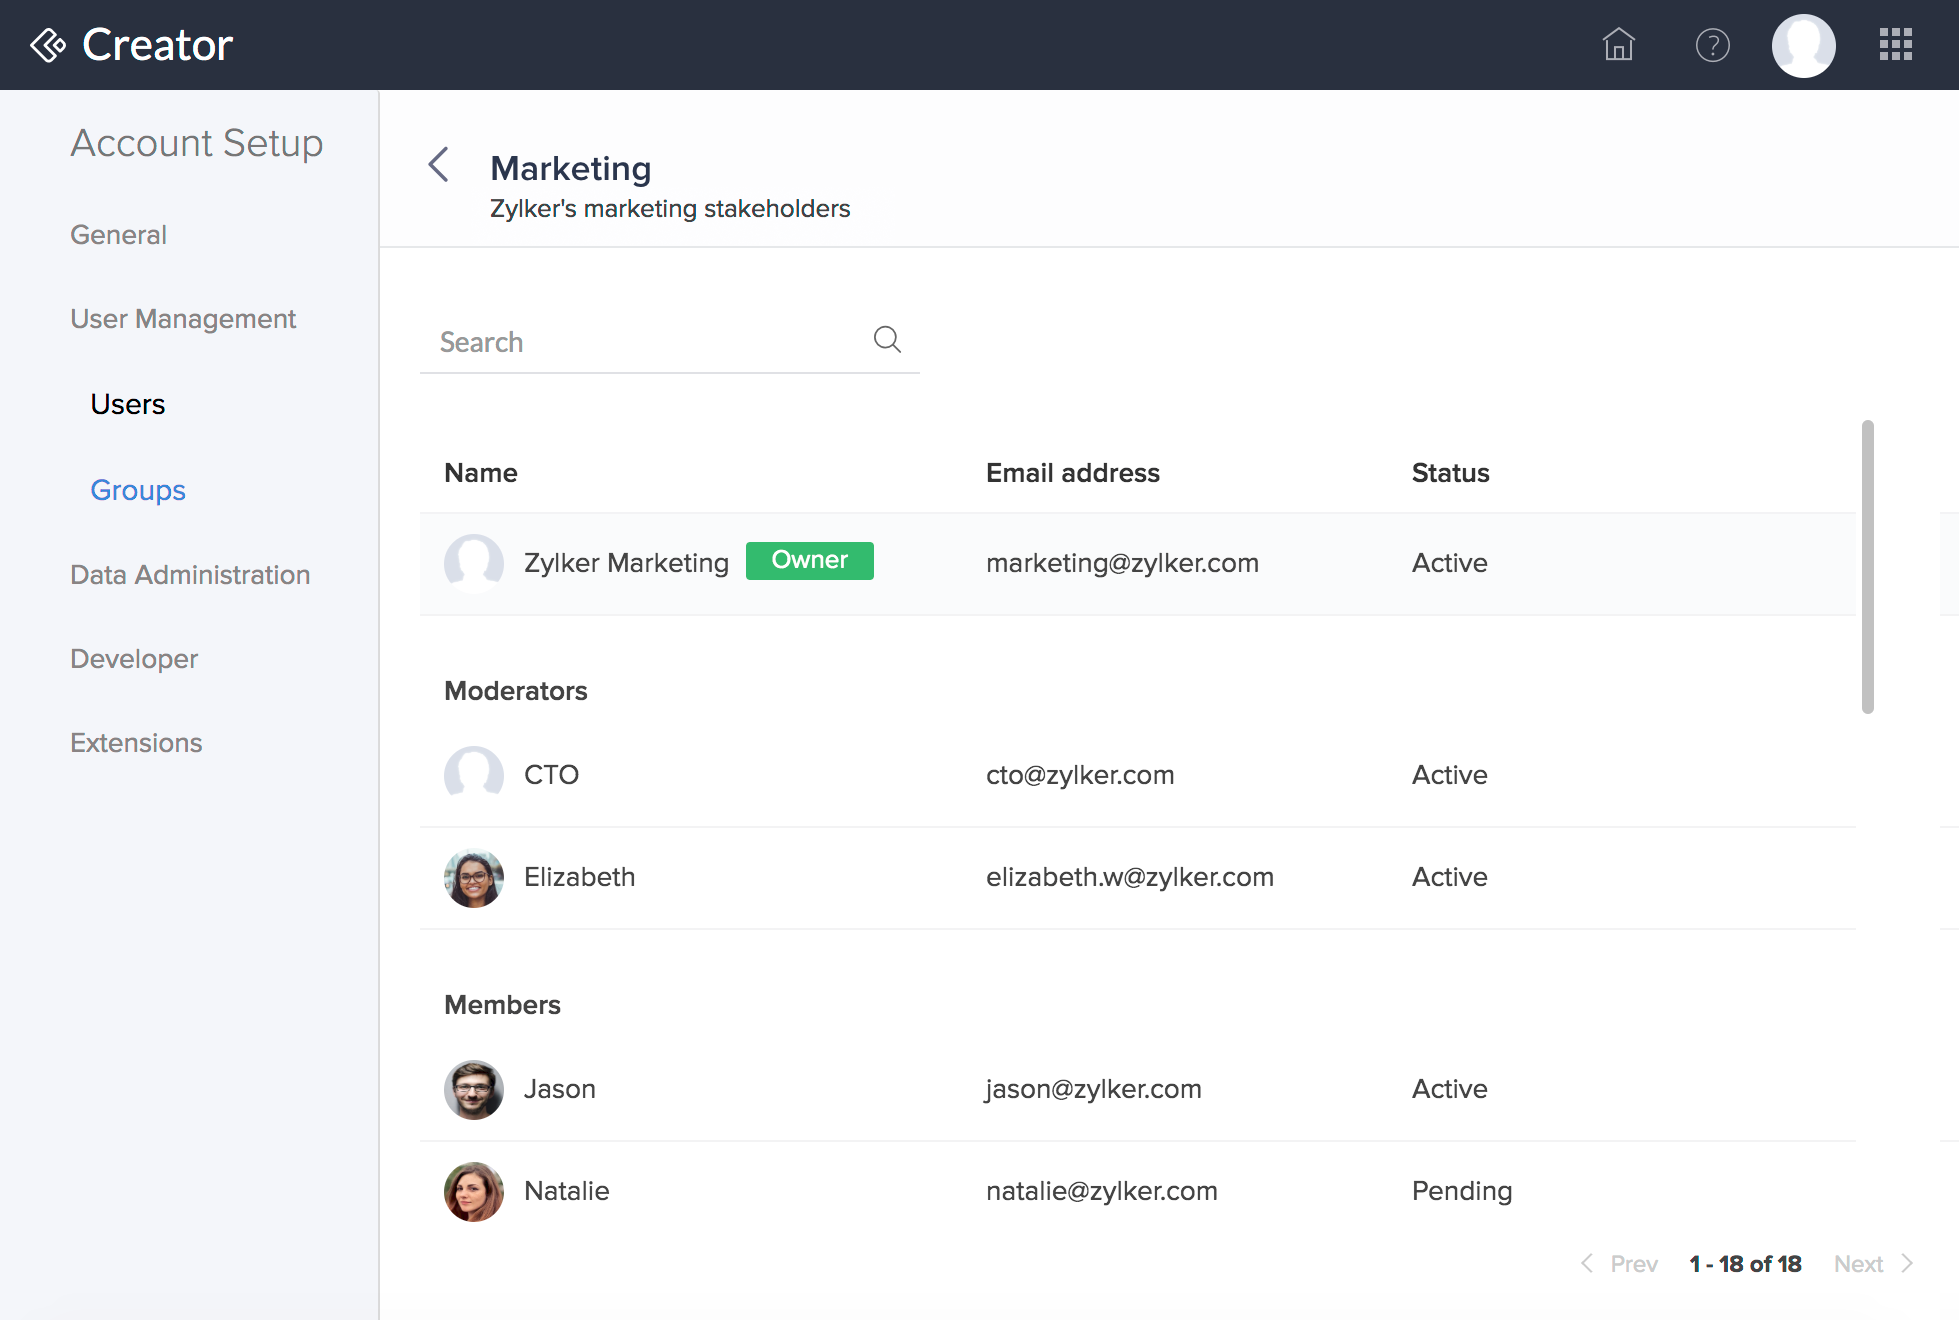
- Click on the required group. Its details will appear.
- Click the Edit button displayed next to the group's name at the top.
- Set Group name as required:
- It can contain a maximum of 30 characters
- It can include the following special characters: hyphen (-) underscore (_), asterisk (*), at (@), backslash (\), forward slash (/), exclamation mark (!), colon (:), pipe (|), tilde (~), and ampersand (&)
- Set Group description as required:
- It can contain a maximum of 200 characters
- It can include the following special characters: hyphen (-) underscore (_), asterisk (*), at (@), backslash (\), forward slash (/), exclamation mark (!), colon (:), pipe (|), tilde (~), ampersand (&), parentheses (), period (.) and comma (,)
- Click Save.
Add and remove participants
- Navigate to the Groups page.
- Hover over the required group, click the More (triple dot) icon, then click Invite. Alternatively, you can click on the group then click the Invite button displayed near the top-right corner of the page. The Invite to Group pane will slide in from the right.
- Enter the Email address of at least one user whom you want to invite to the group.Note: You can add a maximum of 200 participants at a time. Also, you can add a maximum of 2,000 participants per day to the groups in your accounts. If you add beyond this limit, invitation emails from your account will be blocked for the next 24 hours.
- Set an Additional message. This will be added to the invitation email that your invitees will receive, which by default will include the group's name and description.
- Select the Invitation Language. The invitation email will be sent in this language. The group's name, description, and your message won't be translated; they'll be included as is.
- Click Invite. Invitees will receive an invitation email that they must accept to become a participant in your group. Until they accept, their Status will be Pending. You can always Re-Invite such members when required.
To remove a participant from the group, hover over that participant, and then click Delete. Removing a participant from a group will also remove their access to apps that are shared with that group.
Assign and unassign moderators
You can make a Member of your group as its Moderator - a participant who can perform all operations that the group's Owner can. The moderator privilege can be revoked by making that participant a Member or by removing them from the group.
- Navigate to the Groups page.
- Click on the required group. Its details will appear.
- Hover over a participant who's a Member, then click Make Moderator.
- Hover over a participant who's a Moderator, then click Make Member.
Re-invite invitee to join the group
- Navigate to the Groups page.
- Hover over a participant whose Status is Pending, then click Re-invite. The invitee will again receive your group's invitation email.
Delete a group
- Navigate to the Groups page.
- Hover over the required group, click the More (triple dot) icon, then click Delete Group. An alert will appear.
- Click Delete.
Deleting a group will cause the group members to lose access to apps that are shared with that group.
Things to know
- A group's name can contain a maximum of 30 characters and can include the following special characters: hyphen (-) underscore (_), asterisk (*), at (@), backslash (\), forward slash (/), exclamation mark (!), colon (:), pipe (|), tilde (~), and ampersand (&).
- A group's description can contain a maximum of 200 characters and can include the following special characters: hyphen (-) underscore (_), asterisk (*), at (@), backslash (\), forward slash (/), exclamation mark (!), colon (:), pipe (|), tilde (~), ampersand (&), parentheses (), period (.) and comma (,).
- You can add a maximum of 200 participants while creating a group. You can add more after creating the group, as given here.
- You can add a maximum of 200 participants at a time. Also, you can add a maximum of 2,000 participants per day to the groups in your accounts. If you add beyond this limit, invitation emails from your account will be blocked for the next 24 hours.
- You can send a maximum of 10 re-invitations in a day.