Web SDK - Overview
The Catalyst Web SDK has the javascript methods which helps you to access the Catalyst Components from your client web application.
Prerequisites
- Catalyst CLI (Refer CLI Installation)
- Catalyst project (Refer Catalyst Projects)
- Any text editor(Xcode or Sublime)
Authentication
Zoho Catalyst provides a straightforward authentication mechanism for users to access the Catalyst REST APIs and our SDKs. In order to use the catalyst components from your client application, it is mandatory to integrate the authentication mechanism provided by Catalyst.
Initialize SDK
Catalyst Authentication can be integrated with your application, by including the code snippet given below in your application. This script allows you to access the JavaScript methods of Catalyst Web SDK.
This initializes the Web SDK and refers to an init.js file which will automatically populate the essential details of your project, such as the Project ID which is your project's unique ID and ZAID which is the project's key.
These values are automatically populated based on the environment that you are working on. That is, if this script is called from the Development environment URL of your app, the appropriate ZAID value is populated.
Copied<script src="https://static.zohocdn.com/catalyst/sdk/js/2.0.0/catalystWebSDK.js"></script>
<script src="/__catalyst/sdk/init.js"></script>
<script>
	catalyst.auth.signIn("your element id here....");
</script>
You can build the sign-in form of your application as an iFrame using this code snippet. You must however add this code snippet in all of your pages. This initialization script is required in all pages because the scope of the catalyst object is limited to a single page.
The code contains the line: catalyst.auth.signIn("Your elementID here"); . The elementID can be the ID of any HTML element or div element in your application's login page. You should replace this with the elementID of your application's login and implement this in the page that contains the user login.
You can now create a division in the same page for your iFrame as: <div id="Your elementID here"> </div>. This will span the iFrame for user login in the same page.
For example, if your elementID is "login", your code will look like this:
- In the Web SDK Initialisation script: catalyst.auth.signIn("login");
- In the body of your page: <div id="login"></div>
Instance Objects
It is always effective to minimize the API access whenever not required. In case, you need an API reference which should not actually fire the API, but should refer the component in your code for subsequent access, then Catalyst WebSDK provides that facility.
For example, the following code will not fire an API call to refer a specific file component.
Copiedcatalyst.file.folderId(folder_id).fileId(file_id);However, the following code will actually fire an API call to delete a file from a selected folder,
Copiedcatalyst.file.folderId(folder_id).fileId(file_id).delete();Note: Promises are returned with a specified object after firing the actual API call. Therefore, .then() is handled only after the actual API calls. The API calls cannot be used with dummy objects that don't fire an API.
Responses and Exceptions
All the responses are returned as JSON objects containing data, status codes, and status messages. A developer can track the responses easily from these objects.
Exceptions
The faulty behaviors of the application output are called exceptions or errors. The Zoho Catalyst Web SDK throws 3 types of errors called appET, ServerET, and DeveloperET. These errors define whether faulty behavior is caused by application code, server error, or something else.
Code the Client Application
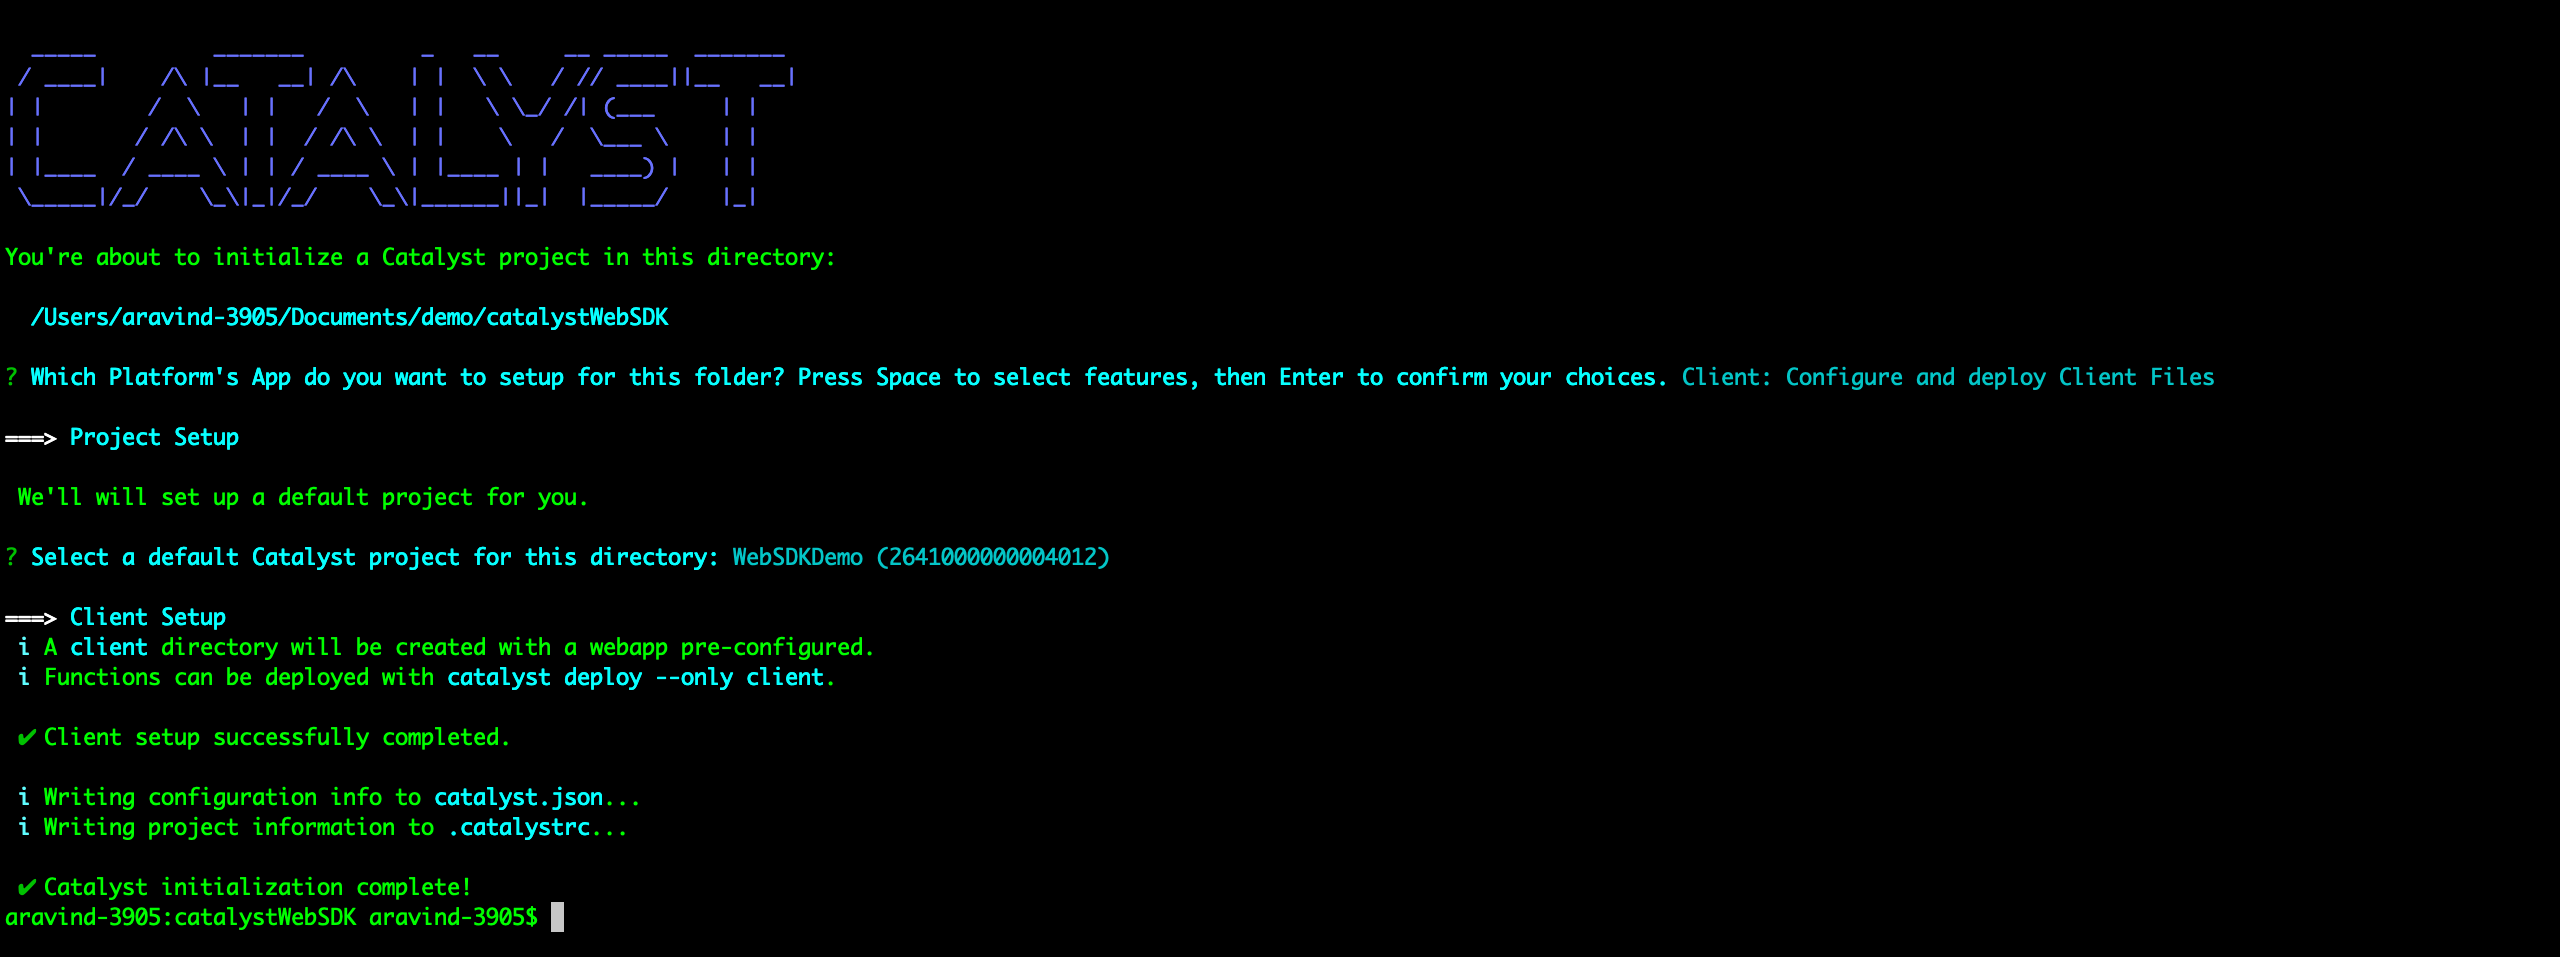
- Open your system's terminal and create an empty resource directory.
- Initialize catalyst and select the client option.
- Select the project you created ,to deploy the client application.
- A boiler plate client code will be generated as shown below,
- Open it in your text editor, whose structure looks like the one shown below,
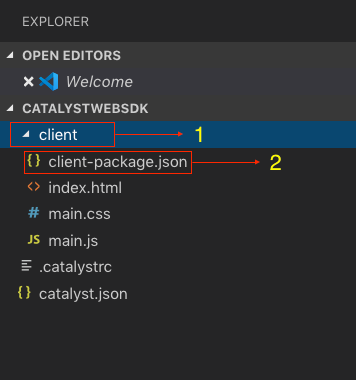


Note: The location where the boiler plate code (client folder and catalyst.json) is generated, is the project's home location.
The following table describes the list of files and their purposes in your resource directory,
| S.No | Files/Packages | Purpose |
|---|---|---|
| 1 | client (folder) | The folder that has the static files(js, css, html,etc) of your client application. |
| 2 | client-package.json | A json file that has the configuration information of your client application |
Structure of client-package.json
Copied{
    "name": "SampleApp",
    "version": "1.0.0",
    "description": "This is my sample app",
    "homepage": "index.html",
    "login_redirect":"home.html"
}
Here are the attributes of client-package.json,
| Key Name | Description |
|---|---|
| name | Name of your client application |
| version | Version of your client application. Refer to Web Client Hosting help page for detailed information about Client application version management. |
| description | A short description about the current version you are going to deploy. |
| homepage | The landing page of your application, say index.html . |
| login_redirect | The page to be redirected after the login page. It should be mandatory if you integrate Catalyst Authentication in your application. Refer to Authentication and Authentication API help pages for details. |
You can code your web application's UI elements, java script files and CSS in the appropriate files given in the Client folder.
Deploy the Client Application
You can deploy the client application using Catalyst CLI. Refer to the Deploy Resources help page for detailed help.
- Open your system's terminal.
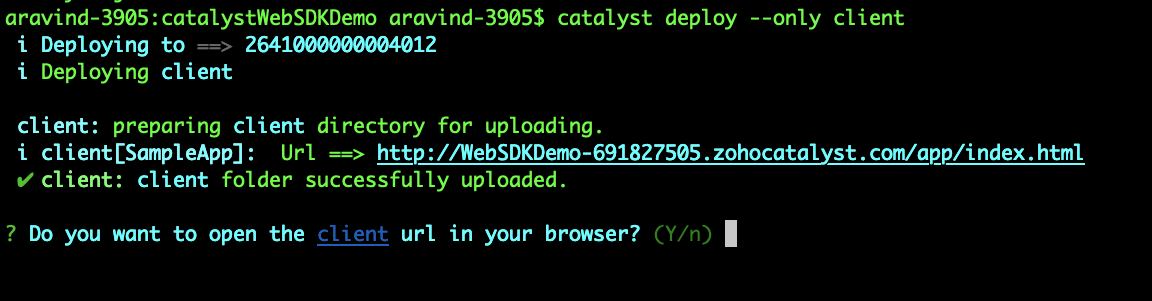
- From the Project's home location, deploy your client app using the command:
Copiedcatalyst deploy --only clientNote: You can also deploy the client using the catalyst web console.
- Once deployed , you will get an URL endpoint with which you can access your client application.