CalDAV Synchronizer for Outlook
CalDAV Synchronizer is a free plugin that can be downloaded and used from Microsoft Outlook to synchronize your Outlook Calendar with Zoho Calendar. This plugin acts as a CalDAV client and establishes a two-way sync between your Zoho Calendar and Outlook Calendar using the CalDAV protocol.
How CalDAV sync for Outlook makes your work easy?
By using CalDAV sync, you get to enjoy the following features:
- Create/ Edit events while you are offline on your phone and it automatically syncs with your Zoho Calendar when you go online.
- Quickly change your schedule from your phone itself.
- Sync multiple calendars with your device in one go. You can also sync the same calendar on multiple devices.
- Get notifications/ reminders for events on Zoho Calendar.
What calendars can you sync via CalDAV Synchronizer for Outlook?
- Personal Calendars (My Calendars) - Two-way sync:
Personal Calendars will be synced in two-way mode. The events in these calendars can be edited on your device and will be updated across Zoho Calendar and your device. - Group Calendars - Read-only mode:
Group Calendars will be synced in read-only mode and the events in these calendars cannot be edited on your device. - Other Calendars (Shared and Subscribed Calendars) - Read-only mode:
Other Calendars will be synced in read-only mode and the events in these calendars cannot be edited on your device.
Configuring CalDAV sync for Zoho Calendar and External Calendars
By default, the primary calendar under My Calendars in your Zoho Calendar account will be enabled for CalDAV sync. In case, you want to sync secondary calendars from your account using CalDAV, follow these steps:
- Log in to Zoho Calendar.
- Go to Settings > Synchronize > CalDAV
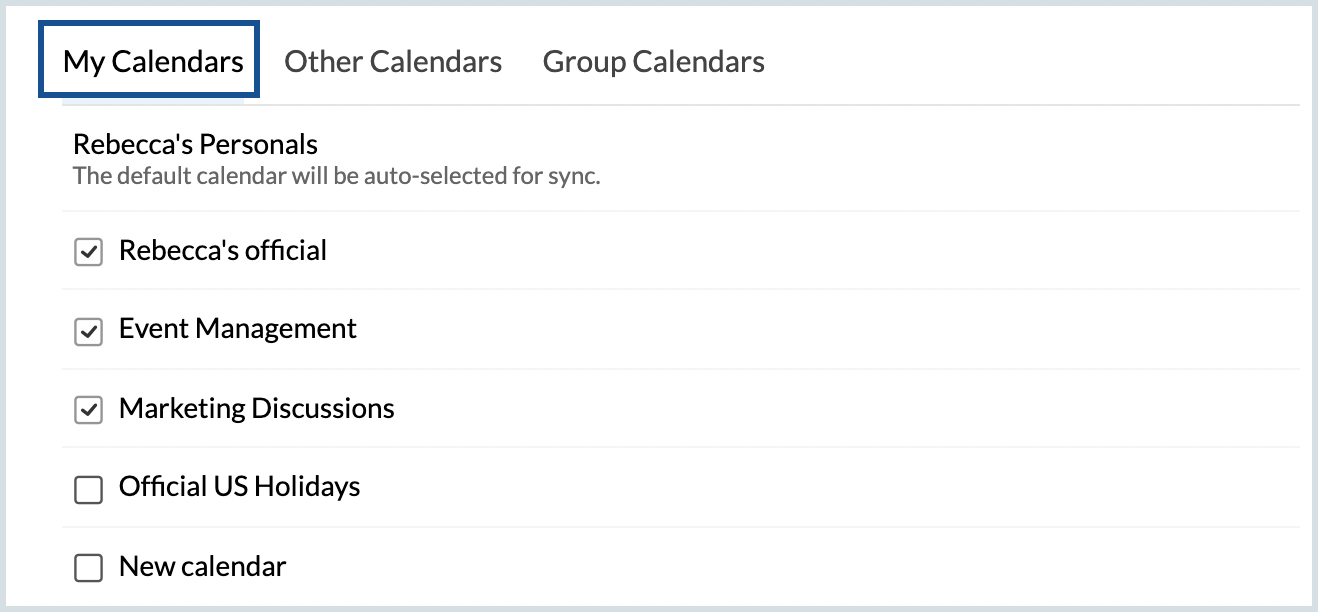
- In the My Calendars tab under CalDAV, the default calendar will be auto-selected for CalDAV sync. You can also select other personal calendars listed below in My Calendars for sync using CalDAV.
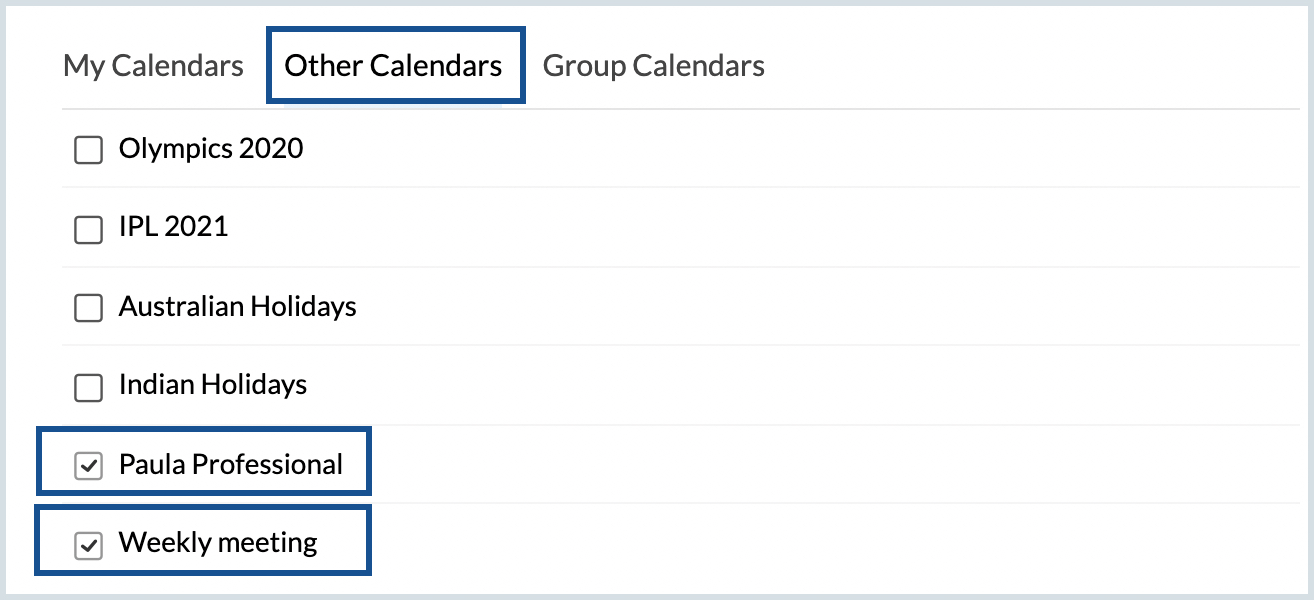
- To sync your Other Calendars (Shared and Subscribed Calendars), navigate to the Other Calendars tab in CalDAV sync and select the respective calendars.
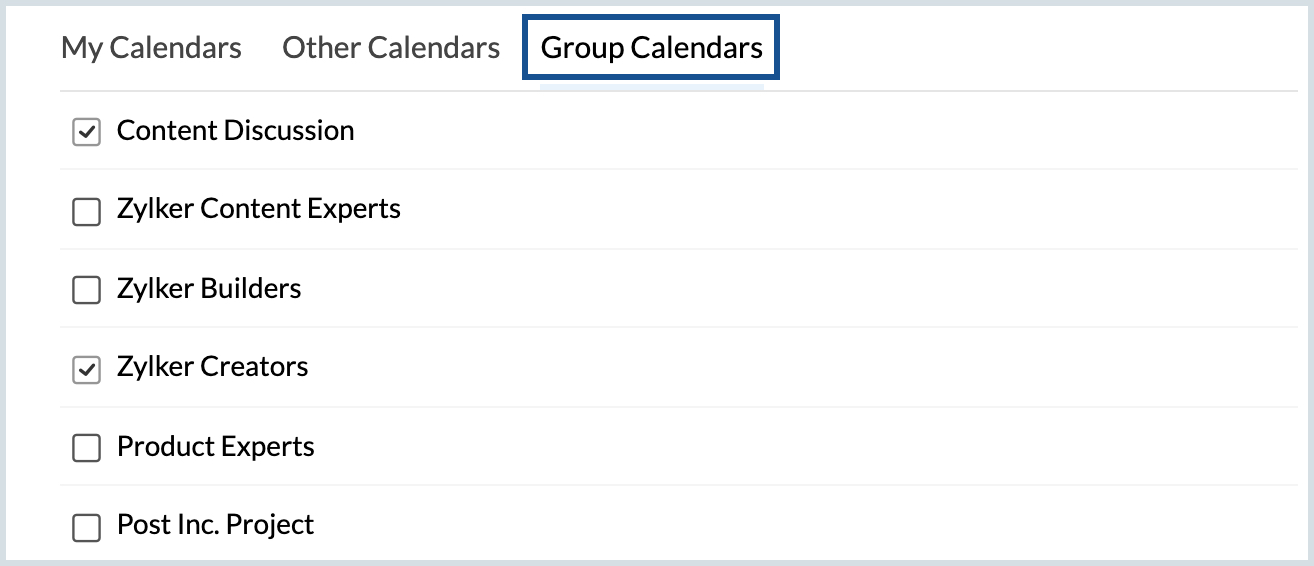
- To sync your Group Calendars, navigate to the Group Calendars tab in CalDAV sync and select the respective calendars.
- After the calendars are selected, then you need to proceed with the configuration on your Outlook Calendar.


Note:
- CalDAV sync for Other Calendars and Group Calendars is available only for Paid Org users and Personal users.
- Other Calendars and Group Calendars will be synced in read-only mode. You will not be able to add/edit events in these calendars.
- You can sync your Outlook Calendar by configuring the CalDAV Sync plug-in for Outlook.
- CalDAV can also be configured for OS X Calendar, BusyCal and Fantastical (MacBook), iPhone and iPad, Thunderbird Lightning, and eM Client.
Steps to configure CalDAV Synchronizer for Outlook
To sync your primary calendar in Zoho Calendar with Microsoft Outlook Calendar:
- Download and install the CalDAV Synchronizer Plugin for Microsoft Outlook.
- You need to configure IMAP for your Zoho account before proceeding to the next step. If you haven't configured IMAP yet, follow these steps.
- Open Microsoft Outlook using your IMAP account.
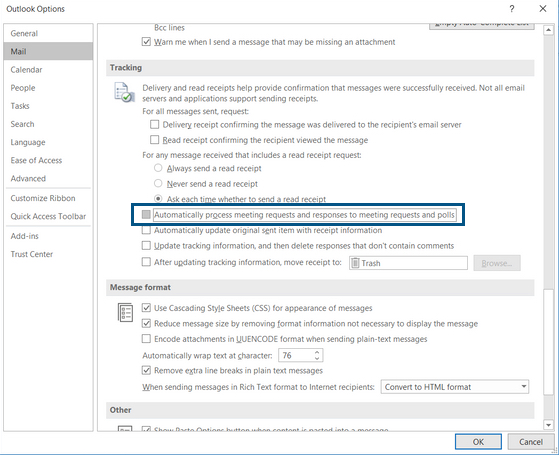
- Go to File > Options > Mail in Outlook. Scroll to the Tracking section and uncheck Automatically process meeting requests and responses to meeting requests and polls and click Ok.
- From the menu bar, go to CalDAV Synchronizer and click on Synchronization Profiles.

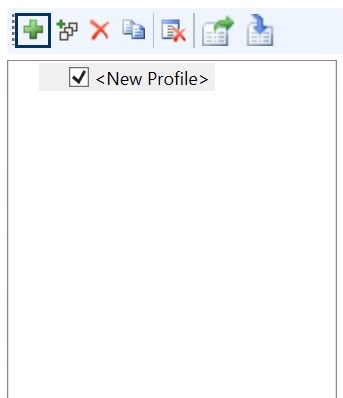
- Click on the add symbol (+) in the dialog box.
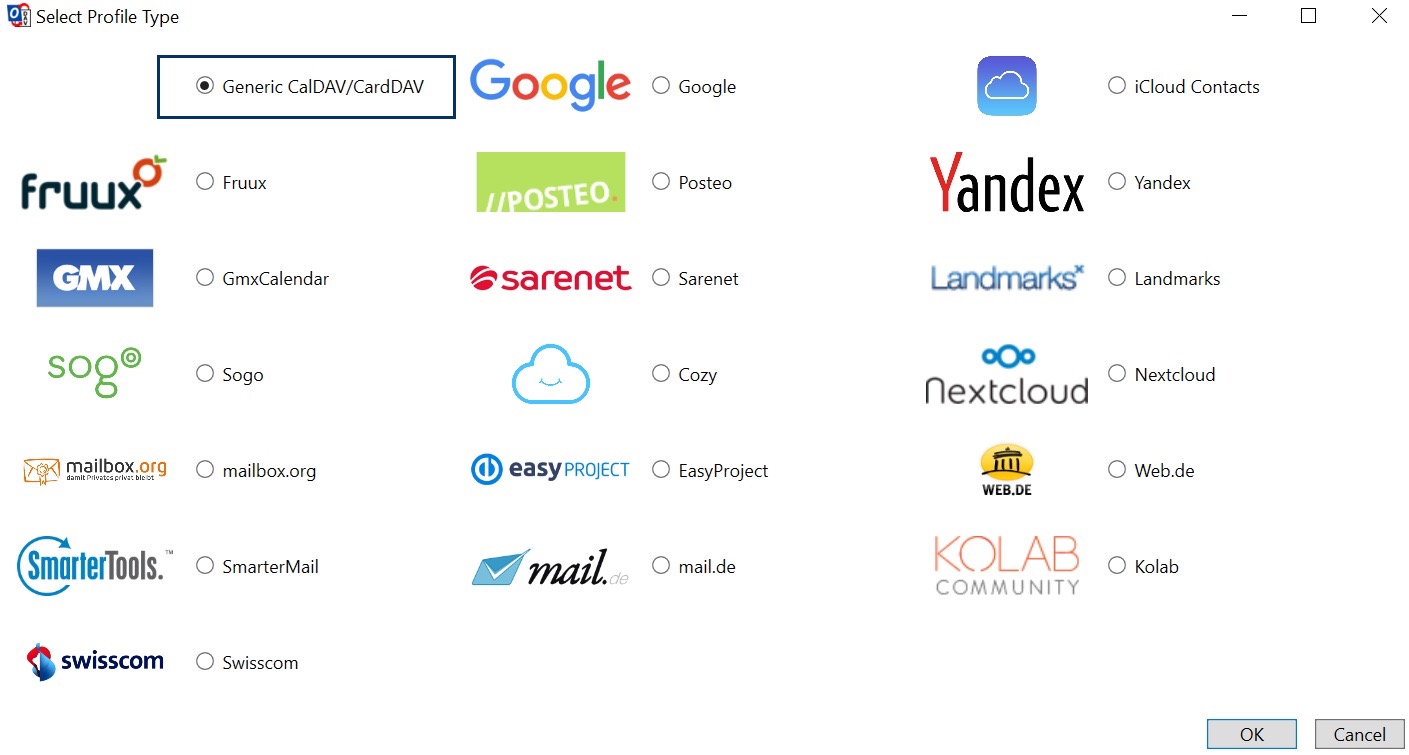
- Select the profile type as Generic CalDAV/CardDAV and click Ok.
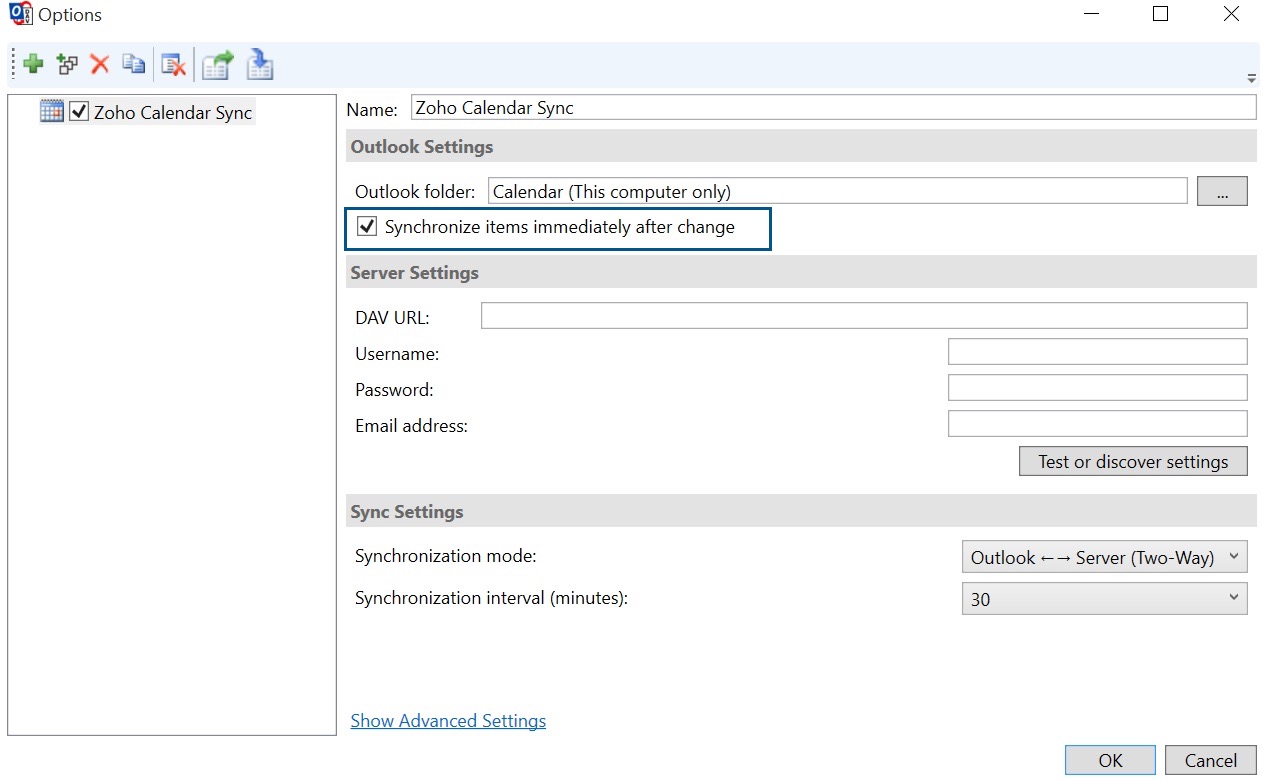
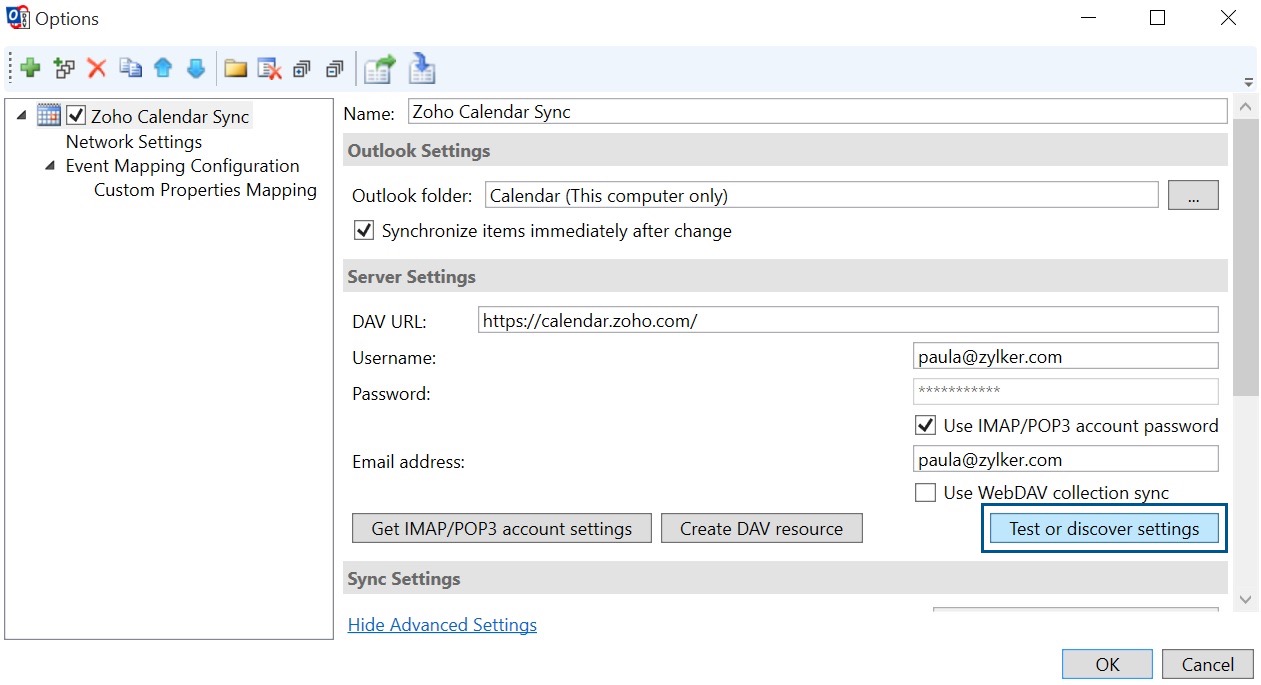
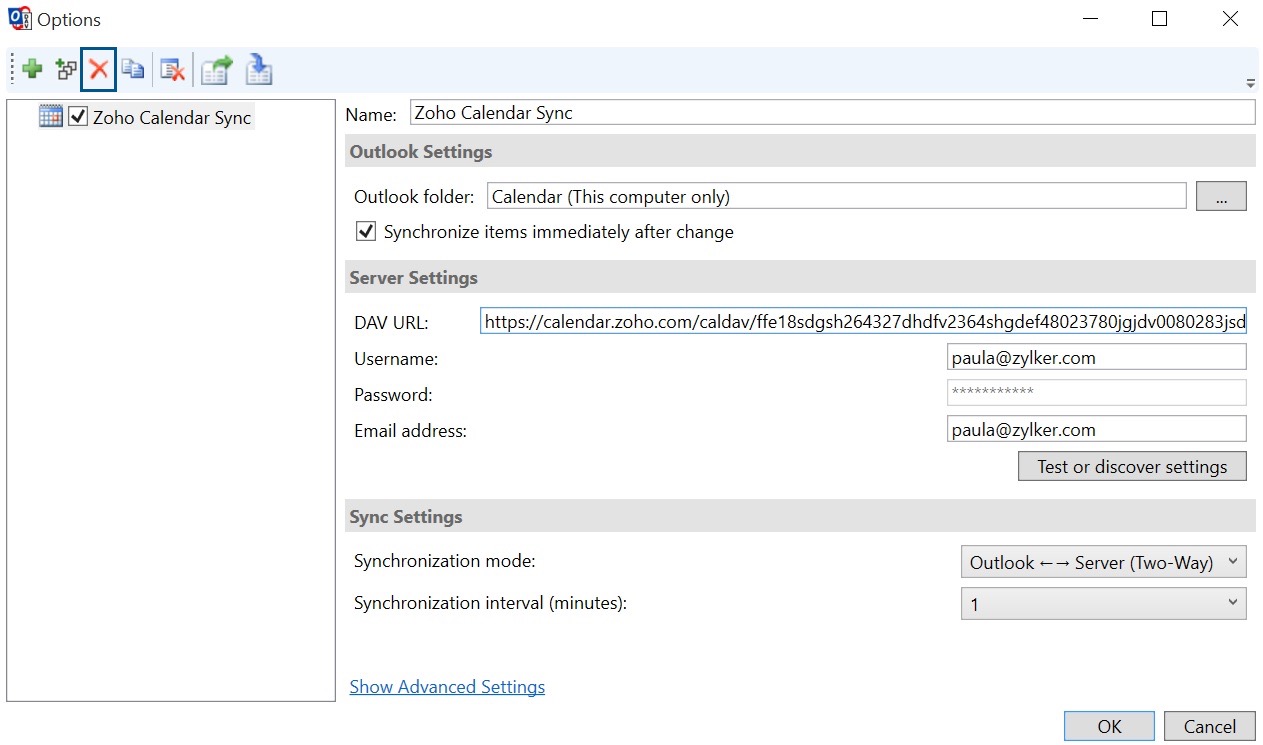
- In the Outlook settings, enter the name for the sync in the Name field.
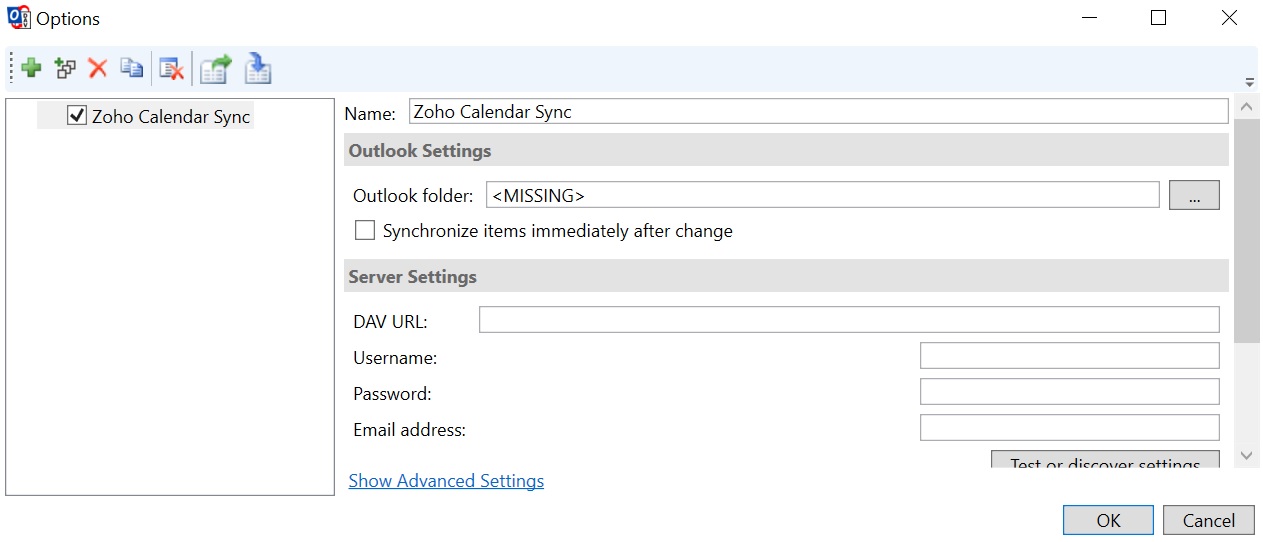
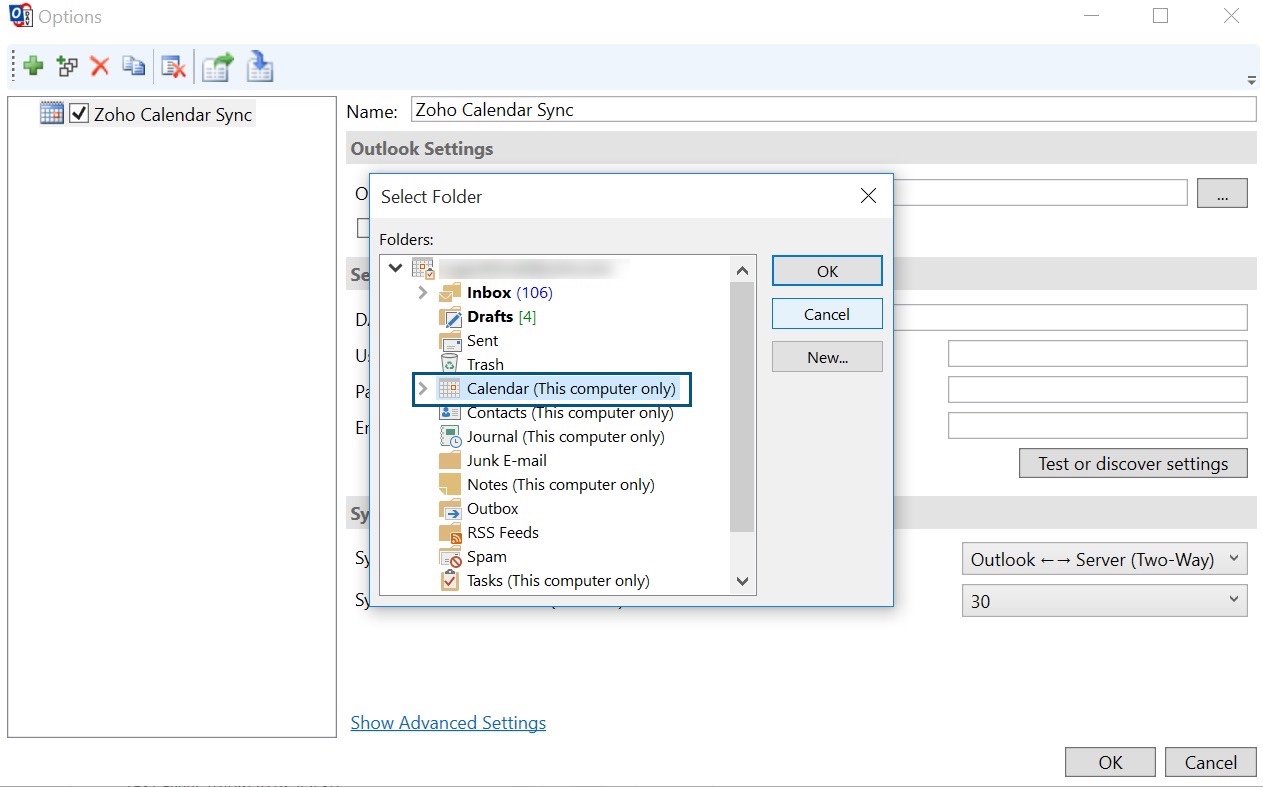
- Browse and select the Outlook Folder as Calendar and Click Ok.
- To enable auto-sync, select Synchronize items immediately after change.
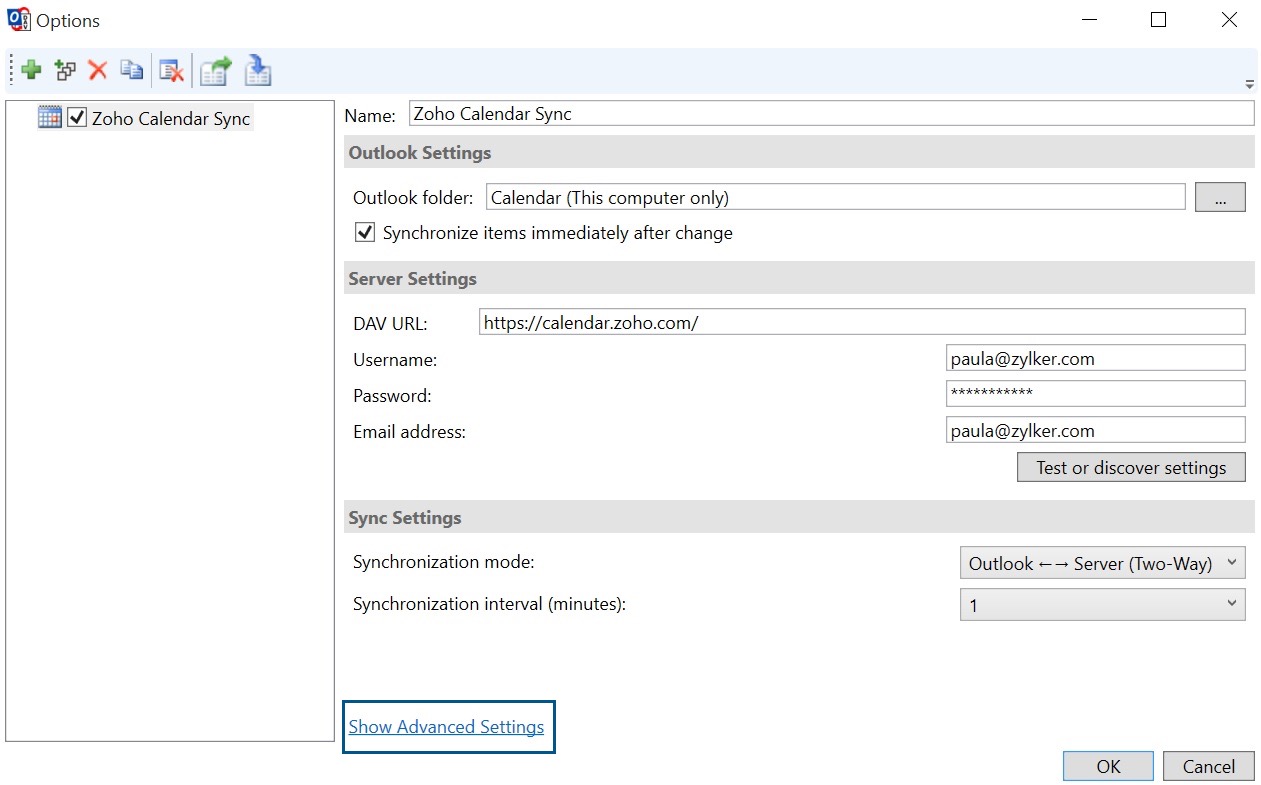
- In the server settings, enter the DAV URL as "https://calendar.zoho.com/". (The server address after https:// will vary for different data centers.)
- Enter the username and password of your Zoho Calendar account in the Username and Password field. If you have enabled Two-Factor Authentication (TFA) for your Zoho account, you need to enter the Application-Specific Password.
- Fill in the email address field with the email ID of your Zoho account.
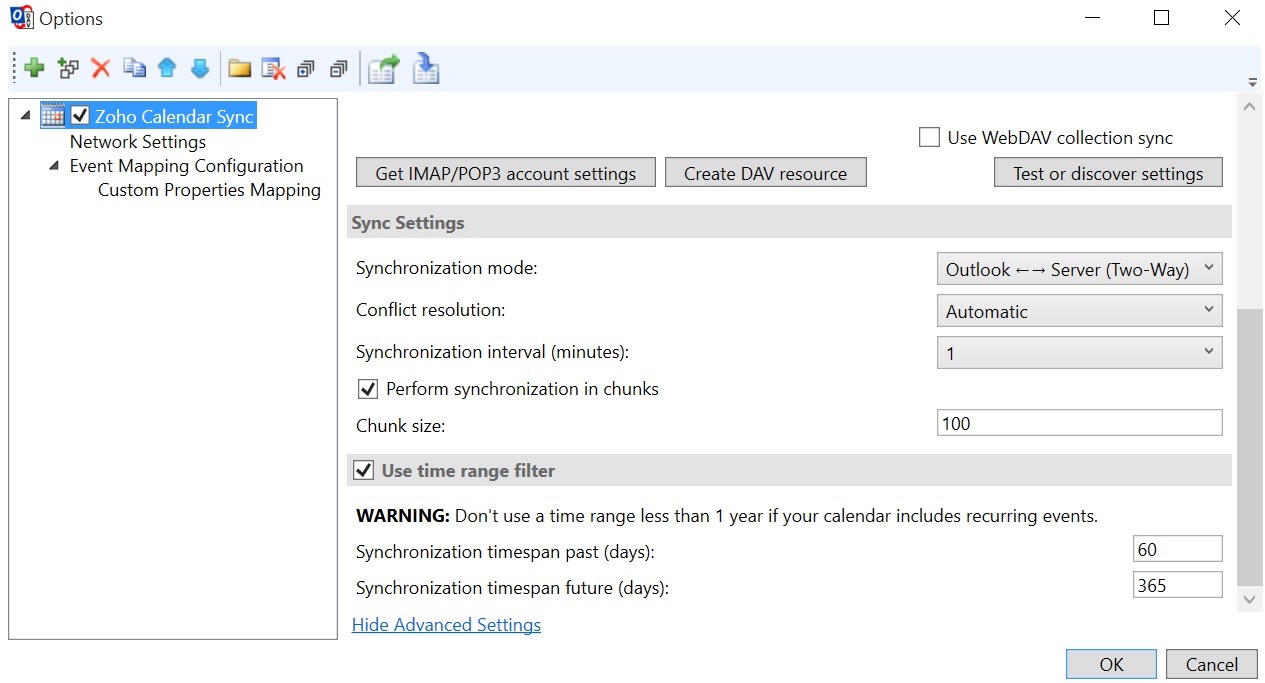
- Select the Synchronization interval in Sync settings as 1 minute from the drop-down.
- Click on Show Advanced Settings.
- If you want to use the IMAP/POP3 account password to sign in, then select the check box.
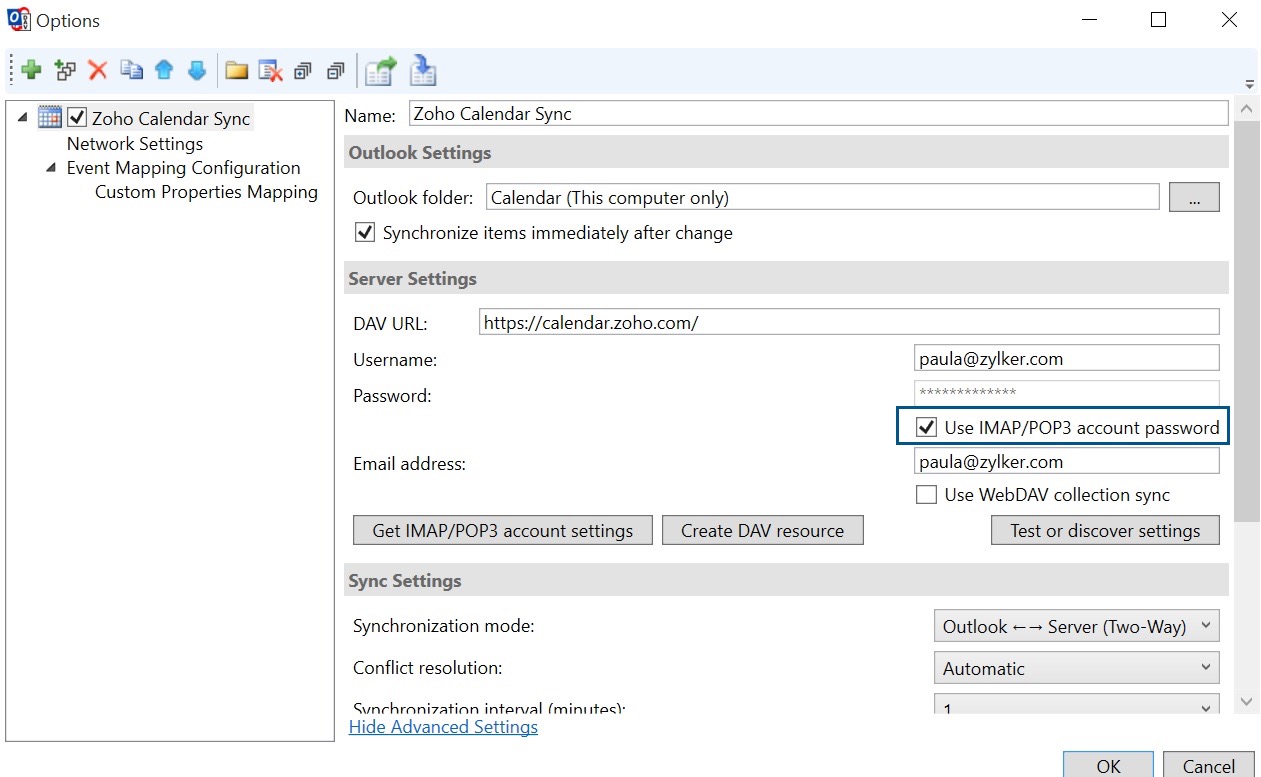
- Click on Event Mapping Configuration from the left tree of the window.
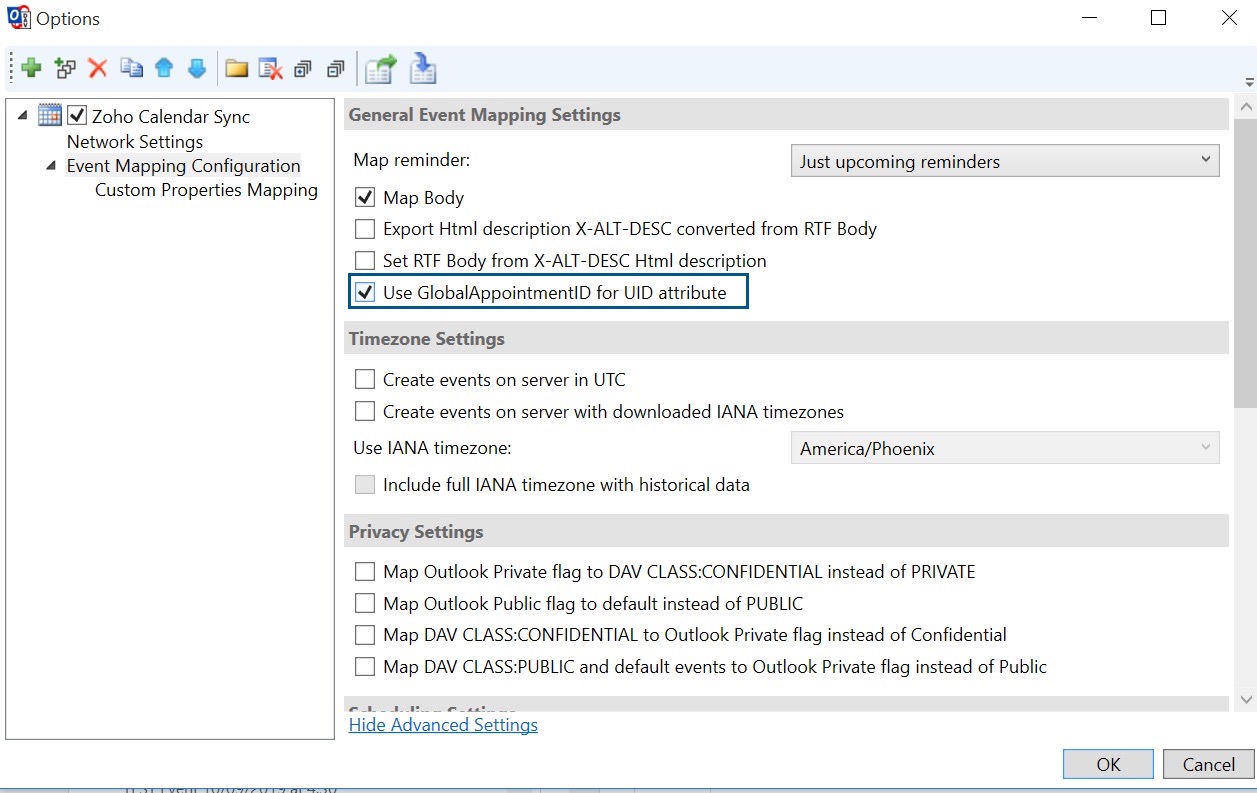
- Under General Event Mapping Settings, select Use Global Appointment ID for UID attribute.
- Navigate to Zoho Calendar Sync from the left menu and edit the number of days for the Synchronization timespan past and Synchronization timespan future.
- After entering the required details, click on Test or discover settings.
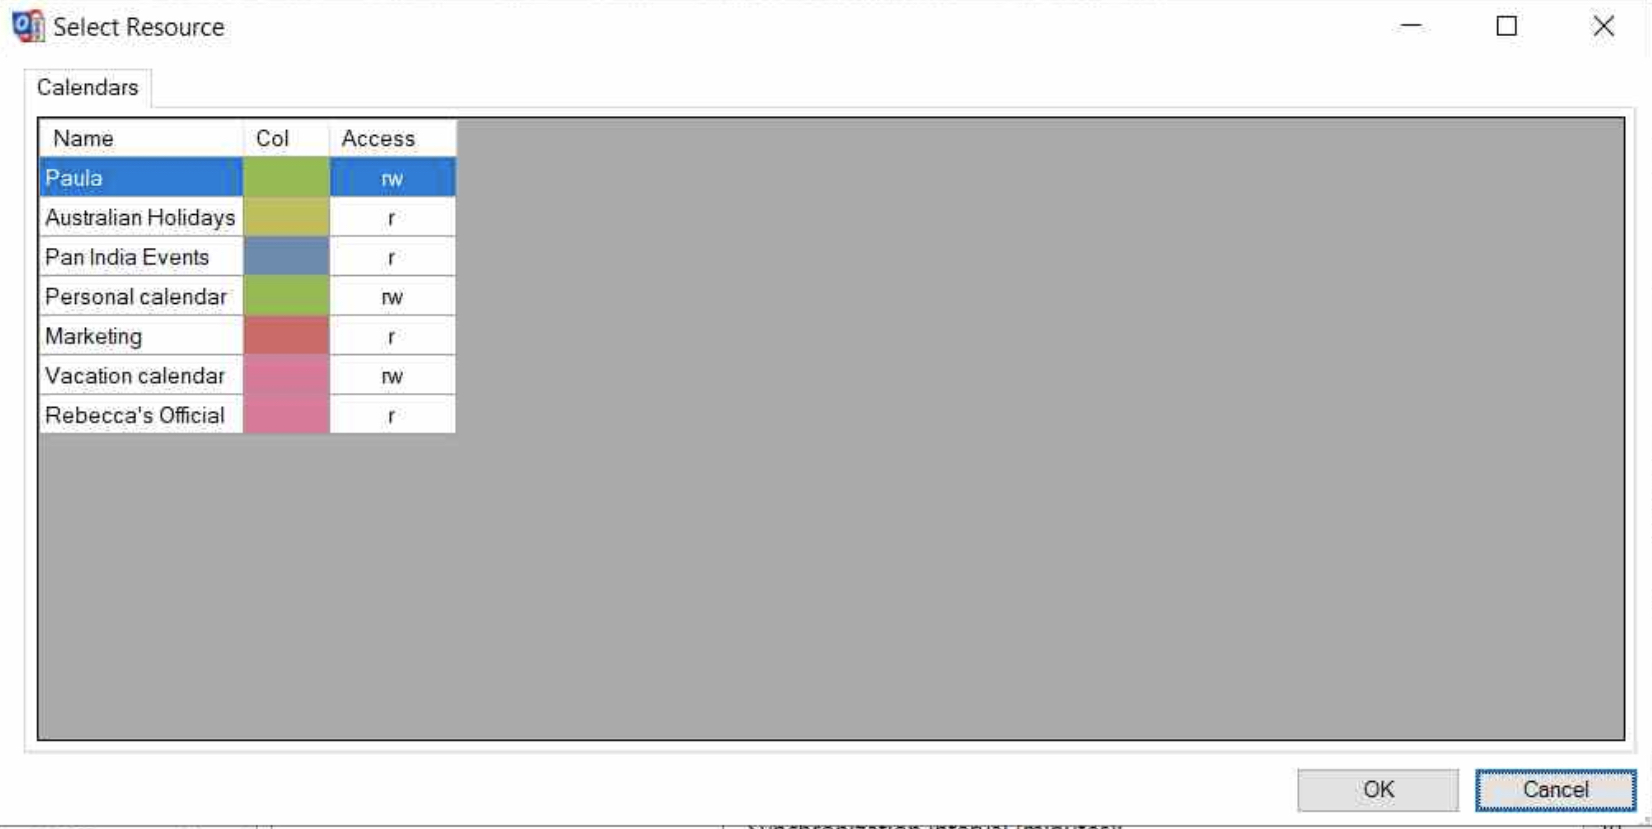
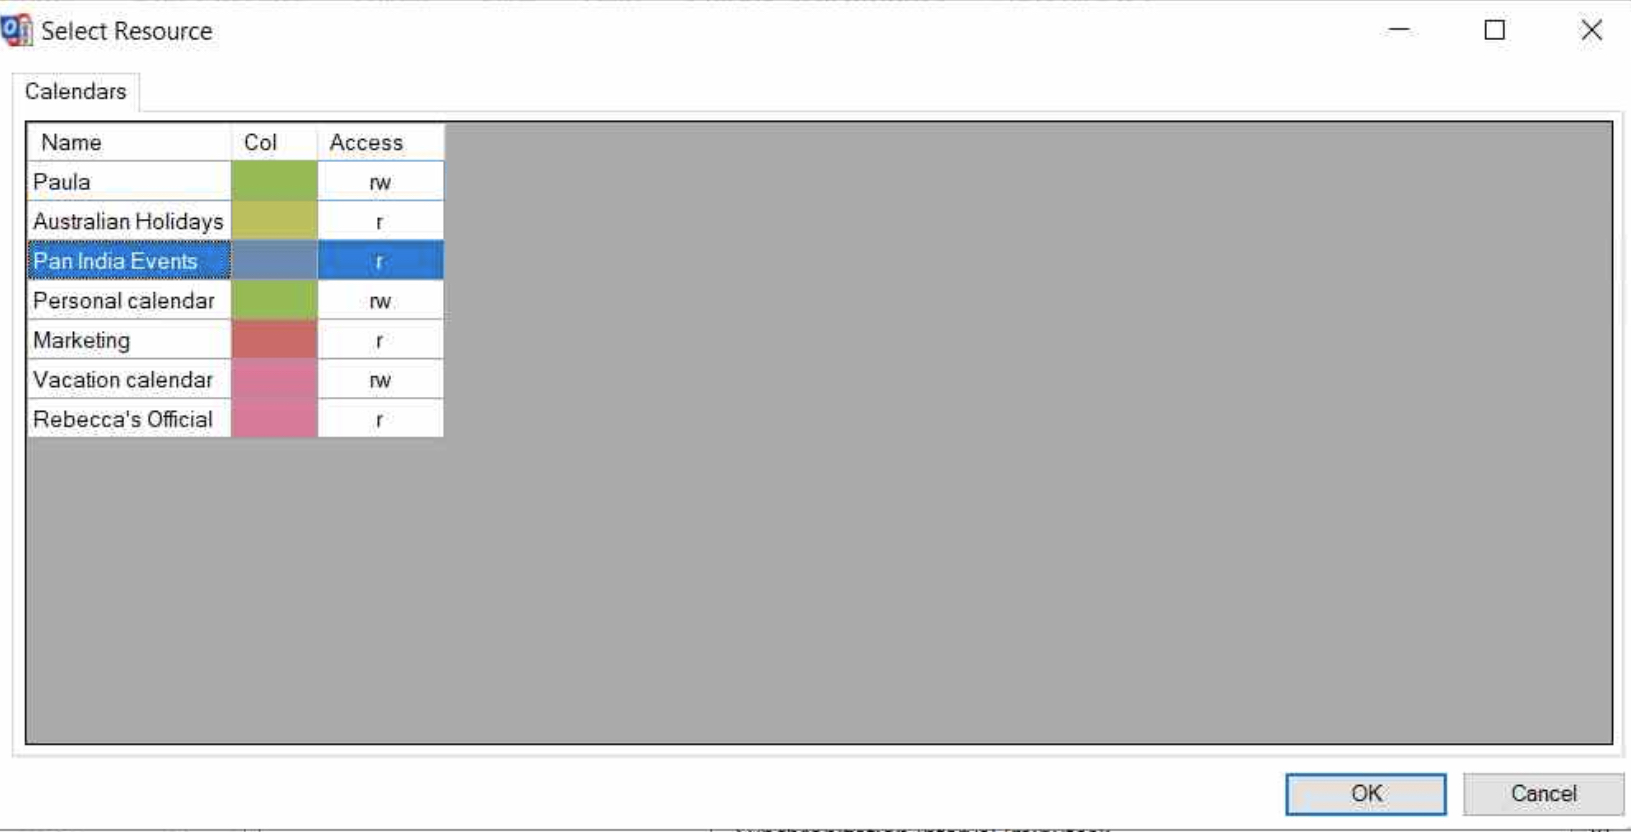
- Select the calendar from Zoho Calendar you want to sync with your Outlook calendar and click Ok.
- The events will be automatically synchronized between both calendars.


Sync secondary/ additional calendars using CalDAV Synchronizer
Apart from the primary calendar in Zoho Calendar that you have synced with your Outlook calendar, you can also sync additional calendars with your Outlook account. You can sync group calendars, personal calendars, shared calendars and subscribed calendars with Outlook. For every additional calendar that you want to sync with Outlook, you need to apply the following steps.
Steps to sync a secondary calendar apart from the primary calendar
- Follow steps 1 to 6 as mentioned above to set up the CalDAV synchronizer.
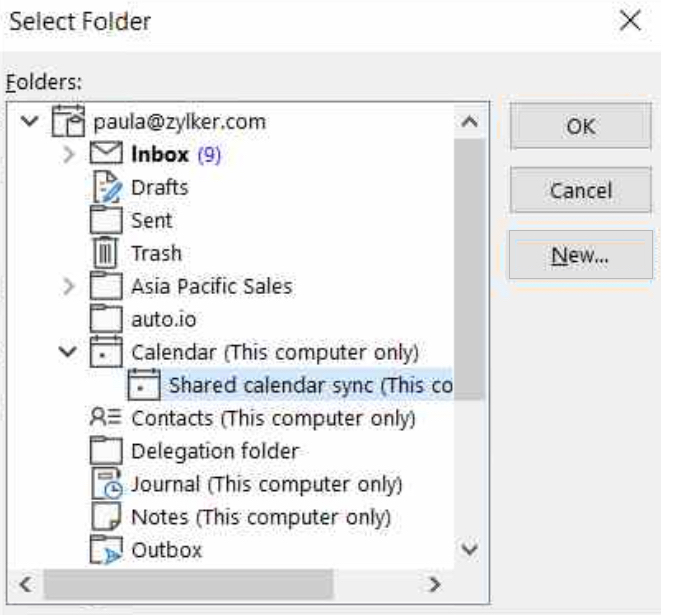
- Browse and select the Outlook Folder as Calendar and click New to create a new folder for the secondary calendar.

- Enter the name of the folder and select Calendar Items from the drop-down in Folder contains and click Ok.
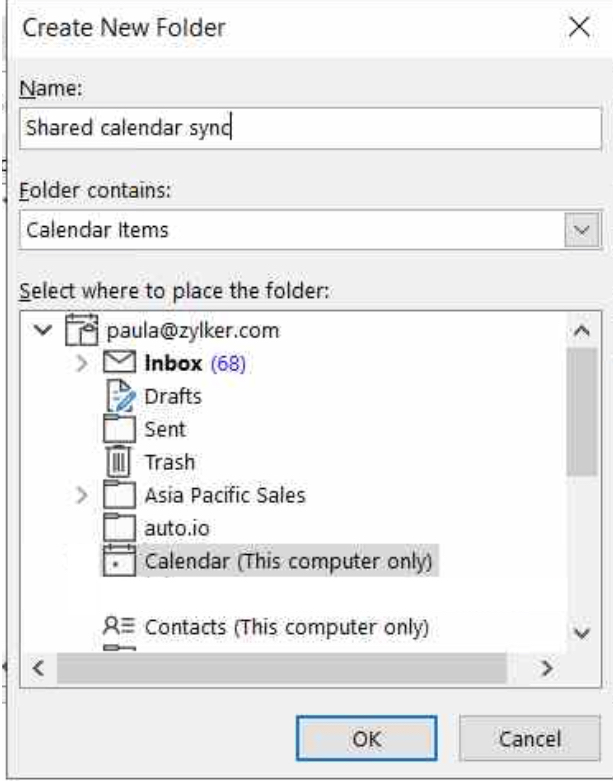
- Once the folder is created, it will be available as a subfolder under the already existing Calendar folder for Outlook.
- Select the subfolder that you have created and click Ok.
- Follow steps 8 to 18 as mentioned above to configure sync for the secondary calendar as well.
- After clicking on Test or Discover settings, the list of calendars available in your Zoho Calendar account will be displayed.
- Select the calendar (other than the primary calendar you have synced) from Zoho Calendar you want to sync with your Outlook Calendar and click Ok.
- The events in the selected calendar will now be synced between Zoho Calendar and Outlook.


Note:
- If the CalDAV Synchronizer plugin isn't available after installation in your Microsoft Outlook account, go to File > Option > Add-in > Go. Check the CalDAV Synchronizer option and Click Ok.
- When you select the IMAP/POP3 account password to sign in, the password gets overridden. If you have IMAP configured for a different account for the DAV URL "https://calendar.zoho.com", the IMAP account will replace the credentials filled in User name, Password, and Email address.
- For every additional calendar in Zoho Calendar that you want to sync with your Outlook account, you need to create a separate subfolder to sync the calendar and follow the steps. The subfolder that you create acts as a sub-calendar on Outlook's end.
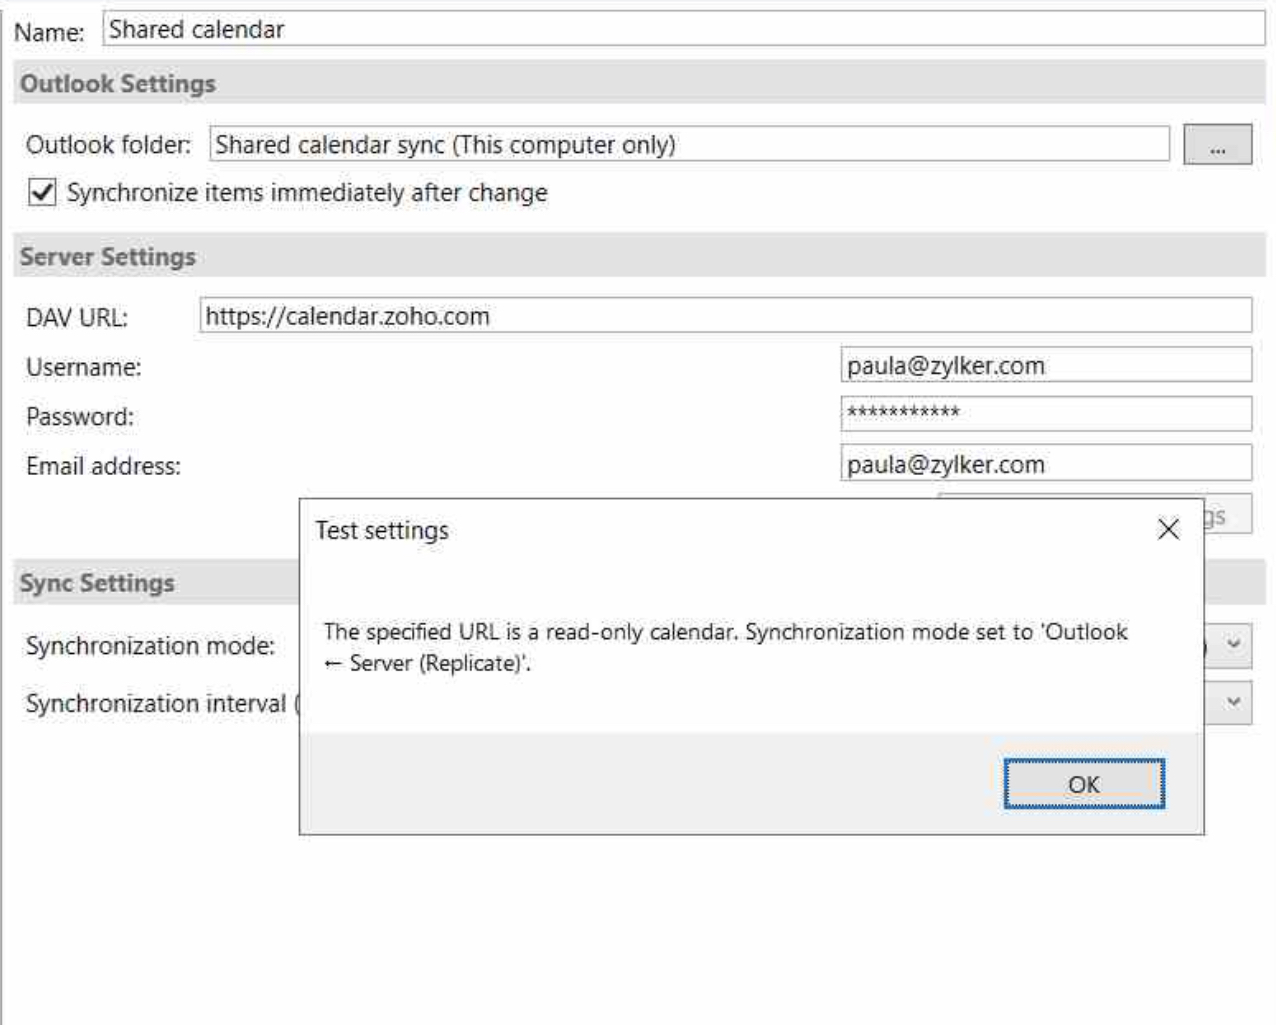
- Shared calendars, subscribed calendars, and group calendars are synced in read-only mode. While synchronizing calendars that are in read-only mode, the following alert will be displayed once you set up the sync. Click Ok.
- To sync your primary calendar (default calendar) in Zoho Calendar with Outlook, you need to choose the default Calendar folder in Outlook.
- If you choose the default Calendar folder in Outlook to sync your secondary/additional calendar, all event invitations received in IMAP will be synced with this secondary calendar on Outlook's end. Hence, make sure to create a separate subfolder while syncing additional calendars.
- Synchronization timespan past represents the number of days in the past for which events will be synced.
- Synchronization timespan future represents the number of days in the future for which events will be synced. The minimum duration for the Synchronization timespan future should be 365 days.

Steps to delete a CalDAV account in CalDAV Synchronizer
- Login to your Microsoft Outlook account and navigate to Calendar.
- From the menu bar, go to CalDAV Synchronizer and click on Synchronization Profiles.

- A list of all the CalDAV accounts configured will be listed in this window.
- Select the CalDAV account you want to delete and hit the Remove (x) button.
- Click Ok to save changes.


Note:
- An IMAP account should be created in Microsoft Outlook using your Zoho Mail account. The email ID of the Zoho Calendar account synchronized using CalDAV synchronizer and the email ID of the Zoho Mail account used for IMAP should be the same.
- In case of more than one IMAP account configured in Outlook, the default IMAP account should be set as your Zoho Mail account.
Limitations in CalDAV Synchronizer
The IMAP account and CalDAV Synchronizer account are different
The IMAP account configured in Microsoft Outlook should be the same as the Zoho account used in CalDAV Synchronizer for the Event Invitation flow to work properly.
IMAP is not configured
If you have not configured an IMAP account in Outlook, for Zoho Calendar events that are synchronized with Outlook, you will not be able to view the attendee information. If you make any edits to a Zoho Calendar event that has attendees, the event invitations will not be sent from Outlook.
The Outlook folder selected should be the default Calendar folder
When you are setting up the CalDAV Synchronizer, you need to select the Outlook folder as the default "Calendar" folder for the sync to work as desired. If you had chosen a different folder instead of the default calendar folder while creating an event with attendees, you will be prompted as "This meeting is not in the calendar folder".
Automatically add meeting invites from your email
You need to make sure that Automatically add meeting invites from your email option in Calendar Settings is set to "Allow". If not, the invited events that are created in Zoho Calendar via Outlook will not be synced with the event invitation but only as a regular event.
Troubleshooting CalDAV Synchronizer for Outlook
Duplication of events while using CalDAV Synchronizer
While using CalDAV Synchronizer to sync Zoho Calendar and Outlook Calendar, if duplication of events happens for Invited events, make sure the Use Global Appointment ID as UI attribute is selected under Event Mapping Configuration. If it is not selected, the Synchronizer passes the event as another unique event in the Zoho Calendar side and duplication happens. If the problem persists, contact support@zohocalendar.com.