Manage Data Table
- Adding Rows to a Table
- Modifying a Row
- Deleting Row(s)
- Adding a Column
- Adding a Lookup Column
- Deleting Column(s)
- Changing Data Type of a Column
You can manipulate the data and columns in a table in Zoho Analytics, as easily as you would do in spreadsheet like Excel. You can add, modify, delete data rows as well as columns. In this chapter we will discuss about how to use these features in detail.
Note: These options will be enabled only to users who have been provided with Write permissions while sharing by the Administrator. Refer to the topic Sharing and Collaboration to know more about permissions.
Adding Rows to a Table
After you have created a table, you can easily add rows dynamically to the table.
- From the Explorer tab of the Workspace, select the table to which you want to add the row.
- Click Add from the toolbar and then select Add Row option or right click on any cell in the table and then select the Add > Add Row option.

- The cursor will be automatically placed at the bottom row of the table.
- Enter appropriate values into the row as you would do in a spreadsheet like Excel. You can navigate across cells (left to right) by using Tab key or the left and right arrow keys.
- Once the data entry is done click Save in the toolbar.

Instead of using the Add Row option as mentioned above, you can also navigate to the end of the table and start adding your new row content in the row indicated with a * in the row number cell.

Tip:
To enter data in a cell, type the values right away or press F2 key or double-click on the cell to get into edit mode. This is similar to how a spreadsheet operates for data entry.
Modifying a Row
To modify data in an existing row, press F2 key or double-click on the cell you wish to get into edit mode and type the values you want. Save the changes by clicking Save in the toolbar.

Deleting Row(s)
You can delete one or more rows from a Zoho Analytics table. This section explains how to delete a row or multiple contiguous rows from a Zoho Analytics table.
To delete a row from a table:
- Select a row by clicking on its row header or select any cell from the row to be deleted.
- Select Delete > Delete Row(s) in the toolbar.
You can also delete multiple contiguous rows at a time from a table.
To delete multiple rows:
- Select the required rows by holding Shift key.
- Delete rows by selecting Delete > Delete Row(S) option from the toolbar
If you want to delete all rows in a column, select Delete > Delete All Rows option in the toolbar.
Note:
- Remember that once you delete a row, you cannot undo the deletion. It is important to back up your data before you do any delete operation.

You can also delete rows using keyboard command. To delete a row use Delete key in Mac and Backspace key in windows.
Adding a Column
To add a new column in a table:
- From the Explorer tab of the Workspace, select the table to which you want to add the column.
- Click Add option in the toolbar and then select Add Column option.
- The Add Column dialog will open in which the details of the new column can be specified.
- Provide the column's name and select data type as shown below. You can refer here to know about various data types (column types) supported by Zoho Analytics.
- Select the This column contains Personal Data to mark this column as a column with personal data.
- A new column with the specified name will be added to the right of the table.
- Click Save in the toolbar.

Adding a Lookup Column
Lookup column relationships in Zoho Analytics function similarly to foreign key relationships in relational databases. A lookup column is a type of column that references values from another column in a different table within the same workspace. This cross-referencing capability allows you to establish meaningful connections between tables.
For example, if you add a new "Department ID" lookup column to the "Employee" table, the values for this column will be derived from the "Department ID" column in the "Department" table. When you edit this lookup column field, a combo box will display the list of all existing Department IDs from the Department table. This enables you to conveniently select the appropriate department (ID) to which the employee belongs, rather than manually typing in the value.

If your Zoho Analytics workspace has more than one table, you can start creating a lookup column.
To add a lookup column to a table:
- Open the table to which you wish to add Lookup column.
- From the toolbar, select Add > Add Lookup Column option.
- In the Add Lookup Column dialog box that opens, type the Lookup column name in the Column Name text box.
- Choose the column to lookup, from the list provided in Column to Lookup option.
- Select the This column contains Personal Data to mark this column as a column with personal data.

- Click OK to add the lookup column.
- When you designate a date column as a lookup column in Zoho Analytics, the platform will automatically determine the suitable date function to use for connecting the tables in your report. For instance, let us say your data tables have daily sales data, and your report involves sales data categorized by Month and Year. Zoho Analytics will perform the necessary data joins based on the Month and Year values across the tables. This ensures seamless integration and accurate analysis of your data.
- You can also define a formula column to be a lookup column. Refer to the topics Relational Data Modeling and
Joining Tables to know more about lookup column.
Deleting Column(s)
You can delete one or more columns from a Zoho Analytics table. This section explains how to delete a column or multiple contiguous columns from a table.
Note:
- You cannot delete a column if it has been used to create a report. Read more.
- Once you delete a column, you cannot undo that deletion. It is recommended to back up your table before you do any delete column operation.
To delete a single column:
- Select the column to be deleted by clicking on the column header
- From the toolbar, select Delete > Delete Columns(s) option.
You can also delete multiple contiguous columns at a time from a table.
To delete multiple columns:
- Select the required contiguous columns by holding Shift key.
- Delete selected columns by selecting Delete > Delete Column(s) option from the toolbar.

You can also delete columns using keyboard command. To delete a column use Delete key in Mac and Backspace key in windows.
Deleting Column(s) with Dependent Views
Columns that are involved in reports, formulas and query tables or in a lookup relationship cannot be directly deleted. Deleting these will affect the existing reports in the workspace.
To avoid unintentional deletion of view, Zoho Analytics will run a dependency check before deleting a column. In case it has dependant views, then Zoho Analytics will abort the delete process and display the dependent items for you to review.

To delete a dependent column, you will have to remove the columns from existing views/lookup relationships. Once you have removed all the connections the column has with other entities in the workspace, you can delete the column.
Changing the Data Type of a Column
You can change the data type of a column in Zoho Analytics. This section explains how to change the data type of a column.
To change the data type of a column:
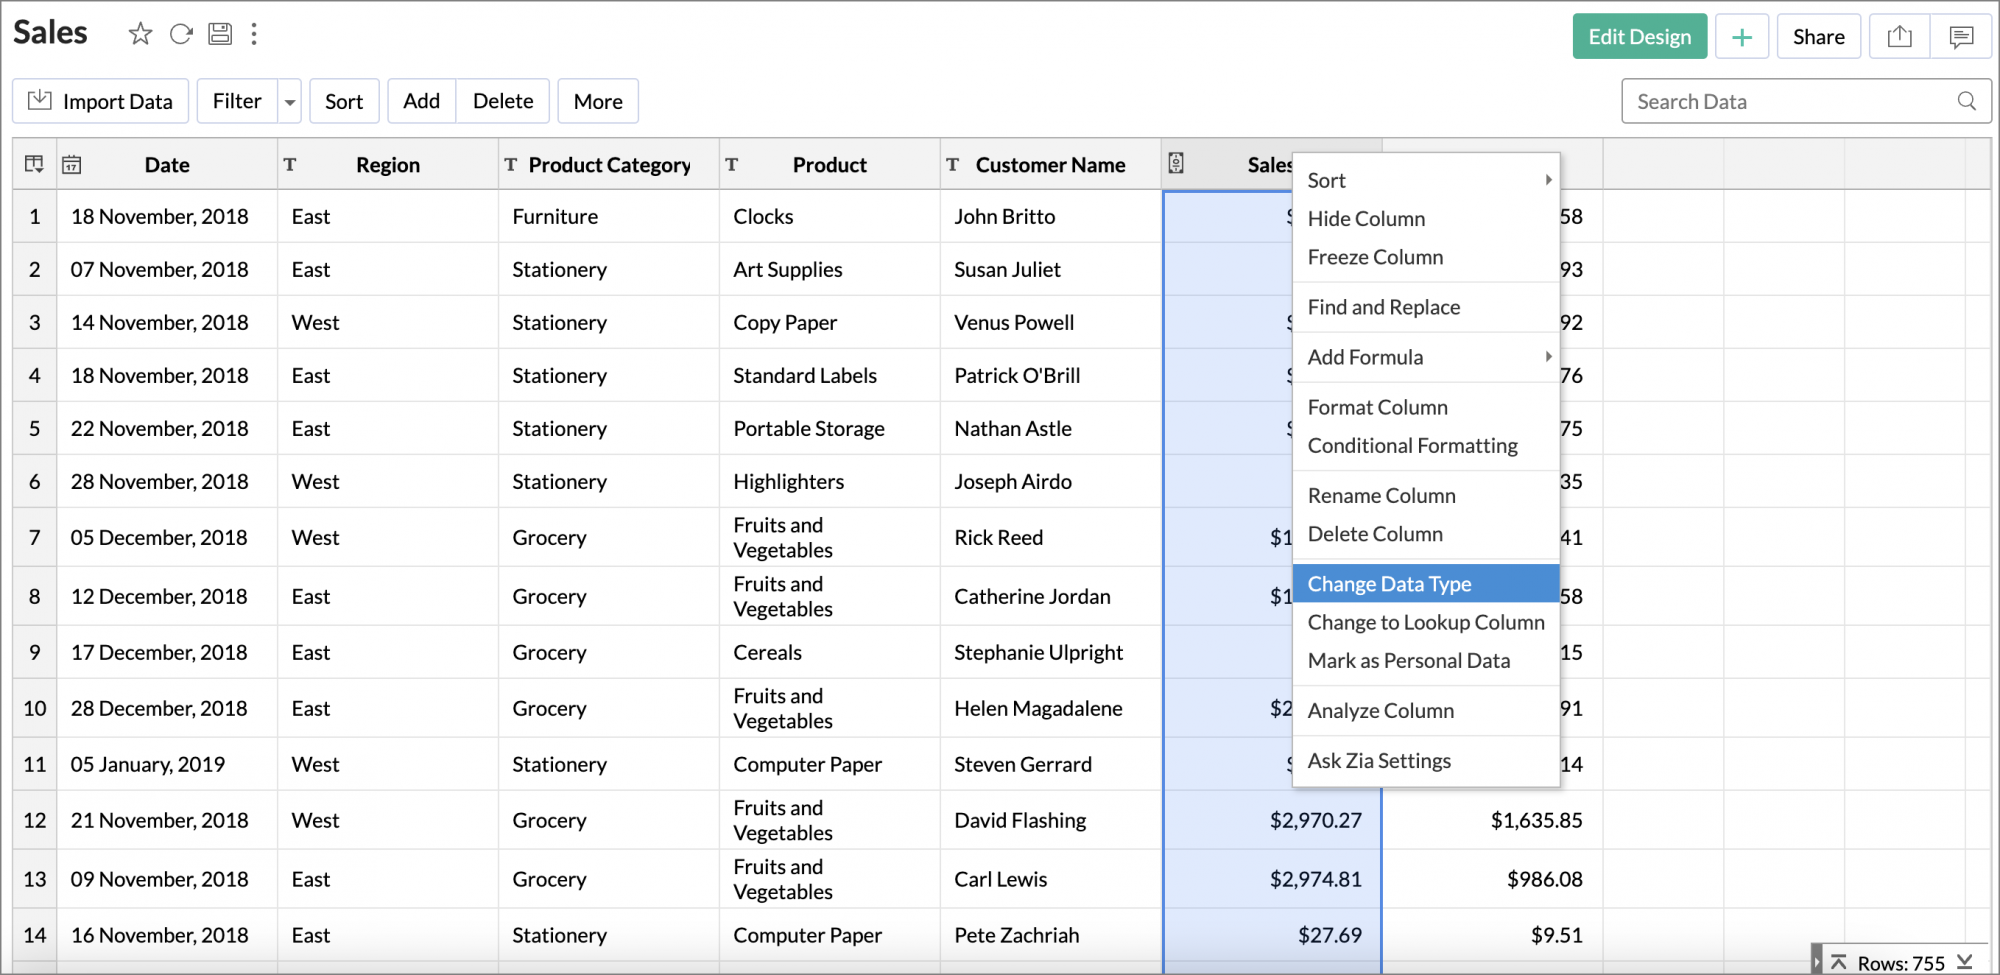
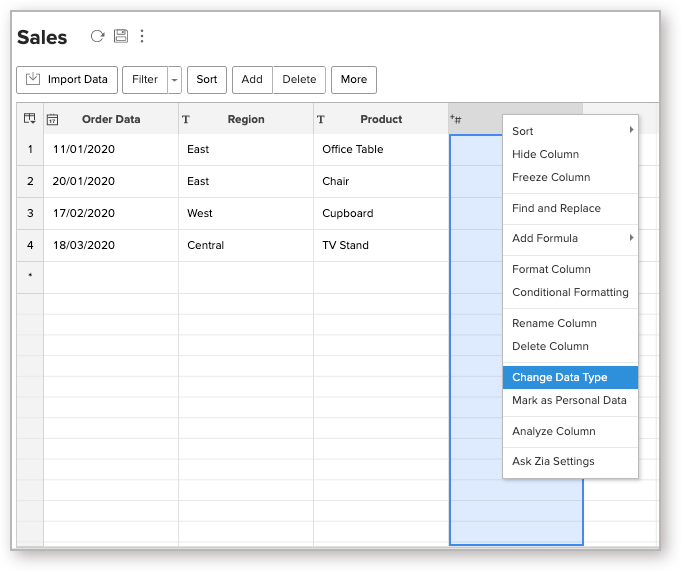
- Right-click the column and select Change Data Type from the drop-down menu.
- The Change Data Type dialog will open. Select the Data Type from the drop-down menu.


Note: Data type of a column cannot be changed if it used in reports or if it has a lookup relationship. When you try to change the data type of dependent columns, Zoho Analytics will abort the process and display the dependent items for you to review. You can review and delete the dependent items before changing the data type of a column.
