Connect HFSQL data with Zoho Analytics
Connect HFSQL data with Zoho Analytics for in-depth analysis of large volumes of data. Predict future trends, identify areas that need improvement, and devise strategies to optimize overall performance. Schedule periodic fetches to get the latest data for near real-time analysis.
- Prerequisites
- Import data from HFSQL
- Edit Setup Details
- Resolving Sync Failure
- Data Blending
- Troubleshooting Tips
Prerequisites
- Install Zoho Databridge, a lightweight, independent utility tool that bridges your on-premise data source and Zoho Analytics server to enable easy data import. Refer to Zoho Databridge article to learn how to install.
- This database requires a JDBC driver to connect to Zoho Analytics. Place the JDBC jar file for the HFSQL database inside the <Databridge>/lib/drivers folder to import data into Zoho Analytics. To do this,
- Download the JDBC jar file.
- Open the downloaded Zoho Databridge folder and navigate to lib > drivers folder.
- Copy the downloaded JDBC jar file and paste it in the drivers folder.
- Restart the Zoho Databridge.
Import Data from HFSQL
Importing data from HFSQL comprises of three steps:
Configure Connection Details
- Click Import Your Data on the upper right corner of the Zoho Analytics home page.
- Choose Local Databases from the listed data sources.
- Zoho Analytics uses Zoho Databridge to connect to the database. Refer to the Install Zoho Databridge section to learn more.
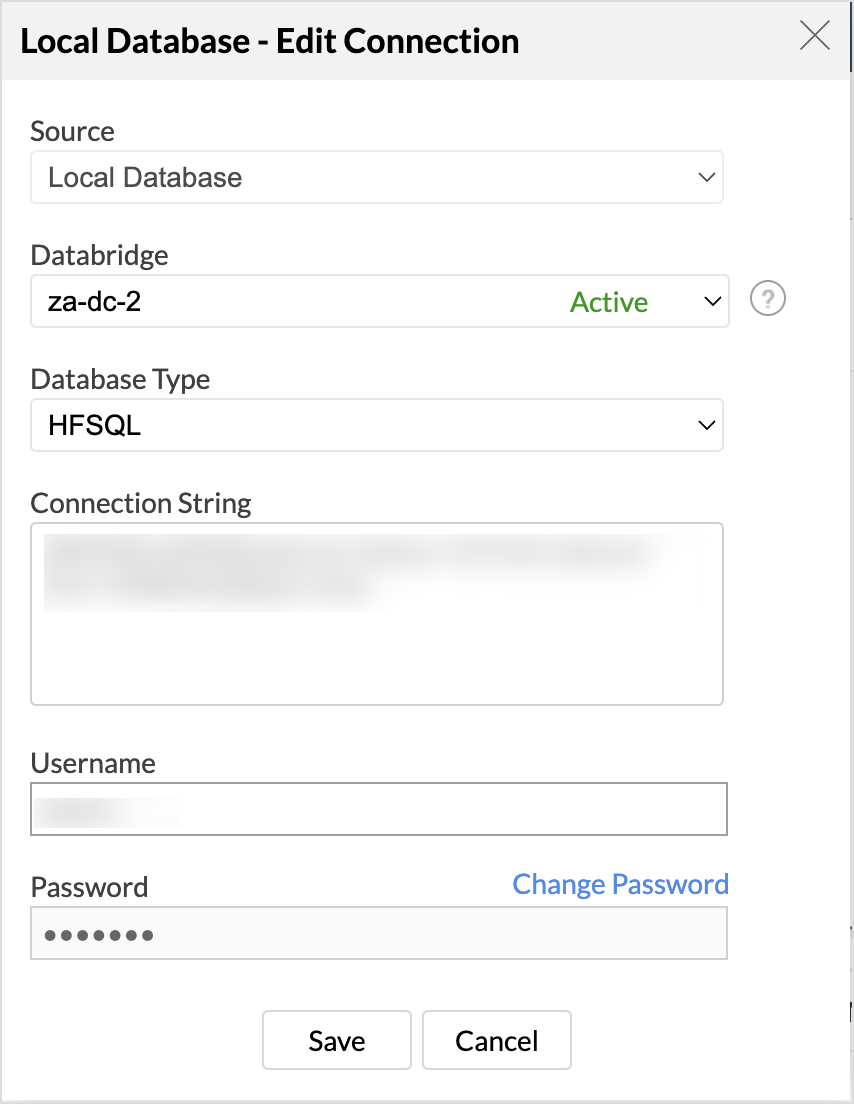
- The Import from Local Databases wizard will open. Provide the following details:
- Select the corresponding Databridge that has access to your HFSQL database from which you want to import.
- Choose the Database Type as HFSQL.
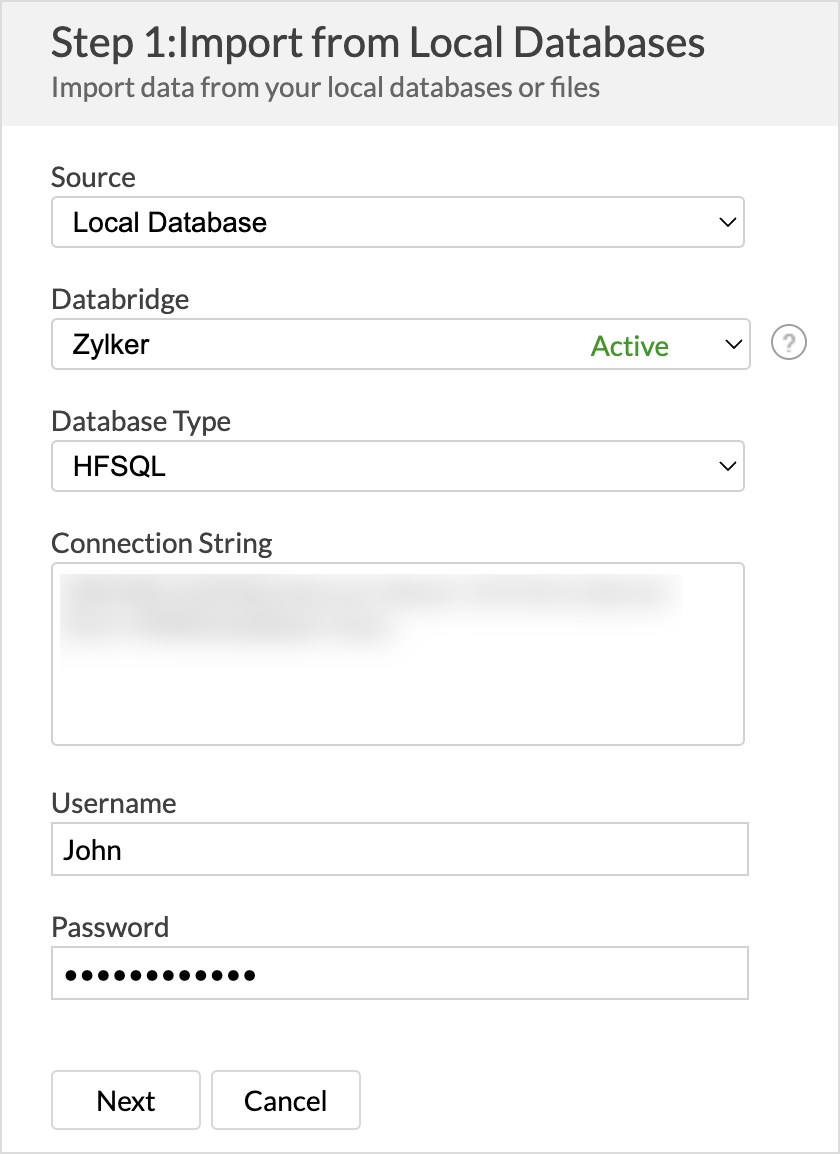
- Enter the Connection Name, Username, and Password.
- Click Next.

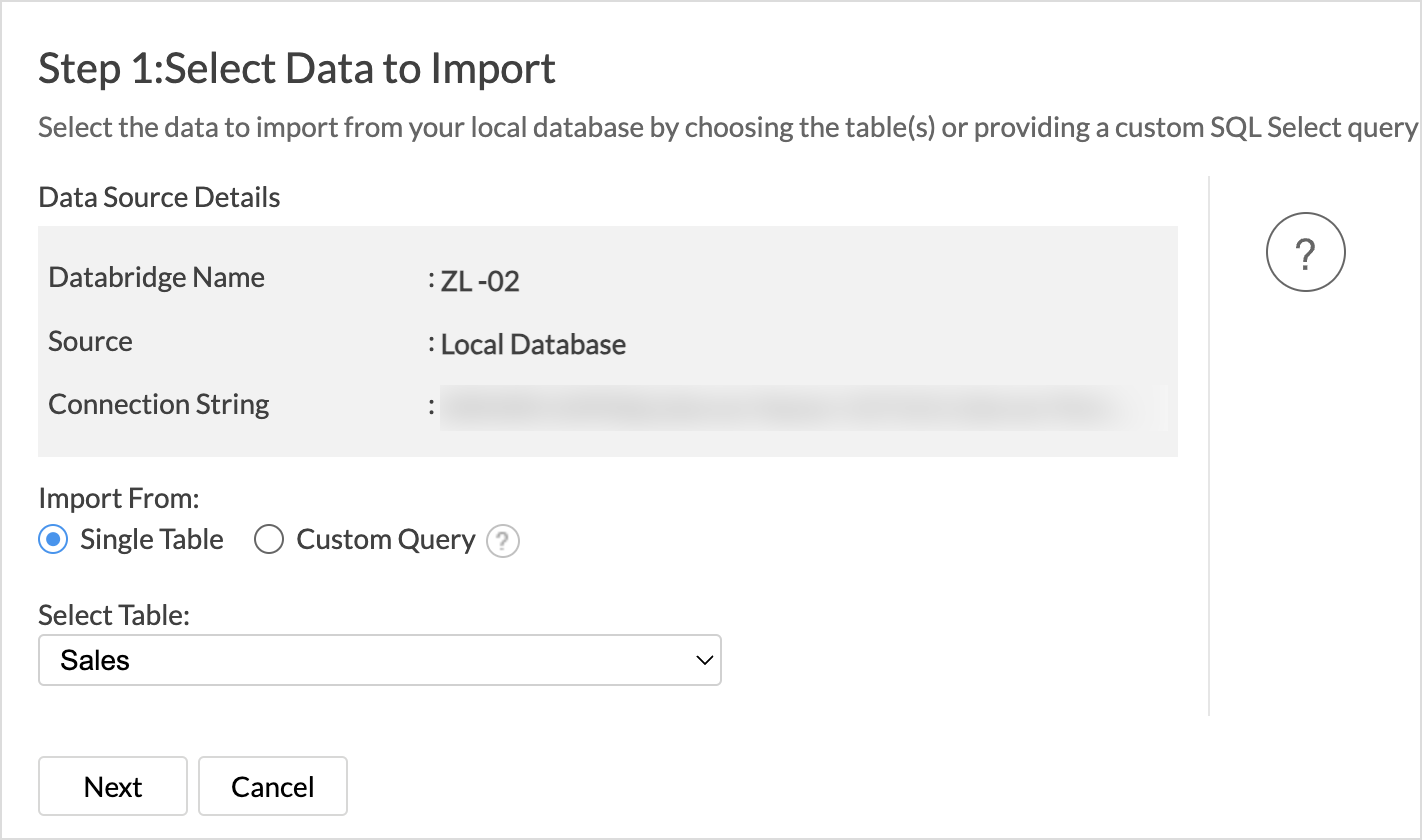
Choose Data to Import
Single Table
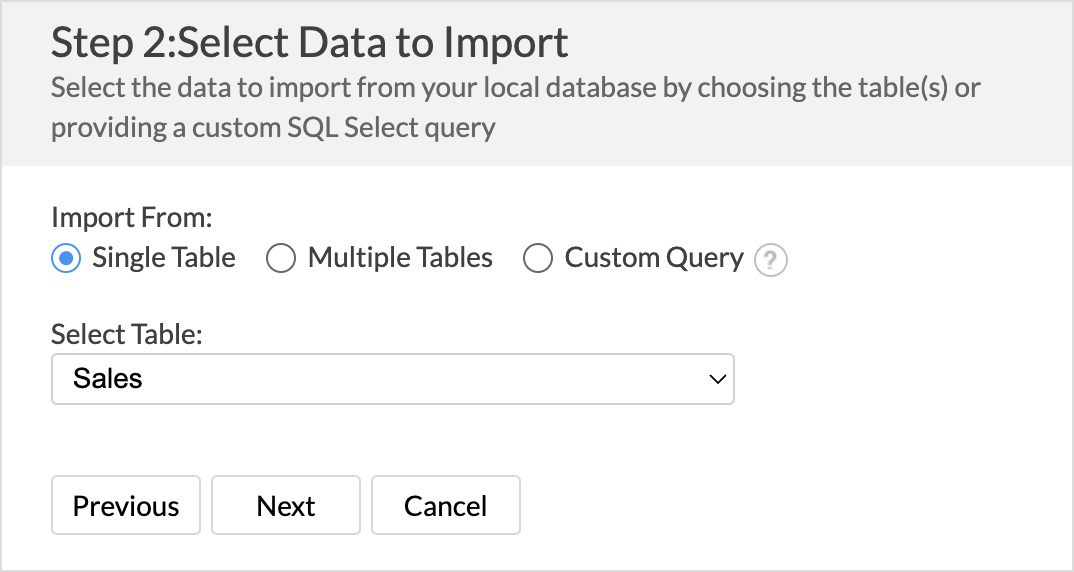
- Select Single Table from the Import From section.
- Choose the table to import from the Select Table drop-down menu.
- Click Next to continue.
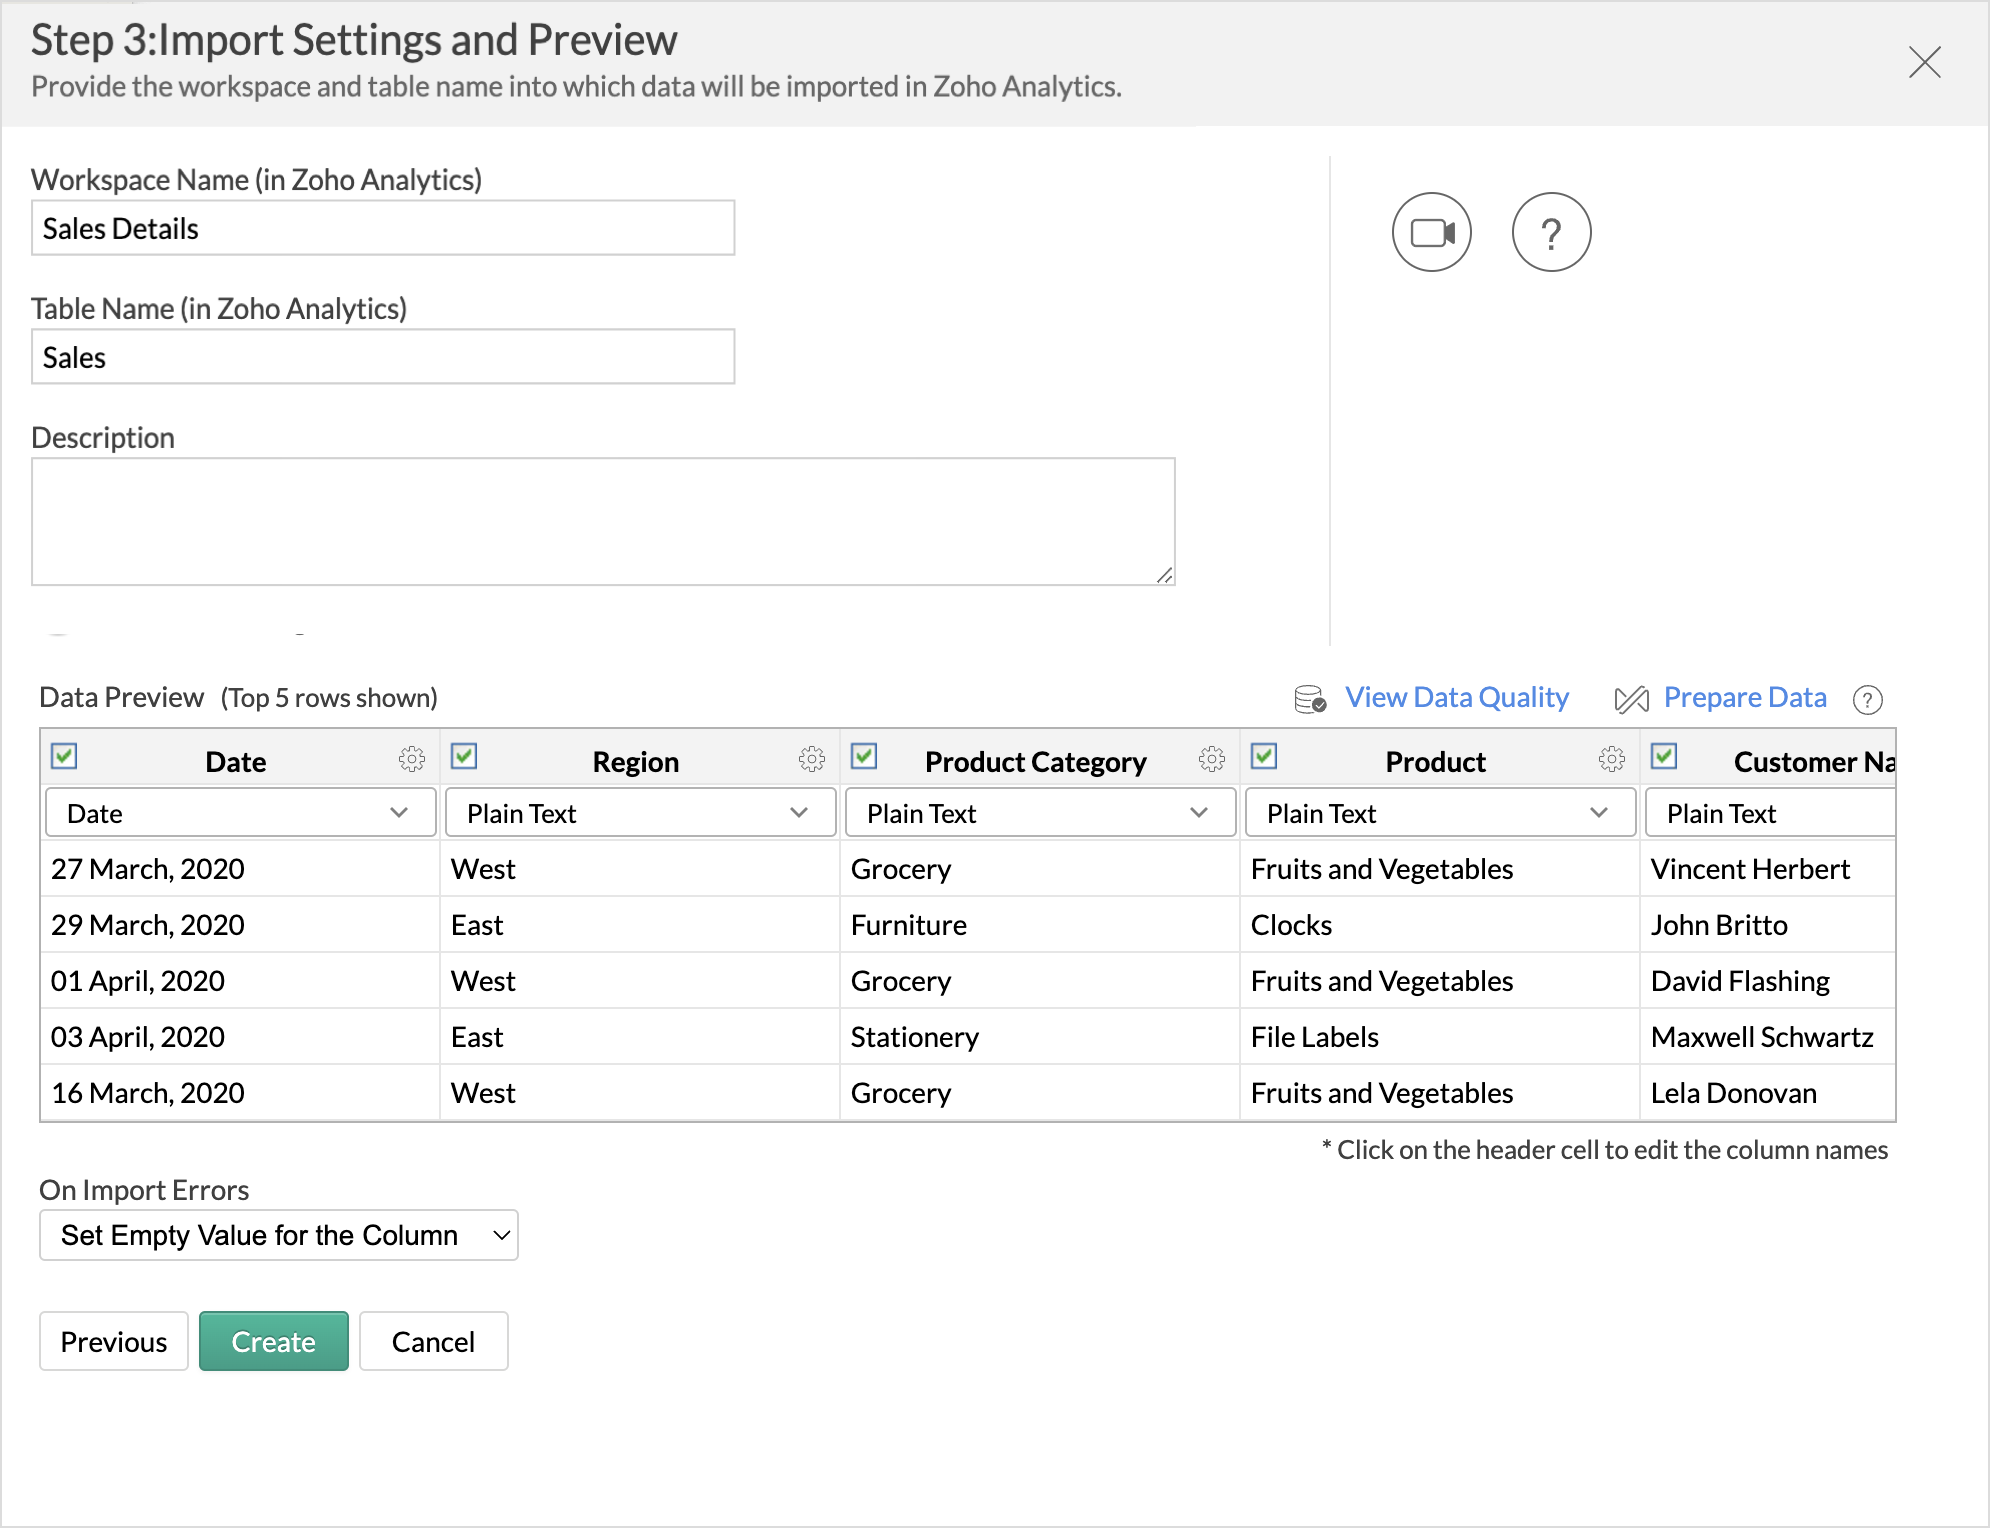
- The Import Settings and Preview wizard will open.
- You can edit the Workspace Name, Table Name, and add a description if needed.
- The Data Preview section displays the first few records of your data; you can verify the column name and the data type.
- Unselect the checkbox adjacent to the column header to Remove Column from importing.
- On Import Errors section allows you to specify how to handle error conditions in case they occur while importing data. The following are the possible options:
- Set Empty Value for the Column (default): Sets an empty value to the corresponding column value which had problems while importing.
- Skip Corresponding Rows: Skips the corresponding rows in which an error occurs while importing.
- Don't Import the Data: Aborts the import process if any error occurs during importing.
- Click Create. Data import will be initiated, and you can also choose to schedule the import.


Multiple Tables
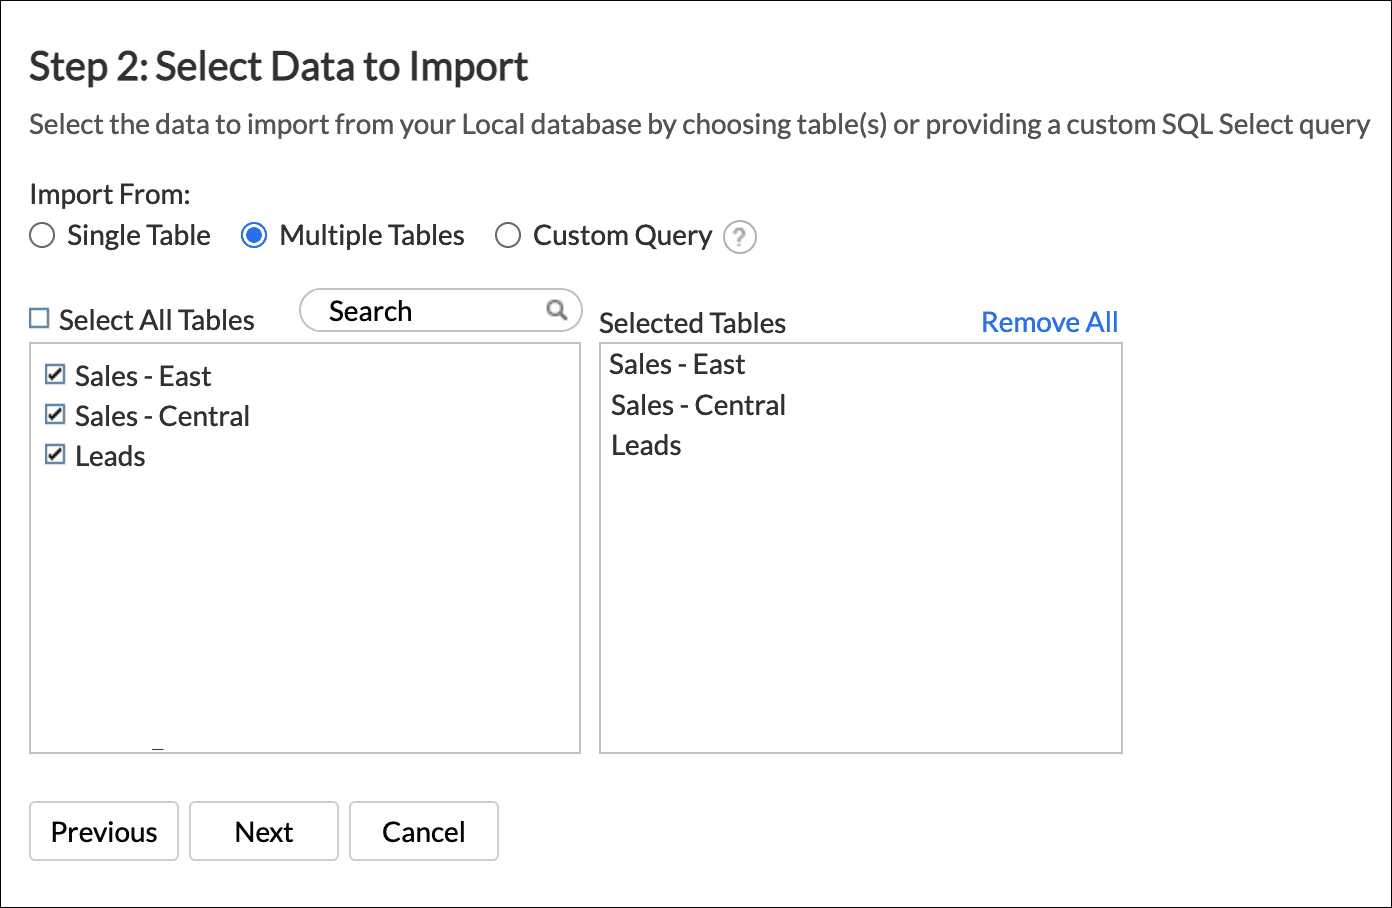
- Select Multiple Tables from the Import From section.
- Choose the tables to be imported.
- Click Next to continue.
- In the Import Settings page that opens, specify the Workspace Name that is to be created in Zoho Analytics. You can also provide a Description about the workspace.
- Click the Edit icon that appears on mouse hover to edit the Table Name.
- Specify how to handle errors that occur during import in the On Import Errors section.
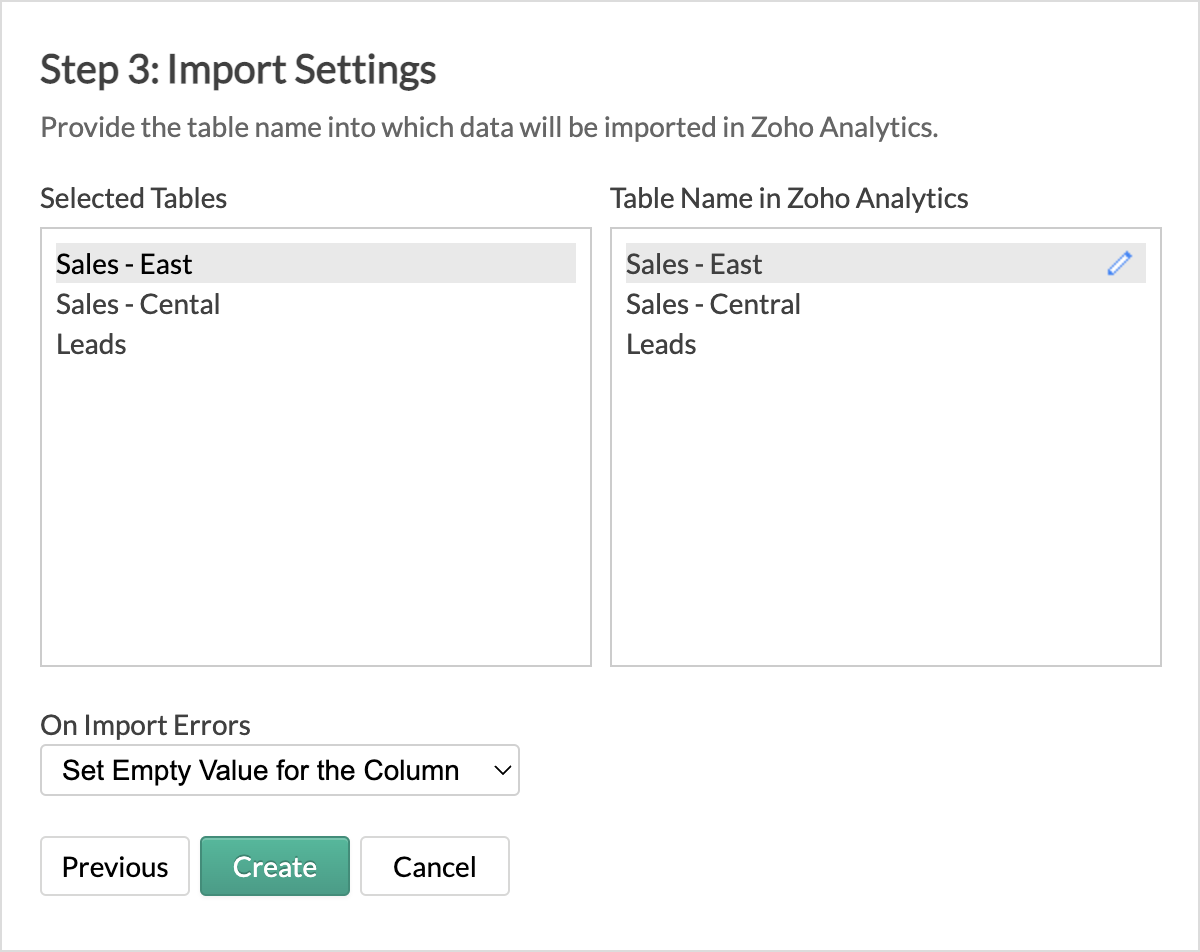
- Click Create. Data import will be initiated, and you can also schedule the import.


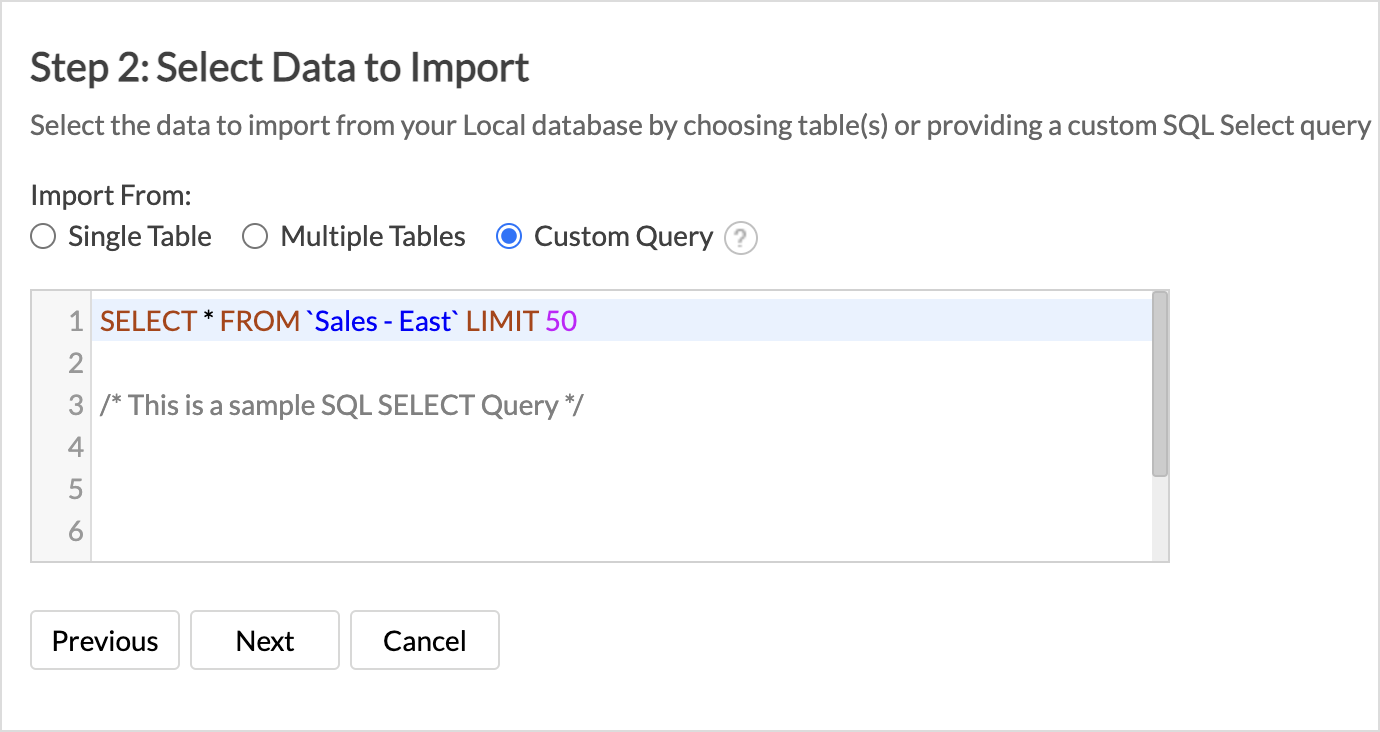
Custom Query
- Select the Custom Query option and provide the SQL SELECT query in the given text area.
- Click Next to continue. The successive steps are similar to importing data from a single table.

Schedule Data Import
Zoho Analytics offers flexible sync schedules to ensure that the data is always up-to-date for effective analysis. It also allows you to configure which data should be fetched in each schedule.You can choose to import All the records in each schedule or the New or modified records based on the requirement.
You can choose to import all the records in each schedule or only the new records, configuring which data should be fetched.
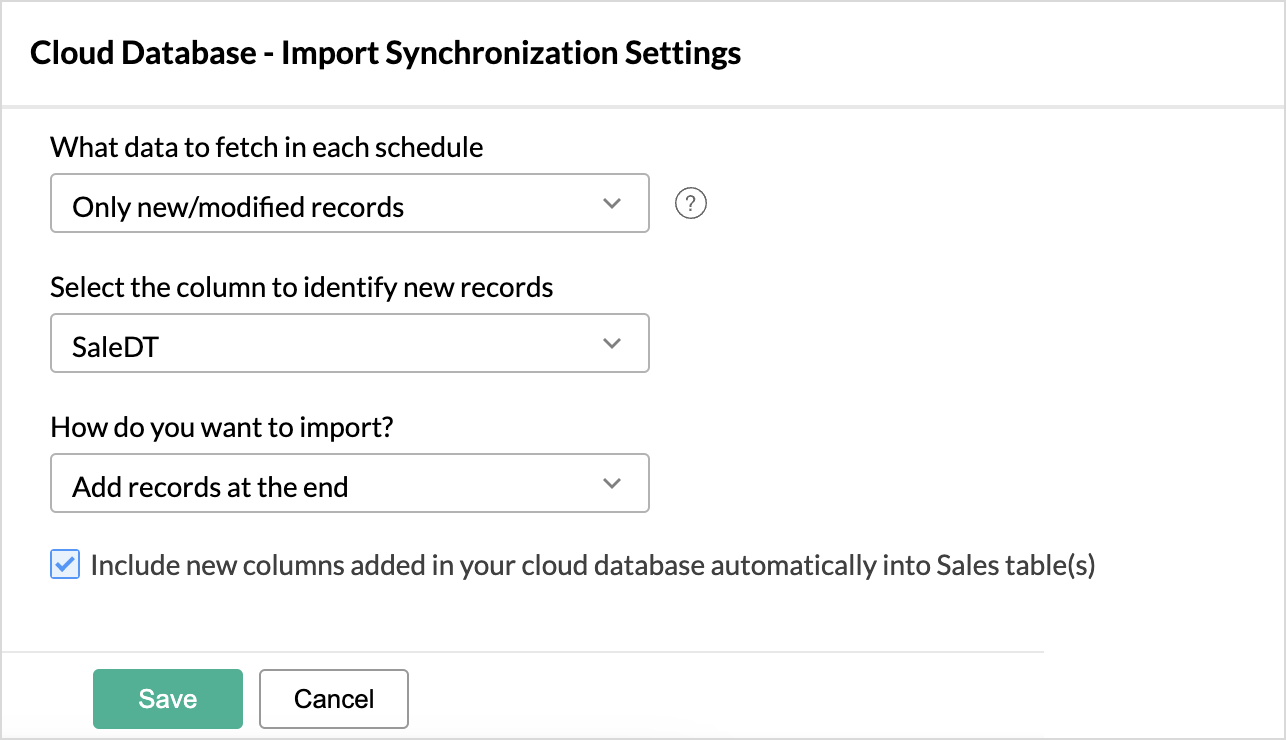
All records
- Select All Records from the What data to fetch in each schedule drop-down menu.
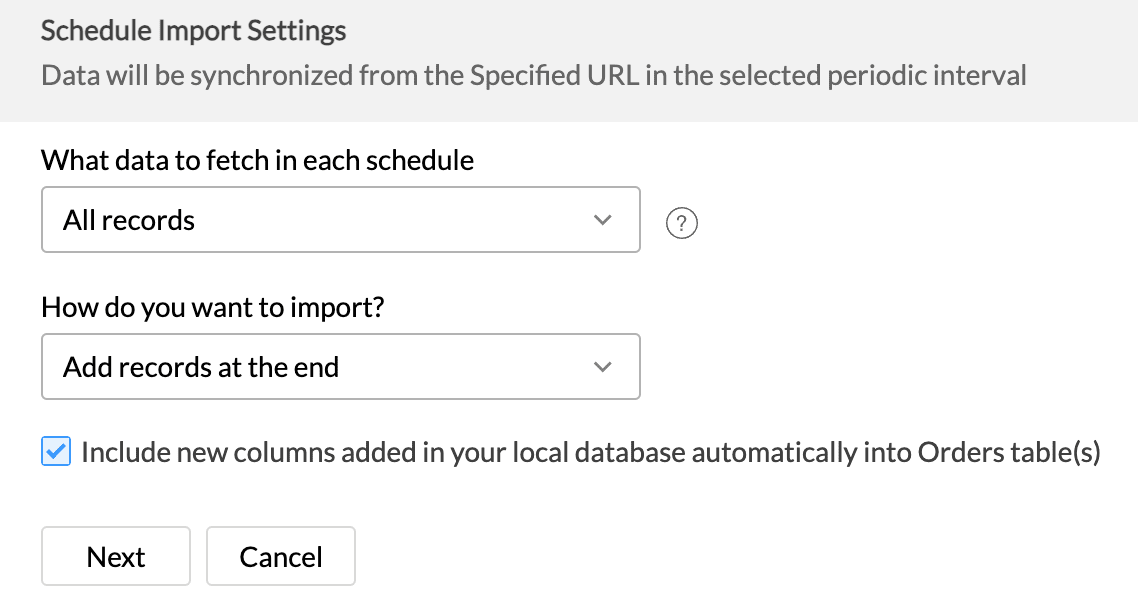
- Choose one of the below options under How do you want to import the data? field.
- Add records at the end: Appends the records to the end of the table.
- Delete existing records and add: Deletes entire records in the Zoho Analytics table and adds the new records.
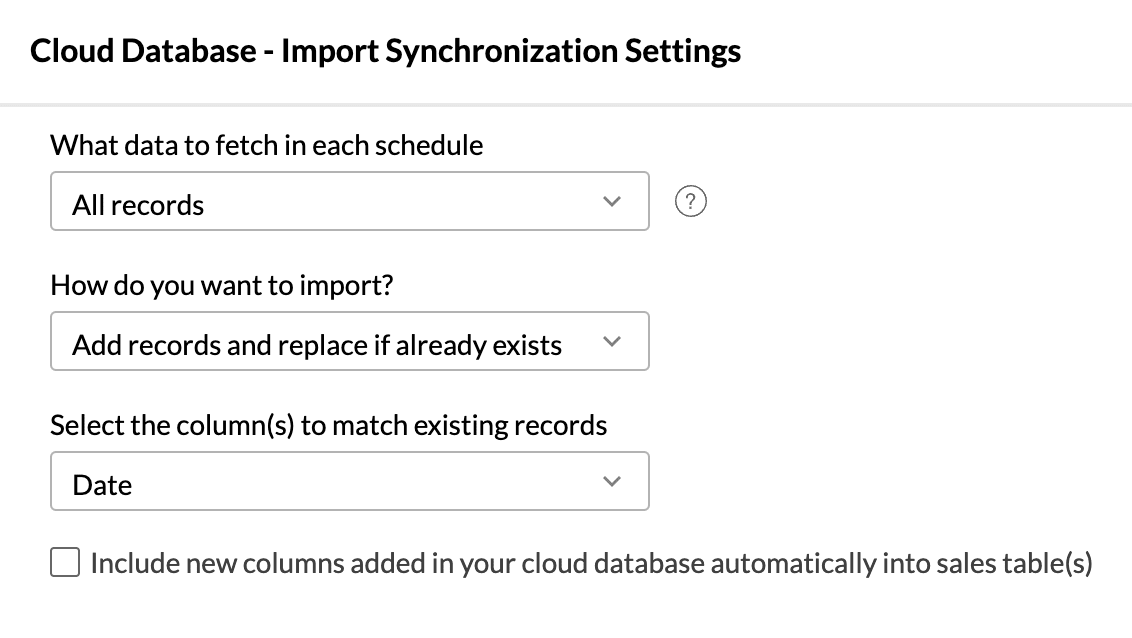
- Add records and replace if already exists: Updates the existing records in the table and appends the new records at the end of the table. For this option, select the column(s) to match existing records.
- Select Include new columns added in your cloud database automatically into Zoho Analytics table(s) to import data from newly created columns in the subsequent imports.
- Click Next.
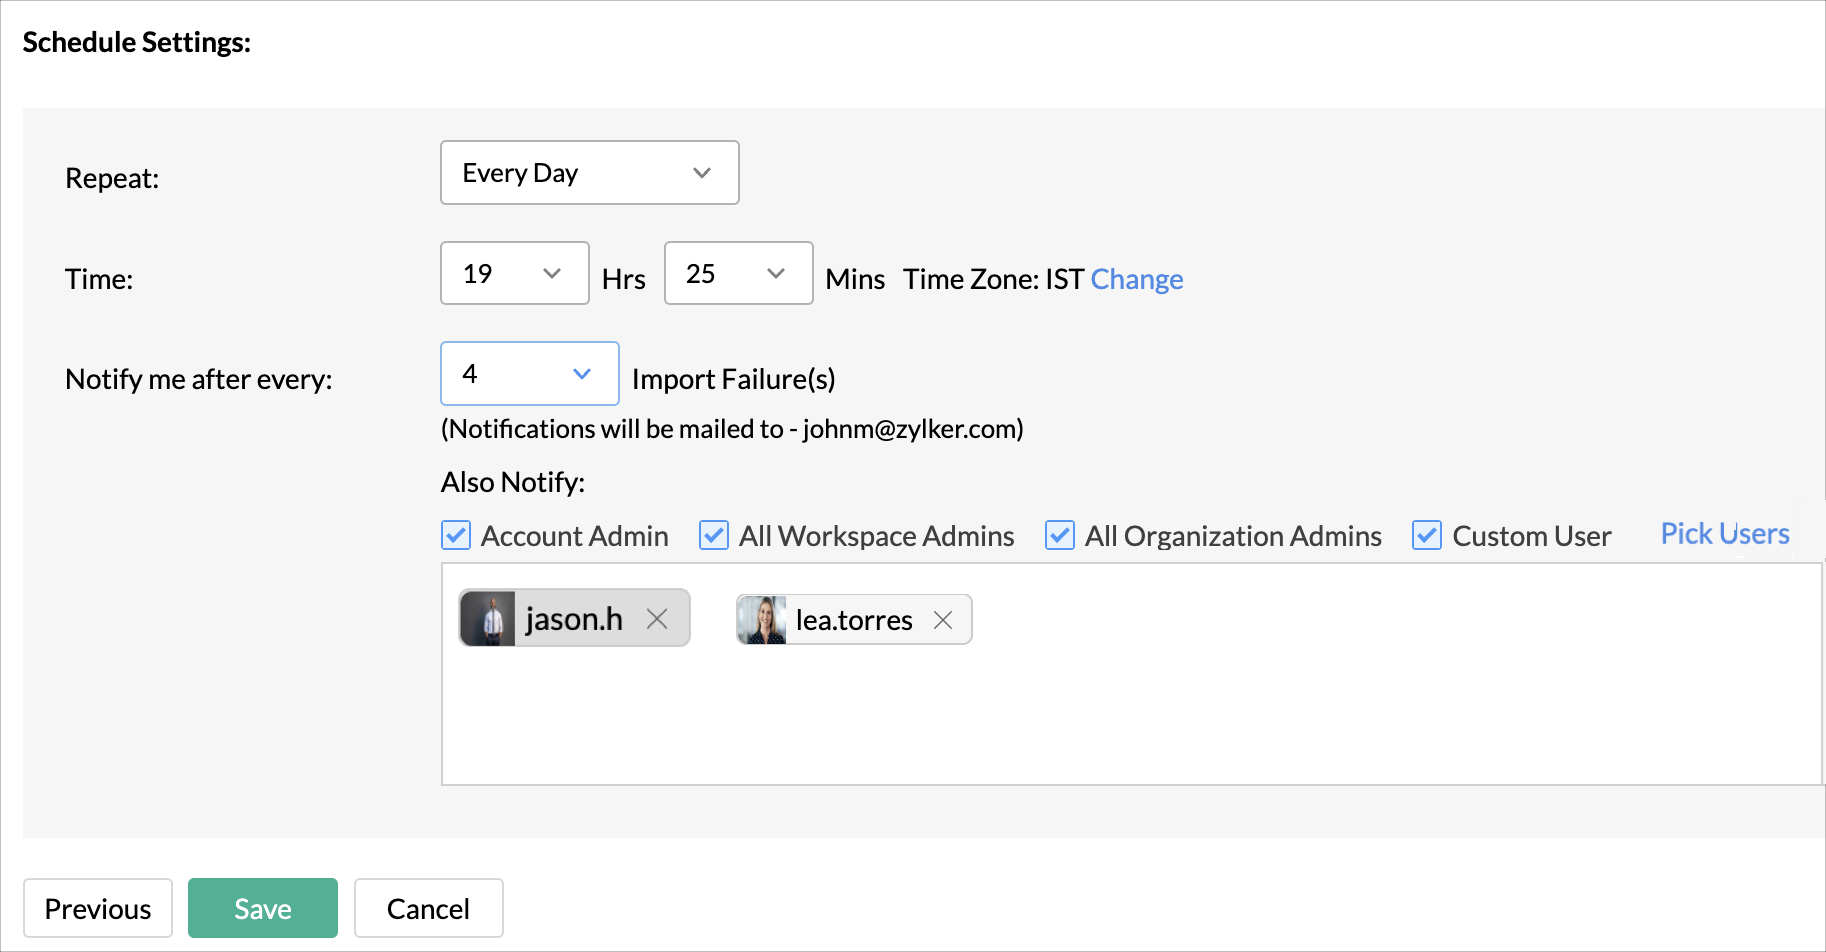
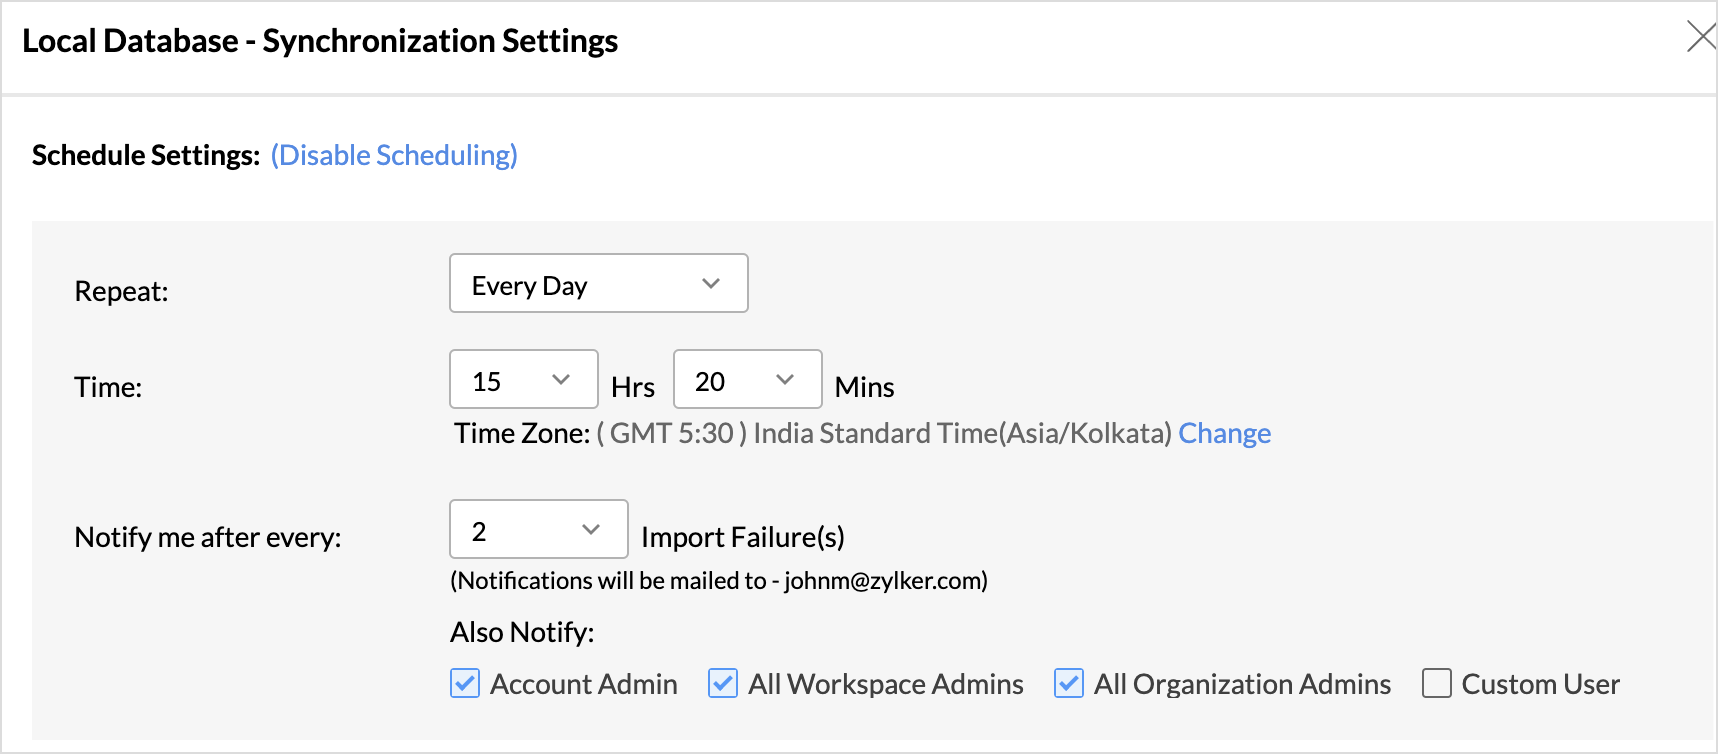
- In the Schedule Setting pane, choose the interval in which you would like to synchronize the data. You can choose to synchronize your data at one of the intervals mentioned below.
- Every 'N' hour
- Everyday
- Weekly Once (Standard plan and above)
- Monthly Once (Standard plan and above)
- Selecting Not Scheduled will import the data only once, i.e., at the time of import.
- In the case of continuous import errors, you can choose to be notified via email. To get notifications, select the interval at which you need to be notified from the Notify me after every drop-down menu.
- You can also choose to notify the Account Admin, All Workspace Admins, All Organization Admins, or any Custom User.


Incremental Fetch
Incremental fetch imports only the new and updated or modified records into Zoho Analytics.This method is beneficial when the database contains transactional records. that get updated frequently. Refer to the Incremental Fetch article to learn more.
Note: Import will take a few minutes to hours depending on the volume of the data. Please note, if you access the Workspace before the initial fetch is completed, you may find the tables empty (with no data).
Edit Setup
Zoho Analytics allows you to modify the connection details if required. Users with administrator privileges can view and edit the connection settings.
The following are the information displayed in the data source tab:
General Connection Details - This includes the Source Database Name, Last Data Sync Status, and Last Data Sync Time.
Table Specific Configurations - This includes details like the Table name, Source Table Name, What data is fetched, Last Fetched time, and the Sync status of the tables.
Edit Connection Details and Sync Settings
- Access the Data Sources tab on the side navigation bar.
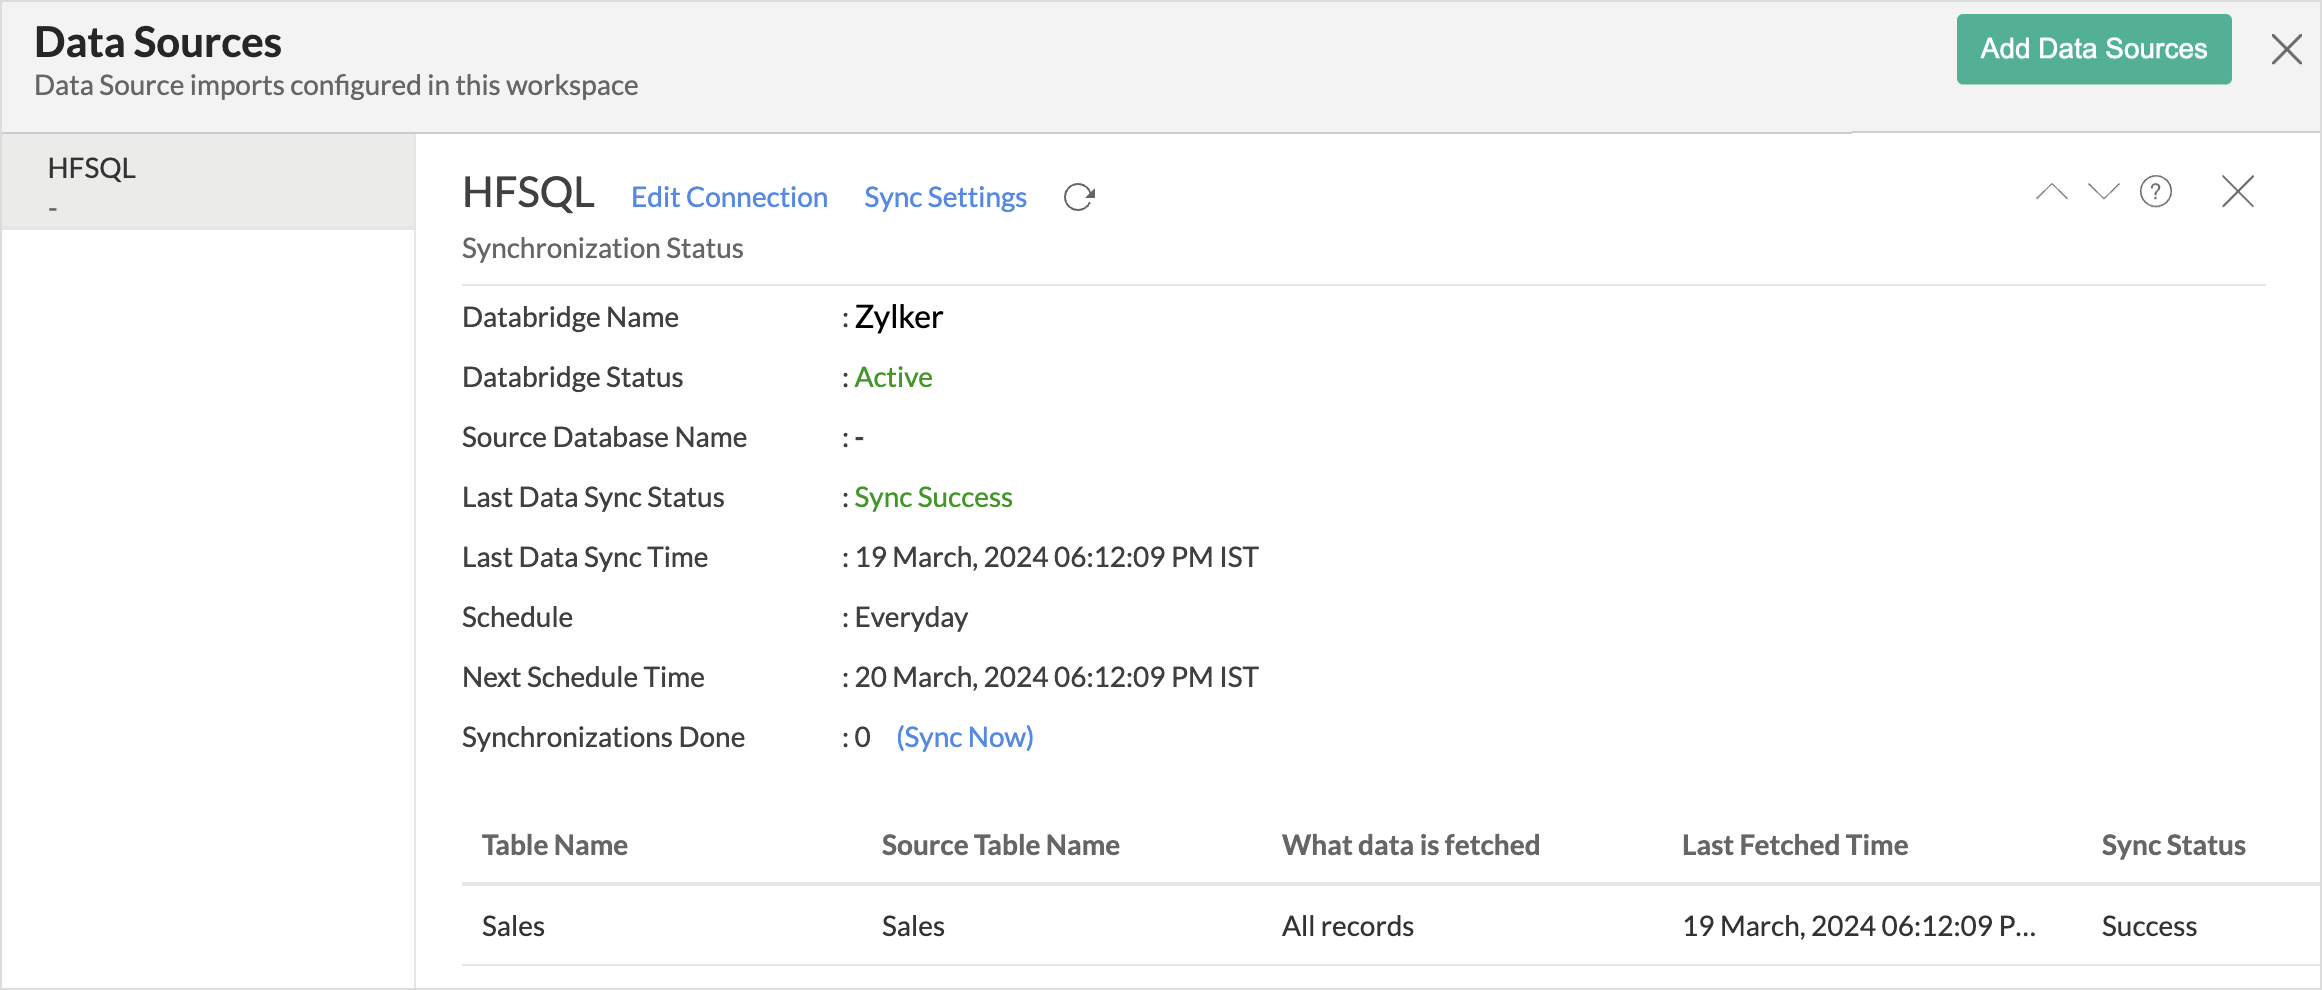
- All the data connections configured in the workspace will be listed. Select the data source you wish to edit.
- Click Edit Connection to modify the connection settings, and then click Save.
- Click Sync Settings to schedule import or to change the sync interval.


Edit Table Synchronization Settings
- Access the Data Sources tab.
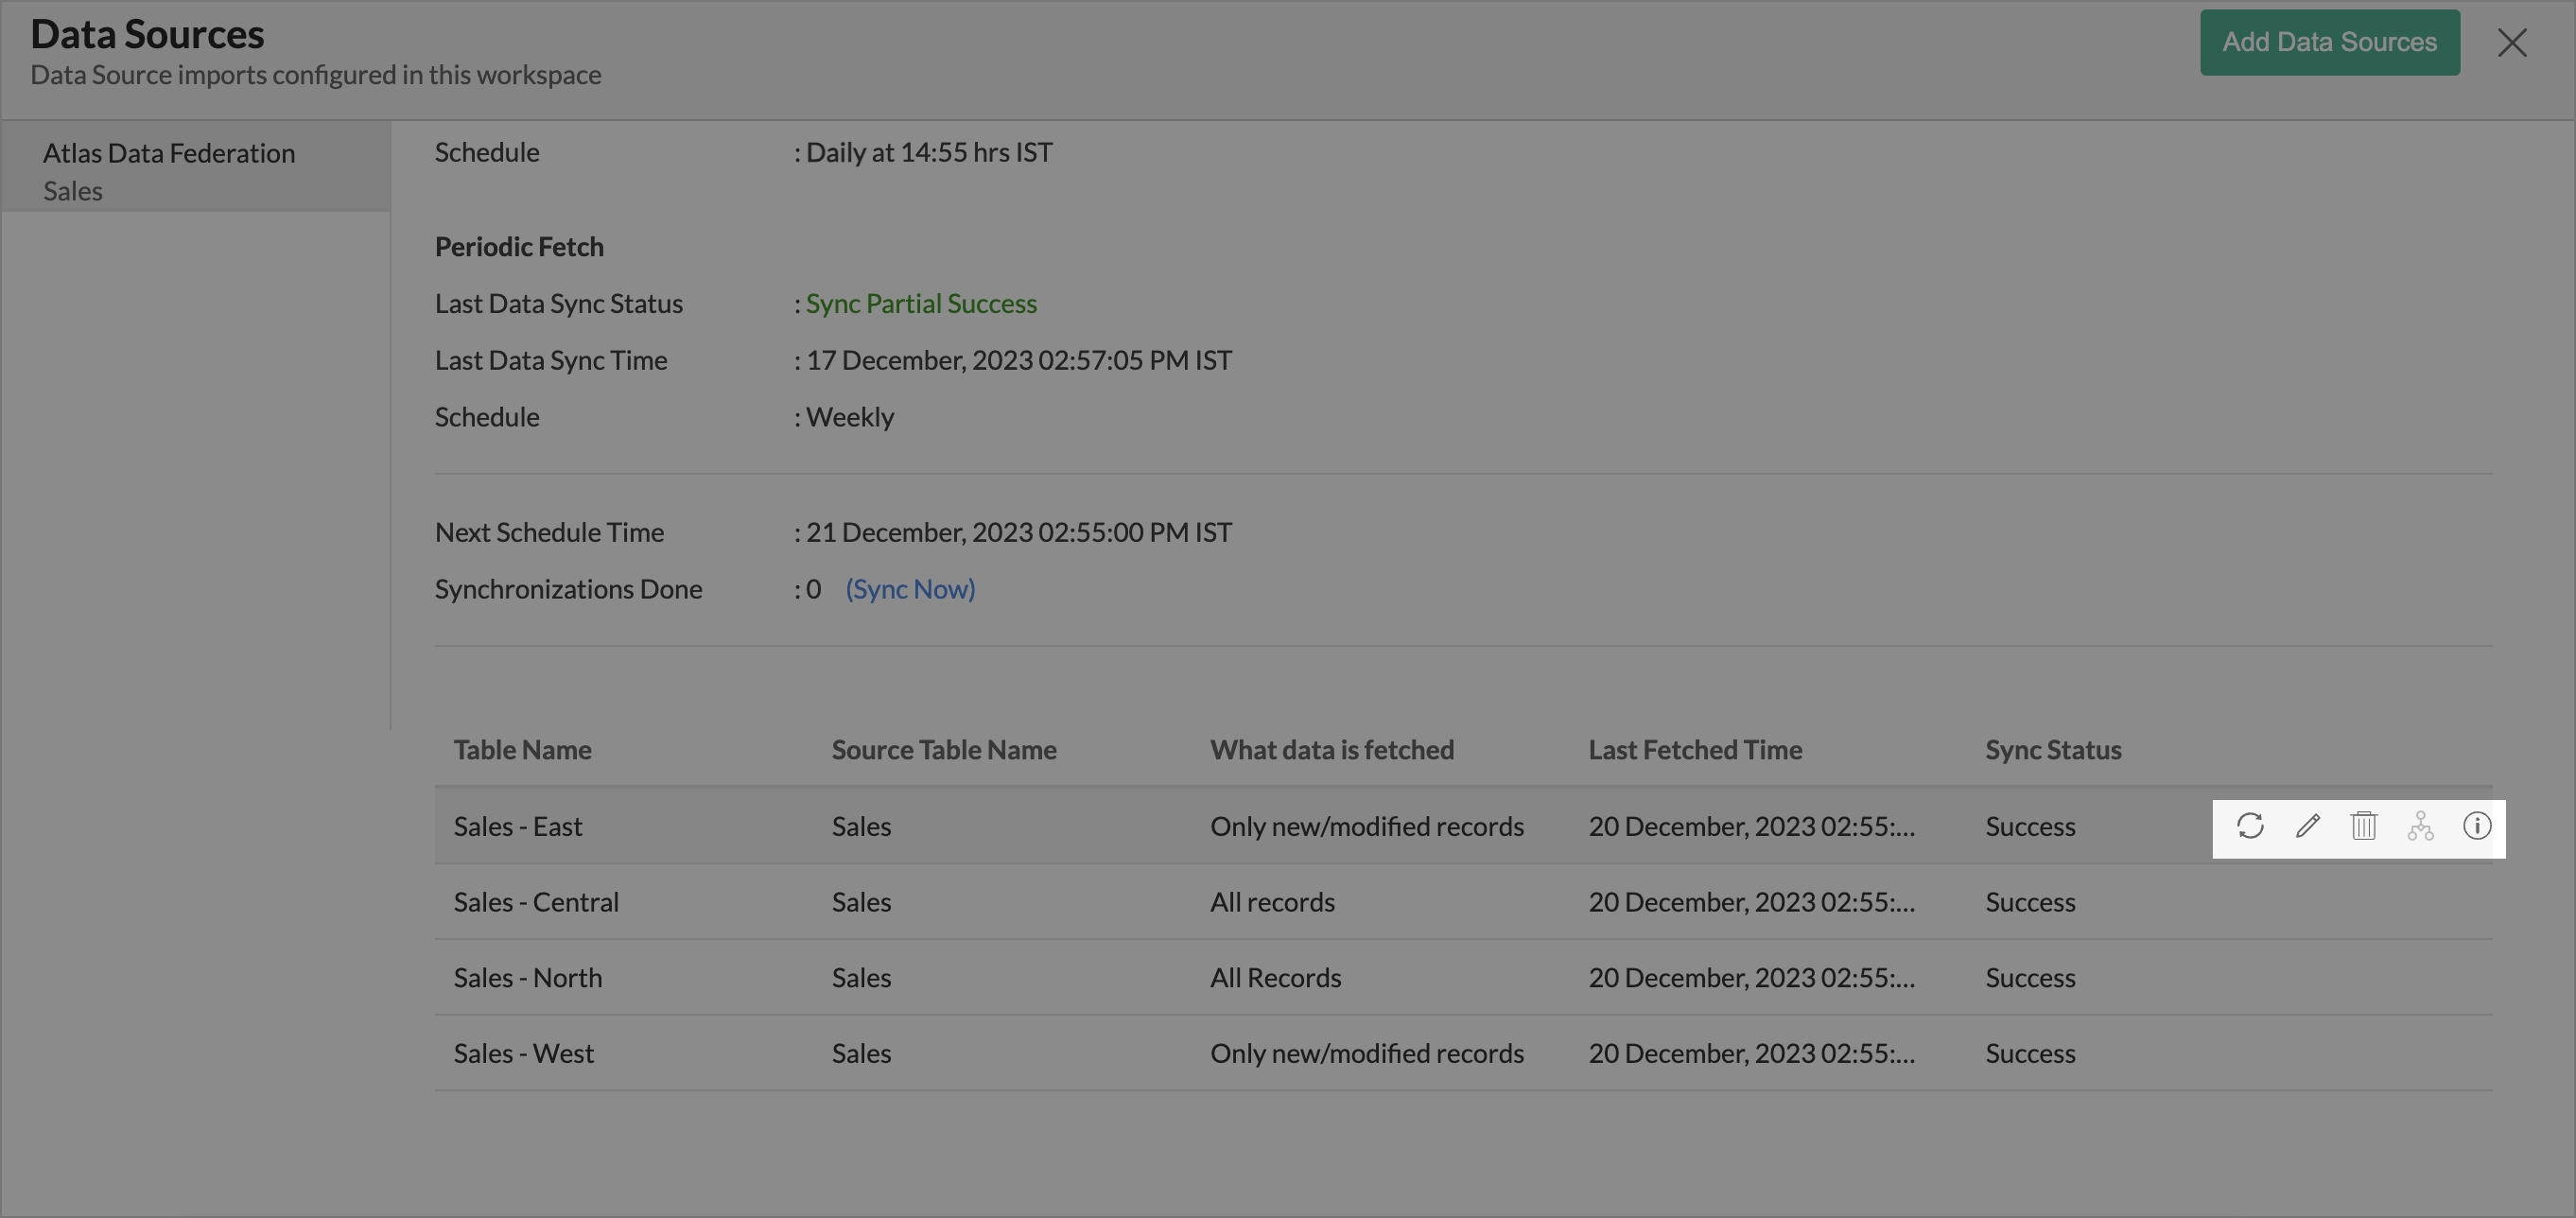
- Hover the mouse over the table for which you want to modify the settings.
- Click the Sync Now icon to include the recent changes made in the source database.
- Click the Edit icon to modify the synchronization settings of the table.
- Click the Delete icon to remove a table.The Data synchronization settings between the source table and Zoho Analytics will be terminated.
Remove Data Source
When you remove a data source, there will be no connection between the source application and Zoho Analytics. However, the tables and the data will be available in the workspace, and no further synchronization will happen.
Click the Settings icon in the Data Sources tab, and select Remove Data Source from the listed options.

Resolving Sync Failures
Data synchronization can fail if the credential provided is invalid or expired, or if the data type mismatches. Zoho Analytics sends an email to the workspace admin and also sends an in-app notification with the reason for failure along with the necessary action to be taken to resolve the issue. Access the Data Sources tab to resolve sync failure. Refer to the Edit Setup section for more details.
Data Blending
Combine data from various data sources, such as Files, Feeds, Cloud storage Databases, and Business applications, for in-depth analysis. While importing data in an existing workspace, Zoho Analytics auto identifies columns of the same data type and provides suggestions for lookup. With Query Tables, you can combine data from different tables in the workspace. Use query tables to import data
To import data into an existing workspace, Click the Create icon on the side navigation panel and choose New Table/Import Data from the drop-down menu. Successive steps are similar to the steps mentioned in this section.
Import Data into an existing table
- Click Import > Import data into this table.
- Select the table you want to import.
- Choose how you want to import the data into the existing table and select how to handle import errors.
- Click Import.

Troubleshooting Tips
1. I am unable to establish the connection between the local HFSQL database and Zoho Analytics server. How do I solve this?
This may happen due to various factors, such as connectivity issues or privileges to access the protected data source. Refer to our Zoho Databridge Troubleshooting tip section to solve the specific issue you are facing.
2. Can I change the data type of the columns imported in Zoho Analytics?
Yes, you can change the data type of the columns imported into Zoho Analytics. However, it is necessary that the data type of your column is compatible with the data type of the column in the source database for successful data synchronizations. It is always recommended that you change the data type in both the source database as well as in the Zoho Analytics Workspace.