Sending email
One of the most basic functions of an email service is sending emails. Zoho Mail provides rich text format editors for sending properly formatted emails. The recipients of the email can be picked from contacts.
Zoho Mail is explicitly built for businesses and helps with sending business emails and normal correspondences. However, as per the policy, Zoho Mail cannot be used to send mass emails or marketing emails to unknown senders.
Email Composer/ Editor
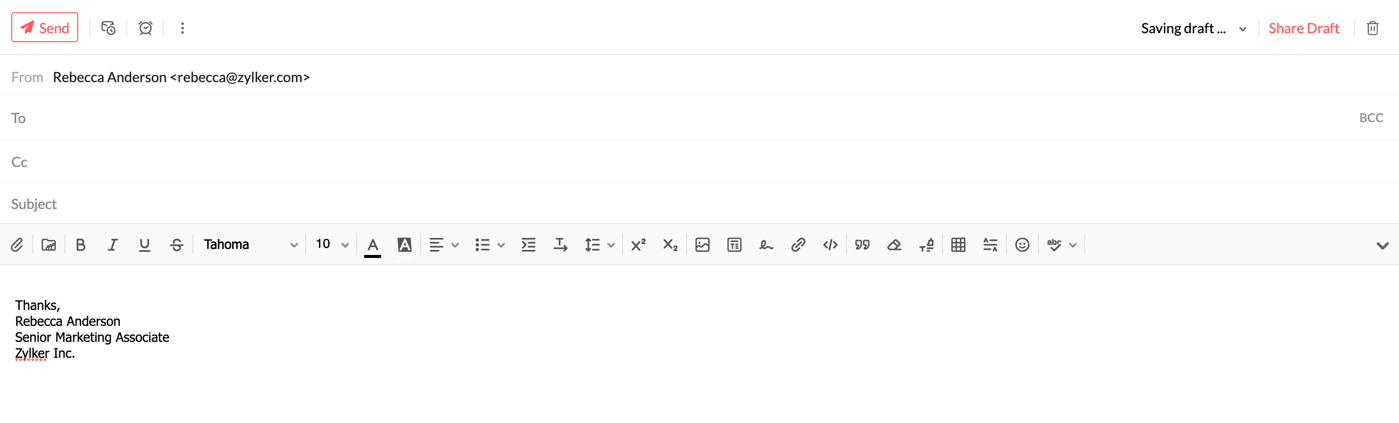
Click the New Mail button in the left pane, to open the Zoho Mail composer, with Rich Text Formatting options. The composer opens in a tab, where you can draft your email. You can choose the inline editor or the new window option to reply to/forward emails from the Settings. The default settings for the Composer can be customized from the Compose Settings.
The composer includes the following:
- From: The From address can be selected from the drop-down which contains the main email address of your account, your email aliases, and the external email addresses configured. The corresponding Display name will also be displayed next to the selected email address. You can also configure an external email address as a From Address.
- To: Specify the direct recipients of the email here. The organization's email addresses will be available from AutoFill. Click the To Label, to open the address book and choose an email address from the address book.
- Cc (Carbon Copy): Specify the recipients to whom the email should be copied. When you add an email address in Cc, other recipients will be able to view the addresses.
- Bcc: (Blind Carbon Copy): Specify the recipients to whom the email should be copied, without exposing the email addresses to others. The other recipients will not know about the email addresses in Bcc.
- Subject: Title or a Short Summary of the contents of the email
Mail Content - Richly Formatted Mail
Zoho Mail provides a WYSIWYG (What You See Is What You Get) editor, which provides options to send a richly formatted email with images, tables, hyperlinks, and even smileys. The formatting options allow you to personalize the layout and your email. The built-in Spell-checker helps you to perform a spell check in your outgoing emails, across multiple languages. You can choose the encoding for the outgoing email. It is recommended that you use UTF-8 for outgoing emails, as it is capable of encoding all characters in Unicode.
Here is a list of formatting options available in the Rich Text mode:
- Bold
- Italics
- Underline
Strike through- Font Face Options
- Font Size Options
- Font Color Options
- Background Color for text (Text highlight)
- Alignment Options
- List Options
- Indentation for text and Lists
- Line Spacing
- Superscript
- Subscript
- Text Direction
- Quote
- Remove formatting
- Format painter
Other than the formatting options available, you can also insert the following in your emails:
- Hyperlinks - Directs a selected portion of the text to the linked URL or email address.
- Images - Inserts images either from the disk storage or directly from the web.
- Signatures - Inserts the selected signature in the composer.
- HTML - Provides options to enter content in HTML format, which will be reflected in the compose window.
- Tables - Inserts tables according to the customizations provided.
- Horizontal Separators - Inserts a horizontal line between text.
- Smiley - Inserts the selected smileys from the list of options.
Voice Recording
Audio messages are a step ahead of text messages and it adds a personal touch to the recipients. Gone are the days when you had to record audio on your computer and then attach it to an email. Zoho Mail's Record audio feature in the Compose mail window allows users to send voice messages with ease. Follow these steps to send a voice message as an attachment:
- Log in to Zoho Mail.
- Select New Mail, click the Record audio button from the compose mail window and follow the on-screen instructions.
- If necessary, you can Pause the recording in between and continue from where you left off.
- Once you are done, click the Stop button to complete the audio.
- Click Attach recording, Rename the file to your preference and hit the Send button. Recipients can listen to the audio directly from the web browser by clicking on the Play button.

Note:
Users can see the recording size at the time of recording the audio and after attaching it. However, below are a few points to remember when you record voice messages:
- The maximum permissible attachment size depends on the settings configured by your administrator.
- A minimum of 2MB is required before you can record an audio message.
- The audio size cannot be 0KB even if the message is too short.
Plain Text Mail
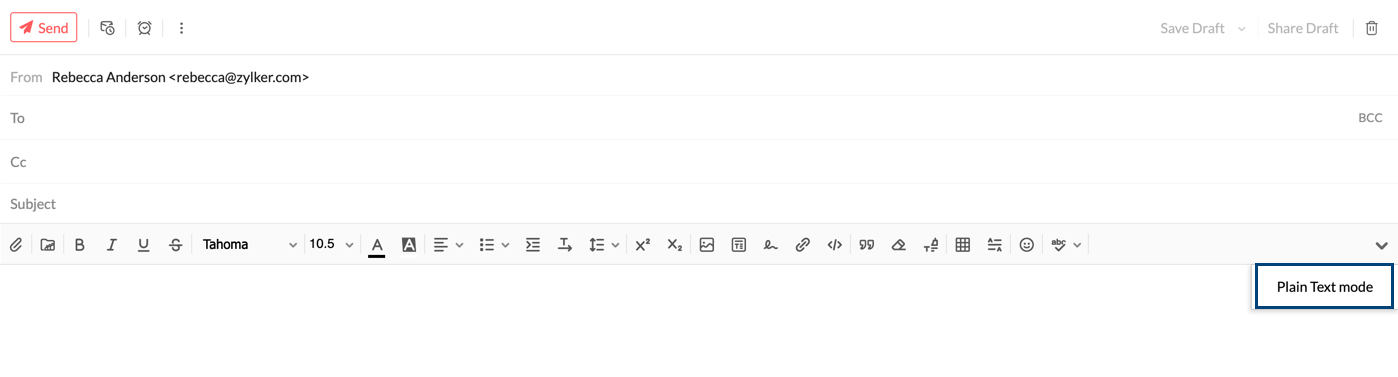
A plain text email is one that contains only the content of the email, without any formatting such as Bold, Italics etc. You can choose the Plain Text option to send an email without any formatting. Click the drop-down in the right corner of the composer, and choose Plain text mode.
The system will request confirmation for converting Rich Text to Plain text. On confirming, the formatting toolbar will be hidden and you will see only the spell check icon. Any formatting changes made to the content and signatures will be lost along with any media or table inserted. These formatting changes will also be reflected when you save the email as a draft or template. Hence, the message will be sent as a plain text email.
To revert to the Rich Text mode, click the same drop-down and choose Rich Text mode. Now you will be able to format the text that you've inserted, add tables, images etc. Even if you revert to Rich Text Mode, the prior formatting will not be restored.
Enhanced Spell check and Composer language
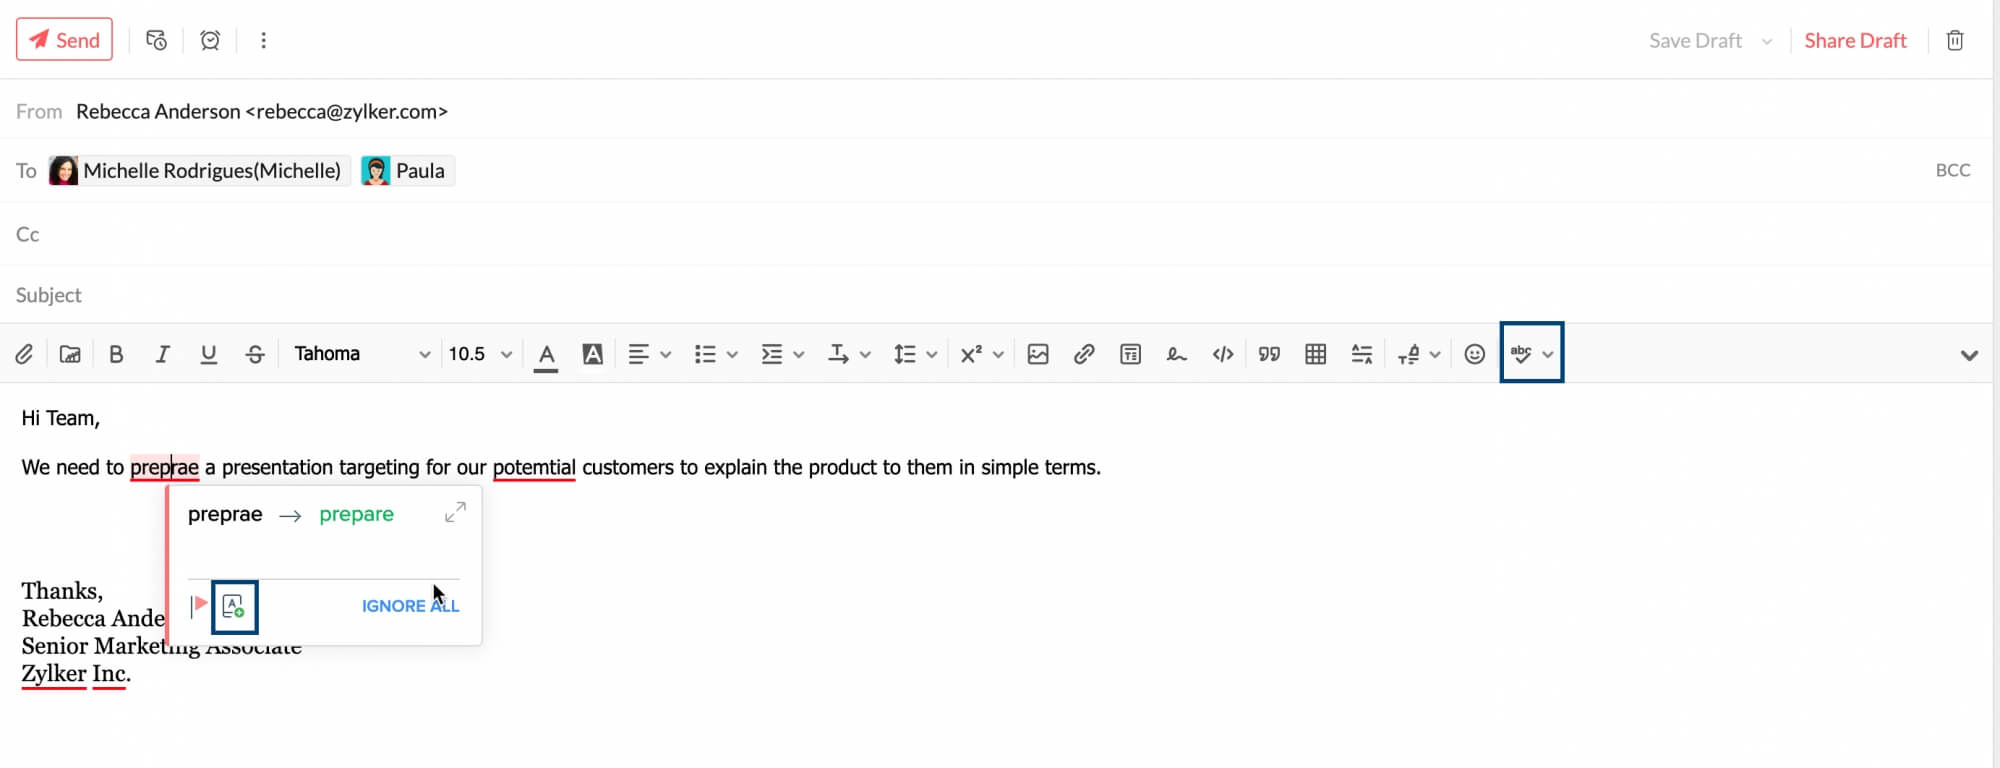
Zoho Mail has an inbuilt enhanced spell checker to correct your spelling and grammar errors on the go. After composing your email, click the Spell check icon. The misspelled words or grammar errors in your email content will be highlighted. Click the highlighted words to see a list of possible words with the nearest spelling or alternative words. You can also add a word to your custom dictionary by clicking the Add to dictionary icon so that it doesn't get flagged the next time you spell-check an email.
If you click the drop-down next to the Spell check icon, you will be shown a list of languages that you can choose from. This primarily means the language against which your email content will be checked for validation during a spell check. It does not refer to the language you can compose the email in. For example, if you've chosen English (US) from the composer language listing, the email content will be checked with an American English dictionary, and relevant spelling and grammar suggestions will be provided.
The language your email is composed in depends on the keyboard you use, and not on any of Zoho Mail's settings.
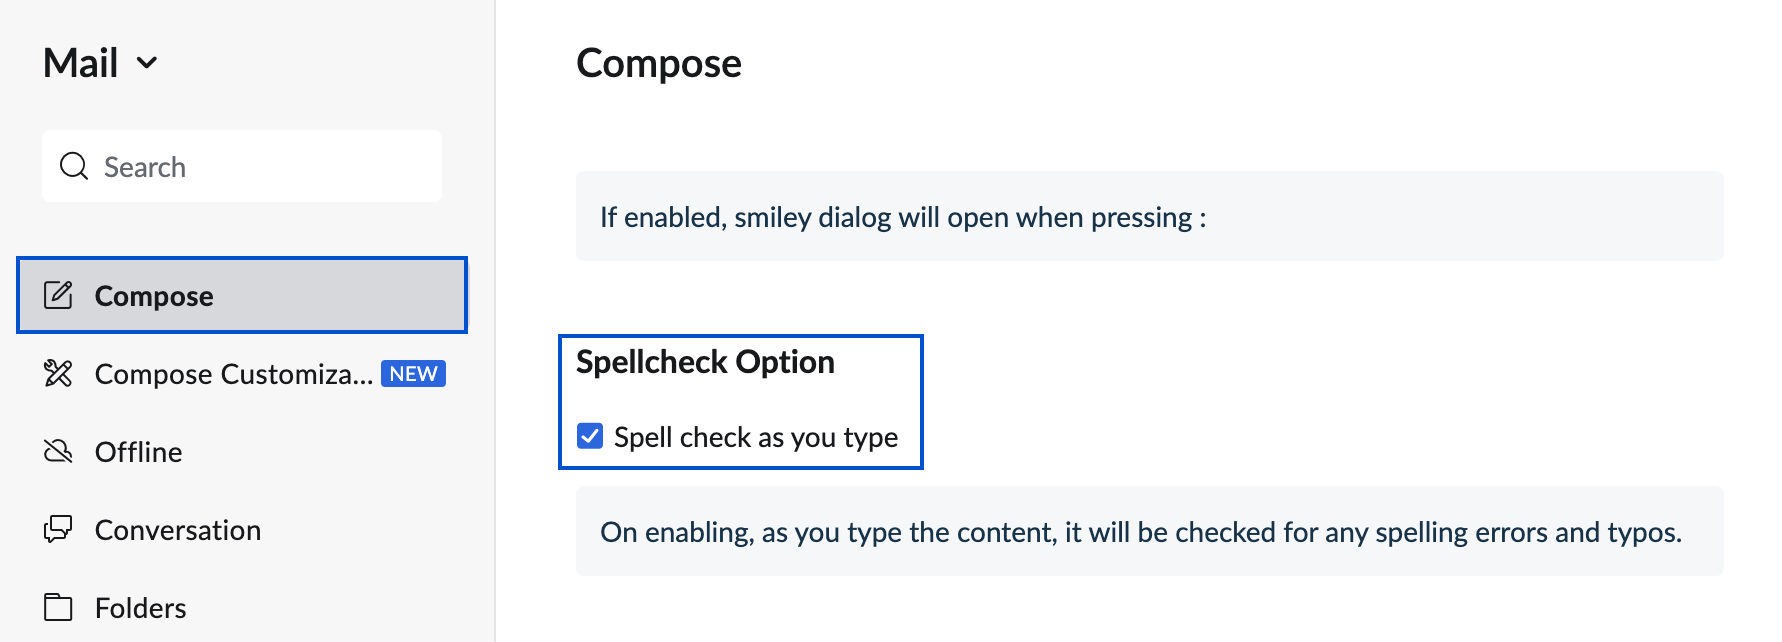
The Auto-spell check option can also be enabled in settings. You can use this to check your spelling as you type. To enable this option, navigate to Settings > Compose > Spellcheck option. Select the Spellcheck as you type check-box.
Note:
The auto-spell check option is available only to users who have subscribed to one of our paid plans.
More email sending options
While composing an email you can also set certain preferences in the compose window before you send the email. You can set the priority for the email, insert a signature/template, change the encoding format, and ask for read receipts from the recipient end.

Priority
You can set the email priority to High/Medium/Low. This will help the recipient classify those emails that need to be attended to immediately, and prioritize them accordingly. In the Compose window, click the Options icon on the top of the window and choose the required priority from the listing.
| High |
| Medium |
| Low |
Insert Template/Signature
You might have some saved templates that might be necessary from time to time. You can insert such templates or one of your signatures directly from the compose window. Click the Options icon at the top of the compose window. The templates/signatures you've added to your account will be listed. Choose the required option and it will be added to the email that you're composing.
Encoding
You have multiple email encoding options in Zoho Mail. If you want a specific email to be sent with a different encoding, you can choose the required option from the Options menu. This will be applied only to the current email. The encoding format selected in the Settings will only be applied to the other emails.
Ask Receipt
When you send certain emails, you might need an acknowledgment to know whether the recipient has read the email. In such cases, you can use the Ask Receipt feature. In the Options menu, select Ask Receipt.
Based on the recipient's Read Receipt settings, you will be notified whether the email has been read or not.
If the recipient sends a read receipt, a new conversation gets created in the relevant email. Click the Preview whole conversation icon to view the time at which your email was read.

You can choose the default behavior for the email which requests you for a 'Read Receipt' by following the below steps.
- Log in to Zoho Mail
- Click the Settingsicon.
- Go to Mail View Options.
- Locate Read Receipt.
- Select Always Send to always send a Read Receipt acknowledgment to the sender.
- Select Never Send to never send a Read Receipt acknowledgment to the sender.
- Select Ask me to ask for confirmation before sending a Read Receipt acknowledgment to the sender.
Add Tag
You can add tags to the email you compose and the chosen tags will be added to the email once you send it. You can access the emails based on the particular tag by navigating to the Tags section on the left menu and choosing the tag from the listing.
To add tags, click on the More options icon on top of the email composer. Choose the Add tag option from the menu and select the tags you want to add to the email.

Include Attachments
This option will only be available in the More Options list if you are replying to an email. By selecting this option, you can include the attachments from the original email in your email.
Note:
You can set more preferences for your email composer from the Compose Settings page.
Compose Settings
Editor Mode
The Rich Text editor is enabled by default to all in Zoho Mail. You can change the editor mode from in the Compose settings.
Go to Settings >> Compose >> Editor Mode and select your preferred editor mode.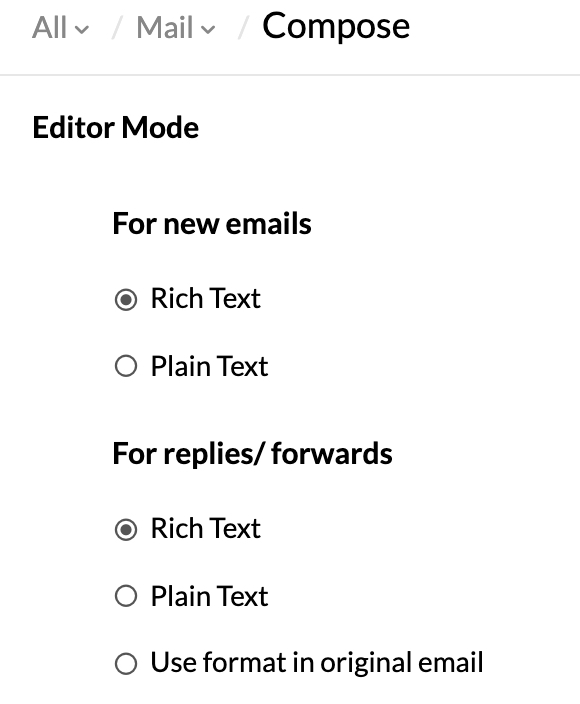
Please note that while you have chosen your preferred editor mode in the Compose Settings, you will still have the option to choose the other mode for individual emails using the drop-down box in the Mail Composer.
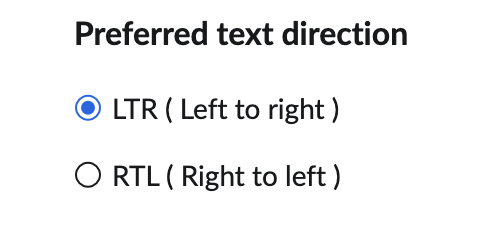
Text direction
You can choose your preferred direction of text input from your compose settings in Zoho Mail. By default, the text is entered in the left to right direction. However, you can change this in Settings >> Compose >> Preferred text direction >> Right to left.
Undo Send
You can undo sending an email by enabling the Undo Send setting
- Log in to Zoho Mail
- Click the Settingsicon.
- Go to Compose Options.
- Under Undo Send, set the duration for which you want the Undo option to be displayed after sending an email.
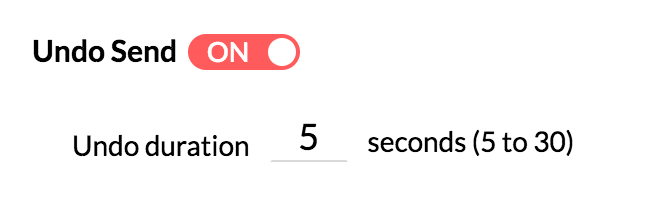
Once the setting is enabled, you will be able to view the Undo Send option while sending emails. On clicking send on an email, you will be able to view the Undo Send option as a banner for the selected duration. Once you click on Undo in the banner, the email will not be sent. This email will be saved as a draft for you to edit and resend if required.

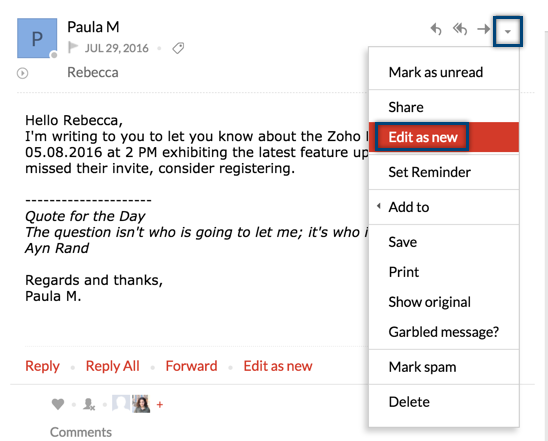
Edit as new
In certain circumstances you might want to send an email to two or more customers, but with certain changes in the email content. In such cases, you can make use of the Edit as new option. Open the email that you'd like to send to a new recipient with edits, click the More option icon, and select Edit as new from the listing. The same email will open in the email composer window. You can now make the essential edits and send the email.
Autofill/ Address Book in Compose
Autofill Contacts
When you compose an email, if you start typing the recipient name/ email address in To/ Cc/ Bcc fields, all the matching contacts (Mail Contacts and CRM Contacts) will be listed in the Autofill dropdown. You can choose the corresponding contacts from the list. The email addresses of your contacts from Personal/ Group and Organization contacts will be listed in this Autofill dropdown. CRM contacts in the autofill drop-down are denoted with the CRM icon next to them.
Similarly, if you start typing any particular category name, you can select from among the matching categories that are listed in the Autofill drop-down. All the contacts associated with that category will be automatically added as recipients.
Address Book
Adding recipient in Compose
Further, to view and select the contacts from the Address book, click the To/ Cc/ Bcc links in the respective fields. The 'Address Book' pops up with your contact details. You can directly select from the listed contacts, or use the 'Search contact' option to search and select the corresponding recipients from the address book. Click the relevant contacts, to add them as recipients.
Using the drop-down on the left top corner of the 'Address book', you can choose to view "All Contacts" or the contacts associated with any of the Personal or Organization Contacts category. You can select the desired contacts from the chosen list or use the 'Select All' checkbox to add all the contacts in that category as recipients.
The selected contacts will be displayed below the address book. You can remove them from here if needed. Finally, select the Insert option to insert the selected contacts in the corresponding field.
Contact Suggestions
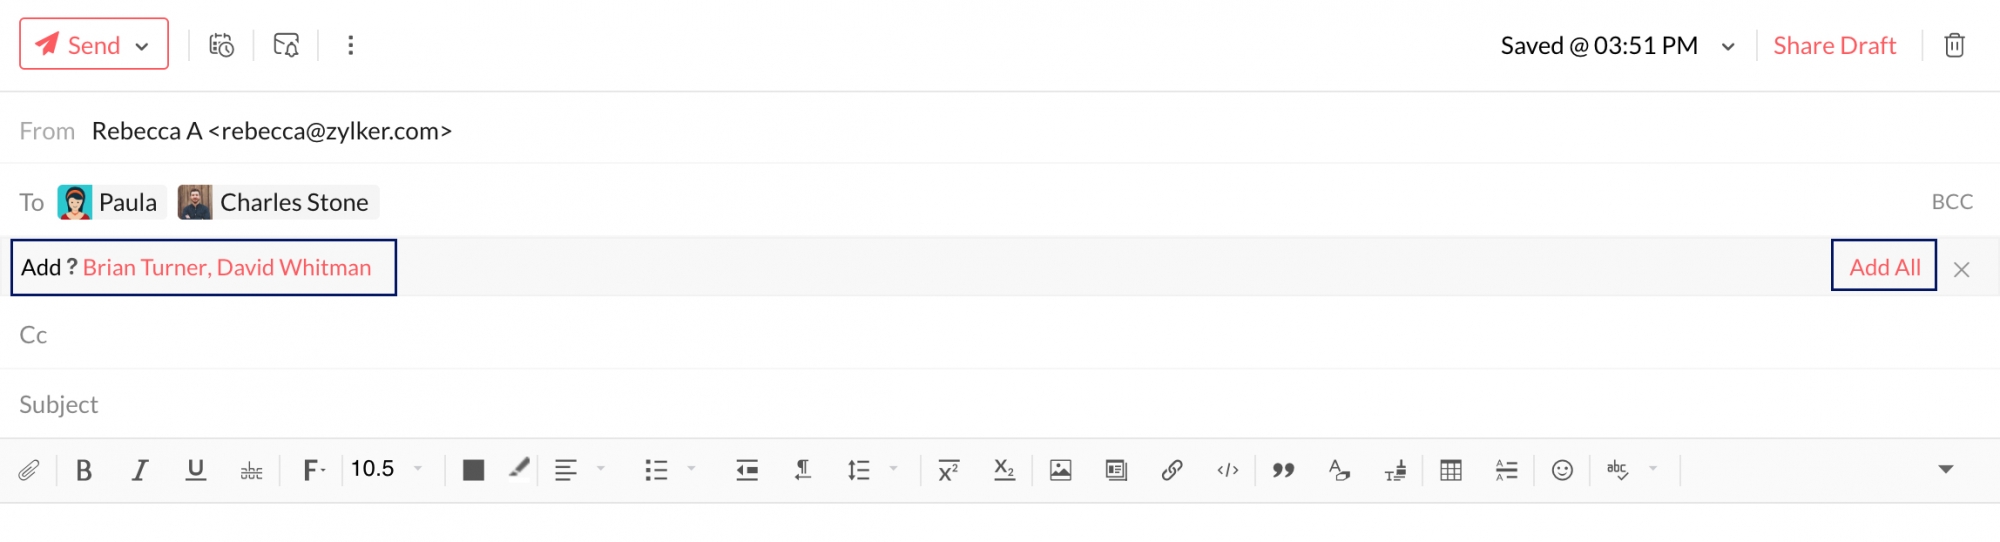
Contact Suggestions are prompted when the same set of recipients are repeated in multiple emails. If you add more than two recipients in the 'TO' field of an outgoing email, the next time you compose an email with any two of those contacts, a contact suggestion bar will appear. This bar lists the contacts that are often emailed alongside the entered contacts. You can click on the individual contacts to add them as recipients or click on the Add All option to include all the suggestions as recipients.
You can also view your CRM contacts from the address book and add them as recipients. Click on the "All Contacts" drop down and scroll to the bottom. Click on the CRM option. You can search for your CRM contacts here.
Creating Category
You can create contact categories directly from the address book. This way you can easily add a group of contacts as recipients.
- Open the Address book from the Compose window.
- Select a minimum of 4 contacts from your listing.
- Click on the Create category option that appears below the selected list.
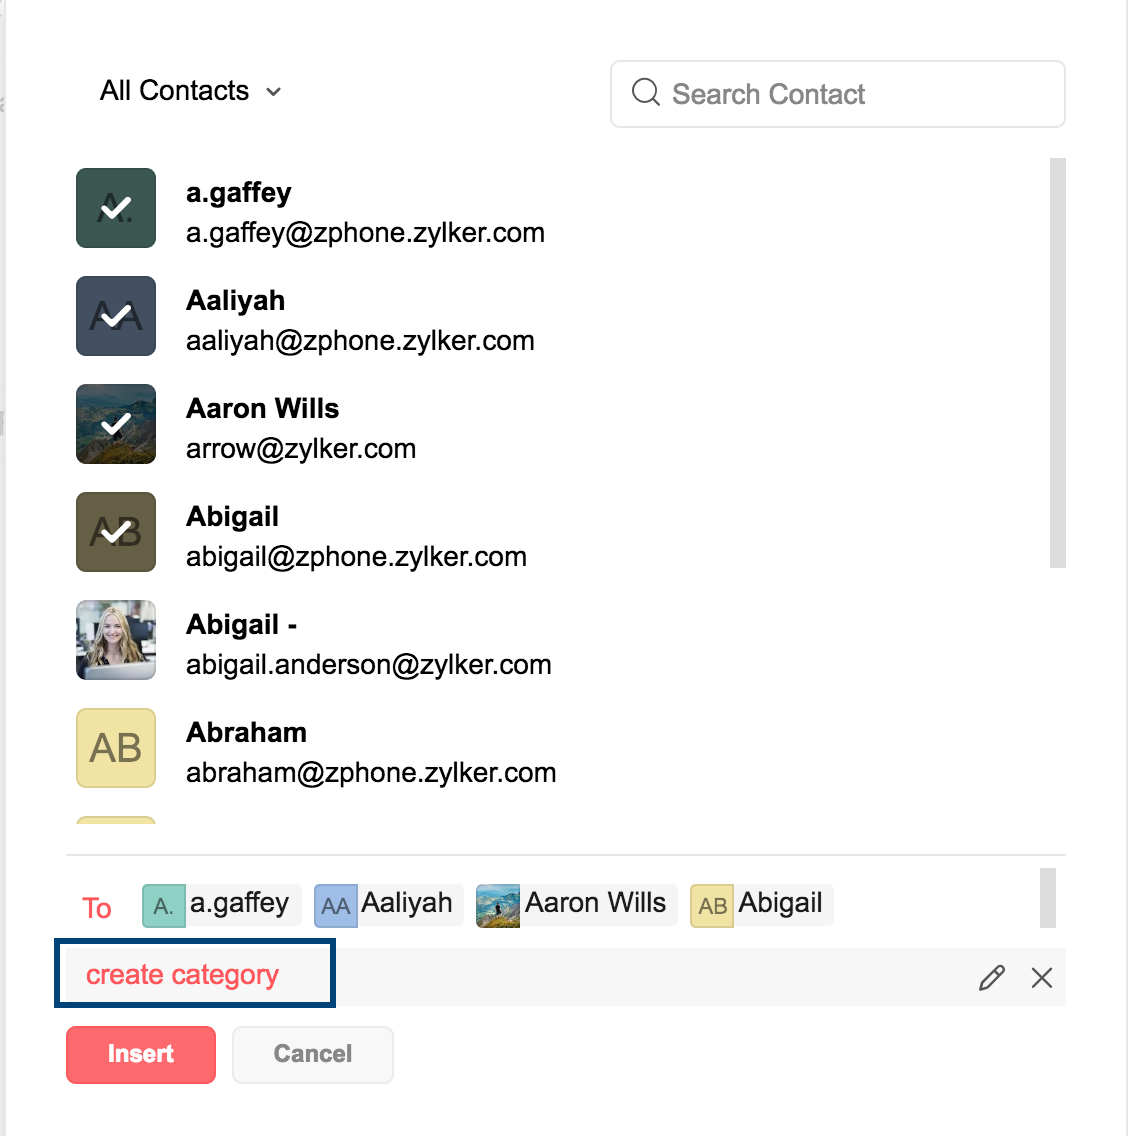
- Enter the desired name for the category and click on the tick sign next to it.

A contact category with the entered details is now created.
@mention Contacts
When you compose an email, directly @mention the users in the content of the email, to automatically add them to the recipient list. You can either compose a new email or you can @mention the users in the replies or forwards to automatically add them to the list of recipients.
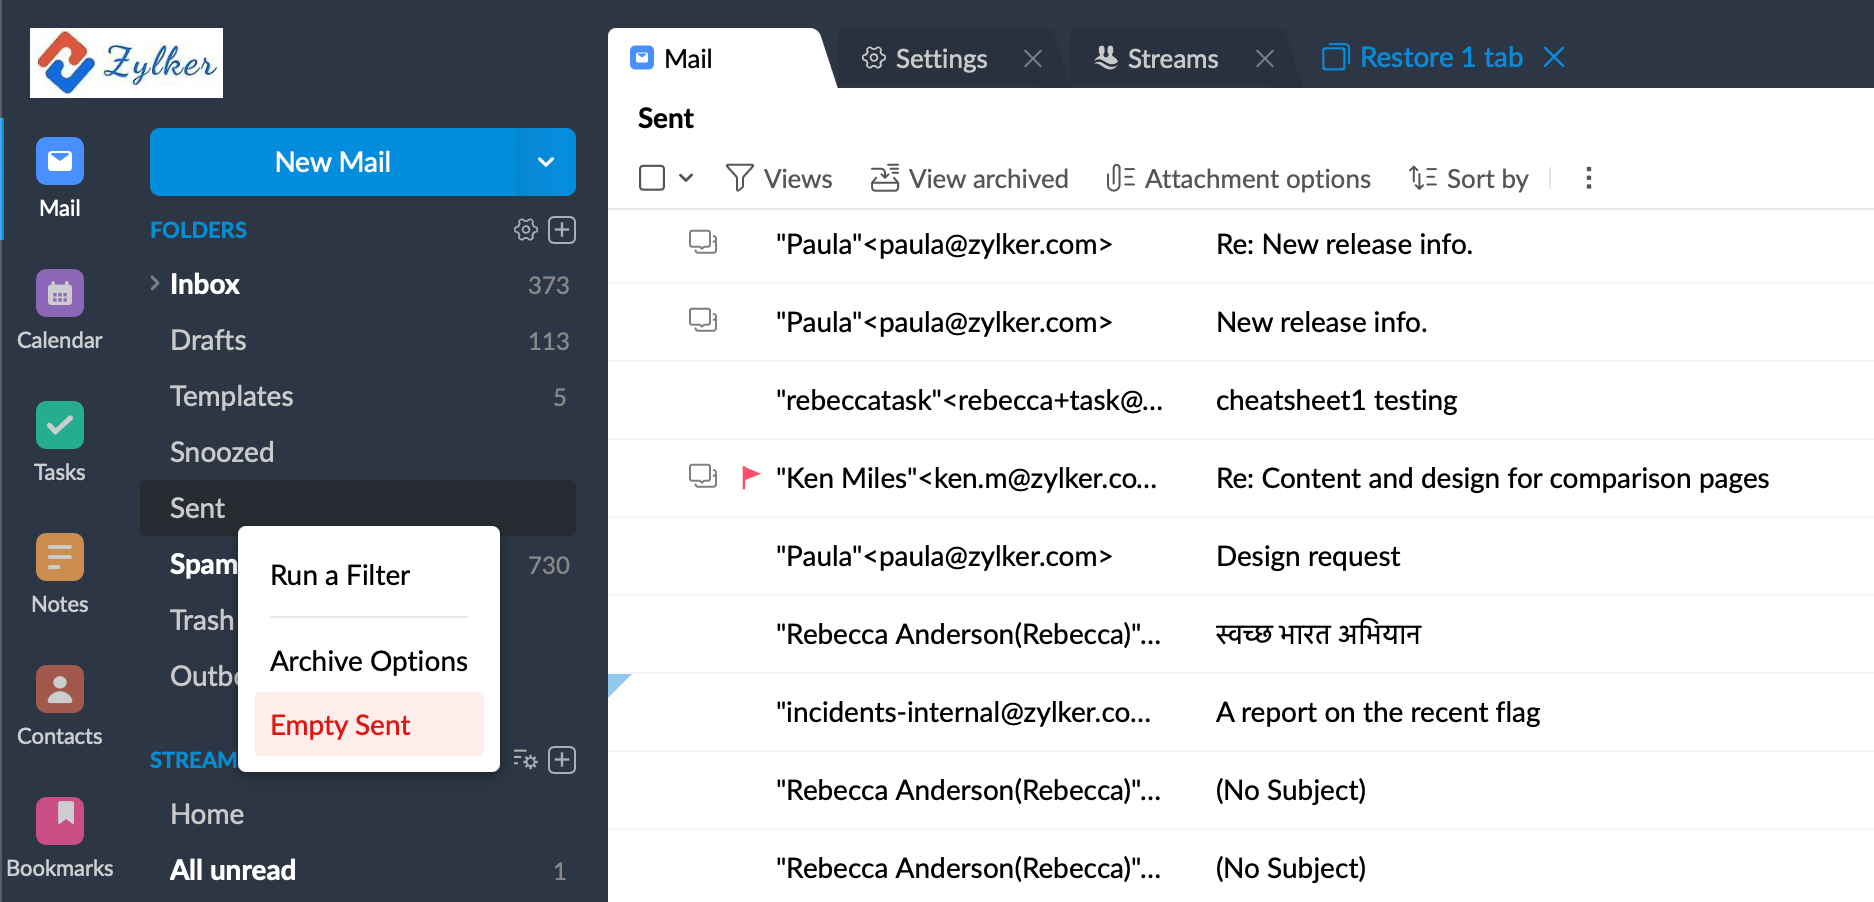
Empty Sent
To delete all the emails or the specific emails you want to from your Sent folder,
- Right-click on the Sent folder and select Empty Sent.
- A pop-up window with the delete options will open. You can choose to,
- Delete all messages in the folder
- Delete messages that were sent up to a particular date
- Delete all messages except a certain number of recently sent emails
- You can also choose to Include archived emails during deletion option if you want to include the emails you archived from the sent folder.
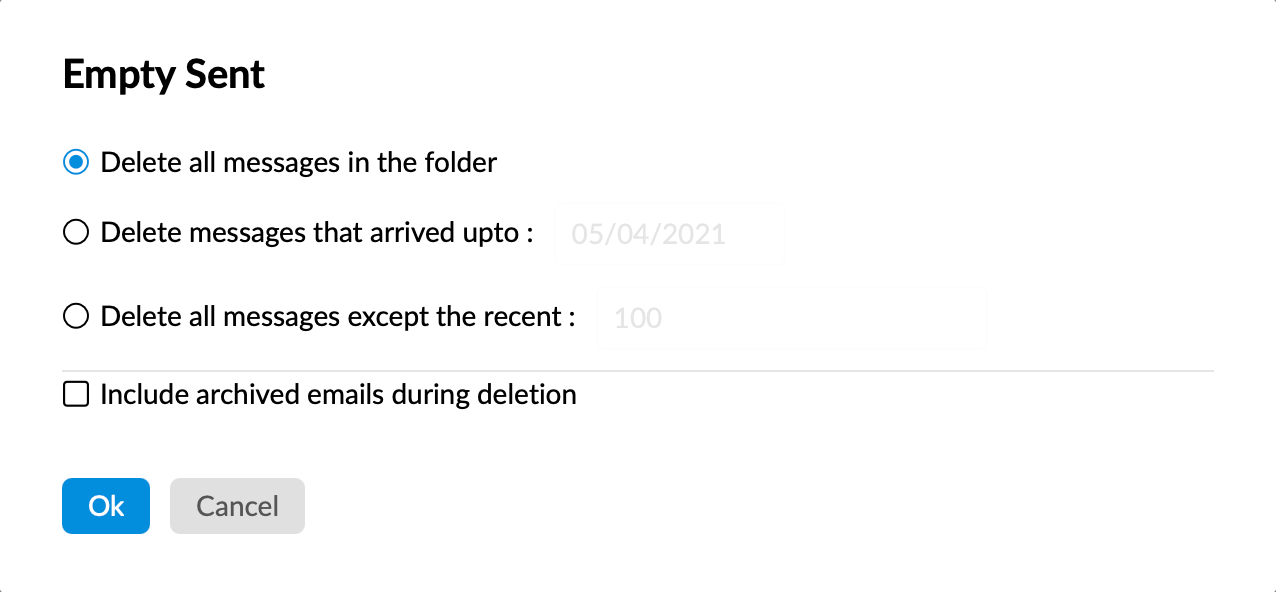
- After selecting the option of your preference, click Ok.

