Sender Address in ZeptoMail
Sender address is the means by which you can send emails using the email addresses verified with ZeptoMail. This aids in setting up your account quickly and start sending emails by simply adding the email addresses that you wish to use.
Note:
For certain cases like initial testing, we have allowed sender address additions through OTP verification. With more and more recipient servers mandating or placing more weight on email authentication protocols, we have stopped sender address addition by OTP verification since April 1, 2024. You will be required to verify your domain in ZeptoMail to use sender address to send emails.
Adding the Sender Address
To add the sender addresses to your list, follow the steps given below :
- Login to your ZeptoMail account.
- Navigate to the Sender address section in the left menu.
- Click the Add sender address button.
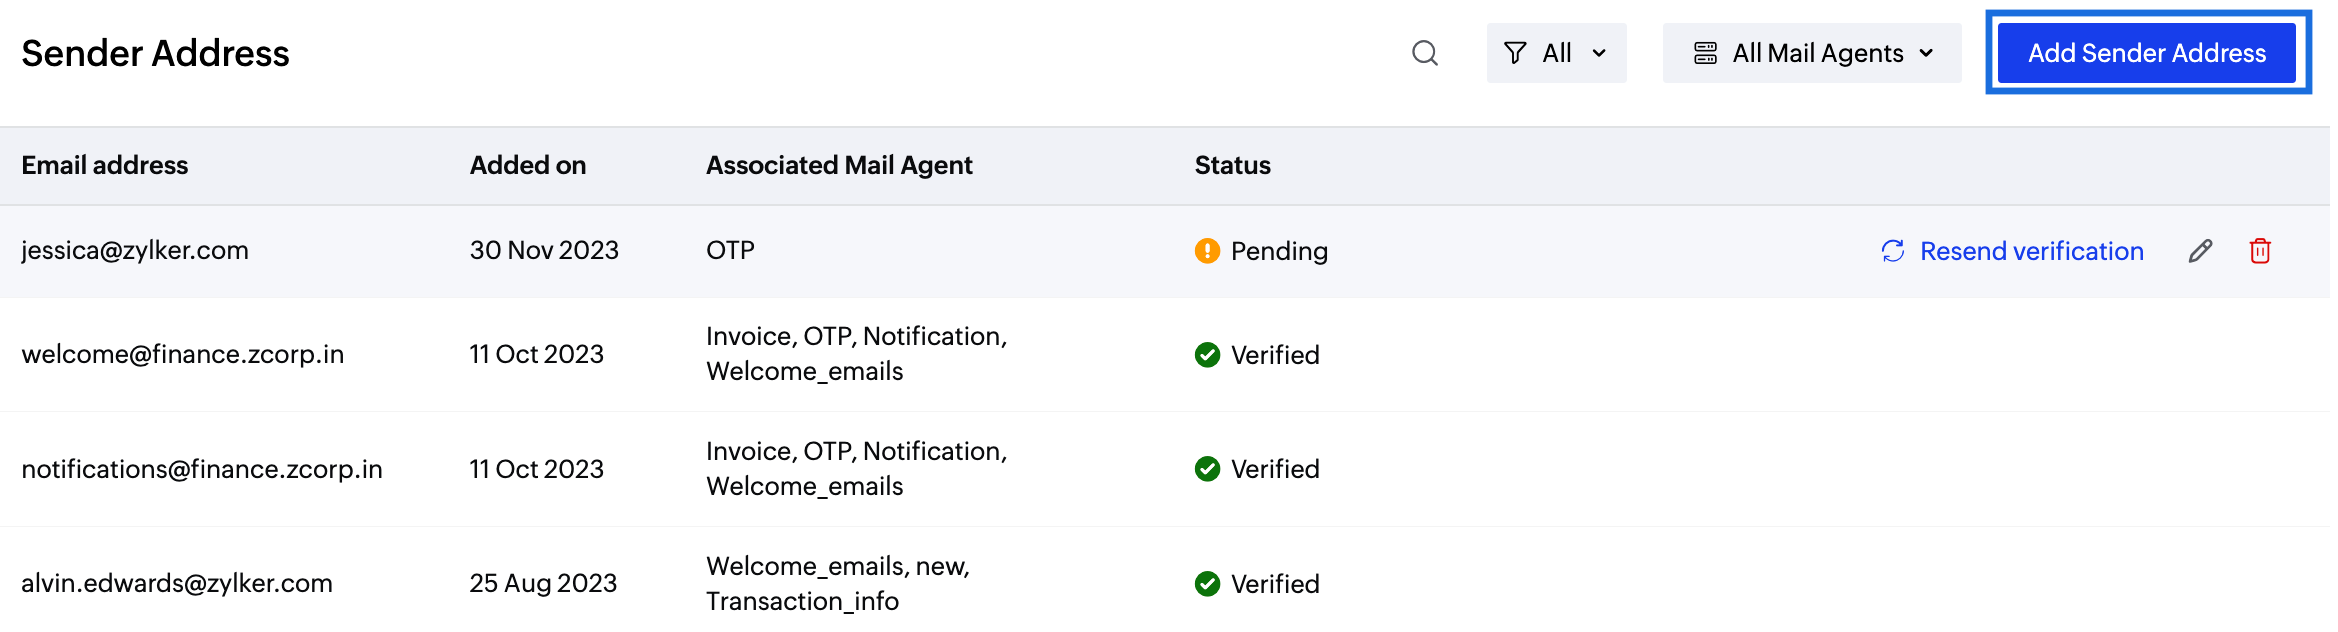
- Fill in the details in the Add sender address dialogue box :
- The sender address or the email address that you will be using to send your emails. This address should be associated with a domain that is verified in your ZeptoMail account.
- The Agent that you wish to associate with the sender address. You can associate multiple Agents to a single sender address.
- Once verified, you can start sending your emails.
- You can add upto 100 sender addresses and they will be listed in the sender address section of your account.

Note:
- Email ids associated with public domains like Google, Yahoo, AOL, Zoho and others, cannot be added as sender addresses.
Sending emails
To start sending your emails using the sender address, follow the steps given below :
- Navigate to the Agent that you wish to send your emails from.
- Under the setup info tab, find the method using which you wish to send your emails - SMTP, API and the integrations available in the setup info section.
- In the Domain/Sender Address drop-down, choose the sender address that you wish to use.
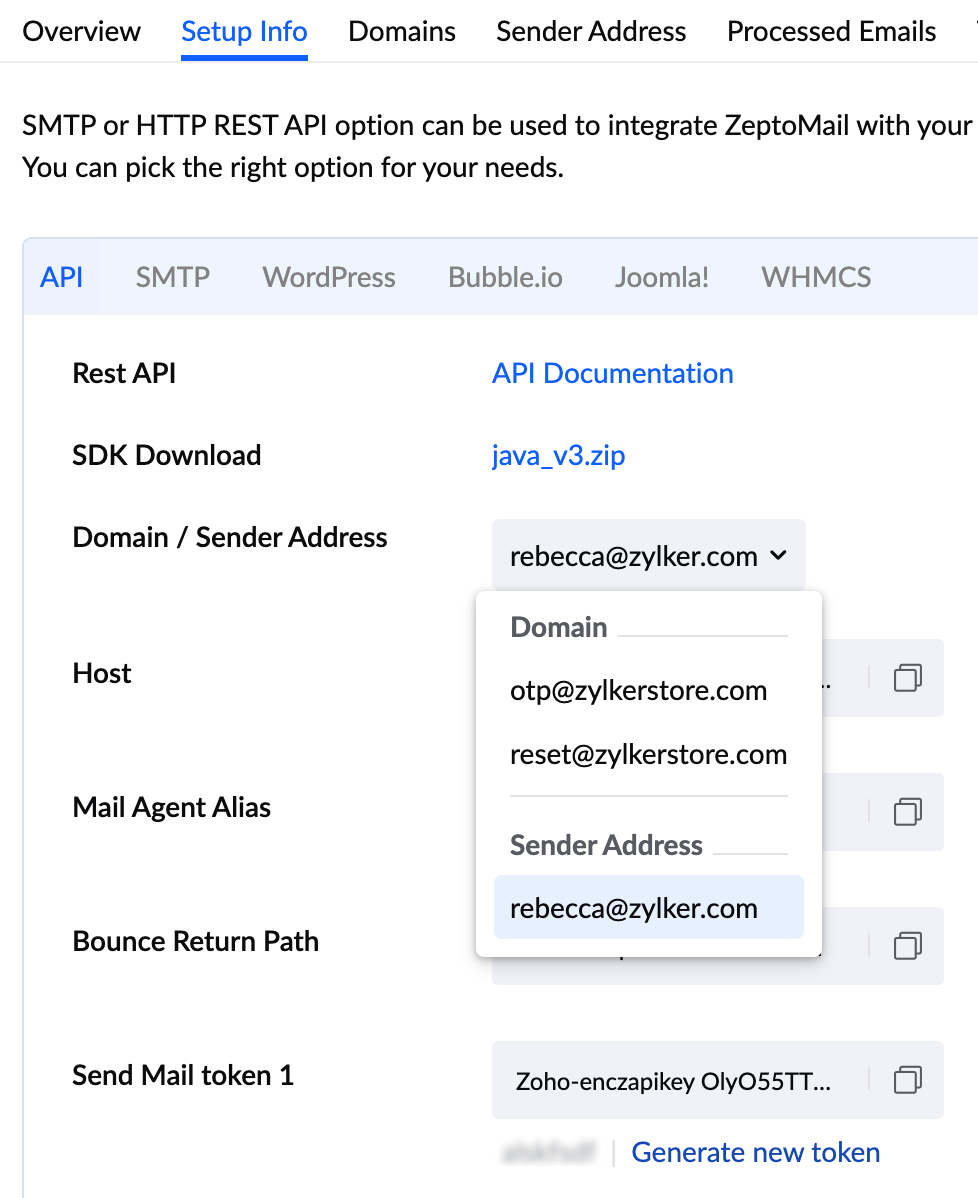
- Follow the usual steps to send your emails.

Editing the Sender Address
You can edit the details of the sender addresses that are yet to be verified.
- Hover over the sender address you wish to edit.
- Click on the edit icon to edit the sender address, associated Agents.
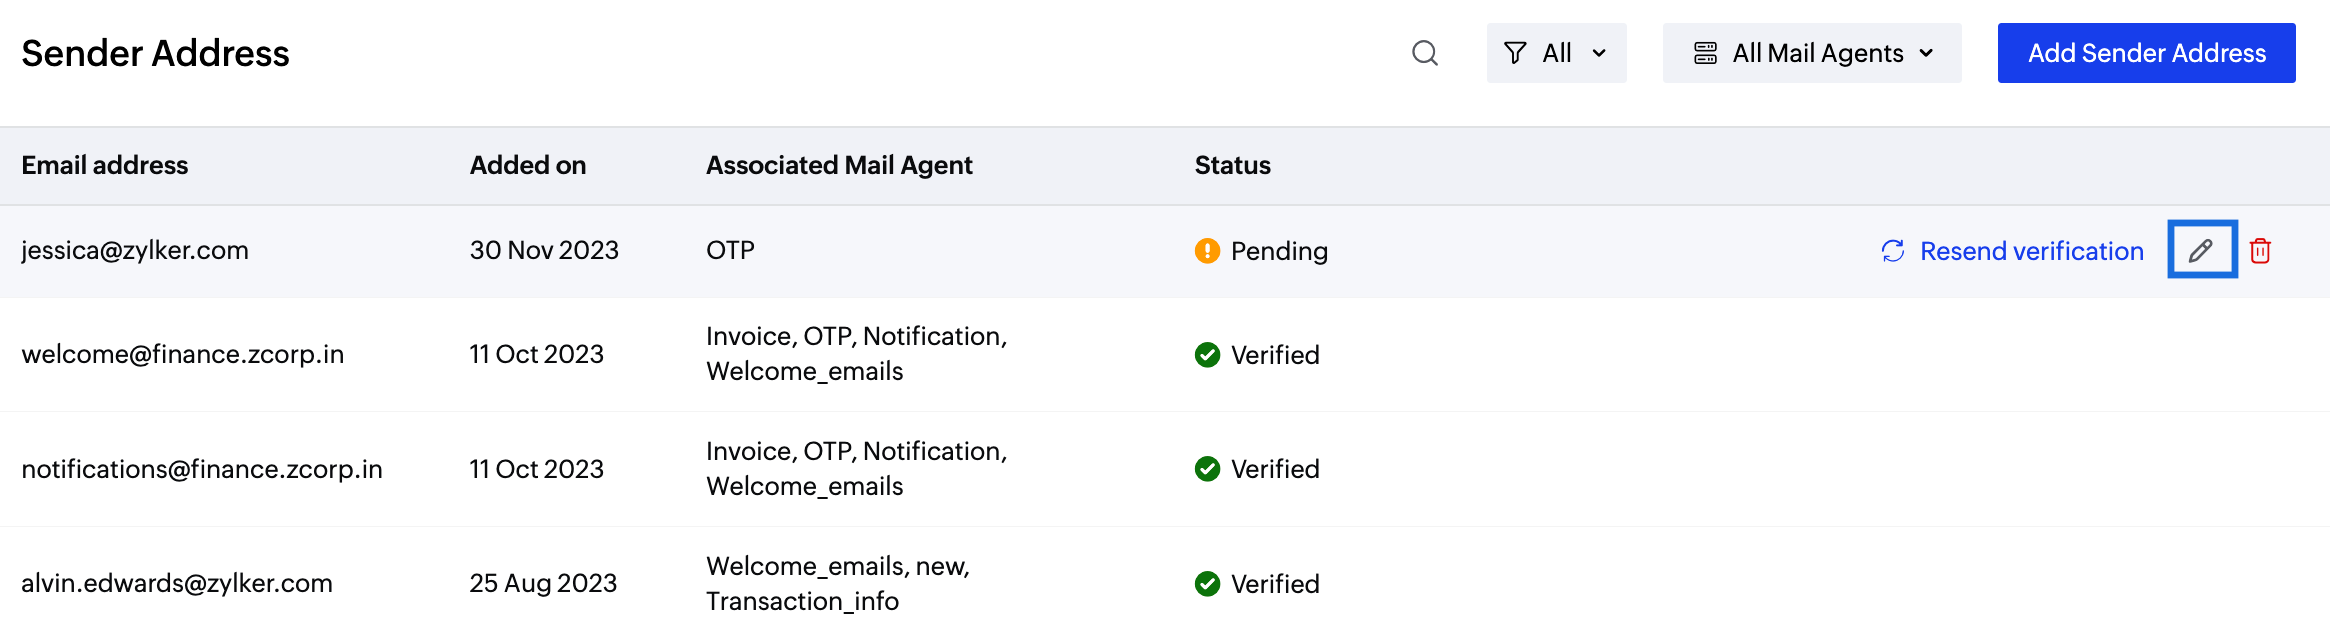
- Click save.

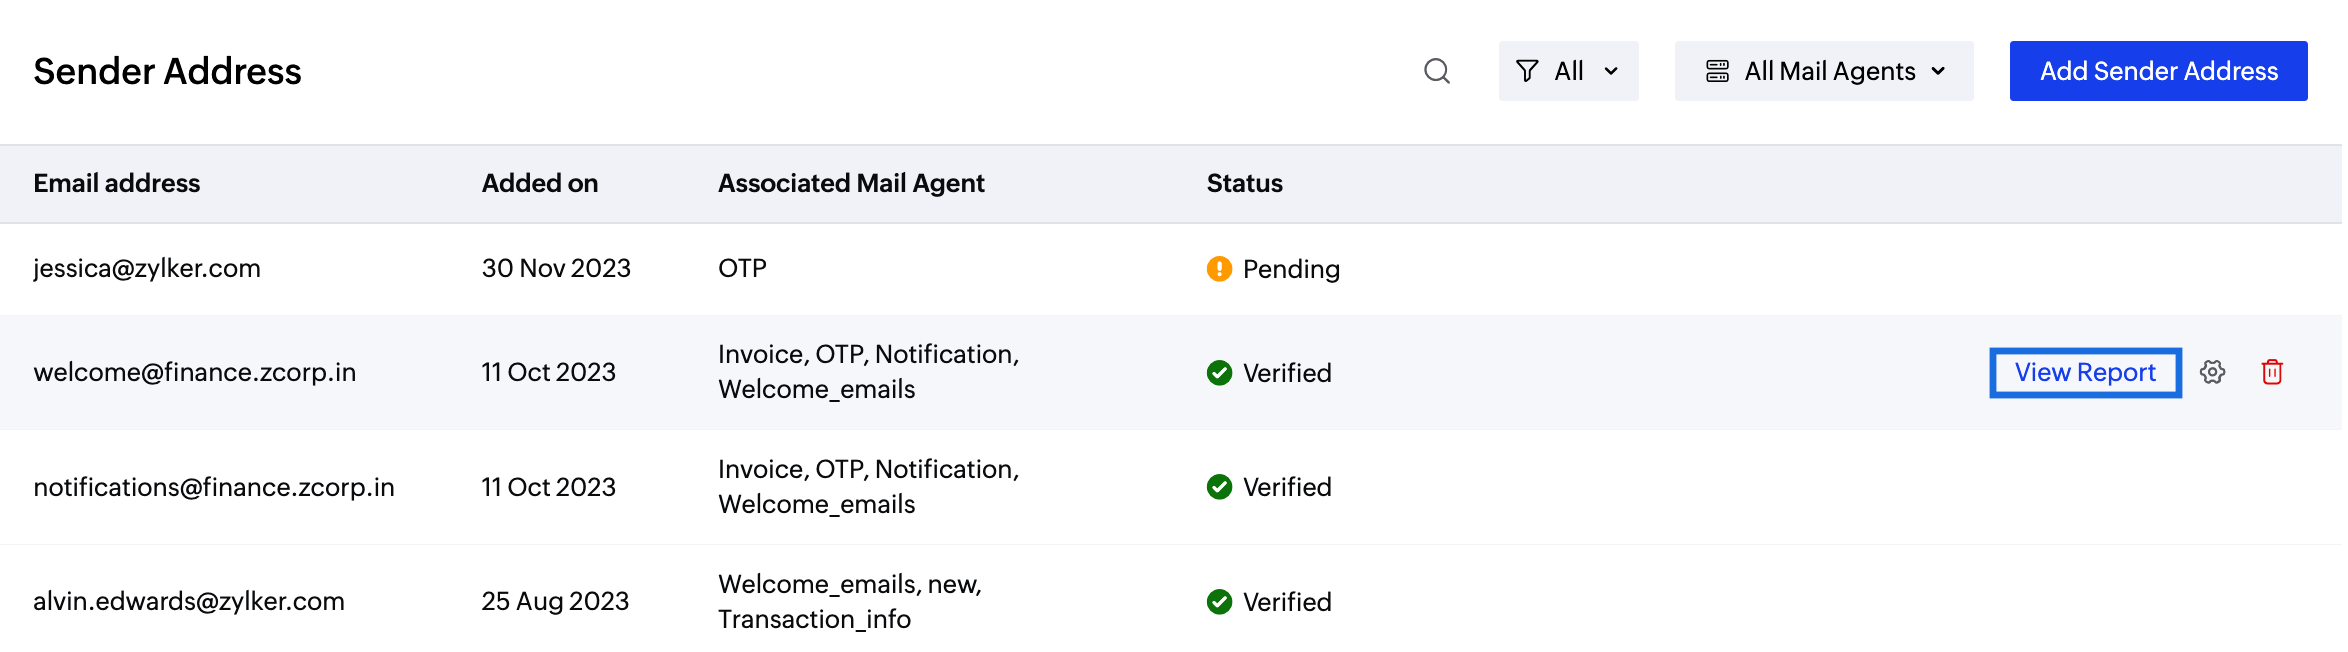
Once verified, you can still associate or dissociate Agents.
To associate or dissociate, simply click the gear icon to the right hand side of the Sender Address and add or remove the desired Agent.
Reports section
You can view a graphical representation of the information relating to the emails sent from a particular Sender Address in the Reports section.
- Click the View report button near the corresponding Sender Address.
- A detailed report of the below mentioned events will be displayed :
- Sent - Total number of emails processed. If your email has 1 recipient in 'to' field, 1 recipient in 'cc' field, and 1 recipient in 'bcc' field; then the total count of emails sent is 3.
- Hard Bounces - Number of emails that did not deliver due to permanent reasons like invalid recipient address.
- Soft Bounces - Number of emails that did not deliver due to temporary reasons like recipient server being down or recipient's inbox being full.
- Process failed - Emails that have not been sent out due to various reasons.
- Click - These clicks are for the links embedded in your email body.
- Open - Number of times the recipient opened your emails.
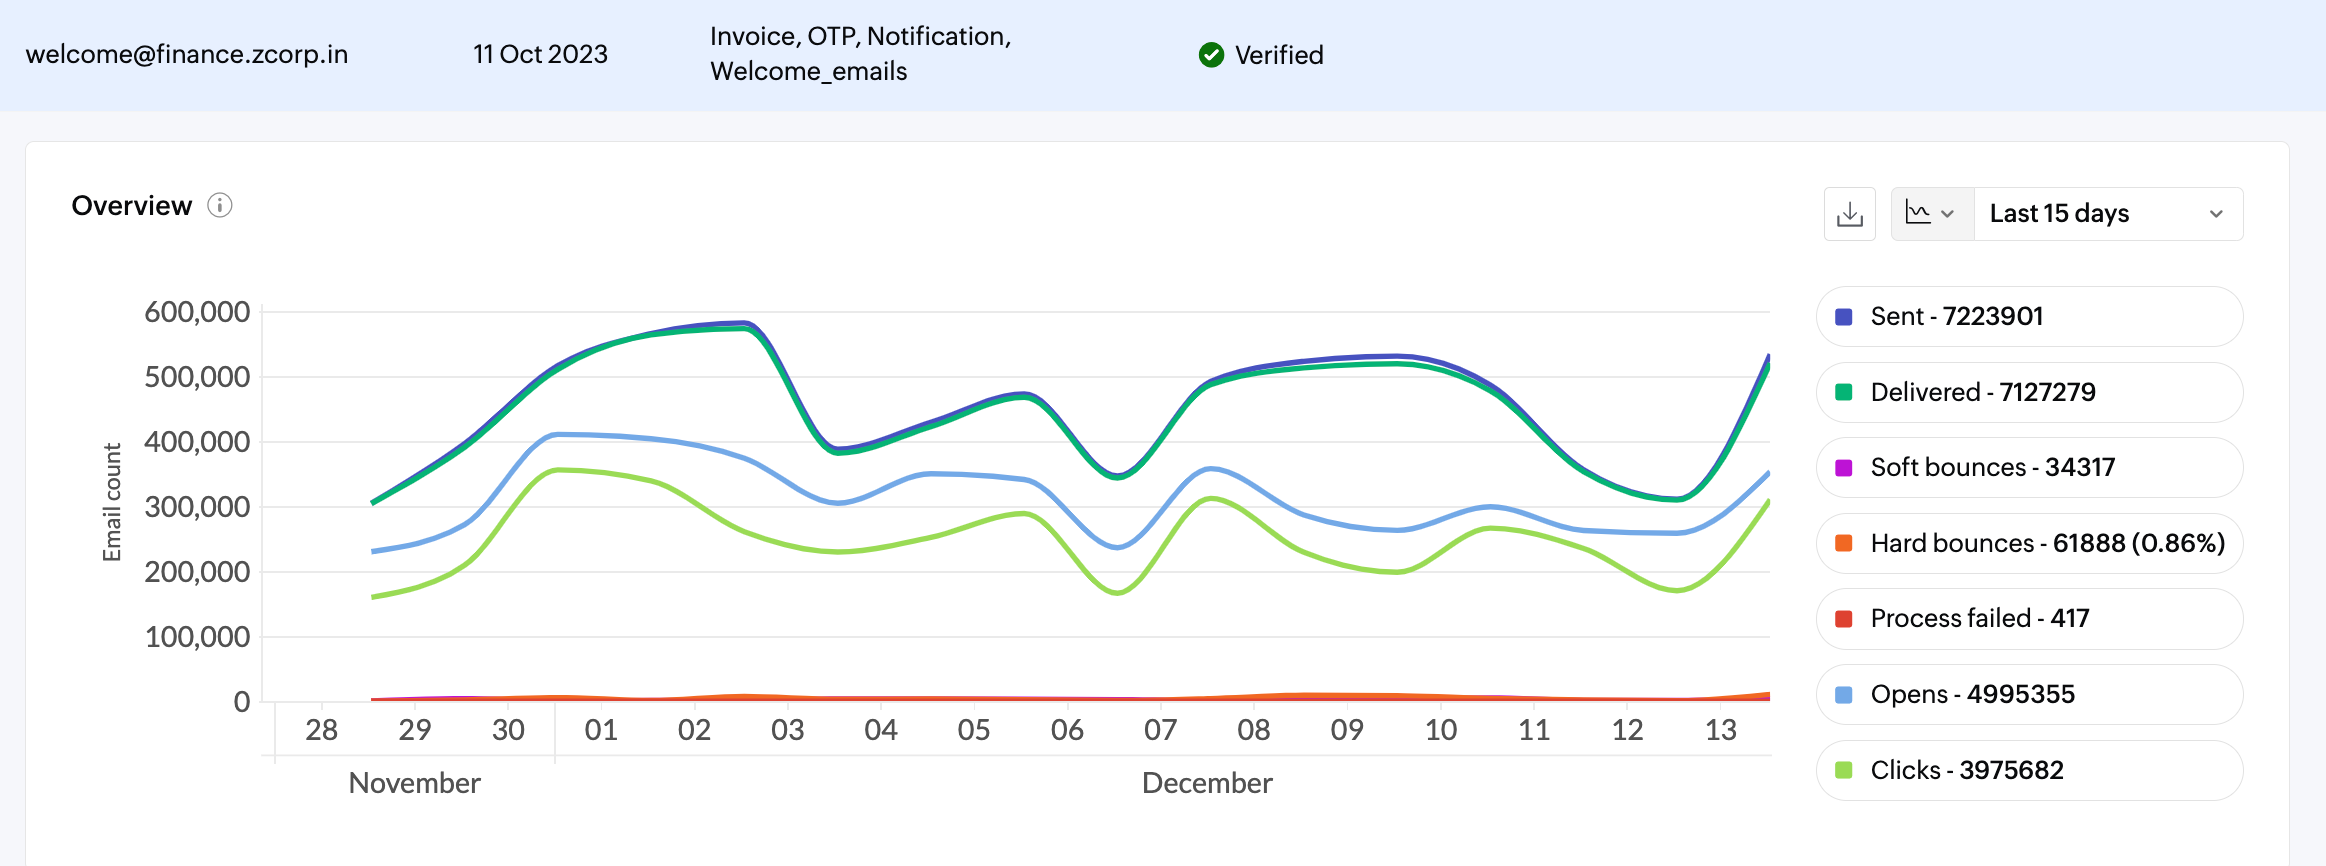
- You can choose the duration over which you wish to view the data from the drop-down given.


Search and filter
You can search specific sender addresses using the search option at the top. 
Further, you can filter out the sender addresses based on their Status or the Agents associated. Choose the desired parameter based on which you wish to filter from the drop-down.
You can filter based on the status of the sender address.
You can filter the content based on the Agents.
Note:
You can restrict the number of sender addresses that is used to send out transactional emails. This can be done in the domain setting option of the domains section. The help page here will explain more about sender address restriction and how you can implement it in your account
Deleting the Sender Address
At any point, you can delete the sender address you have added. Once deleted, you should re-verify it again to start using it. Follow the steps given below to delete the sender address.
- Click the Delete icon near the sender address.
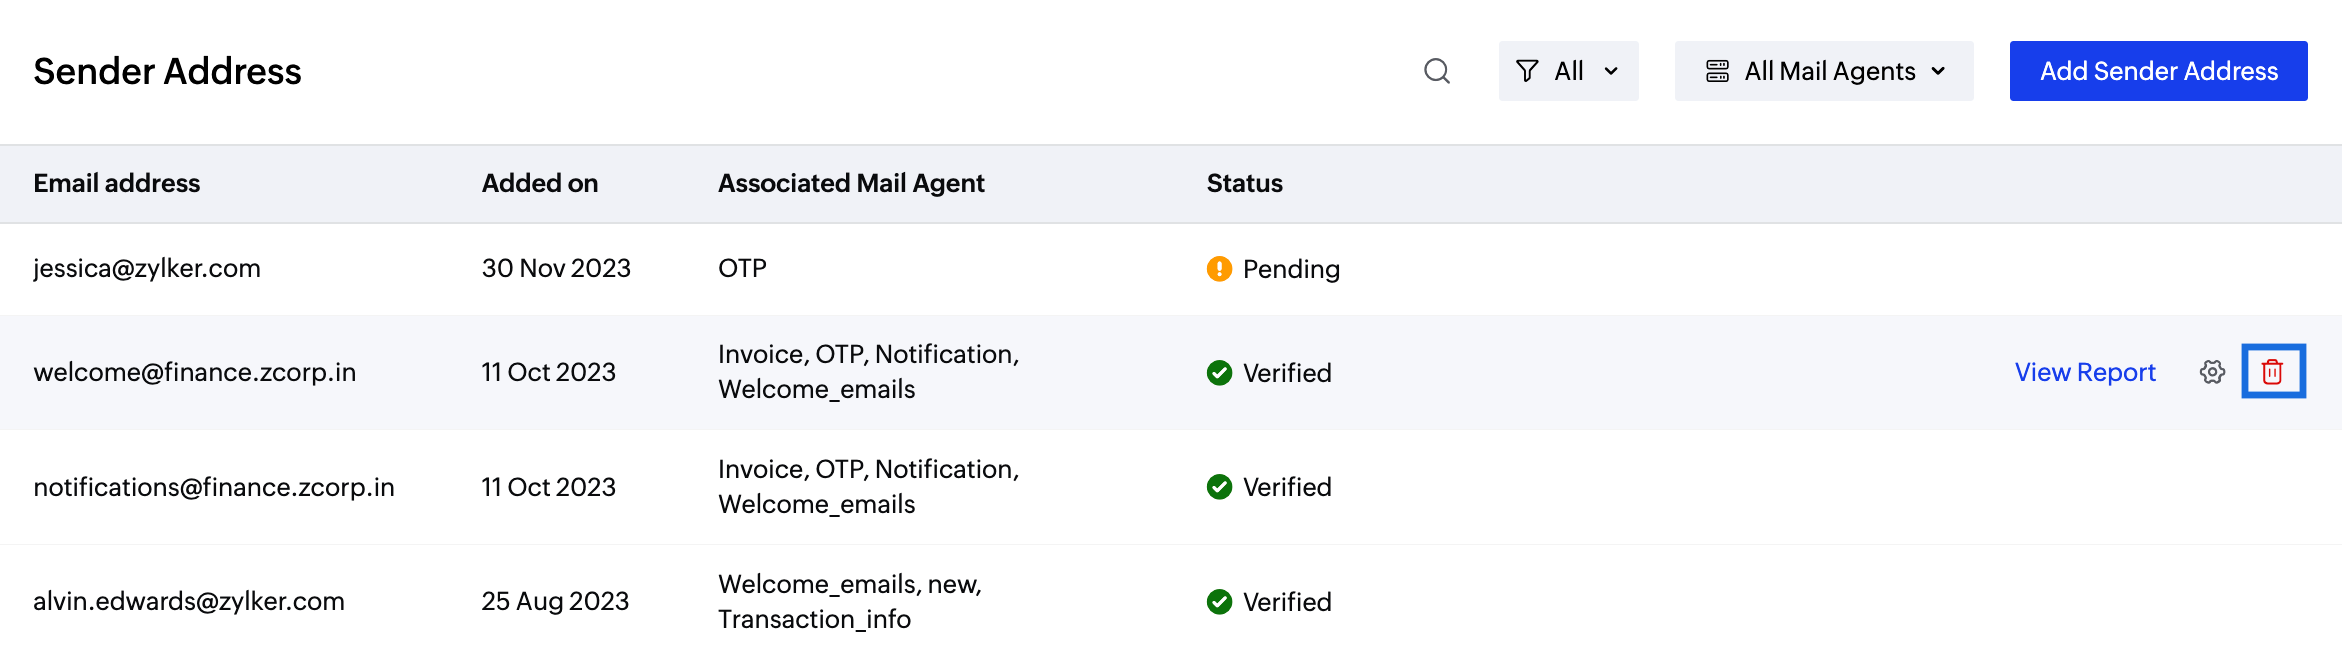
- Confirm your deletion in the dialogue box that appears. Your sender address will be deleted and email sending will be disrupted from that particular address.
