SMS for Zoho CRM by Zoho Voice
SMS for Zoho CRM by Zoho Voice enables you to send and receive Short Messaging Service (SMS) messages to your domestic customers using voice and SMS-enabled local phone numbers. You can also expand your reach with multi-channel connectivity.
Note
Local two-way SMS service is only available in the USA and Canada. International outbound SMS service is available in 100+ countries.
Prerequisites for using this extension
A valid Zoho CRM plan supporting this extension
A valid Zoho Voice account and plan supporting this extension
Purchase of number in Zoho Voice
For the US regions, 10DLC registration must be completed for the purchased local number (mandatory to send and receive SMS/MMS)
Supported plans in Zoho Voice
All Zoho Voice plans except the Solo plan support this SMS extension.
Note
For users on the Solo plan, you must purchase a user add-on to use the extension.
For Zoho CRM users with an active Zoho Voice account
Install the SMS for Zoho CRM by Zoho Voice extension
Send SMS/MMS in Zoho CRM using this extension
Installing the SMS for Zoho CRM by Zoho Voice extension
To start sending SMS/MMS messages directly from Zoho CRM, you need to install the SMS for Zoho CRM by Zoho Voice extension.
To install:
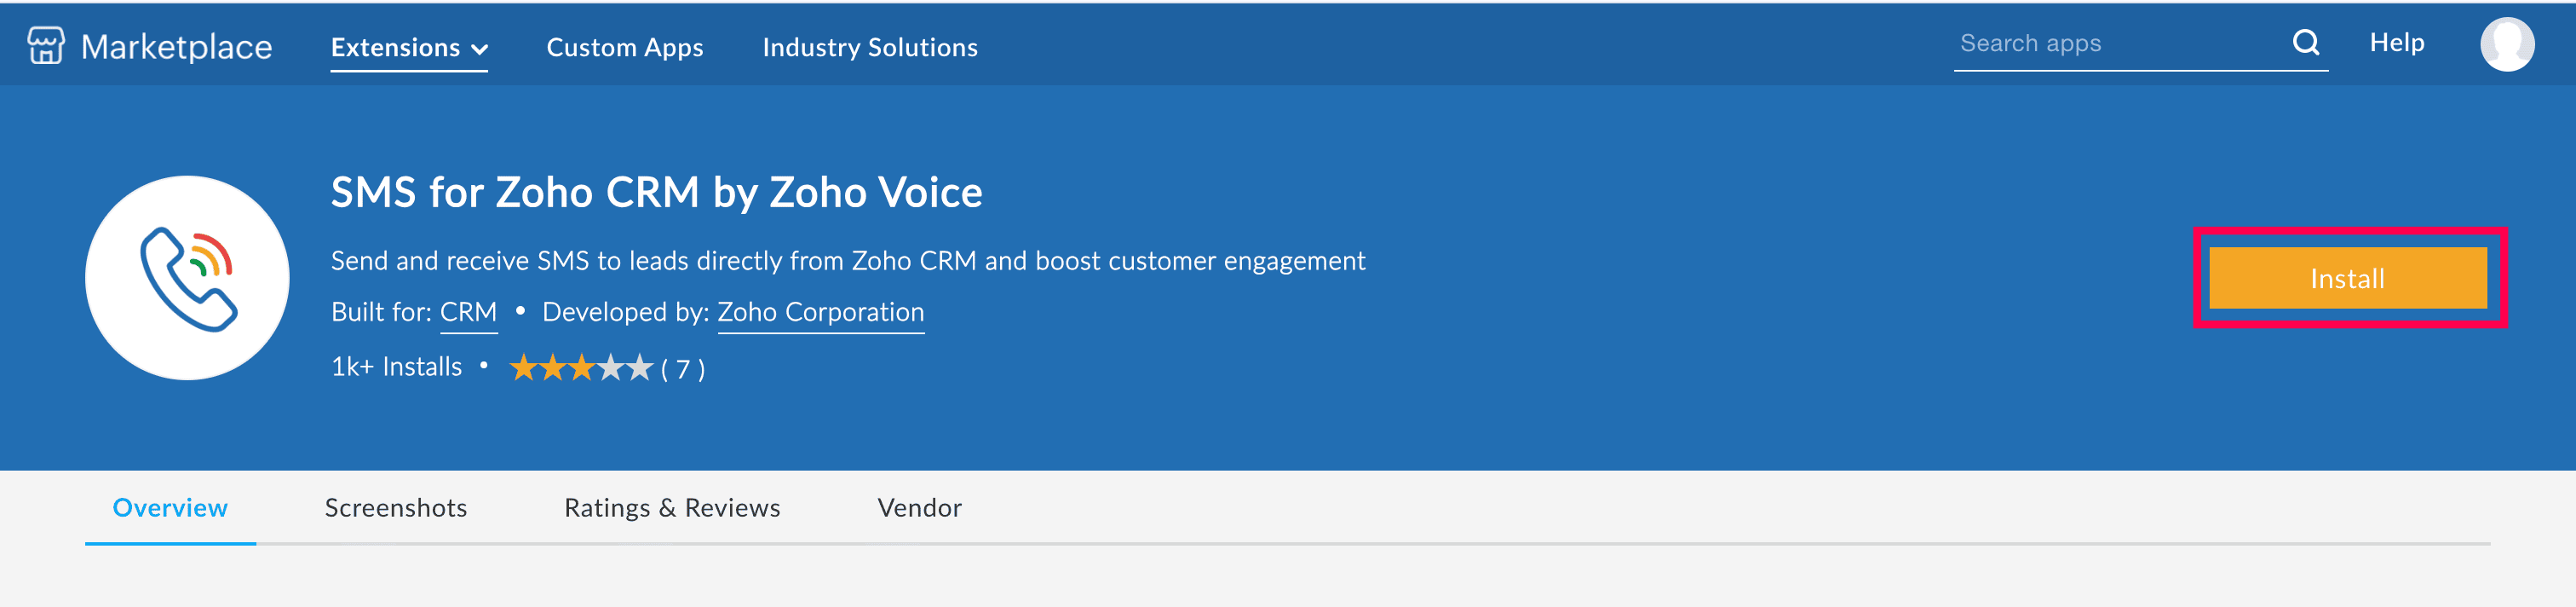
In your Zoho CRM account, navigate to Marketplace.
Search for SMS for Zoho CRM by Zoho Voice and click Install.

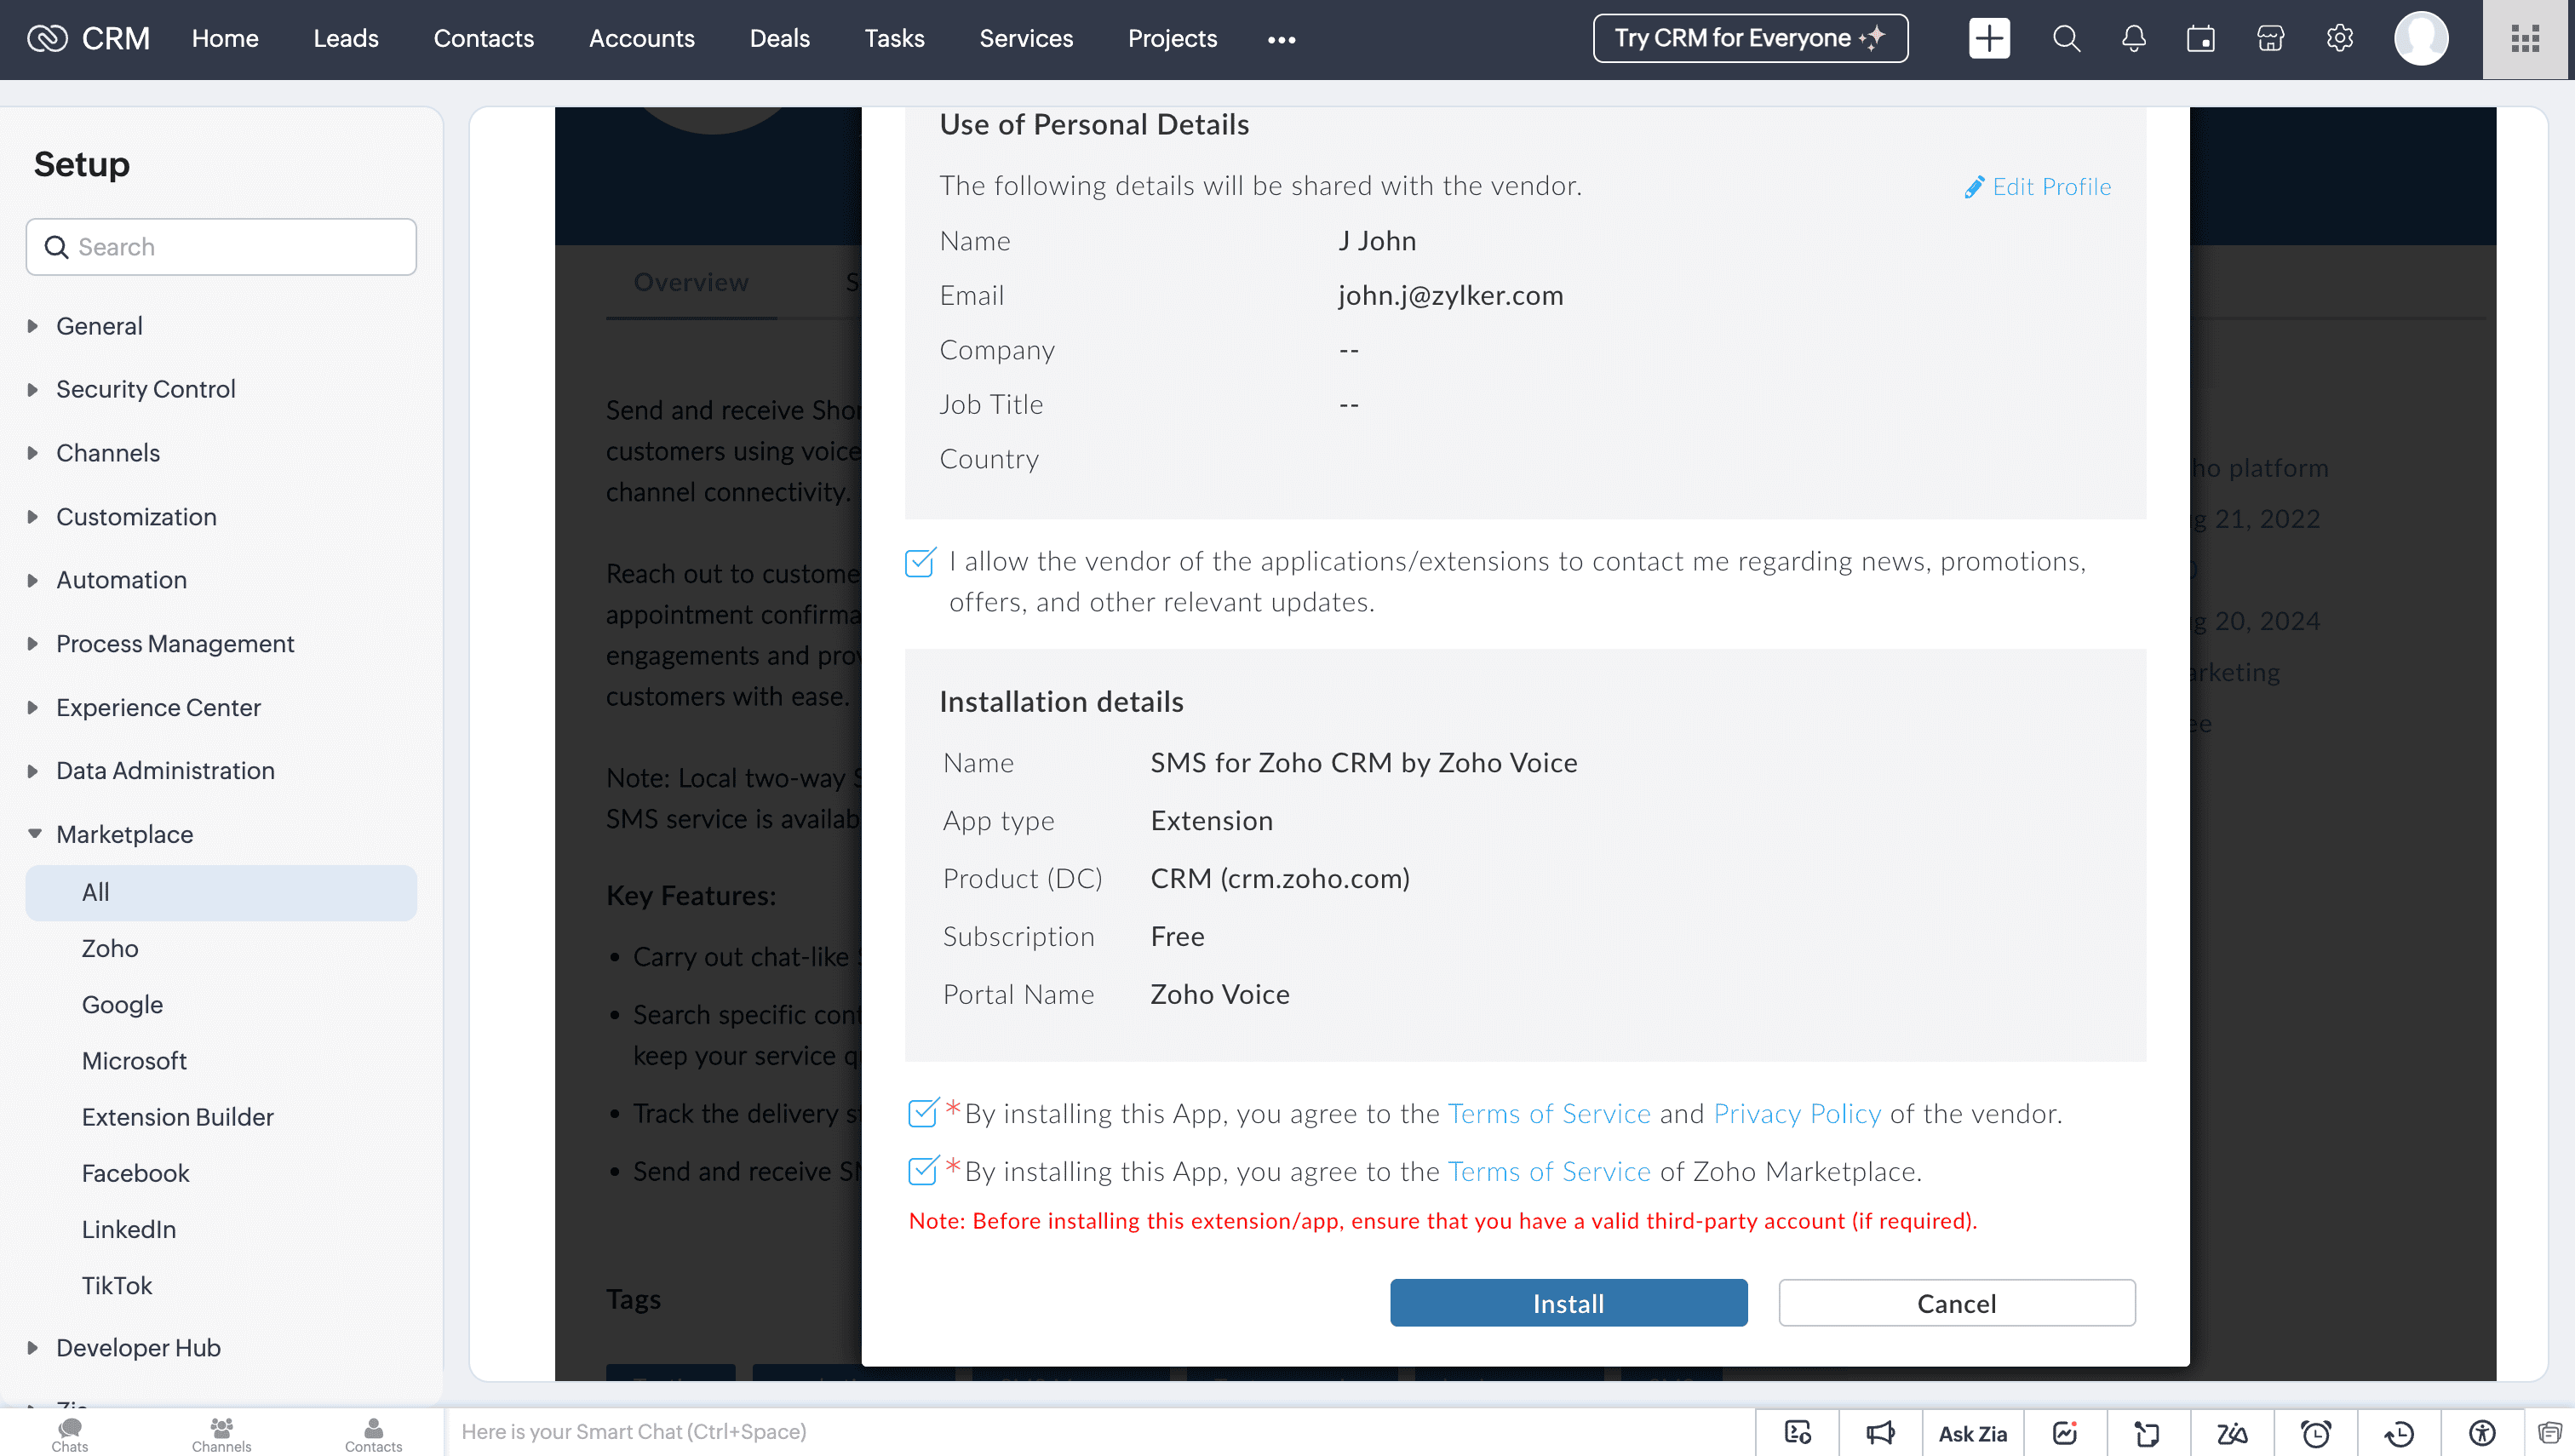
Review your profile details and accept the Terms of Service and Privacy Policy, then click Install.

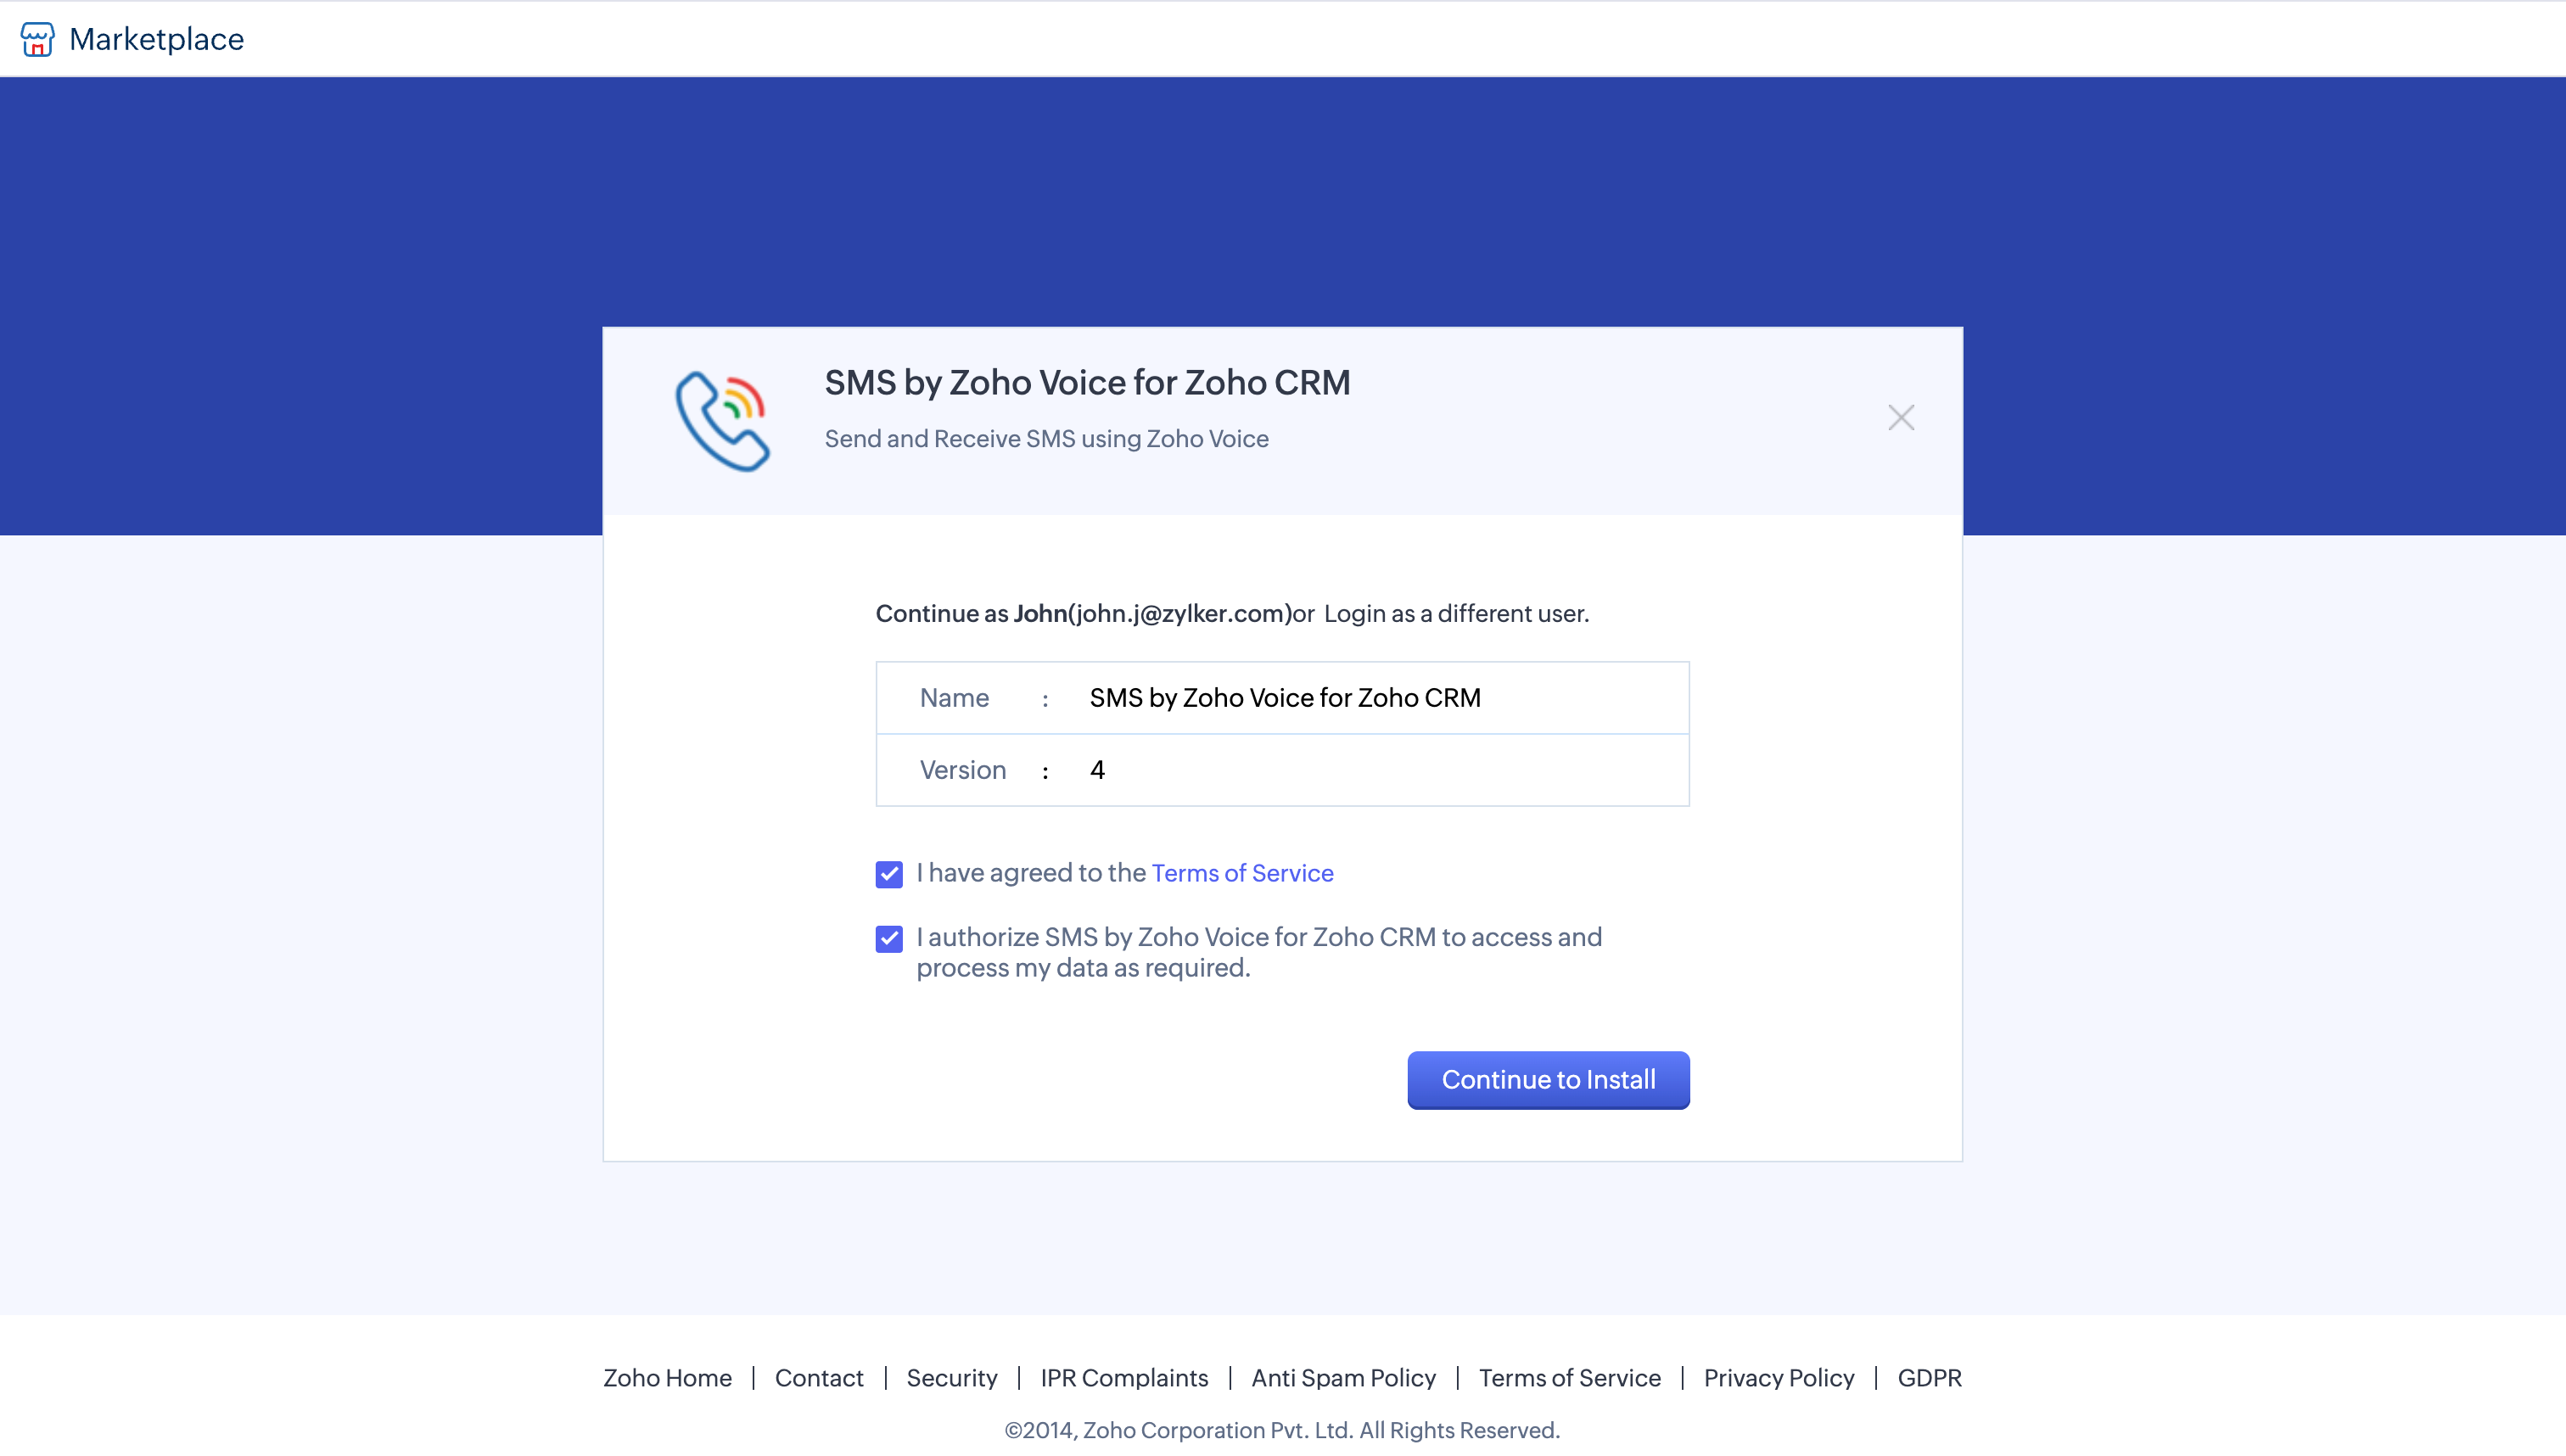
Verify your login details, including the extension name and version, then accept the Terms of Service and authorize the extension to access and process the required data. Finally, click Continue to Install.

Choose the users or profiles who should have access to this extension. You can grant access to admins only, all users, or specific profiles.
Once selected, click Confirm. The extension will be installed successfully.


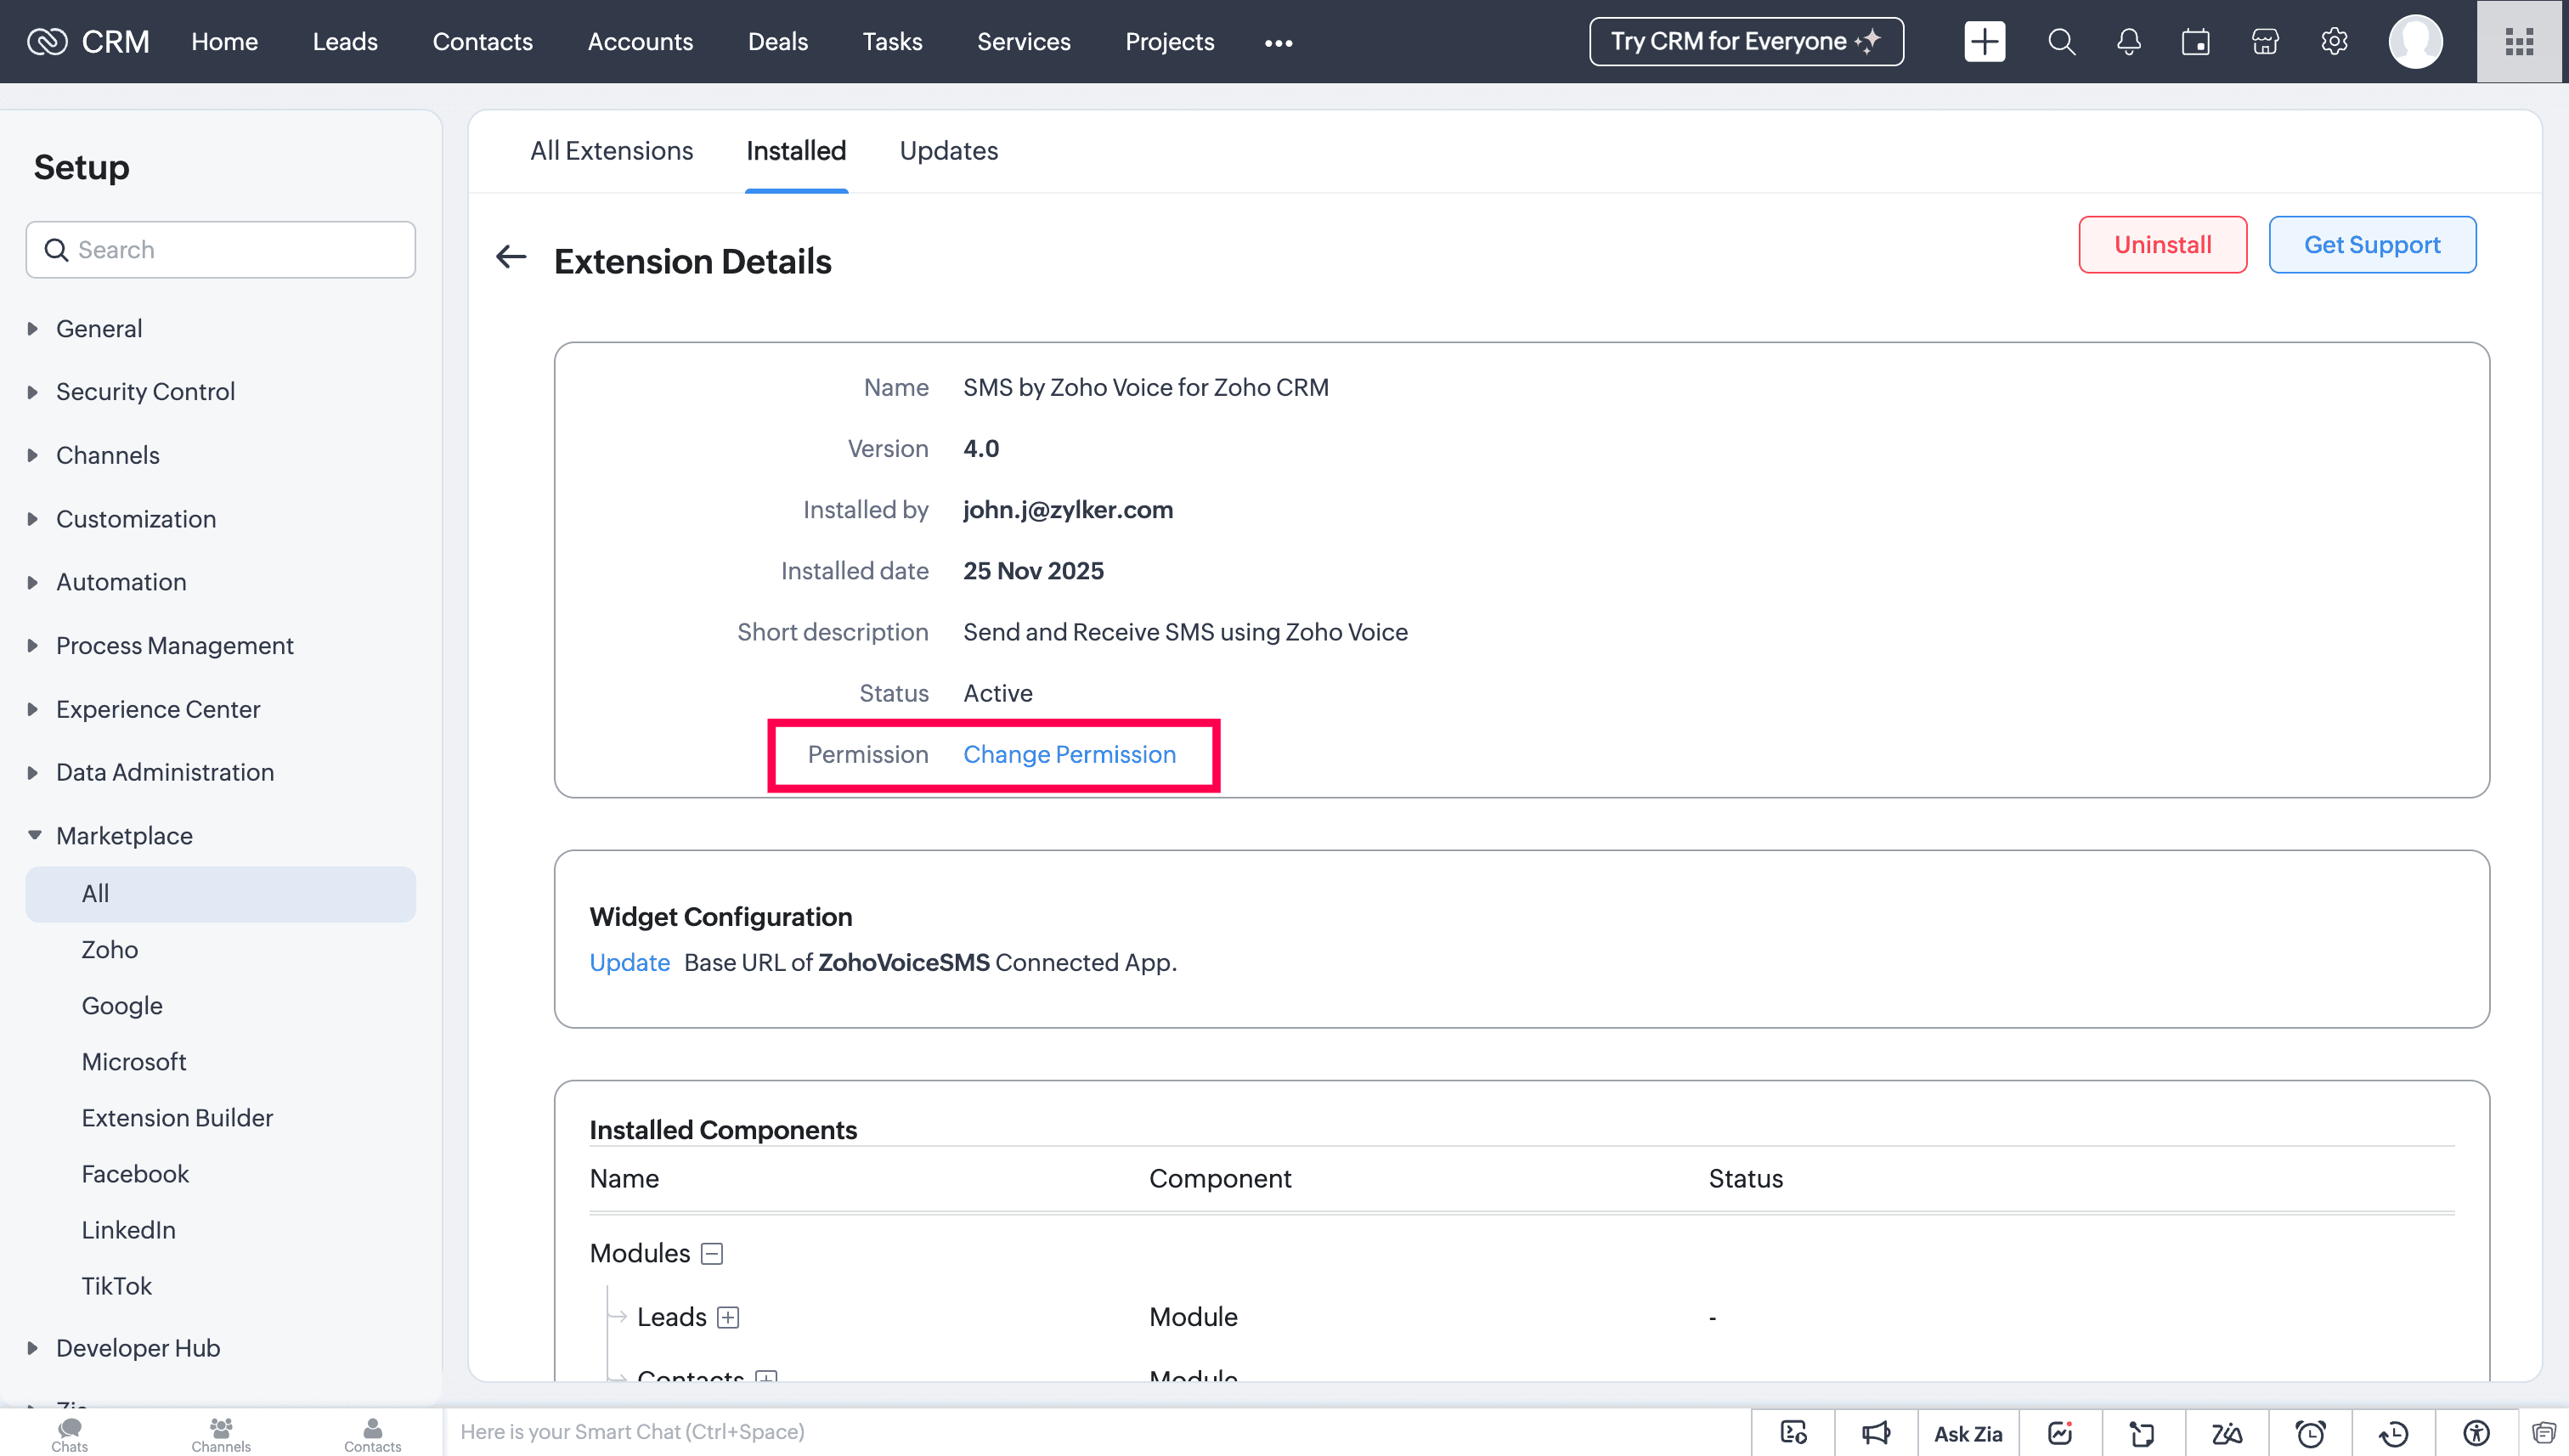
You can change the permission by navigating to Marketplace → Installed and clicking Configure of SMS for Zoho CRM by Zoho Voice. In the extension details page, click on Change Permission and make necessary changes.

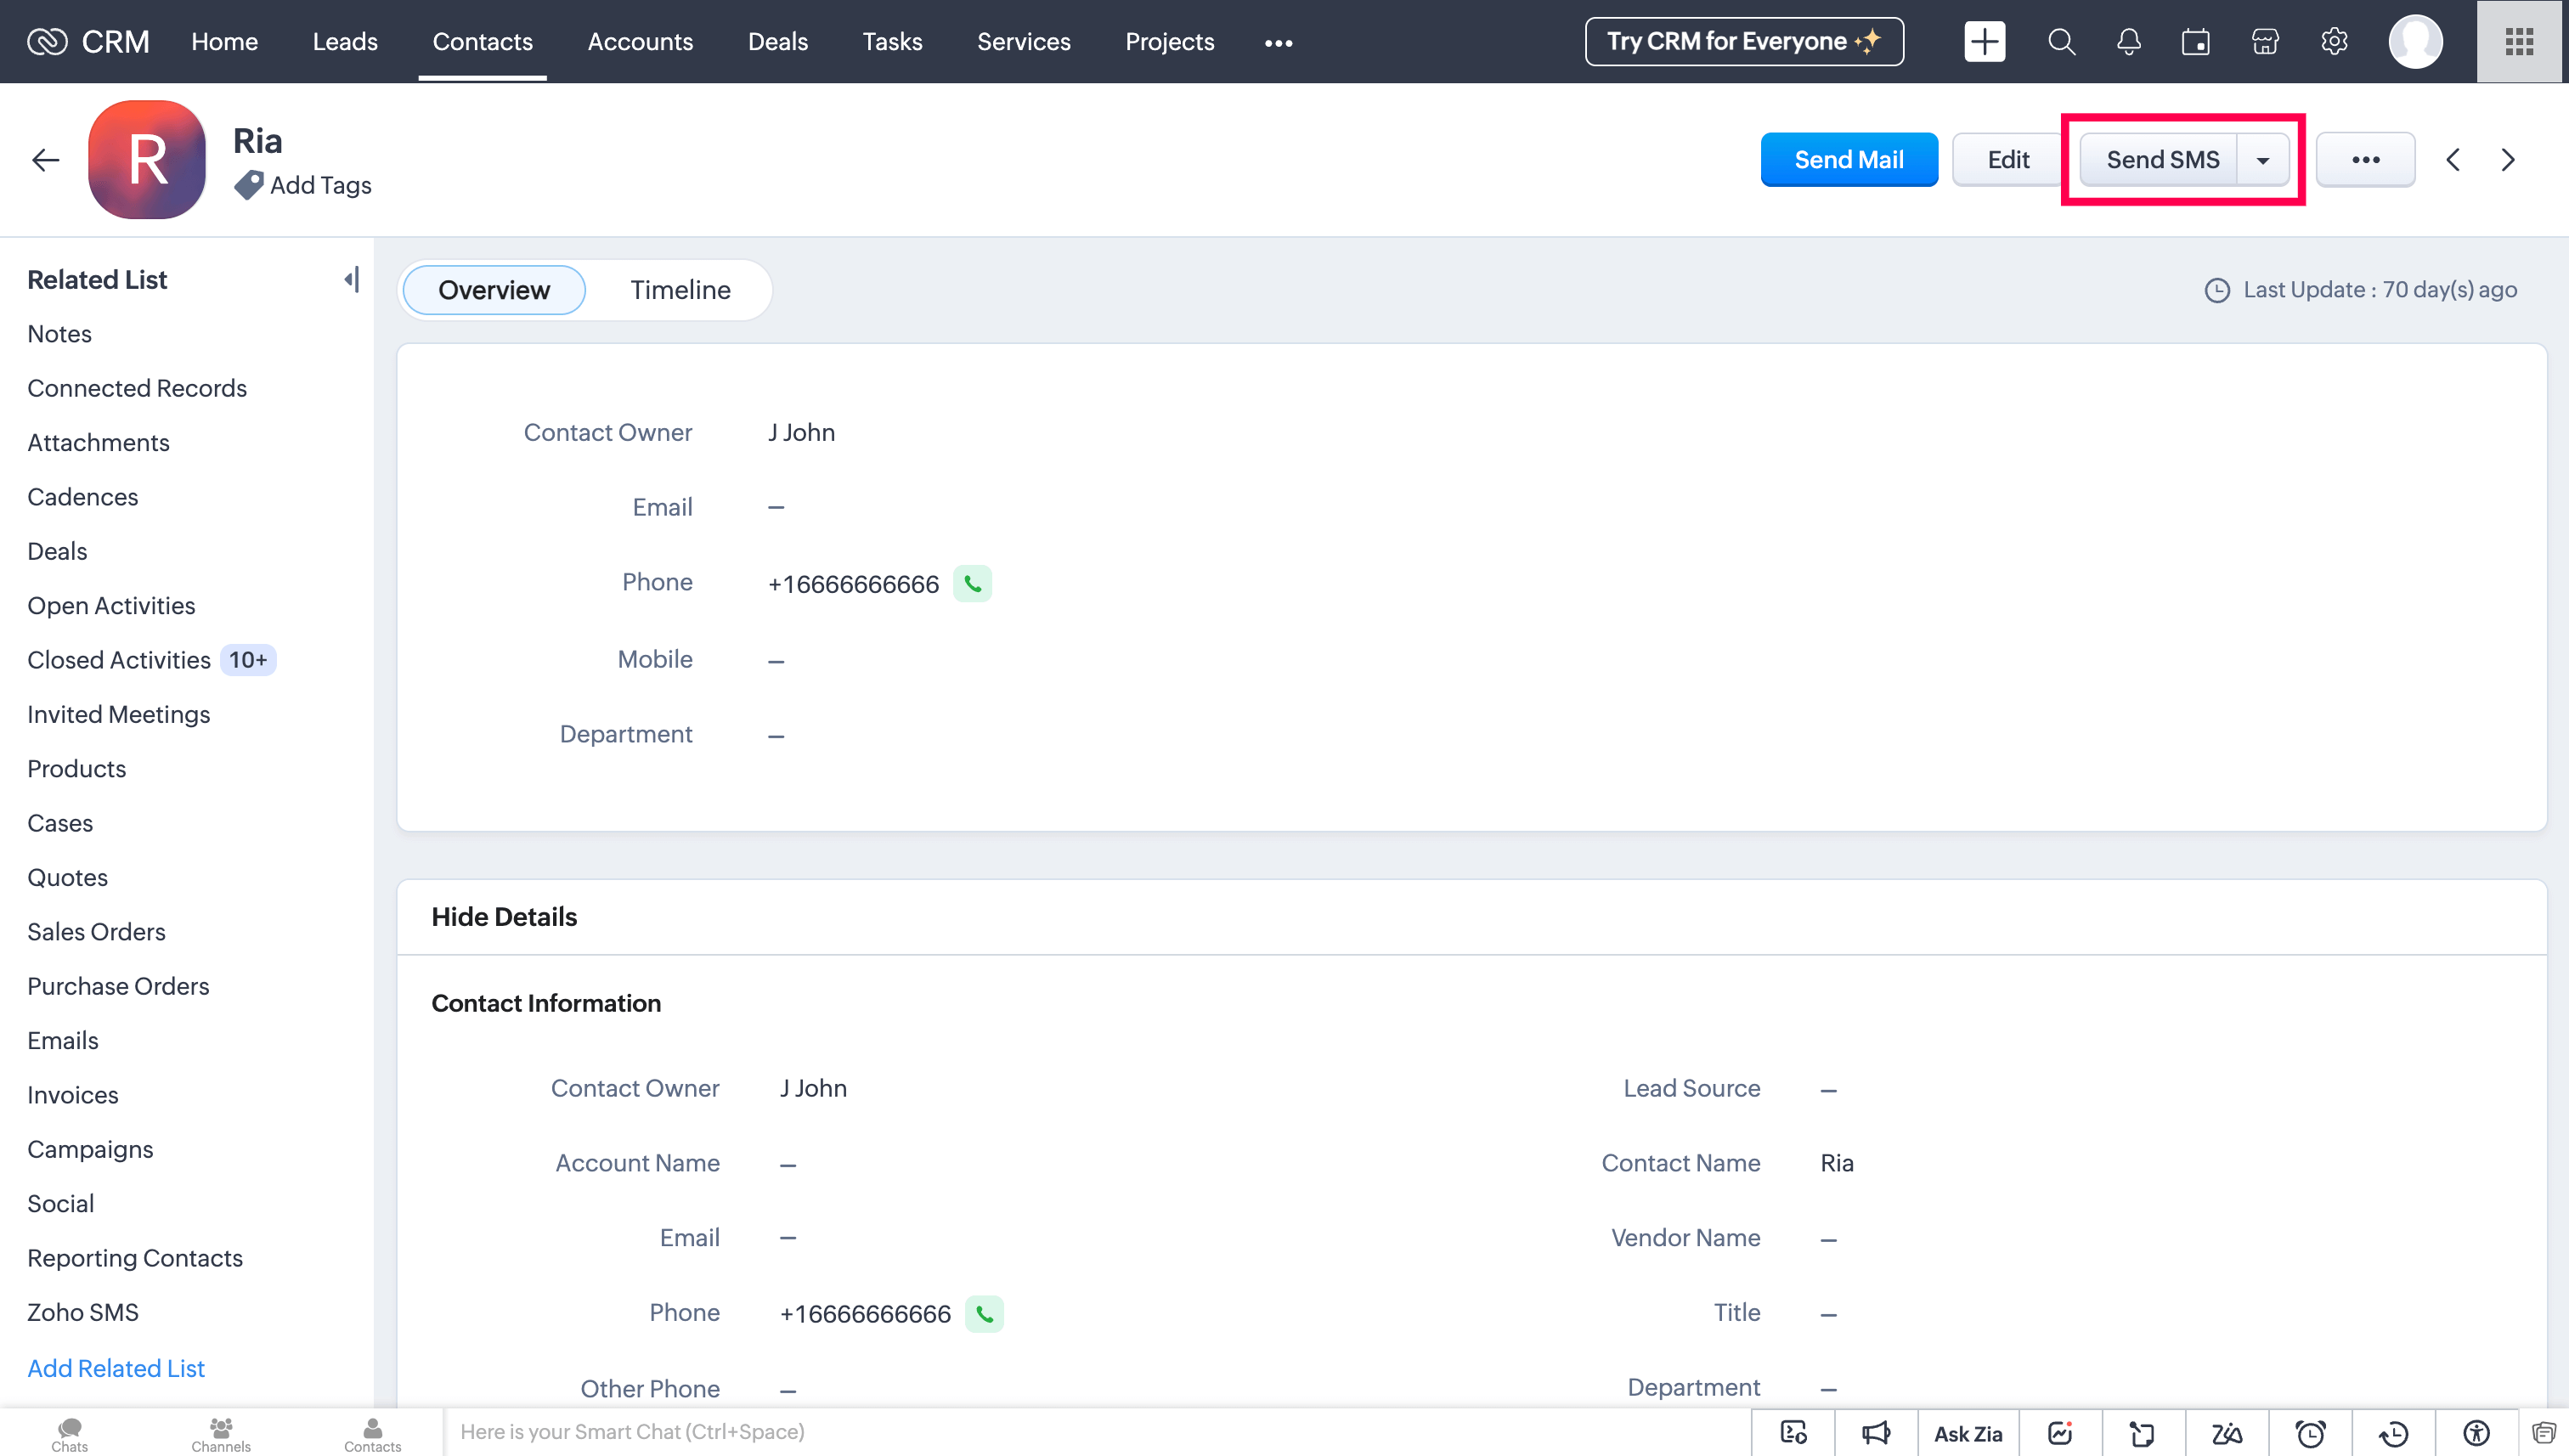
Send SMS/MMS using the extension in Zoho CRM
In your Zoho CRM account, navigate to the Leads, Contacts, Accounts, Tasks, or Deals module.
Select a lead or contact from the list.
On the detailed view page, do one of the following:
Click the Send SMS icon.
Alternatively, go to the Related List on the left side and select Zoho SMS.

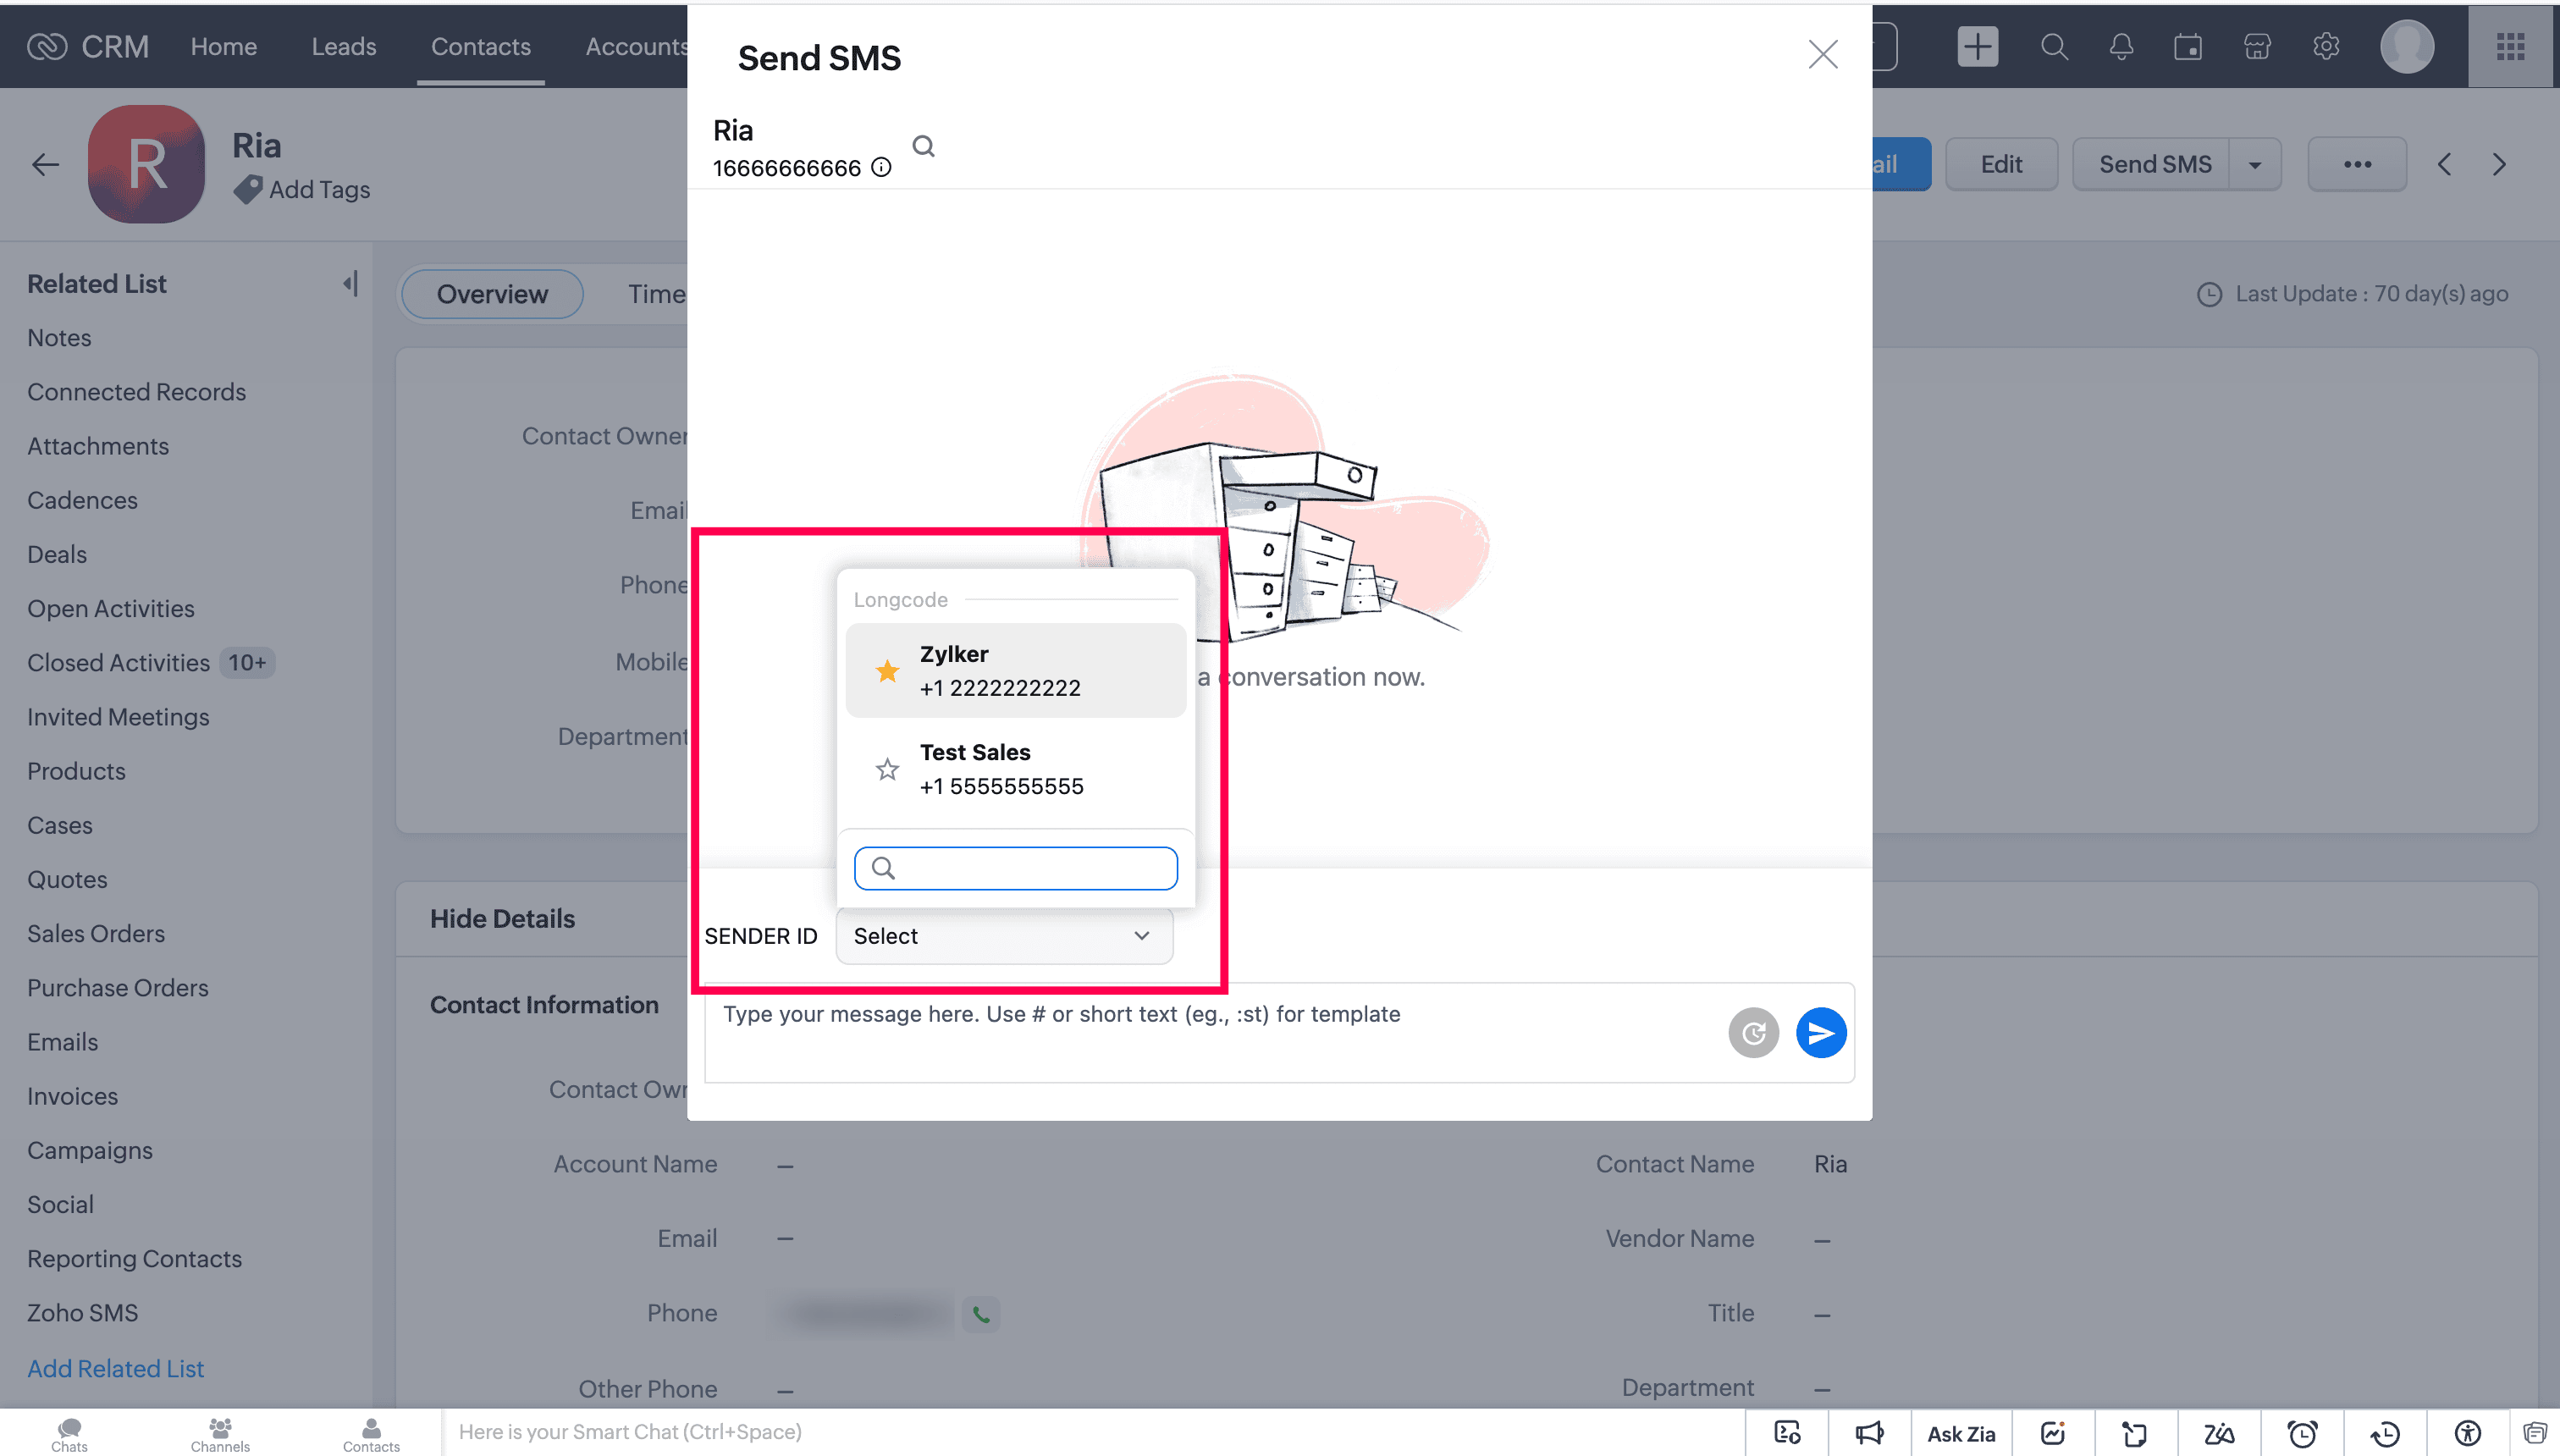
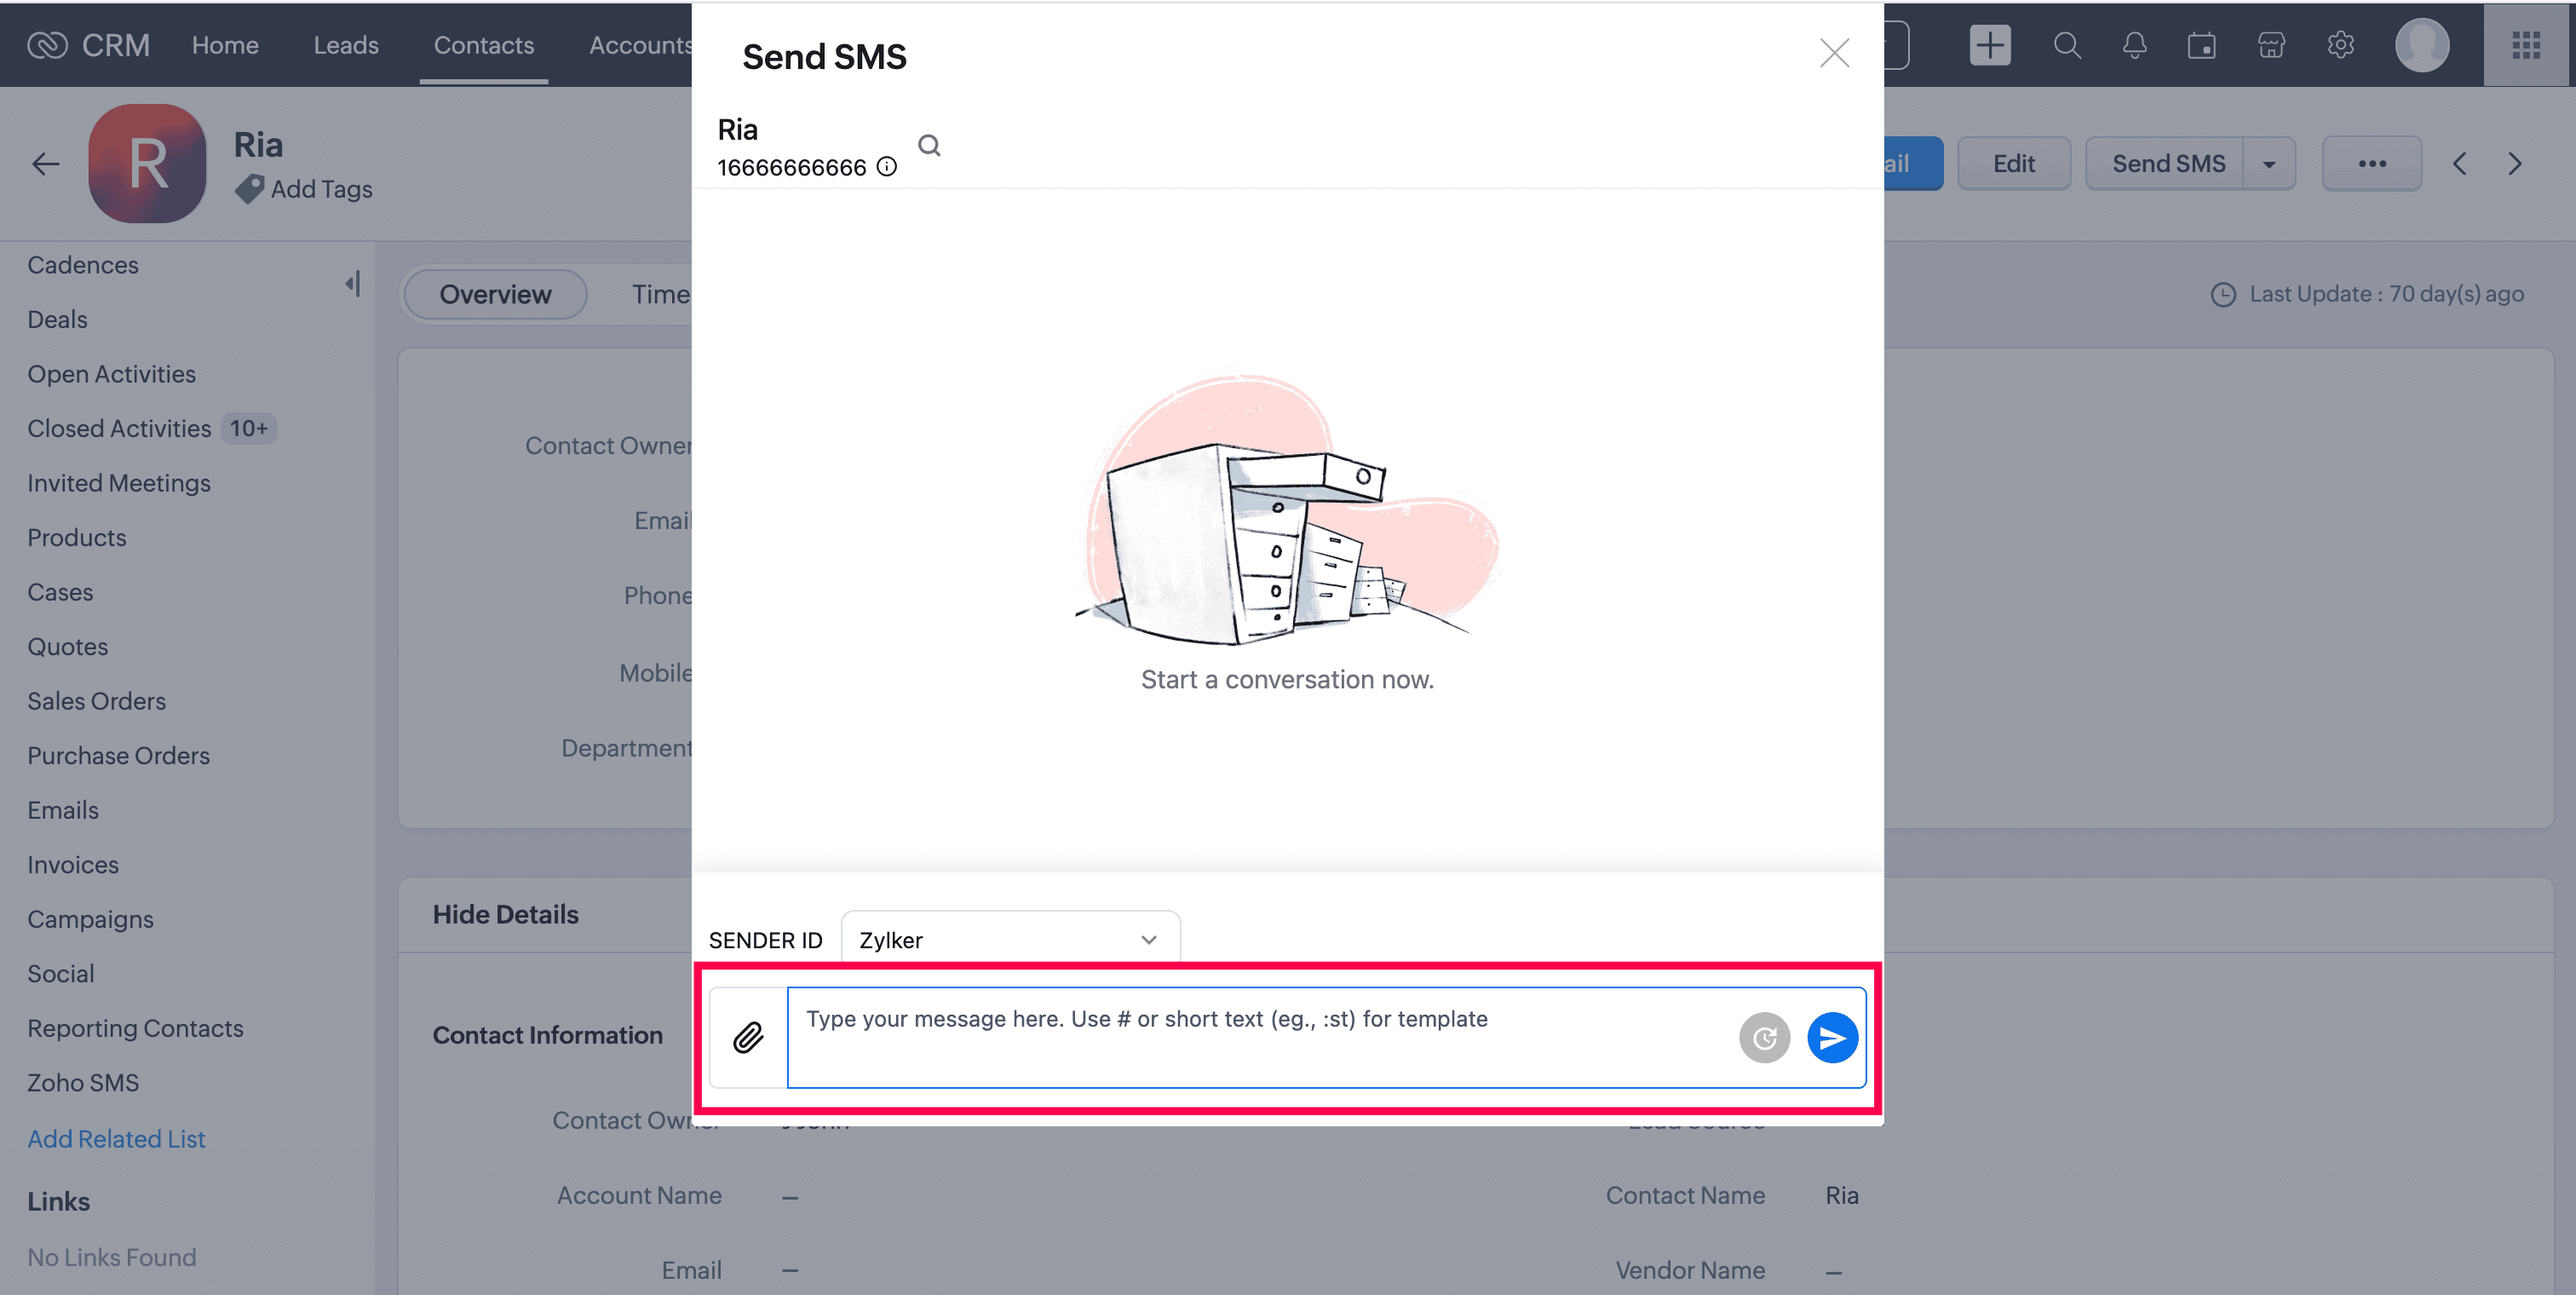
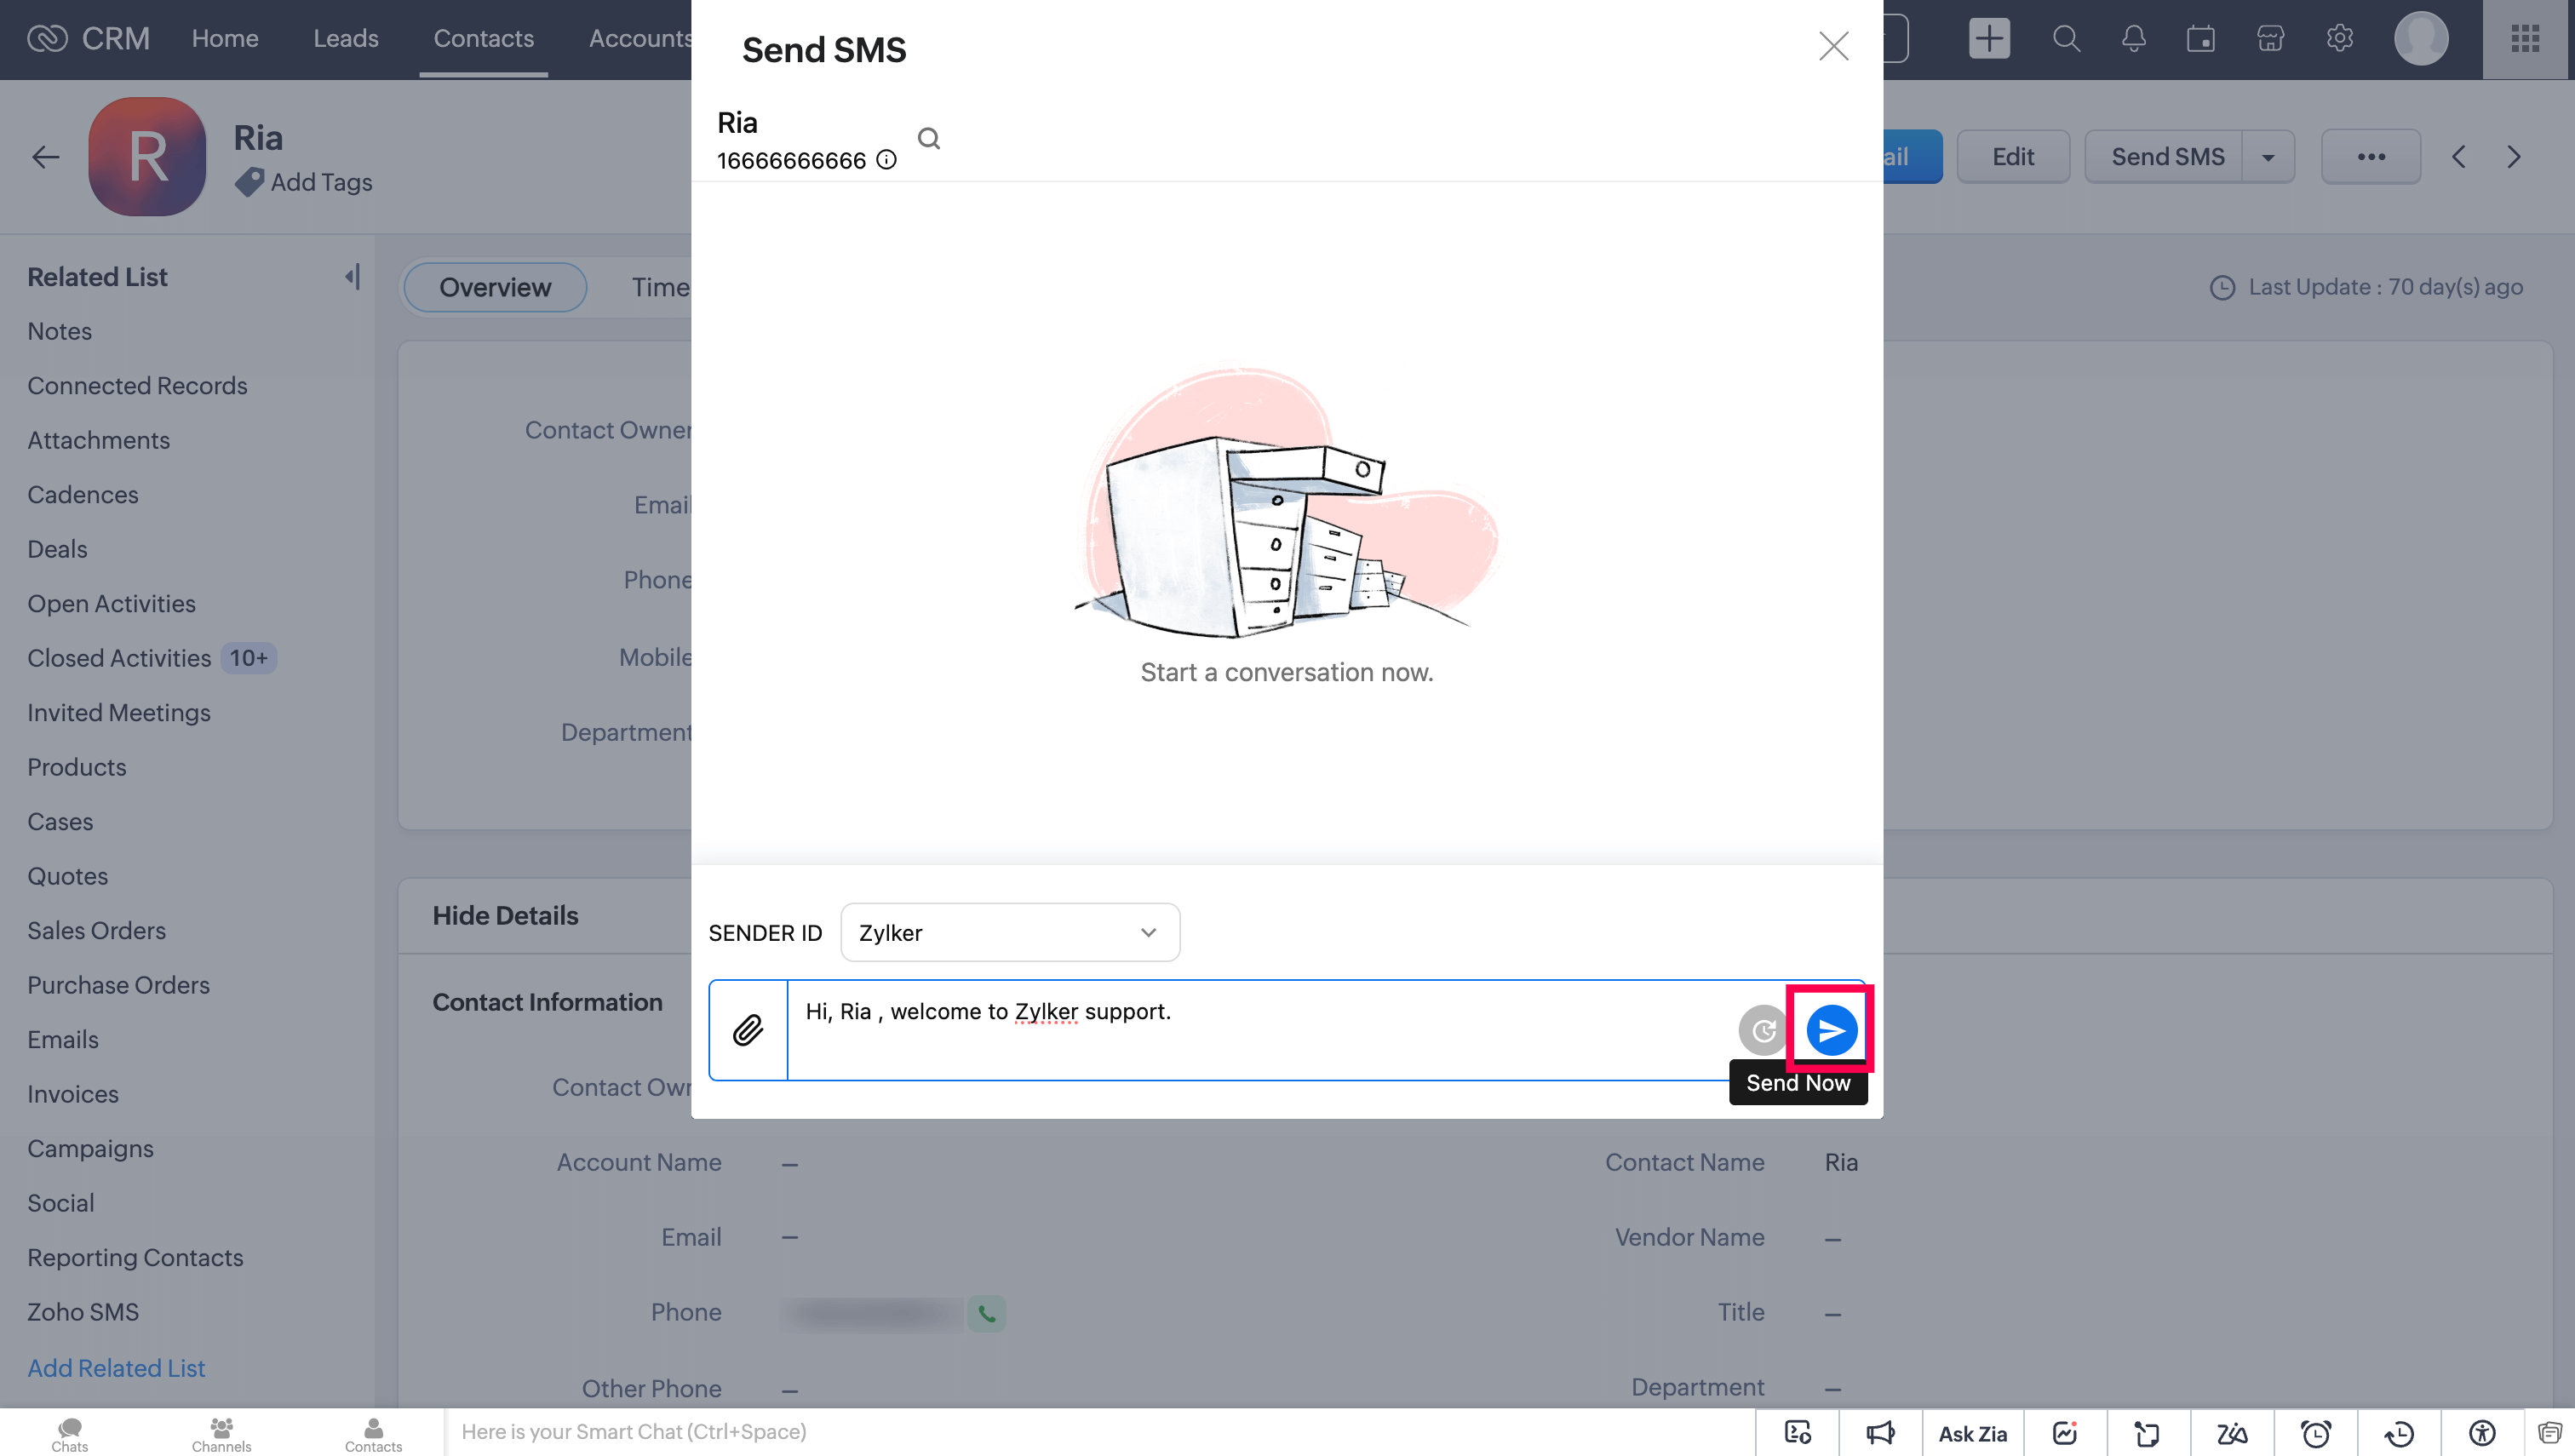
On the conversation page, select the Sender ID from the list of SMS enabled numbers you have.

Type your message and attach files if needed. Note that attachments (MMS) are applicable only for US and Canada numbers.

You can also choose a pre-created template (created in Zoho Voice → Messages → Templates) instead of manually typing a message. These templates can be inserted in the message field using # icon or through short texts (eg., :st).
When selecting a template through the # icon, you can preview the template, send it immediately, or schedule it for later by selecting the respective icon (refer the screenshot below). Learn more about templates and short texts
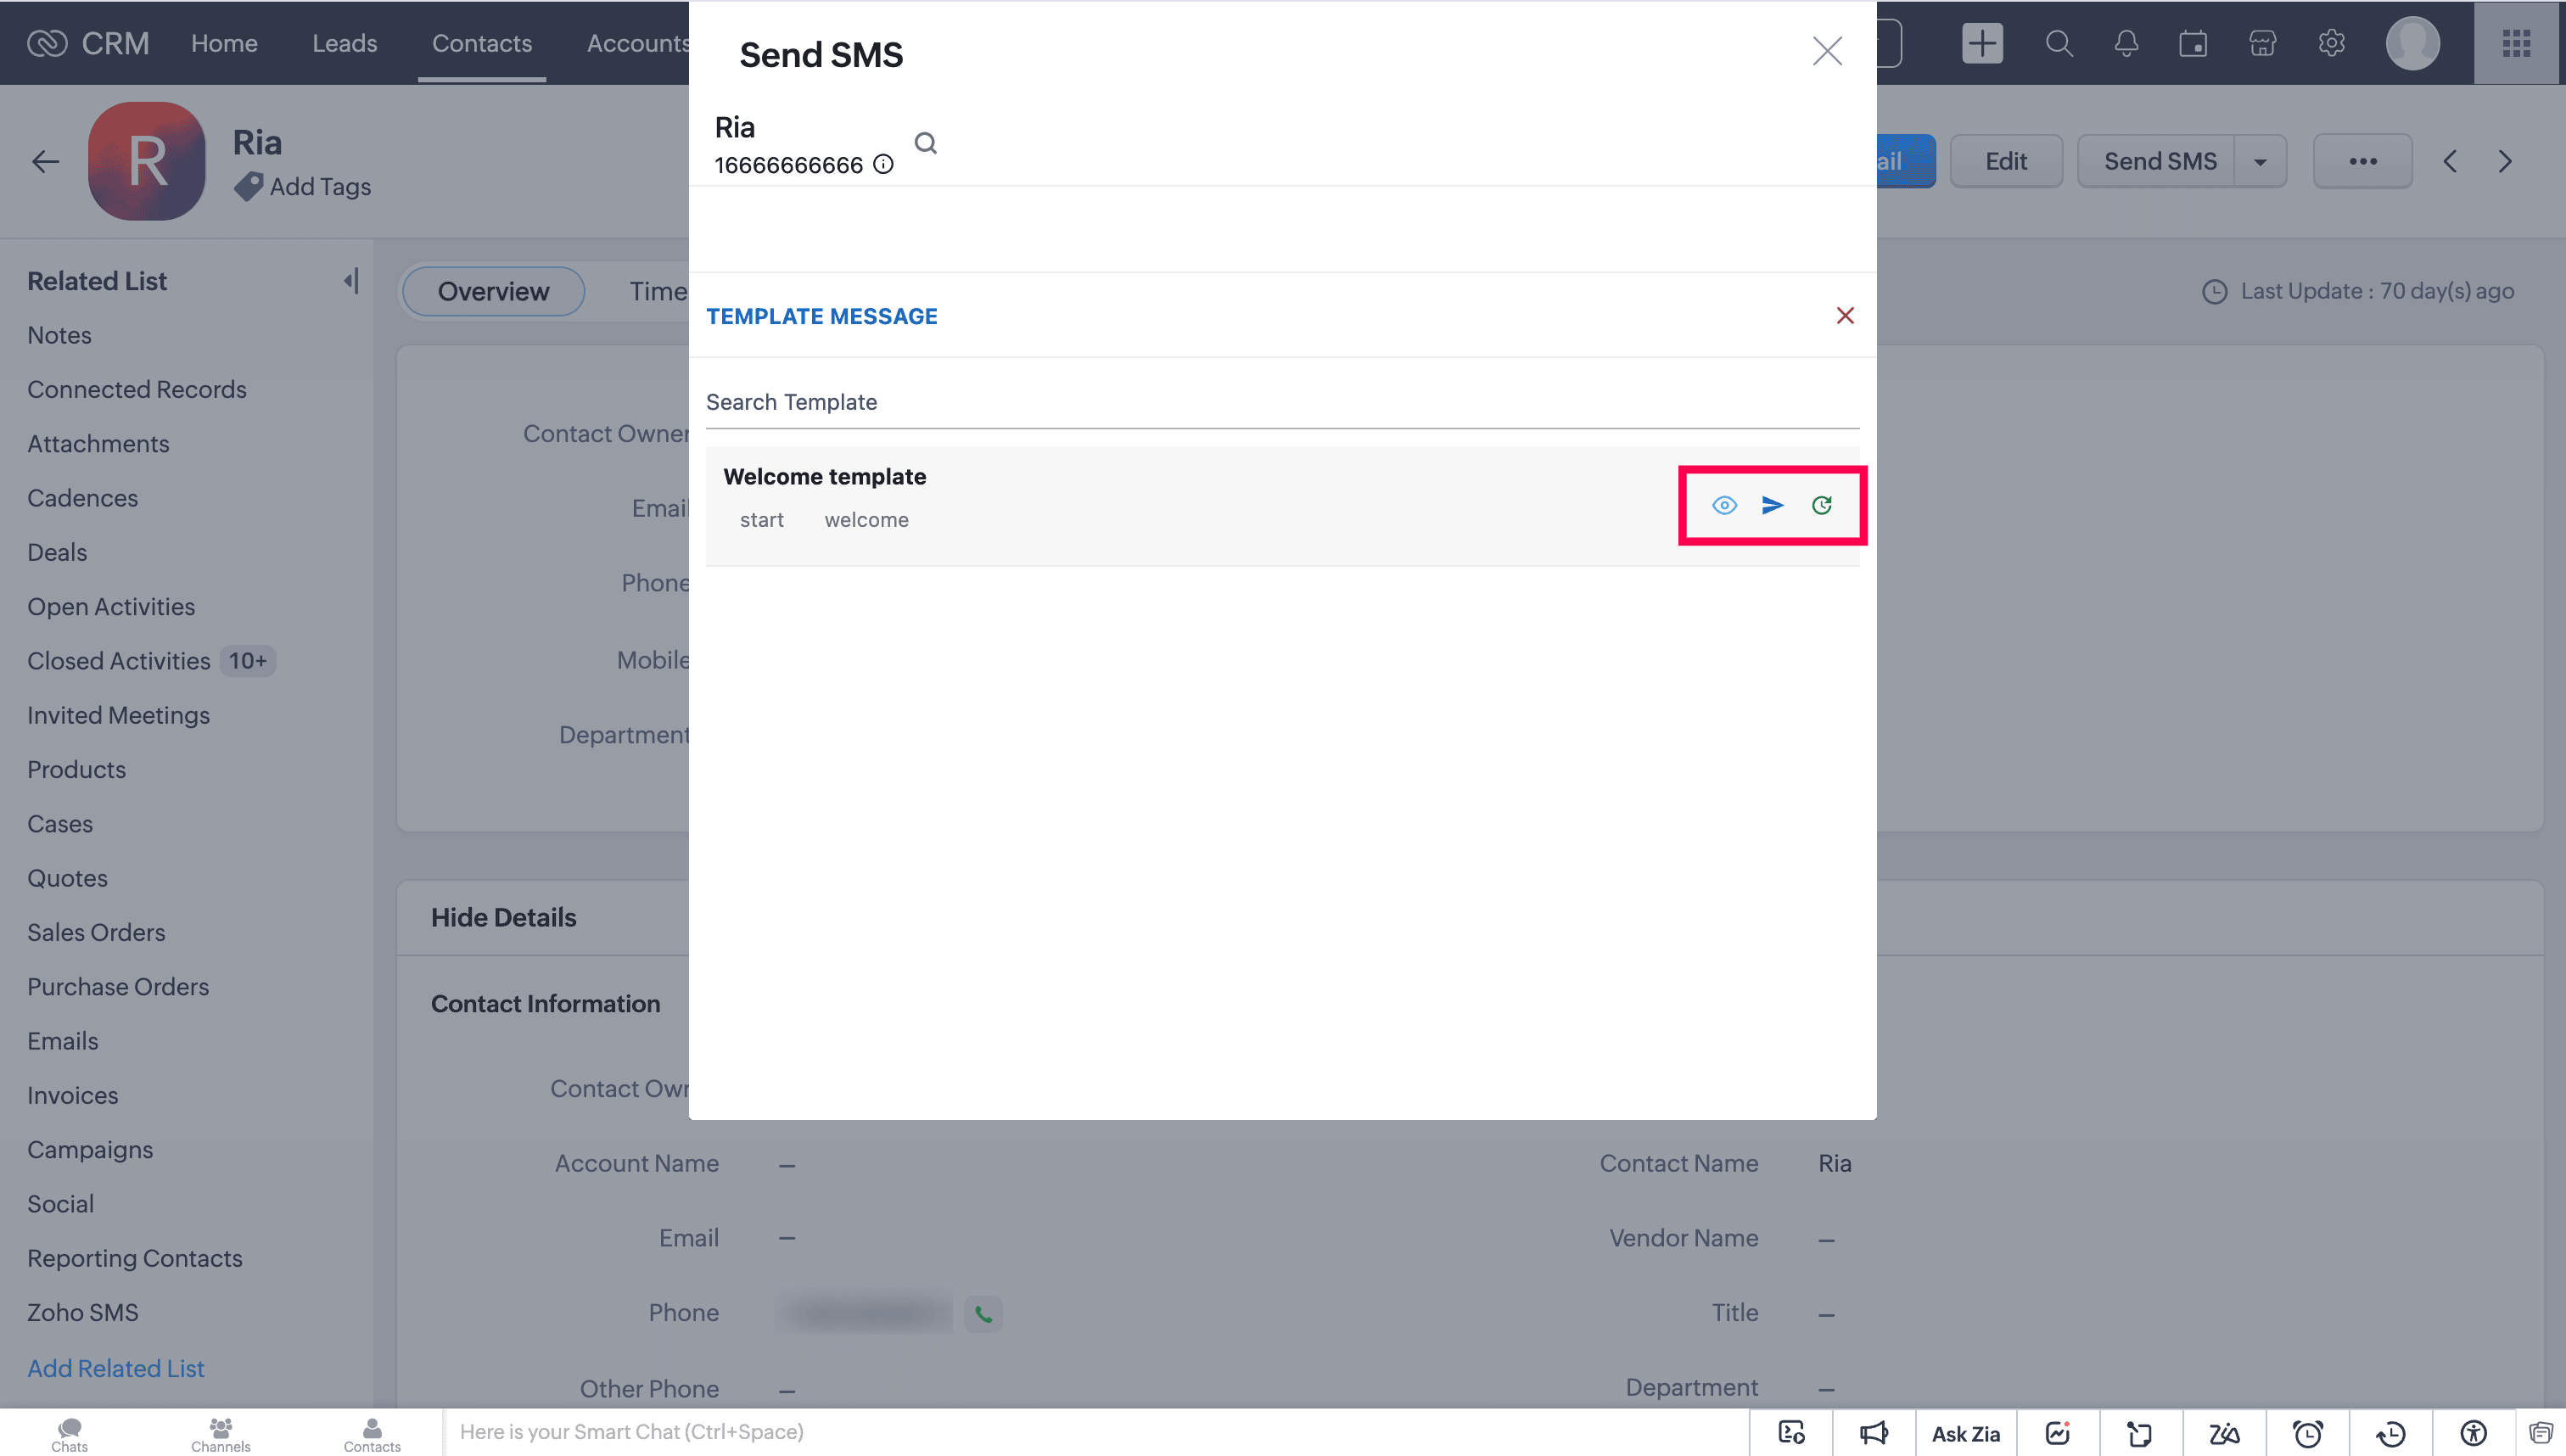

For regular messages and for templates inserted using short texts (eg., :st), click Send.

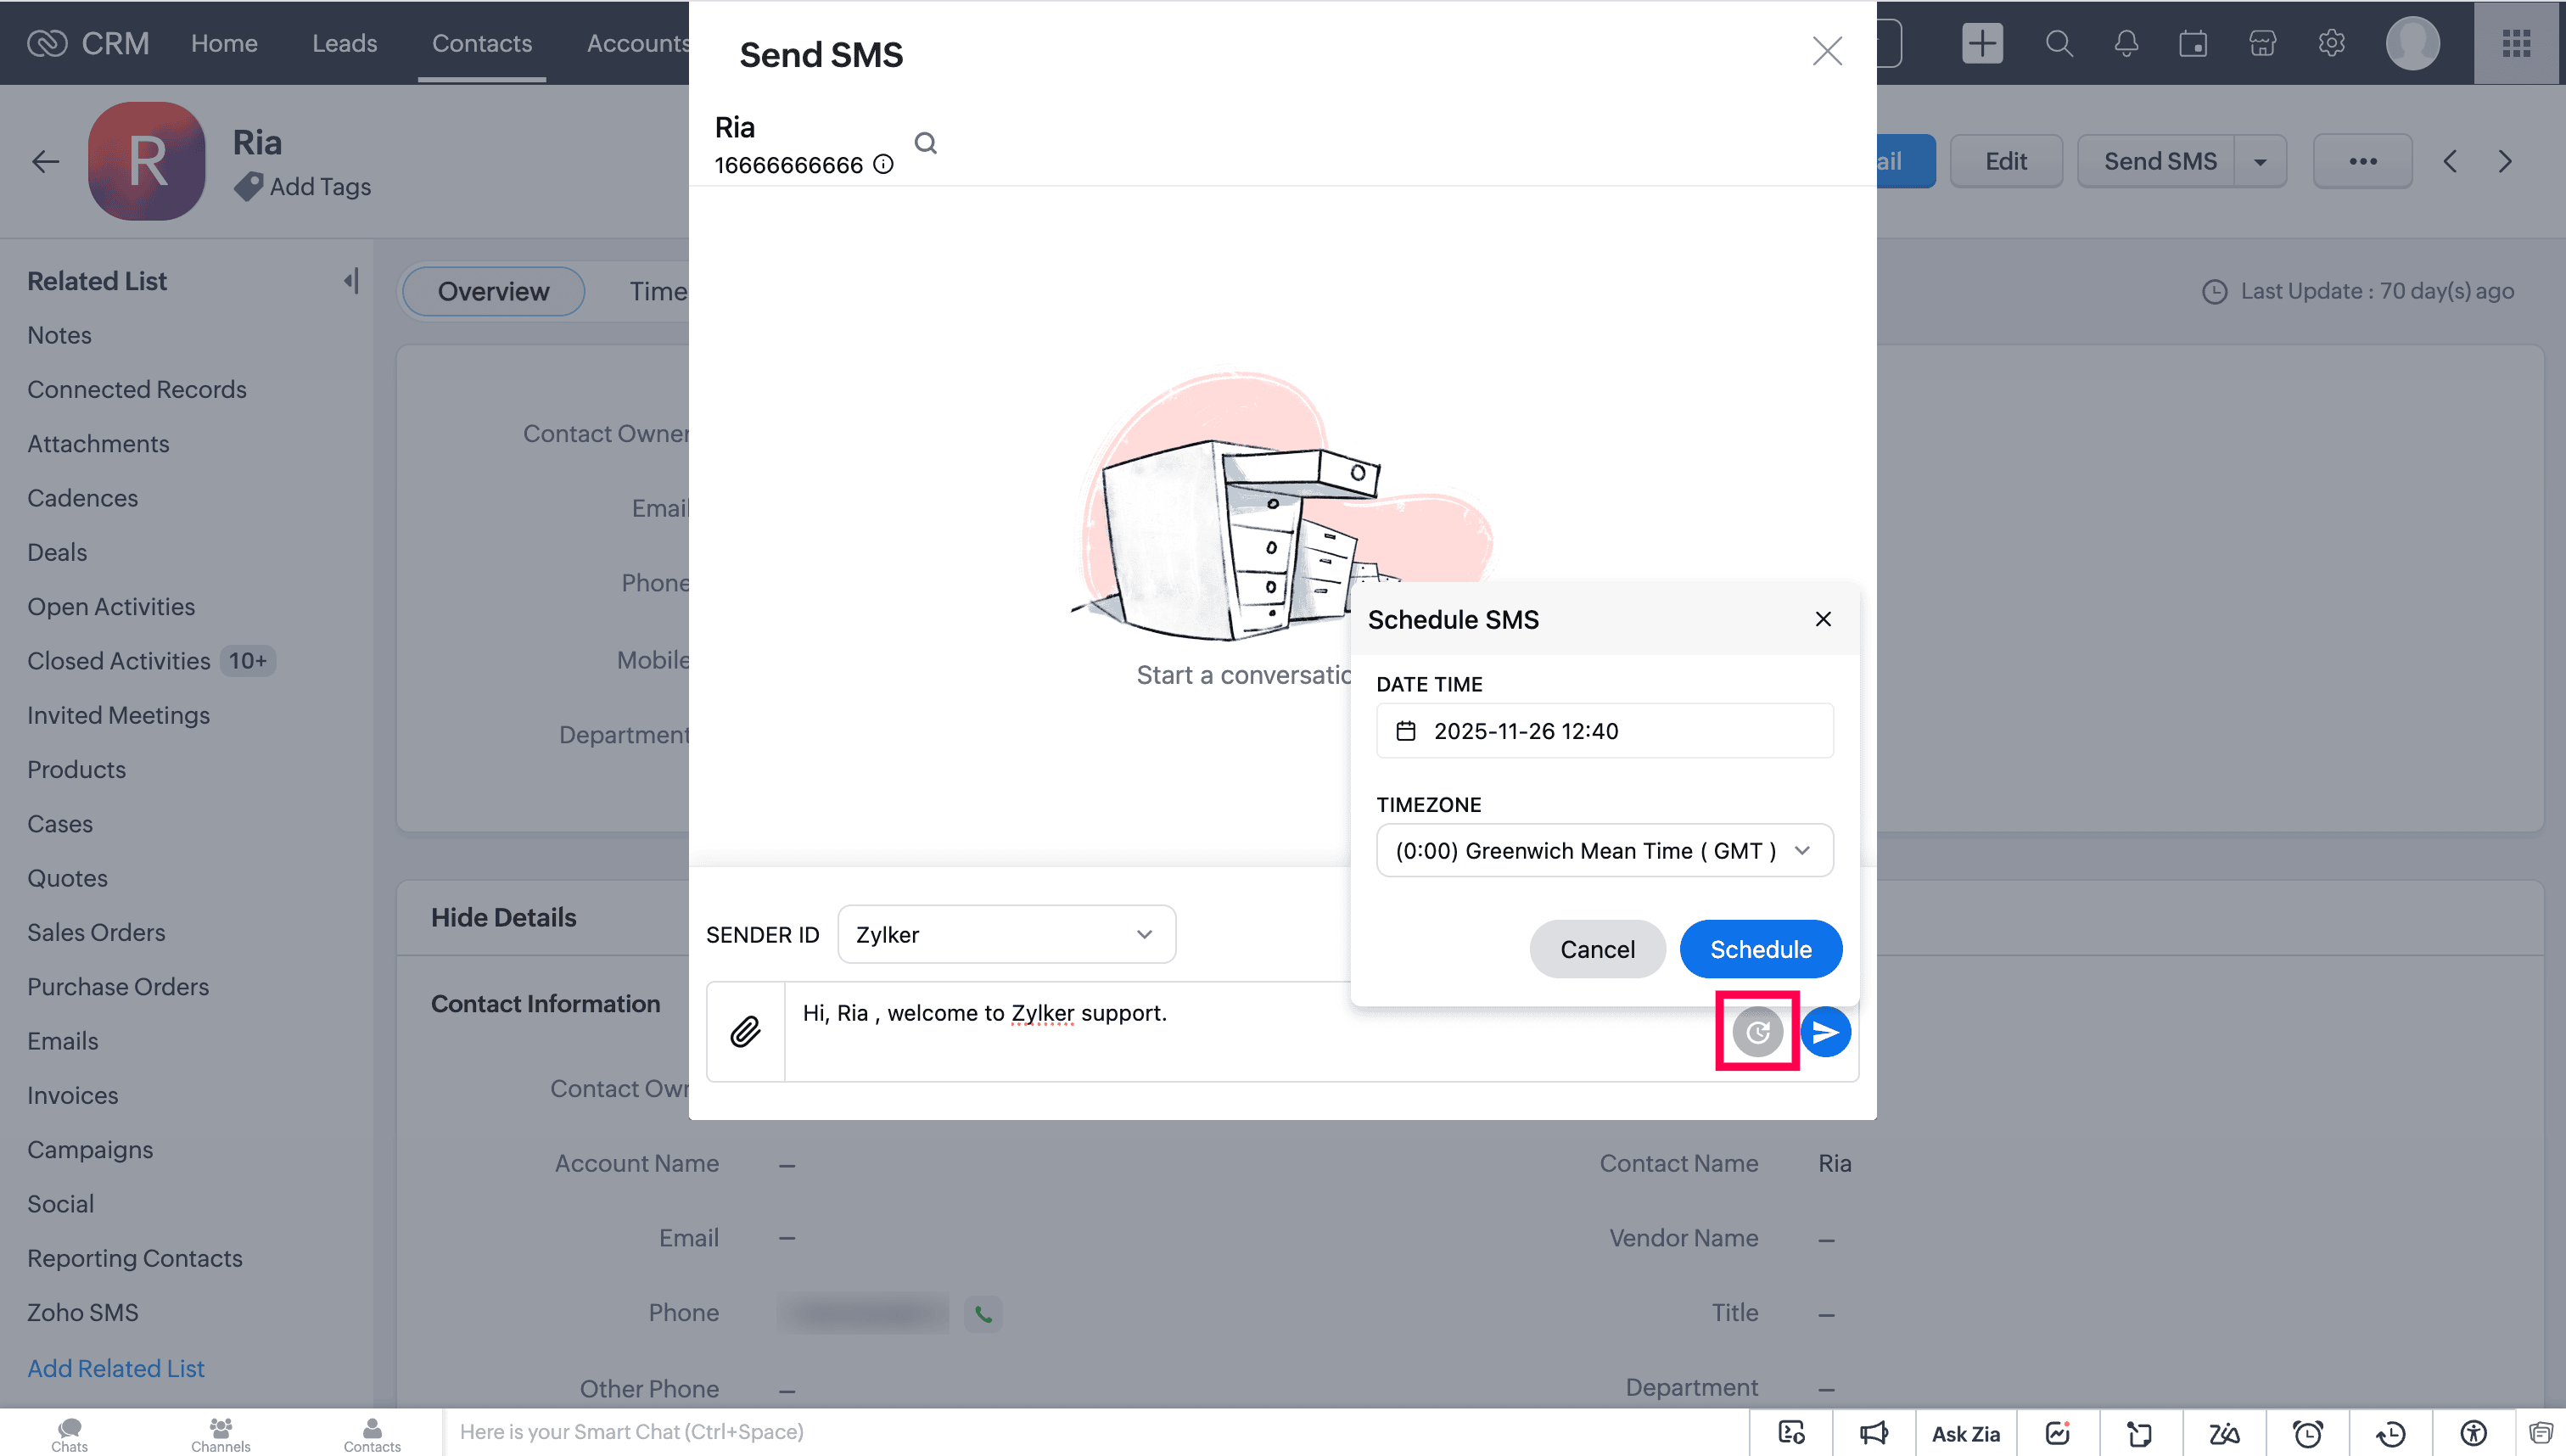
To schedule for later:
Click Schedule Later icon instead of Send.
Choose the date, time, and time zone, and click Schedule.

For Zoho CRM users without an active Zoho Voice account
If you are a Zoho CRM user and do not have an active Zoho Voice account, please follow the steps below before installing the SMS for Zoho CRM by Zoho Voice extension:
Sign up and Sign in to Zoho Voice
Plan purchase
Number purchase
Activate SMS/MMS in Zoho Voice
Sign up for Zoho Voice
Sign up here to Zoho Voice. Enter the credentials and click Sign Up.
Go to the Home page of Zoho Voice.
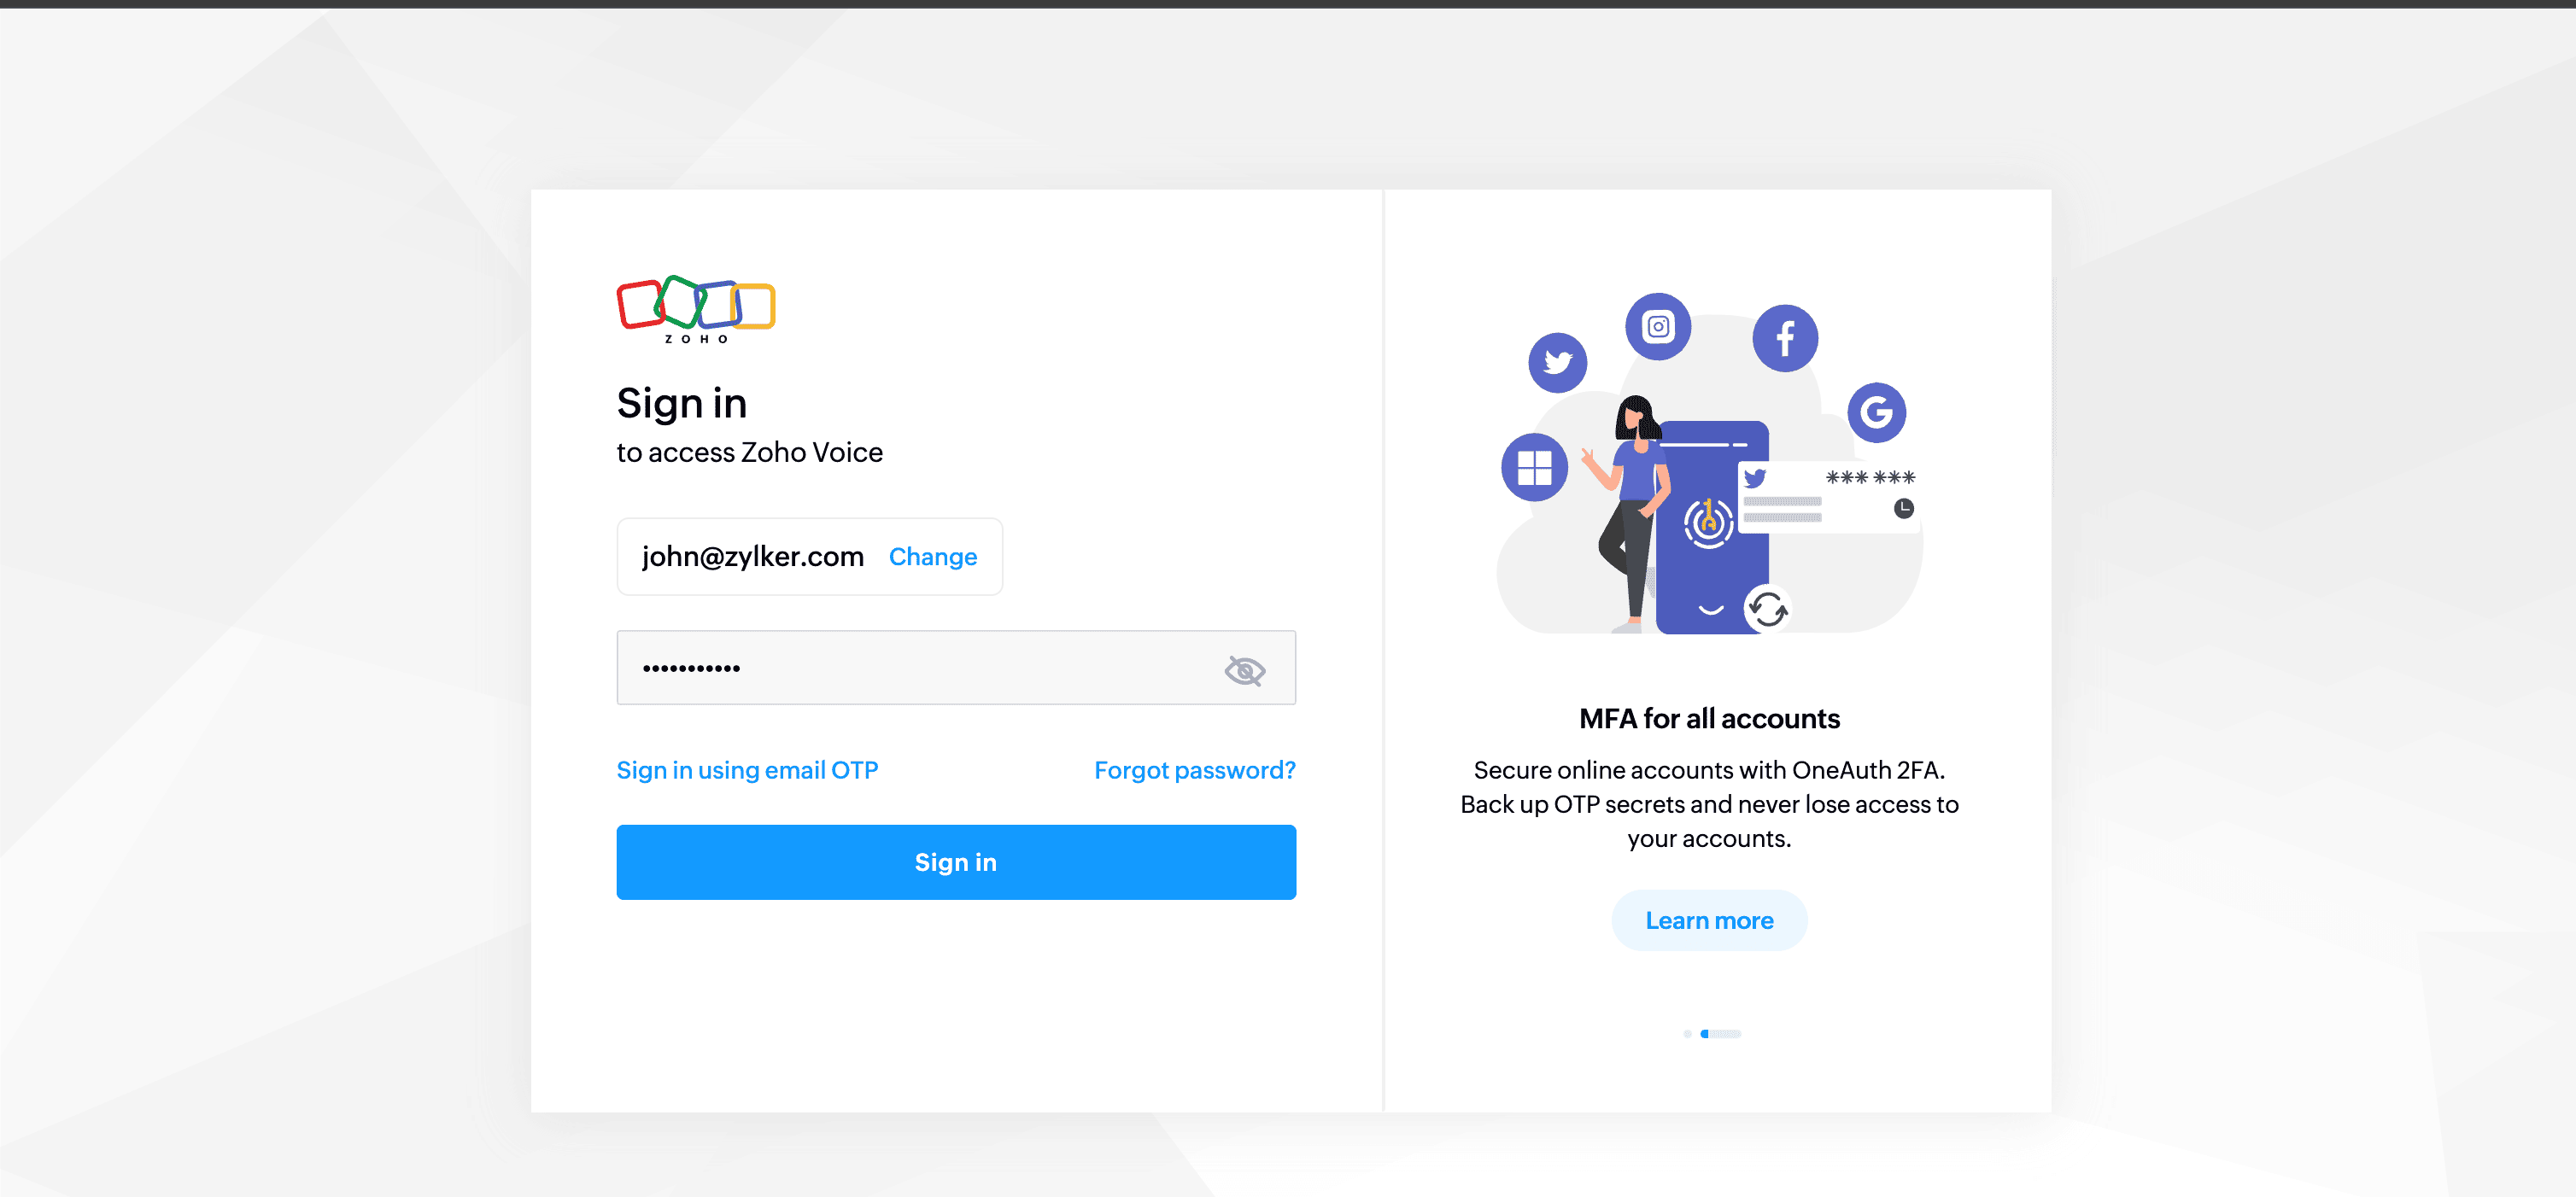
Click Sign In in the top-right corner of the page.
Fill in the credentials and click Sign In.
Note
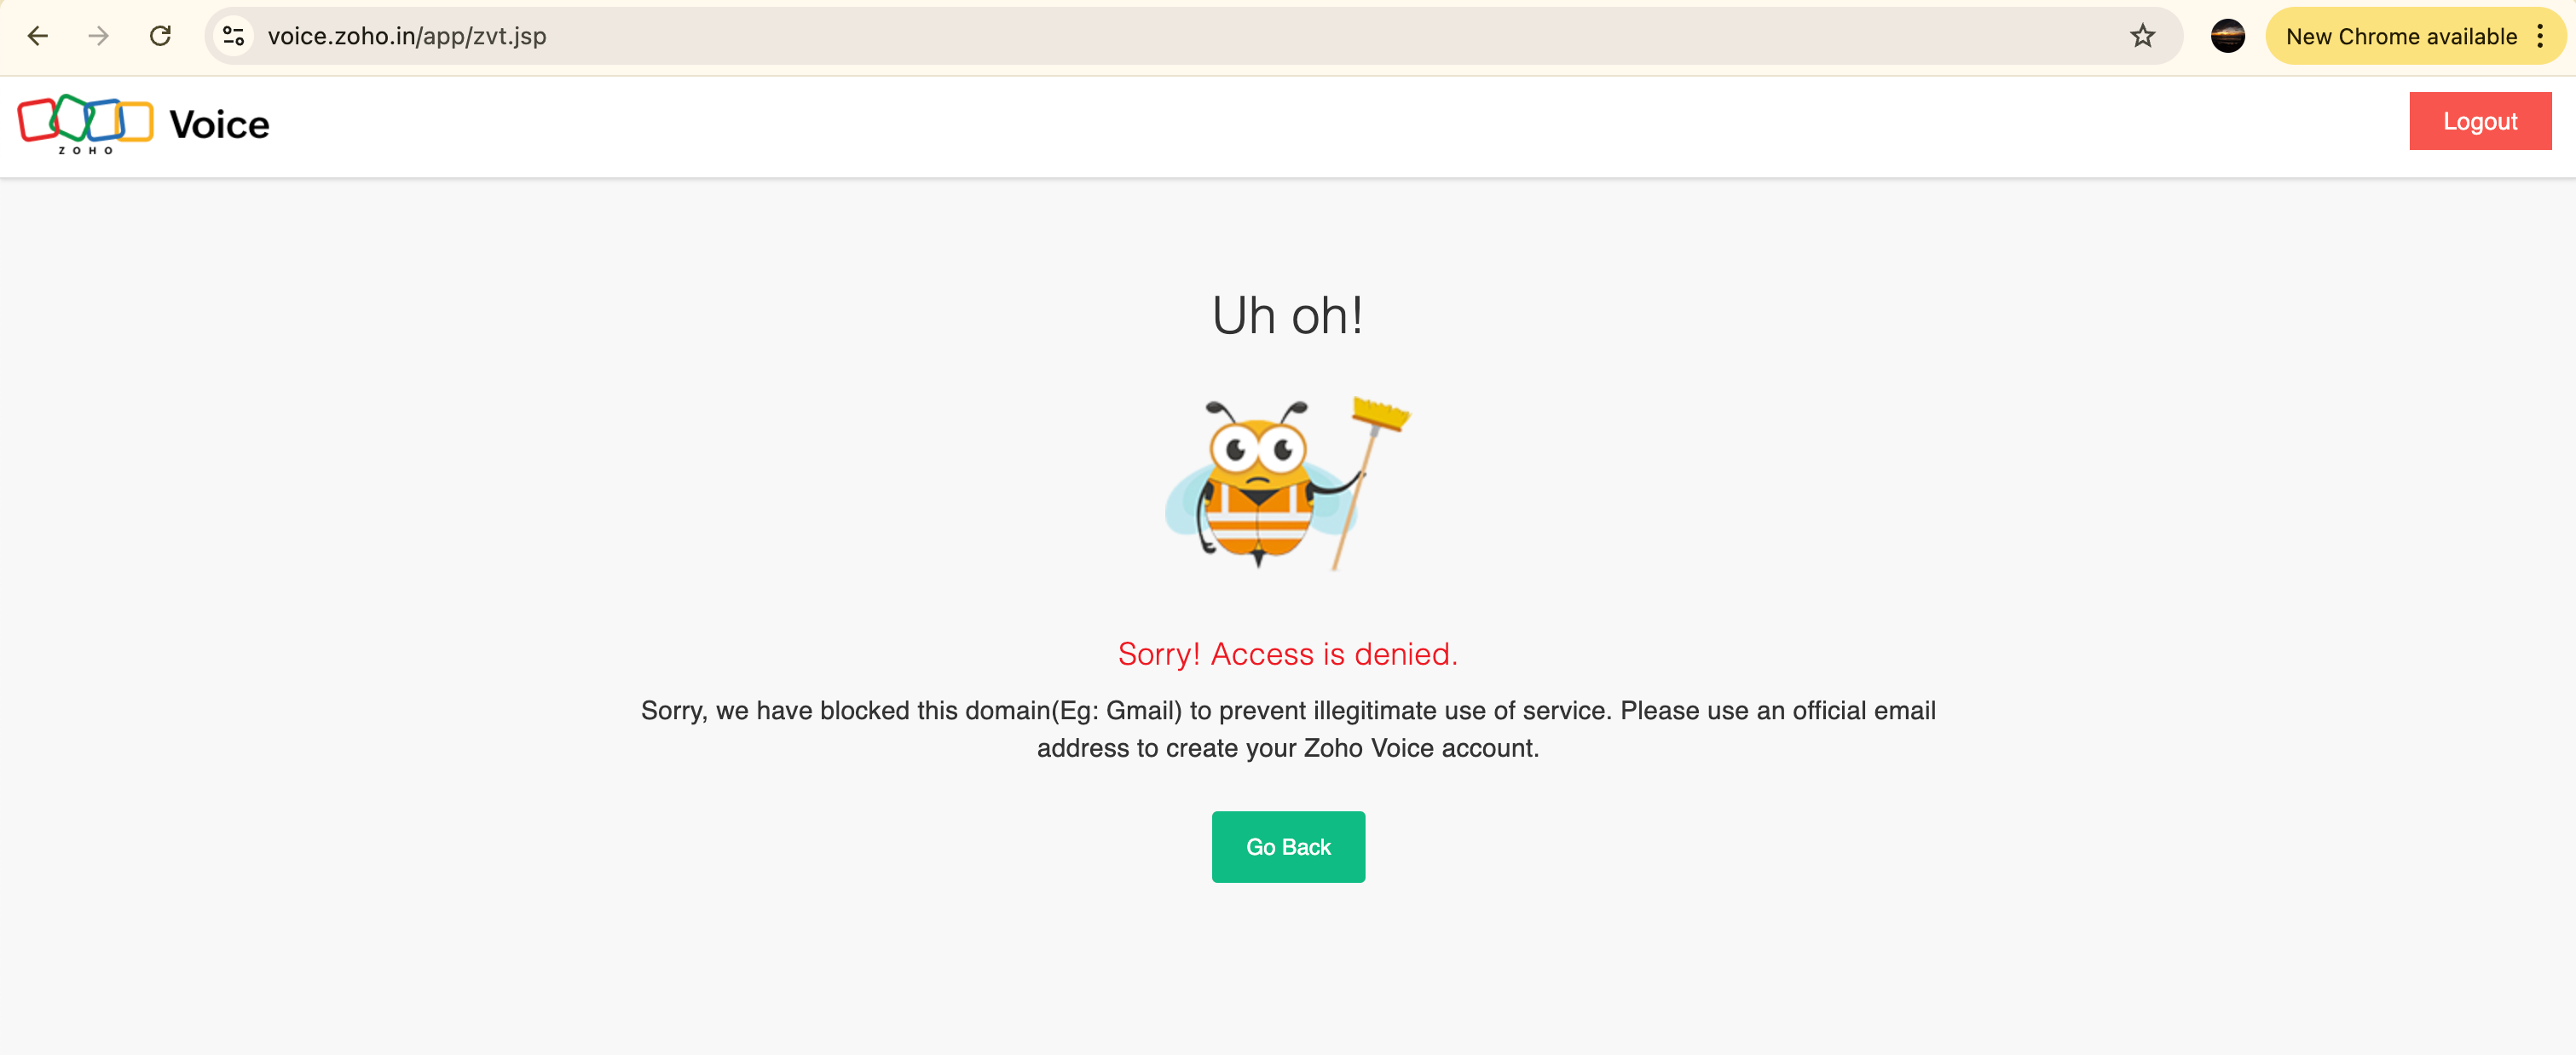
For users encountering an Access denied message like the one shown in the screenshot below, kindly contact our support (support@zohovoice.com).


Upgrade to a supporting plan
After successfully logging in to your Zoho Voice account, upgrade to a supporting plan. To upgrade to a supporting plan:
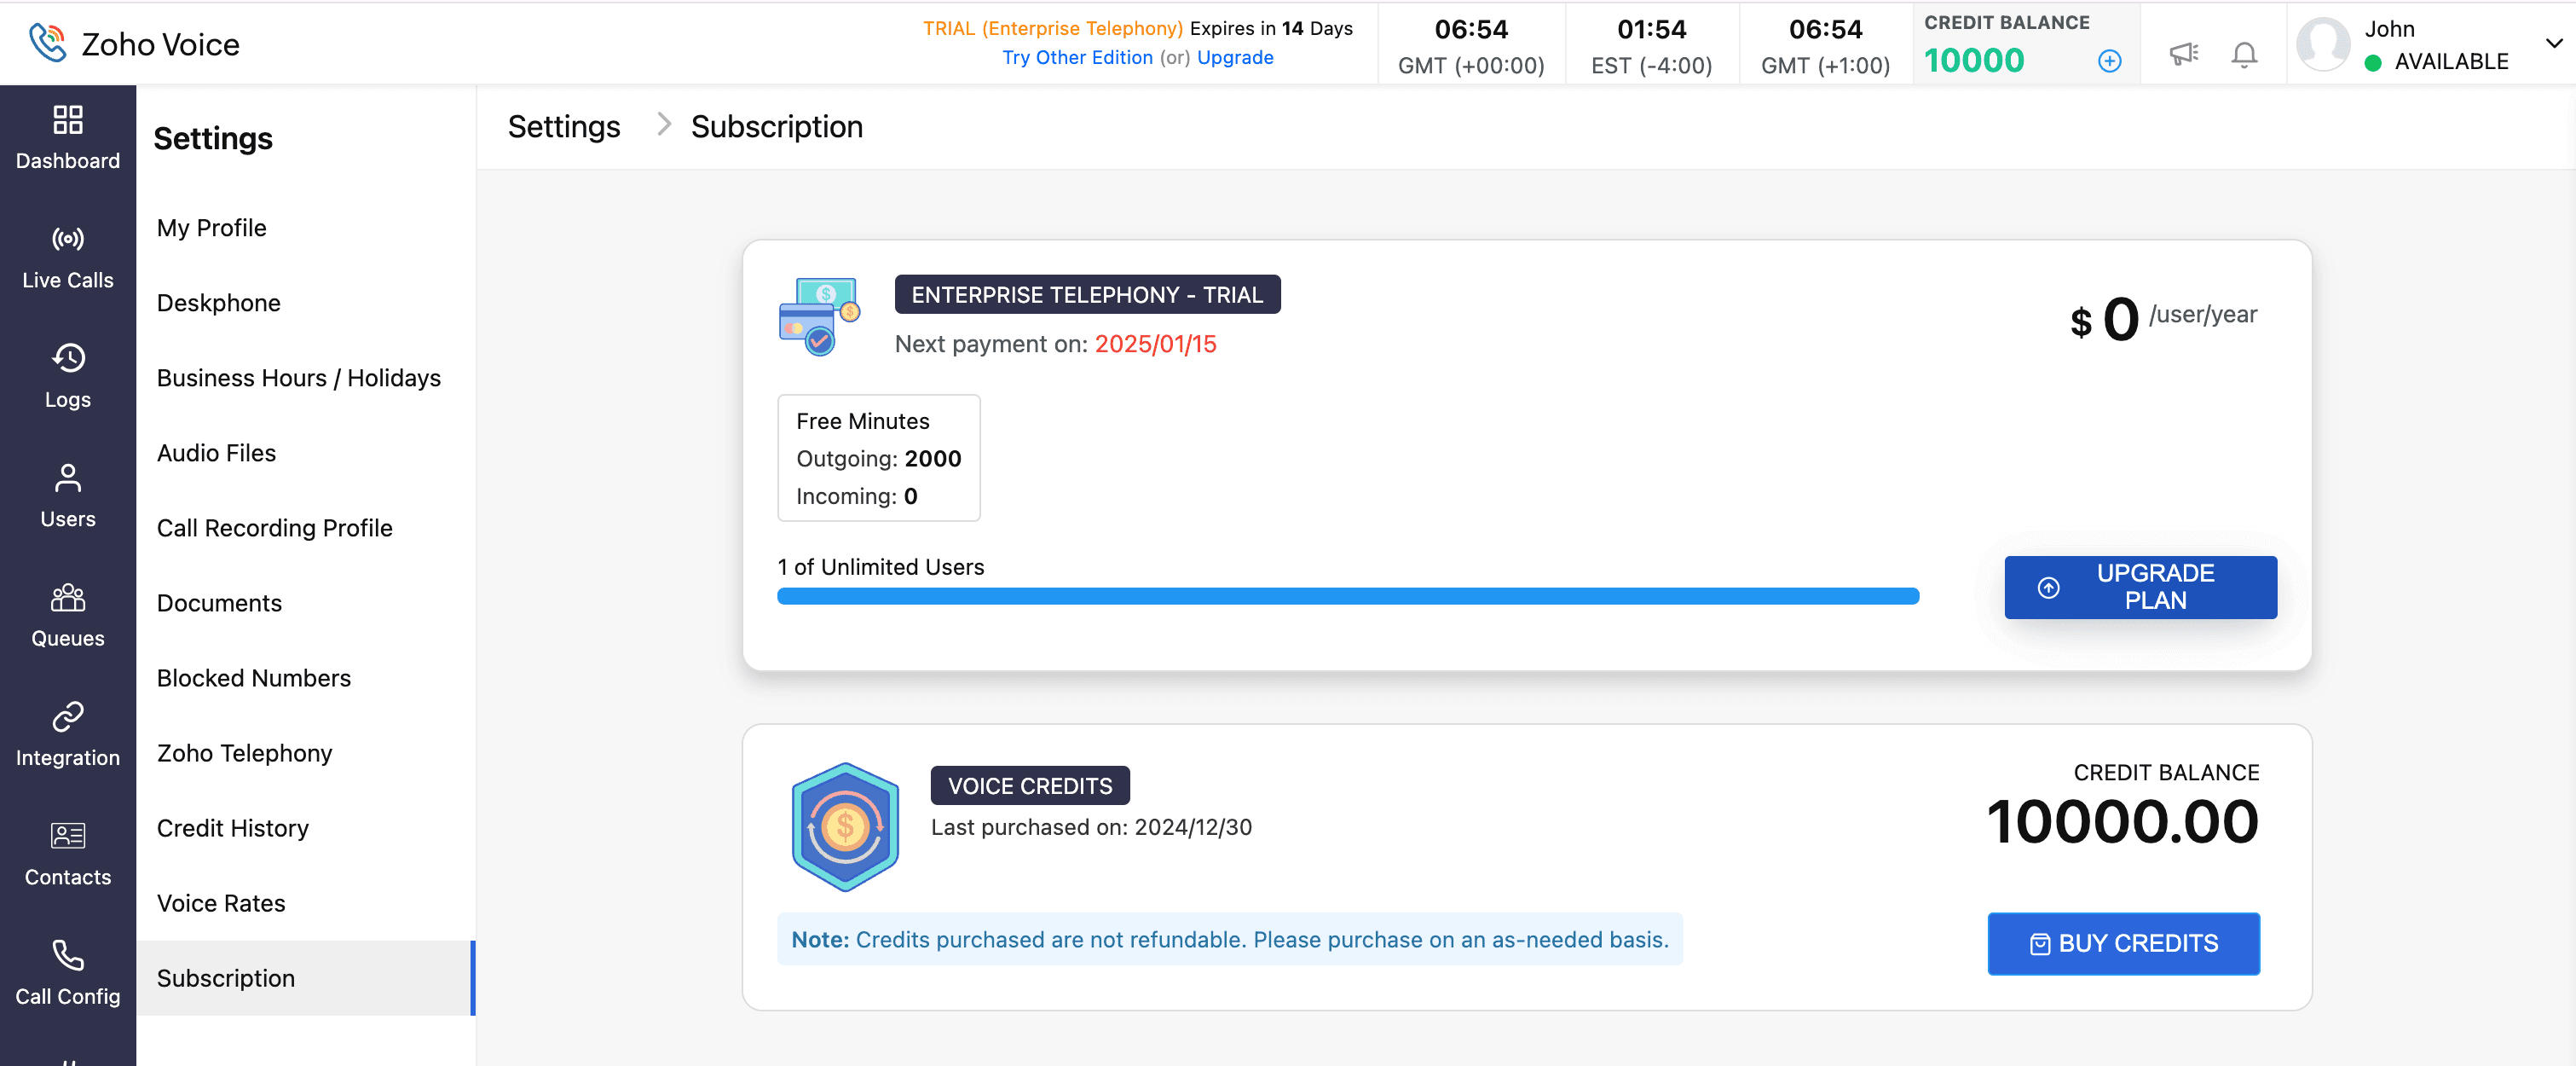
Go to Settings and to Subscription from the left sidebar menu.
Click Upgrade plan under the Subscription tab. You will be redirected to the Zoho Store.

Click Upgrade under your preferred plan.
Enter the number of licence/users. Verify the total amount and click Proceed.
Enter your billing and payment details in the Pay section and click Make Payment.
Once the payment is successful, your Zoho Voice organization will be upgraded to the selected subscription plan.
Purchase user add-on
For users who have decided to go with the Solo plan, you must purchase the user add-on since the solo plan as stand-alone doesn't support the SMS extension.
To purchase user add-ons:
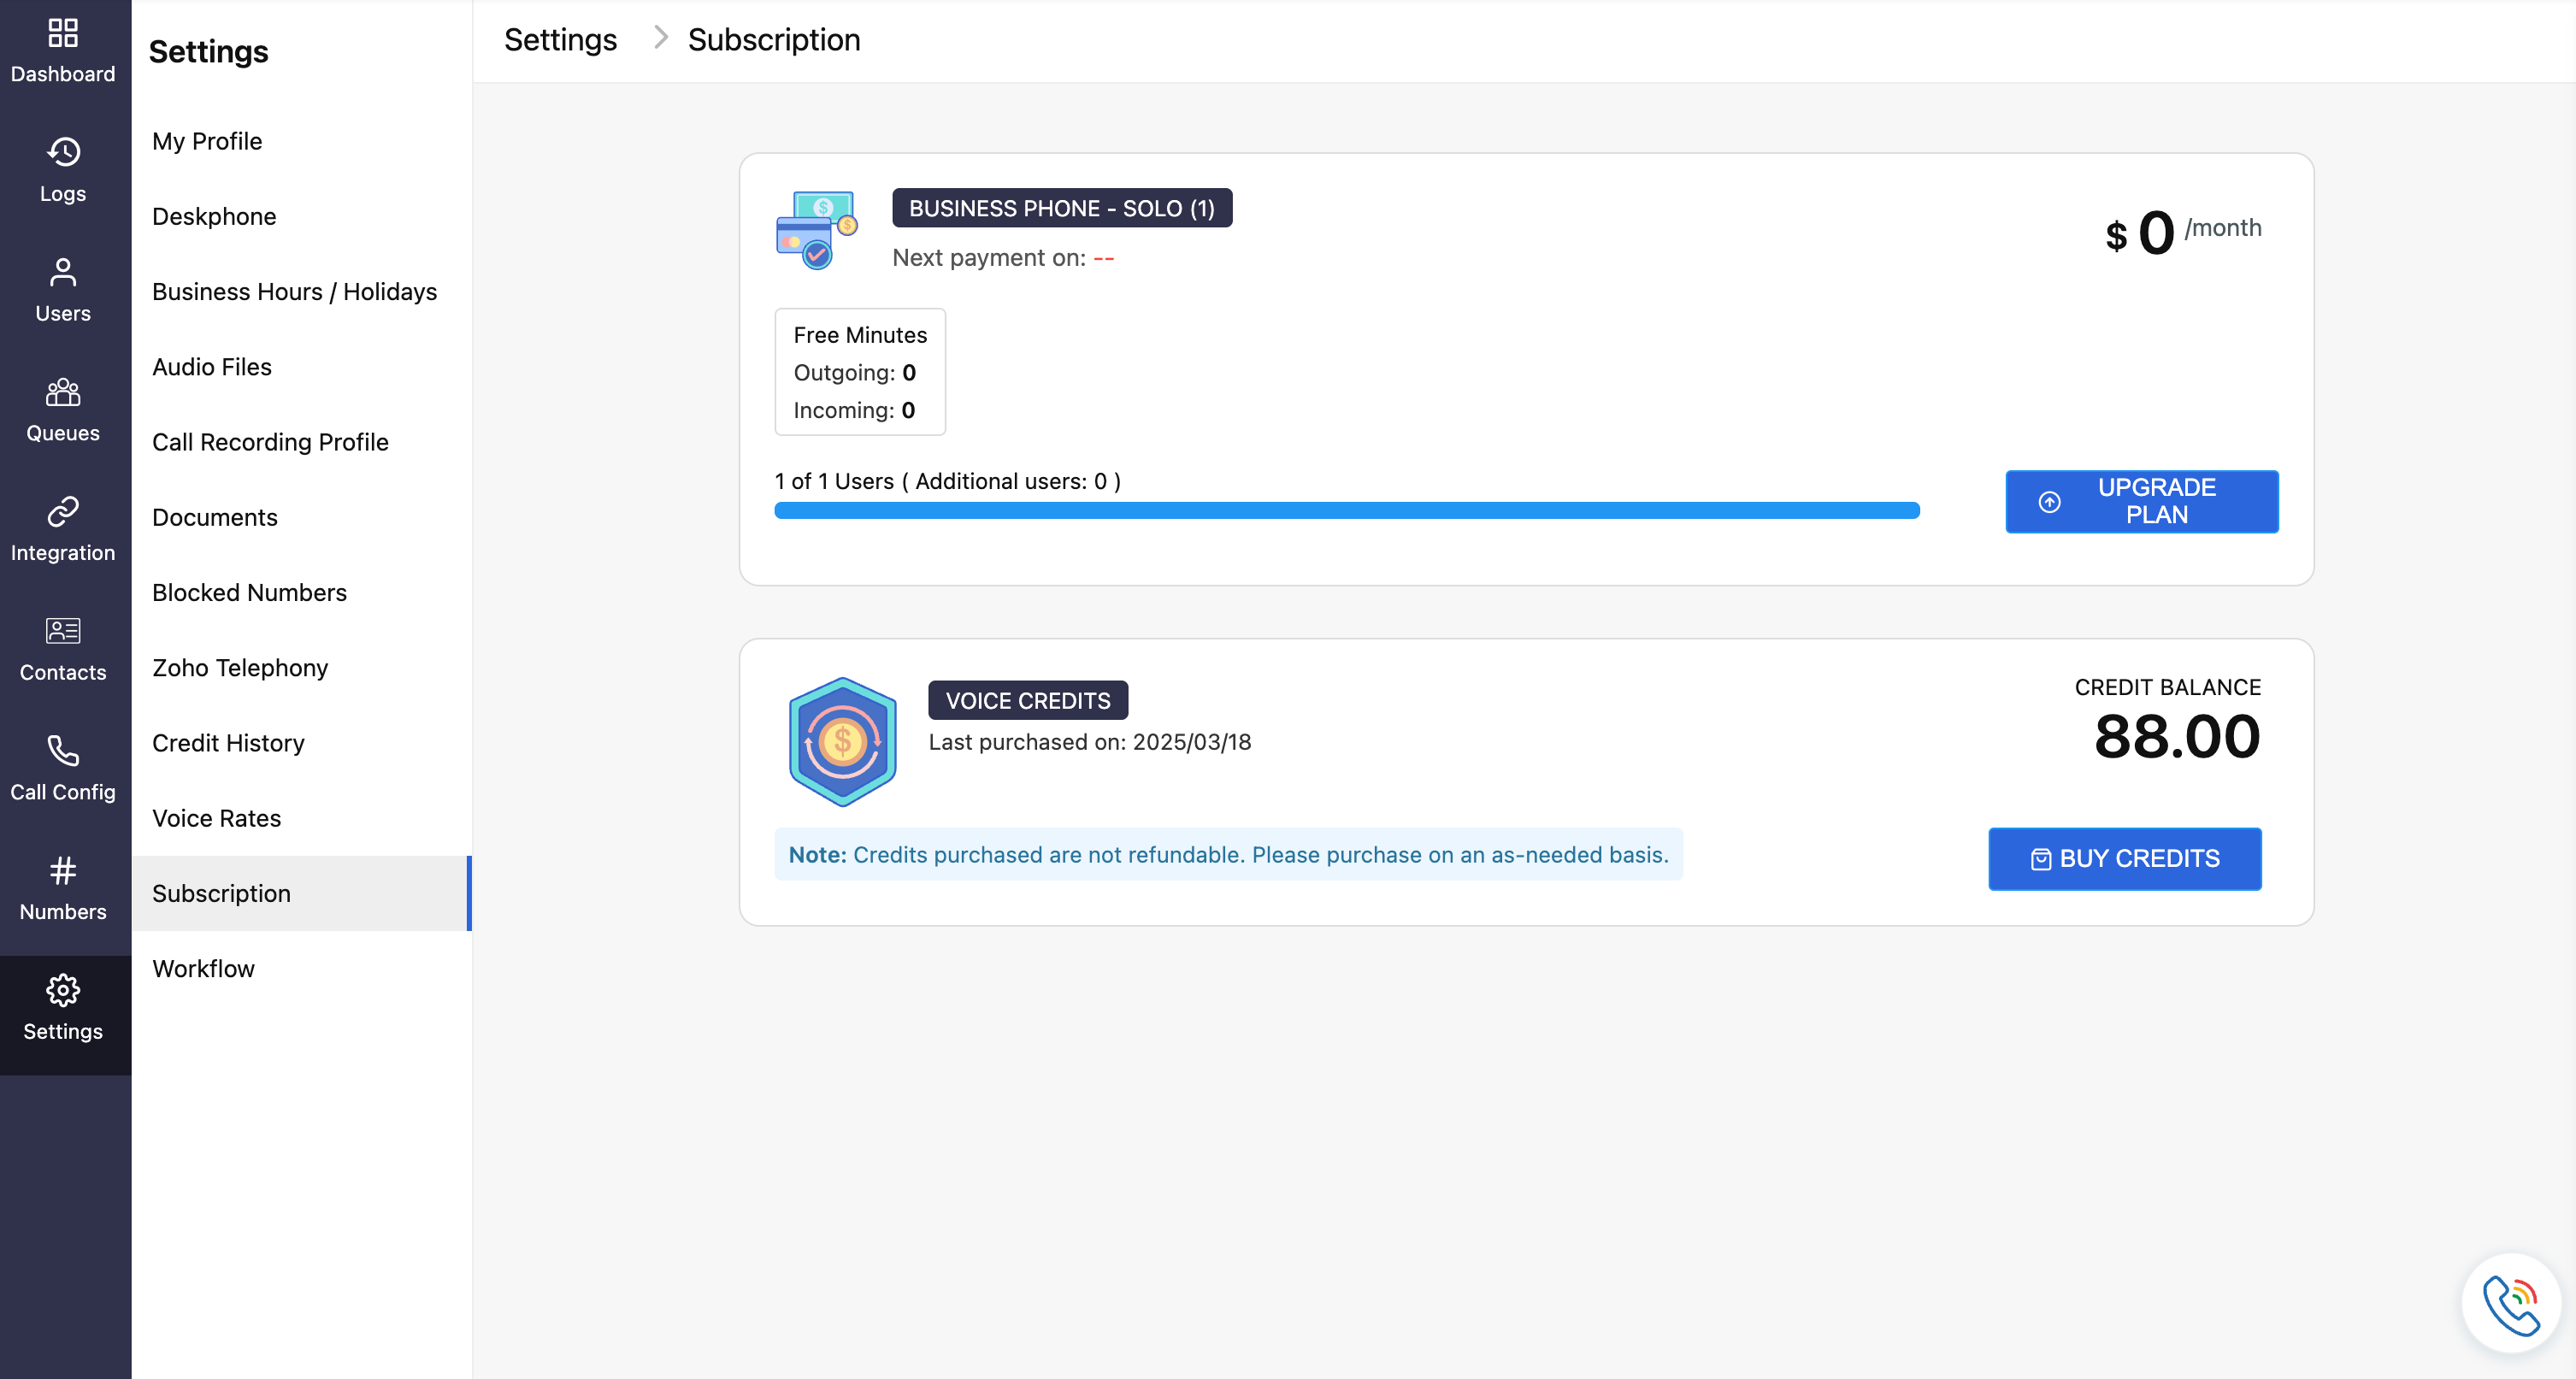
Navigate to Settings → Subscription tab.
Click Upgrade plan and select Buy Add-on of Solo.

Choose the required user add-on count and click Proceed.
Enter your billing and payment details in the Pay section and click Make Payment.
Once the payment is successful, your Zoho Voice organization will be upgraded to the Solo+ user add-on.
Number purchase in Zoho Voice
After successfully upgrading to a supporting plan, you can purchase a local number.To purchase a number:
Go to the Numbers module.
You may choose to filter numbers by type and specify whether they should contain, start with, or end with the country code and the number entered in the Country field. Then click Search to view any available matching numbers.
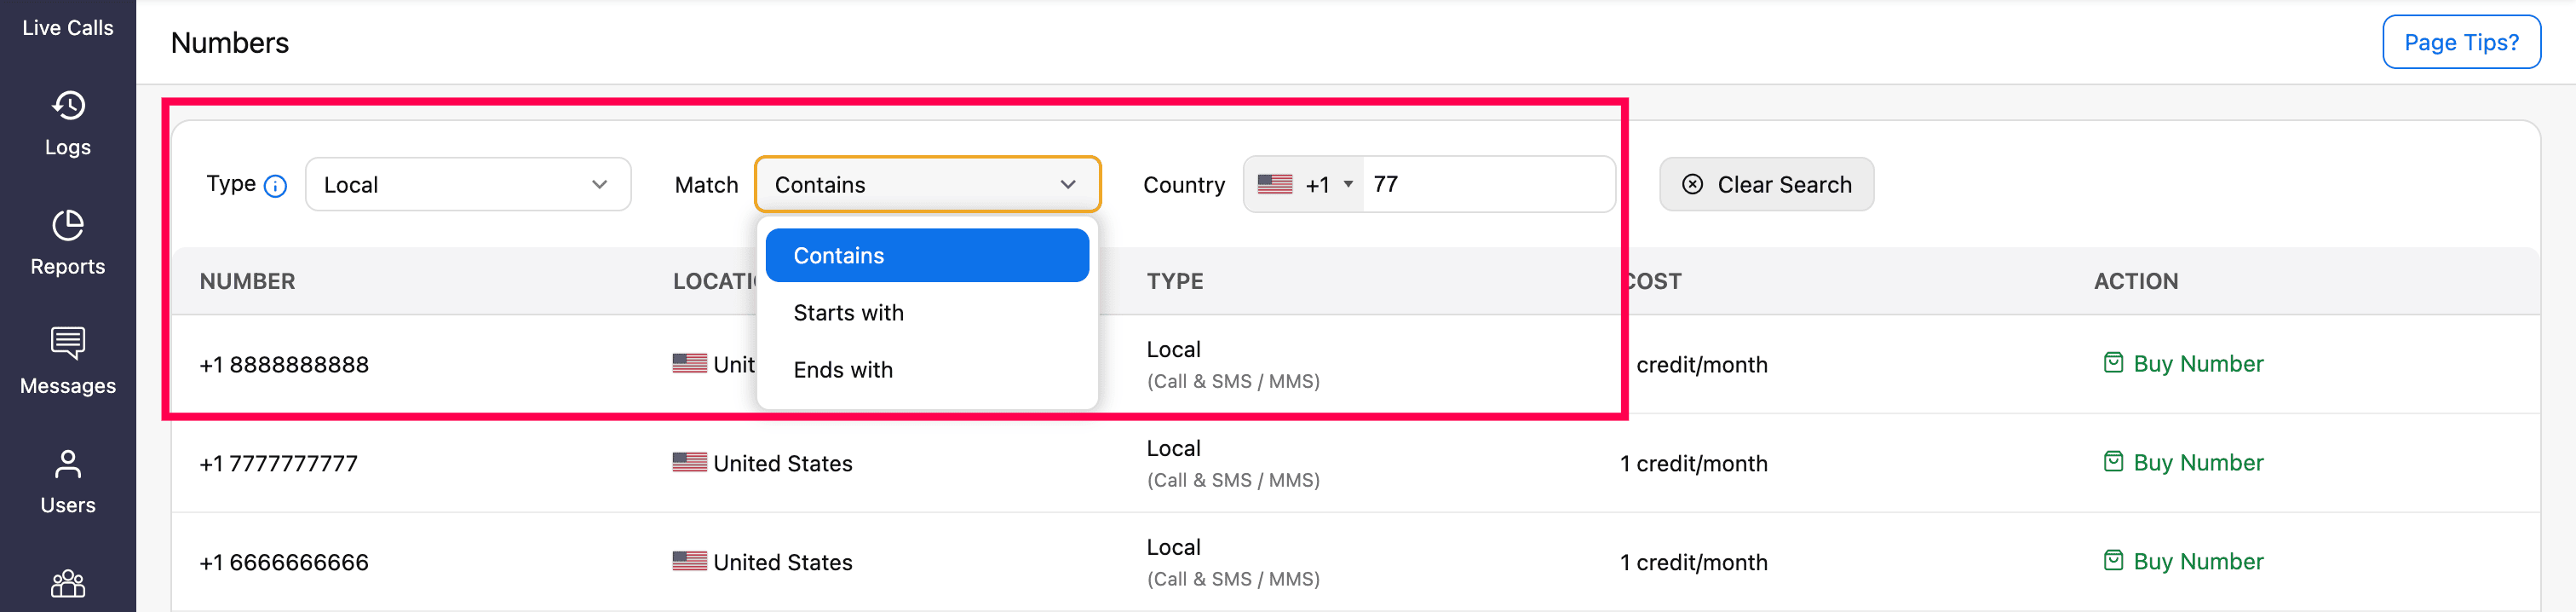

Click Buy Number next to the desired number of your choice.
A pop-up box will display the details of the selected number type. Review the details and click Continue.
On the Purchase Number using Credit page, enter a Display Name for the number for easy identification.


Attach your address proof under the Proof of Business field. You can either select a previously uploaded business document from the drop-down (sourced from the Settings → Document module) or directly upload a new one by clicking Add New.
Note
Submit your Business Registration Certificate as Proof of Business for verification.


Select the users/agents to assign this number as their default outgoing number.
Note
- For personal and personal unlimited numbers, only one agent/user can be assigned.
- If you prefer, skip this step and assign the number later in the Call Config module.
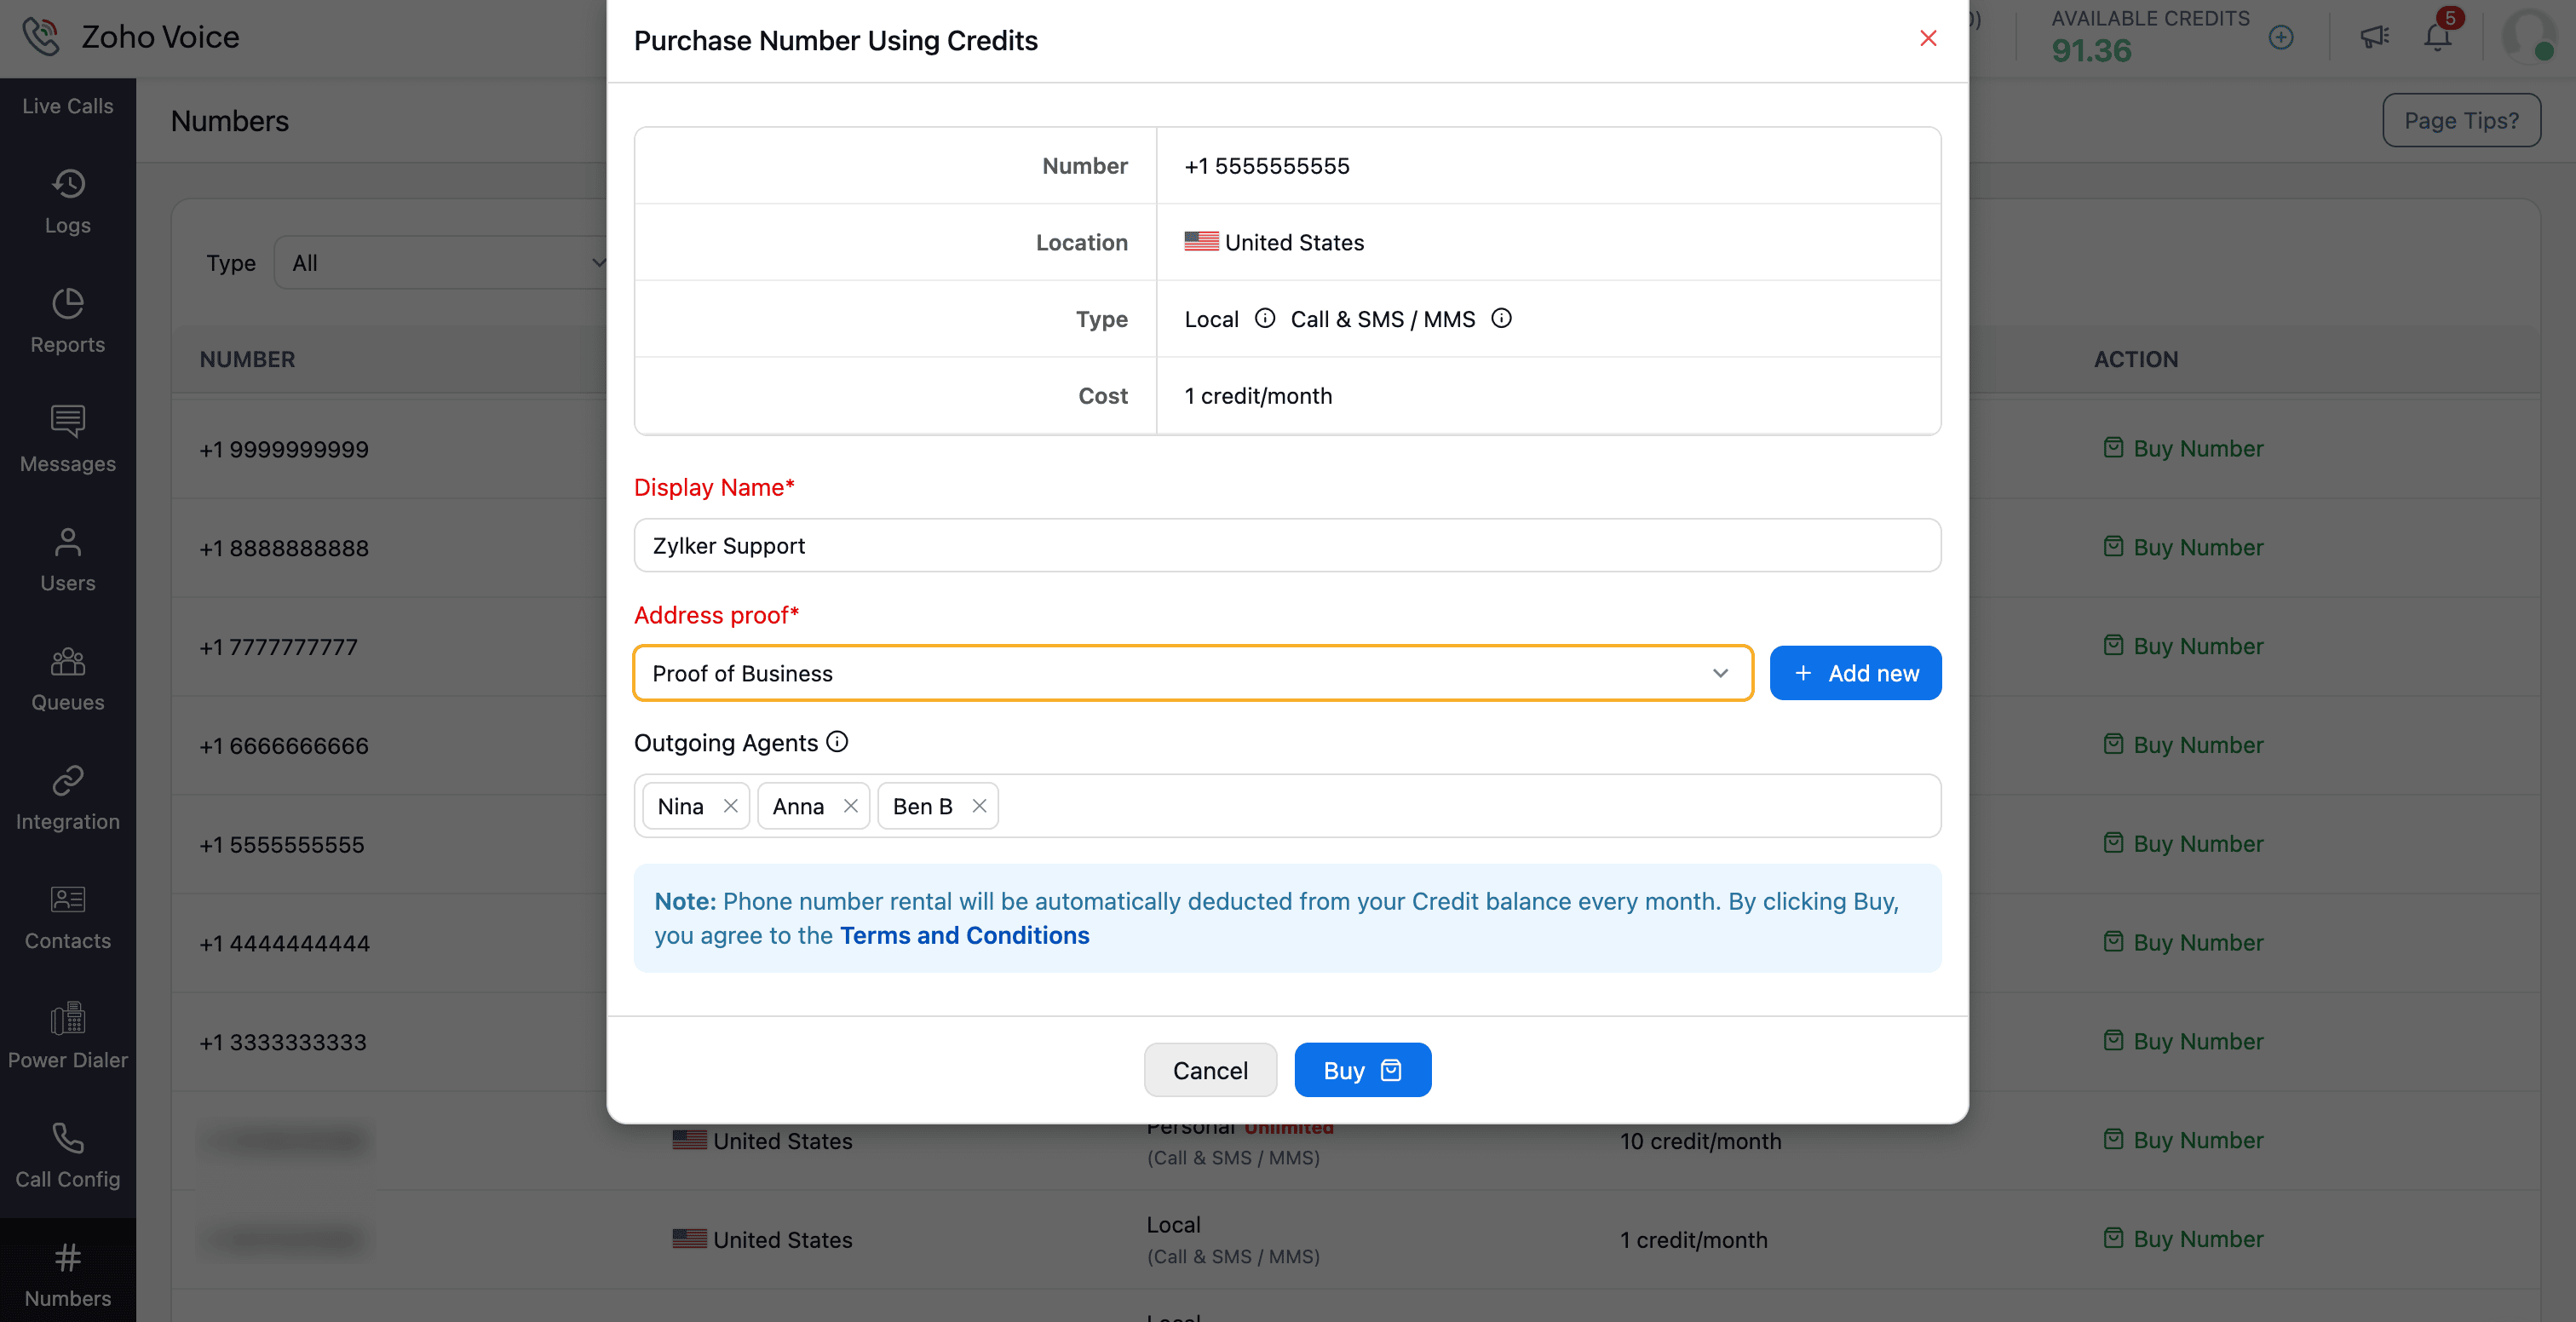
Click Buy and finalize the payment using credits.
Note
Phone number rental will be automatically deducted from your Credit balance every month. By clicking Buy, you agree to the Terms and Conditions
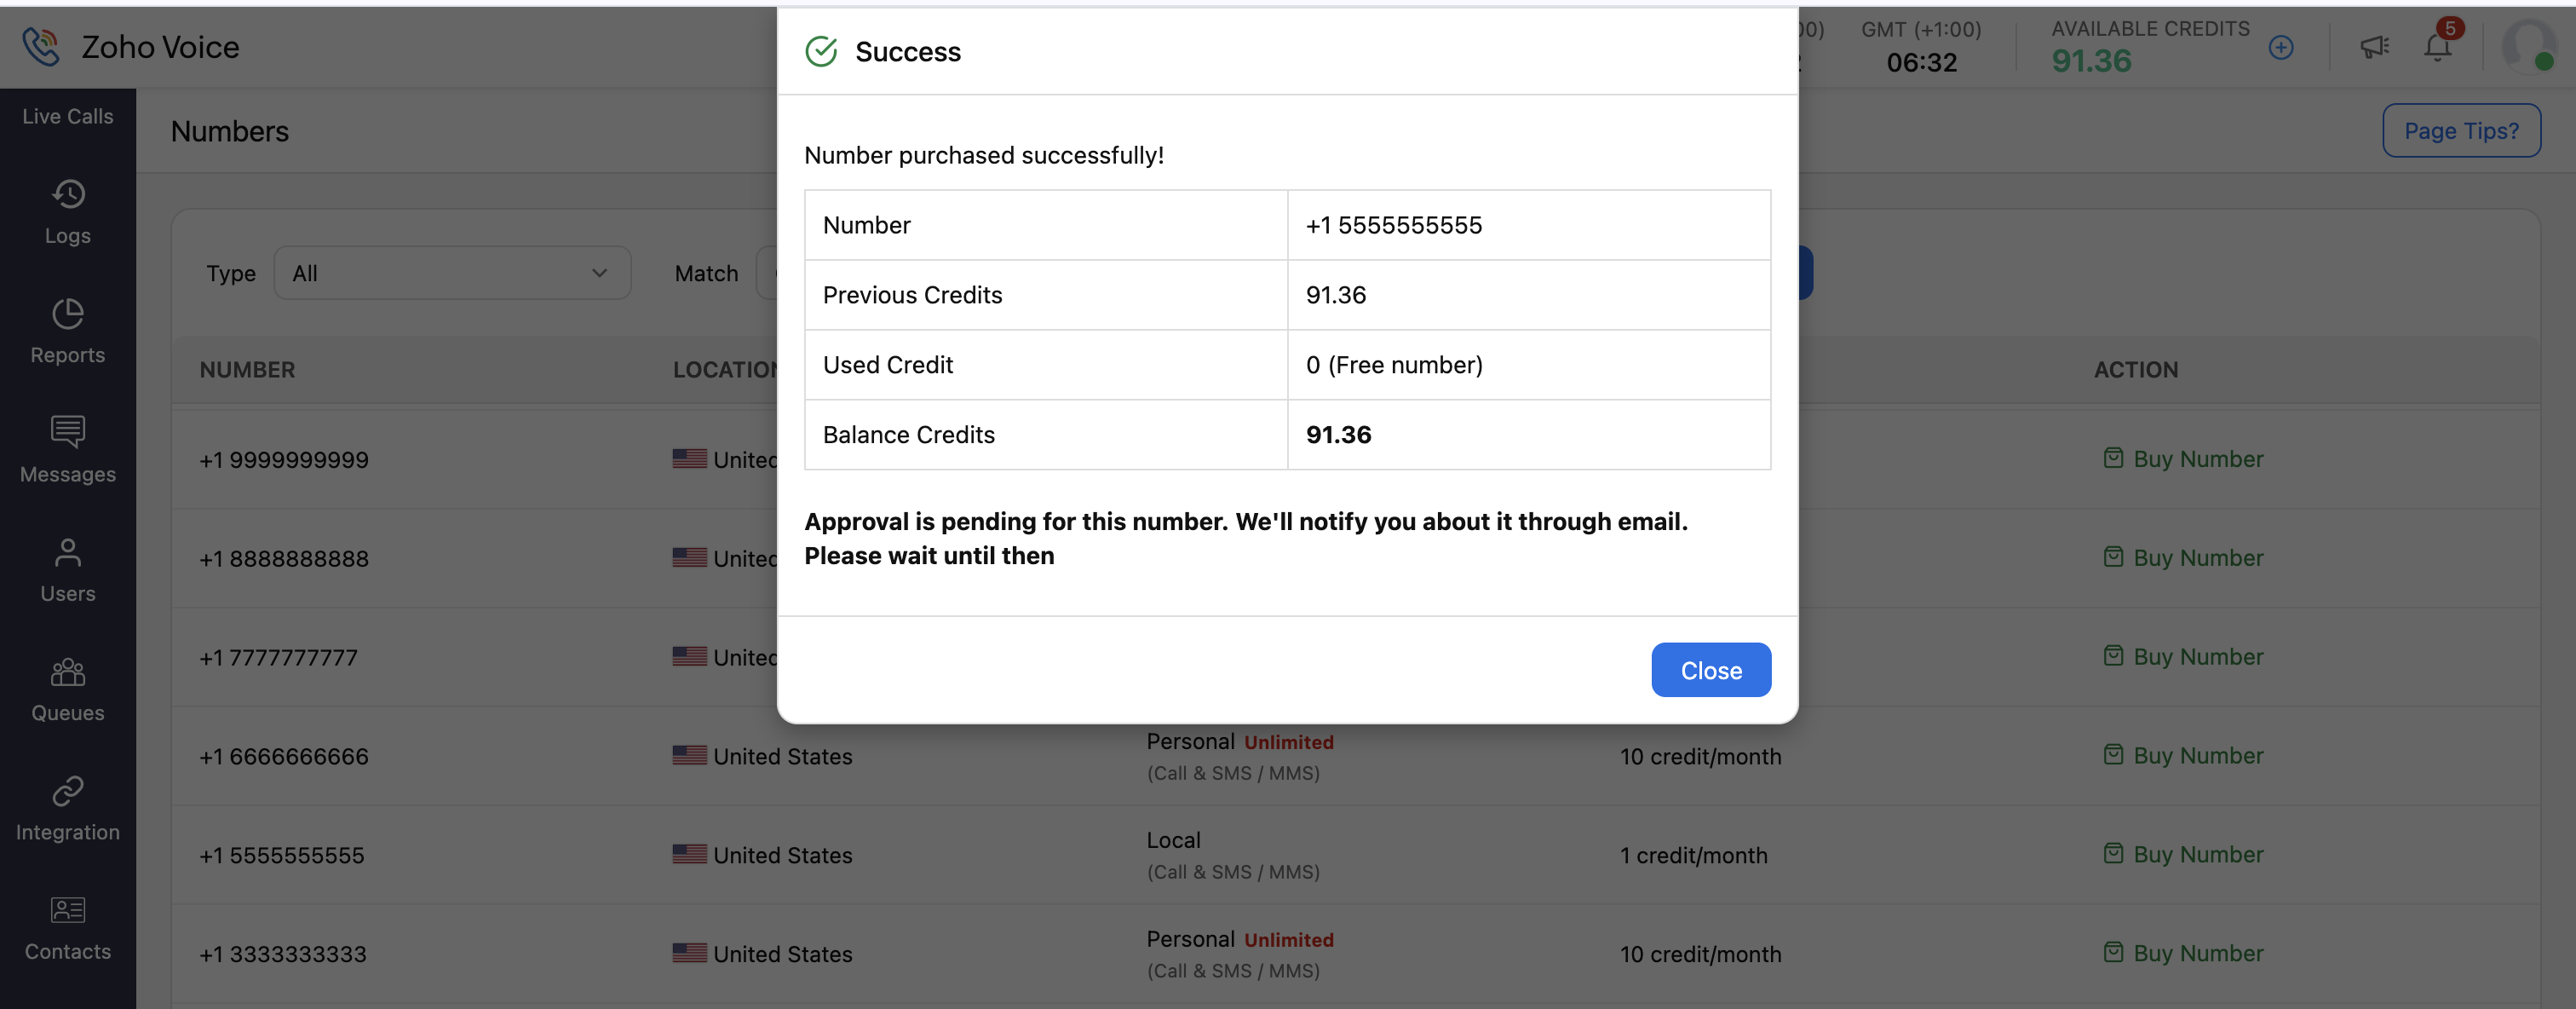


Zoho Voice support will verify your submission and approve the number upon successful completion of the number purchase.
Documents required for number purchase
To complete your number purchase, you'll need to provide any of the following documents:
Business Registration Certificate - A copy of your valid Business Registration Certificate is required.
Local address proof - You might need to submit proof of address for the region where you're purchasing the number. Acceptable documents include an internet bill, water bill, or electricity bill.
Valid business website - Your business website details must match the submitted documents.
Note
In some regions, additional documents may be required, such as a government-issued ID or a passport copy. Requirements may vary, so please check with our support (support@zohovoice.com), before proceeding with number purchase.
Activate SMS & MMS
Zoho Voice provides SMS and MMS services that are supported for local numbers in the US and Canada.
On the Call Config page, you can review information about all the phone numbers you've acquired. If SMS/MMS is not activated for a specific number, the SMS/MMS column will show Not Enabled. If the SMS/MMS column indicates Not Available, it means that SMS cannot be enabled for that particular number.

To create a new request to enable SMS/MMS for a number:
Go to the Call Config module.
In the Active tab, do one of the following:
Click the Enable SMS/MMS button at the top-right corner (or) Hover over the number you want to enable SMS/MMS for and click the Enable SMS/MMS icon.
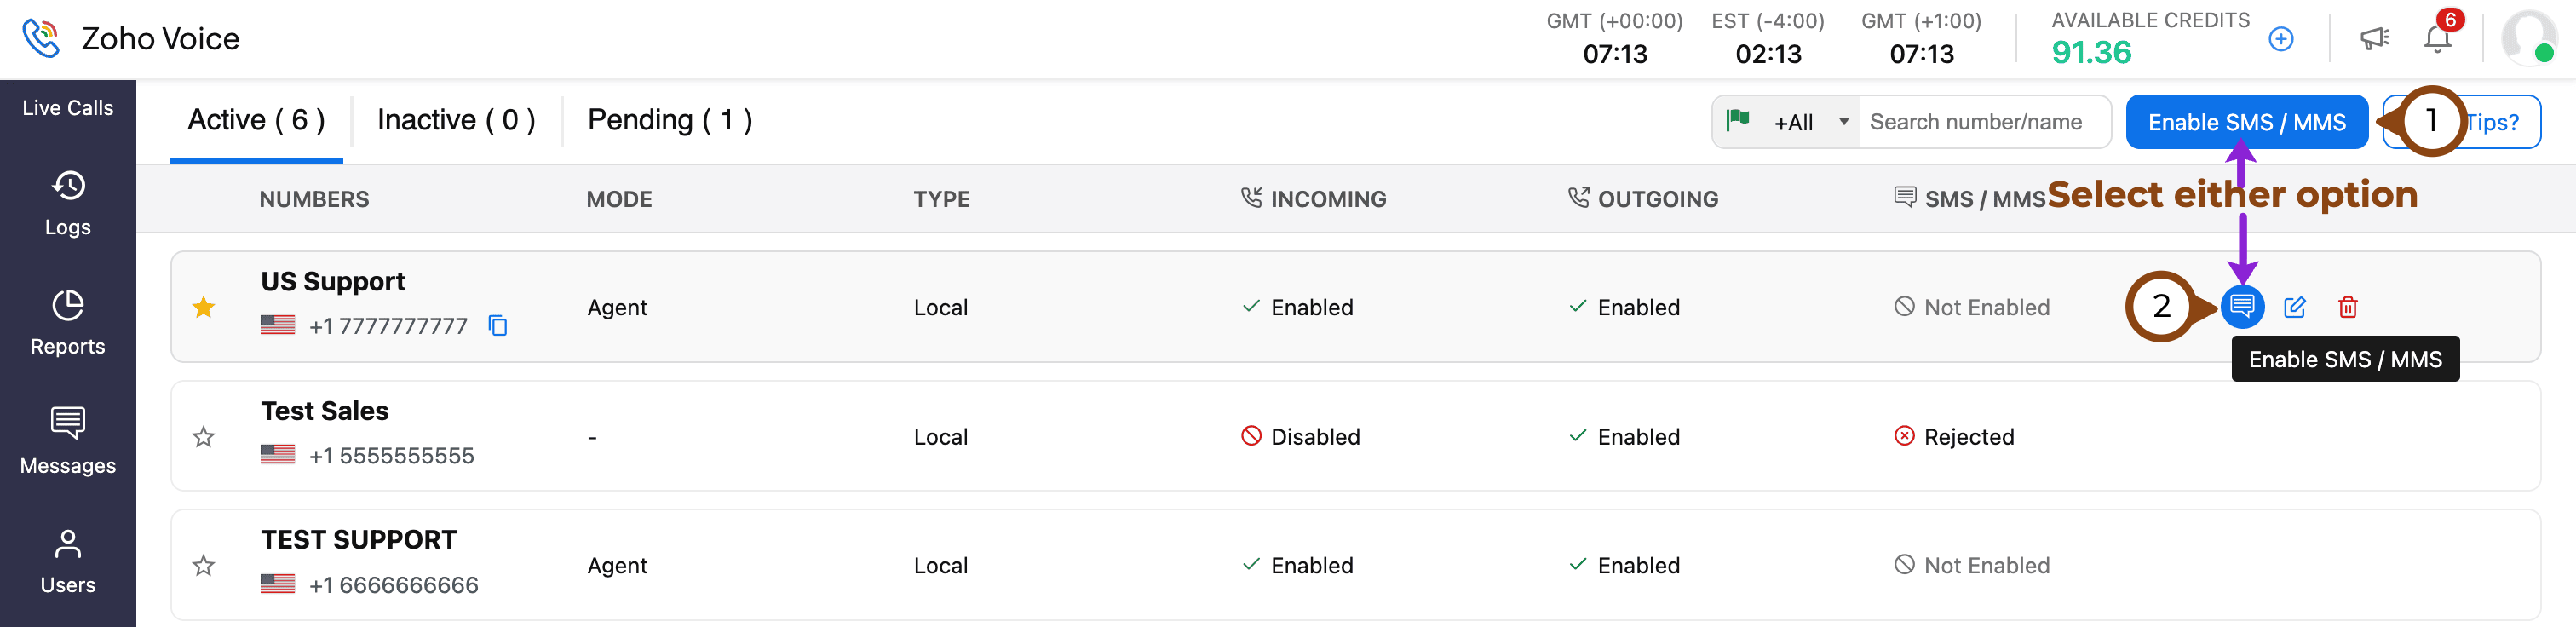

Review the number details, add comments, and click Submit..


Once the request has been raised, the status (SMS/MMS column) will be marked as Requested.
Our team will review the request, verify the details, and will start the activation process. During this process, the status will be changed to In Progress.
After SMS/MMS is successfully enabled, we’ll notify you, and the status will be updated to Enabled.
Valid Local Address Proof Includes (any one):
Internet Bill
Water Bill
Electricity Bill
Valid Government issued ID Includes (any one):
Passport
Driving License
Note
In some cases, government ID proof might be needed. The Business Registration Proof is mandatory.
Important Note
To use SMS/MMS services in the US and Canada, you must complete the 10DLC registration process(refer to this document). This is a regulatory requirement and is essential for successfully enabling and using SMS/MMS features in these regions.
Once your Zoho Voice account setup is completed, proceed to install the extension from the Zoho CRM Marketplace.