Create IVR Profile
In Zoho Voice, you can set up an IVR (Interactive Voice Response) profile for your number to automate call handling and route callers to the right team or department based on their input. With IVR, you can greet your customers with custom welcome messages, provide menu options through voice prompts or keypad selections, and ensure every caller reaches the right destination without the need for manual call handling.
To configure IVR for incoming calls:
Go to the Call Config module from the left sidebar menu.
Under the Active tab, hover over the number you want to configure and click the Edit Config icon.

Navigate to the Mode field and select the IVR option.
You can either create new IVR profile from scratch or clone from existing IVR profile to reuse its settings.
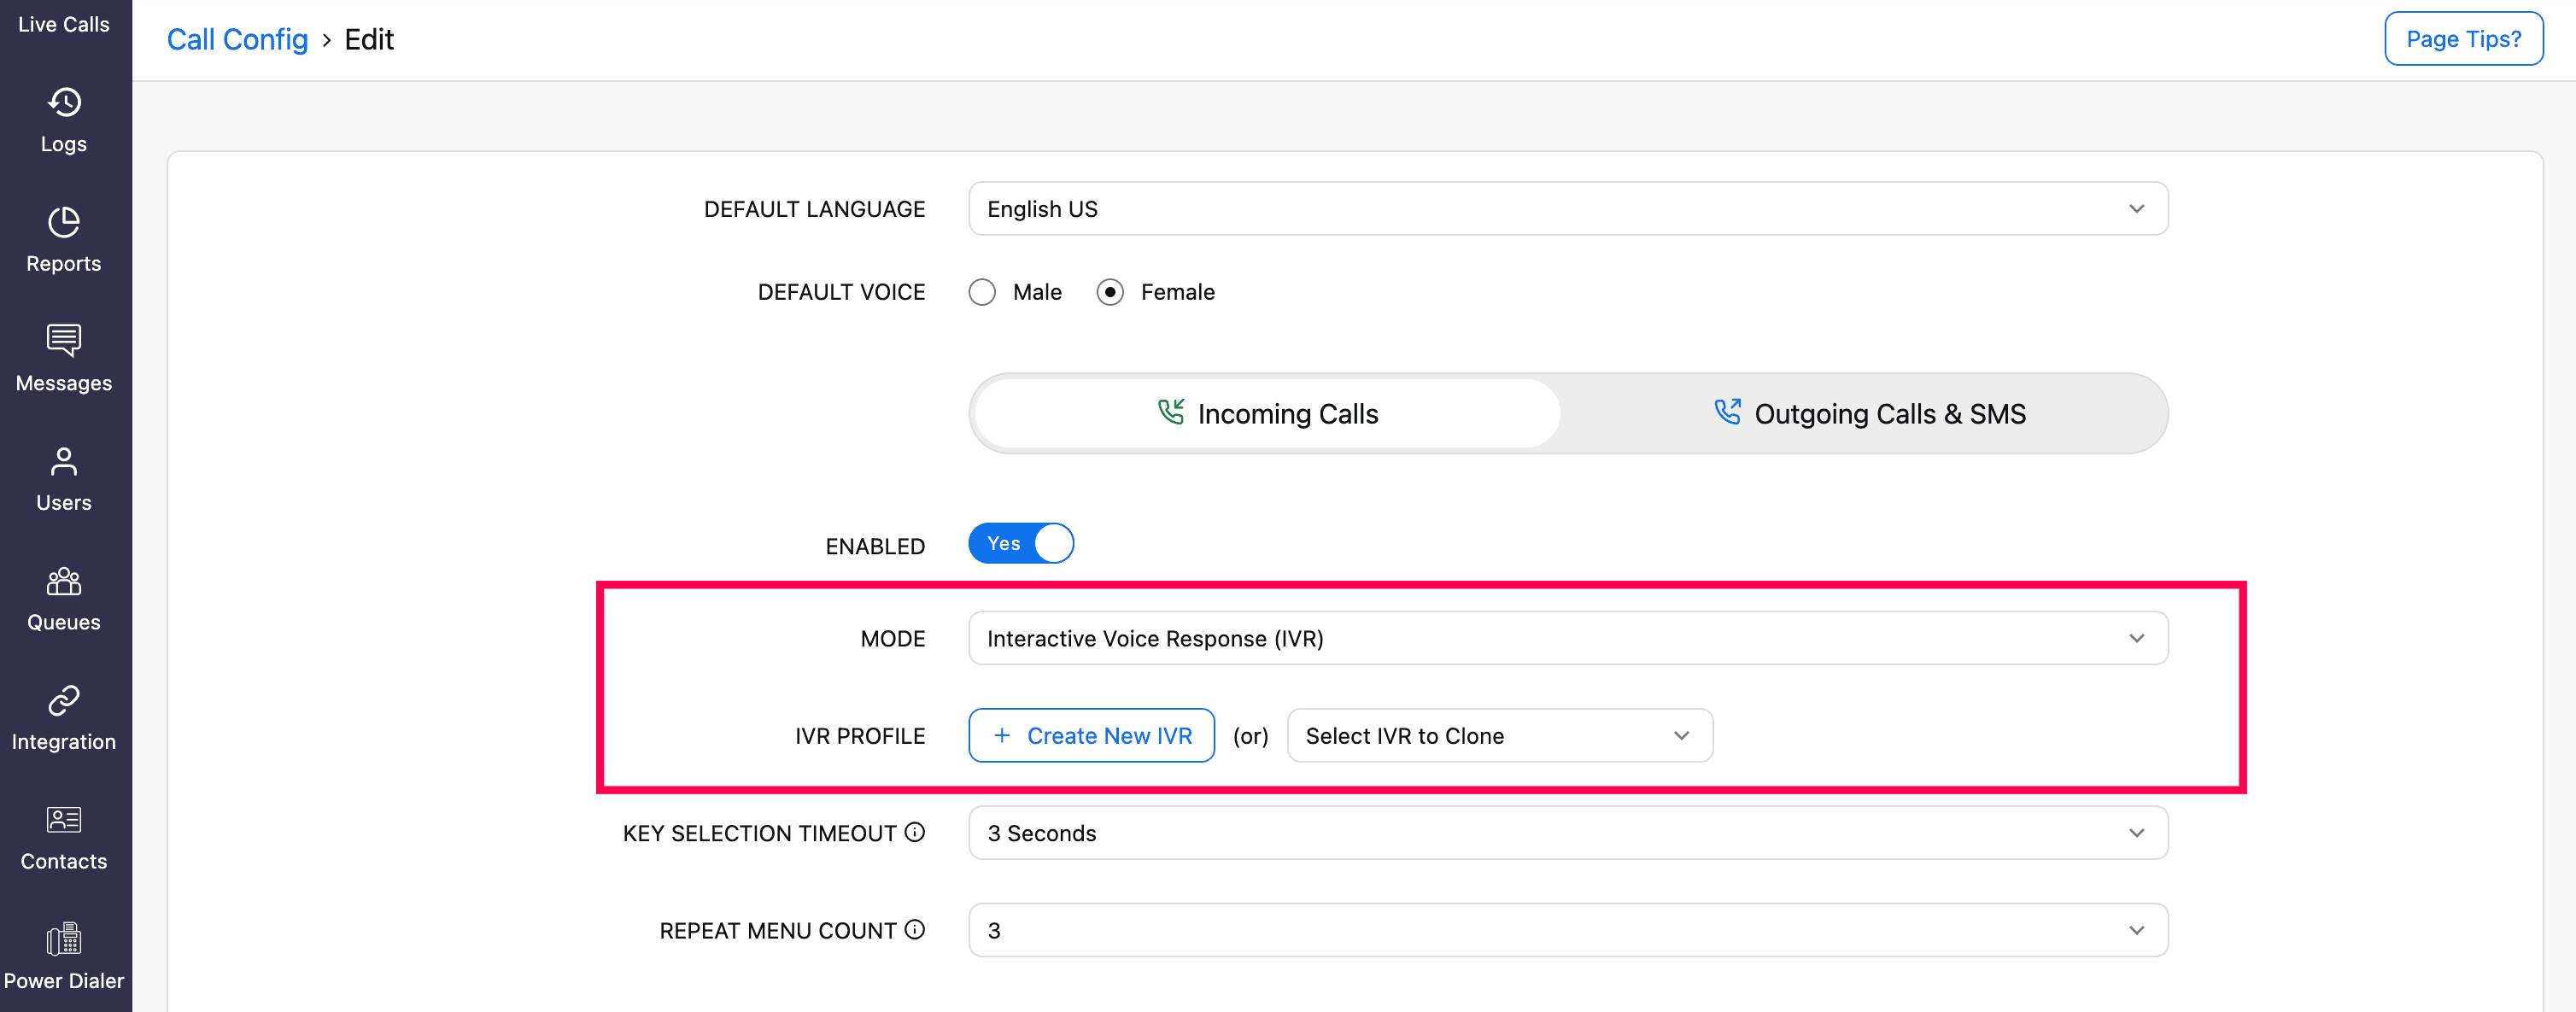


Steps to create a new IVR
Click the Create New IVR. You will be navigated to the IVR Menu Config page.
Enter the name for the IVR config.
Click the Add icon to begin adding the required IVR configuration.
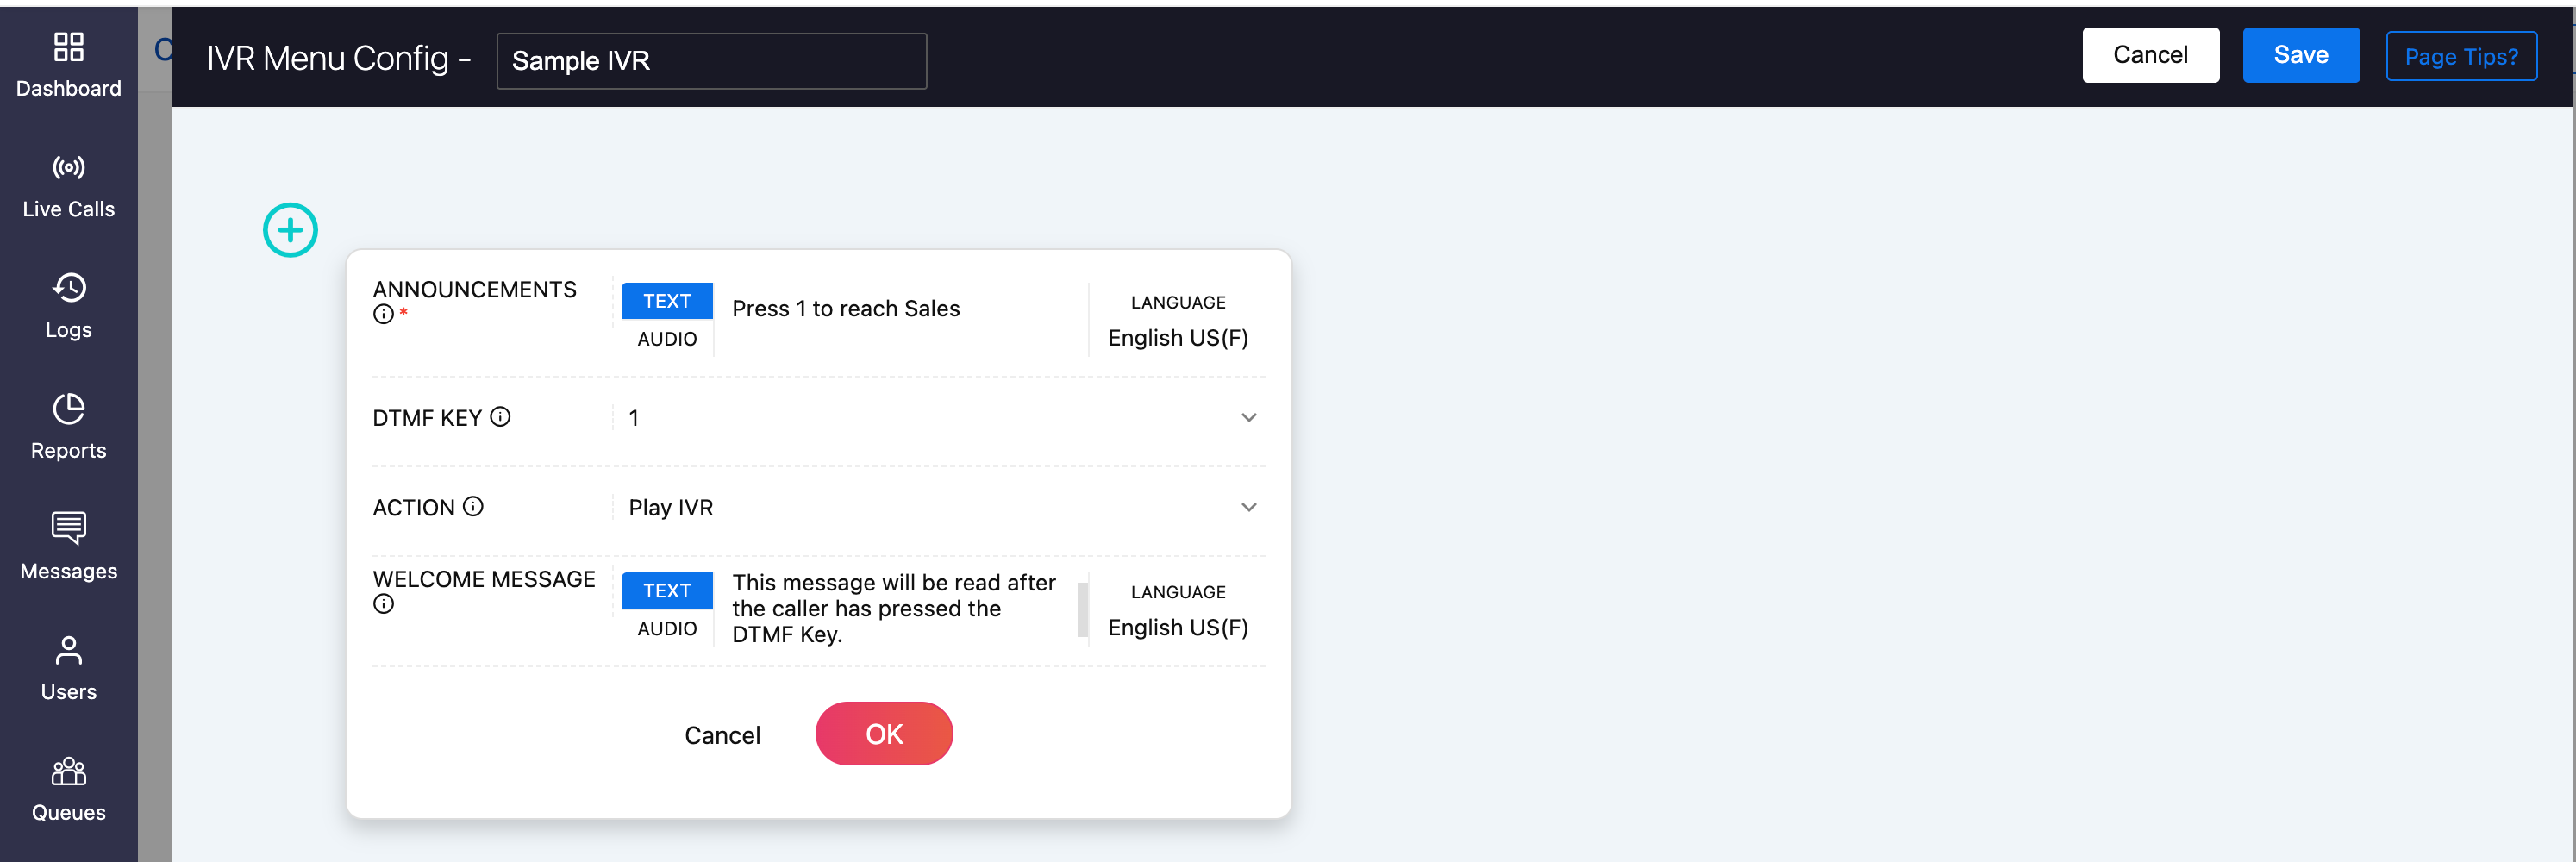

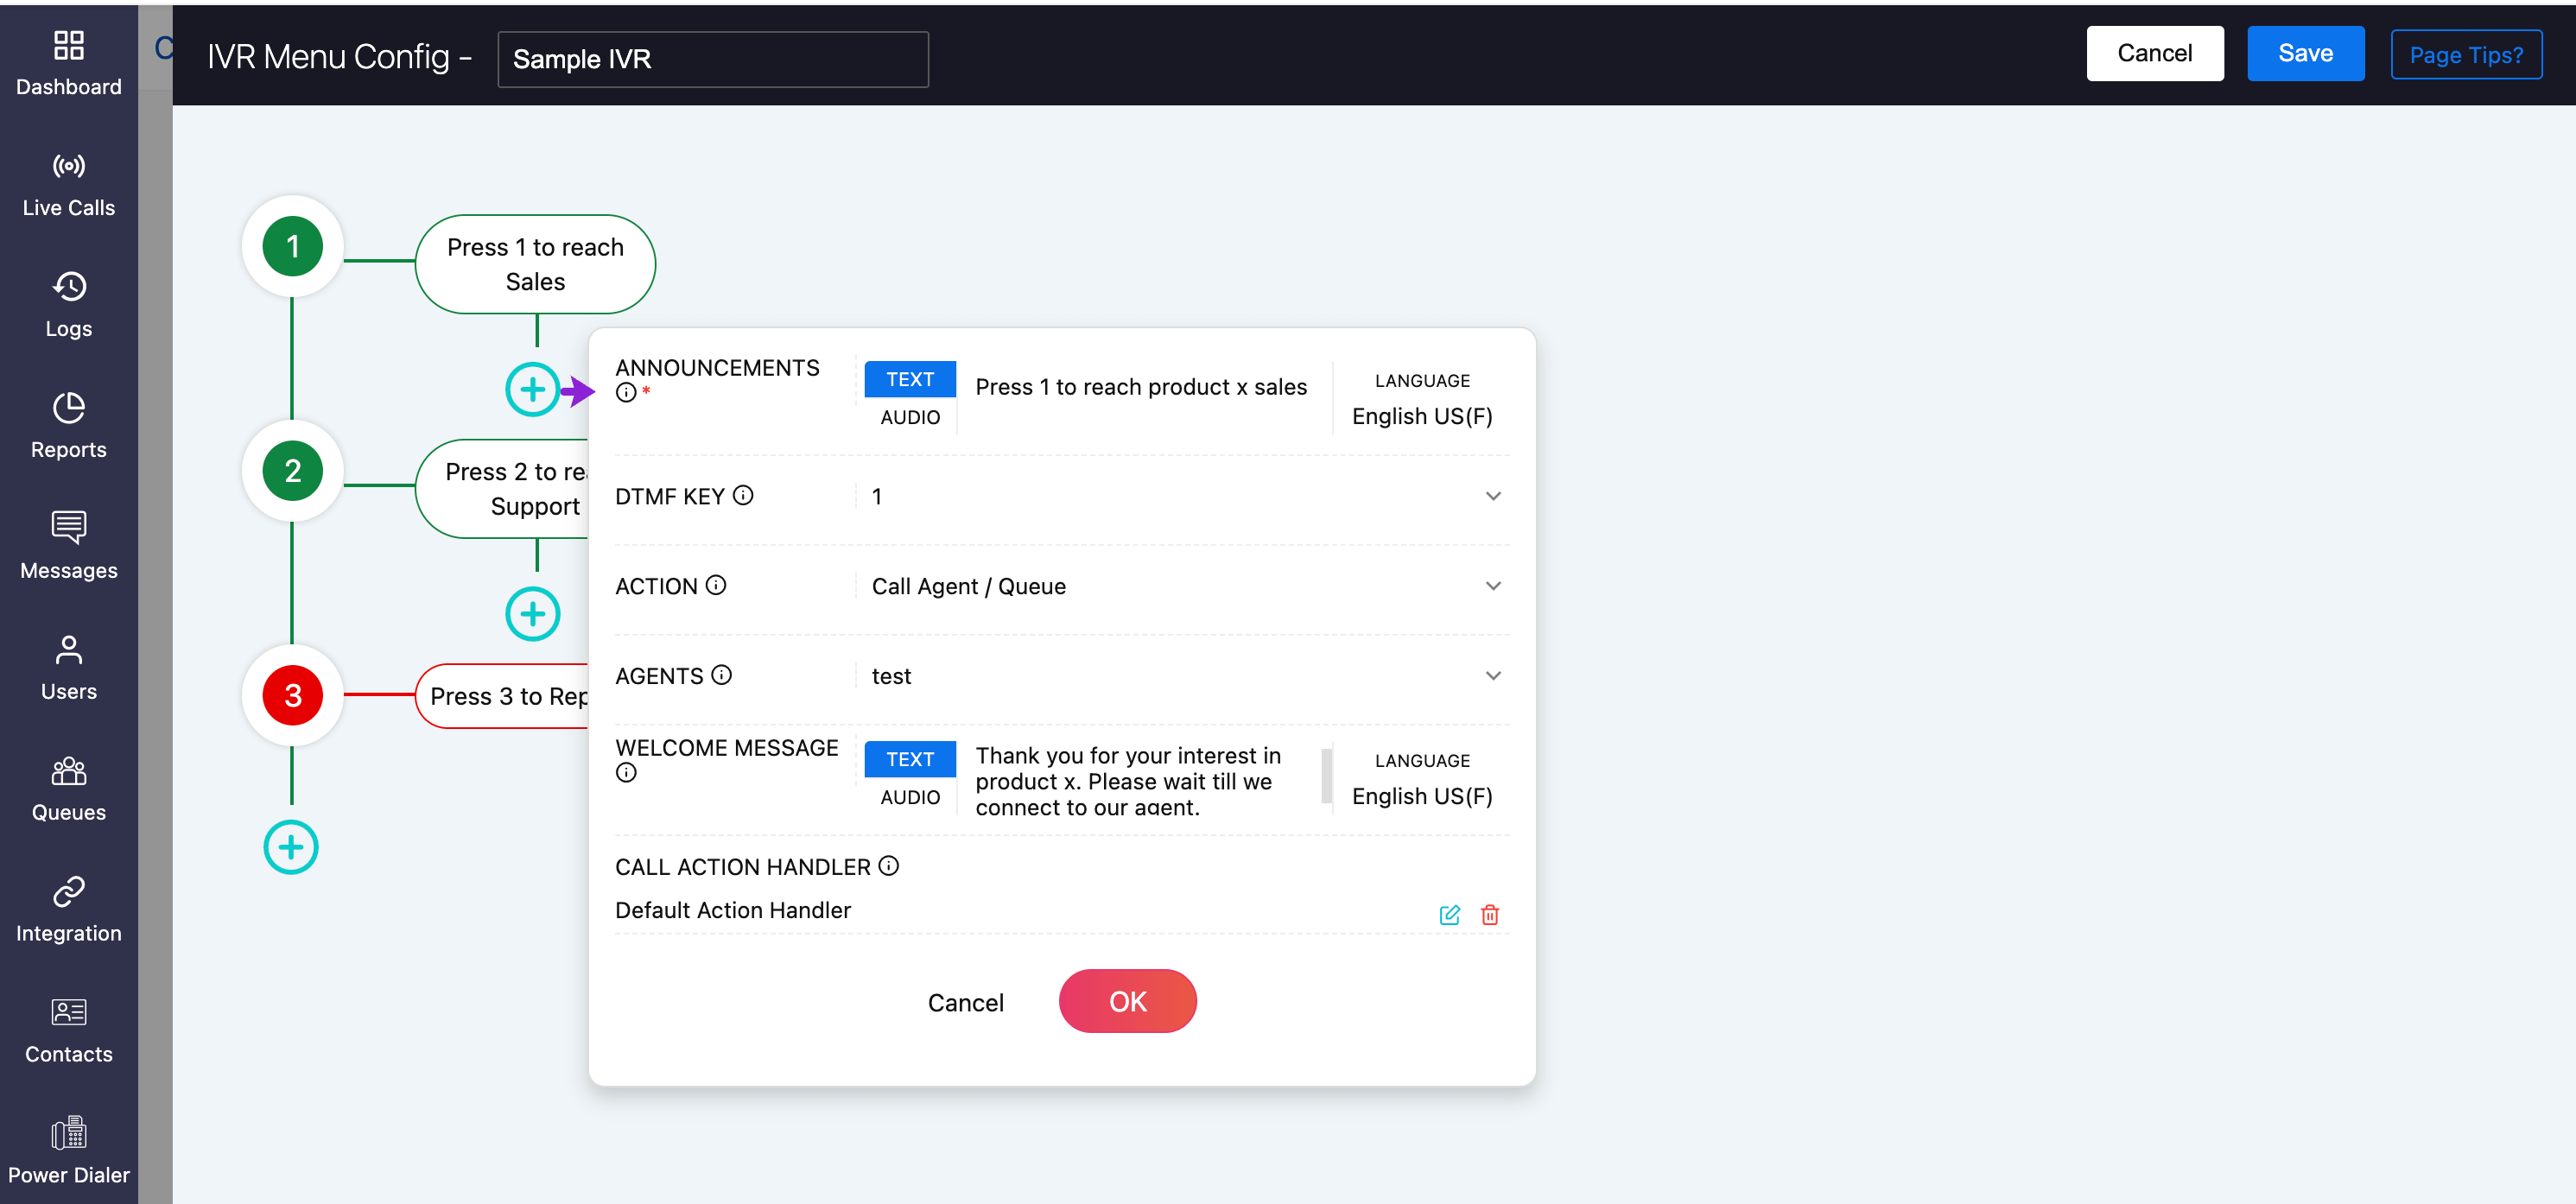
At the level 1, you can configure:
Announcements: This will the played right after the caller has entered the IVR. You can choose either Text or Audio:
Text: Enter your message in the selected language.
Example: "Press 1 to reach Sales."Audio: Select an audio file that includes all menus in Level 1. This same audio will be used across all menus in the Level 1, so there’s no need to assign separate audio files for each key. Example: Use a single audio file that says: “Press 1 for Sales, Press 2 for Support, Press 3 to repeat this menu.”
Note
You can pre-upload the IVR audio file in Settings → Audio files → IVR Audio. Learn more about uploading IVR audio files
DTMF Key: Assign the key that the caller needs to press for each option (e.g., 1, 2, 3, etc.). For the menu 1, the first key will be 1.
Action: Choose what happens when the caller presses the corresponding key. Available actions include:
Play IVR: Will take you to next IVR level, making the configuration a multi-level IVR. You can optionally add a welcome message for this next level.
Note
Multi-level IVR is available in all of the Enterprise Telephony plans and not supported in Business Phone plans.
Call agent/queue: Select the agent/queue for whom the call must be routed. You can add a welcome message (if needed) and set a Call Action Handler (used if the agent is busy or offline). Learn more about call action handler.
Forward to: Specify the number to which the call is to be transferred.
External SPI URI: Select the required External SIP URI profile from the dropdown to route calls to an external AI voice agent. Before using this option, create an External SIP URI profile under Settings → External SIP URI. Learn more about External SIP URI.
Call an extension: The caller must enter the extension number to reach a specific agent.
Note
Ensure the caller knows the extension number in advance.
Repeat current menu: This will repeat the current menu to the caller.
Note
Go to previous and Go to main menu configuration cannot be used in level 1. They can be used in multi-level IVR.

Once your required configuration is set for menu/key 1, click OK.
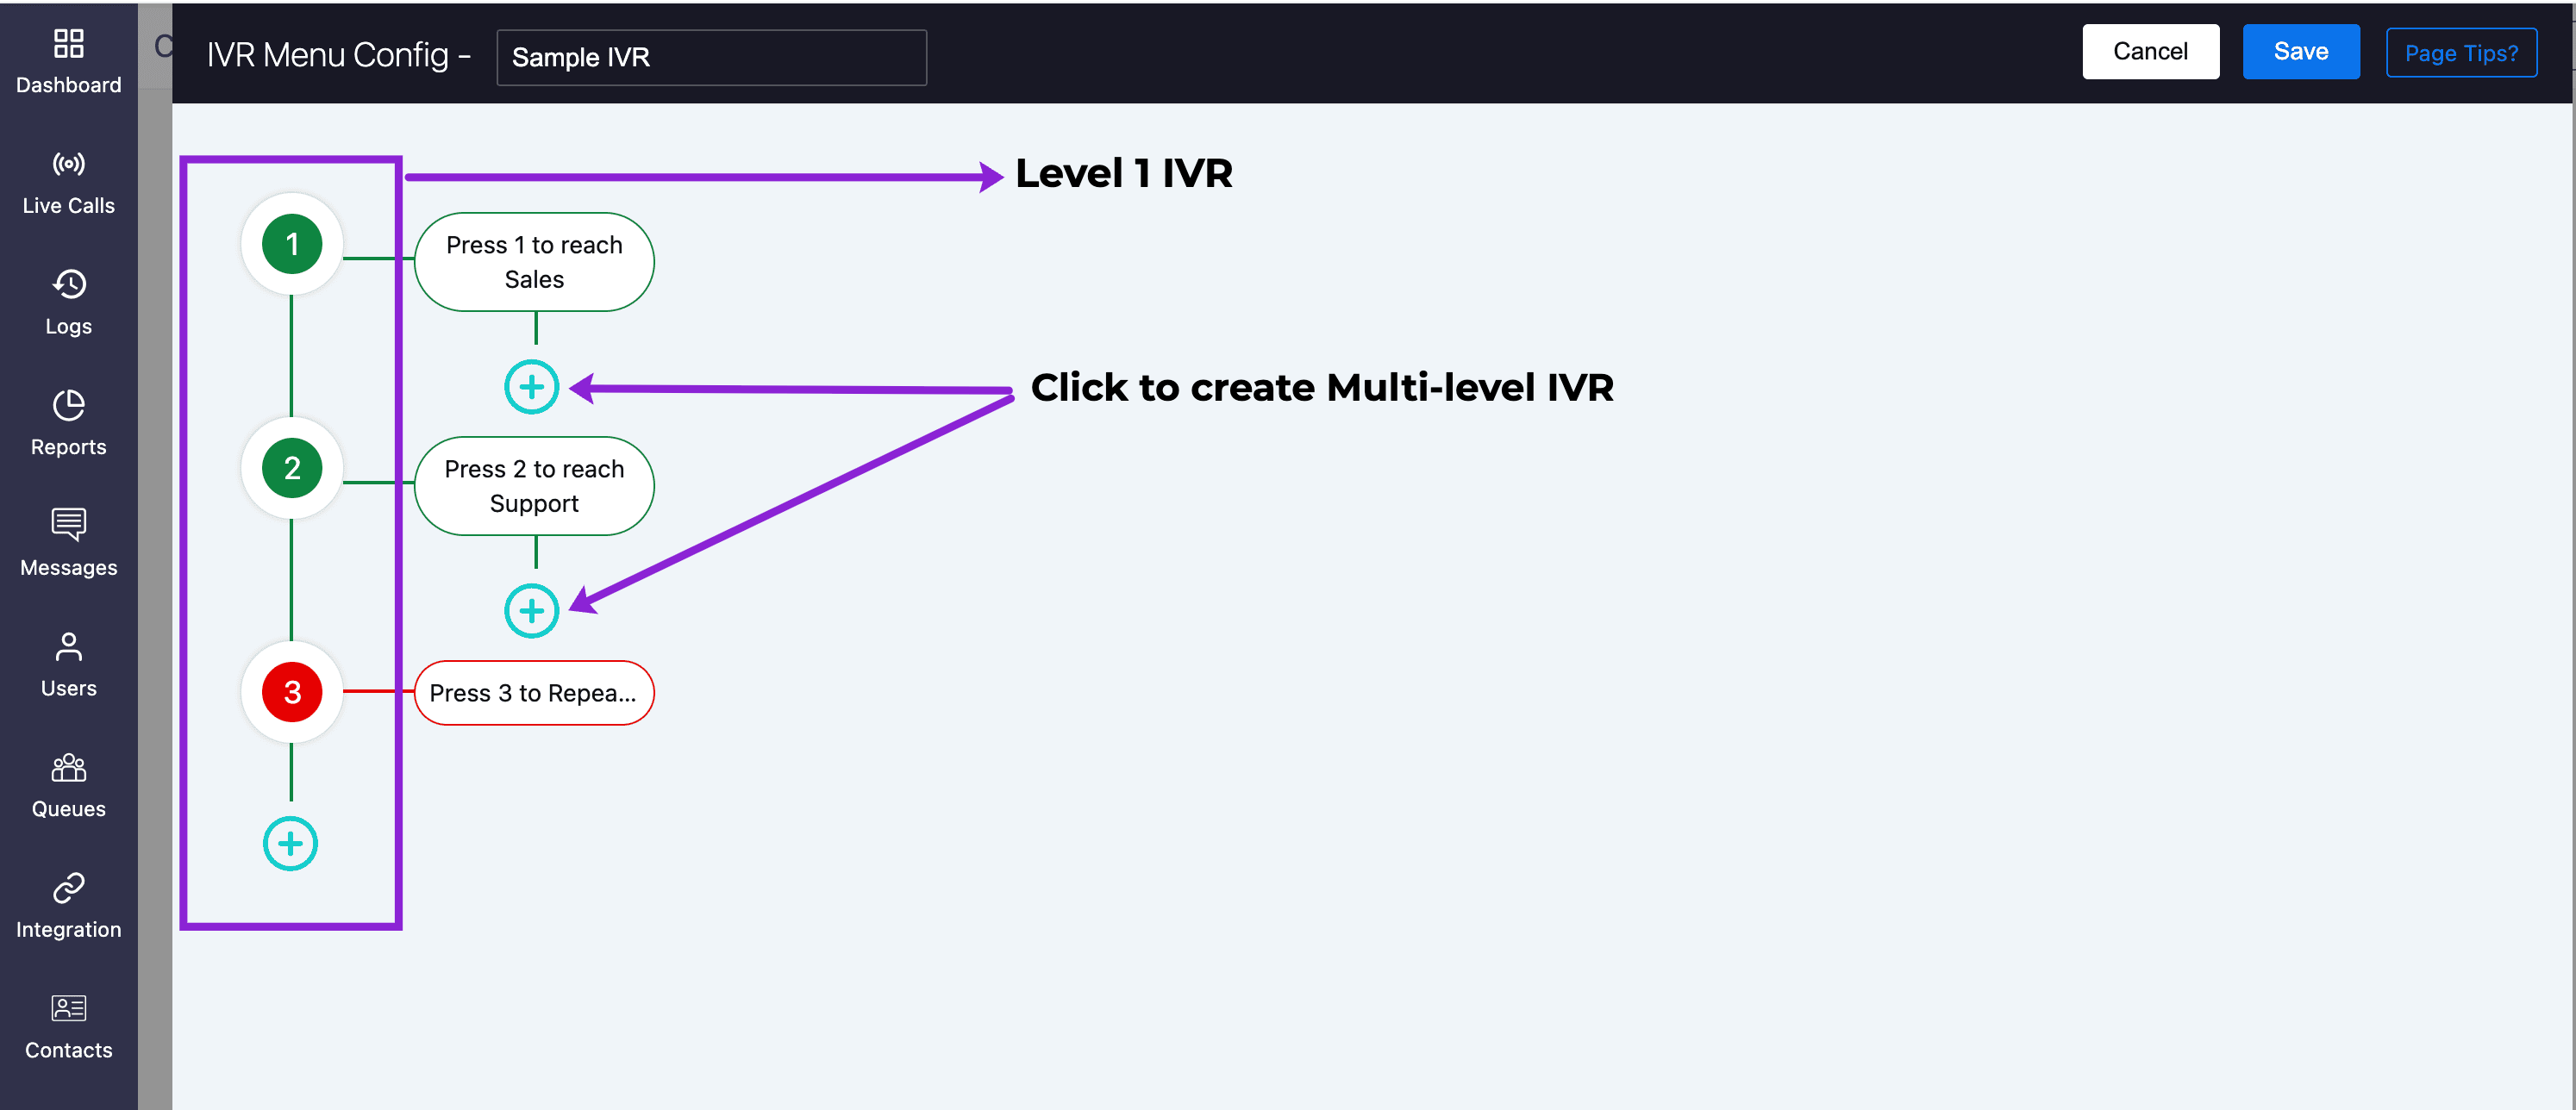
Repeat the above steps to add other menus/keys under Level 1(e.g., Press 2 for Support, Press 3 to repeat menu, etc.).
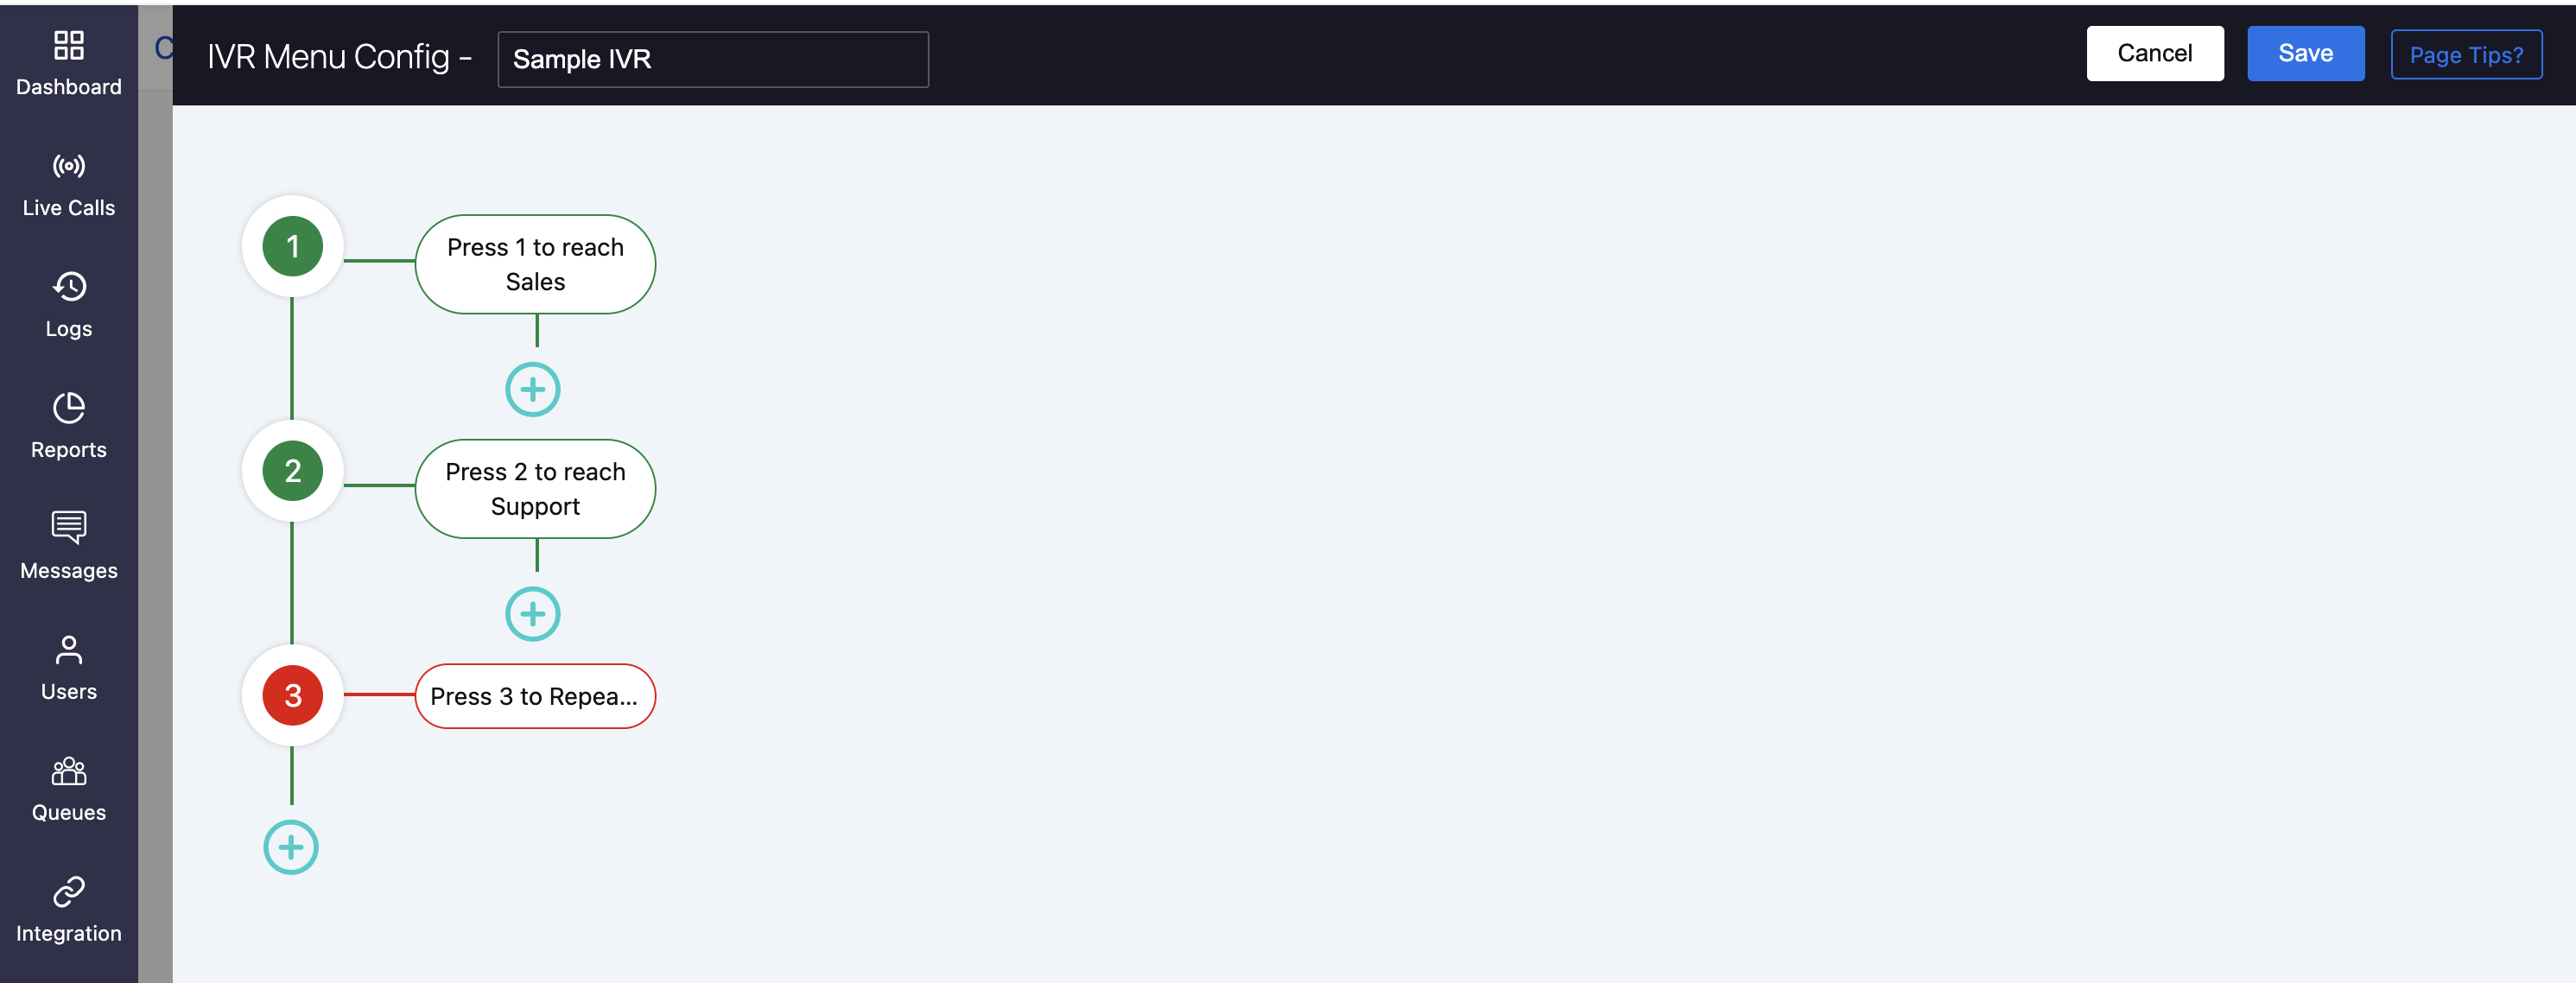
For creating a multi-level IVR, follow the same process for subsequent levels.
You can edit/delete the configured menus by hovering over the menu and clicking on the Settings or Delete icons, respectively.

Once all the required menus(keys) are configured in Level 1, and all required levels are set for a multi-level IVR, click Save.

In the Incoming Calls Configuration page, specify the:
Key Selection Timeout: Defines the duration within which a caller must press a key. If no key is pressed, the IVR menu will be repeated.
Repeat Menu Count: Specifies the number of times the IVR menu will be repeated if the caller does not press a valid key.
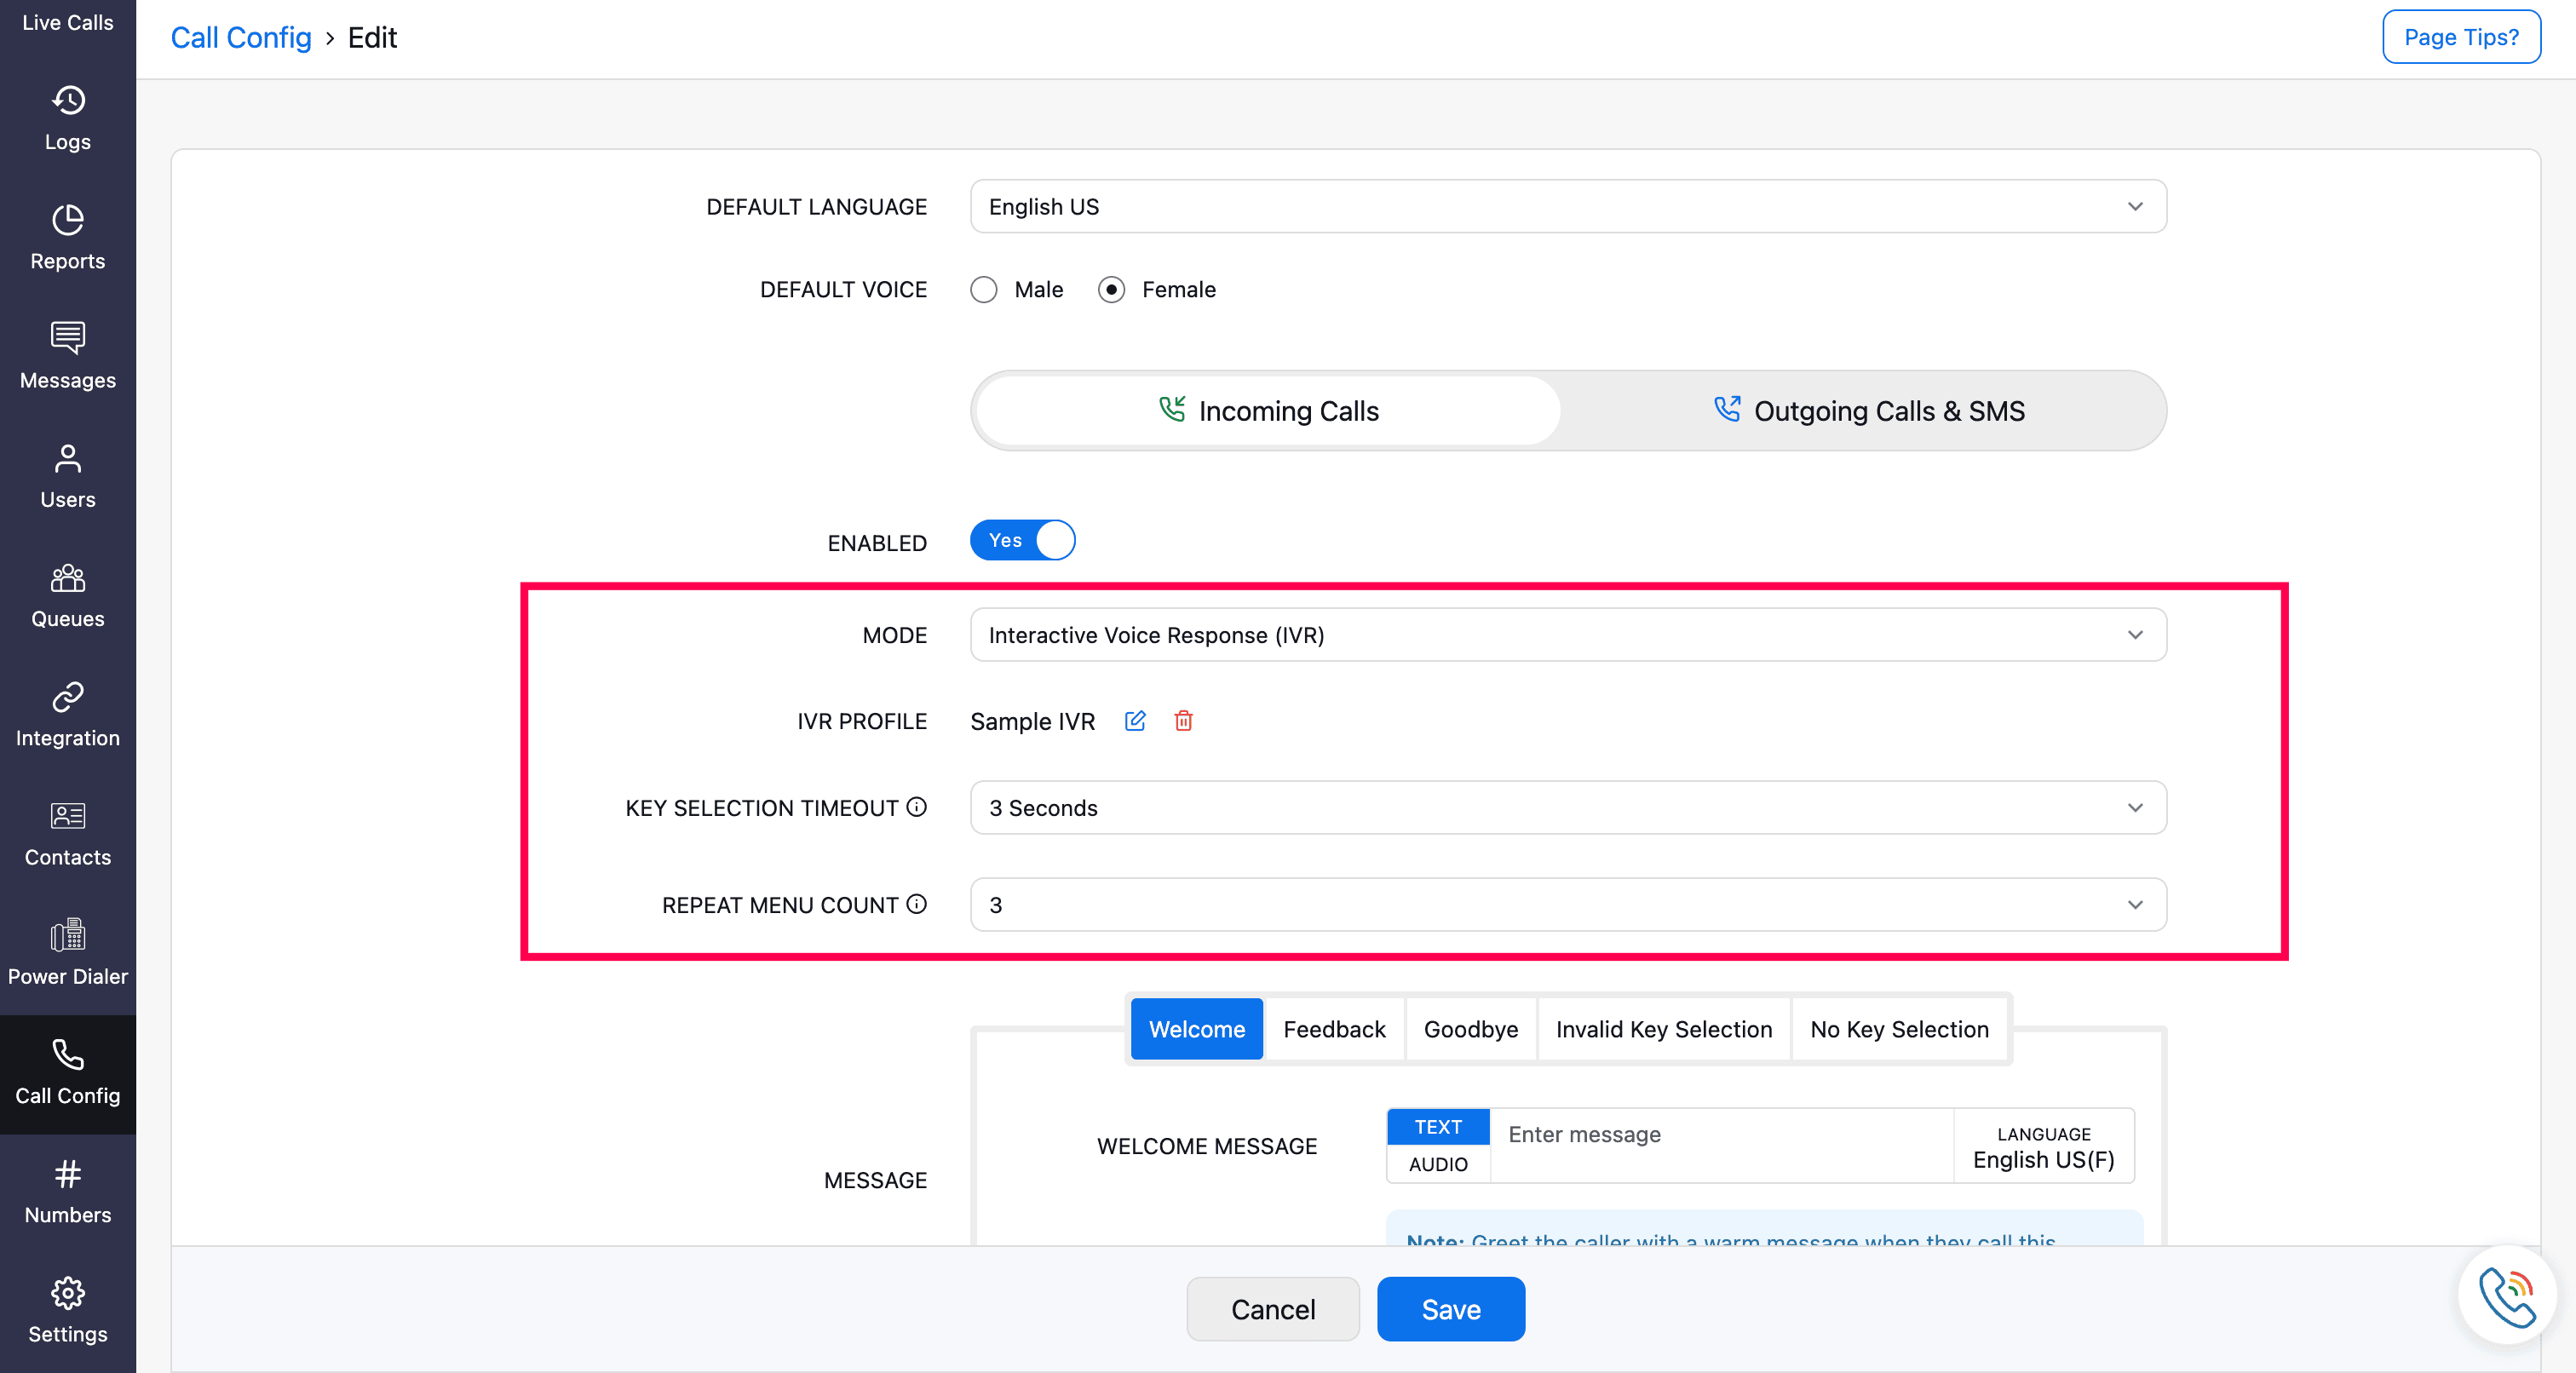
Once configuration is set, click Save to apply it for your number's incoming call configuration.


Steps to clone an IVR
Under the IVR Profile field, click Select IVR to Clone. The previously-saved IVR profiles will be listed.
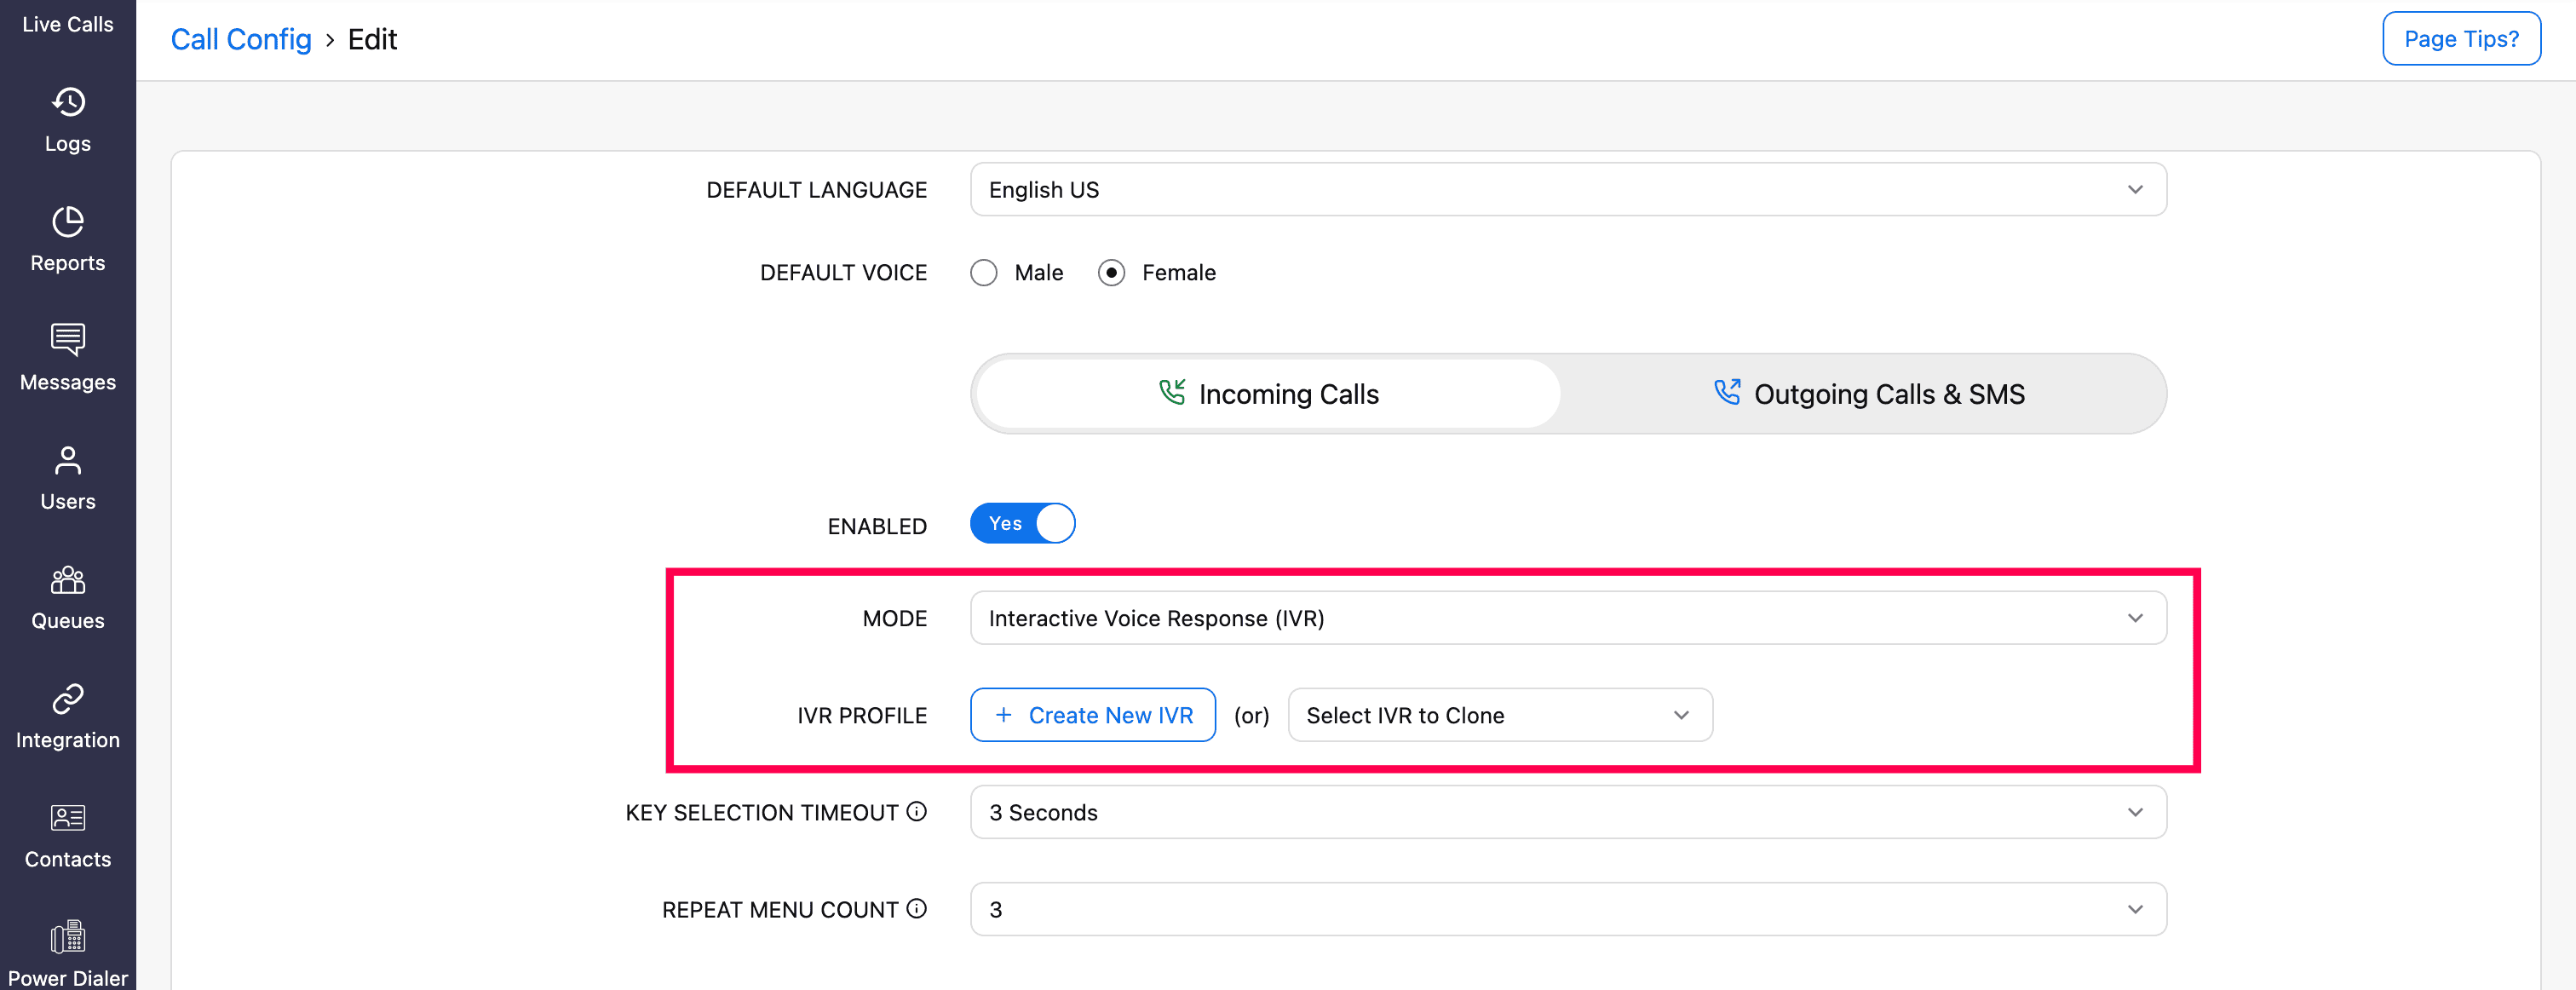
Select the required IVR profile to be cloned.

You will be navigated to the selected IVR profile's configuration. Make the required changes if needed and click Save.

