- HOME
- Automatically send personalized meal plans using spreadsheets
Automatically send personalized meal plans using spreadsheets
- Last Updated : August 16, 2025
- 620 Views
- 4 Min Read
Let's say you're a nutritionist looking to send a customized nutrition plan based on your clients' goals. Nutritionists often face challenges like disorganization and delays while coordinating multiple clients and manual errors in tailoring meal plans specific to each client. Spreadsheets can be a versatile and accessible tool to help overcome these challenges, as they can help organize client information in one place by using formulas for calculations, enabling easy customization through templates, and automating the process of sharing plans.
Overview
You use a meal planner, which is an organized tool designed to help you plan meals for your clients. It typically includes sections for weekly meal scheduling with breakfast, lunch, dinner, and snacks. There are often multiple sheets designed this way for every goal type. Using merge functions, you can design an email template, connect it to the meal planner's sheets, map fields that dynamically change based on goals and days of the week, and send plans to clients automatically.
Here's an overview of the steps involved in creating this template:
Step 1: Add your clients' information to a sheet.
Step 2: Create a weekly meal plan based on goal types in separate sheets.
Step 3: Design a merge template to send meal plans to clients on a daily basis.
Before we dive in, check out this link for a peek at the output, which will help you to follow the next set of instructions more easily.
Step 1: Create a sheet to store clients' information
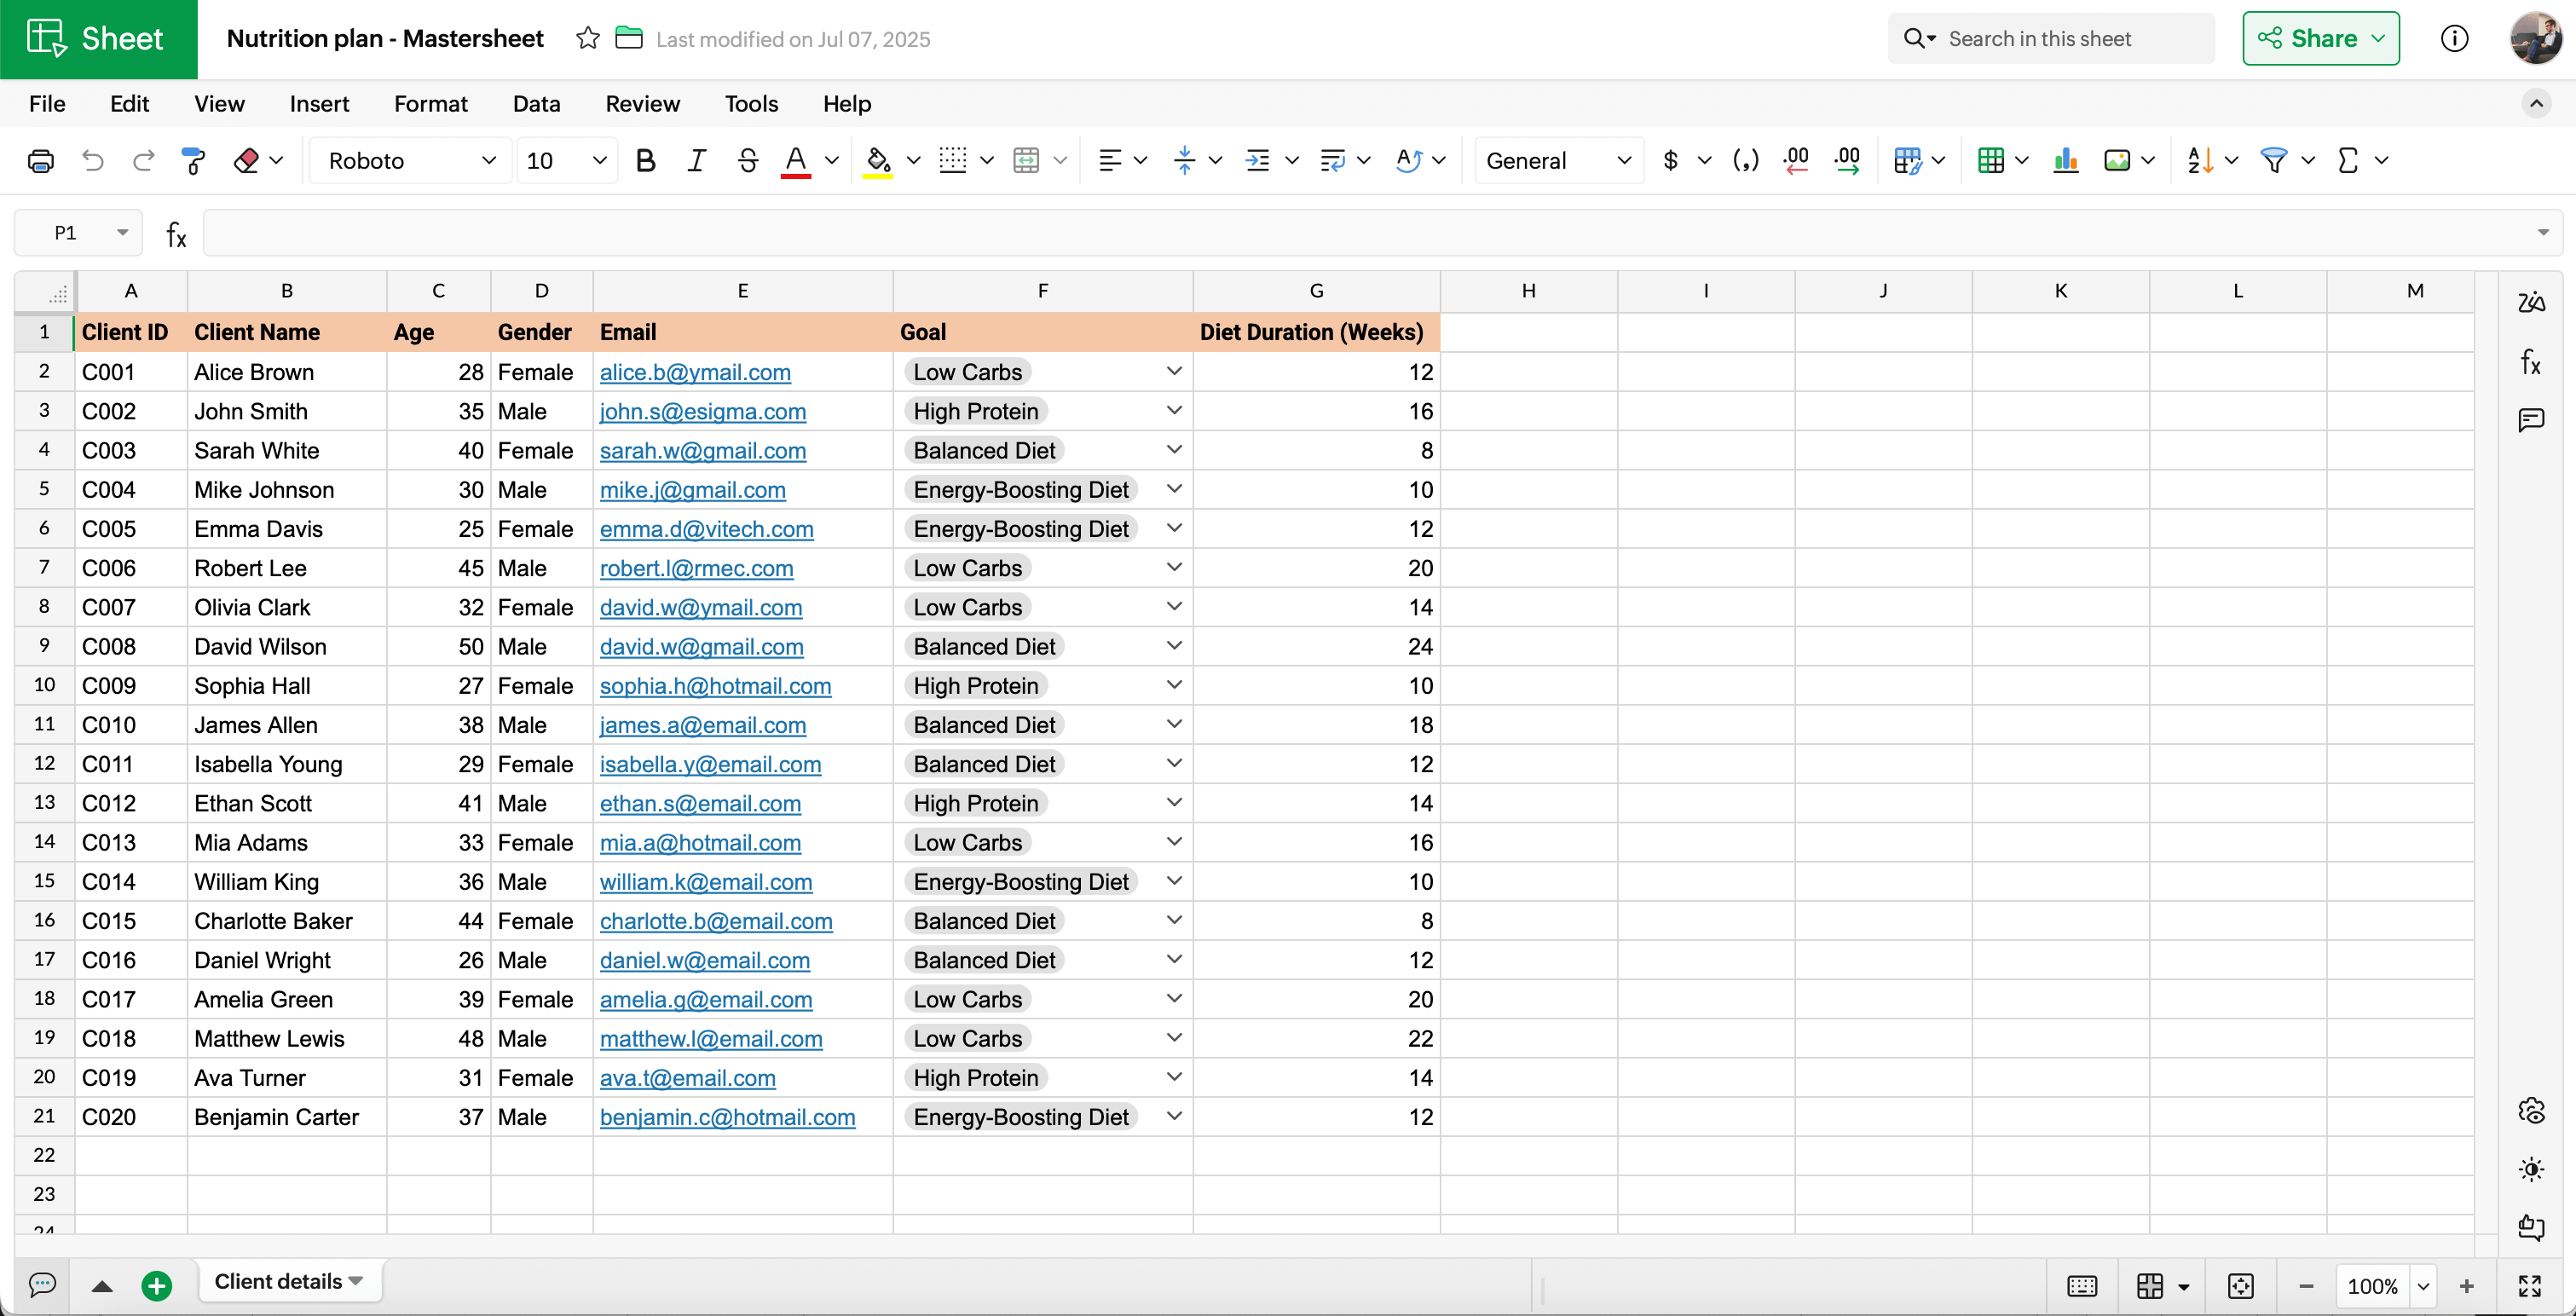
This is where the client information is stored.
Open a blank spreadsheet and name it Nutrition plan - Mastersheet. Add the following information manually or import it from other sources. Enter the following column headers:
- Client ID: A unique code assigned to each client for easy tracking
- Client name: The full name of the client receiving the meal plan
- Age: The client's age, which is important for tailoring nutritional recommendations
- Gender: The client's gender, which can influence dietary needs.
- Email address: The client's email address, to which the nutritionist will send meal plans.
- Goal type: The client's primary objective, such as weight loss, muscle gain, or another objective.
- Diet duration: The length of time for which the client plans to follow the meal plan.
Step 2: Create a weekly meal plan based on the goal type
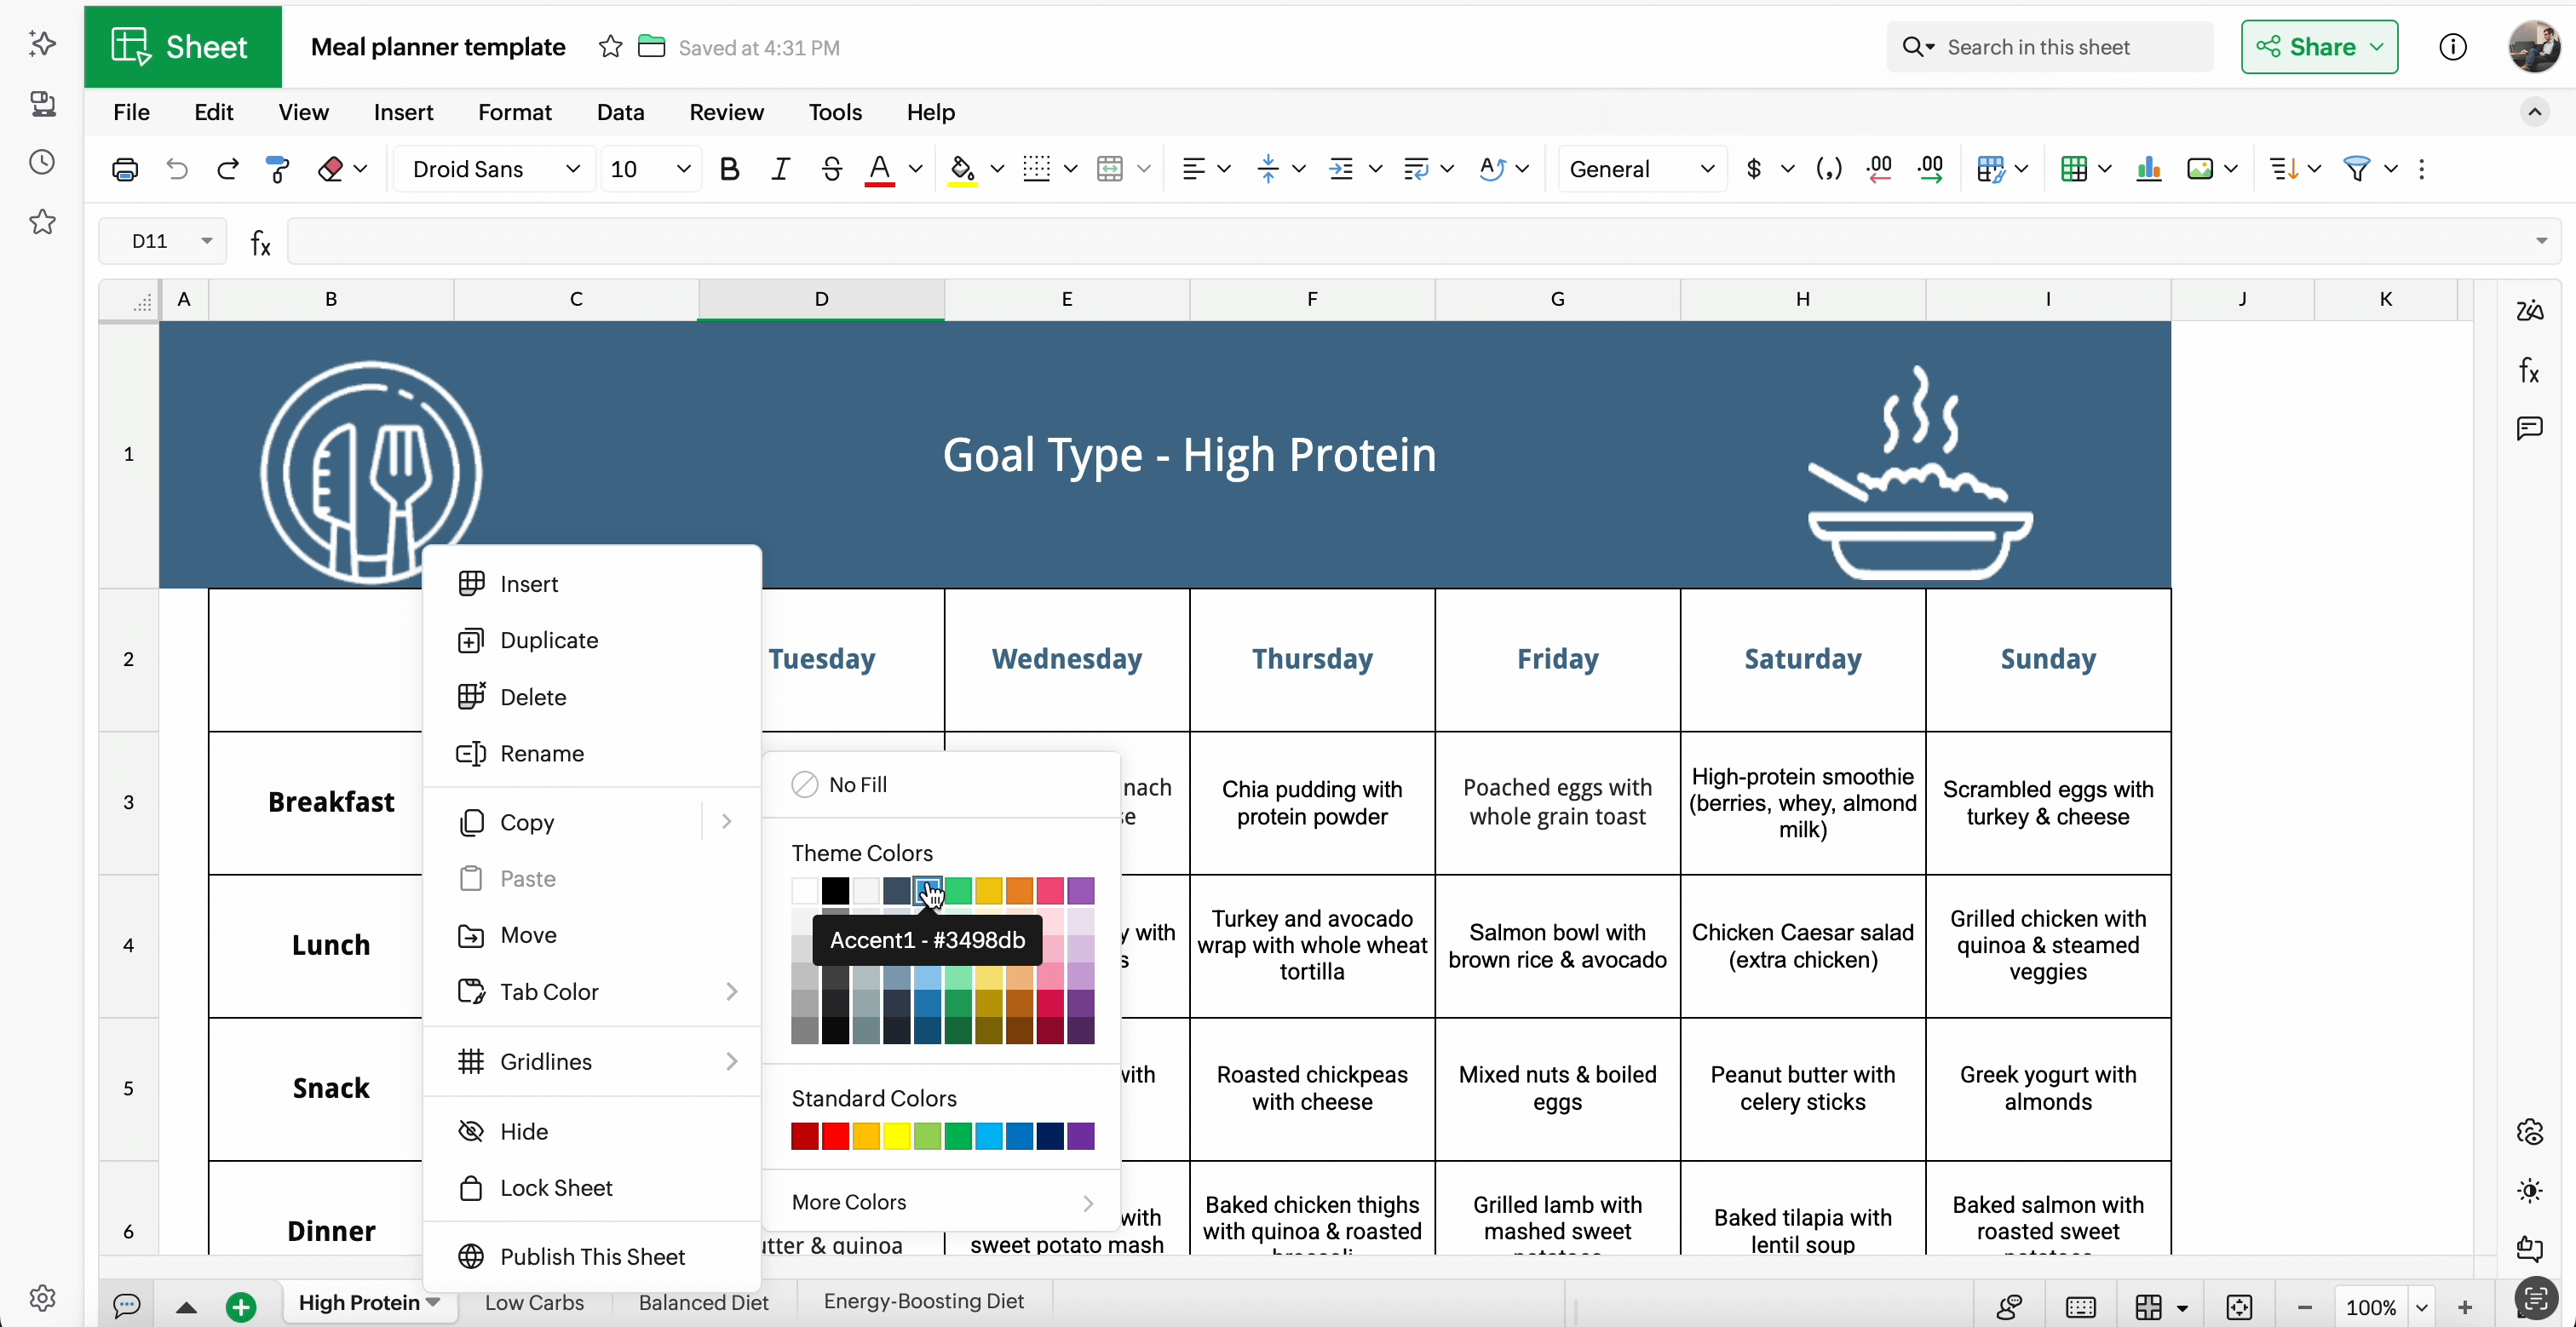
This is the complete meal plan template curated for every goal type. The meal plan includes sections for each meal of the day—breakfast, lunch, dinner, and snacks for every day of the week.
Select the Meal Planner template from the list of publicly available templates in this page. Name it Meal planner template.
Note: We're using a readily available template suitable for creating a meal planner in order to invest time in building other aspects of the complete automation template.
Add the meal plan for every day of the week and every goal type in separate sheets.
Rename the sheets according to goal types. Right click on the sheet name, select Tab color, and select a desired color for each sheet.
Step 3: Design a template to send daily meal plans to clients
This is the email template that will be sent to clients automatically using Zoho Sheet's merge template feature.
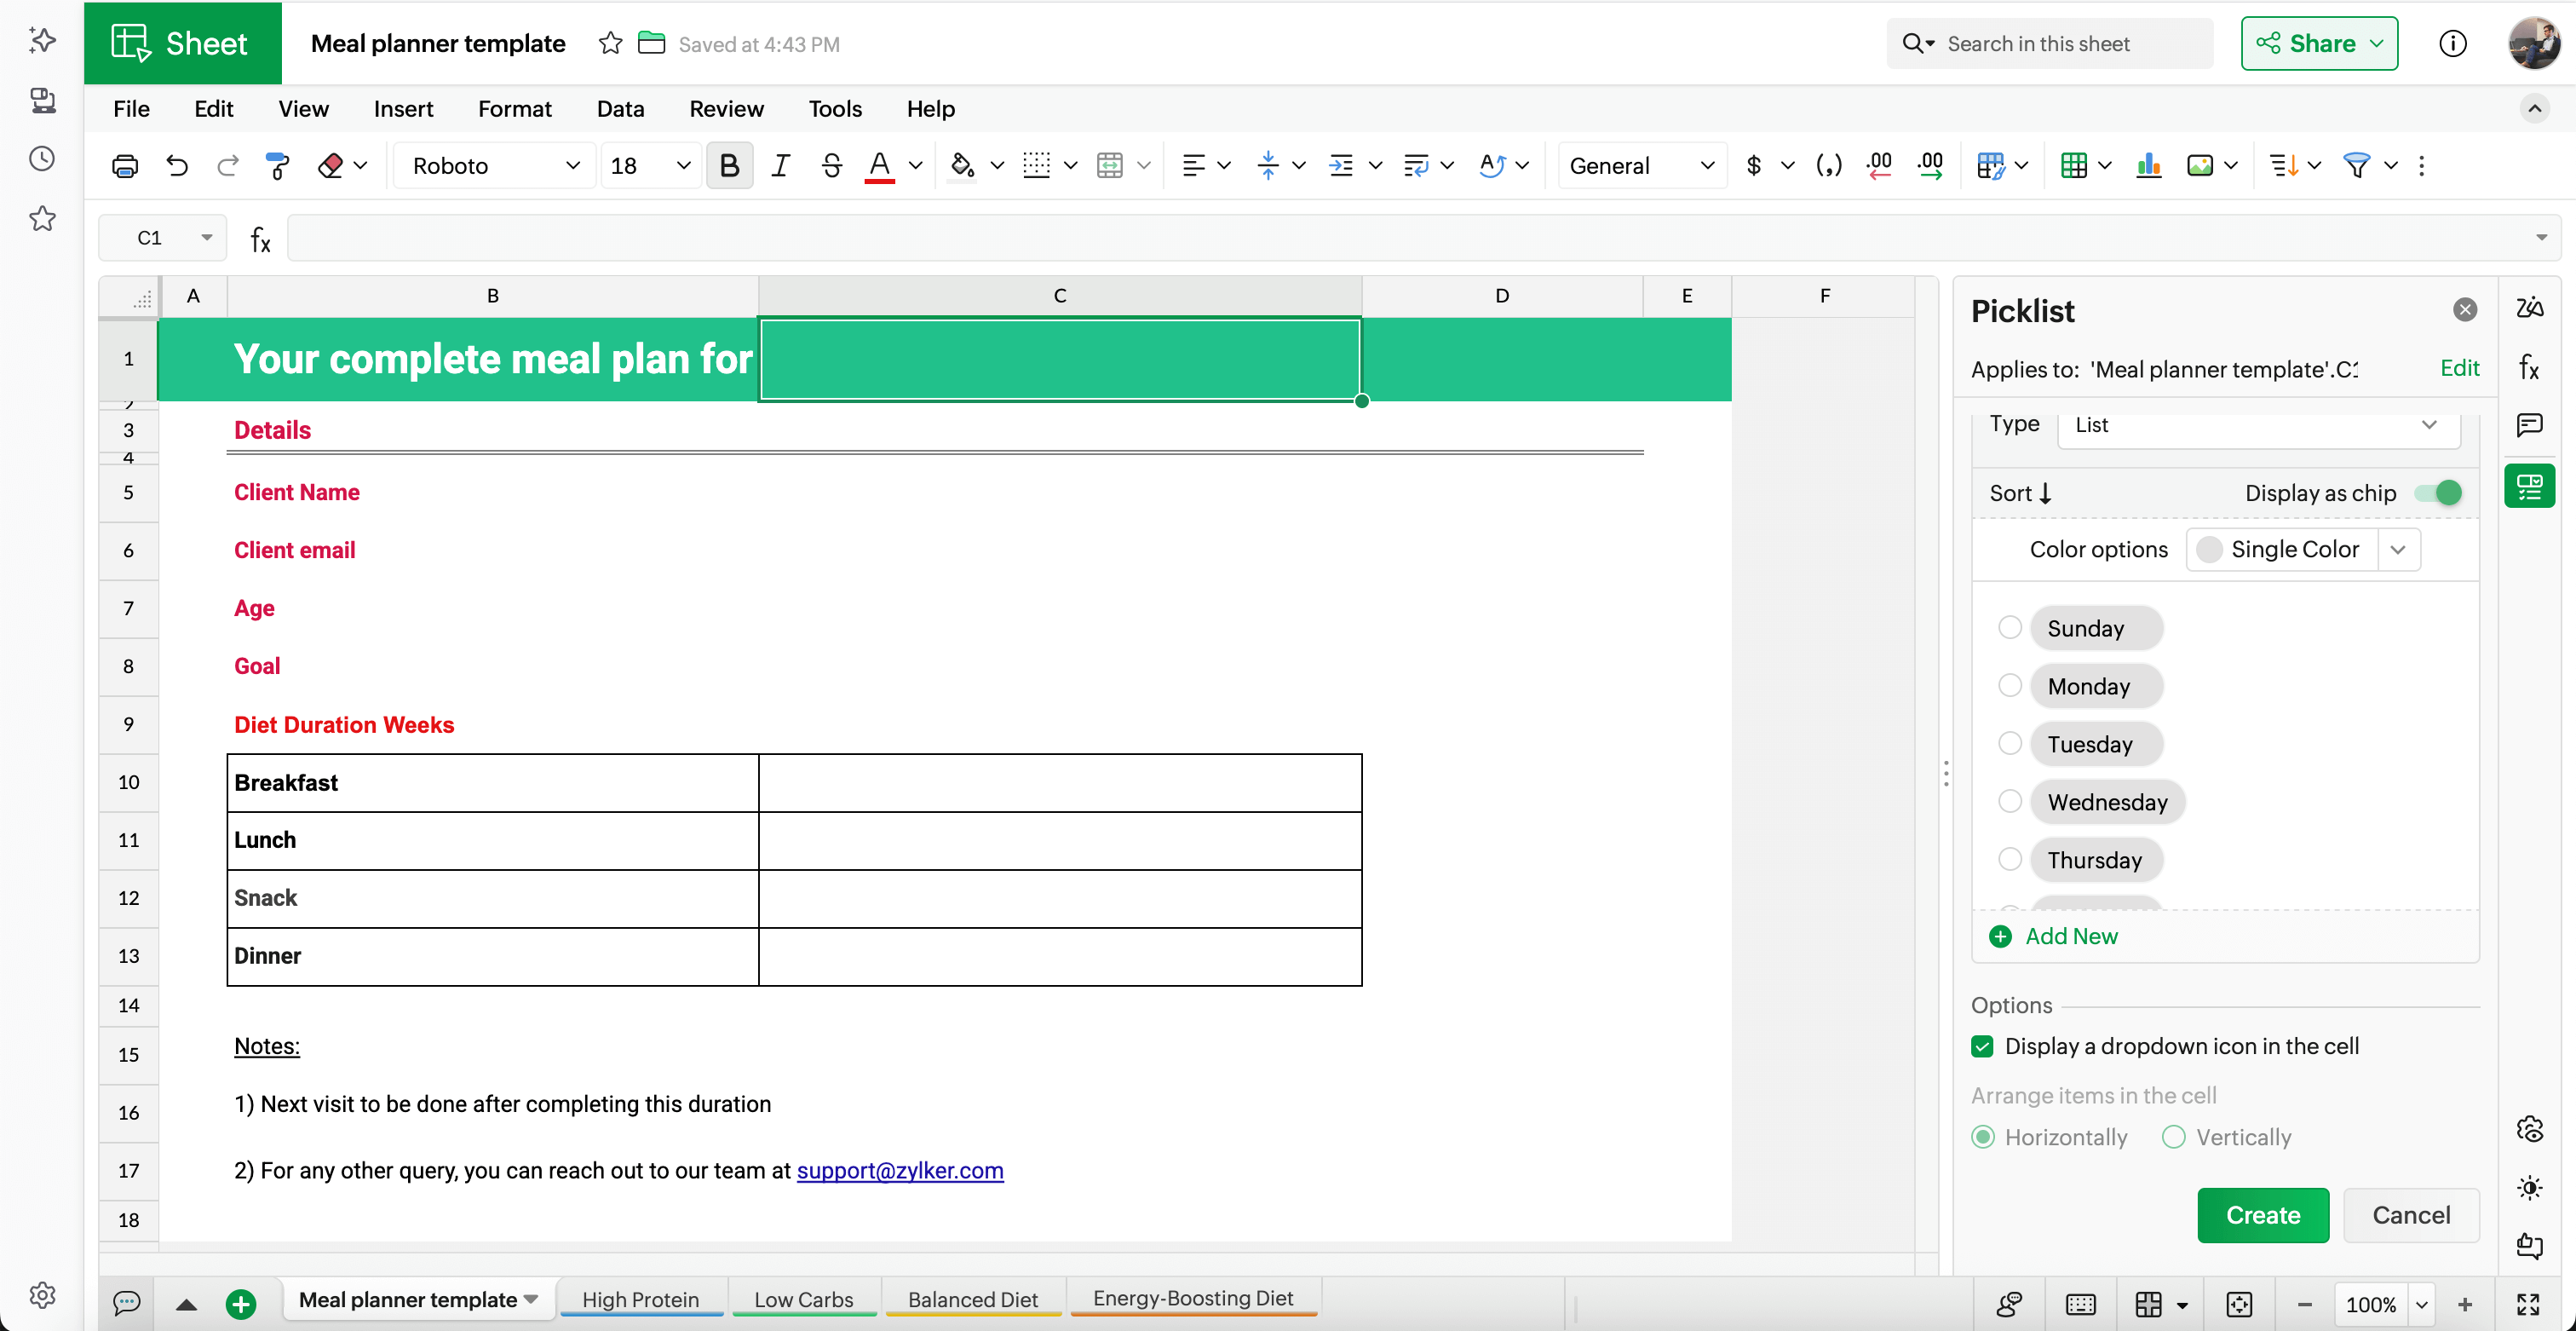
Open a sheet and name it Meal planner template. Design it as shown in the image below.
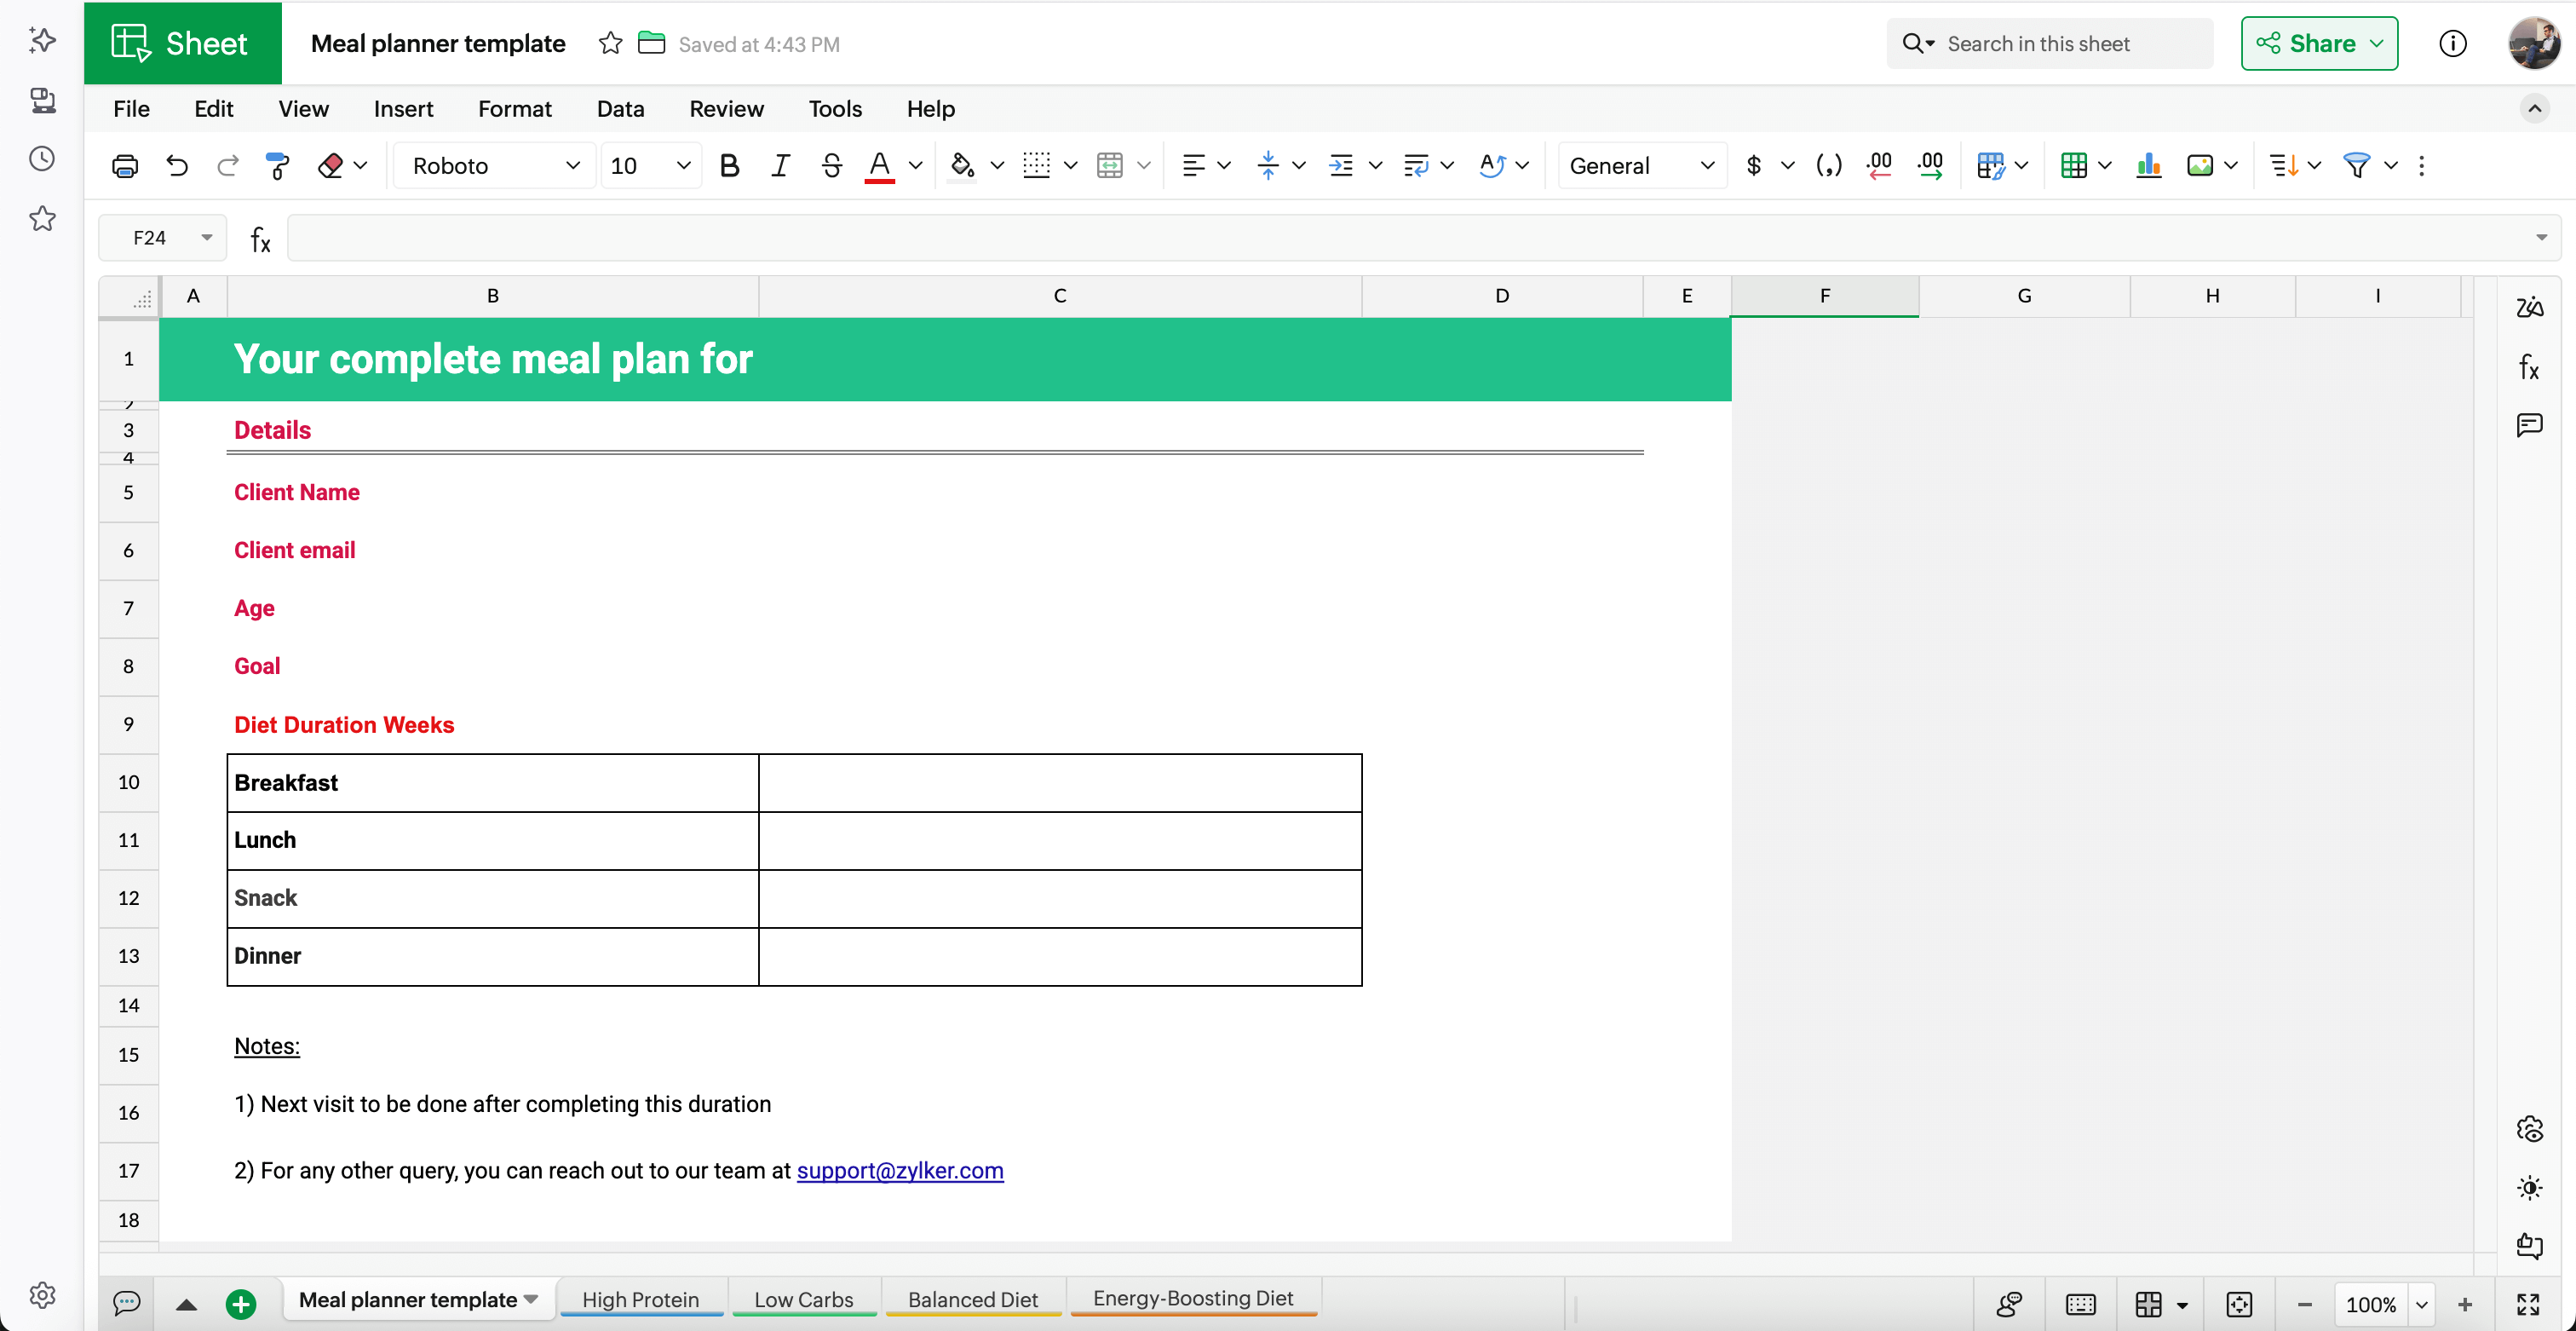
Go to Insert > Picklist > Create Picklist and add the days of the week.
Now apply automation to convert this sheet into a template. Go to Tools > Merge Template. Now your sheet will be converted to a template.
Add the source by selecting the sheet name and mapping the desired fields. Next, insert the fields next to the corresponding field name. You can either drag and drop the field or click the insert icon next to the field name.

To add the meal plan, use this formula: =IFS($C$8="High Protein";XLOOKUP(C1;'High Protein'.C2:I2;'High Protein'.C3:I6);$C$8="Low Carbs";XLOOKUP(C1;'Low Carbs'.C2:I2;'Low Carbs'.C3:I6);$C$8="Balanced Diet";XLOOKUP(C1;'Balanced Diet'.C2:I2;'Balanced Diet'.C3:I6);$C$8="Energy-Boosting Diet";XLOOKUP(C1;'Energy-Boosting Diet'.C2:I2;'Energy-Boosting Diet'.C3:I6);true;"")

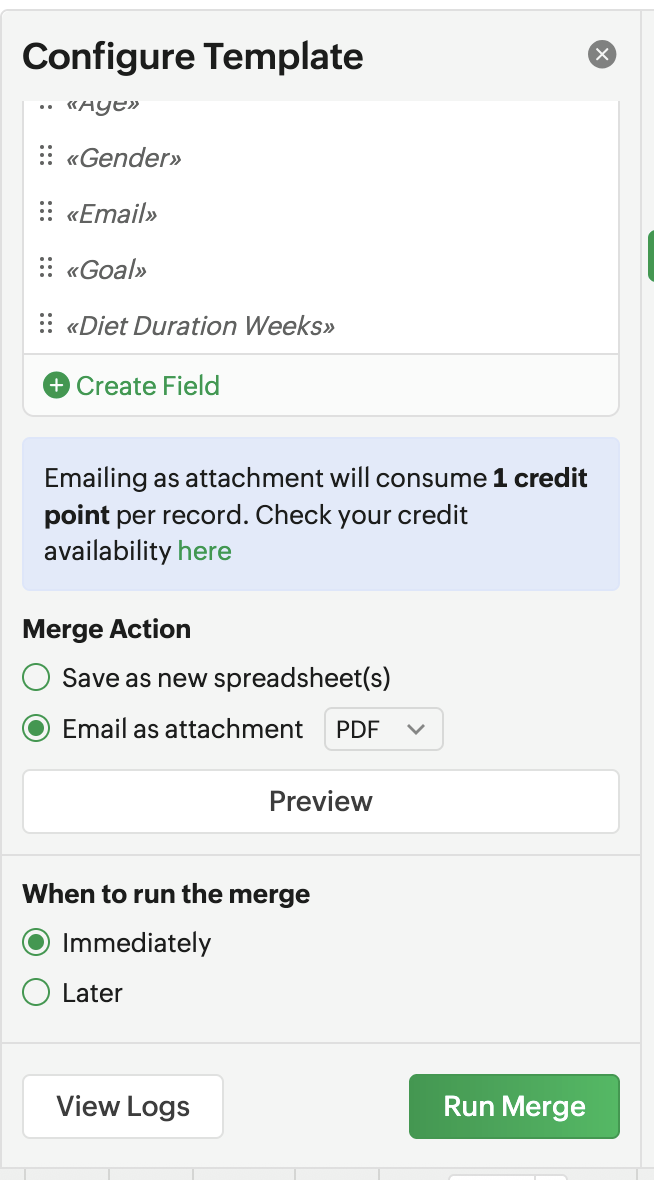
To automatically send the meal plans, run the merge action. In the Merge Template configuration box, select Email as attachment under Merge Action. Set the file type as PDF and schedule it as per your requirement. Click Preview to check your template and then click Run Merge.
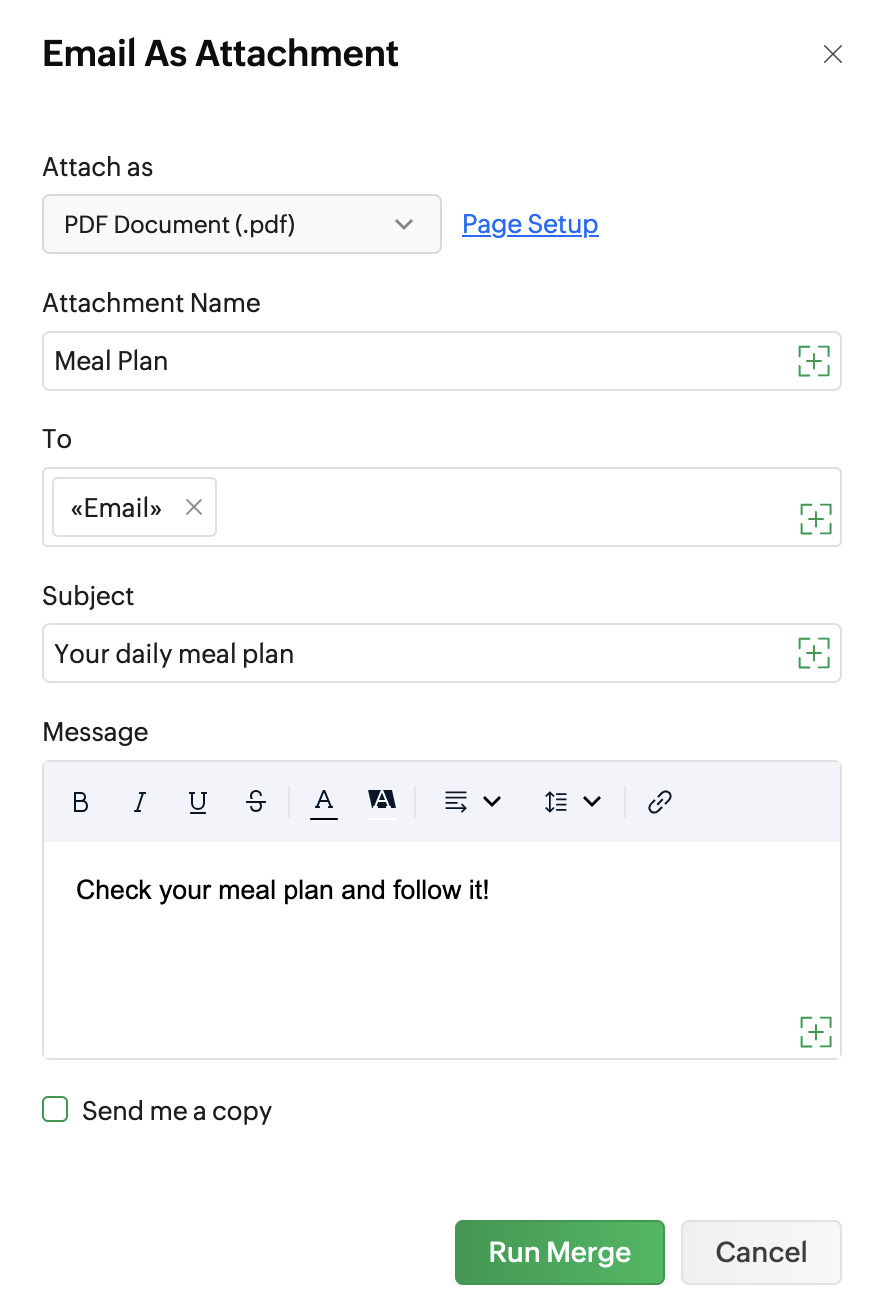
In the email configuration box, provide the following details:
File Type - PDF
Attachment name - Name of your attachment. In this case, it can be "Meal plan".
To - Click the [+] icon and select the email field to add recipients.
Subject - Add an email subject. In this case, it can be "Your daily meal plan"
Message - Add any message you want to convey to your clients.
Once the details are added, click Run Merge. The customized email template will be sent to all your clients.
Conclusion
Incorporating a merge template into your meal plan automation not only saves valuable time but also ensures each client receives a personalized and professional nutrition guide. By seamlessly integrating client data with tailored meal information, this approach simplifies communication, enhances client engagement, and streamlines your workflow, making it easier than ever to deliver customized meal plans at scale without sacrificing quality or personalization.
Download the template and try it for yourself!
 Srinalini M
Most businesses are one good spreadsheet away from getting clarity on their numbers. I craft stories and messages that help them get there. My approach combines technical research with a problem-solving narrative, ensuring the insights are understood and implemented.