Organization Files
- Adding an Organization file
- Share files using copy URL
- Notifications
- Permissions
- HR Forms & Templates
- Document Acknowledgement
Organization files are common files that are shared throughout the organization based on organization entities and locations. Organization files might include your employee handbook or policy documents.
Adding an Organization file
To add Organization Files,
- Beginning in your home page, go to Files > Organization Files > + Add.
- Select the file you would like to add. You can either upload the file from your desktop, from Zoho WorkDrive or other cloud services.
Note: The following services are supported.
- Zoho Docs
- GDrive
- Dropbox
- One Drive
- Box
- Evernote
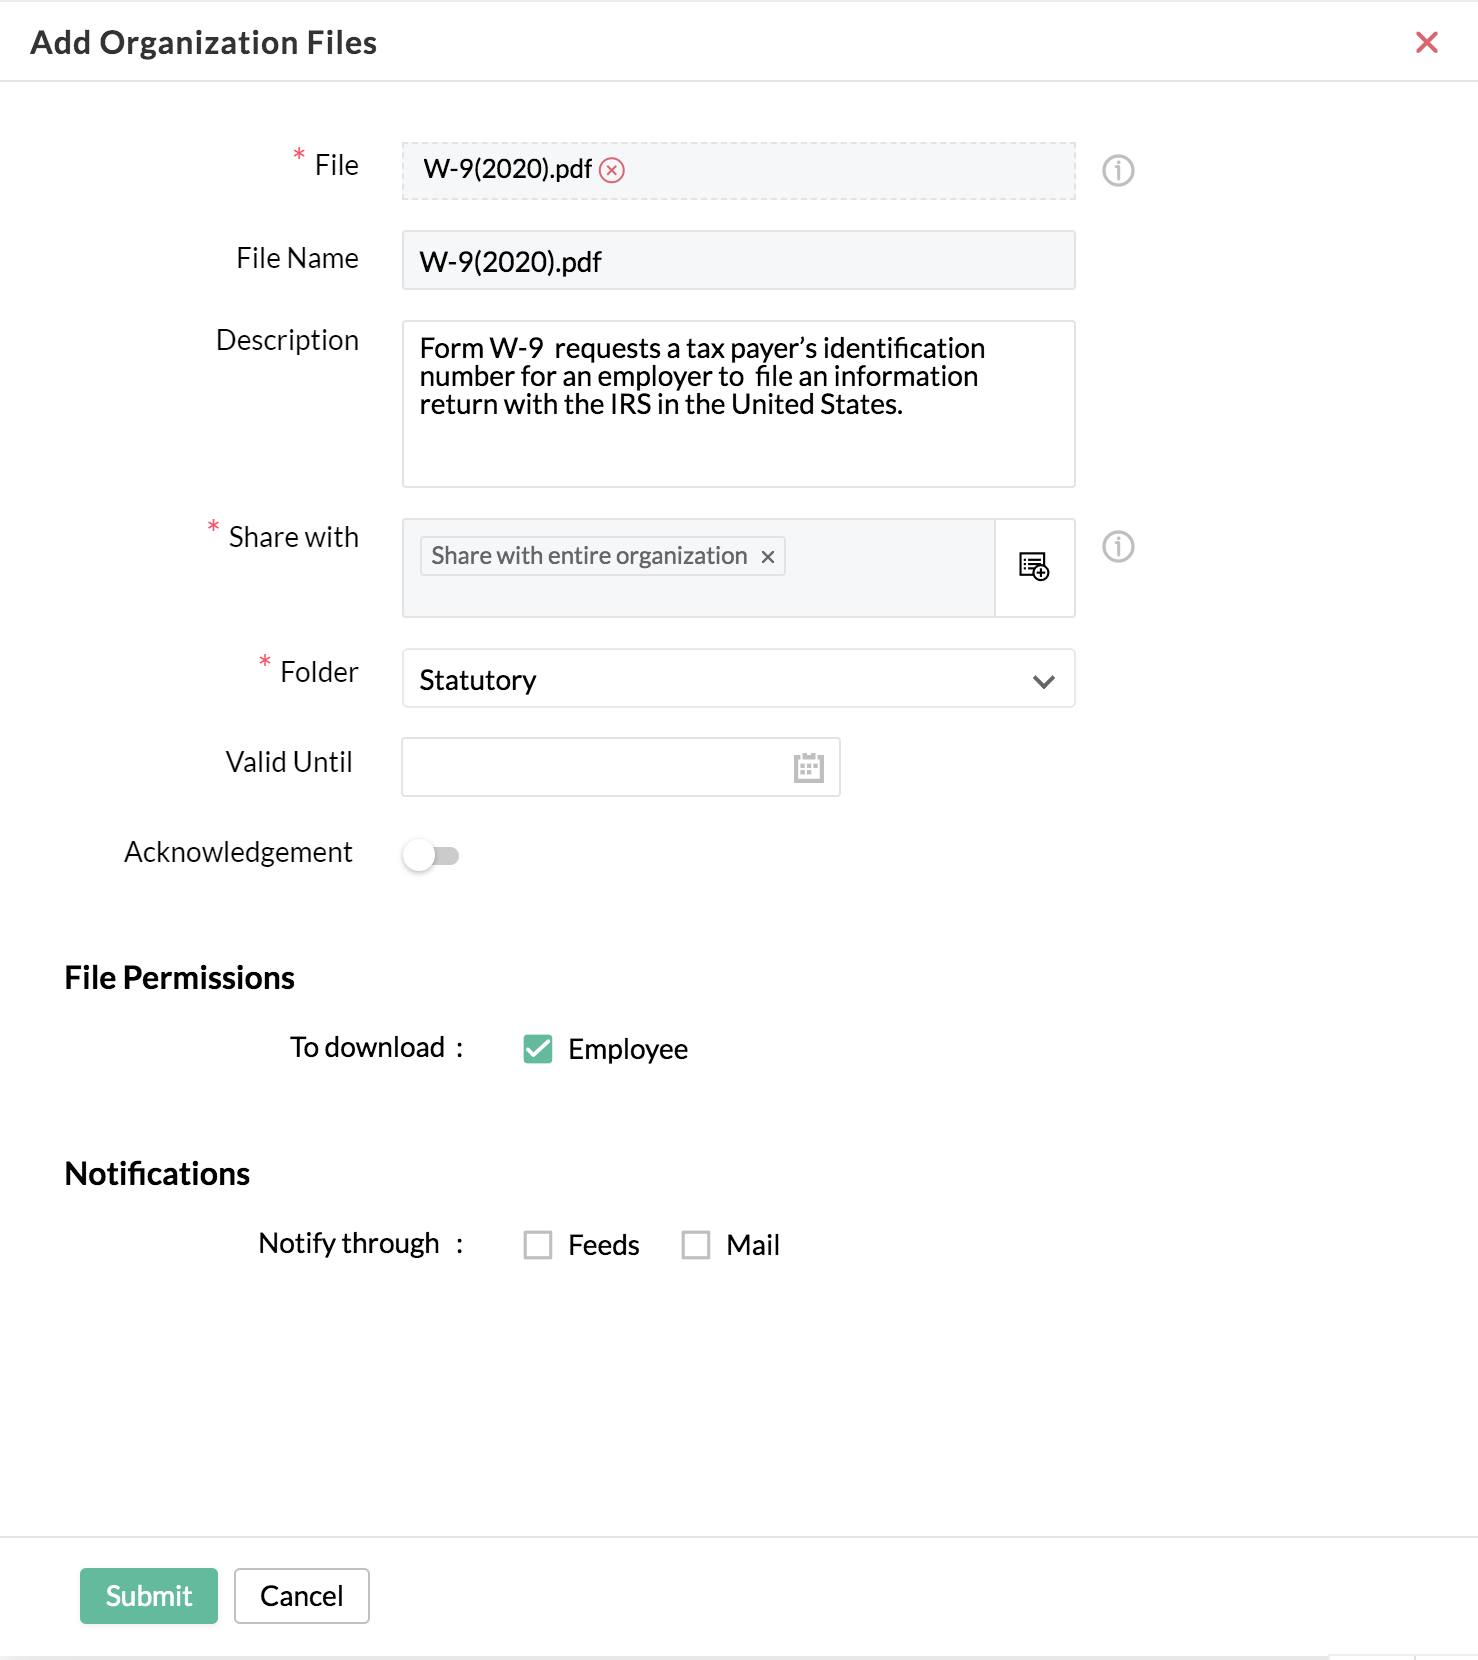
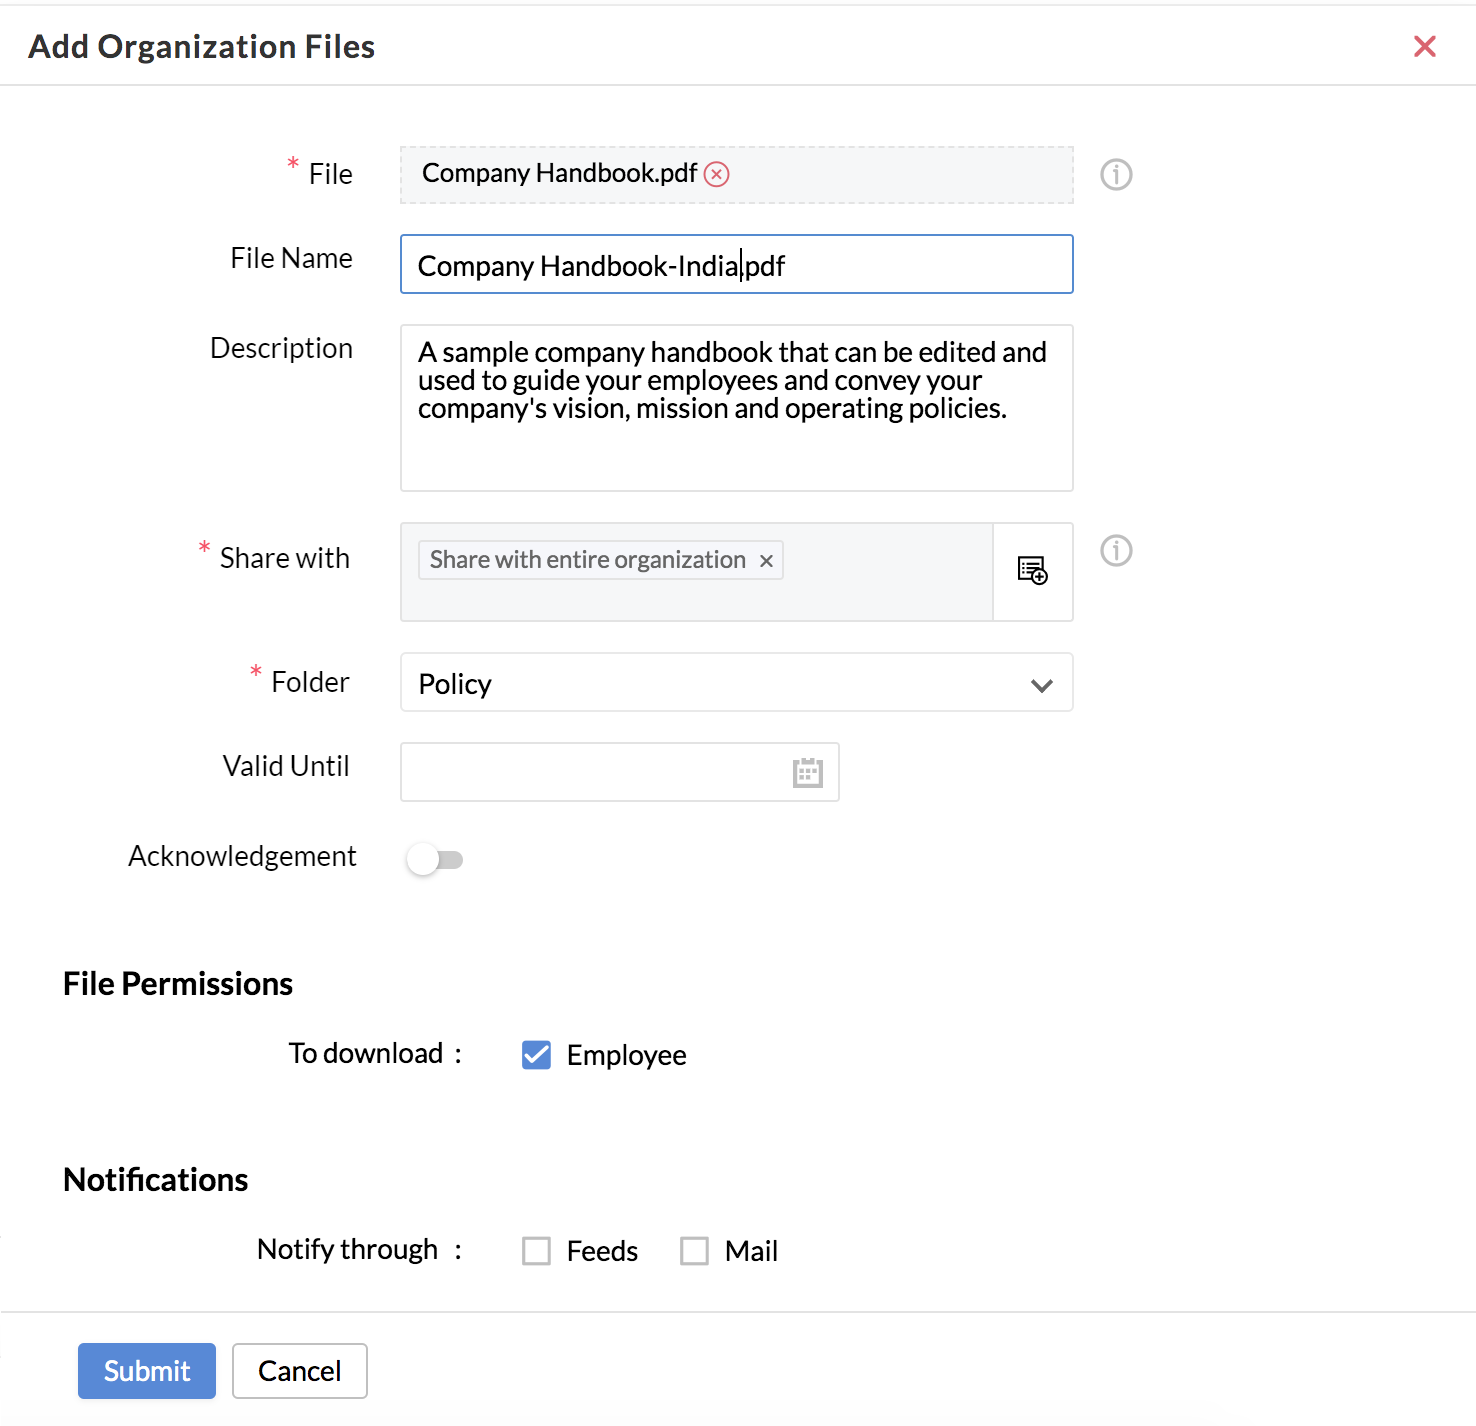
- Name the file.
- Select the entity to Share With. If you have not enabled organization structure, location and department will be listed.
- If you want to share this file with everyone in the organization, select Share with entire organization.
- Provide a description if needed.
- Under Folder, select the folder or add a new folder.
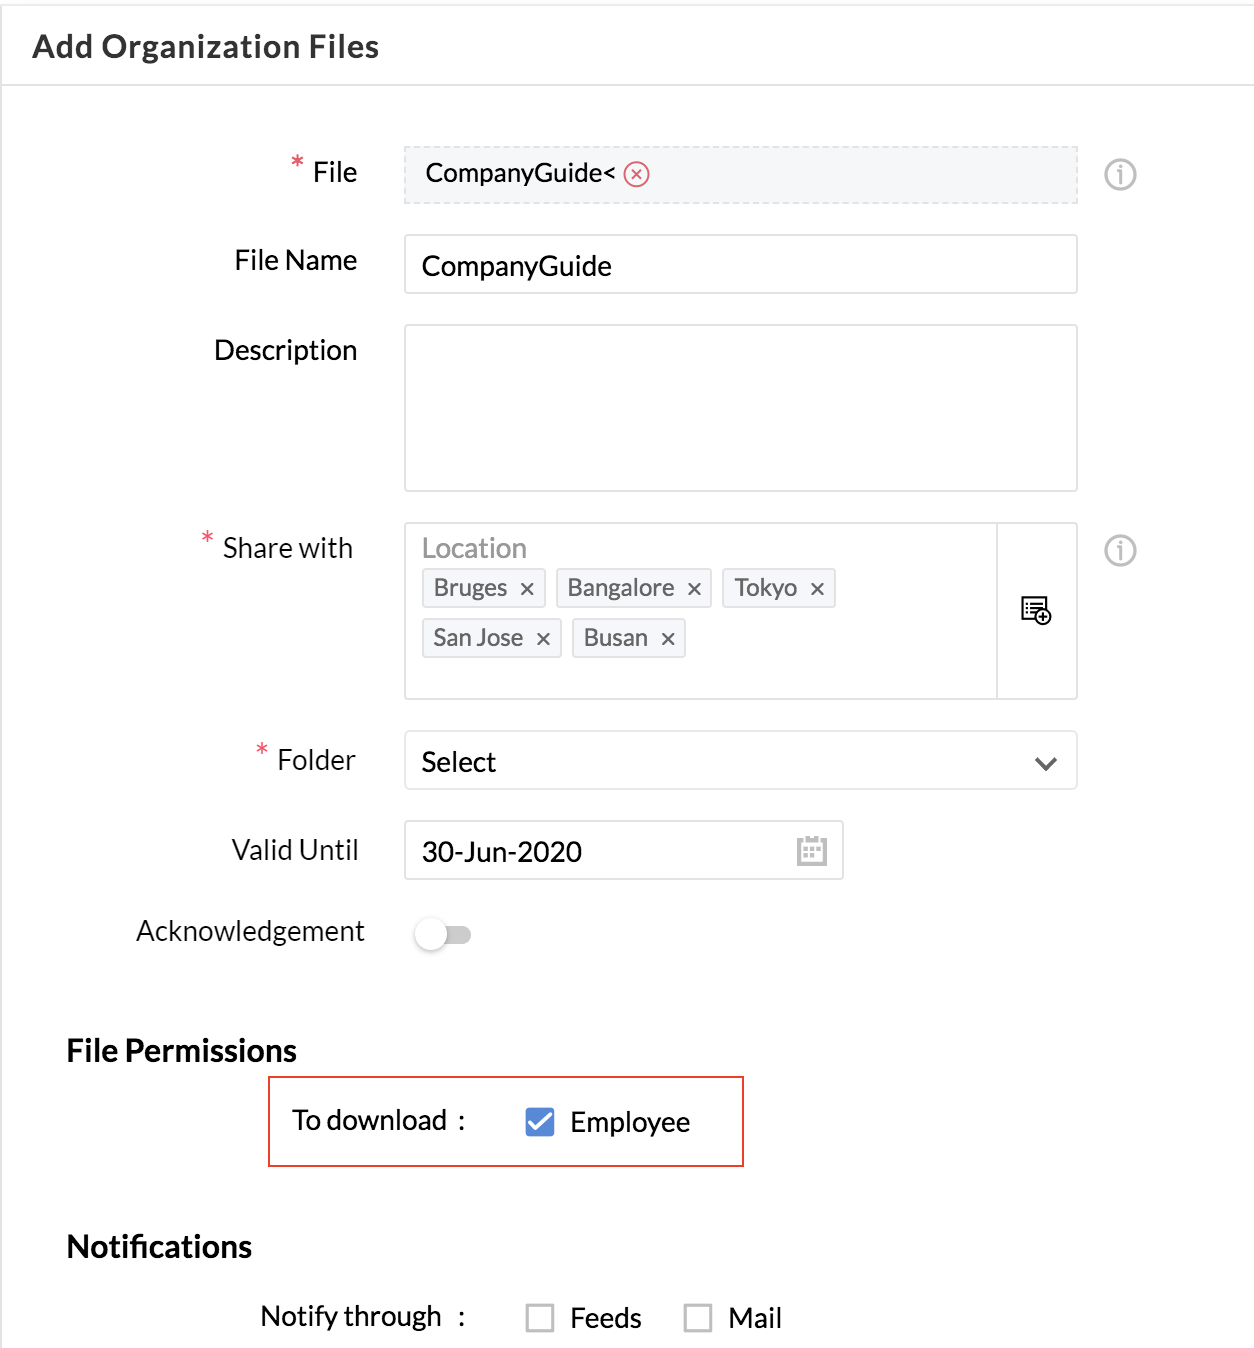
- If you want the file to have an expiration date, provide a valid until date.
- Enable acknowledgement using if required. You can read more about document acknowledgement feature here
- Check Employee under File Permissions if you want the employee to be able to download this file.
- Select the relevant options under Notifications through which you want users to be notified.
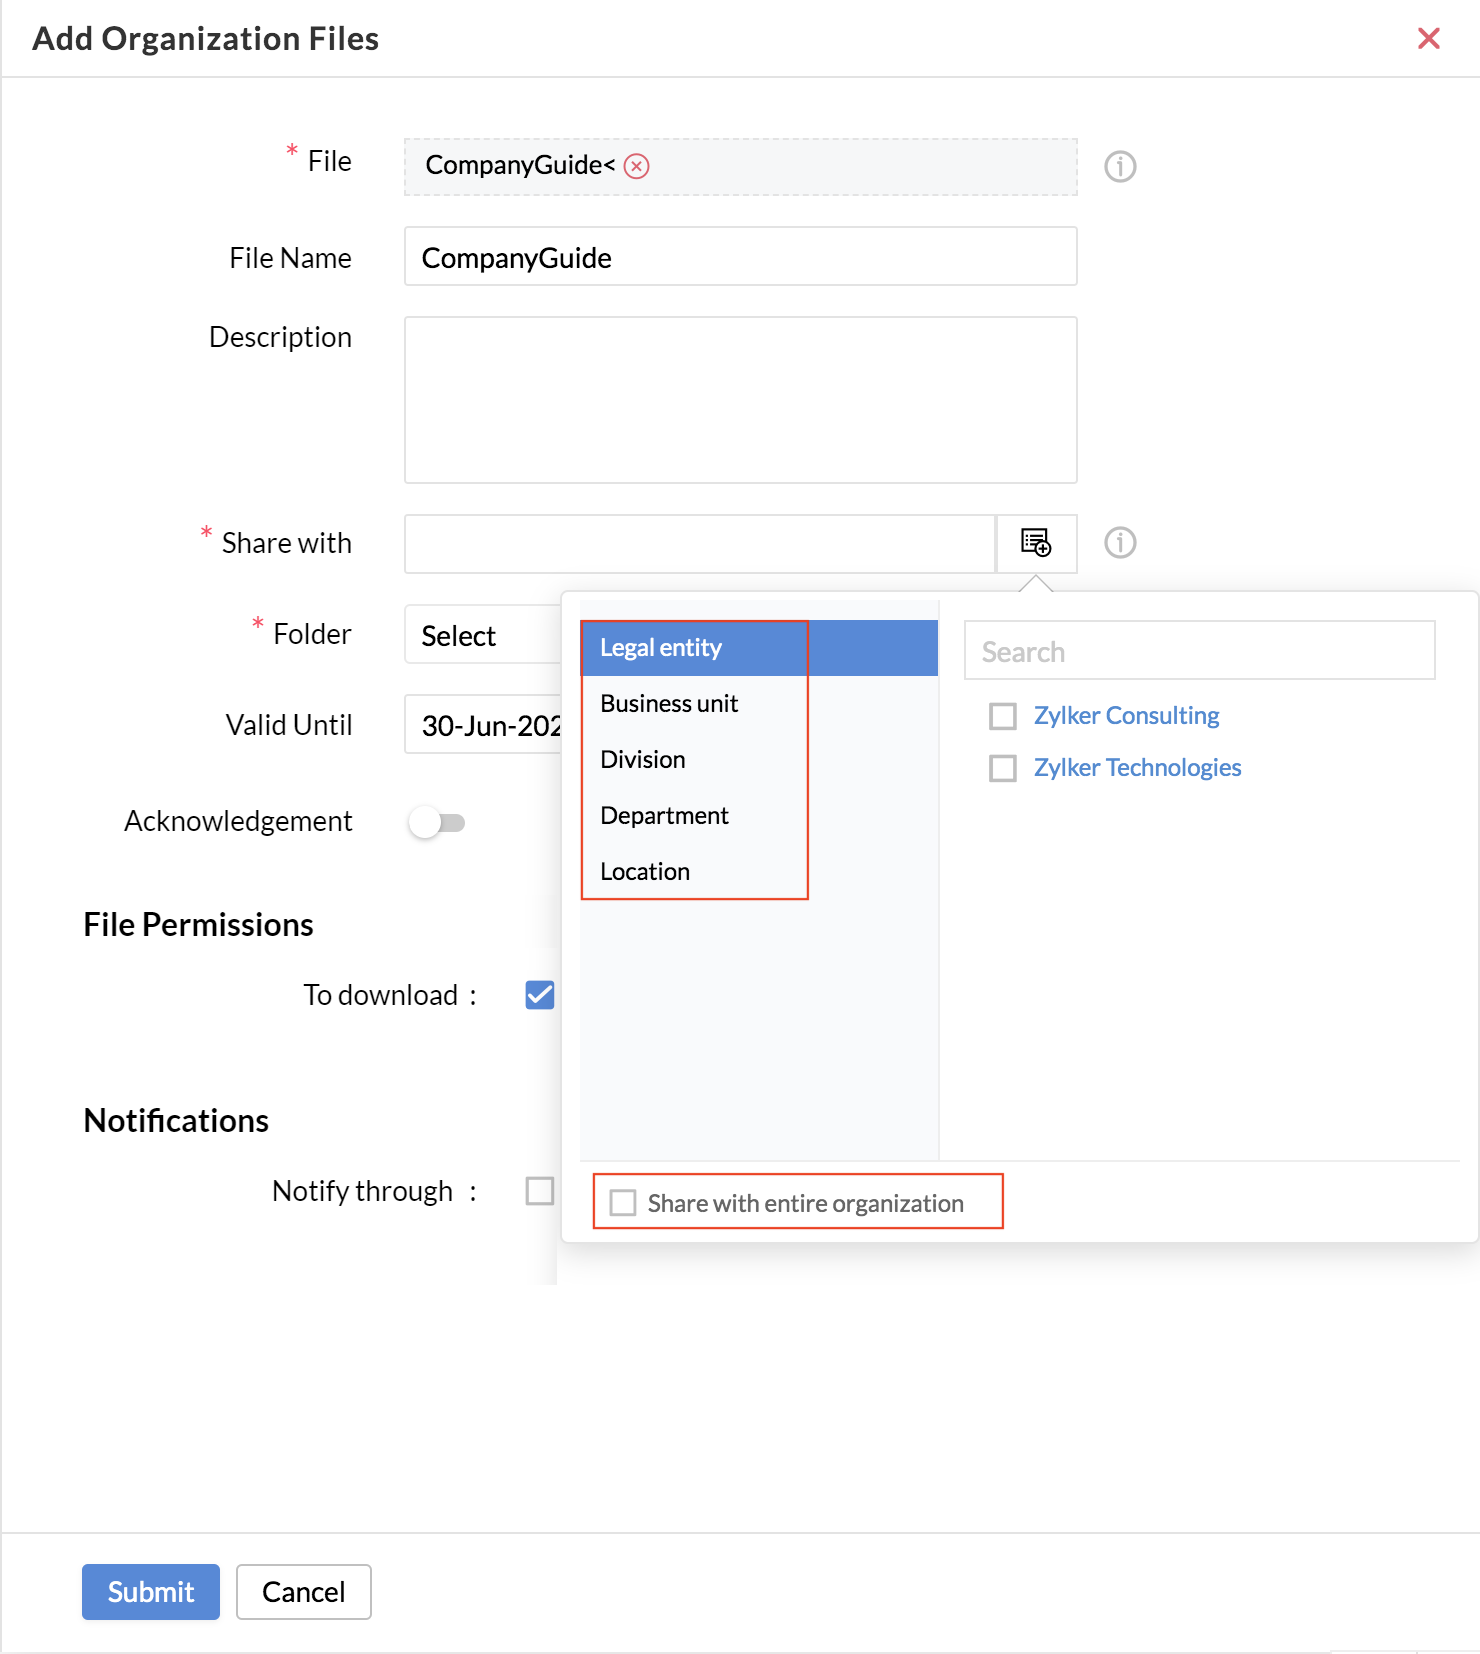
- Click Submit.
Viewing Organization Files of a specific Entity or Location
- From your home page, select Files, then Organization Files.
- Click the filter.
- Under Organization Entity, select the type of entity or location.
- Select the entity or location.
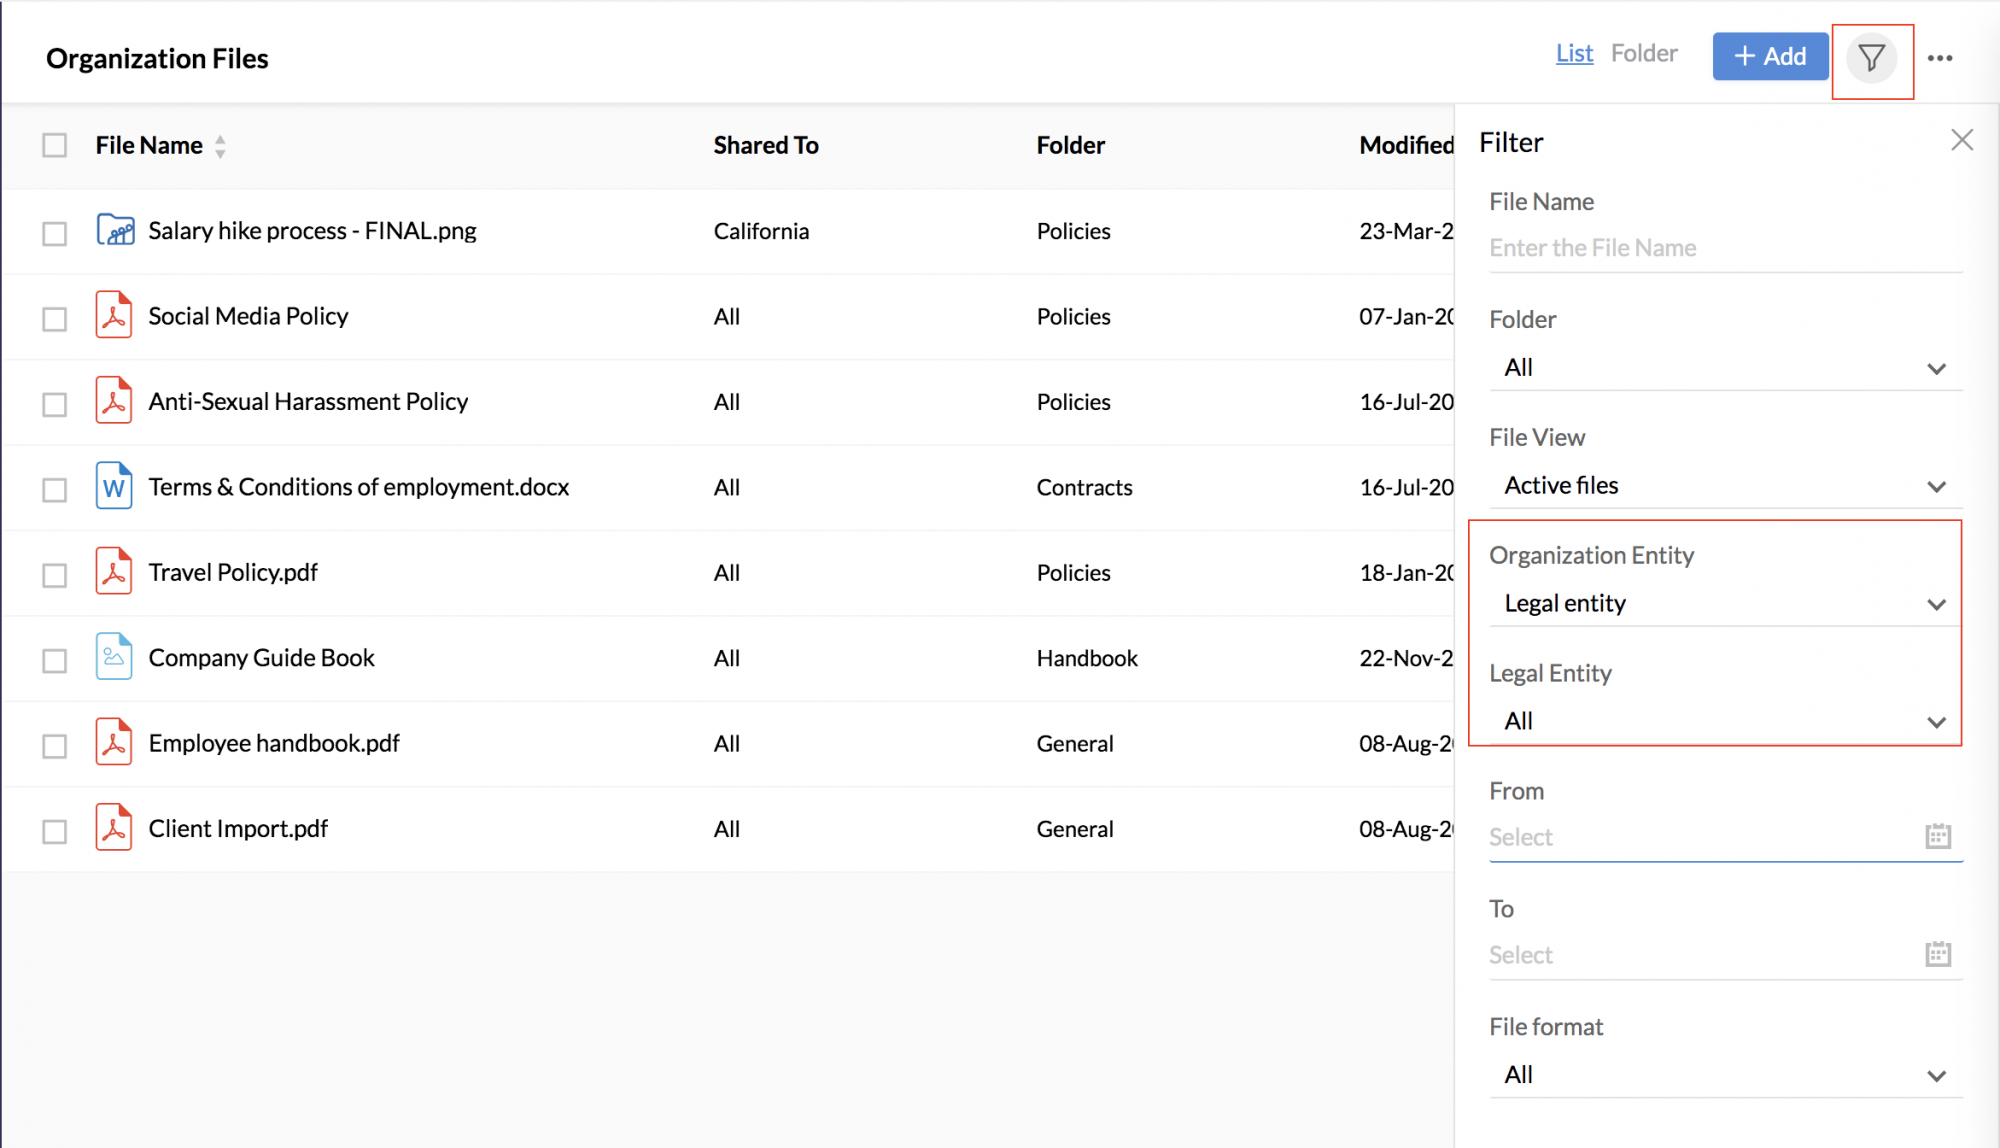
- Hit Search.
You will be only able to see the Organization files pertaining to that entity or location.
Note: Organization structure feature is only available for the enterprise edition based on request.
Share files using copy file URL
You can copy the file URL of an organization file and share it as needed.
For instance, if you would like employees to see the leave policy when they apply leave, you can include an Add Notes field and include the URL to the leave policy in this field. When an employee views this field, they will be able to view the leave policy from the same page. Follow the steps given below to do this.
- Beginning in your home page, go to Settings (Gear icon) > Customization > Forms > Leave.
- Drag and drop an Add Notes field from the left side and add your text. For example, the text can be 'Click here to read the leave policy'.
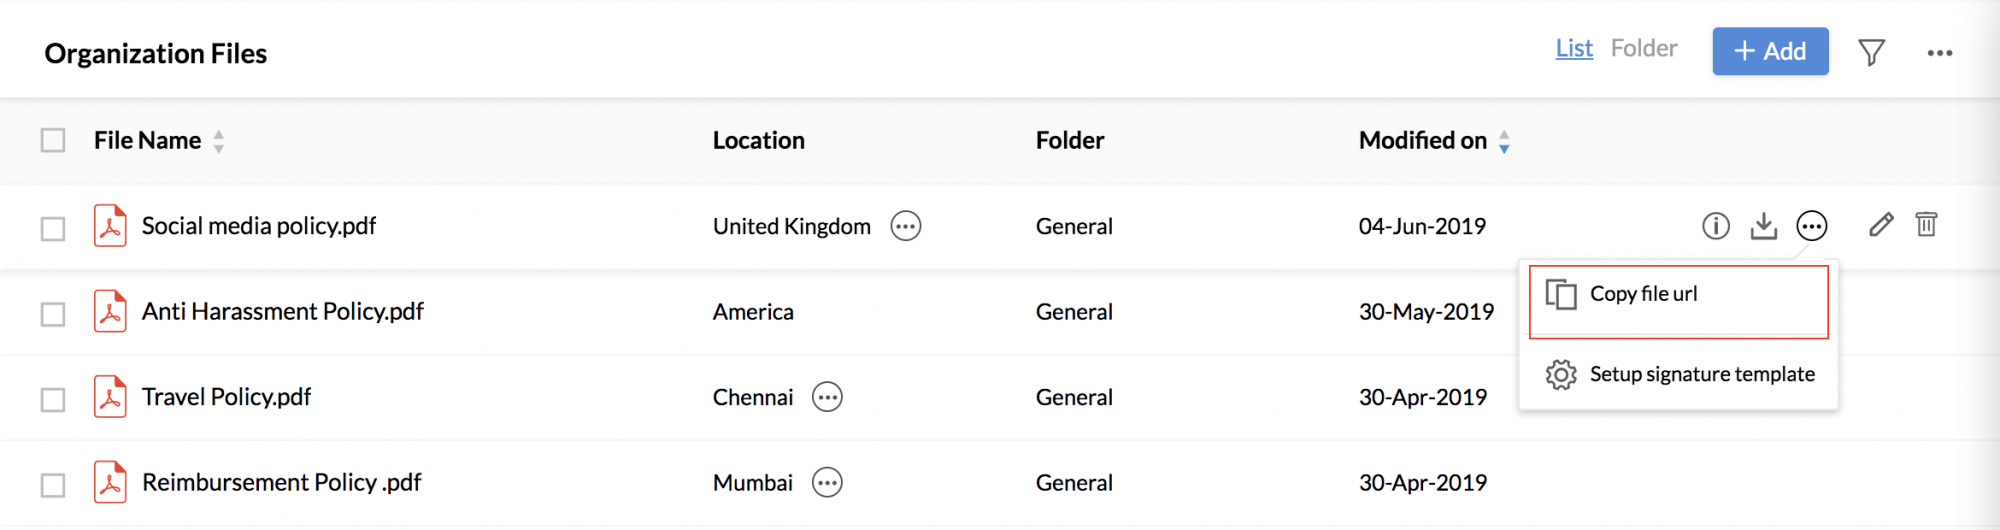
- Return to your home page, go to Files, then Organization Files.
- Click Copy file URL.
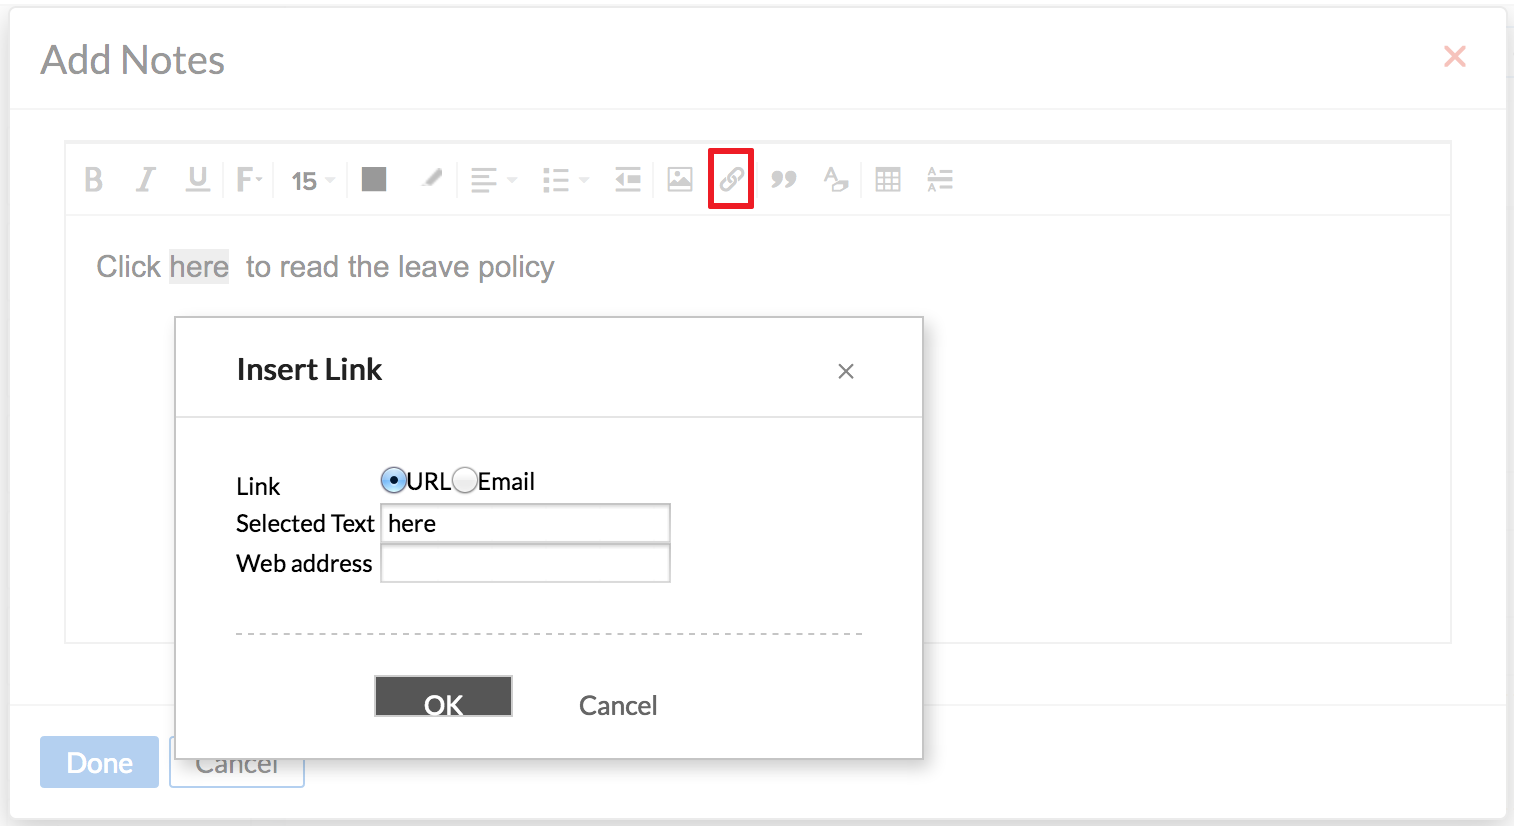
- Go to the leave form and in the Add Notes field, then select the word you would like to hyperlink.
- Click on the hyperlink icon on the top bar and insert the copied file URL.
When an employee applies for leave, they will be able to view the leave policy right on the same page as shown in the image below.
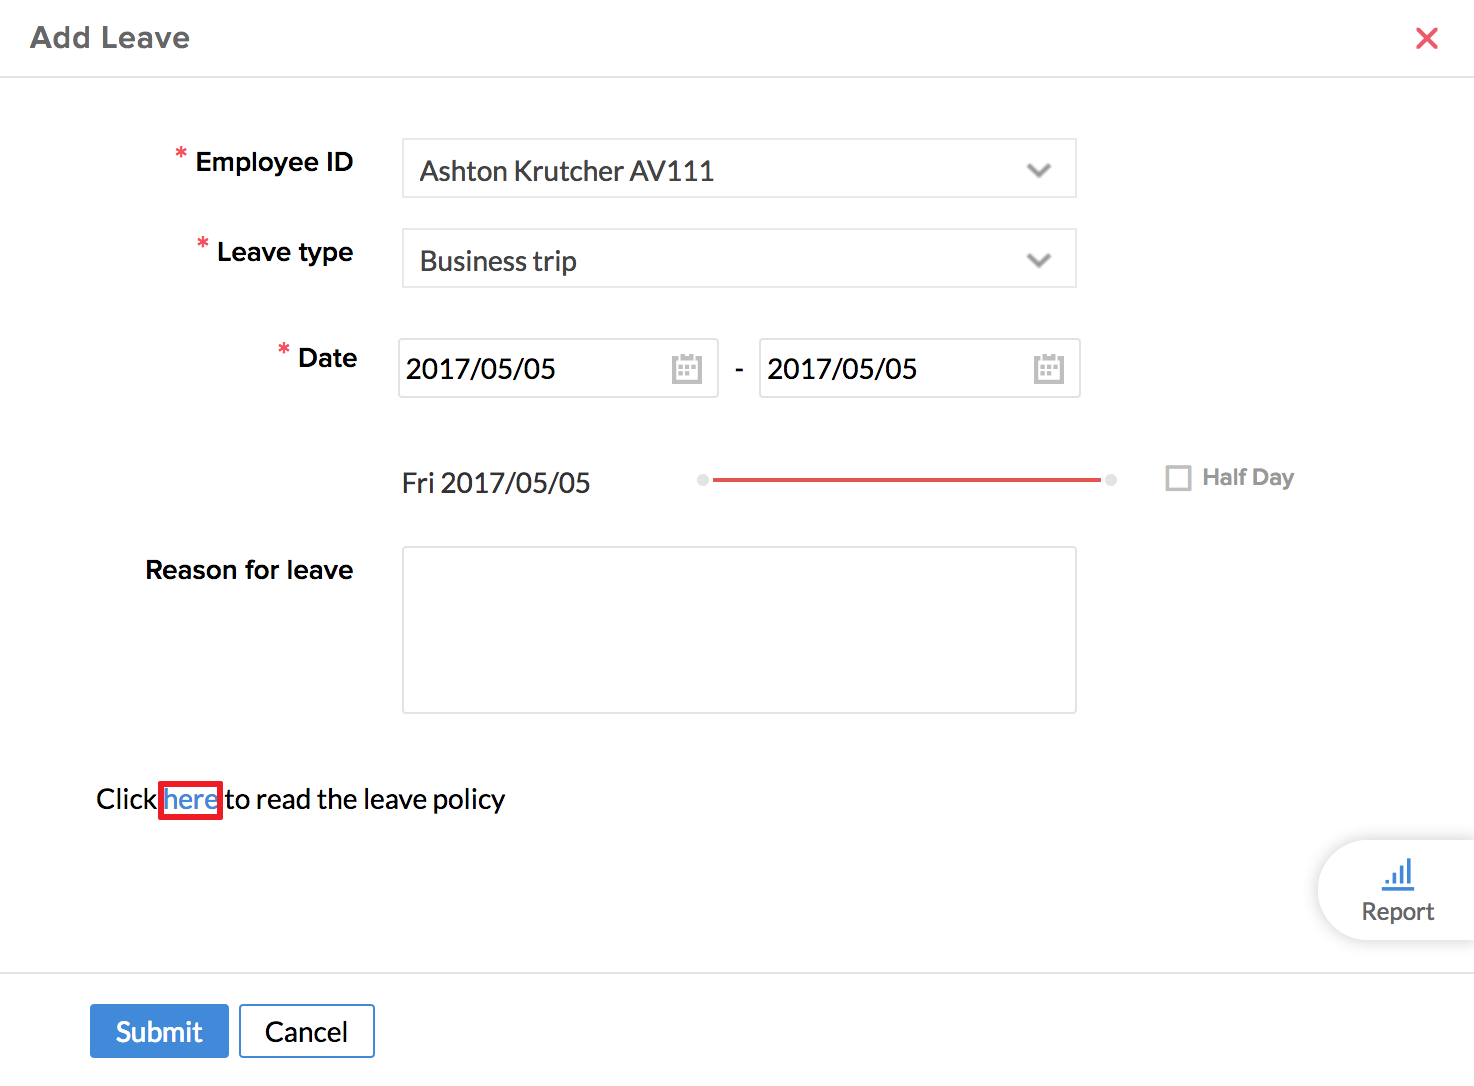
Employees also have the option to print the leave policy.
Note: You can edit or delete the added file only based on your role permissions.
Notifications
The Files module hosts options to notify the employees of your organization via email, or notify through Feeds on every new file that is added or every time there is an edit done. This increases policy awareness and keeps your employees informed of company information.
Permissions
You can set certain permissions regarding who can access the Files.
Enabling IP restriction for the file cabinet can help you restrict anyone from accessing this module from anywhere beyond the IP address mentioned. Follow the steps given below to do this.
- From your home page, go to Settings (Gear icon) > User Access Control > Allowed IPs.
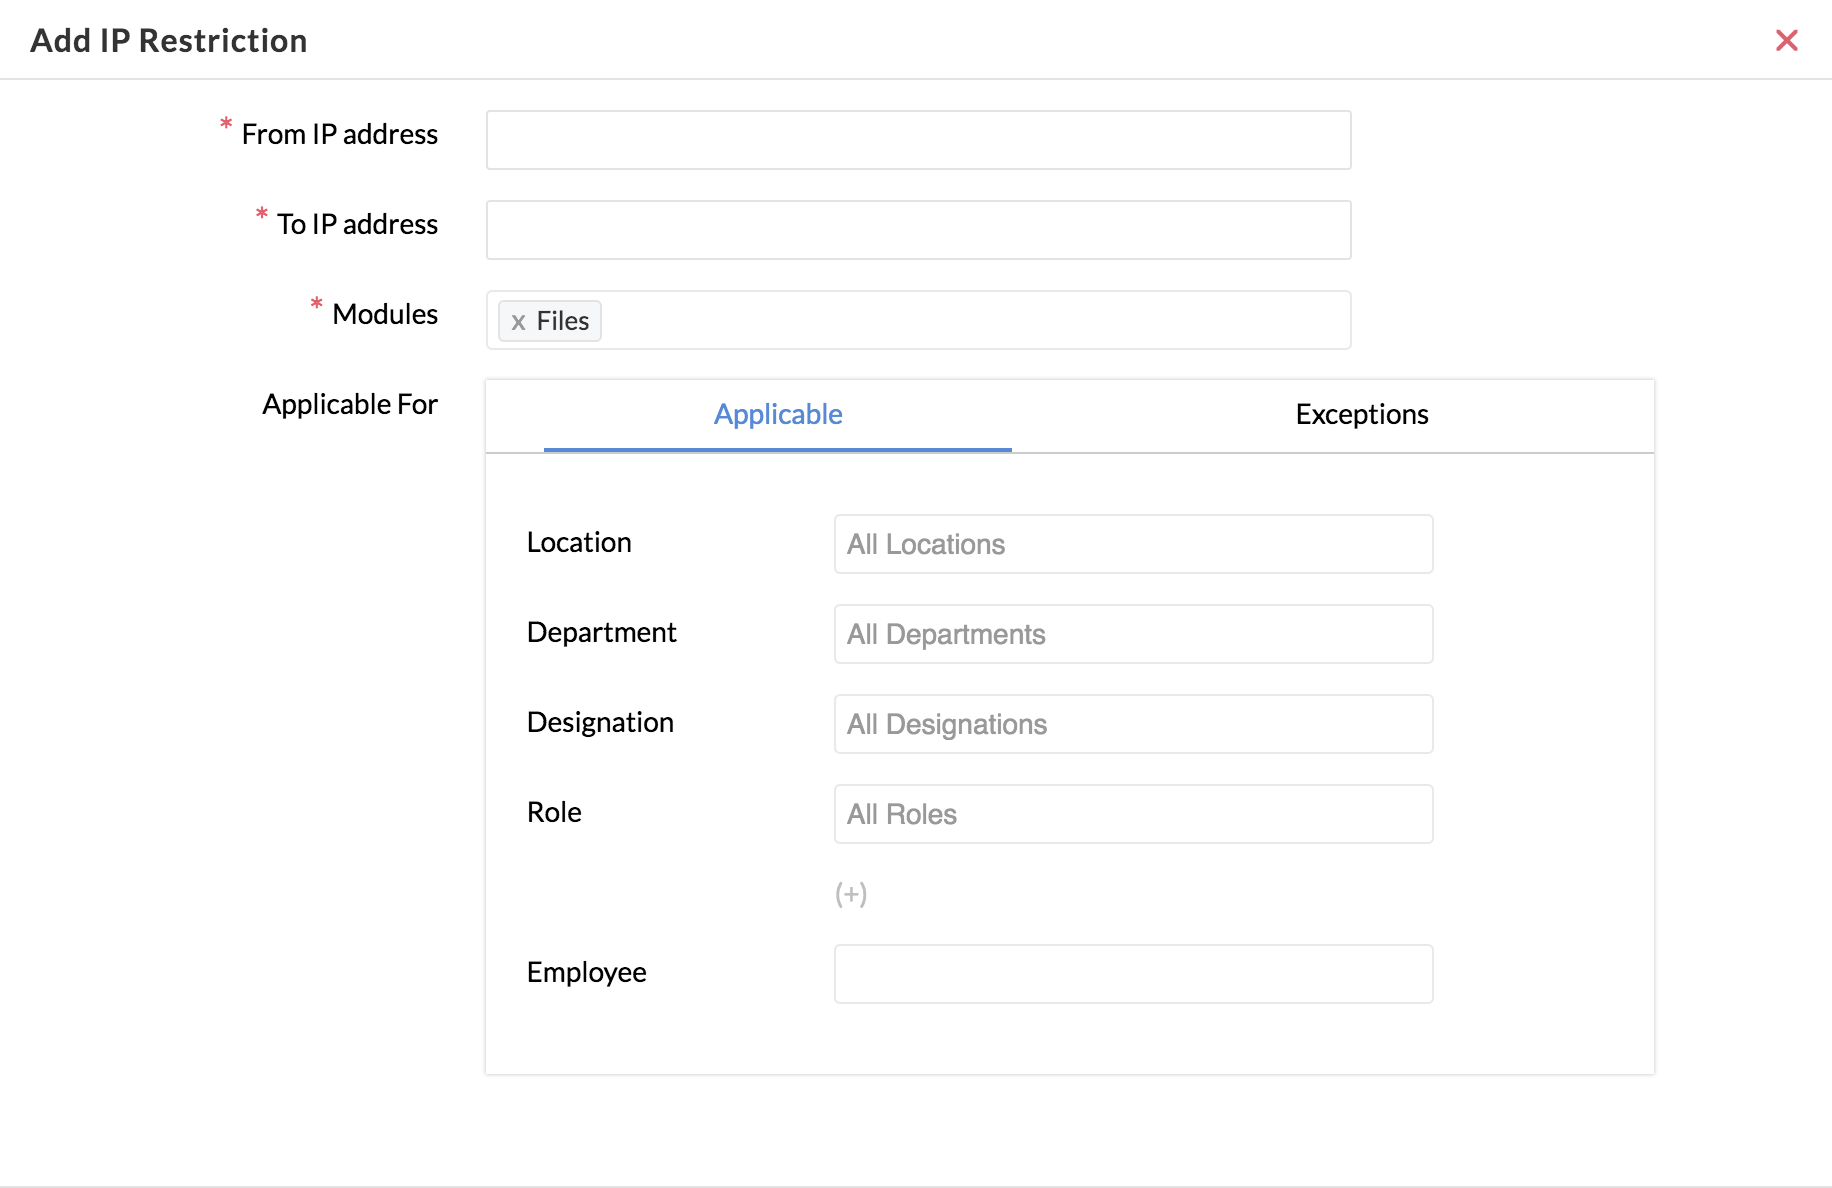
- Click Add IP restriction.
- Give a From and To IP address to define the range.
- Under Modules, select Files.
- Under Applicable, select the Roles, Departments, Designation or Employee.
- Under Exceptions, select exceptions, if any.
- Click Save.
Note: When configuring IP restrictions, we always recommend using static IP addresses as dynamic IP addresses get refreshed in every 72 hours. Check with your ISP to get a static public IP address to implement in Zoho People. Contact support@zohopeople.com for any further assistance.
In addition to IP Restriction, Geo restriction is created in order to restrict access to files from outside a geographical range.
The restriction is applicable for any action in the files or folders adding, viewing, editing, deleting and downloading.
Follow the steps given below to create this restriction.
- From your home page, go to Settings (Gear Icon) > User Access Control > Geo Restriction
- Click on Add Geo Restriction.
- Click Share Location in the pop up in the top-left corner.
- Give a name.
- Under Applicable For, select Roles, Departments, Designations or Users.
- Under Modules select Files. You can also select the other modules based on your need.
You will be able to see your current location by default.
- Use the Search tab to search for the starting location of your range.
- Use the drawing toolbar on the right-hand side to select the range.
- Click Show My Location icon to return to the current location.

![]() Tip: Use the delete layers icon in the drawing toolbar to delete a selection that has been made erroneously. Click Save after deleting and use the shapes to define your range again.
Tip: Use the delete layers icon in the drawing toolbar to delete a selection that has been made erroneously. Click Save after deleting and use the shapes to define your range again.
- Click Submit.
![]() Using IP restriction, you can only define a particular IP address from which employees can access the modules. However, using geo-restriction, you can define a location range within which the modules can be accessed.
Using IP restriction, you can only define a particular IP address from which employees can access the modules. However, using geo-restriction, you can define a location range within which the modules can be accessed.
Note: You can enable both IP restrictions and geo-restriction for your organization and make them applicable to employees based on the need.
You can also allow or restrict employees from downloading a file from Files.
While adding a file, you can also create this restriction.
To add a file,
- From your home page, go to Files, then Organization Files.
- Click Add and upload the file.
- Uncheck Employee under File Permissions to restrict users from downloading the file.
- Enter other details and click Submit.
Note: This restriction can be created only for Organization Files.
HR Forms & Templates
What are HR Forms?
HR Forms in Zoho People are statutory forms that are created by a government that serve as a model or a free form to be used. They usually meet all legal requirements and can be used without any textual changes.
Where is this useful ?
There are some important statutory forms such as the I-9 form (in the United States), that are often used while inducting new employees into the organization. This action can be completed in a quick and effective manner using these HR forms.
HR Forms house important statutory forms that you can use to:
- Share with many or all employees in your organization by converting the form into an organization file.
- Send for e- signatures to multiple employees from organization files.
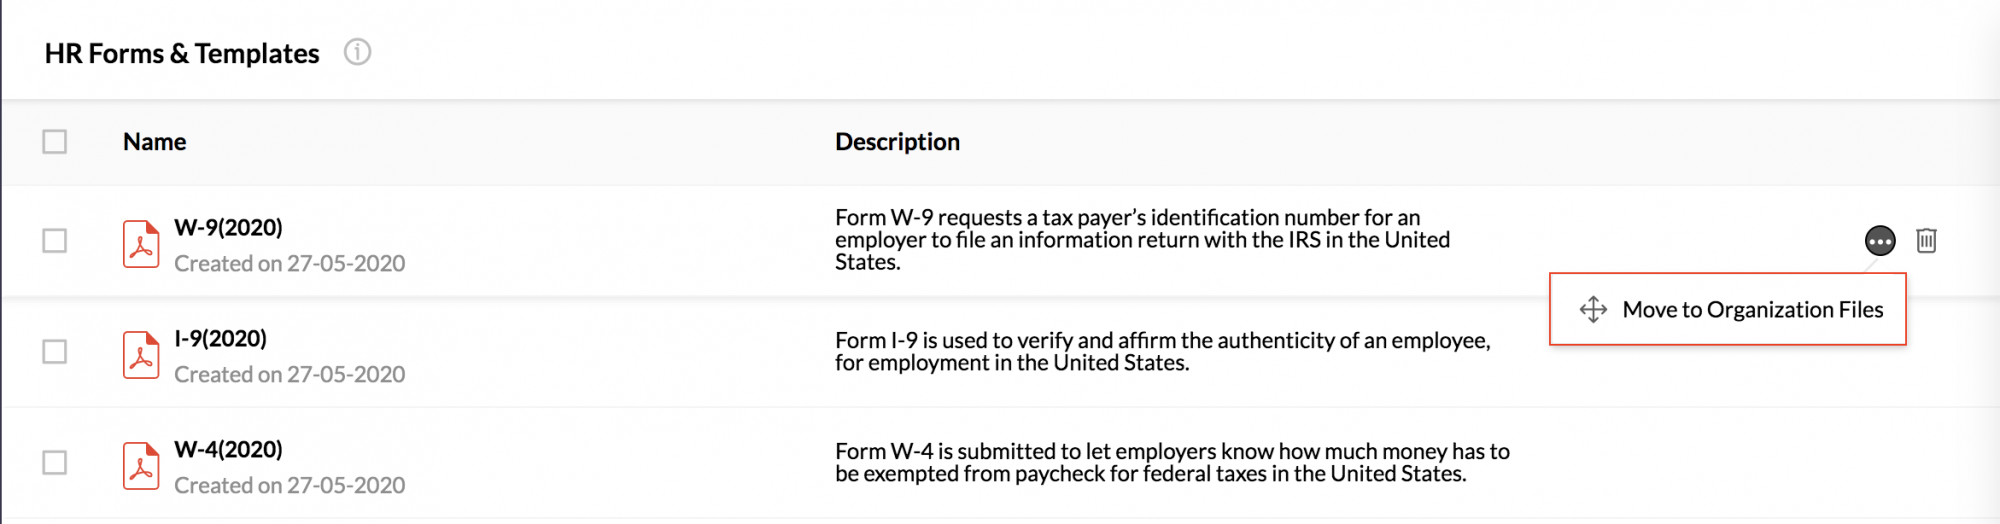
To share an HR Form with multiple employees:
- Go to Files > HR Forms & Templates.
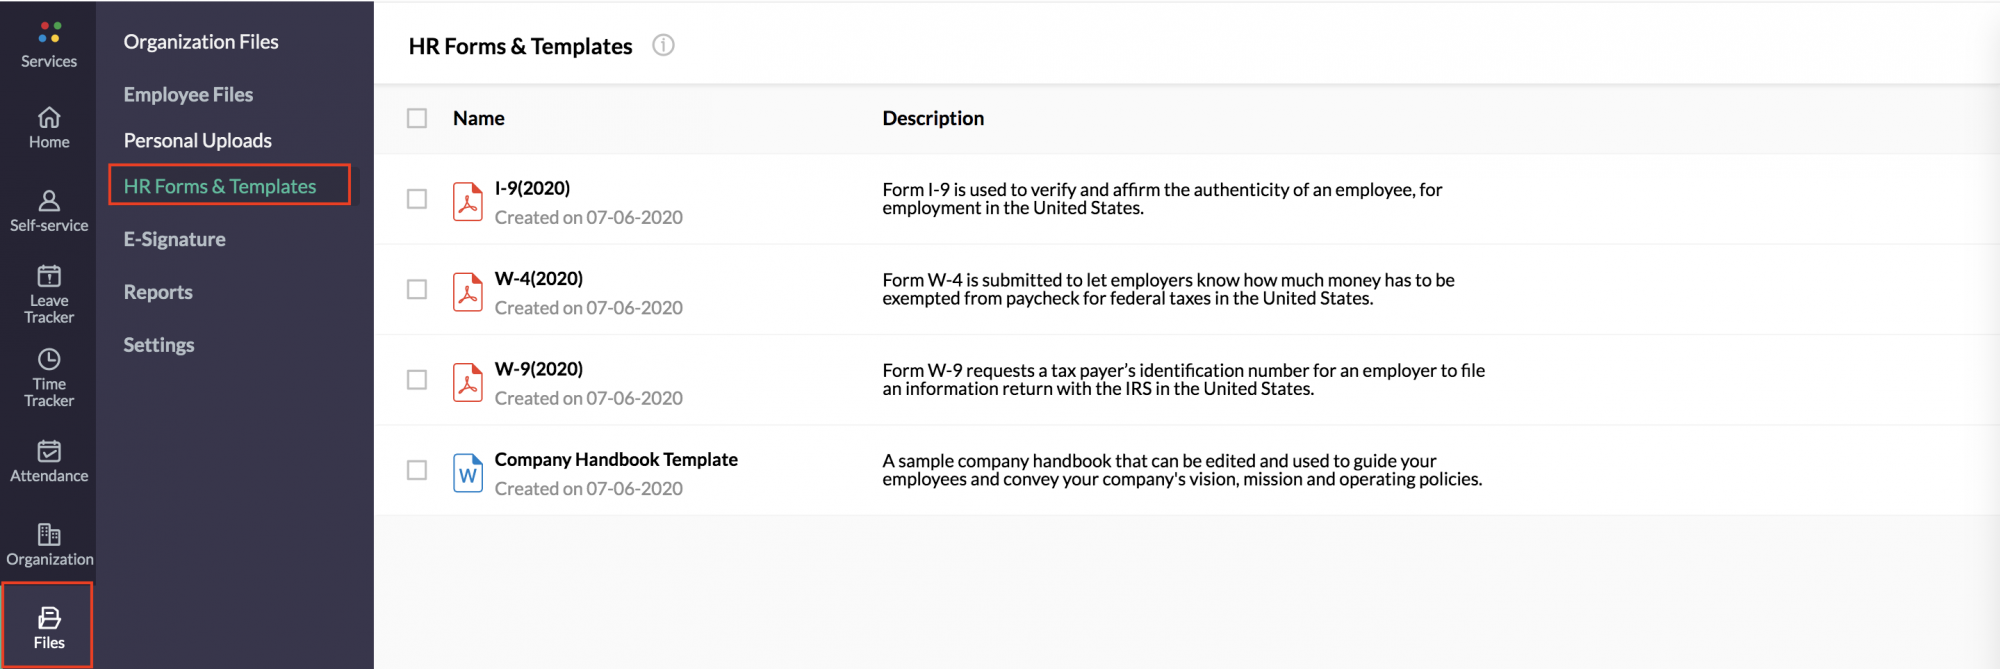
- Click the ellipsis icon beside the form you want to share.
- Click Move to Organization Files.
- Enter and edit the details, wherever required.
- Click Submit.
To send an HR form for e-sign:
- Go to Files > Organization files.
- Click the ellipsis icon beside the form, now converted as a file.
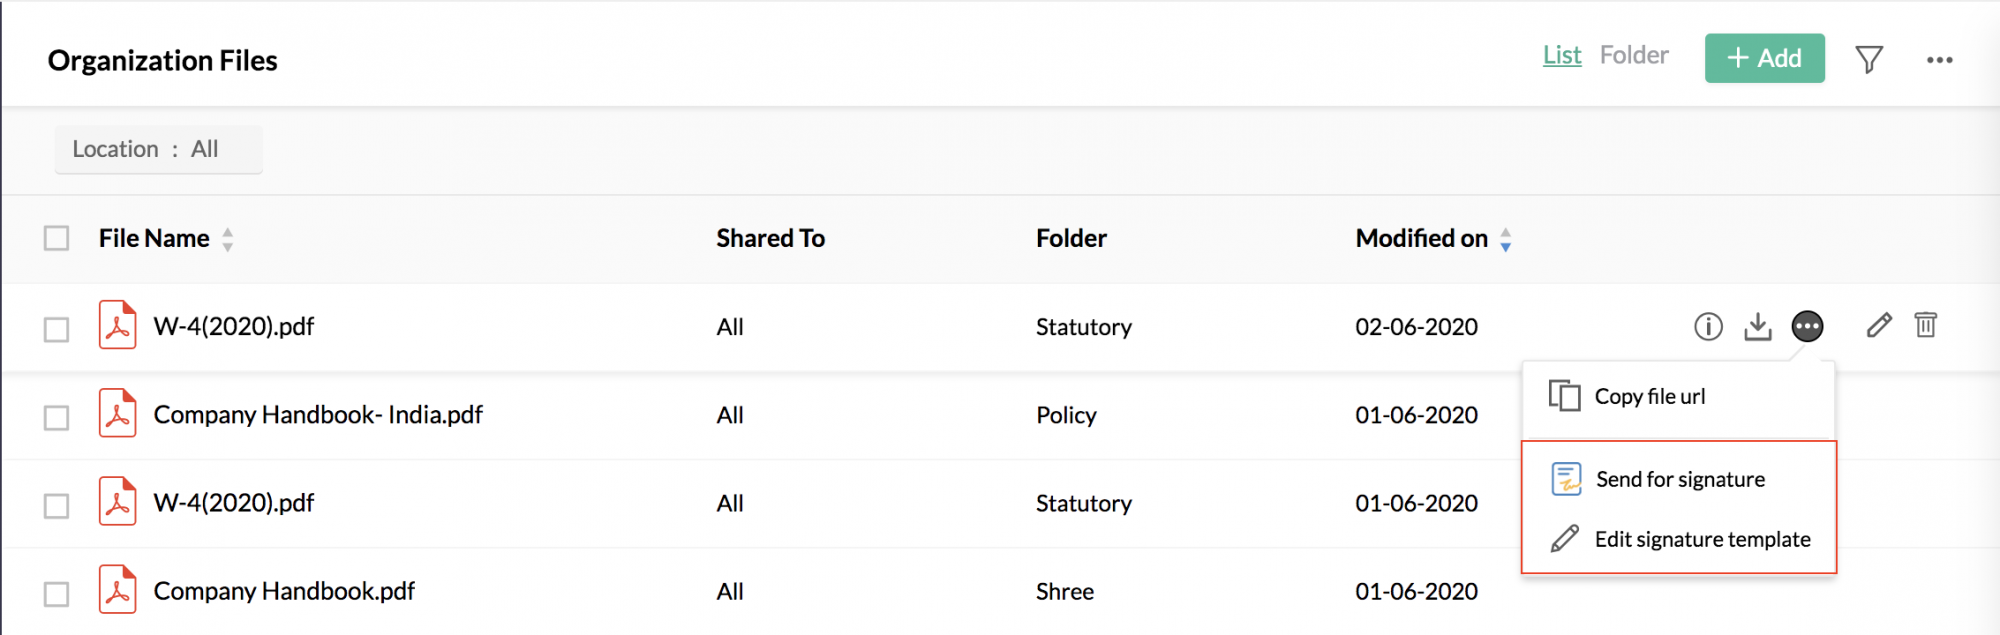
All the required signature fields will be auto populated.
- To send for signature directly, select Send for Signature. If All Employees is selected, then the file will be sent to all the applicable employees for e-sign. Otherwise choose Select Employees and add employees.If you want to make changes to the signature fields before sending, click Edit Signature Template.
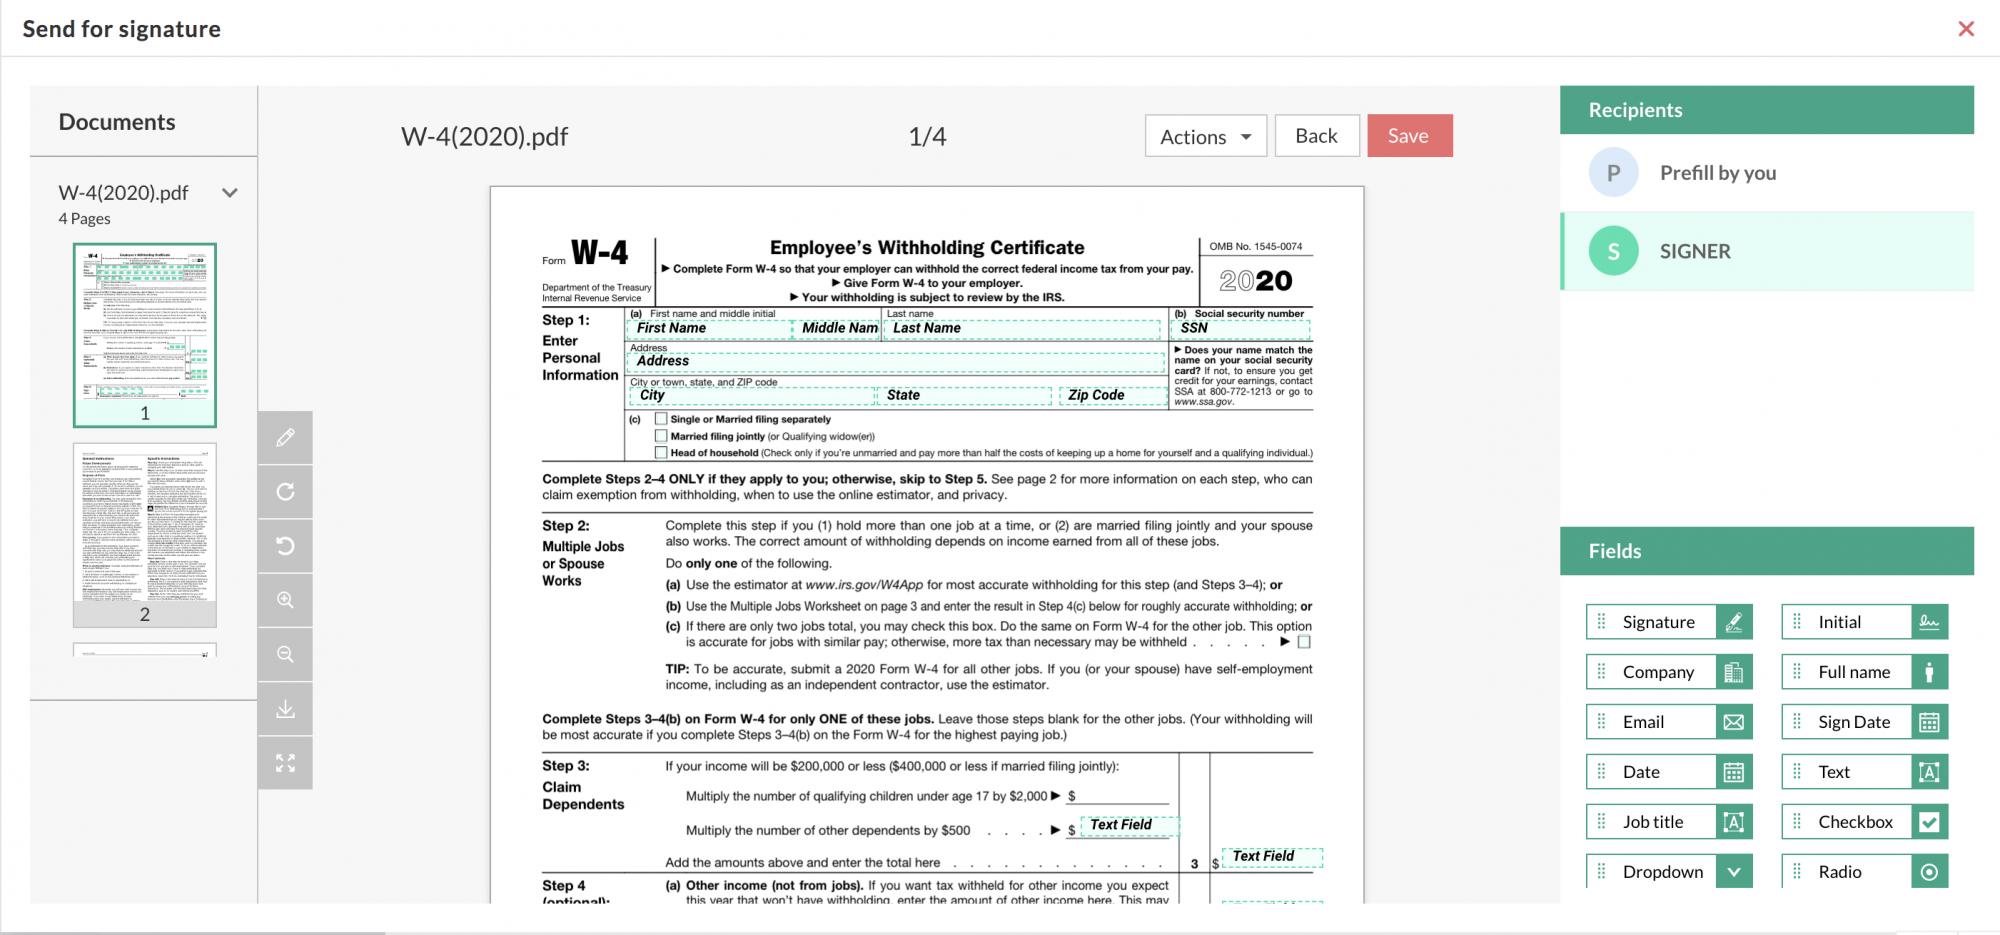
- Make the required changes to the file and click Save.
HR Templates
What are HR Templates?
HR Templates in Zoho People are common HR documents used by the HR department in organizations to guide and manage employees
The Company Handbook Template can be edited and used to inform employees about the organization's vision, mission, goals, and policies. The handbook is usually handed out to all new members in an organization.
The template can be:
- Customized based on the region it is to be applied to. For example, a company handbook for India will vastly vary with that of the US region.
- Shared with the applicable location, department and other criteria.
- Sent for e-sign to the applicable recipients.
To customize and share the Company Handbook with applicable recipients:
- Go to Files > HR Forms and Templates.
- Click the ellipsis icon beside company handbook.
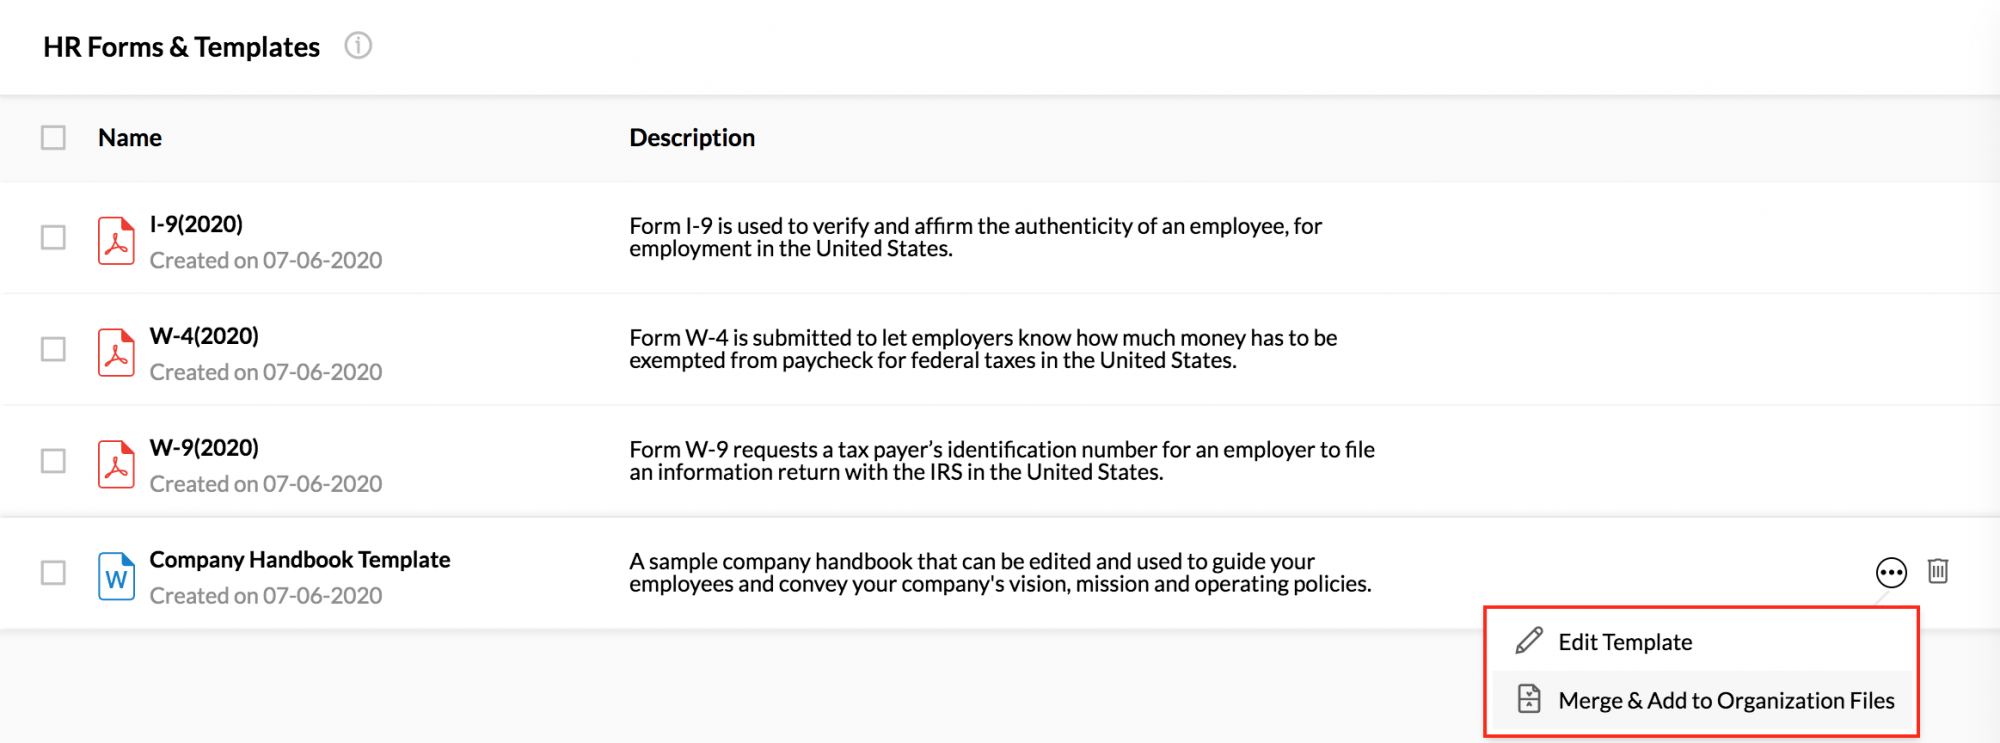
- Click Edit Template.
- Click on the template.
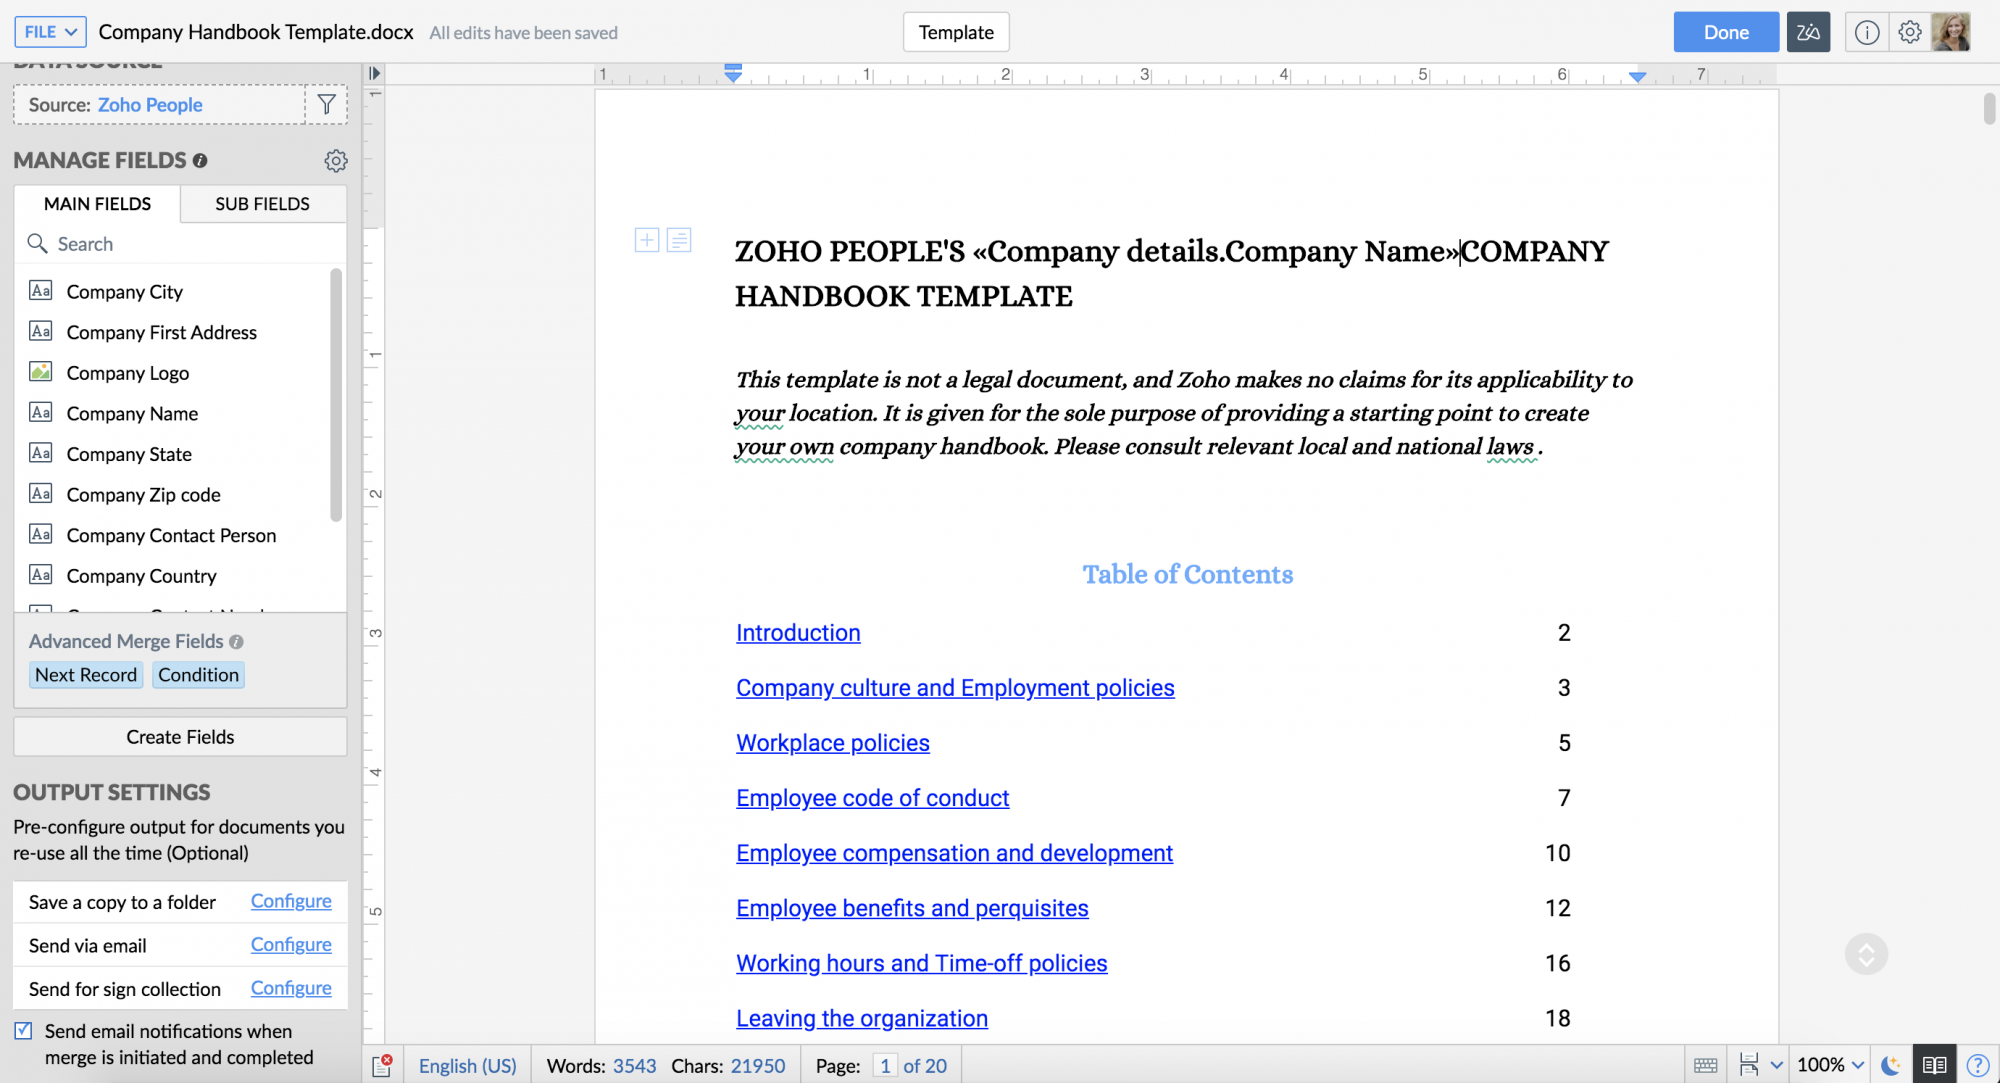
- Make the necessary changes and click Done.
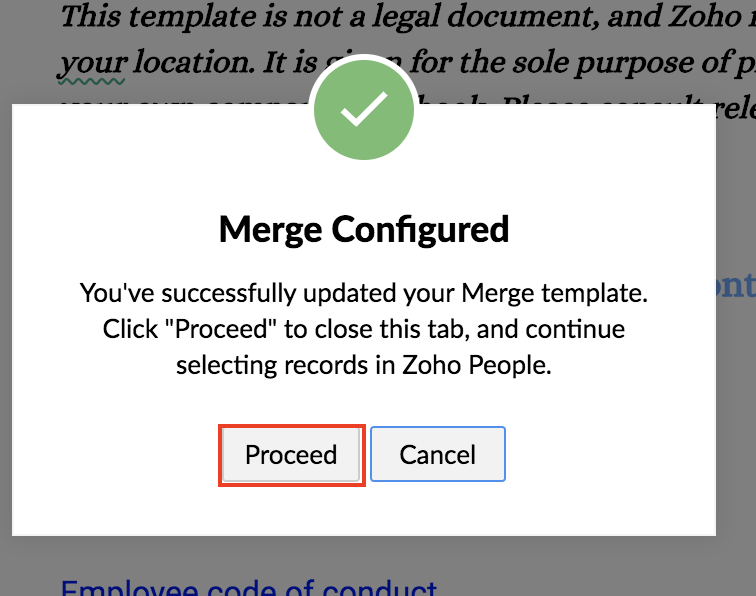
- Click Proceed in the popup message that appears.
- Return to the template and click the ellipsis icon beside it.
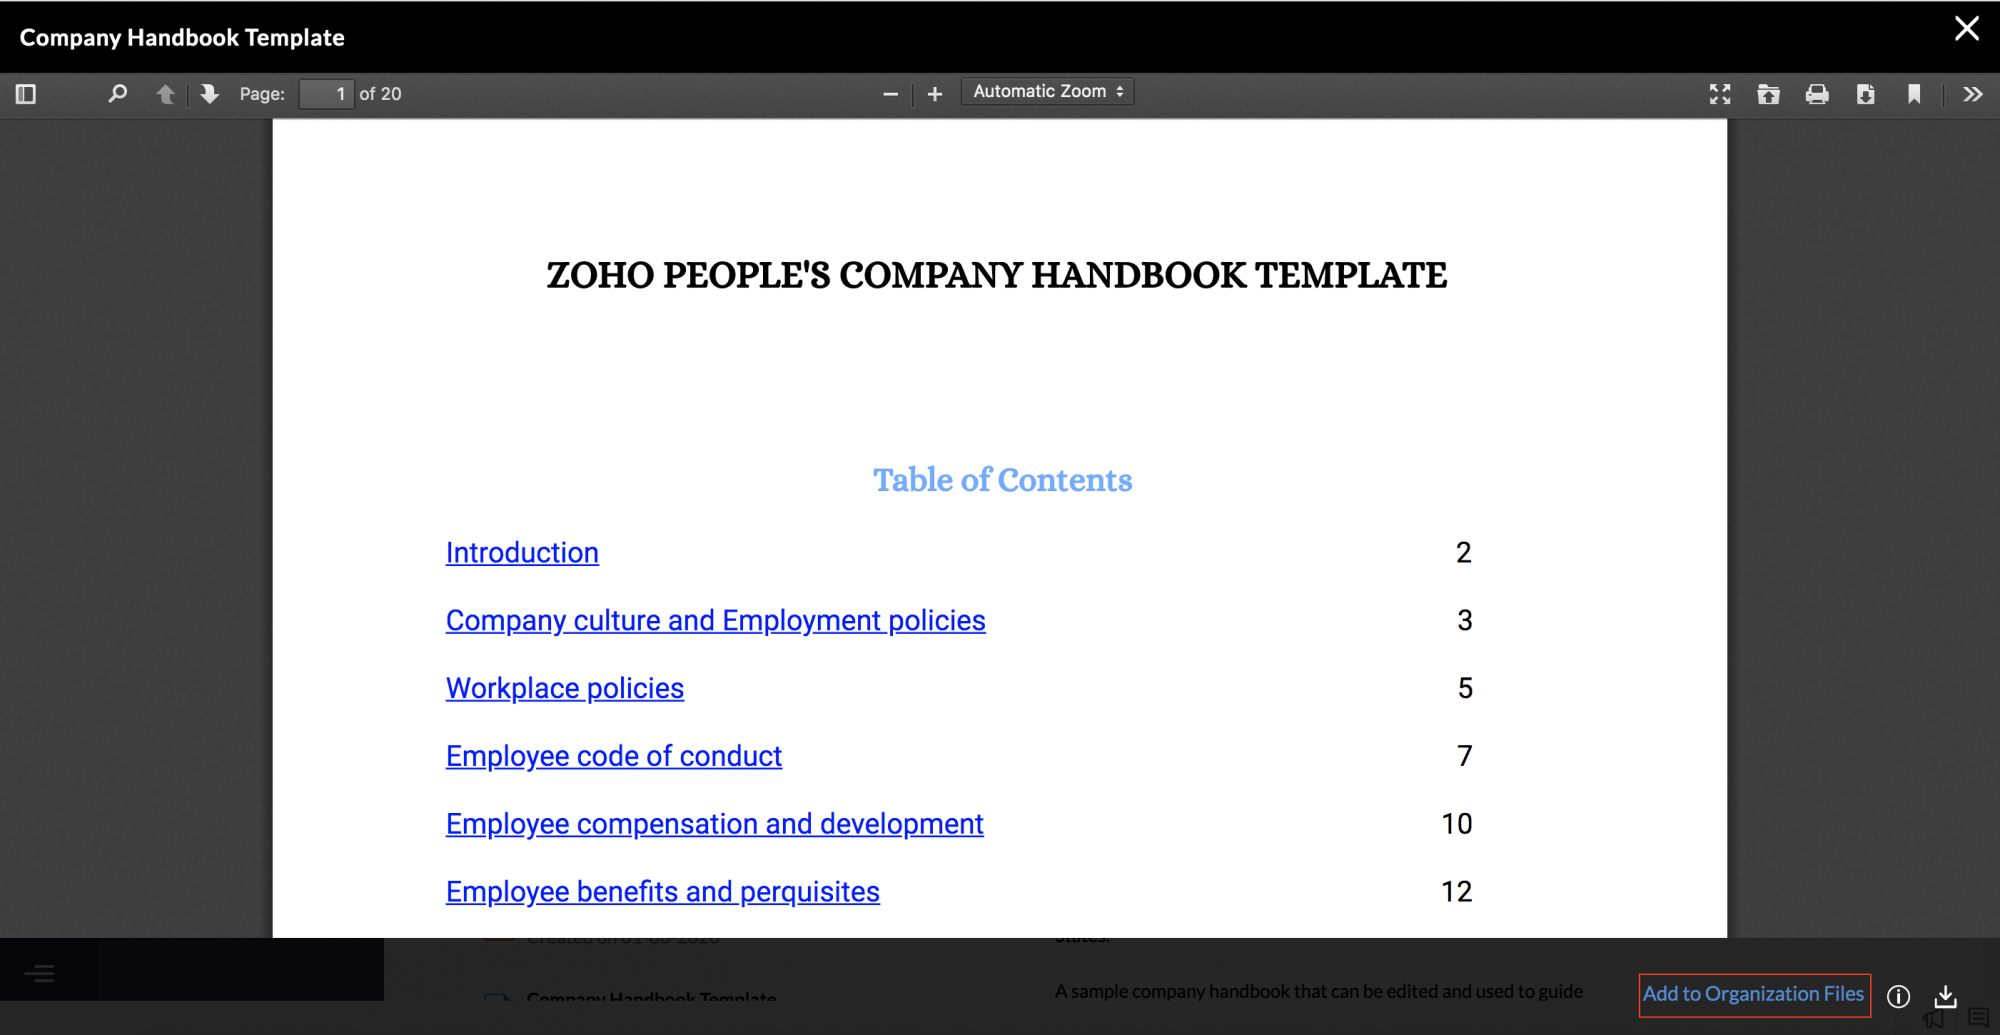
- Click Merge and Add to Organization files.
- Preview the data that you have merged and click Add to Organization Files.
- Enter and edit the details wherever required.
- Click Submit.
To send the edited company handbook for e-sign to applicable recipients.
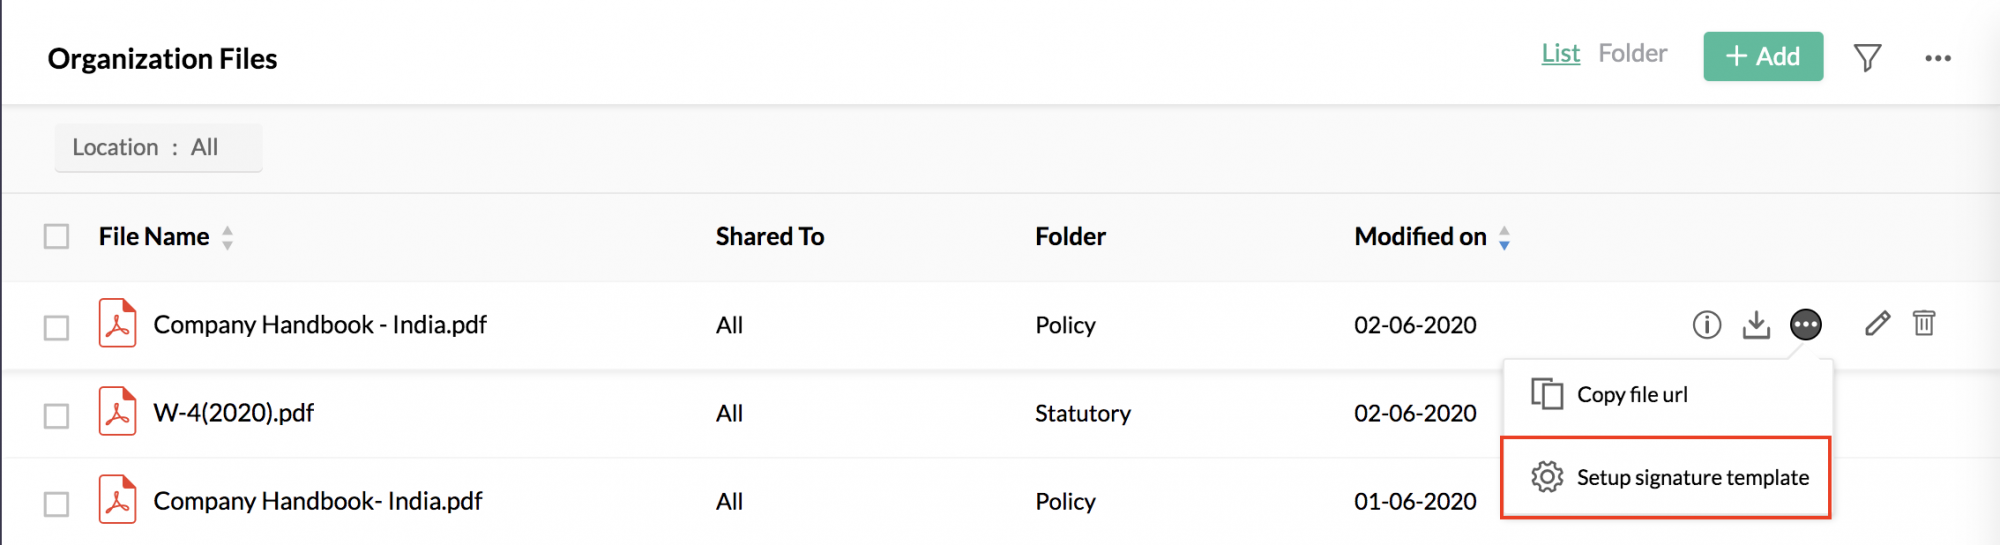
- Go to Files > Organization files.
- Click the ellipsis icon beside the file.
- Select Setup signature template.
- Enter the name of the file and other required details.
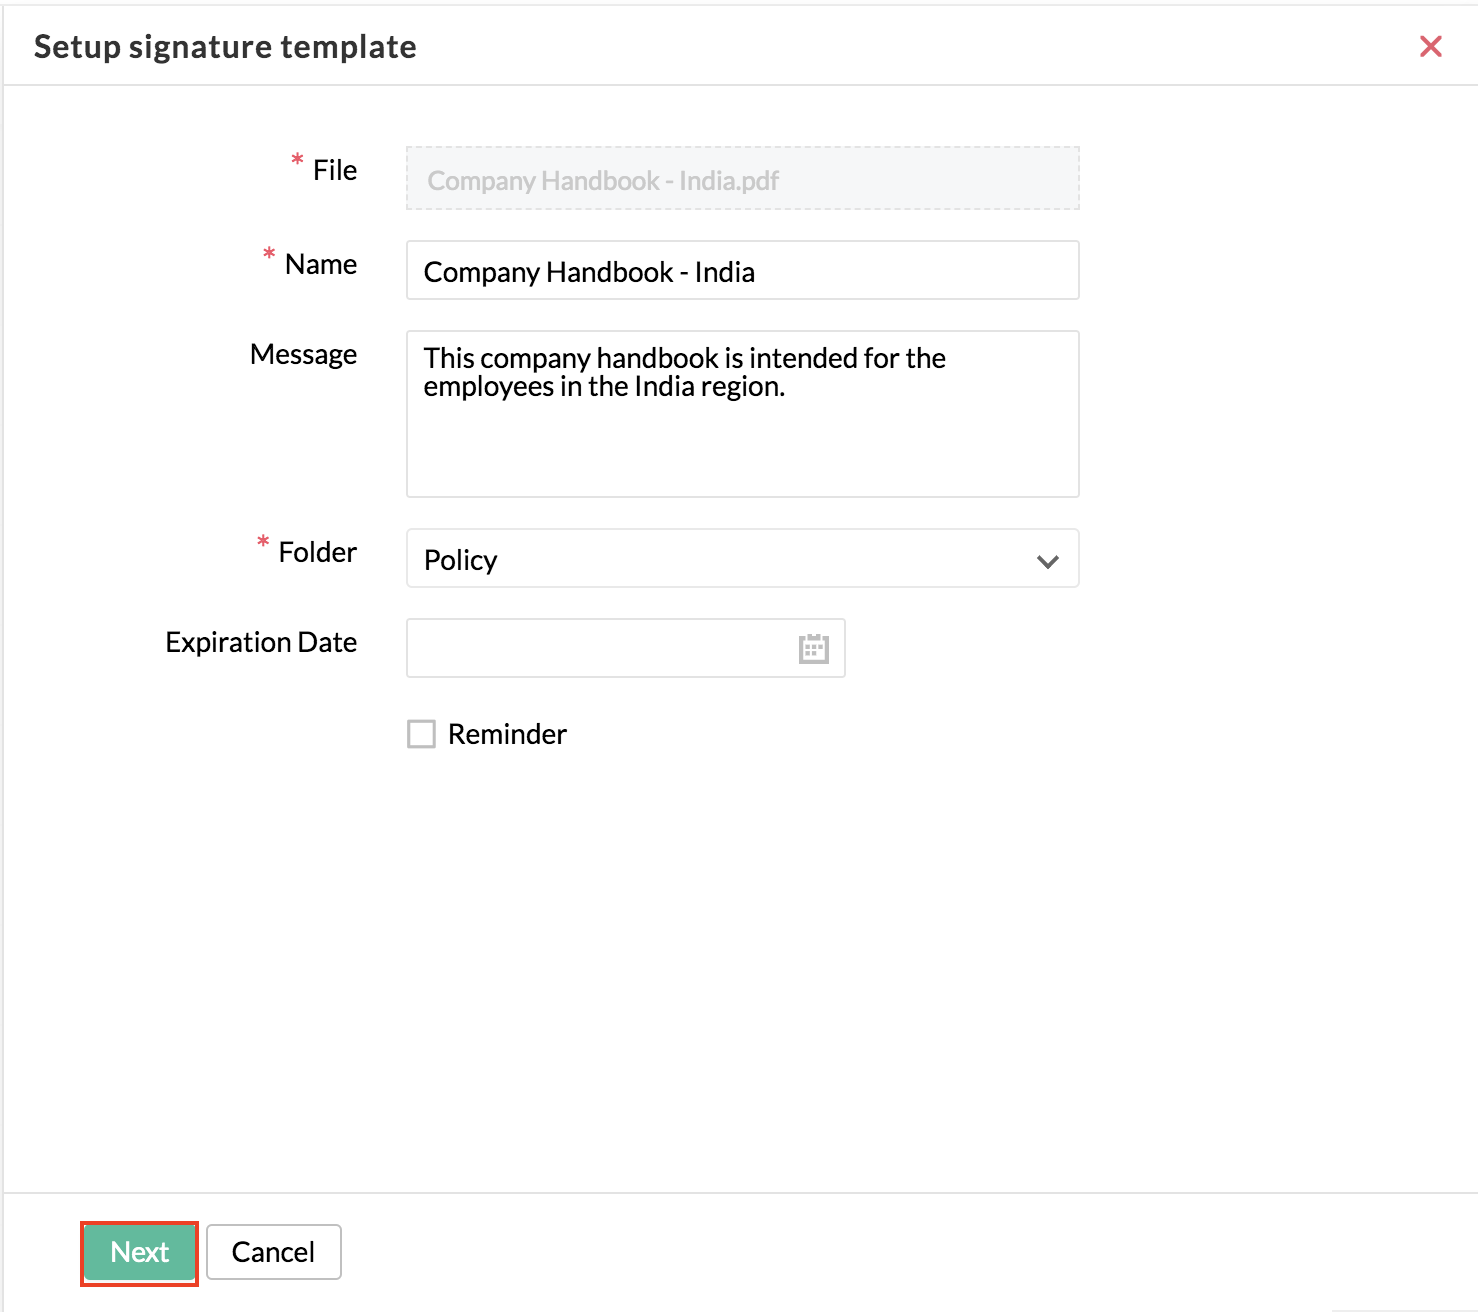
- Click Next.
- Add the required fields in the file for e-sign.
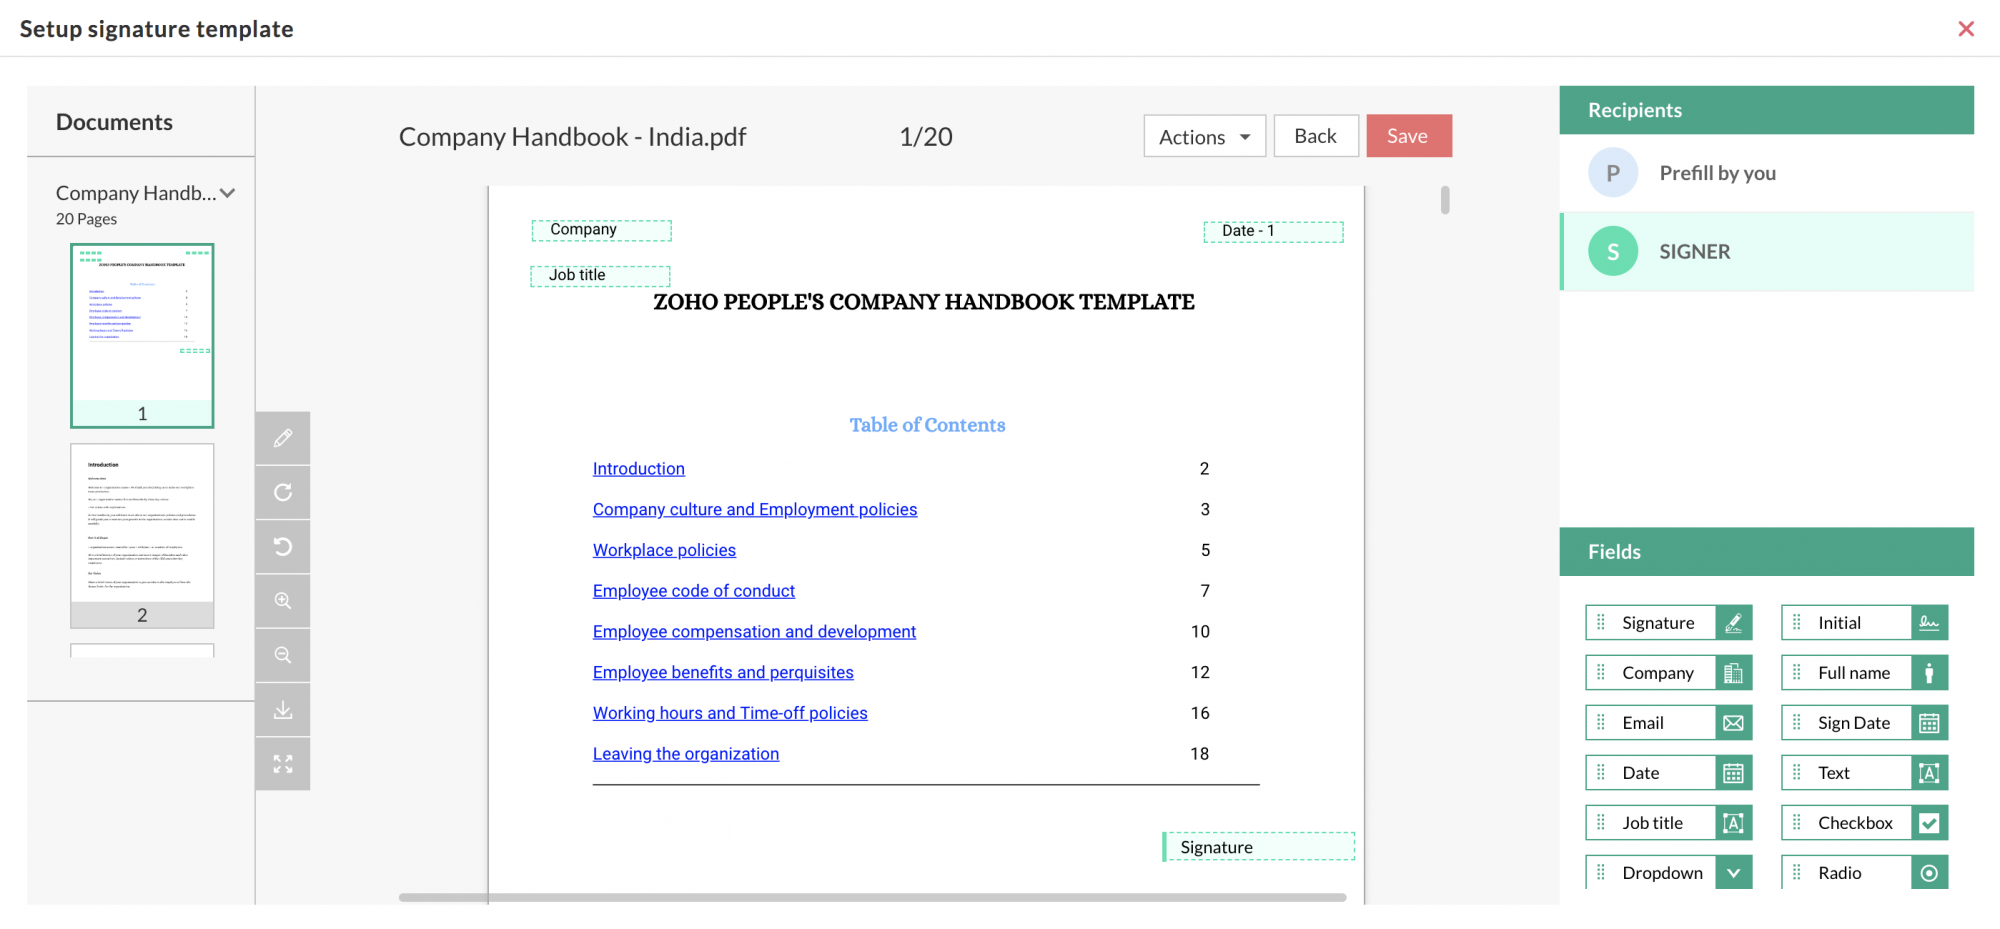
- Click Save.