Mail Scheduler
Purpose
Email scheduler is useful when you want to send reminders to your employees periodically. For eg. If you would like your employees to submit their mobile bills for a claim on a particular date/day etc, you can create a scheduler. The scheduler will send an email to the employee that you have selected.
Creating a Mail Scheduler
Follow the steps given below to configure an email scheduler.
- From your home page, go to Settings (gear icon) > Automation > Scheduler > Mail Scheduler
- Click on 'Add Mail Scheduler'
- Give a name for the scheduler. For eg - Reminder for submitting mobile bills
- Give a Start date and time
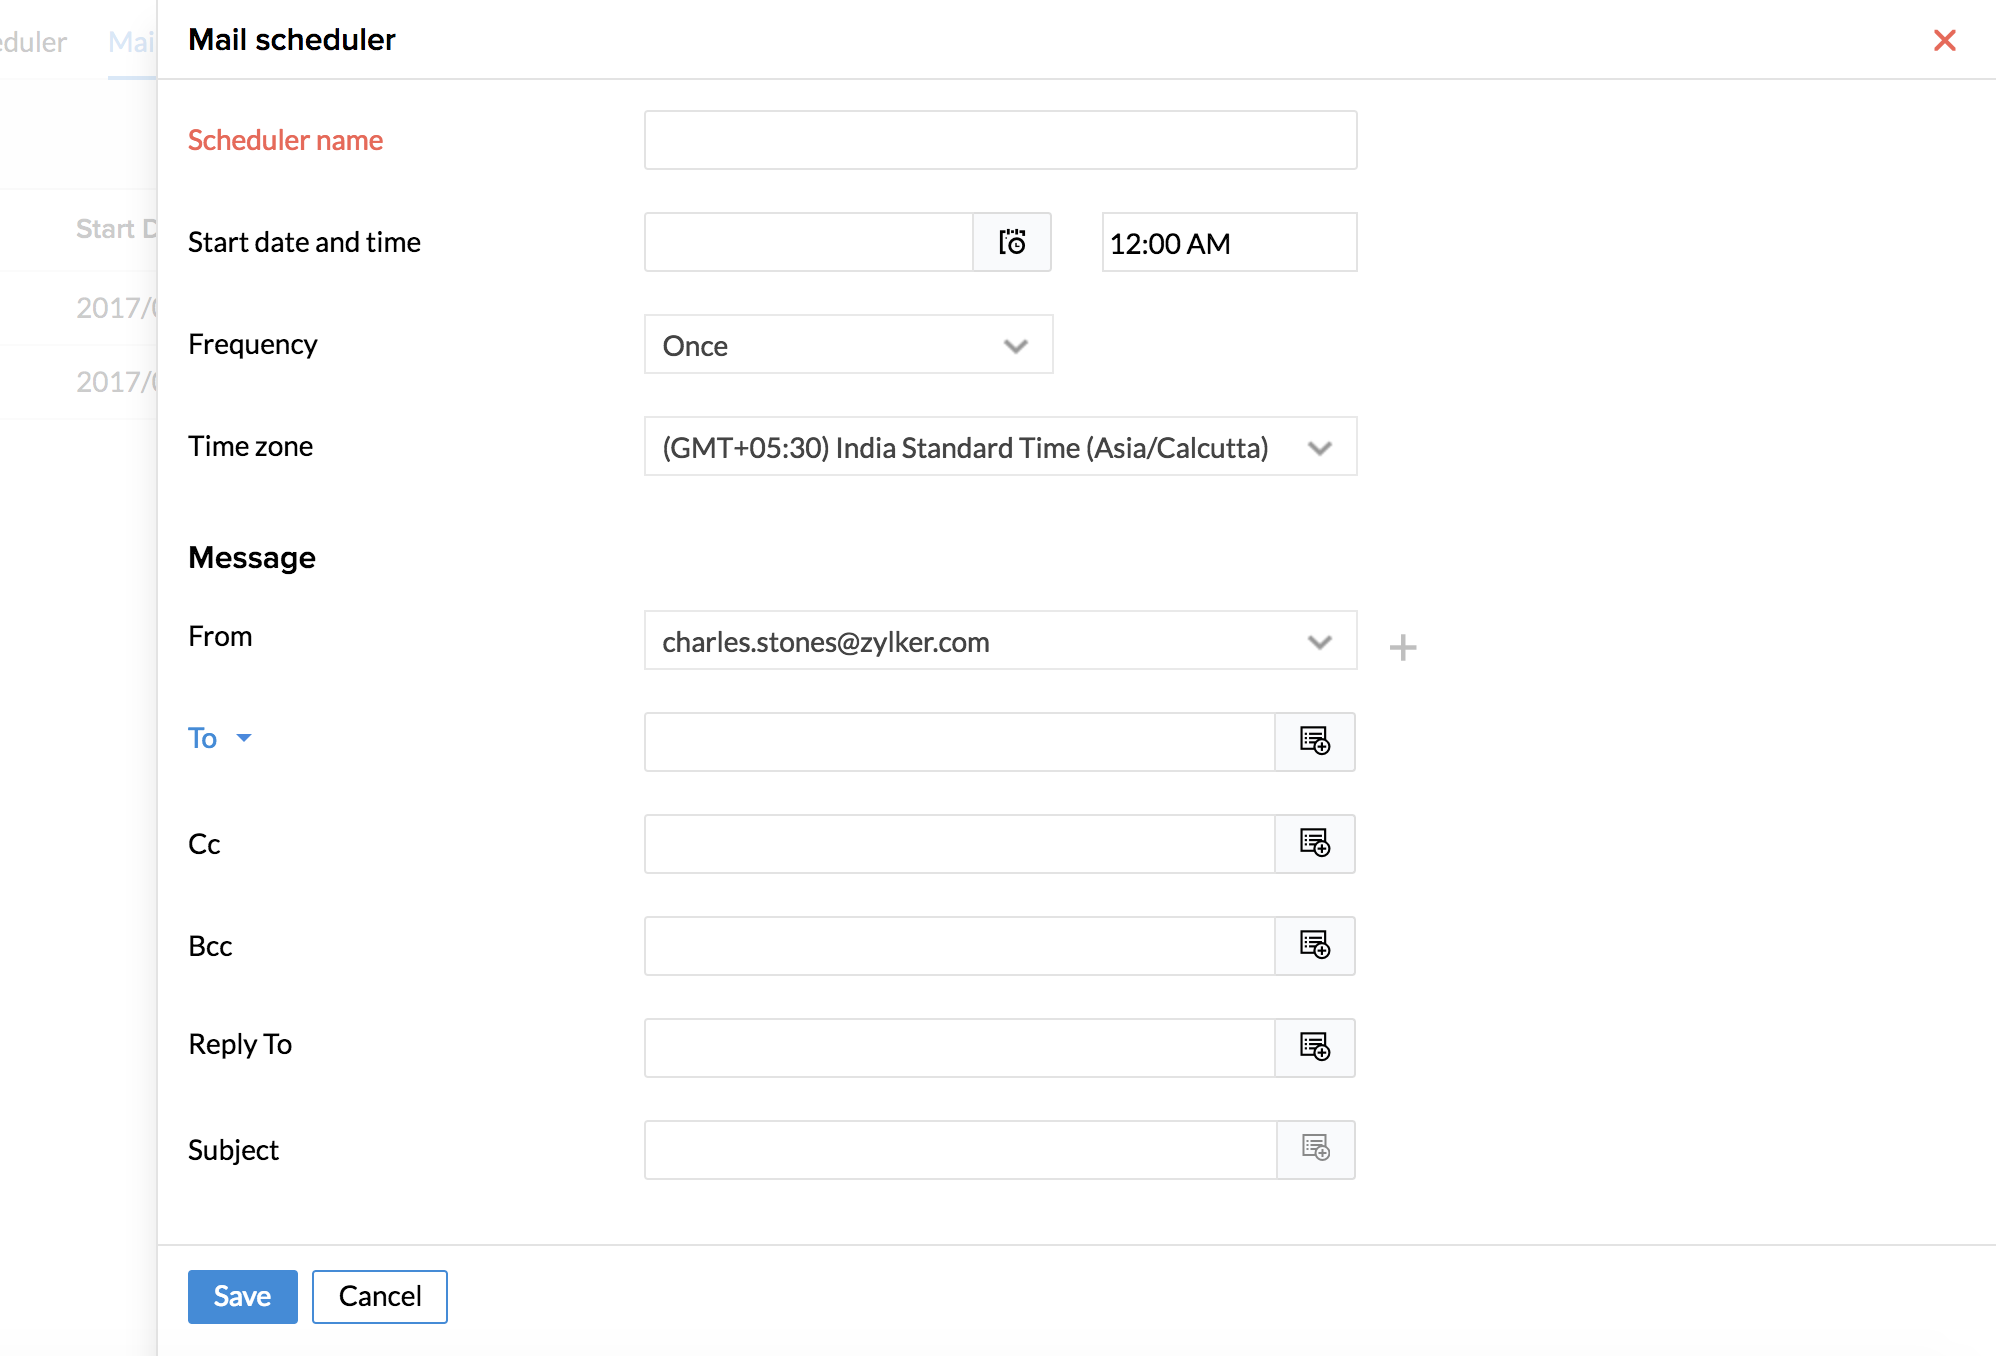
The Start date is the date on which you would like to get the scheduler running.
- Set a Frequency. For eg - for mobile bills to be submitted, you can select Monthly and select a date
If you would like to set Weekly, then you can decide on the day of the week that you would like the scheduler to run. In case of Quarterly/Half yearly and Yearly, the scheduler will run once in 3months/6months/year from the date that you set in the start date.
- Select a Time Zone. The Time Zone should be selected based on the Time Zone of the recipient of the email. For eg. If your email is meant for someone in another region, then the Time Zone should be chosen accordingly.
- Under Message, select a From and To
- Under To, you can choose from options like User List, Role List, etc
- Give a CC and BCC if required
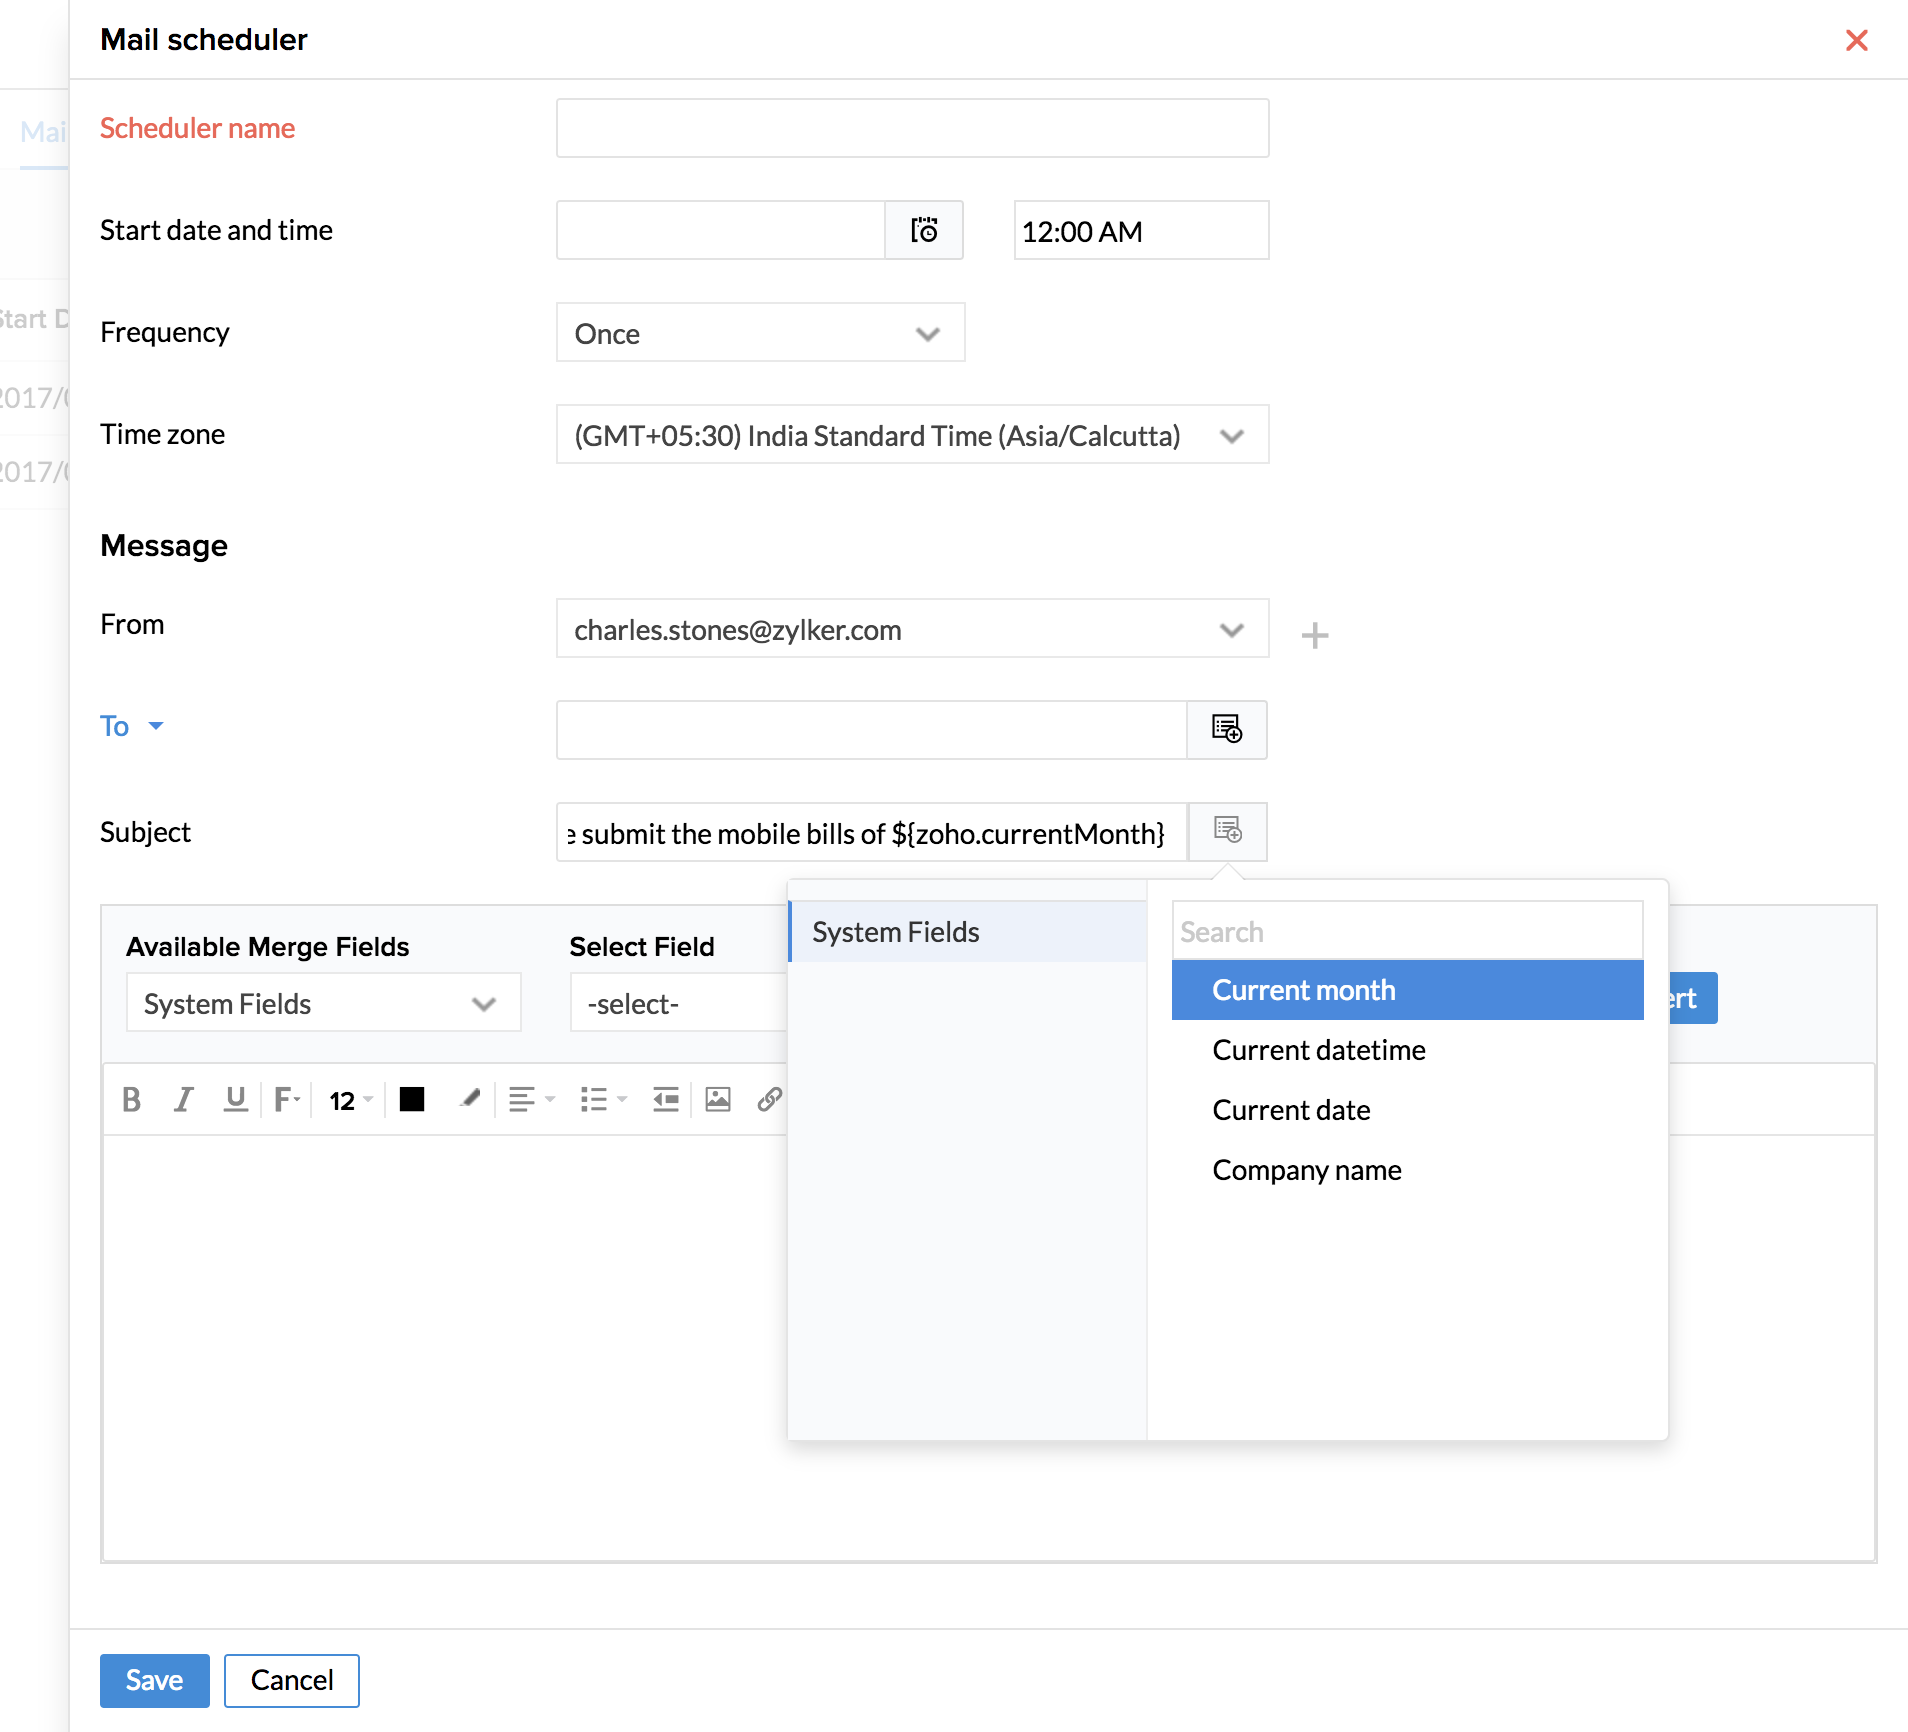
- Give a subject
You can make the subject dynamic by using options from the list icon, like Current Month, Current date etc. For eg, if you give subject as 'Please submit the mobile bills of ${zoho.currentMonth} by selecting the Current Month from the system fields, then every month the subject will change with that month's name.
- Click on 'Create your message'
Create a message with the help of the available merge fields.
For eg
"Hi
Please submit your mobile bills for ${zoho.currentmonth}"
Here, ${zoho.currentmonth} is inserted in the message by using Insert, and Merge fields as shown in the image below.

- Click Save
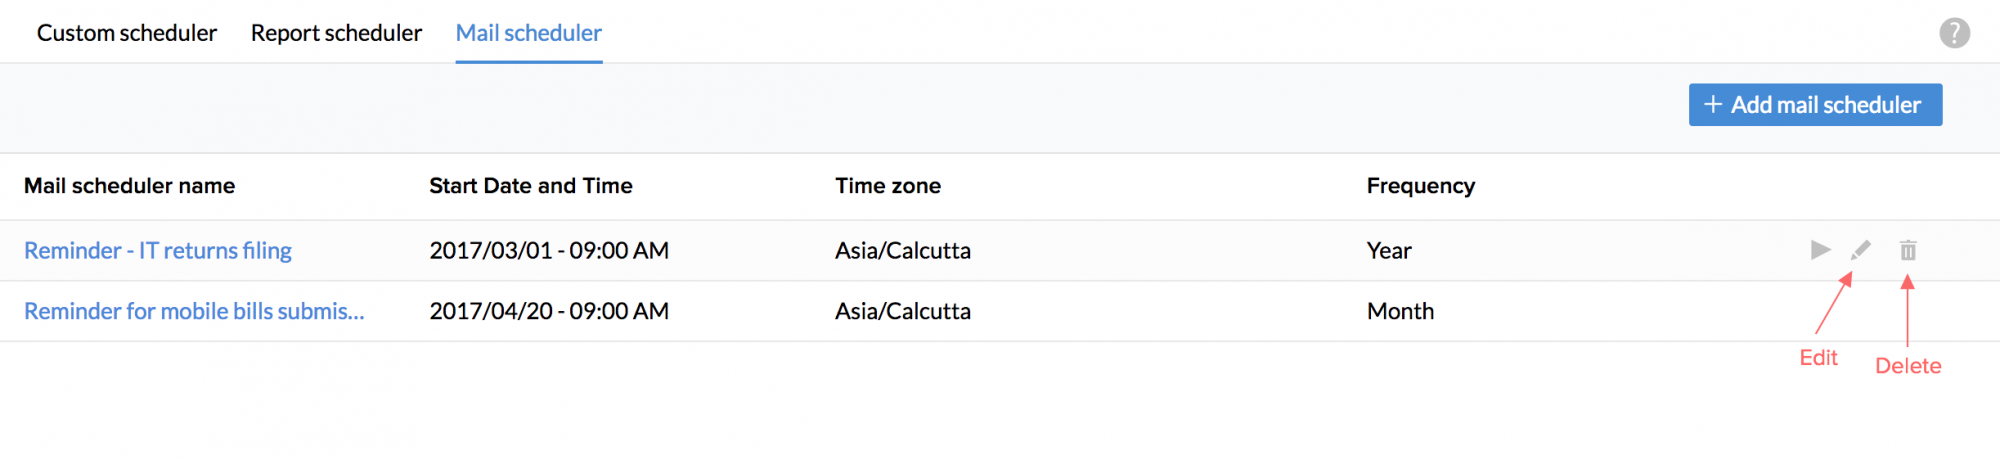
Once you have created the mail scheduler, you will be able to see it under Automation > Scheduler > Mail Scheduler with the following details.
- Mail Scheduler name
- Start Date and Time - this is the date and time on which the scheduler takes effect
- Time Zone
- Frequency - the frequency in which the mail(s)will be sent Eg, Daily, Monthly etc
Use the play icon if you would like to trigger the scheduler immediately.
Editing and Deleting a Mail Scheduler
- Hover your mouse over the Mail Scheduler
- Click on the edit icon that you see at the right corner of the row
- Edit the scheduler accordingly
- Click Save
To delete a Mail Scheduler:
- Hover your mouse over the Scheduler
- Click on the delete icon that you see at the right corner of the row
The scheduler will get deleted and the mail will not be triggered automatically.