Field Updates
- Purpose
- Adding a Field Update
- Integrating Field Update in Workflow
- Example Scenario - Exit Process
- Example Scenario - To automatically upload Employment Proof Letter
Purpose
To automatically update the value in the related form by selecting or providing the specific lookup value in the form. The field gets updated with the new values when the corresponding rule is triggered in the related form. This feature is very useful to avoid manual value entries in the related forms and thus saves time.
Field updates are used to update the field values of a form based on the input given or action taken in any other form. Consider these examples for a better understanding of its utility
Example 1 : Used in employee exit process.
When an employee resigns from the organization, the employment status in employee form will be edited to 'Resigned' when the employee submits the exit details form.
Example 2 : Team change request
When an employee submits a request in the team change form, the department or the team name can be updated in the department field of the Employee form.
Adding a Field Update
- Click Settings > Field Update under Automation > Add Field Update
- Select Form Name from the drop-down list
- Provide Field Update Name and Description
- Select a value from the first drop-down list of Edit Field. This selected lookup value gets invoked and thus updates the value in the related form
- Select or provide value under Edit Field from the second drop-down list
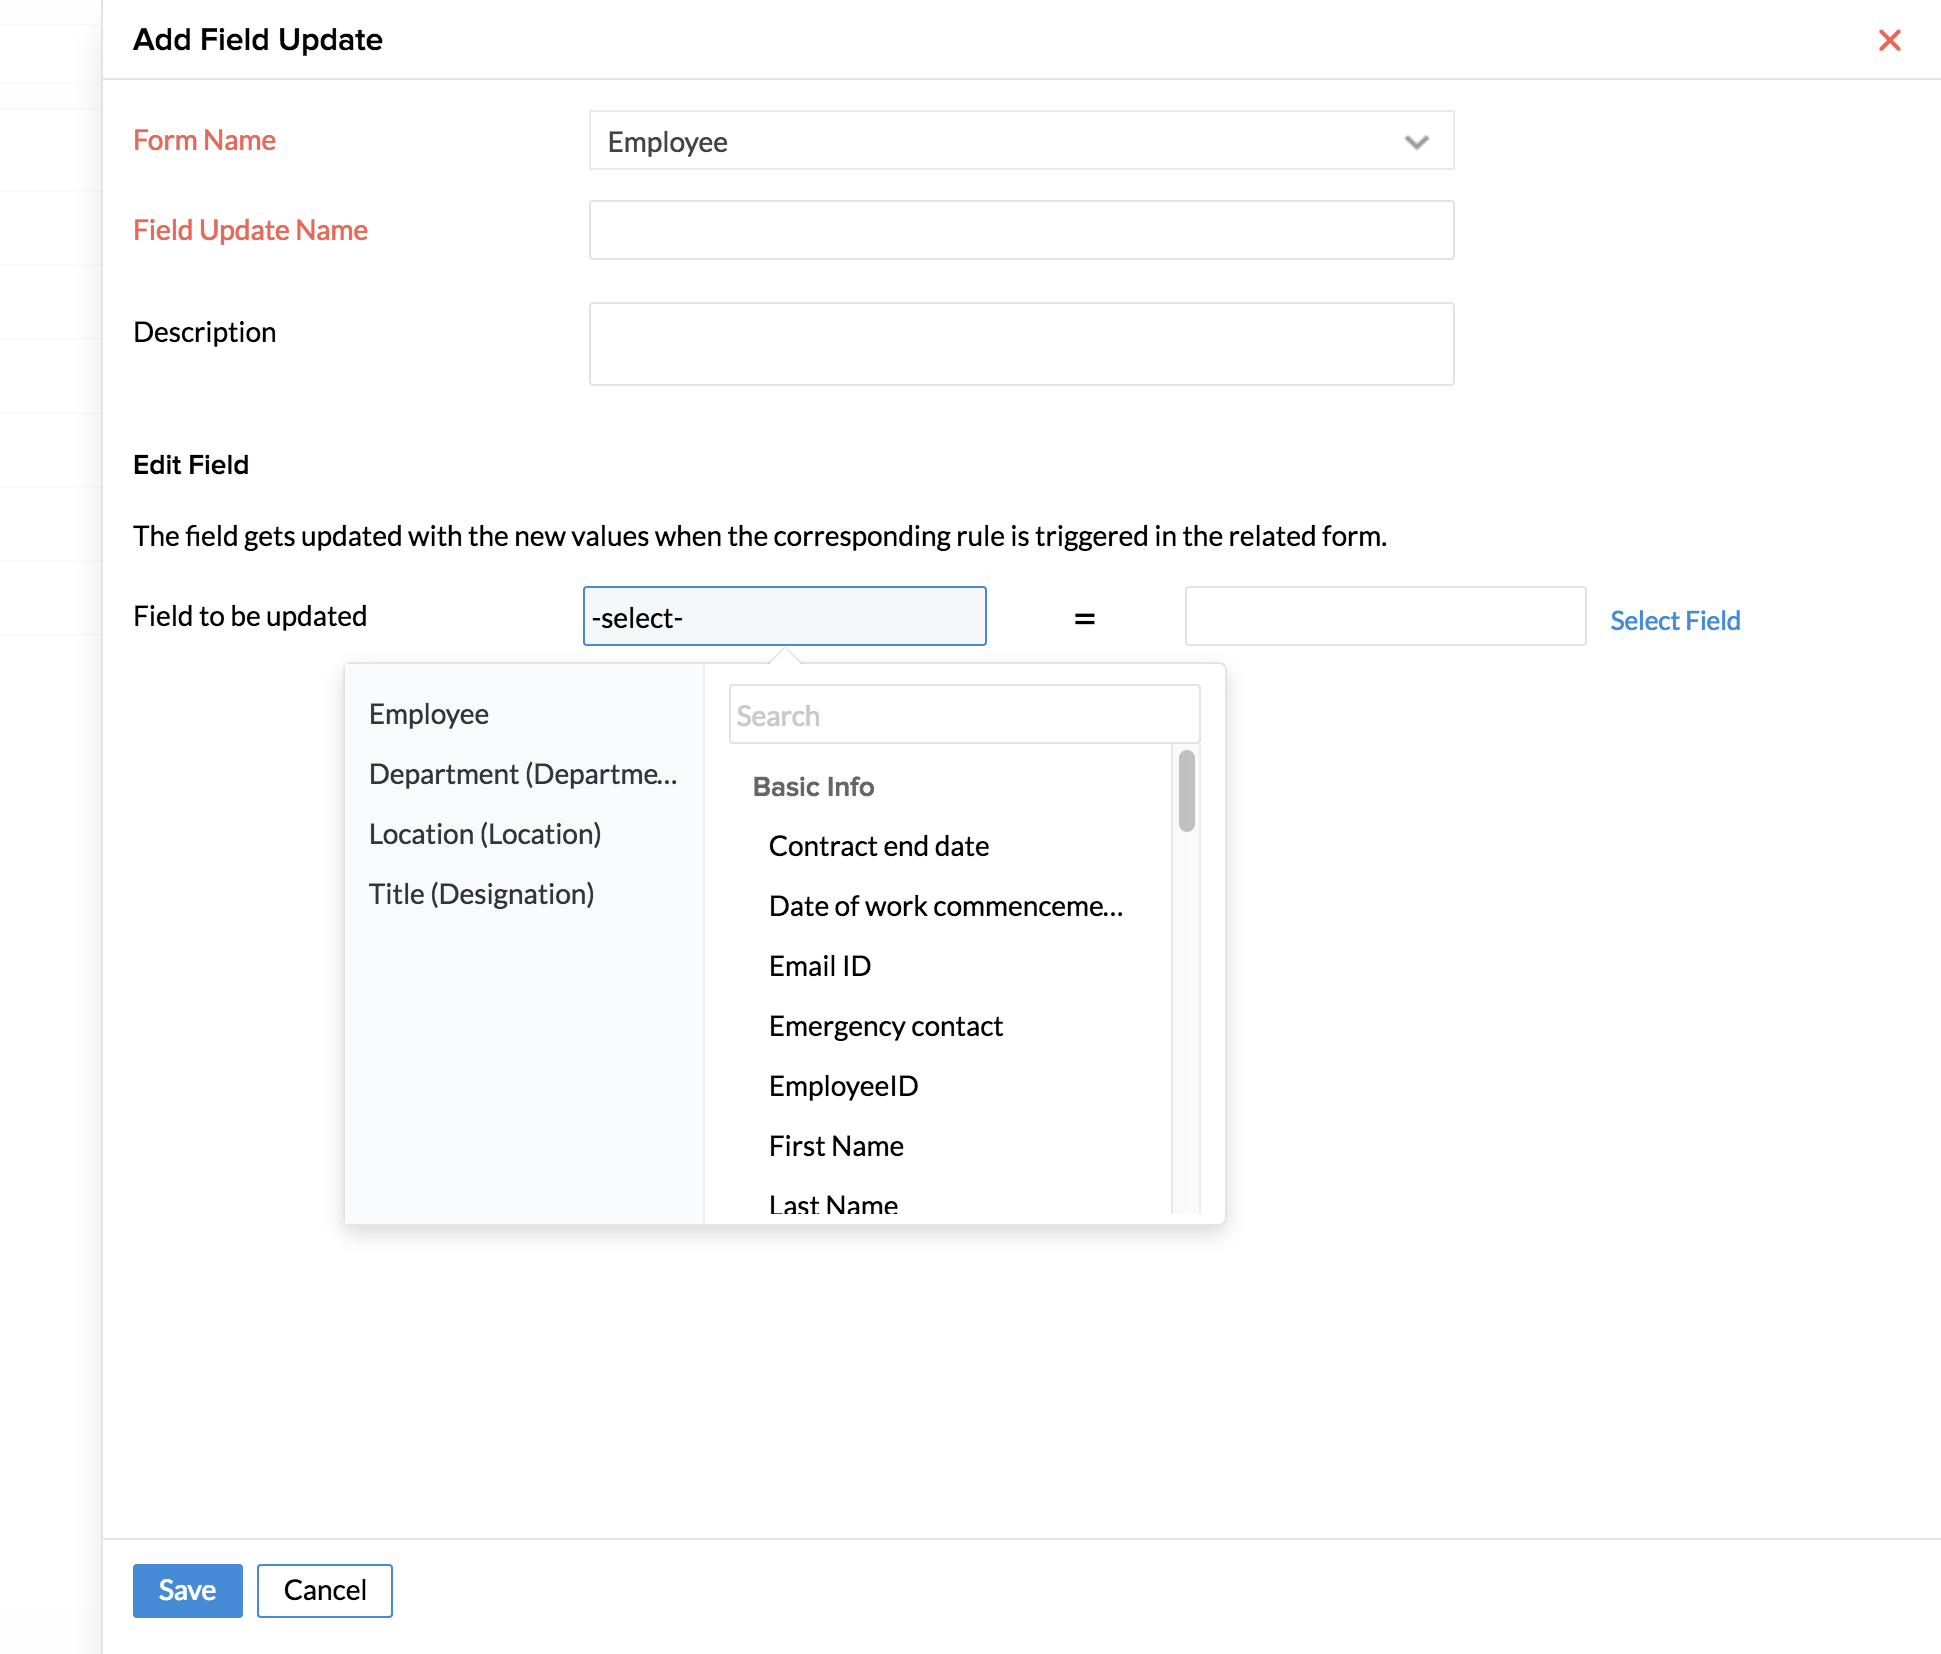
7. Click Save
Integrating Field Update in Workflow
- Click Setup > Workflow under Automation
- Click Workflow > Add Workflow
- Select Form Name
- Provide Workflow Name and Description
- Workflow is triggered only when the status check box is enabled and active
- Select Execute based on action
- Under Trigger Process click the folder icon in the Field update list and select the field update
- Click Save
Example Scenario - Exit Process
This example lets you do the complete process of field update in exit details form. To automatically update the Employee Status as Resigned in the employee form by updating a value in the Resignation form, follow the below steps:
- Click Settings > Field Update under Automation > Add Field Update
- Select Resignation Form from Form Name
- Provide Field Update Name as Change Employee Status as Resigned and Description if needed
- Select Employee Status (Employee ID) from the first drop-down list of Edit Field. This selected lookup value gets invoked and thus updates the same value in the employee form
- Click Provide Value and enter 'Status of employee ( Resignation Form)'
- Click Save
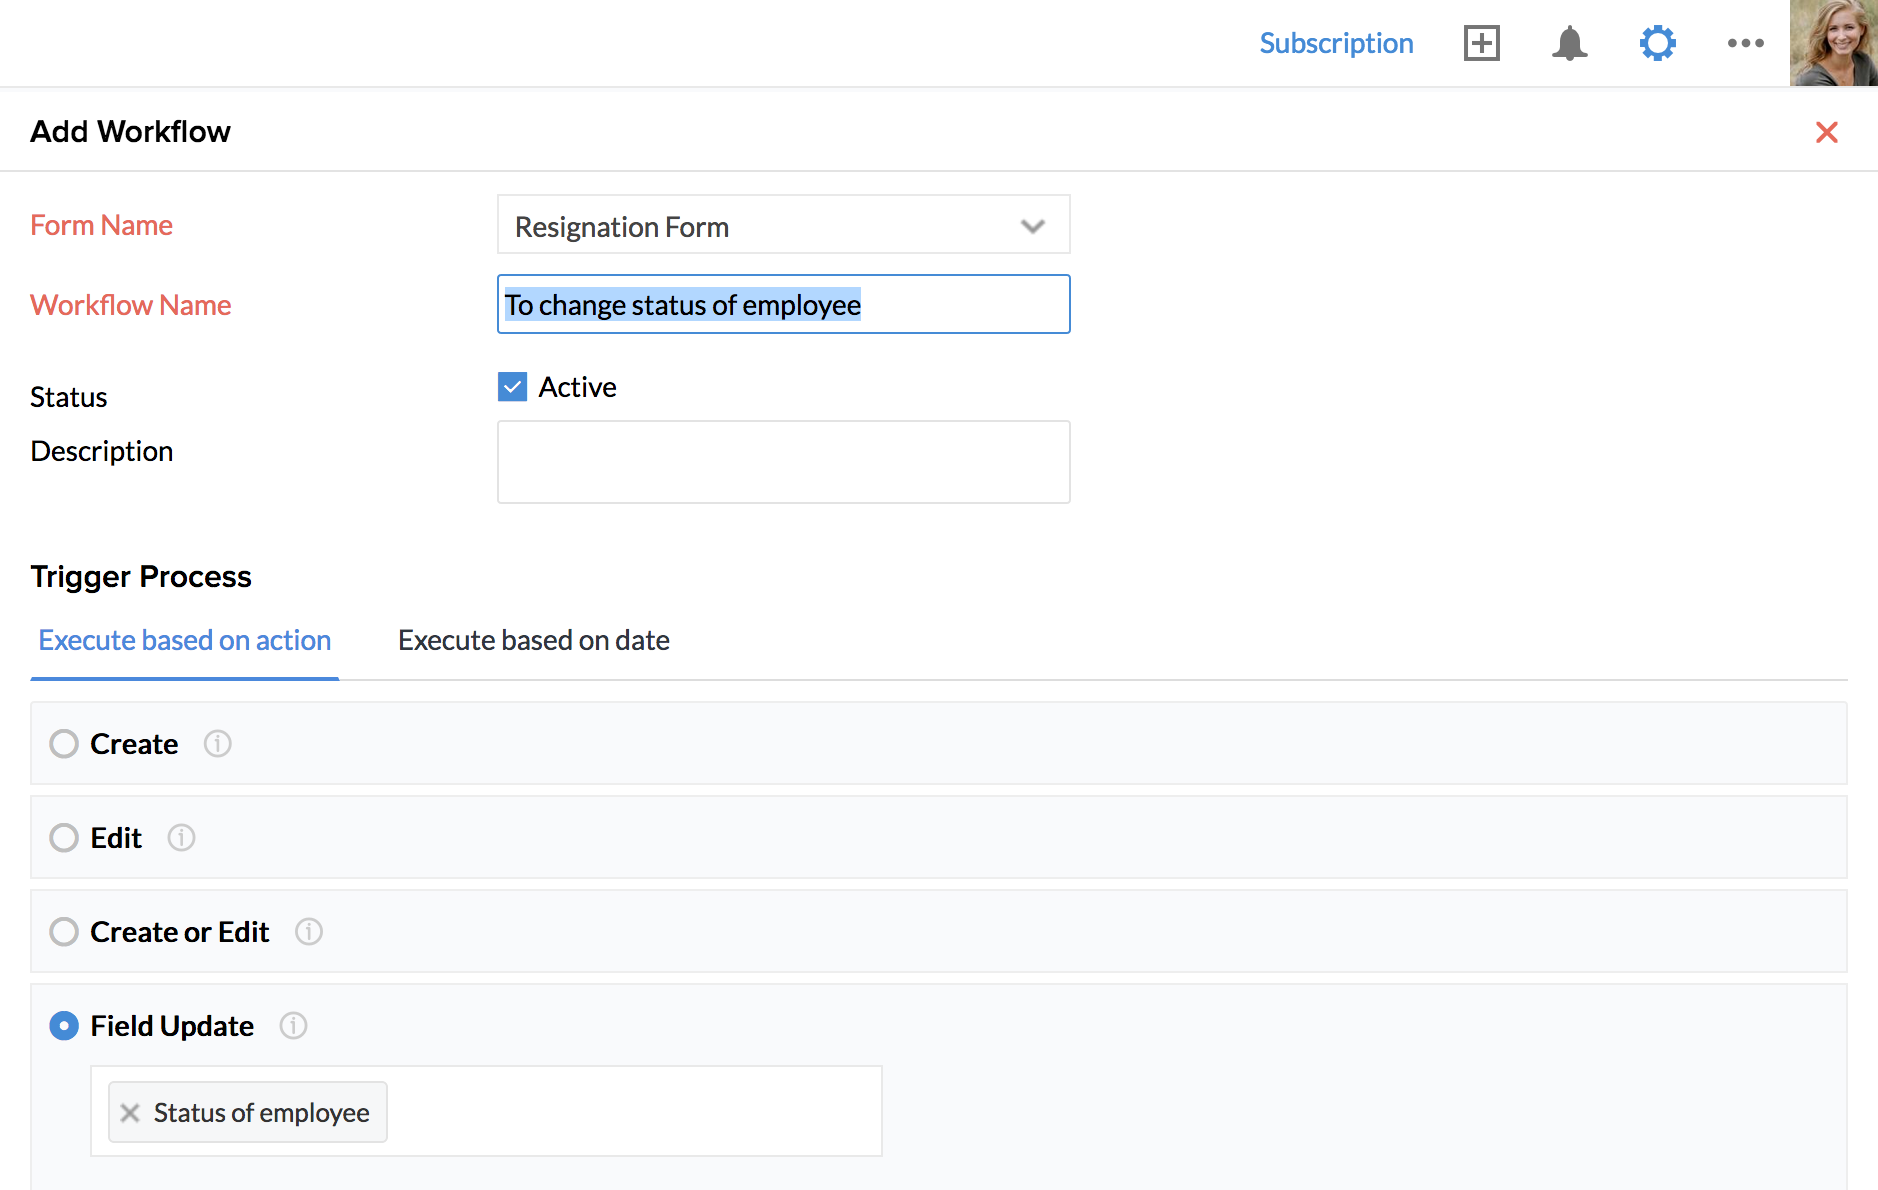
To map this Field Update to a workflow:
- Click Settings > Workflow > Add Workflow
- Select 'Resignation Form'from Form Name
- Provide Workflow Name as 'To change status of employee' and give a Description if needed
- Select Execute based on action
- Under Field Update, select Status of Employee
- Under Action, go to Field Update and click on the folder to select the Field update (To change the employee status)
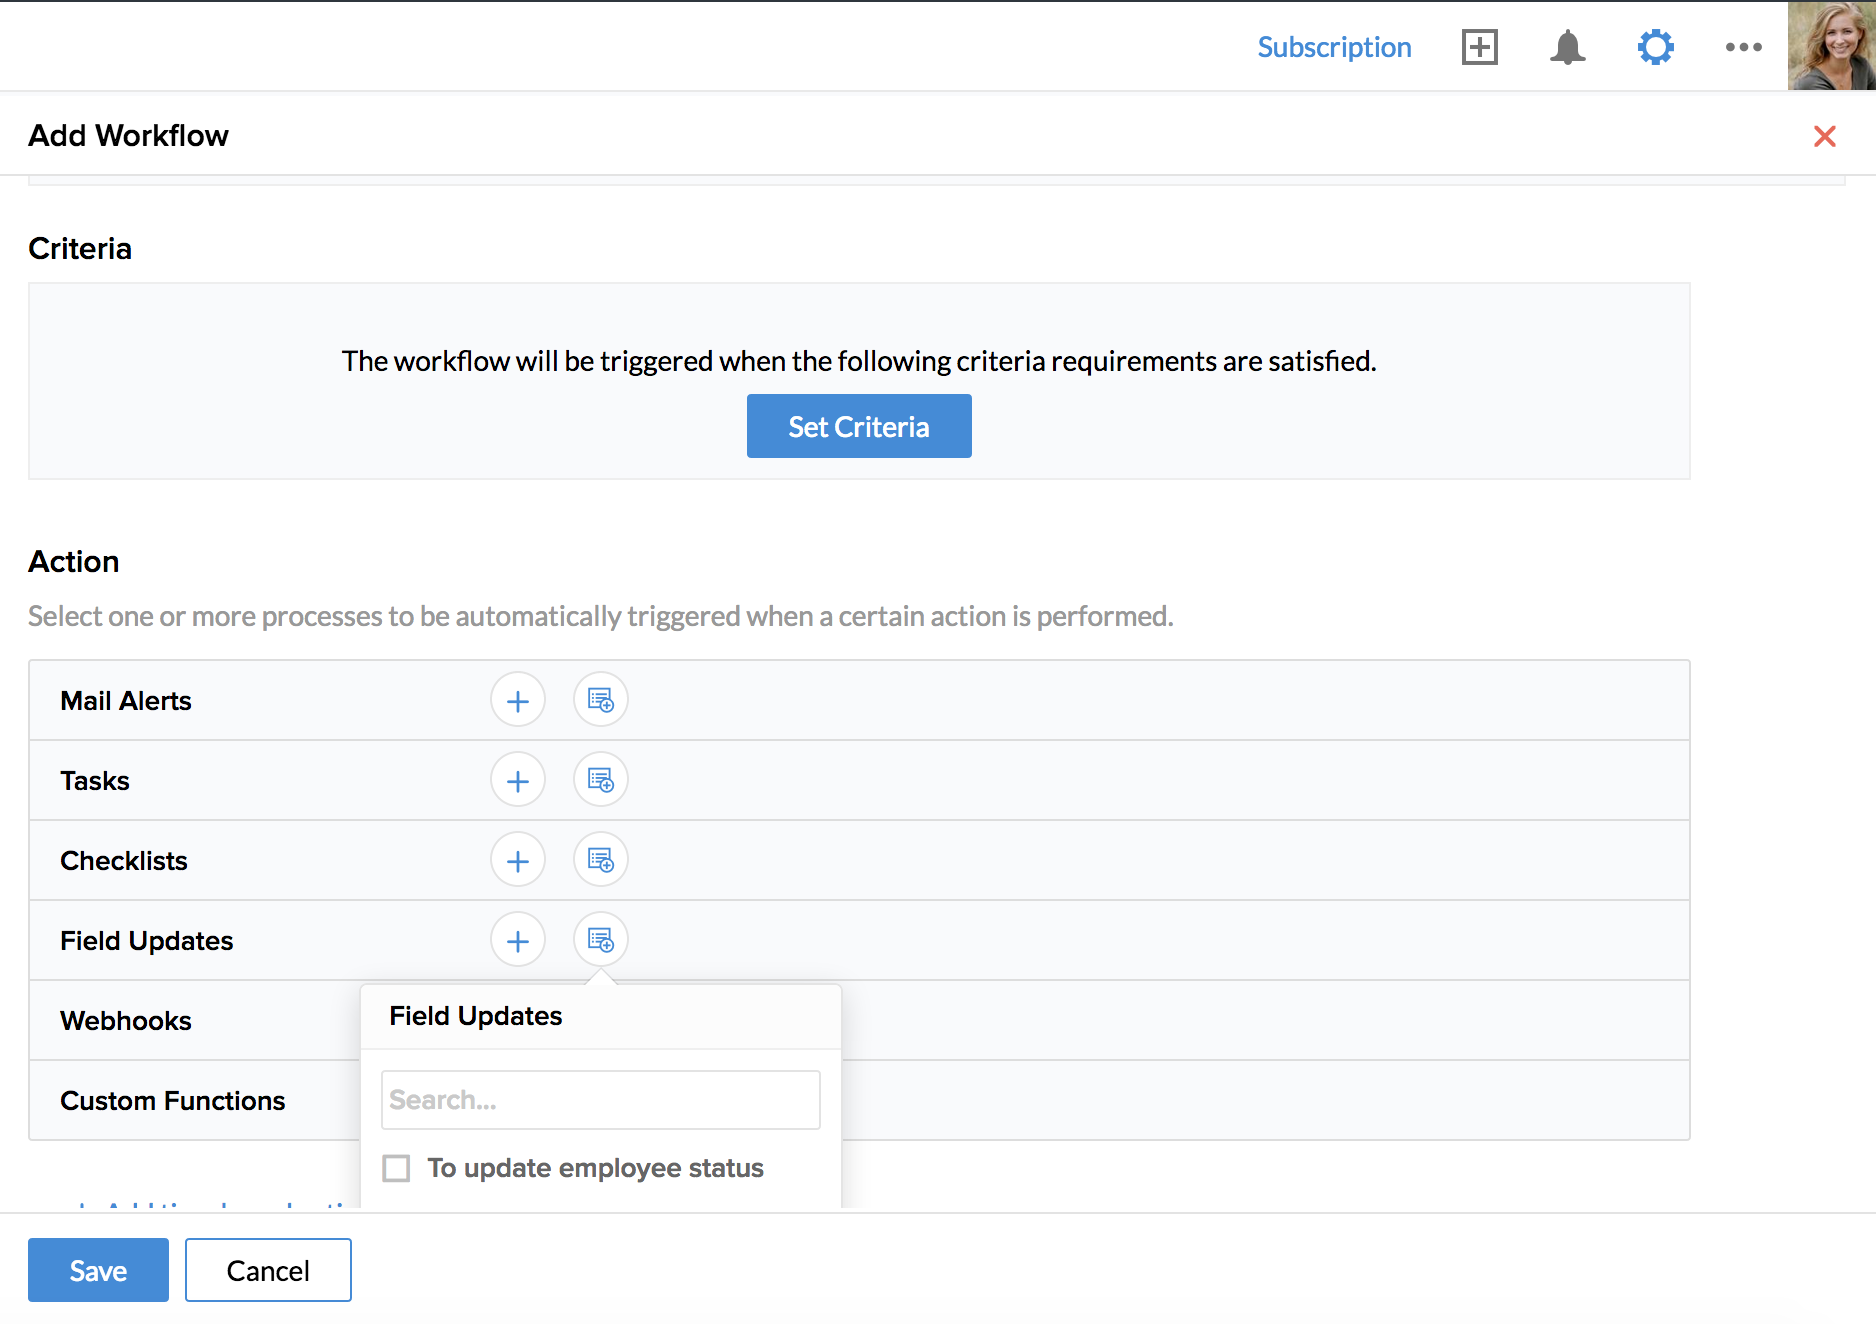
- Click Save
Note:
You can trigger only 500 workflows per day if the workflow rule is given based on the same field. This is a precautionary action to avoid repeated looping and to maintain server efficiency.
Example Scenario - To automatically upload Employment Proof Letter
In many Organizations, the need to issue employment proof letter arises often. You can make use of Record Template or Mail Merge Template to generate this letter.
Apart from this, using Field Updates, you can also set a workflow to upload the letter automatically in a field of a form as a result of an action. For example if you have a form called 'Employment Proof' form in which employees add requests for a letter, you can have their letter automatically uploaded in the form with the help of workflows. Take a look at the steps given below.
To create Mail Merge Template:
- From your home page, go to Settings > Templates > Mail Merge Template
- Click on 'Add Template'
- Give a name - For Eg - 'Employment Proof Letter'
- Select the form name as 'Employment Proof Letter'
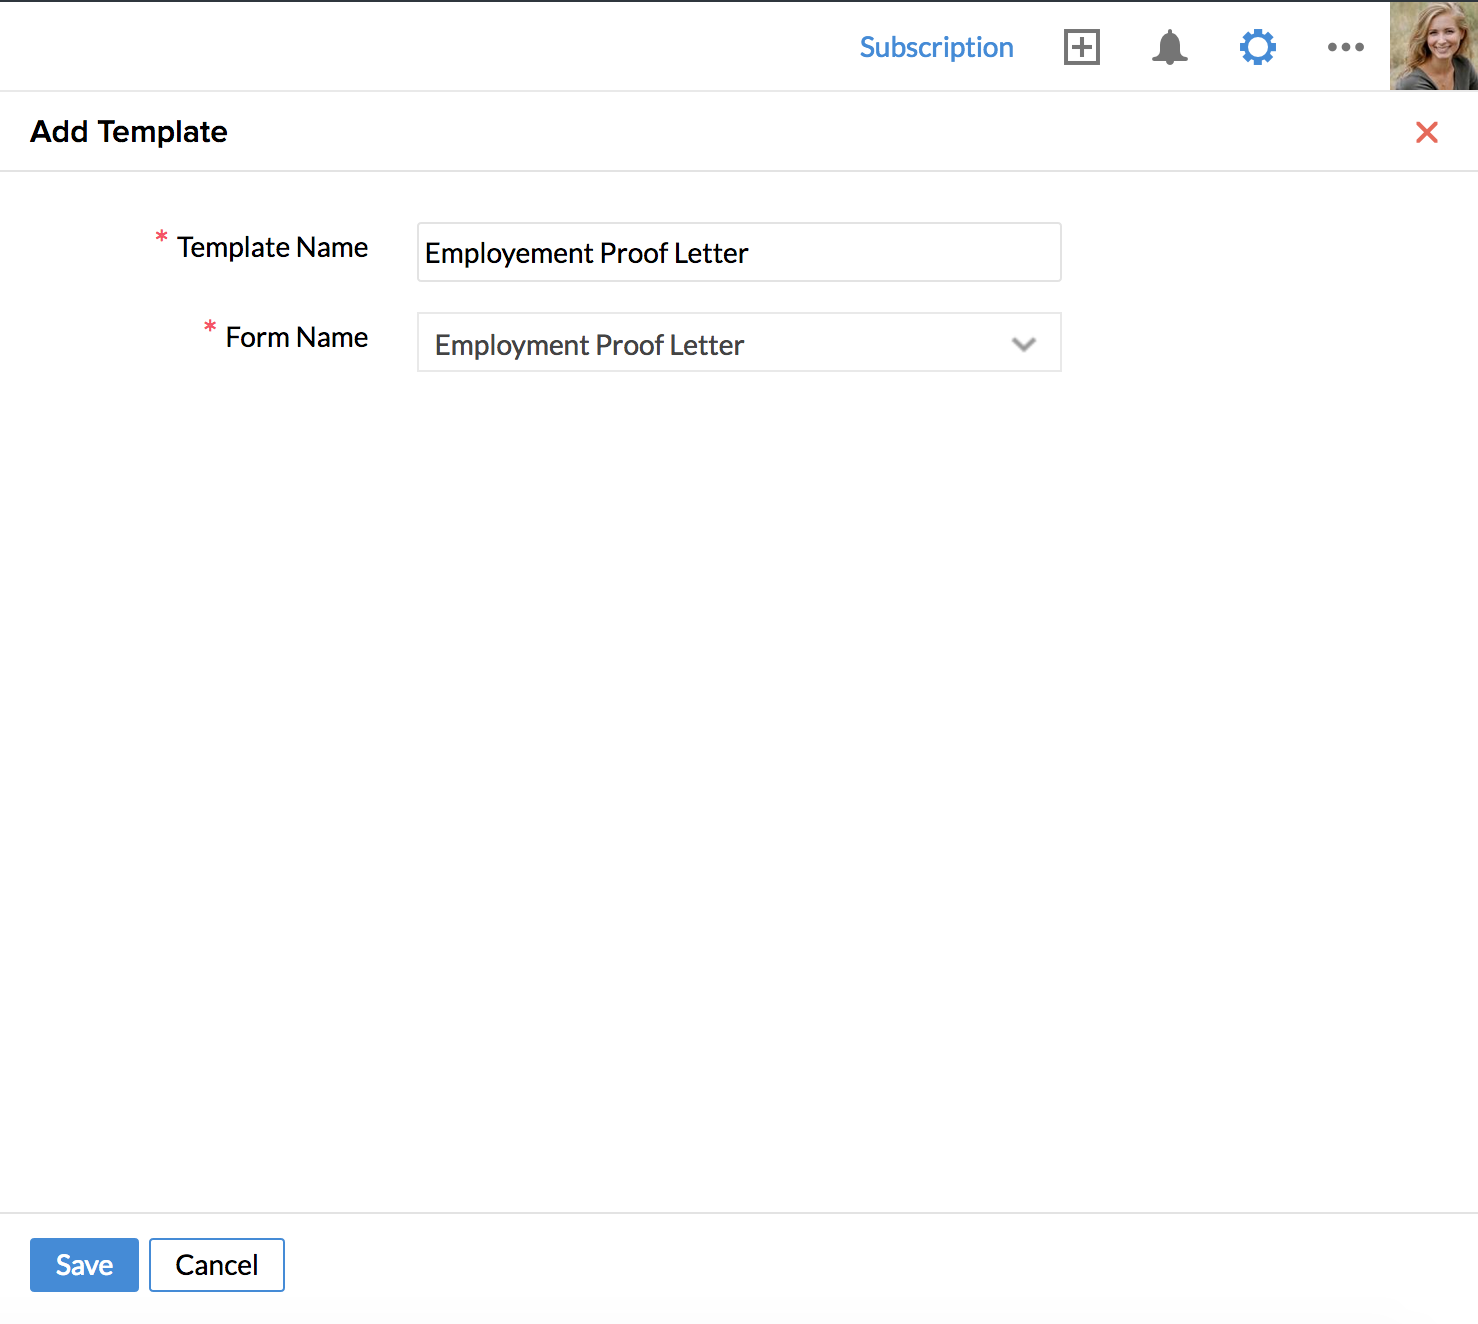
- Click Save
You will be taken to Zoho Writer page. Here, you will see the fields of the chosen form listed on the left hand side.
- Type the content of the employment proof letter with the help of the fields on the left hand side
For eg -
"This is to confirm that «Employment Proof .Employee Name» - «Employment Proof .Employee ID» has been working in our organization from «Employment Proof .Date Of Joining» as «Employment Proof .Designation».
Regards
HR Team
«Company Details.Company Name»
«Company Details.Company First Address»
Now the mail merge template is ready.
To create the workflow:
- From your home page, go to Settings > Automation > Add Workflow
- Select the form name - in this case, the Employment Proof Letter form
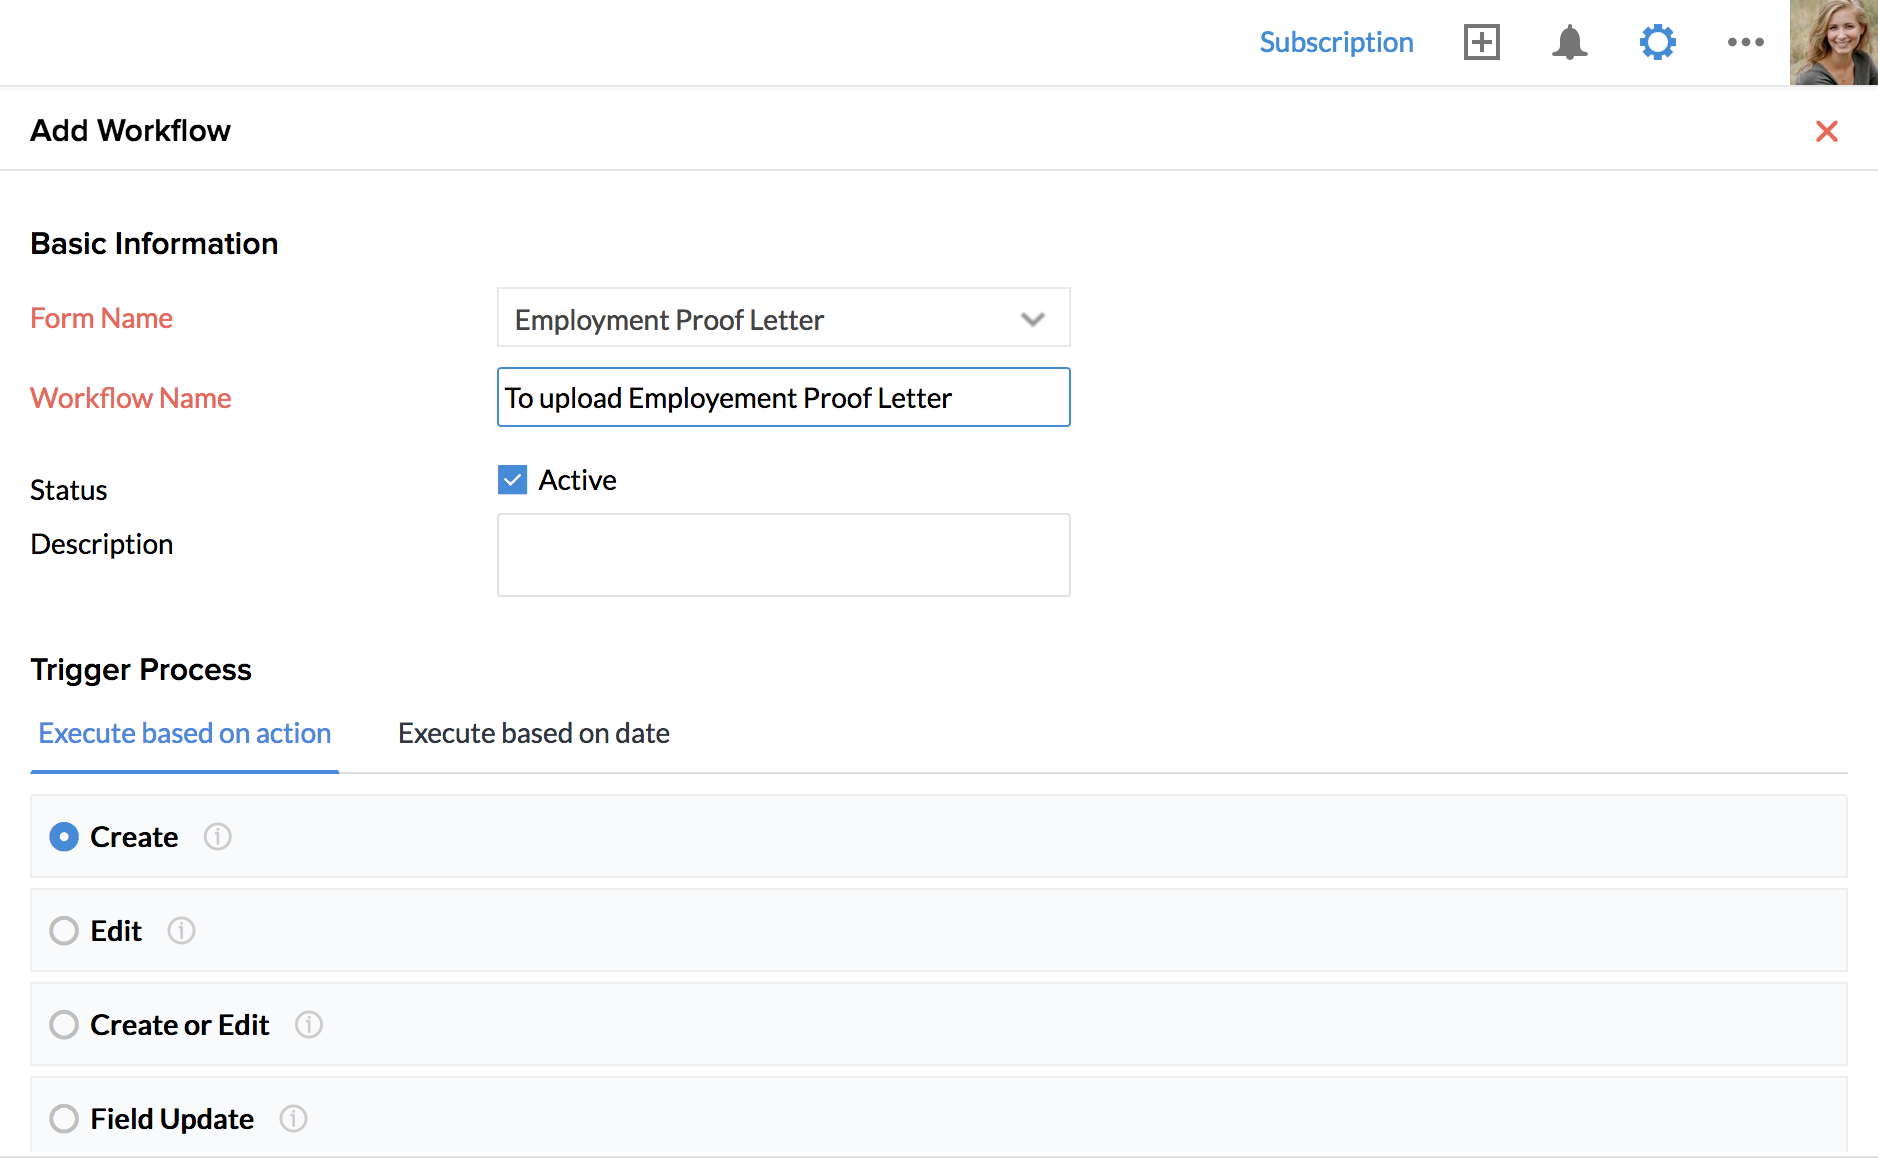
- Give a name for the workflow - for eg - 'To upload Employment Proof Letter'
- Give a description if needed and keep the status active
- Under 'Trigger Process', select 'Create'
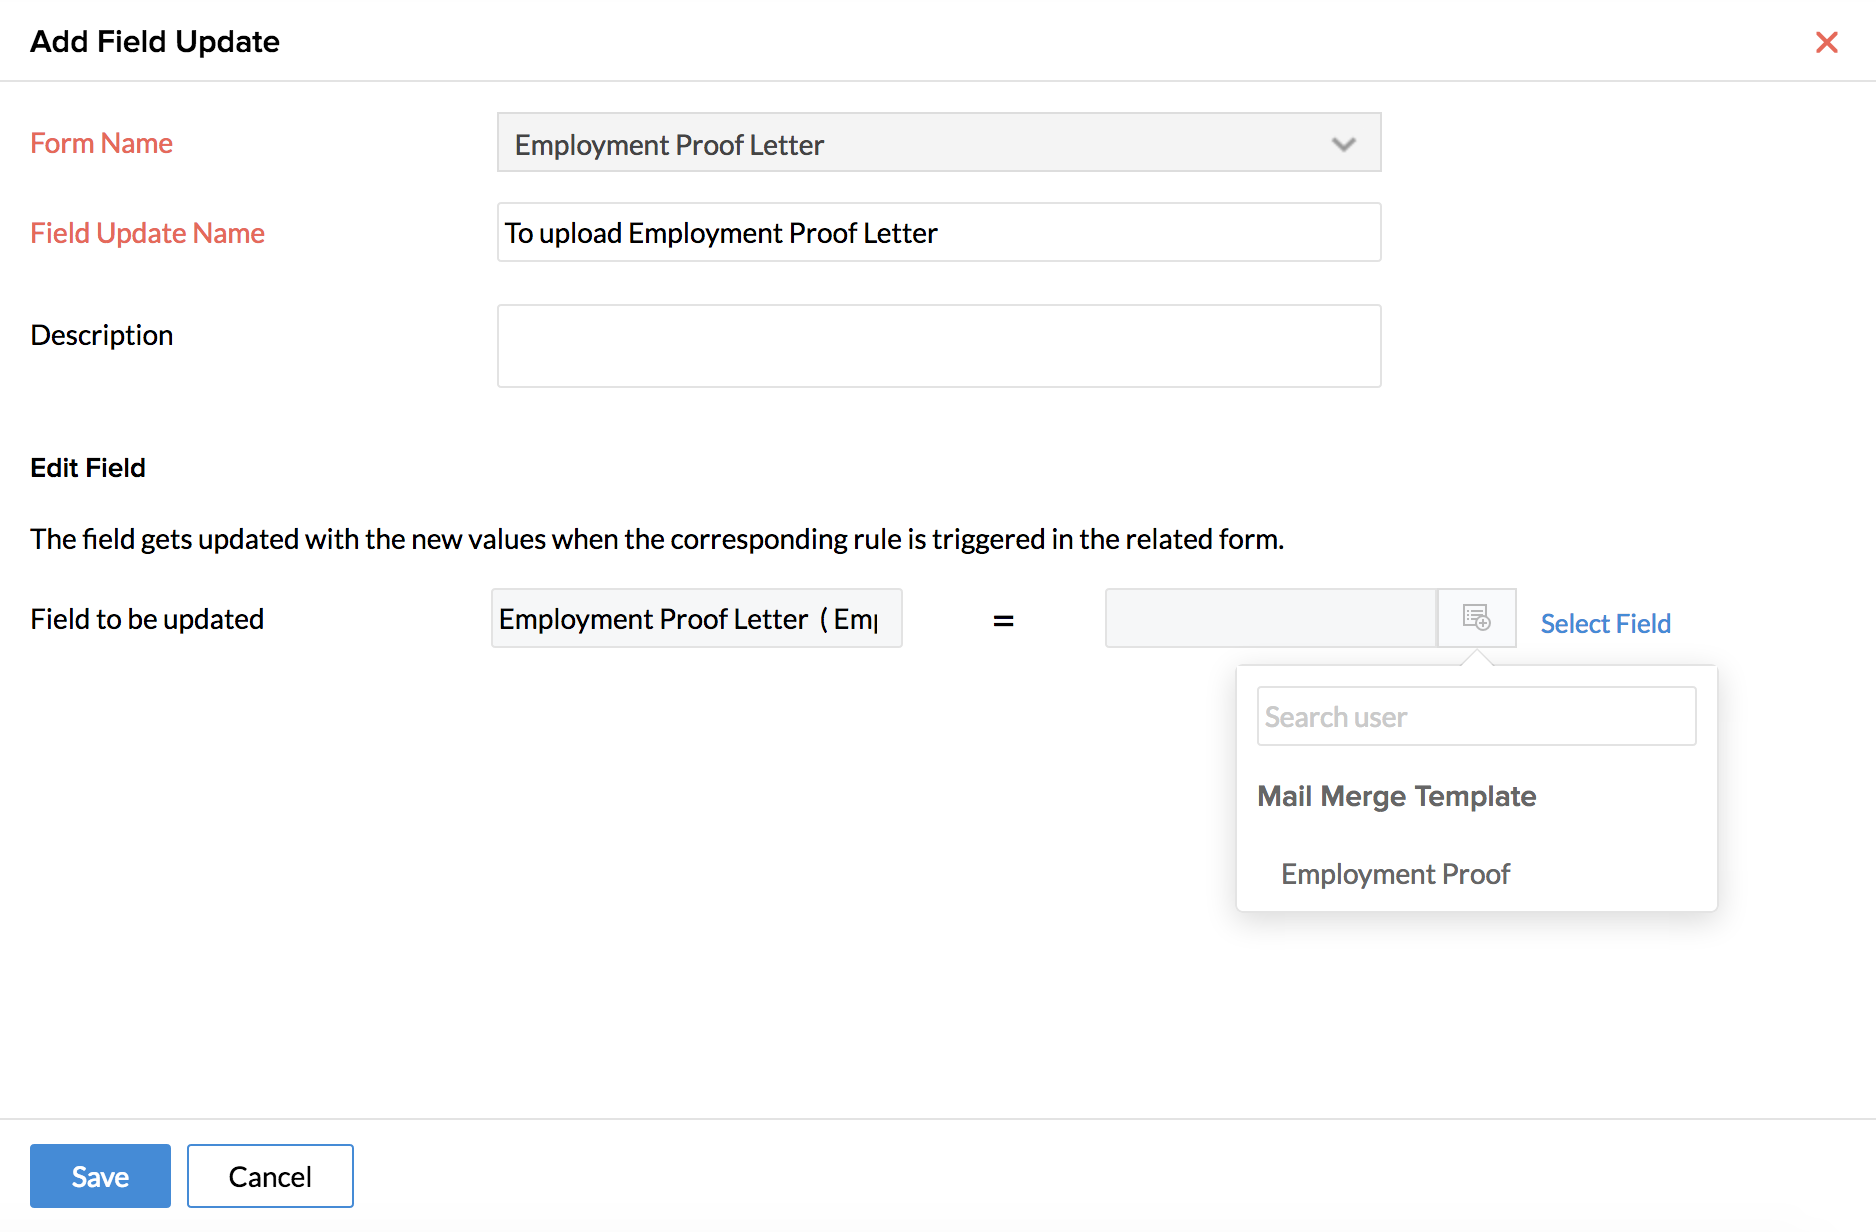
- Under 'Action', click on the + icon under 'Field Updates'
- The form name is selected as 'Employment Proof' by default
- Give a name for the Field update - for eg - 'To upload employment proof letter'
- Under 'Edit Field', go to 'Field to be updated' and select 'Employment Proof Letter ( Employment Proof )' from the Employment Proof option
- Under the next field, click on the list icon and select the mail merge template that you have created
- Click 'Save'
- Click 'Save' under the workflow
As a result of this workflow, as and when an employee adds a record in the Employment Proof form, the 'Employment Proof Letter' field of the form will get updated with the letter automatically with the field names like Name, Designation, Date of Joining etc replaced dynamically.