How to send personalized emails with a mailing list
Mailing list
When you send out bulk emails, a mailing list comes in handy as you can send the information to multiple people simultaneously. Also, with a mailing list, you can avoid the redundancy of entering individual details every time you send an email. You collate a mailing list comprising the set of people to whom you wish to send emails, and add other required information about them like their contact number, address, etc. At the time of sending emails, you simply select the mailing list rather than picking out names one by one.
To make it more convenient, you can create different mailing lists depending on the nature of the email. For example, you can have a mailing list containing specific members of a class you take, a list with all the employees, a list with your clients, and so on.
You can create mailing lists either with Zoho Sheets/MS Excel or with Zoho Forms.
Personalize your emails with Mail Merge
With Mail Merge, you can send bulk emails and also tailor them to individual recipients. For example, suppose you wish to send a welcome email to your newly joined employees saying, ''Hey Rebecca, welcome to Zylker Inc.'' and similar emails to others. In that case, you could send a customized welcome email to all your new joiners in one shot using Mail Merge. All you need to be prepared with are:
- An email template.
- A source file (the mailing list) containing the recipients' data.
Mail Merge collects the data from the source file and inserts them into the template, thus being able to churn out customized messages to several people quickly.
With Zoho's Mail Lite plan, you can send emails to a maximum of 250 recipients per day and Zoho's Mail Premium plan lets you send emails to a maximum of 500 recipients per day.
Preparing a mailing list
For Zoho's Mail Merge to source recipients from your mailing list automatically, you need to provide To as the header for the column containing the recipients' email IDs. For other information such as their name, contact number, address, etc., you can give the proper headers in the source file and add the details under the relevant columns. If you're preparing the file with MS Excel, you need to save it as a CSV file before uploading it into Mail Merge.
To insert these fields into the email template, enter the field name within {{}} in the places you deem appropriate. For example, if you wish to address each recipient by name, you can enter, ''Hi {{name}}'', provided you have given name as the header in your source file. Similarly, you can enter other field names within {{}} to personalize your message to every recipient.
Mail merge using a mailing list
Once you've created a mailing list, you can send emails to the people in the source file using Mail Merge in one shot . In Zoho Mail, you can use Mail Merge from the eWidget icon in the right pane.
- Log in to your Zoho Mail account.
- Click the eWidget icon in the right pane.
- Select Mail Merge from the app menu.
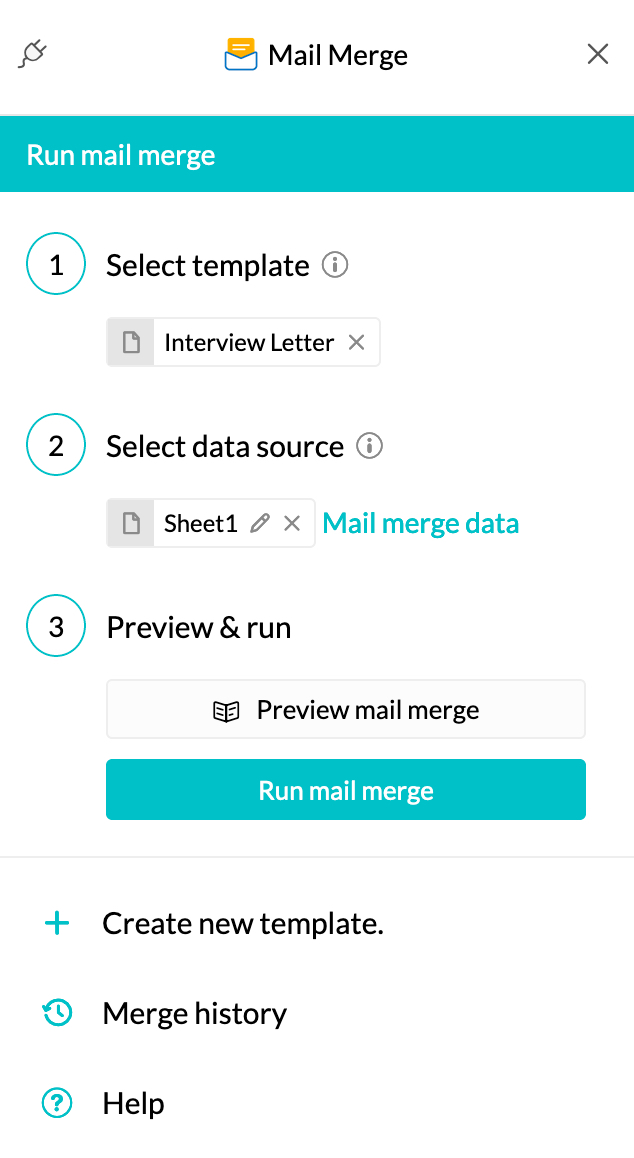
- Under Select Template, click Insert Template, and select the template you want. Note that you can also create a new template by clicking on the Create new template option.

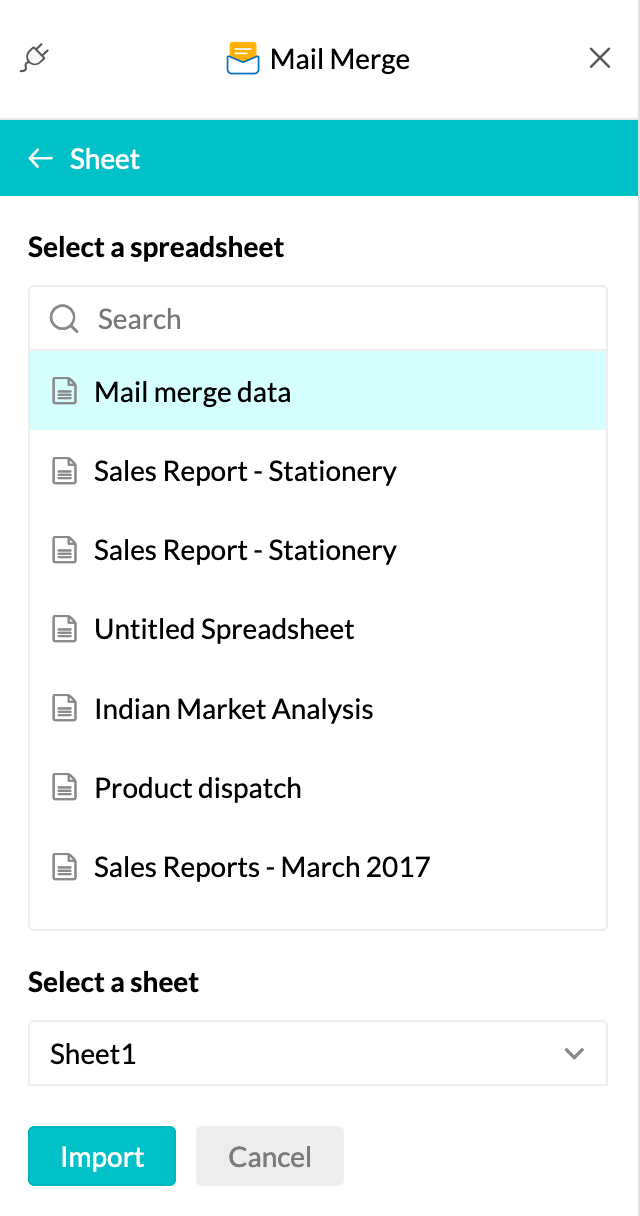
- Select your Data Source - either upload a CSV/XSL file, or you can use a Zoho Sheet/Zoho Form.
- Pick the file you want to add. Note that you can preview the file by clicking on the Preview button next to the file name.
- Once you've added the file, click Import.
The email template preview window gets displayed. Note that the preview only shows the first record from your data source and not the other recipients. For example, if your file contains information about Rebecca as the first record followed by others, the email template preview shows only Rebecca's information as the preview email.
If you wish to edit the template, you can do so by clicking on the Edit button and making the necessary changes. In the editor window, you can add any fields present in your source file into your template by clicking on Insert Field and selecting the appropriate field. - Once you've finalized the template, click Run Mail Merge.

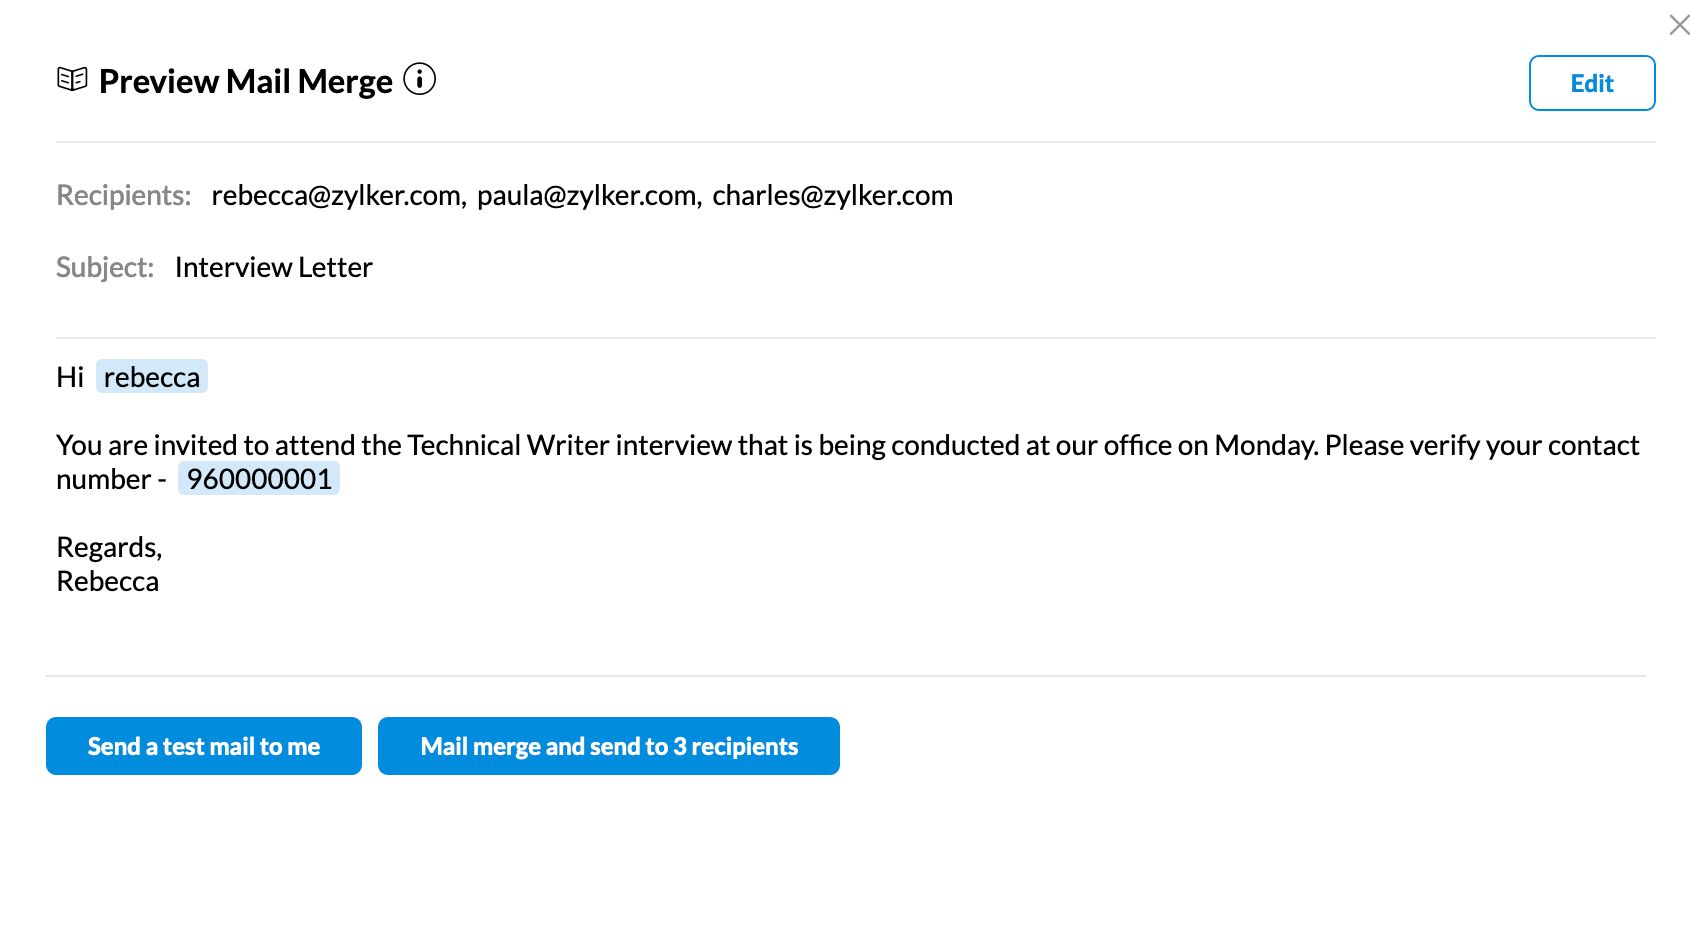
You can also run the Mail Merge directly from the preview window. However, it is recommended to send a test mail to yourself first to ensure email deliverability and check if the fields have been replaced with the appropriate details. You can view the emails that you send using Mail Merge in the Sent folder of your mailbox.
Mail Merge history
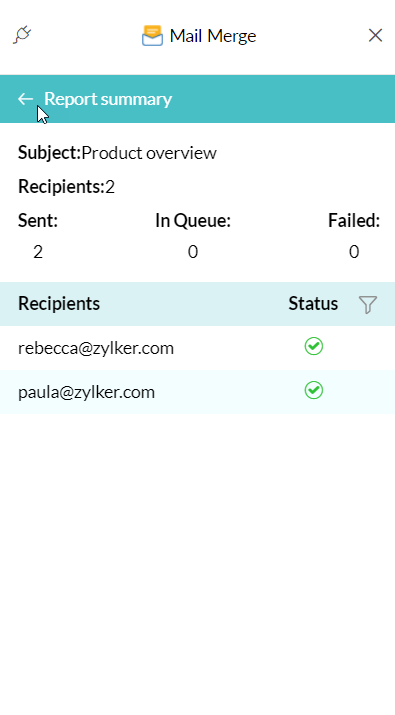
When you click on Mail Merge history in the Mail Merge eWidget, you can see the history of bulk emails sent using Mail Merge. The title appearing on the report is your Subject for the email set. Click on a report and you can see the statistics of that Mail Merge such as the number of recipients, email delivery status of each recipient, and other details. You can use the Filter icon and view the Sent/Delayed/Failed emails individually.
Top Articles