Email Avatar setup using Gravatar
What is Gravatar?
Gravatar (Globally recognized avatars) is a web platform that helps you set up a unique digital avatar and associate it with your email address. When you post a blog and the use of your email address has been mandated by the blogging software then the blogging software if integrated with gravatar will check the association of your email address with Gravatar and display the avatar associated with it. This will help your followers to identify you by your digital avatar. Additionally, this saves you the hassle of uploading an avatar for each platform where you register using your email address.
You can sign into your Gravatar account using your existing WordPress.com account. If you don't have a Gravatar account, follow the steps given in this link to create an account using your email address.
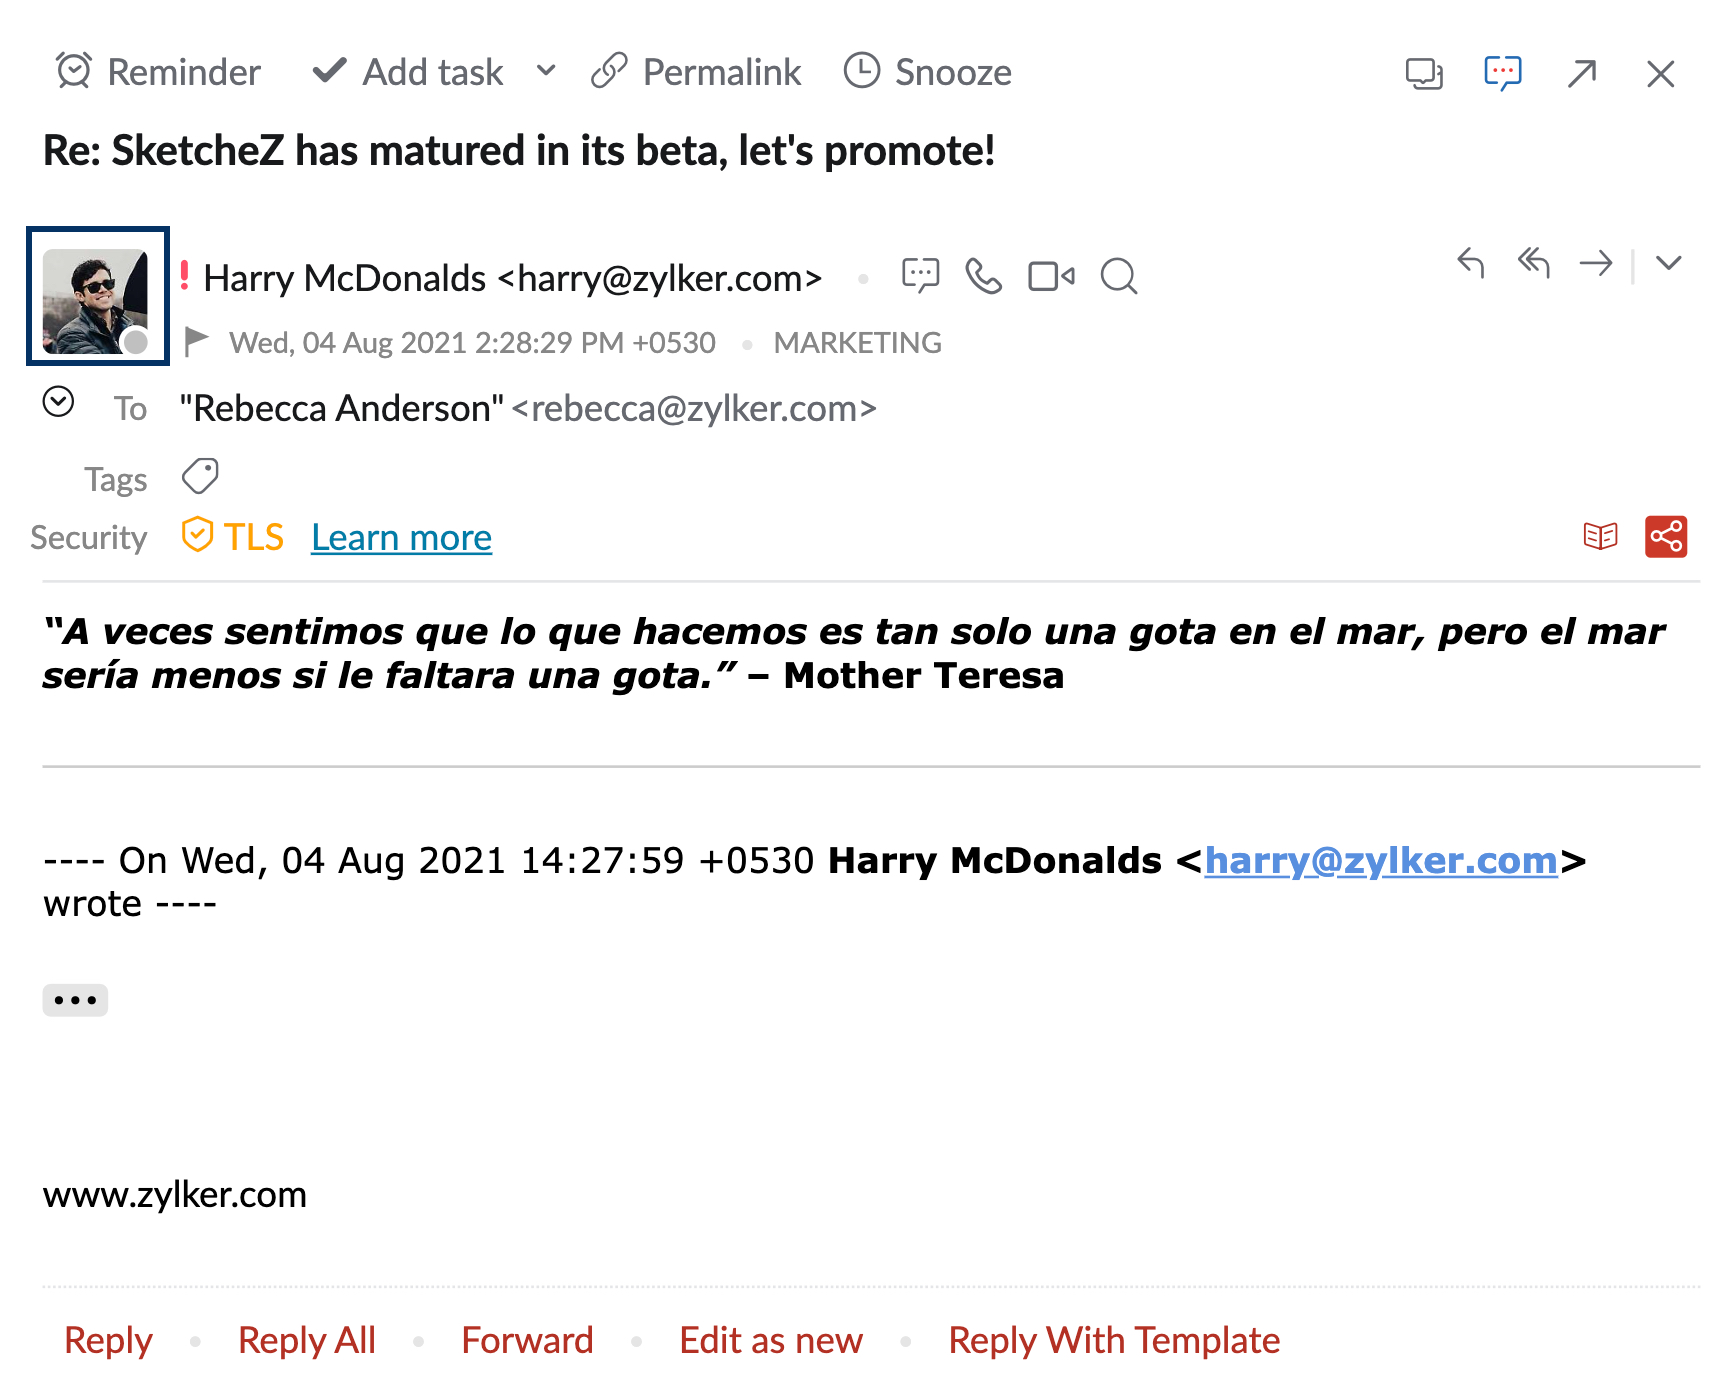
The integration of Gravatar with Zoho Mail helps you to view the avatars of the email addresses of the person who sends you an email. The gravatar can be viewed in the contact details section of the Mail preview pane.
How to enable Gravatar integration in Zoho Mail
Gravatar integration in Zoho Mail will be disabled by default. Admin has to enable the extension from Zoho Mail Admin Console for the users to have permission to enable the extension.
Steps to enable the extension from Admin Console
- Log in to Zoho Mail Admin Console
- Navigate to Other App Settings on the left pane.
- Go to the Integrations and extension section on the Other App settings page.
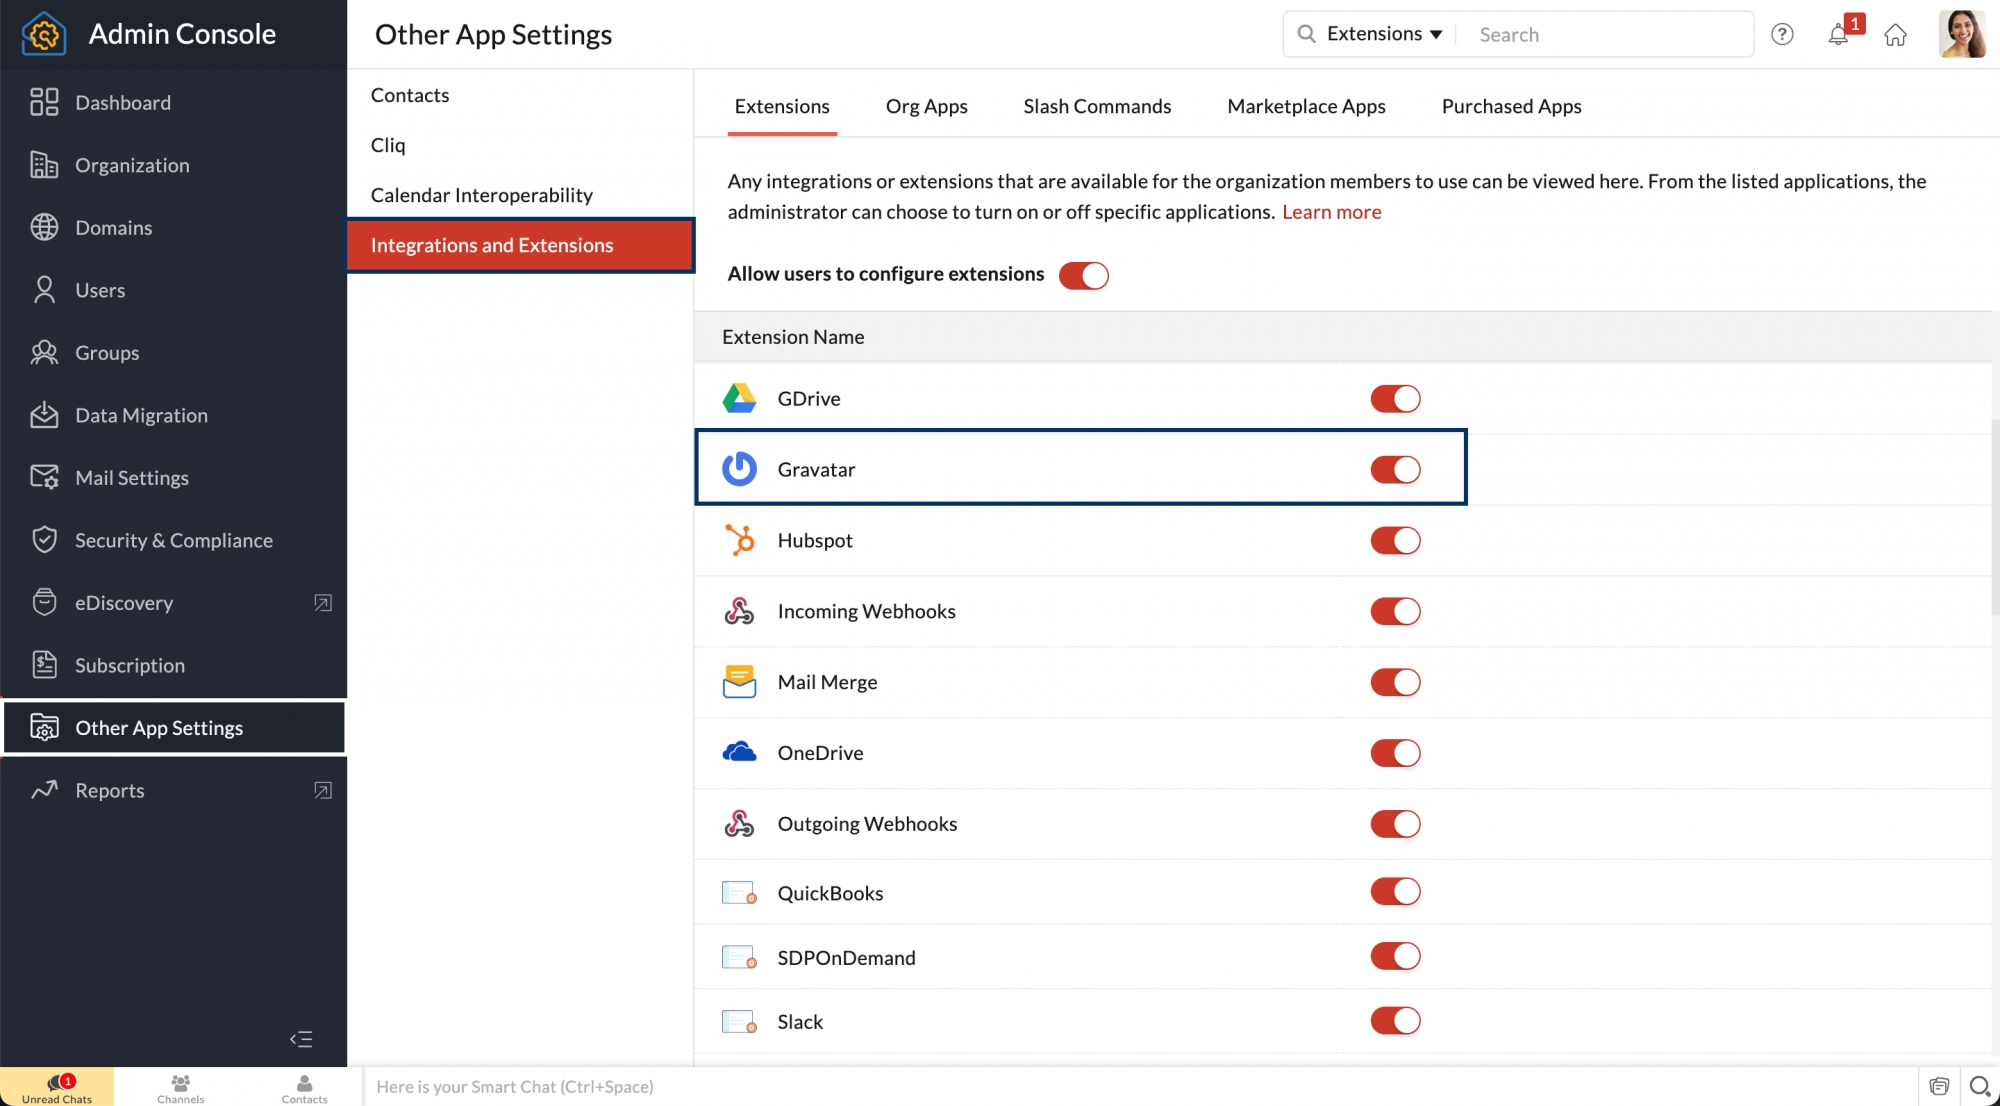
- Locate Gravatar extension under the Extensions section.
- Turn ON the toggle switch.
Once the Admin enables the extension, the users will have permission to enable it for themselves.
Steps to enable the extension by the user
- Log in to Zoho Mail
- Navigate to Settings
- Go to Integrations > Extensions under the General section of Settings.
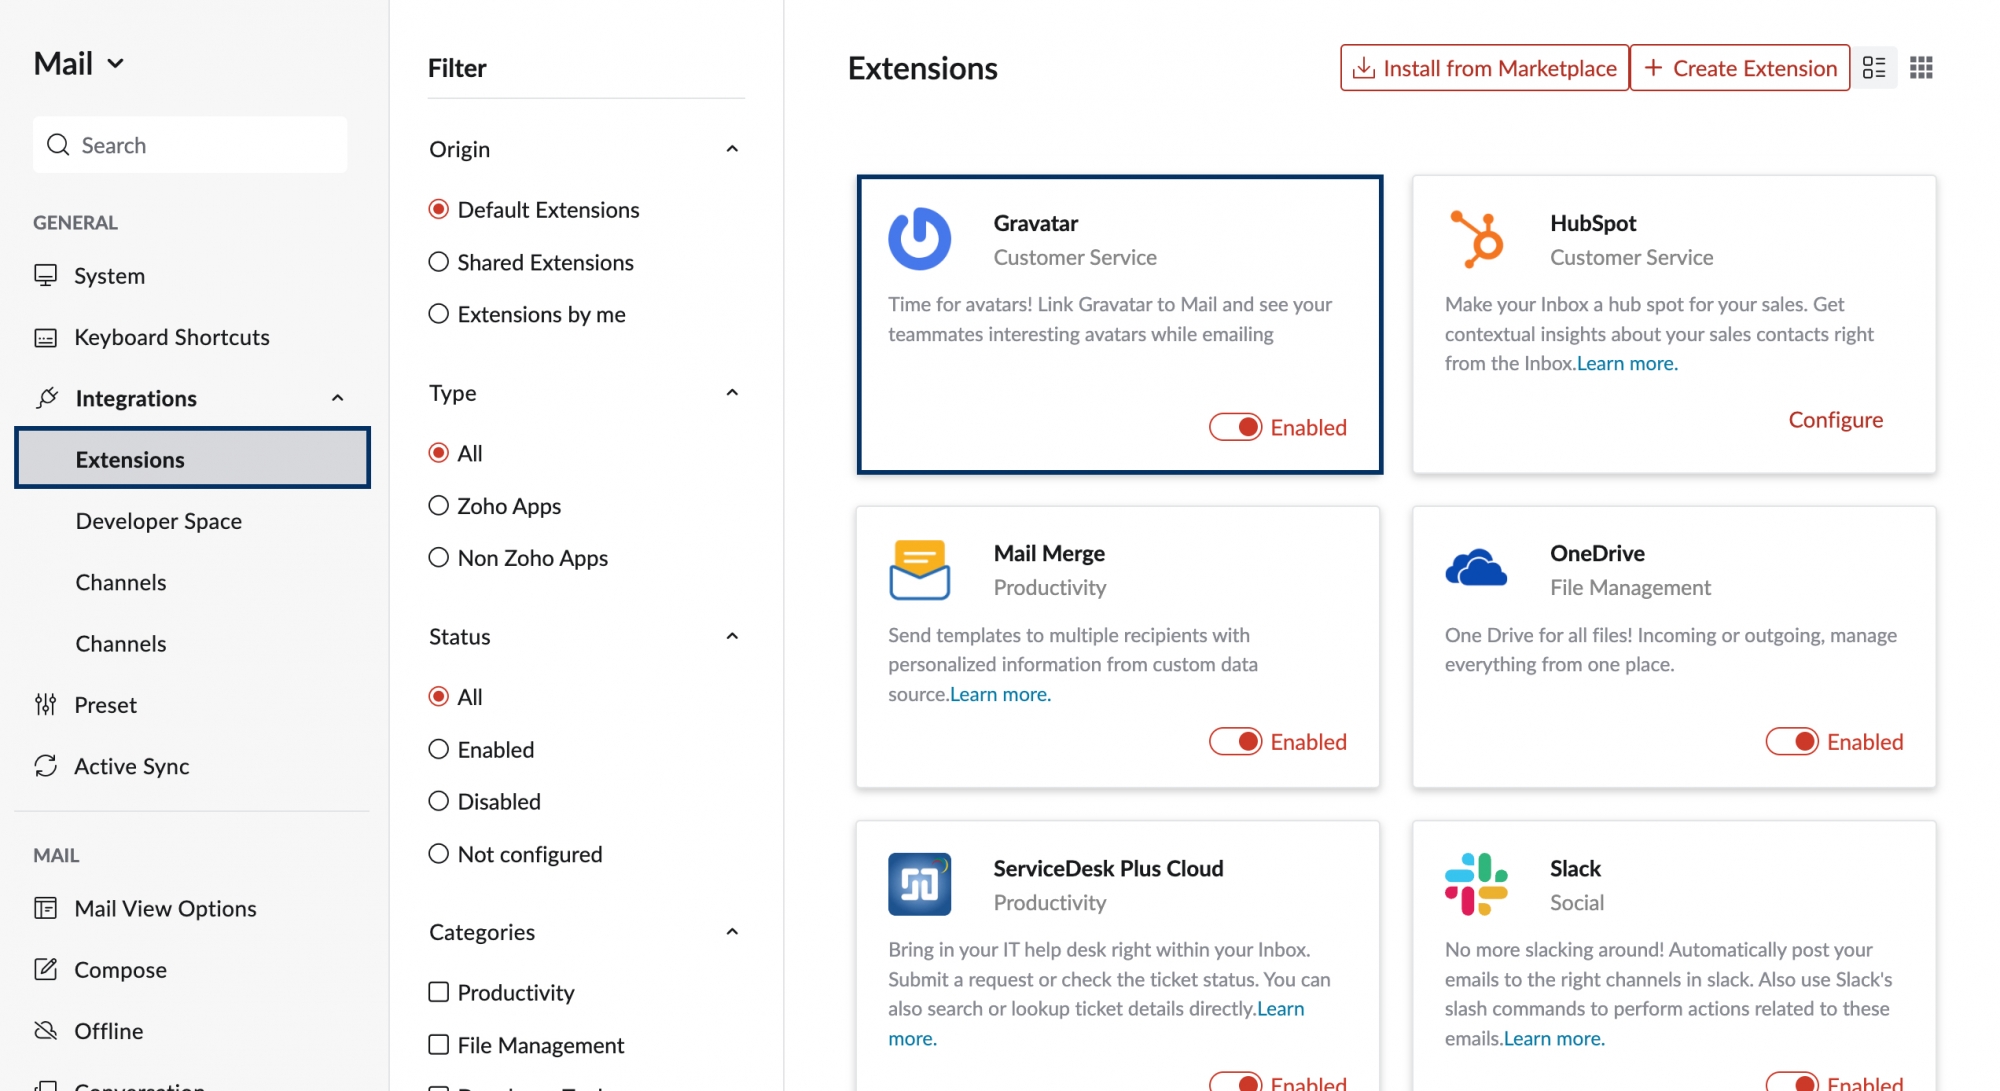
- Locate Gravatar integration card.
- Enable the toggle switch.
You will be able to view the avatar of the email addresses of senders that are associated with Gravatar from the Mail preview pane. You can disable the toggle switch to stop viewing the avatars.
Add your Zoho Mail email address in Gravatar
You can also add your Zoho Mail email address to your Gravatar account and associate it with a profile picture. Follow the steps given below to add your Zoho Mail email address to your Gravatar account:
- Log in to your Gravatar account.
- Navigate to My Profile pane and go to Avatars

- Pick your Zoho Mail email address from the Choose email address drop-down.

- If you haven't added your Zoho Mail email address, click on the Add email option.
- Provide your email address and click Add. You'll receive a confirmation email.
- Click the link in the email to confirm the addition of email address to your Gravatar account and pick to add an avatar.
- Click on the image you want to associate from the Images section below the Choose email address section.
- If you wish to associate a new image, click Upload image and add a new image of your preference.
- After uploading an image, you can choose a rating for your Gravatar image.
- To rate the image, hover over the image and click on the More options.

- Choose Set rating from the options
- Pick the rating for the image and click Save.

- To rate the image, hover over the image and click on the More options.
- Choose an image to associate with any of your Zoho Mail email address by clicking on it.


The newly chosen picture will be associated with your Zoho Mail email address, and your audience will be able to see your Gravatar on blogs, websites, emails, and other places where you use your Zoho Mail email address.