Connections in Zoho Mail
You can integrate third-party or other Zoho applications with Zoho Mail by setting up Connections. In the My Connections section, you can view all connections created by you or your administrator. Using these Connections, you can extend your Zoho Mailbox's integration capabilities using the predefined services we provided or establish custom services.
Note:
Zoho Mail also provides connectors for your e-widgets available on the right-hand side menu of your Zoho Mailbox.
Table of Contents
Create a new DRE connection
You can establish new Connections from Incoming and Outgoing Webhooks, and the Filters section. To create
- Login to Zoho Mail
- Click on the Settings icon and navigate to Developer Space or Filters
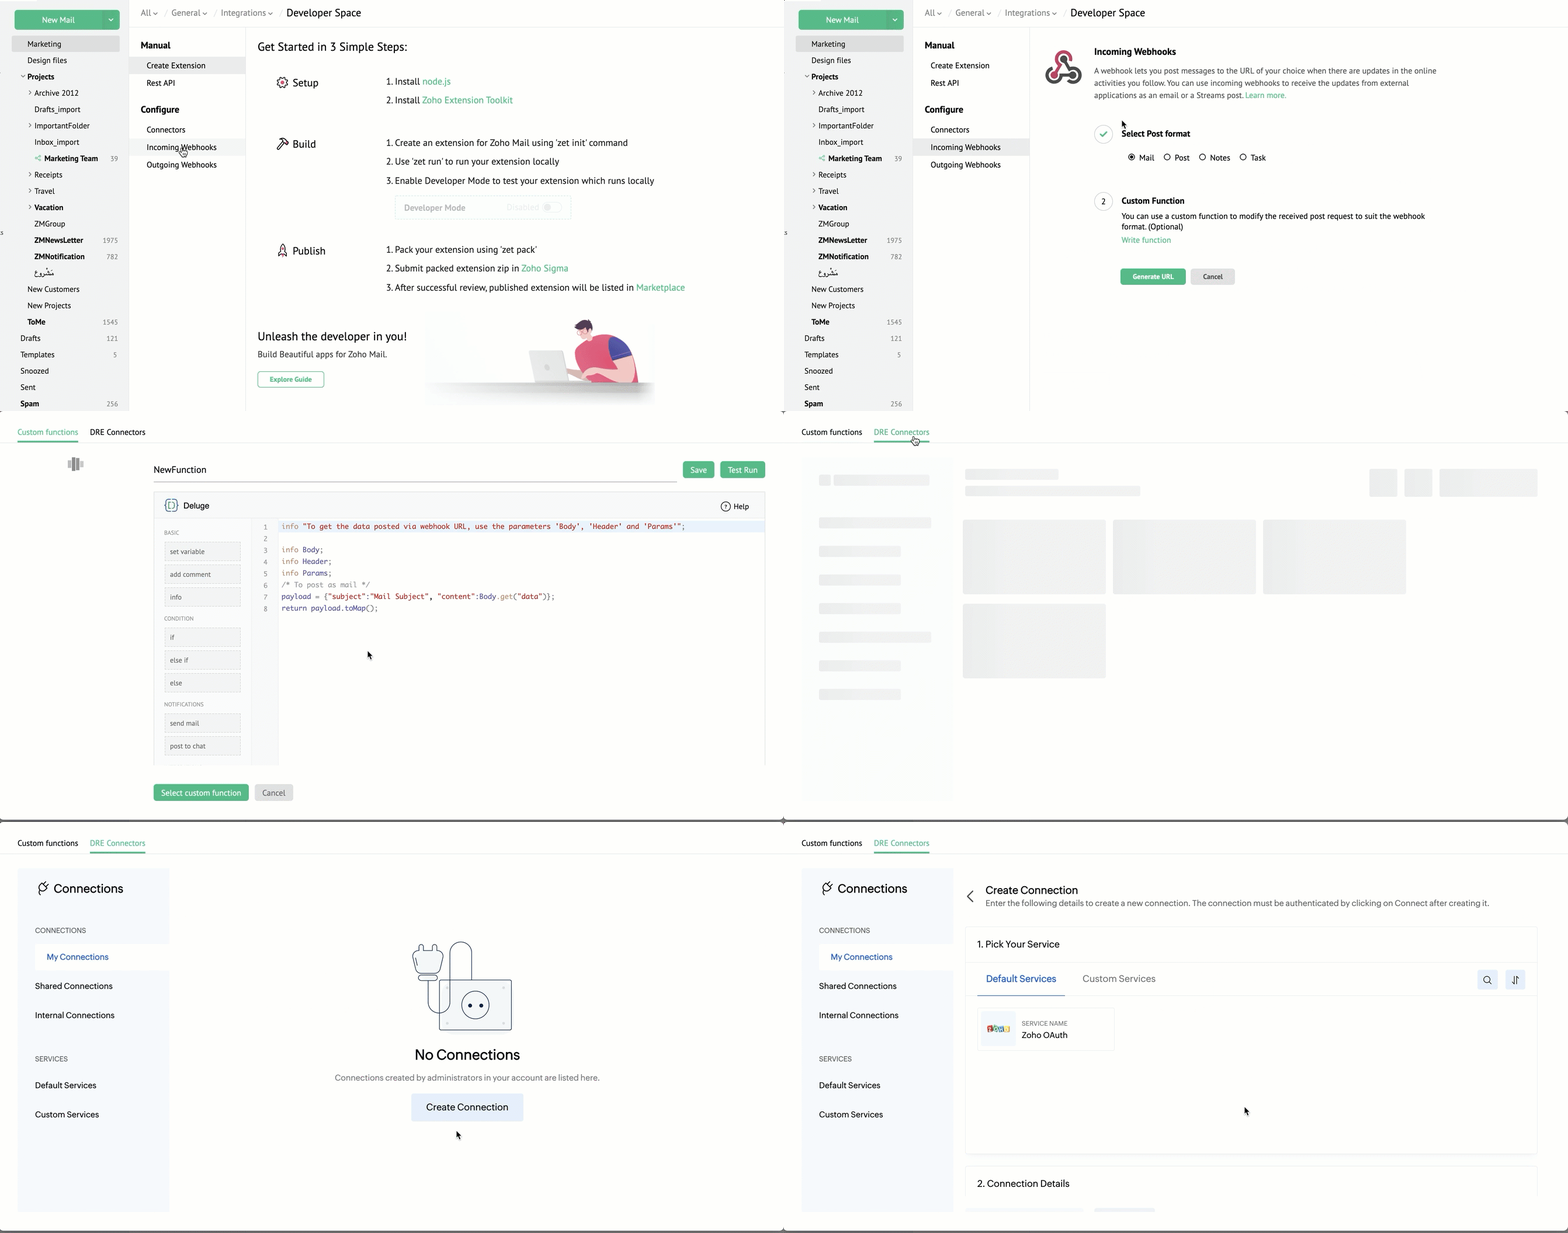
- To establish a connection from Developer space under Settings, go to Incoming or Outgoing Webhooks >>> New Configuration >>> Write Function.

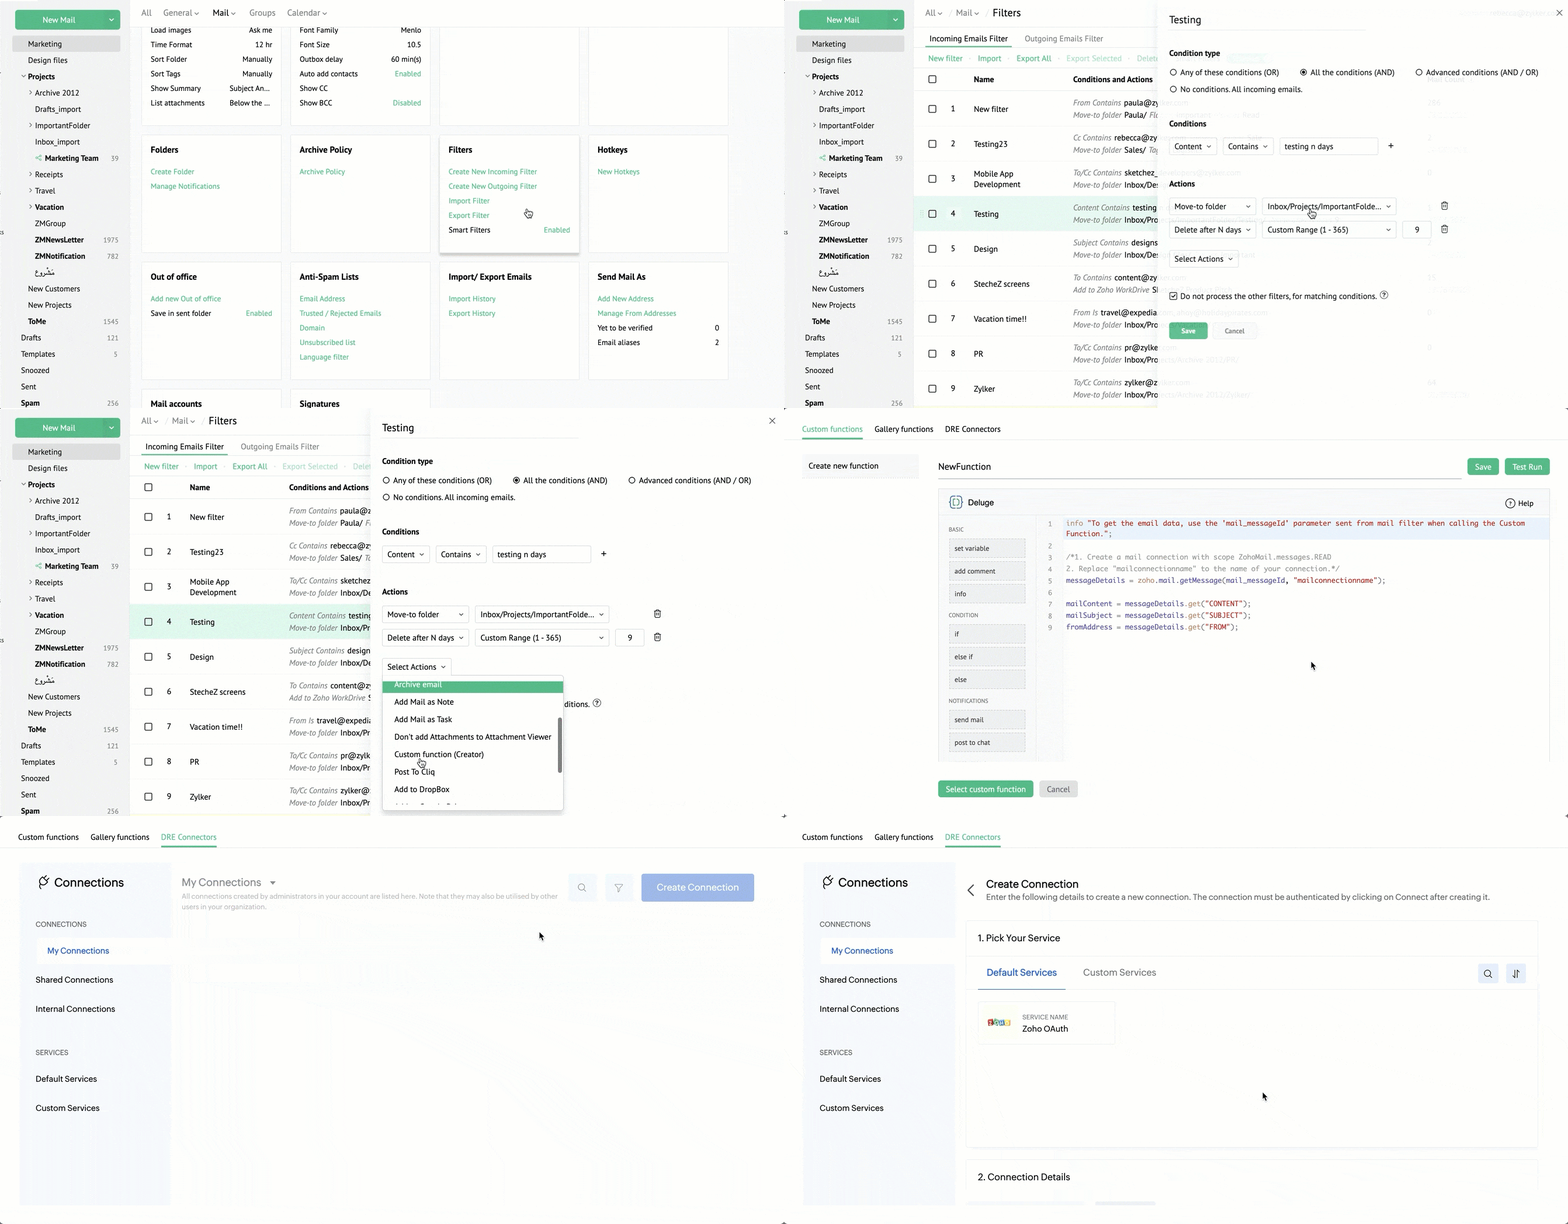
- To establish a connection from Filters under Settings, create a new filter or edit an existing filter and select Custom function under Actions drop-down list.

- To establish a connection from Developer space under Settings, go to Incoming or Outgoing Webhooks >>> New Configuration >>> Write Function.
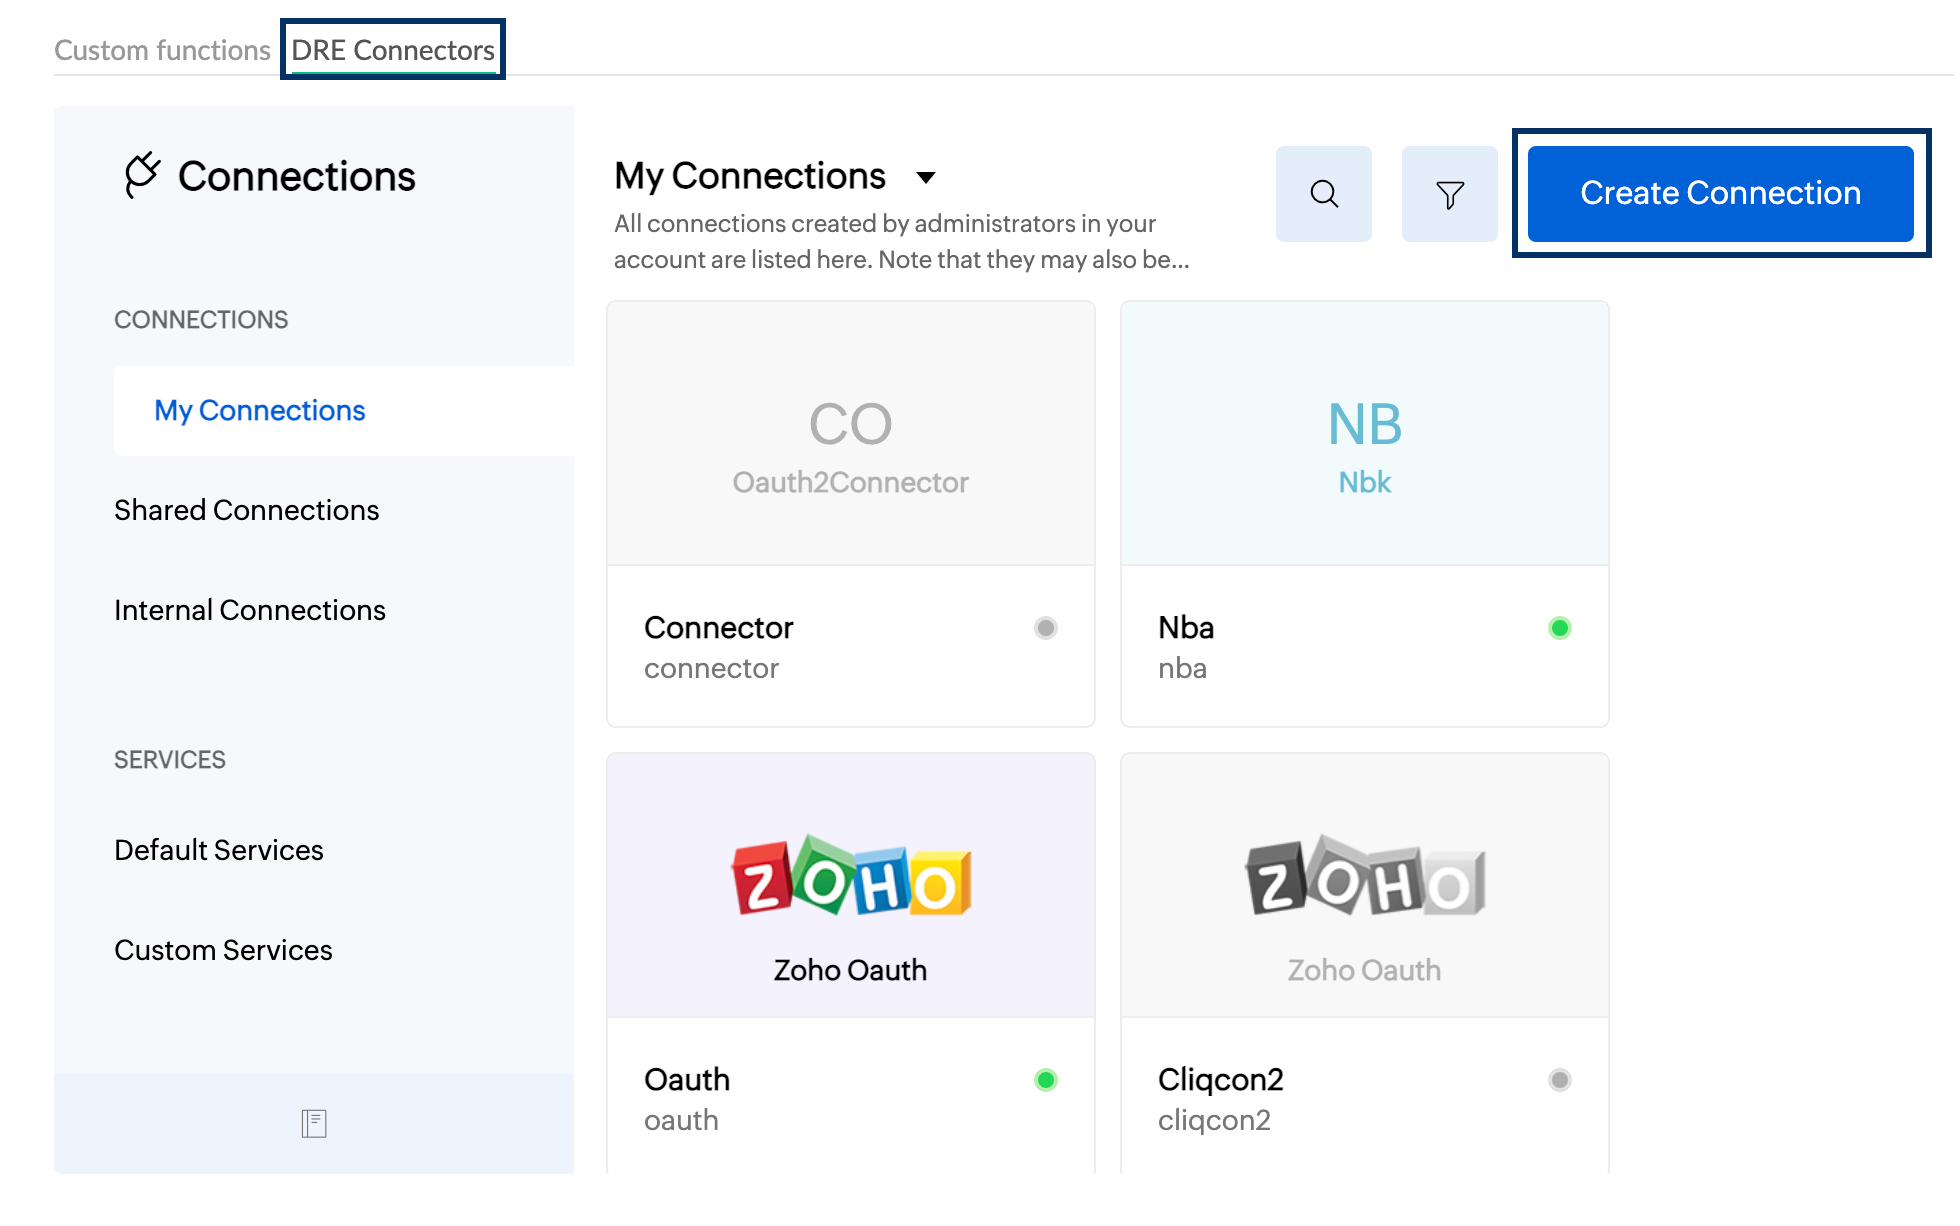
- In the Custom functions window, navigate to DRE Connectors.
- To create a new Connection, click Create Connection. You can also Edit or Delete the existing connection by hovering over the respective connection.

- You can create a connection for either a Predefined Service or a Custom Service if you don't find your preferred service under Predefined Service.
You can use these connections in the custom function section using certain Deluge Tasks for Zoho Mail.
Add Predefined Connections
To establish a connection between a service we have already defined,
- Choose the service of your choice under the available list of services.
- After picking your service enter the connection details.
- Enter the Connection Name and the Connection Link name of your choice. Your Link name has to be unique to the connection because it will be used in Deluge integration tasks and invoke URL scripts to authenticate.
- Select the necessary Scopes for the connection. Scopes are provided by the respective third-party applications. To know more refer to their help documentation.
- You can choose to authenticate using the Credentials of the logged-in user by toggling the option ON.
- You will be taken to a different browser tab to authenticate your preferred service. Click Connect.
- Upon clicking Connect, you will be redirected to your selected service's login page. Authenticate your account using the login credentials and provide the permissions required.
You will be successfully connected with your preferred third-party service.
Add Custom Connections
To establish a custom connection,
- Navigate to Custom Services in New Connection under DRE Connectors.
- Click Create New Service.
- Enter the Service Name and Service Link name and select the Authentication Type of your choice.
- Select the authentication Param Type and enter the Parameter Key and the Parameter field Display Name.
- You can add more parameters by clicking the + icon and delete the added parameter by hovering over the param and clicking the Delete icon.
- After giving the necessary details, click Create Service.
After successful authorization, your connection will be created and added to the My Connections list.
Note:
You can access and modify the data of your third-party service using the invokeURL task in Deluge or transfer and synchronize your data across Zoho using Integration tasks.


